Author

Tom

Browsing

Welcome to the Heart of Comfort Cooking

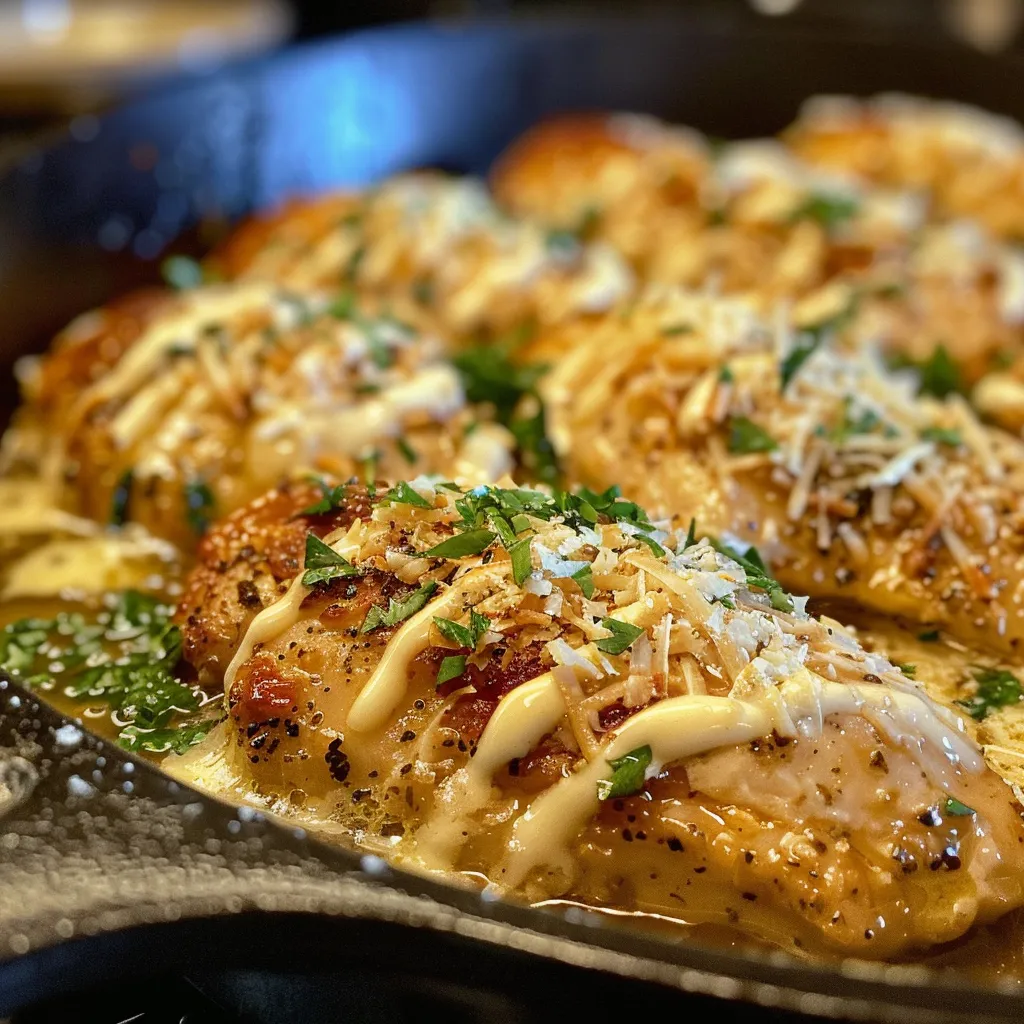
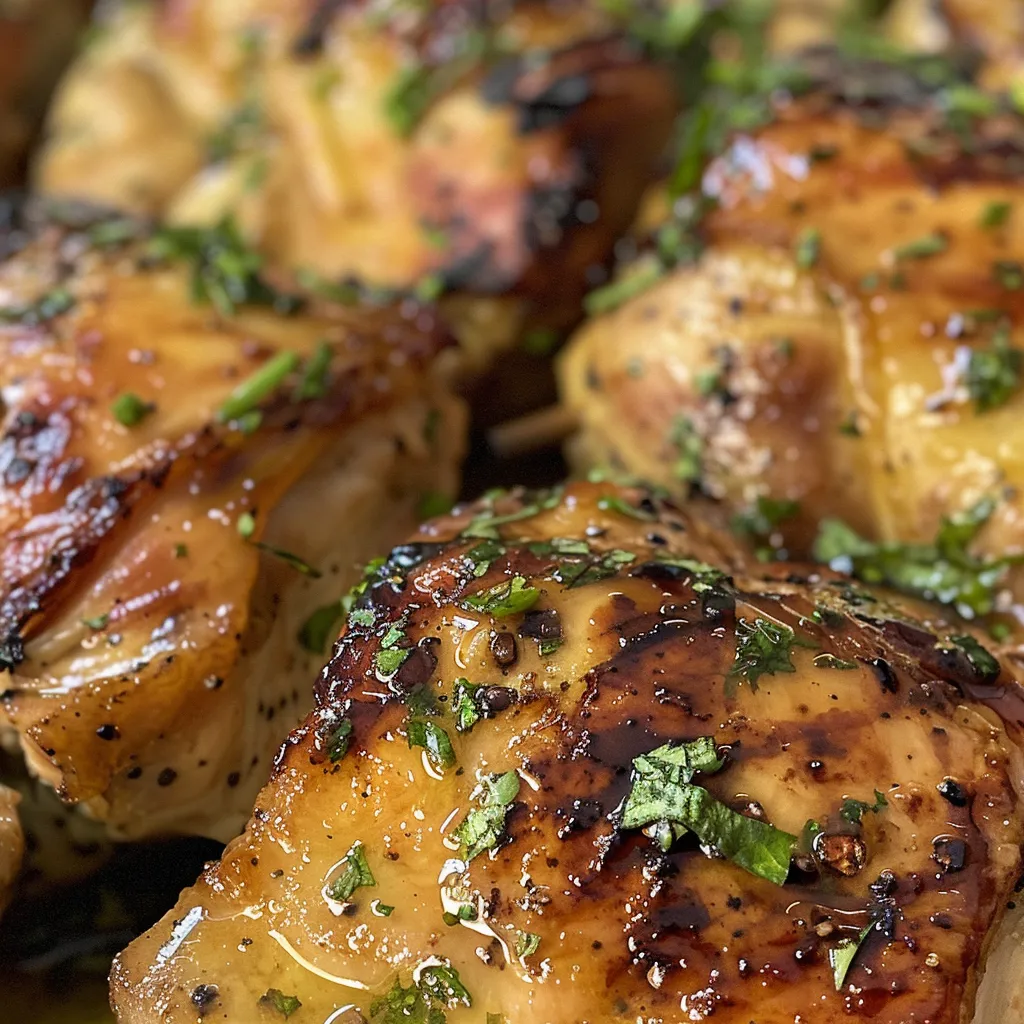
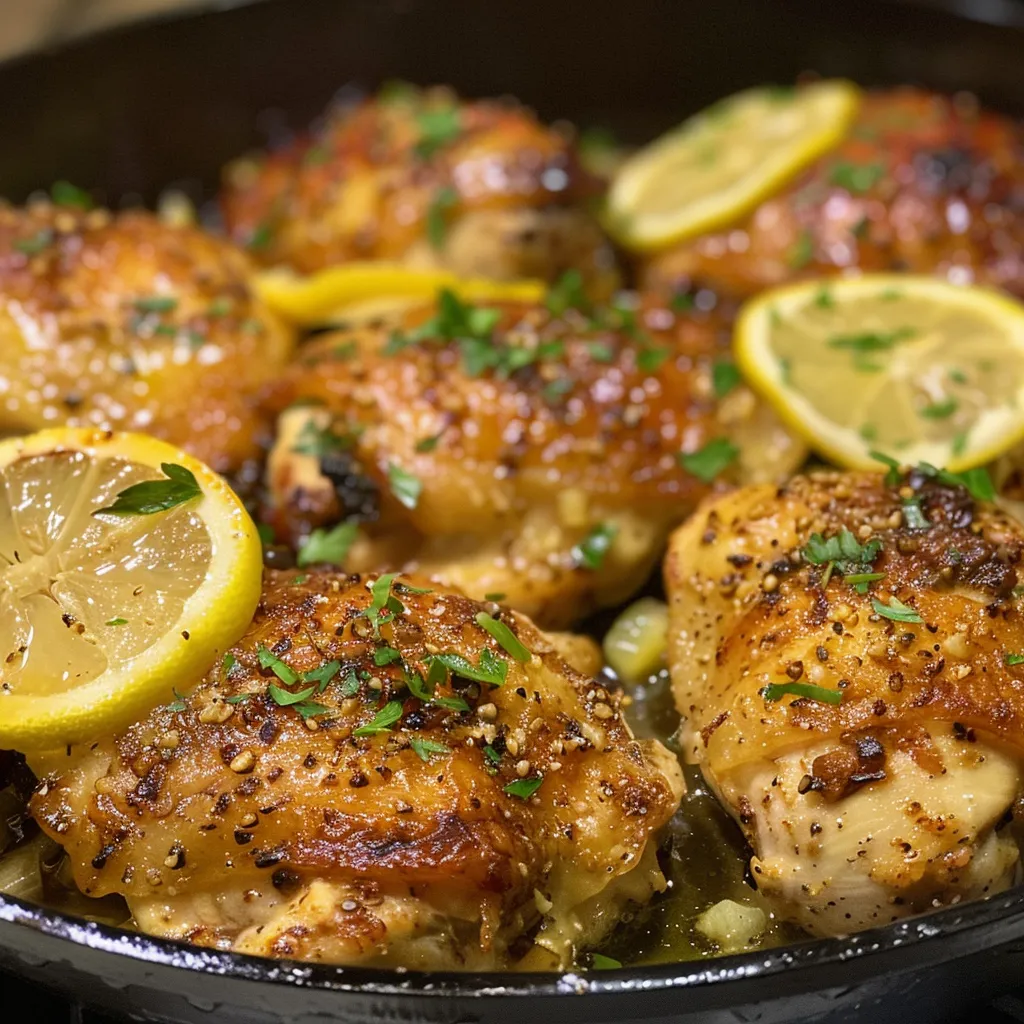
Gather around, my friend, because today we’re diving into a dish that embodies the very essence of home cooking. This Lemon Garlic Skillet Chicken is more than just a meal; it’s a comforting hug on a plate, a recipe that takes simple ingredients and transforms them into something truly special. Whether you’re preparing a weeknight dinner or hosting friends for a cozy gathering, this dish will surely impress.

Why You’ll Love This Lemon Garlic Skillet Chicken Recipe

This recipe isn’t just about the flavors—though they are fantastic! Here are five reasons why this dish will become a staple in your kitchen:

  • Quick and Easy: With just a few pantry staples, you can whip up this meal in about 30 minutes, perfect for those busy weeknights.
  • Flavor-Packed: The combination of lemon and garlic creates a bright, zesty flavor that elevates the chicken to new heights.
  • Versatile: This recipe is perfect for any occasion. Pair it with rice, pasta, or a fresh salad, and you’ve got a meal that fits any season.
  • Healthy and Wholesome: Packed with protein and minimal added fats, this dish is a great option for health-conscious eaters.
  • Family-Friendly: Even picky eaters will enjoy this delicious chicken, as its flavors are familiar yet exciting.

Gather Your Ingredients

Here’s what you’ll need to create this wonderful Lemon Garlic Skillet Chicken:

  • 4 pieces of bone-in or boneless chicken thighs or breasts: Pat them dry to ensure a good sear.
  • 4 cloves of garlic: Sliced thin for maximum flavor.
  • 1 tablespoon of olive oil: To help brown the chicken beautifully.
  • 1 teaspoon of lemon zest: Freshly grated from one lemon, this adds a burst of citrus aroma.
  • 3 tablespoons of fresh lemon juice: About one lemon, for that unmistakable tang.
  • Salt and pepper: To taste, enhancing all the flavors.

Substitutions and Tips

If you don’t have all the ingredients on hand, don’t fret! Here are some substitutions:

  • Chicken: You can use any chicken parts you prefer—just adjust the cooking time accordingly.
  • Olive Oil: Canola or avocado oil can be used in place of olive oil.
  • Garlic: If fresh garlic isn’t available, you can use garlic powder, though fresh is recommended for the best flavor.
  • Lemon: Lime juice can be a zesty alternative if you’re in a pinch.

Step-by-Step Instructions

A side view of delicious lemon garlic chicken, garnished with sliced garlic and lemon wedges.

Let’s bring this dish to life with these straightforward steps:

  1. Season the chicken generously with salt and pepper on both sides.
  2. Heat the skillet over medium-high heat and add the olive oil until shimmering.
  3. Place the chicken pieces in the hot skillet, skin-side down if using skin-on, and cook without moving for about 5-7 minutes until the underside is golden brown and crispy.
  4. Flip the chicken with tongs or a spatula and cook the other side for another 5-7 minutes, until the chicken is cooked through and juices run clear.
  5. Add the sliced garlic to the skillet around the chicken, letting it sizzle and become fragrant, turning a light golden color.
  6. Sprinkle the lemon zest over the chicken and garlic, shaking the skillet gently to distribute evenly.
  7. Squeeze the fresh lemon juice into the skillet, scraping up any browned bits from the bottom to create a flavorful sauce.
  8. Let the sauce simmer for 2-3 minutes, allowing the garlic to soften slightly and the flavors to meld.
  9. Taste the sauce and adjust seasoning with salt and pepper as needed. Spoon the sauce over the chicken to coat evenly.
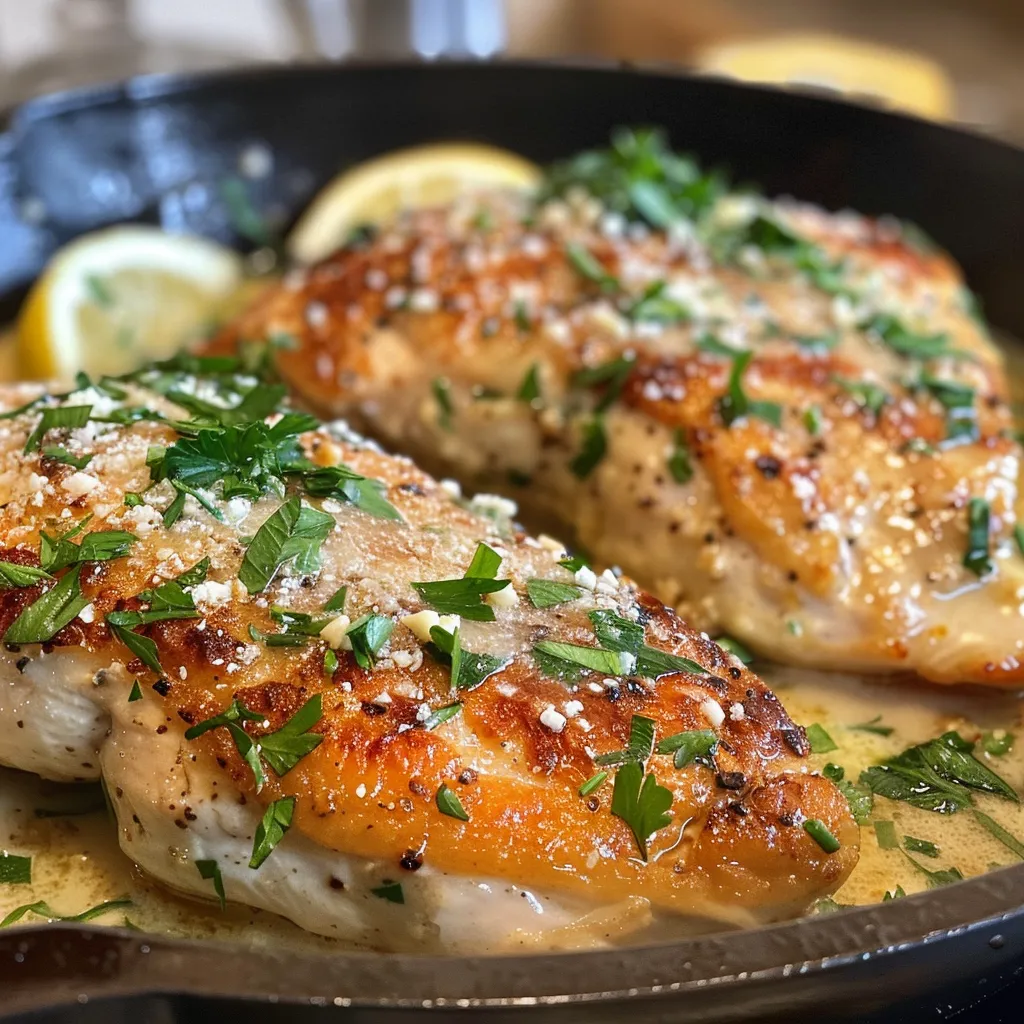
  10. Transfer the chicken to a serving plate, pouring any extra pan sauce over the top for added flavor and shine.
  11. Garnish with additional lemon zest or fresh herbs if desired, and serve immediately with your preferred sides.

Pro Tips for Perfect Lemon Garlic Chicken

To ensure that your Lemon Garlic Skillet Chicken turns out perfectly every time, keep these expert insights in mind:

  • Choose the right skillet: A cast iron skillet holds heat well and gives a beautiful sear.
  • Don’t overcrowd the pan: Give each piece of chicken plenty of space to brown properly; cook in batches if necessary.
  • Monitor the temperature: Use a meat thermometer; chicken should reach an internal temperature of 165°F.
  • Let it rest: Allow the chicken to rest for a few minutes after cooking; this helps retain its juices.
  • Experiment with herbs: Fresh herbs like thyme or rosemary can add additional depth to the flavor.
  • Deglazing is key: Don’t skip scraping the bottom of the skillet; those bits are full of flavor!
  • Adjust the acidity: If the sauce is too tart, balance it with a pinch of sugar.
  • Make it a meal: Consider adding vegetables like asparagus or spinach to the skillet for a one-pan dinner.

Common Mistakes and Troubleshooting

Sometimes things don’t go as planned. Here’s how to avoid some common hiccups:

  • Overcooking the chicken: Keep an eye on the cooking time; it’s better to check earlier than later.
  • Burning the garlic: If it starts to brown too quickly, reduce the heat to avoid bitterness.
  • Dry chicken: Make sure to baste with the pan sauce to keep the chicken moist.
  • Lack of flavor: Always taste the sauce before serving; adjust seasonings as necessary.

Variations to Try

Feeling adventurous? Here are some delightful variations to spice things up:

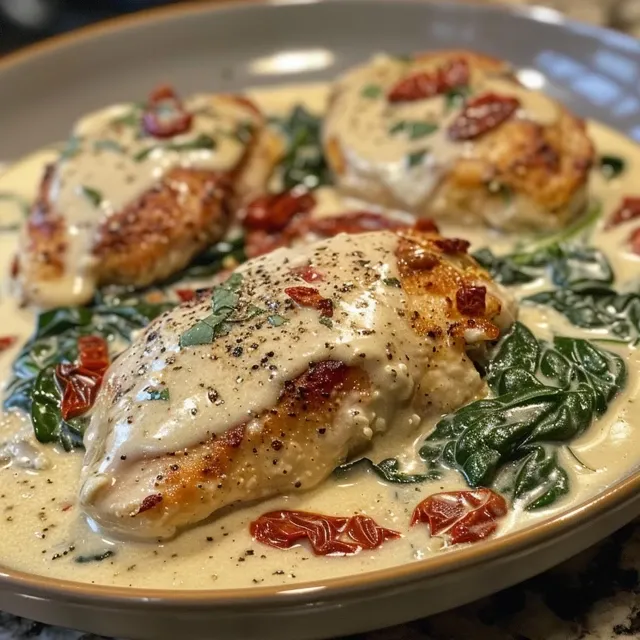
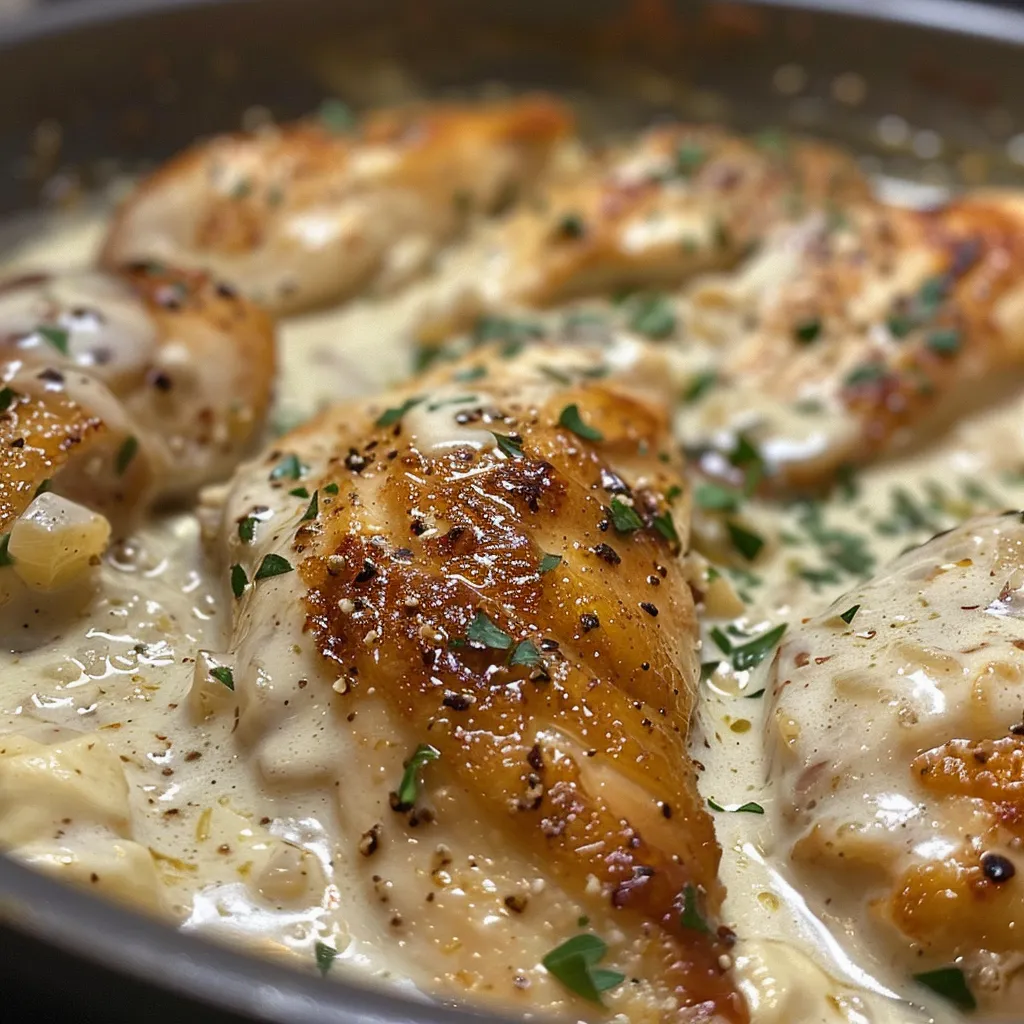
  • Creamy Lemon Garlic Chicken: Stir in a splash of heavy cream after deglazing for a rich, creamy sauce.
  • Honey Lemon Garlic Chicken: Add a tablespoon of honey to the marinade for a sweet twist.
  • Spicy Lemon Garlic Chicken: Incorporate red pepper flakes into the skillet for a touch of heat.
  • Herb-Infused Chicken: Mix in fresh herbs like parsley or dill for a fresh flavor boost.

Storage and Make-Ahead Instructions

Want to enjoy this dish later? Here’s how to store and reheat:

  • Storing: Refrigerate leftovers in an airtight container for up to 3 days.
  • Freezing: This dish freezes well for up to 2 months; freeze without the sauce for best results.
  • Reheating: Warm gently in a skillet over low heat, adding a splash of chicken broth to keep it moist.

Frequently Asked Questions

Here are some common questions folks ask about this recipe:

  • Can I use chicken breasts instead of thighs? Absolutely! Just adjust the cooking time as they may cook faster.
  • What sides pair well with this dish? Serve it with rice, quinoa, or a fresh salad for a complete meal.
  • Can I use dried herbs instead of fresh? Yes, but use less; dried herbs are more potent than fresh.
  • Is this recipe gluten-free? Yes, all the ingredients are gluten-free, making it suitable for those with dietary restrictions.
  • How do I make it dairy-free? This recipe is naturally dairy-free, so you’re good to go!
  • What if I don’t have a skillet? You can use any oven-safe pan; just be careful when transferring it to the oven.
  • Can I marinate the chicken ahead of time? Yes, marinating for a few hours will enhance the flavors beautifully.
  • What should I do if I don’t have fresh lemons? Bottled lemon juice can be used in a pinch, but fresh is best for flavor.

Nutritional Information and Dietary Adaptations

This dish is not only delicious but also nutritious. Here are some tips:

  • High Protein: Chicken is a great source of lean protein, essential for muscle repair and overall health.
  • Low Carb Option: Pair with steamed vegetables instead of rice for a low-carb meal.
  • Vitamin C Boost: The lemon adds a healthy dose of vitamin C, which is great for your immune system.

Equipment Recommendations

To make this recipe, having the right tools can make all the difference:

  • Cast Iron Skillet: Ideal for getting that perfect sear and retaining heat.
  • Meat Thermometer: Ensures your chicken is cooked safely and perfectly.
  • Sharp Knife: For slicing garlic and trimming chicken with ease.

Serving Suggestions

Here are some ideas to round out your meal:

  • Fresh Green Salad: A simple salad with mixed greens and a light vinaigrette complements the richness of the chicken.
  • Garlic Bread: Serve with garlic bread for a classic combination that everyone loves.
  • Steamed Vegetables: Brighten your plate with colorful veggies like broccoli or green beans.
  • Rice or Quinoa: These grains soak up the delicious sauce and make for a hearty side.

Final Thoughts: A Taste of Home Awaits

Cooking is about more than just food; it’s about creating memories and sharing love. This Lemon Garlic Skillet Chicken is a testament to that spirit. As you gather around the table, enjoy the laughter and stories shared over this comforting dish. Remember, cooking doesn’t have to be complicated—just let the ingredients shine, and you’ll create something that feels like home every time.

Lemon Garlic Skillet Chicken

Prep Time 10 minutes
Cook Time 15 minutes
Total Time 25 minutes
Servings 4 pieces
Calories 250
A quick and flavorful chicken dish with bright lemon and garlic notes, perfect for a weeknight dinner.

Ingredients

Chicken

  • 4 pieces bone-in or boneless chicken thighs or breasts (patted dry)
  • 4 cloves garlic (sliced thin)
  • 1 tablespoon olive oil
  • 1 teaspoon lemon zest (from one lemon)
  • 3 tablespoons fresh lemon juice (about one lemon)
  • to taste Salt and pepper

Instructions 

  • Season chicken with salt and pepper. Heat oil in skillet over medium-high heat.
  • Cook chicken 5-7 minutes per side until golden and cooked through.
  • Add garlic to skillet, cook until fragrant, then add lemon zest and juice.
  • Simmer sauce 2-3 minutes, then spoon over chicken and serve.

Notes

For extra flavor, garnish with fresh herbs or lemon slices.
Calories: 250kcal
Cost: $15
Course: Main Course
Cuisine: American
Keyword: chicken, Garlic, Lemon

The Comfort of Creamy Garlic Parmesan Chicken

Welcome to my rustic kitchen! Today, we’re diving into a heartwarming recipe that transforms simple ingredients into a feast for the senses: Creamy Garlic Parmesan Chicken Breast. This dish isn’t just food; it’s a gathering of flavors and memories, perfect for family dinners or a cozy night in. With its creamy sauce and tender chicken, this recipe captures the essence of home-cooked comfort and is sure to become a staple on your dinner table.

Why You’ll Love This Recipe

  • Flavorful Comfort: The balance of garlic and parmesan creates a rich, savory sauce that complements the chicken beautifully.
  • Quick & Easy: With just a few steps, you can whip up a delicious meal in under 30 minutes, perfect for those busy weeknights.
  • Adaptable: This recipe is versatile—whether you want it over pasta, with mashed potatoes, or alongside fresh green beans, it fits right in.
  • Family-Friendly: The creamy garlic sauce is a hit with kids and adults alike, making dinnertime a delightful experience.
  • Healthy Options: With a few adjustments, this dish can be made low carb or lighter without sacrificing flavor.

Ingredients Breakdown

Here’s what you’ll need to create this creamy delight:

  • 2 large boneless, skinless chicken breasts: The star of the dish! Make sure they are fresh for the best flavor.
  • 1 tablespoon olive oil: For searing the chicken and adding a bit of healthy fat.
  • 2 tablespoons butter: This adds richness to the creamy sauce.
  • 4 garlic cloves, minced: Fresh garlic is key; it brings an aromatic punch to the dish.
  • 1 cup heavy cream: The base of our creamy sauce, creating a luscious texture.
  • 1/2 cup grated Parmesan cheese: Use freshly grated for the best flavor and meltability.
  • 1 teaspoon Italian seasoning: A blend of herbs that complements the chicken and sauce beautifully.
  • Salt and black pepper to taste: Essential for seasoning the chicken and enhancing flavors.
  • Fresh chopped parsley for garnish (optional): Adds a pop of color and freshness.

If you’re looking for substitutions, consider the following:

  • Chicken thighs: For a richer flavor and more moisture.
  • Half-and-half or evaporated milk: Can replace heavy cream for a lighter option.
  • Vegan butter and plant-based cream: For a dairy-free version that still tastes great.

Step-by-Step Instructions

Close-up of succulent chicken breast smothered in creamy garlic sauce.

Now, let’s get cooking! Follow these easy steps to create your creamy garlic parmesan chicken:

  1. Prepare the Chicken: Slice the chicken breasts in half horizontally to create thinner cutlets. Season generously with salt, pepper, and Italian seasoning.
  2. Sear the Chicken: Heat olive oil in a skillet over medium heat. Place the chicken in the skillet and sear for about 4-5 minutes on each side, or until golden brown and cooked through. Remove the chicken and set aside.
  3. Make the Sauce: In the same skillet, reduce the heat and add butter. Once melted, add the minced garlic and sauté until fragrant, about 1 minute.
  4. Add the Cream: Pour in the heavy cream and stir to deglaze the pan, scraping up any bits from the chicken. Add the grated parmesan cheese and stir until melted and the sauce thickens.
  5. Combine: Return the chicken to the skillet and let it simmer in the sauce for another 2-3 minutes, ensuring each piece is well-coated.

Pro Tips for Perfecting Your Dish

  • Don’t Overcook the Chicken: Ensure your chicken is cooked through but still juicy. Use a meat thermometer to check for an internal temperature of 165°F.
  • Fresh Ingredients Matter: Use fresh garlic and Parmesan for the best flavor and texture in your sauce.
  • Customize Your Seasoning: Feel free to adjust the Italian seasoning based on your family’s preferences. Add a pinch of red pepper flakes for a little heat!
  • Let It Rest: After cooking, allow the chicken to rest for a few minutes before serving. This helps retain its juices.
  • Experiment with Add-ins: Consider adding spinach or sun-dried tomatoes to the sauce for extra flavor and nutrition.
  • Perfect Pairing: This dish goes well with a simple side salad to balance the richness of the sauce.

Common Mistakes & Troubleshooting

Even the best can stumble in the kitchen. Here are some common pitfalls and how to avoid them:

  • Overcooking the Sauce: If your sauce thickens too much, add a splash of chicken broth or water to loosen it.
  • Underseasoned Chicken: Ensure to season your chicken well before cooking; it’s hard to fix blandness later.
  • Garlic Burning: Garlic can burn quickly; always sauté it on low to medium heat and watch closely.
  • Clumpy Sauce: Stir continuously when adding cheese to prevent clumping—freshly grated cheese melts better!

Variations to Try

This creamy garlic parmesan chicken is easy to customize. Here are a few delicious variations:

  • Vegetable Medley: Add bell peppers, zucchini, or mushrooms to the skillet before adding the sauce for a colorful veggie boost.
  • Cheesy Spinach Chicken: Stir in fresh spinach into the sauce just before serving for a nutrient-packed twist.
  • Herbed Lemon Chicken: Add a squeeze of lemon juice and fresh herbs like thyme or rosemary for a refreshing flavor.
  • Spicy Buffalo Version: Mix in buffalo sauce to the creamy sauce for a spicy kick that pairs perfectly with the chicken.

Storage and Make-Ahead Instructions

This dish can be made ahead and stored for future meals. Follow these guidelines:

  • Make-Ahead: Prepare the chicken and sauce, then store them separately in airtight containers in the refrigerator for up to 3 days.
  • Freezing: While the sauce can be frozen, the texture may change upon reheating. It’s best to freeze the chicken alone and make the sauce fresh.
  • Reheating: Gently reheat on the stove over low heat, adding a splash of cream or broth to return creaminess.

Frequently Asked Questions

  • Can I use chicken thighs instead of breasts? Absolutely! Chicken thighs add more flavor and moisture.
  • Is this recipe gluten-free? Yes, all the ingredients are naturally gluten-free. Just ensure your chicken broth is gluten-free if you use it.
  • How can I make it lighter? Substitute half-and-half for heavy cream and use less butter.
  • What can I serve with this dish? It pairs perfectly with mashed potatoes, rice, or a side of steamed vegetables.
  • Can I double this recipe? Yes, just ensure your skillet is large enough or cook in batches.
  • What if I don’t have Italian seasoning? You can create your own blend using oregano, basil, and thyme.
  • Can I use pre-grated cheese? While you can, freshly grated Parmesan will melt and taste better.
  • How long does leftovers last? Store leftovers in the fridge for up to 3 days.

Nutritional Information & Dietary Adaptations

This recipe is not just delicious but can also be adapted for various dietary needs:

  • Low Carb: Serve it over zucchini noodles or cauliflower rice to keep it low-carb.
  • High Protein: The chicken provides a hearty dose of protein, making it a filling option for those watching their macros.
  • Vegetarian Option: Substitute chicken with hearty mushrooms or tofu, and use vegetable broth in place of chicken broth.

Equipment Recommendations

To make this dish, you’ll need:

  • Non-stick skillet: Essential for preventing sticking and for easy cleaning.
  • Sharp knife: For slicing the chicken evenly.
  • Cutting board: A sturdy surface for prep work.
  • Meat thermometer: To ensure your chicken is cooked to perfection.

Serving Suggestions

This creamy garlic parmesan chicken is versatile in its pairings:

  • With Mashed Potatoes: The creamy sauce complements the fluffy potatoes beautifully.
  • Over Pasta: Serve it atop your favorite pasta for a hearty meal.
  • With Green Beans: A side of sautéed green beans adds freshness and crunch.
  • Alongside a Salad: A crisp green salad balances the richness of the dish.

Conclusion

This Creamy Garlic Parmesan Chicken is more than just a recipe; it’s a dish that brings people together. With its rich flavors and simple preparation, it’s the kind of meal that makes every dinner feel like a celebration. So gather your loved ones, set the table, and enjoy the warmth of home-cooked goodness. Happy cooking, y’all!

Creamy Garlic Parmesan Chicken Breast

Prep Time 10 minutes
Cook Time 15 minutes
Total Time 25 minutes
Servings 4 servings
Calories 550
A rich and flavorful chicken dish with a creamy garlic Parmesan sauce, perfect for a satisfying meal.

Ingredients

Protein

  • 2 large boneless, skinless chicken breasts
  • 1 tablespoon olive oil
  • 2 tablespoons butter
  • 4 garlic cloves garlic, minced
  • 1 cup heavy cream
  • 1/2 cup grated Parmesan cheese
  • 1 teaspoon Italian seasoning
  • to taste Salt and black pepper
  • for garnish Fresh chopped parsley (optional)

Instructions 

  • Slice chicken in half horizontally and season with salt, pepper, and Italian seasoning.
  • Heat olive oil in a skillet and sear chicken until golden and cooked through, about 4–5 minutes per side.
  • Remove chicken, lower heat, add butter and garlic, and sauté until fragrant.
  • Pour in cream, add Parmesan, and simmer until sauce thickens.
  • Return chicken to skillet, simmer for 2–3 minutes, then serve garnished with parsley if desired.

Notes

For a richer flavor, use freshly grated Parmesan cheese.
Calories: 550kcal
Cost: $15
Course: Main Course
Cuisine: Italian
Keyword: chicken, creamy, Parmesan

Welcome, friends! Today, I’m excited to share a recipe that’s not just a meal, but a celebration of flavors and memories—the beloved Bang Bang Chicken Skewers. This dish is perfect for family gatherings, backyard barbecues, or any occasion where you want to bring people together over good food. With juicy chicken, a spicy and creamy sauce, and the option to grill or air fry, these skewers are sure to become a staple in your cooking repertoire. Let’s dive into how you can make these skewers shine!

Why You’ll Love This Recipe

There are countless reasons to love Bang Bang Chicken Skewers. Here are just a few:

  • Versatile Cooking Methods: Whether you prefer grilling on the barbecue or using the air fryer, these skewers can be prepared to suit your cooking style.
  • Flavor Explosion: The combination of juicy chicken and spicy bang bang sauce creates an unforgettable taste experience that will have everyone coming back for more.
  • Quick and Easy: With simple ingredients and straightforward steps, you can whip up these skewers in no time, making them perfect for weeknight dinners or last-minute gatherings.
  • Customizable Heat Level: Adjust the spiciness of the bang bang sauce to suit your taste—make them mild for the kids or crank up the heat for adults!
  • Perfect for Any Occasion: From family barbecues to game day snacks, these skewers fit right in, making them a versatile addition to your recipe collection.

Ingredient Breakdown

Here’s what you’ll need to create these mouthwatering Bang Bang Chicken Skewers:

  • 1.5 lbs boneless, skinless chicken breasts or thighs: Cut into 1 to 1.5-inch chunks. Thighs offer more flavor and moisture, while breasts are leaner.
  • 1 tablespoon olive oil: For coating the chicken and preventing sticking.
  • 1 teaspoon salt: Essential for seasoning the chicken.
  • ½ teaspoon black pepper: Adds a bit of warmth and depth to the flavor.
  • ½ teaspoon garlic powder (optional): For extra flavor; fresh garlic also works well!
  • ½ teaspoon smoked paprika (optional): Adds a lovely smoky flavor that enhances the dish.
  • 8-10 skewers: Use wooden or metal skewers. If using wooden skewers, soak them in water for at least 30 minutes to prevent burning.
  • ½ cup mayonnaise: The base of the bang bang sauce. For a lighter option, use ¼ cup mayo and ¼ cup Greek yogurt.
  • 2 tablespoons sriracha: Adjust according to your heat preference.
  • 1 tablespoon honey (or sugar): Balances the heat with a touch of sweetness.
  • 1 tablespoon rice vinegar (or lime juice): Adds acidity to the sauce for a well-rounded flavor.
  • 1 tablespoon chopped green onions: For garnish, providing a fresh, crunchy element.
  • 1 teaspoon sesame seeds: Optional garnish, adding a nutty flavor and texture.

How to Make Bang Bang Chicken Skewers

Let’s get cooking! Follow these easy steps to prepare your Bang Bang Chicken Skewers:

  1. In a large bowl, combine the chicken chunks, olive oil, salt, black pepper, garlic powder, and smoked paprika. Mix until the chicken is well-coated.
  2. Thread the marinated chicken onto the skewers, leaving a little space between each piece for even cooking.
  3. If grilling, preheat your grill to medium-high heat. If using an air fryer, preheat it according to the manufacturer’s instructions.
  4. Grill the skewers for 10-12 minutes, turning occasionally, until the chicken is cooked through and has nice grill marks. For air frying, cook at 400°F for about 8-10 minutes, flipping halfway through.
  5. While the chicken is cooking, prepare the bang bang sauce by whisking together the mayonnaise, sriracha, honey, and rice vinegar in a bowl.
  6. Once the chicken is cooked, remove it from the heat and drizzle or dip it in the bang bang sauce. Garnish with chopped green onions and sesame seeds if desired.
  7. Serve warm and enjoy!

Pro Tips for the Best Bang Bang Chicken Skewers

Side view of succulent chicken skewers drizzled with a spicy sauce, ready to be served.

To take your skewers to the next level, keep these expert insights in mind:

  • Marinate for Flavor: If you have time, marinate the chicken in the seasoning mix for at least 30 minutes or overnight for deeper flavor.
  • Cook in Batches: Avoid overcrowding the grill or air fryer basket; cook in batches for even cooking and optimal crispiness.
  • Let the Sauce Shine: Don’t skimp on the bang bang sauce—it’s the star of the dish! Serve extra on the side for dipping.
  • Experiment with Proteins: While chicken is a favorite, feel free to try shrimp or tofu for a delightful twist.
  • Use Fresh Ingredients: Fresh garlic, lime juice, and high-quality mayonnaise make a big difference in flavor.
  • Check for Doneness: Always ensure chicken reaches an internal temperature of 165°F for safe consumption.
  • Rest the Skewers: Let the skewers rest for a few minutes after cooking before serving to help retain juices.
  • Make it a Meal: Serve these skewers over rice or alongside a fresh salad for a complete meal.

Common Mistakes and Troubleshooting

Even the best of us can make mistakes in the kitchen! Here’s how to avoid common pitfalls:

  • Overcooking the Chicken: Keep an eye on the cooking time to prevent dry chicken. Use a meat thermometer for accuracy.
  • Using Cold Skewers: Always pre-soak wooden skewers to prevent burning. Metal skewers can be used straight from the drawer.
  • Skipping the Sauce: The bang bang sauce is what makes these skewers special—don’t leave it out!
  • Not Preheating: Always preheat your grill or air fryer for the best results; this helps achieve a nice sear.

Variations to Try

Feel free to get creative! Here are some variations to try:

  • Vegetable Skewers: Add bell peppers, zucchini, and onions alongside the chicken for colorful and tasty skewers.
  • Spicy Bang Bang Shrimp: Substitute chicken with shrimp for a seafood twist that cooks quickly and is full of flavor.
  • Bang Bang Tofu: For a vegetarian option, use firm tofu, marinated and grilled to perfection.
  • Sweet and Spicy Glaze: Mix in some pineapple juice with the bang bang sauce for a sweet tropical flavor.

Storage and Make-Ahead Instructions

If you want to prepare ahead of time or have leftovers, follow these guidelines:

  • Refrigeration: Store cooked skewers in an airtight container in the fridge for up to 3 days.
  • Freezing: Freeze cooked skewers for up to 2 months. Thaw in the fridge overnight before reheating.
  • Reheating: Reheat in the air fryer or oven to maintain crispiness, or use a microwave for a quick warm-up.

Comprehensive FAQ

Here are some common questions about making Bang Bang Chicken Skewers:

  • Can I use store-bought bang bang sauce? Absolutely! For convenience, you can use store-bought sauce; just make sure it’s a good quality brand.
  • How spicy is it? The spiciness comes from the sriracha. Adjust the amount to suit your taste—less for milder, more for extra kick!
  • Can I cook this in the oven or air fryer? Yes! Both methods work well. Adjust cooking times as needed based on your appliance.
  • How long do leftovers last? Leftovers can be stored in the fridge for up to 3 days. Reheat thoroughly before serving.
  • What can I serve with these skewers? Try serving with rice, a fresh salad, or grilled vegetables for a complete meal.
  • Can I make this recipe gluten-free? Yes! Use gluten-free soy sauce and ensure all other ingredients are gluten-free.
  • Is it possible to make these skewers ahead of time? You can marinate the chicken and prepare the sauce ahead of time, then assemble and cook when ready to serve.
  • What’s the best way to garnish? Fresh green onions and sesame seeds are excellent garnishes that add flavor and beautiful presentation.

Nutrition Tips and Dietary Adaptations

Making Bang Bang Chicken Skewers can fit into various dietary needs with a few adjustments:

  • Low-calorie Option: Use Greek yogurt instead of mayonnaise for a healthier bang bang sauce.
  • Dairy-Free: Stick to the mayo or yogurt options that are dairy-free.
  • Low-Carb: Serve with a side of veggies instead of rice for a low-carb meal.

Equipment Recommendations

Here’s what you’ll need to make these skewers:

  • Grill or Air Fryer: Both methods yield delicious results; choose based on your preference.
  • Skewers: Invest in a good set of metal skewers for easy reuse or use disposable wooden ones.
  • Mixing Bowl: A large bowl for marinating the chicken and mixing the bang bang sauce.

Serving Suggestions

Pair your Bang Bang Chicken Skewers with some delightful sides:

  • Rice or Quinoa: Serve over fluffy rice or quinoa to soak up the delicious sauce.
  • Fresh Salad: A crisp garden salad or coleslaw complements the skewers nicely.
  • Grilled Corn: Add some grilled corn on the cob for a summer vibe.

In conclusion, these Bang Bang Chicken Skewers are more than just a recipe; they’re an invitation to gather around the table with family and friends. With their bold flavors, easy preparation, and endless customization options, they’re sure to become a favorite in your home. So fire up the grill or air fryer, and enjoy a meal that’s as warm and comforting as a summer evening spent on the porch. Happy cooking!

Bang Bang Chicken Skewers Recipe

Prep Time 15 minutes
Cook Time 10 minutes
Total Time 25 minutes
Servings 4 servings
Calories 350
Enjoy these flavorful grilled chicken skewers coated in a spicy, creamy sauce, perfect for a quick and delicious meal or appetizer.

Ingredients

Protein

  • 1.5 lbs boneless, skinless chicken breasts or thighs (cut into 1 to 1.5-inch chunks)
  • 1 tablespoon olive oil
  • 1 teaspoon salt
  • ½ teaspoon black pepper
  • ½ teaspoon garlic powder (optional)
  • ½ teaspoon smoked paprika (optional)

Skewers

  • 8-10 skewers wooden or metal skewers (soak wooden skewers in water if using)

Sauce

  • ½ cup mayonnaise (or use ¼ cup mayo + ¼ cup Greek yogurt for a lighter option)
  • 2 tablespoons sriracha (adjust to taste)
  • 1 tablespoon honey (or sugar)
  • 1 tablespoon rice vinegar (or lime juice)
  • 1 tablespoon chopped green onions
  • 1 teaspoon sesame seeds

Instructions 

  • Thread chicken chunks onto skewers.
  • Mix olive oil, salt, pepper, garlic powder, and smoked paprika; brush onto chicken.
  • Grill skewers until cooked through, about 8-10 minutes.
  • Combine mayonnaise, sriracha, honey, and rice vinegar to make sauce.
  • Brush sauce onto cooked chicken and garnish with green onions and sesame seeds.

Notes

Soaking wooden skewers prevents burning during grilling.
Calories: 350kcal
Cost: $15
Course: Main Course
Cuisine: Asian
Keyword: chicken

The Comfort of Home-Cooked Goodness

Welcome to my rustic kitchen, where we celebrate the simple joys of cooking with heart and soul. Today, we’re diving into a delightful dish that embodies warmth and flavor: 15-Minute Garlic Butter Chicken Bites. This recipe isn’t just about quick cooking; it’s about creating memories with every bite. Whether you’re gathering around the dinner table with family or hosting friends for a casual get-together, these garlic butter chicken bites are sure to impress. Let’s roll up our sleeves and get started!

Why You’ll Love This Recipe

  • Quick and Easy: This dish takes only 15 minutes to prepare, making it perfect for those busy weeknights when time is scarce but flavor is essential.
  • Flavor-Packed: With the rich combination of garlic and butter, these chicken bites are bursting with flavor that will have everyone coming back for seconds.
  • Versatile: Serve them as appetizers, toss them in salads, or pair them with your favorite sides for a complete meal.
  • Family-Friendly: Kids and adults alike will adore these tender chicken bites, making dinner a breeze.
  • Minimal Cleanup: One skillet, a handful of ingredients, and you’re done. Less time cleaning means more time enjoying!

Ingredient Breakdown

Let’s take a closer look at what you’ll need for these garlic butter chicken bites and some easy substitutions to keep the recipe accessible:

  • 20 oz boneless, skinless chicken breasts: Cut into bite-sized pieces for even cooking. You can substitute with chicken thighs for a juicier option.
  • 2 tbsp all-purpose flour: This helps create a crispy coating. If you’re gluten-free, consider using almond flour or a gluten-free blend.
  • ½ tsp dried oregano: Adds a lovely herbal note. Fresh oregano can be used for a brighter flavor.
  • ½ tsp dried basil: A staple herb, but feel free to switch it with Italian seasoning.
  • ½ tsp sweet paprika: For a touch of color and sweetness. Smoked paprika can add a smoky depth.
  • ½ tsp salt: Essential for enhancing flavor. Adjust to taste.
  • Freshly ground pepper (to taste): A little kick to balance the richness of butter.
  • 1 tbsp olive oil: For cooking the chicken. You can use butter or another cooking oil if preferred.
  • 3 tbsp unsalted butter (divided): The star of this dish! Use more or less depending on your taste.
  • 3 garlic cloves (minced): Fresh garlic is key here. Granulated garlic can substitute in a pinch.
  • 2 tbsp parsley (freshly chopped): For garnish and freshness. Basil or chives can also work well.

How to Make 15-Minute Garlic Butter Chicken Bites

Side view of succulent chicken pieces coated in garlic butter, garnished with parsley.

Let’s get cooking! Follow these simple steps to whip up a batch of these delicious bites:

  1. Start by cutting the chicken breasts into bite-sized pieces, ensuring they’re even for consistent cooking.
  2. In a mixing bowl, toss the chicken pieces with flour, oregano, basil, paprika, salt, and pepper until they are well-coated.
  3. Heat olive oil in a skillet over medium-high heat and add half the butter.
  4. Add the seasoned chicken to the skillet and cook for about 7-10 minutes, stirring occasionally until they are golden brown.
  5. Stir in the minced garlic and the remaining butter, cooking until the garlic is fragrant and the chicken is cooked through.
  6. Garnish with freshly chopped parsley before serving.

Pro Tips for Success

  • Prep Ahead: Marinate the chicken pieces in the seasoning for 30 minutes to intensify the flavors.
  • Don’t Overcrowd the Pan: Cook in batches if necessary to ensure even browning.
  • Temperature Matters: Ensure the skillet is hot enough before adding the chicken to get that nice sear.
  • Use a Meat Thermometer: Chicken should reach an internal temperature of 165°F for perfect doneness.
  • Experiment with Flavors: Try adding lemon juice or zest for a refreshing twist.
  • Garnish Wisely: Fresh herbs, lemon slices, or even a sprinkle of red pepper flakes can elevate the dish.
  • Pairing Suggestions: Serve with rice, pasta, or a fresh salad for a complete meal.
  • Storing Leftovers: Keep any leftovers in an airtight container in the fridge for up to three days.

Common Mistakes and Troubleshooting

Even the best recipes can sometimes go awry. Here are some common pitfalls and how to avoid them:

  • Burnt Garlic: If garlic burns, it can turn bitter. Add it later in the cooking process to prevent this.
  • Soggy Chicken: If the chicken is wet when added to the pan, it won’t brown properly. Pat it dry before seasoning.
  • Overcooked Chicken: Keep an eye on the cooking time to ensure the chicken remains juicy and tender.

Variations to Try

Feel free to get creative with this recipe! Here are some variations you might enjoy:

  • Lemon Garlic Butter Chicken: Add the juice and zest of one lemon for a zesty kick.
  • Spicy Garlic Butter Chicken: Incorporate red pepper flakes or diced jalapeños for some heat.
  • Honey Garlic Butter Chicken: Drizzle in a tablespoon of honey for a sweet and savory blend.
  • Herb Butter Chicken: Mix in fresh herbs like thyme or rosemary for added fragrance.

Storage and Make-Ahead Instructions

Planning ahead? Here’s how to store and reheat your chicken bites:

  • Refrigerating: Store cooled chicken bites in an airtight container in the fridge for up to three days.
  • Freezing: Freeze leftovers in freezer-safe bags for up to three months. Thaw in the refrigerator before reheating.
  • Reheating: Warm in a skillet over low heat with a splash of broth to keep them moist.

Frequently Asked Questions

Got questions? I’ve got answers! Here are some FAQs about this dish:

  • Can I use frozen chicken? Yes, but thaw it completely before cooking for even results.
  • What sides go well with chicken bites? Consider serving with mashed potatoes, steamed vegetables, or a hearty salad.
  • Can I make this dish in advance? Yes, prepare the chicken bites ahead of time and reheat when ready to serve.
  • Is this recipe gluten-free? Use gluten-free flour to make it suitable for a gluten-free diet.
  • Can I double the recipe? Absolutely! Just ensure your skillet can accommodate the extra chicken.
  • What if I don’t have fresh garlic? You can use garlic powder, but fresh garlic has a superior flavor.
  • How do I know when the chicken is done? Use a meat thermometer to check for an internal temperature of 165°F.
  • What’s the best way to serve these chicken bites? They’re great as appetizers or served over rice or pasta for a full meal.

Nutritional Tips and Dietary Adaptations

This dish can easily fit into various dietary needs:

  • Low-Carb Option: Skip the flour for a low-carb version; the chicken will still be delicious!
  • Dairy-Free: Substitute the butter with a dairy-free alternative, like olive oil or coconut oil.
  • High-Protein: Pair with quinoa or legumes to boost protein content in your meal.

Equipment Recommendations

Here are a few tools that will make your cooking experience even smoother:

  • Non-stick skillet: A good quality skillet will help prevent sticking and burning.
  • Meat thermometer: Essential for checking the doneness of your chicken.
  • Cutting board and knife: For prepping your chicken and vegetables efficiently.

Serving Suggestions

These garlic butter chicken bites are incredibly versatile. Here are some ideas for serving:

  • As an appetizer: Serve with toothpicks and a side of your favorite dipping sauce.
  • Over rice or pasta: Create a hearty meal by serving the chicken over a bed of fluffy rice or pasta.
  • In a salad: Toss them into a mixed green salad for a protein-packed lunch.

Final Thoughts

Cooking is about bringing people together, and these 15-Minute Garlic Butter Chicken Bites do just that. They’re quick, flavorful, and perfect for any occasion. So gather your loved ones, share a meal, and create lasting memories around the table. Remember, it’s not just about the food; it’s about the love that goes into it. Happy cooking!

15-Minute Garlic Butter Chicken Bites

Prep Time 5 minutes
Cook Time 10 minutes
Total Time 15 minutes
Servings 4 servings
Calories 350
Quick and flavorful chicken bites cooked in garlic butter, perfect for a fast dinner or snack.

Ingredients

Main

  • 20 oz boneless, skinless chicken breasts
  • 2 tbsp all-purpose flour
  • ½ tsp dried oregano
  • ½ tsp dried basil
  • ½ tsp sweet paprika
  • ½ tsp salt
  • to taste Freshly ground pepper
  • 1 tbsp olive oil
  • 3 tbsp unsalted butter (divided)
  • 3 cloves garlic (minced)
  • 2 tbsp parsley (freshly chopped)

Instructions 

  • Cut chicken into bite-sized pieces and toss with flour and spices.
  • Heat olive oil and half the butter in a skillet over medium-high heat; cook chicken until golden, about 7-10 minutes.
  • Add minced garlic and remaining butter; cook until fragrant, about 1-2 minutes.
  • Garnish with chopped parsley before serving.

Notes

Serve immediately with your favorite sides.
Calories: 350kcal
Cost: $15
Course: Main Course
Cuisine: American
Keyword: chicken, Garlic, quick

The Heartwarming Art of Making Butter Chicken

Butter chicken has a special place in many hearts, and for good reason. This dish is a comforting fusion of flavors and textures that brings families together around the dinner table. With its creamy sauce and tender chicken, butter chicken isn’t just a meal; it’s an experience steeped in tradition and warmth. In this definitive guide, we will explore everything you need to know about making the best butter chicken right in your own kitchen, from selecting the finest ingredients to troubleshooting common pitfalls.

In this article, we’ll dive deep into the world of butter chicken, ensuring you have all the tools and knowledge to create a dish that wraps you in warmth. Let’s roll up our sleeves and get cooking!

Why You’ll Love This Recipe

Here are some compelling reasons to whip up this butter chicken:

  • Simple Ingredients: Made with accessible ingredients that you may already have in your pantry, this recipe keeps cooking uncomplicated.
  • Rich Flavors: The combination of spices and cream creates a multi-layered flavor profile that tantalizes the taste buds.
  • Family-Friendly: With its mild spice level, this dish appeals to both adults and kids, making it perfect for family dinners.
  • Versatile Serving Options: Butter chicken pairs beautifully with various sides like basmati rice, naan, or even roasted vegetables.
  • Make-Ahead Friendly: You can prepare the chicken and sauce ahead of time, making it easy to reheat and serve on busy weeknights.

Ingredients Breakdown

To create a delicious butter chicken, you’ll need the following ingredients:

  • Chicken Thighs: 1 ½ pounds of boneless skinless chicken thighs are preferred for their juicy texture. You can substitute with chicken breasts if desired, but thighs are recommended for moisture.
  • Greek Yogurt: ½ cup of full-fat Greek yogurt acts as a tenderizer and adds creaminess. Substitute with plain yogurt if necessary.
  • Lemon Juice: 1 tablespoon of fresh lemon juice brightens the dish. Lime juice can be used as an alternative.
  • Fresh Ginger and Garlic: 2 teaspoons of minced ginger and 3 cloves of garlic enhance flavor depth.
  • Kashmiri Red Chili Powder: 1 teaspoon adds color and mild heat; adjust based on personal preference.
  • Garlic and Spices: 1 teaspoon each of garam masala, ground turmeric, and salt for seasoning.
  • Oils: 2 tablespoons of extra-virgin olive oil or avocado oil are used for sautéing.
  • Onion: 1 medium yellow onion, diced, brings sweetness and body to the sauce.
  • Cashews: ¼ cup of raw cashews thicken the sauce and add richness. You can replace them with almonds or omit for a nut-free version.
  • Crushed Tomatoes: 1 (15-ounce) can of crushed tomatoes forms the base of the sauce.
  • Butter: 2 tablespoons of unsalted butter or ghee enrich the sauce.
  • Heavy Cream: ½ cup of heavy cream or coconut cream adds velvety texture; you can substitute with half-and-half.
  • Basmati Rice: Serve over 1 cup of cooked basmati rice for a complete meal.
  • Cilantro: Freshly chopped cilantro for garnish is optional but adds brightness.

Step-by-Step Cooking Instructions

Side view of juicy Butter Chicken garnished with cilantro in a bowl.

Here’s how to bring your butter chicken to life:

  • 1. Dice the Chicken: Cut the chicken into 1-inch pieces and place in a bowl.
  • 2. Marinate the Chicken: Combine the yogurt, lemon juice, ginger, garlic, chili powder, garam masala, turmeric, and salt in the bowl with the chicken. Mix well, cover, and refrigerate for at least 1 hour or up to overnight.
  • 3. Cook the Chicken: Heat the oil over medium-high heat in a large sauté pan. Add the marinated chicken and cook for 5-6 minutes until opaque. Transfer the chicken to a separate bowl.
  • 4. Make the Sauce: In the same pan, add the diced onions and sauté for 3-4 minutes until softened.
  • 5. Add Spices: Stir in the ginger, garlic, red chili powder, garam masala, coriander, and cumin, and cook for another minute.
  • 6. Incorporate Cashews and Tomatoes: Add the cashews, crushed tomatoes, coconut sugar, and water. Stir well and simmer for 5 minutes.
  • 7. Blend the Sauce: Transfer the sauce to a blender and blend until smooth and creamy.
  • 8. Combine the Sauce and Chicken: Wipe the pan clean, then return the sauce to the pan. Add butter and heavy cream, stirring to combine. Add the chicken back to the pan and heat through for 3-5 minutes.
  • 9. Serve: Dish out the butter chicken over basmati rice and garnish with fresh cilantro.

Pro Tips for Perfect Butter Chicken

Here are some pro tips to elevate your butter chicken game:

  • Quality Chicken: Always choose fresh, high-quality chicken for the best flavor and texture.
  • Marination Time: Marinate your chicken overnight for deeper flavor infusion.
  • Spice Adjustments: Feel free to adjust spices to your taste; add more chili powder for heat.
  • Blend Smoothly: Ensure your sauce is blended thoroughly for a silky consistency.
  • Cook Low and Slow: Simmering the sauce gently allows flavors to meld beautifully.
  • Pair Wisely: Serve with sides that complement the dish, like naan or roasted vegetables.
  • Don’t Rush: Take your time throughout the cooking process; patience yields the best results.
  • Garnish Generously: Use fresh herbs generously to brighten up the dish.

Common Mistakes and Troubleshooting

Here are some pitfalls to avoid when making butter chicken:

  • Overcooking Chicken: This can lead to dry, tough meat. Cook just until opaque.
  • Underseasoned Sauce: Always taste and adjust seasoning before serving.
  • Too Thin Sauce: If your sauce is too thin, simmer it longer to reduce and thicken.
  • Burnt Spices: Add spices towards the end of sautéing to prevent burning and bitterness.

Variations to Try

If you’re feeling adventurous, here are some tasty variations:

  • Butter Chicken with Spinach: Stir in fresh spinach for added nutrition and flavor.
  • Paneer Butter Masala: Substitute chicken with paneer for a vegetarian twist.
  • Butter Chicken Tacos: Use butter chicken as a filling for soft tacos, topped with cilantro and lime.
  • Spicy Butter Chicken: Increase the chili powder and add jalapeños for an extra kick.

Storage and Make-Ahead Instructions

To make your cooking experience easier, consider these storage tips:

  • Make-Ahead: Prepare the chicken and sauce in advance, then store separately in airtight containers in the fridge for up to 3 days.
  • Freezing: Butter chicken can be frozen for up to 3 months. Thaw overnight in the fridge before reheating.
  • Reheating: Gently reheat on the stovetop over low heat, adding a splash of water or cream if the sauce is too thick.

FAQ About Butter Chicken

Here are answers to some commonly asked questions:

  • Can I use chicken breasts instead of thighs? Yes, but thighs are juicier and more flavorful.
  • What’s the best way to serve butter chicken? It’s traditionally served with basmati rice or naan.
  • Can I make it dairy-free? Use coconut cream instead of heavy cream and skip the butter.
  • What can I substitute for cashews? Almonds or sunflower seeds are good alternatives.
  • Is butter chicken spicy? It can be adjusted to your spice preference; use less chili powder for milder flavor.
  • How long does it take to make butter chicken? Preparation and cooking time combined is about 1 hour.
  • Can I use frozen chicken? Yes, just ensure to thaw it fully before marinating.
  • What’s a good side dish? Serve it with naan, rice, or a fresh salad for balance.

Nutrition Tips and Dietary Adaptations

For a healthier version of butter chicken, consider these tips:

  • Lean Proteins: Use skinless chicken breasts to reduce fat content.
  • Low-Fat Dairy: Choose low-fat yogurt and cream alternatives for lighter options.
  • Vegetable Additions: Incorporate more vegetables like bell peppers or spinach to boost nutrition.
  • Gluten-Free Options: Serve with gluten-free naan or rice to accommodate dietary restrictions.

Essential Equipment for Making Butter Chicken

Here’s what you’ll need to prepare this dish:

  • Large Sauté Pan: For cooking the chicken and sauce.
  • Mixing Bowl: For marinating the chicken.
  • Blender: To achieve a smooth sauce consistency.
  • Measuring Cups and Spoons: For accurate ingredient portions.
  • Spatula: For stirring and combining ingredients.

Serving Suggestions

Butter chicken can be enjoyed in various ways:

  • Over Basmati Rice: This classic pairing absorbs the delicious sauce.
  • With Naan: Perfect for scooping up that creamy goodness.
  • In Tacos: A fun twist for a casual meal with friends.
  • With a Side Salad: Balance the richness with a refreshing salad.

Conclusion

Butter chicken is more than just a dish; it’s a celebration of flavors and shared moments. By following this comprehensive guide, you’re not just cooking; you’re creating memories around the table. So, gather your loved ones, prepare this rich butter chicken, and enjoy the warmth it brings. Thank you for letting me share this cherished recipe with you; I hope you love it as much as I do!

Butter Chicken

Prep Time 20 minutes
Cook Time 30 minutes
Total Time 50 minutes
Servings 4 servings
Calories 550
A rich and creamy Indian-inspired dish featuring tender chicken in a flavorful tomato and spice sauce, perfect served over rice.

Ingredients

Protein

  • 1.5 pounds boneless skinless chicken thighs
  • 0.5 cup full-fat Greek yogurt
  • 1 tablespoon fresh lemon juice
  • 4 cloves garlic (minced)
  • 4 teaspoons minced ginger
  • 1 teaspoon Kashmiri red chili powder
  • 1 teaspoon garam masala
  • 1 teaspoon ground turmeric
  • 1 teaspoon salt
  • 2 tablespoons extra-virgin olive oil or avocado oil
  • 1 medium yellow onion (diced)
  • 0.5 cup raw cashews
  • 1 tablespoon coconut sugar (or other sweetener)
  • 1 15-ounce can crushed tomatoes
  • 1 cup water
  • 2 tablespoons unsalted butter (or ghee)
  • 0.5 cup heavy cream (or coconut cream)

Basmati rice

Fresh cilantro

Instructions 

  • Cut chicken into 1-inch pieces, marinate with yogurt, lemon juice, ginger, garlic, spices, then refrigerate for 1 hour.
  • Cook marinated chicken in oil until opaque, then set aside.
  • Sauté onions, add spices, cashews, tomatoes, sugar, and water; simmer for 5 minutes.
  • Blend sauce until smooth, then stir in butter and cream.
  • Return chicken to pan, cook for 3-5 minutes, then serve over rice topped with cilantro.

Notes

For extra flavor, let the chicken marinate overnight.
Calories: 550kcal
Cost: $15
Course: Main Course
Cuisine: Indian
Keyword: chicken

Unlock the Secrets to Perfectly Baked Chicken Thighs

Welcome, friends! If you’re looking for a recipe that brings the comfort of home right to your dinner table, you’re in the right place. Today, we’re diving into the world of baked chicken thighs. These juicy, tender morsels are not just easy to prepare; they also hold a special place in the hearts of many families. Whether you’re a seasoned chef or just starting out in the kitchen, this recipe will guide you to create chicken that’s crispy on the outside, succulent on the inside, and bursting with flavor. Let’s get started!

Why You’ll Love This Recipe

  • Effortless Preparation: Simply season, bake, and serve—no fancy techniques needed!
  • Flavorful and Juicy: The thighs stay moist and tender, making every bite a delight.
  • Versatile Dish: Pair with your favorite sides—mashed potatoes, roasted veggies, or a fresh salad.
  • Family-Friendly: Kids love the taste, and it’s a hit for gatherings and weeknight dinners.
  • Meal Prep Hero: Bake a batch and enjoy leftovers in salads, wraps, or sandwiches all week!

Ingredient Breakdown

To make the best baked chicken thighs, you’ll need the following ingredients:

  • Chicken Thighs: Bone-in, skin-on thighs work best for flavor. You can substitute boneless skinless thighs if you prefer, but the skin adds delicious crispiness.
  • Olive Oil: A good drizzle for moisture and flavor. You can also use melted butter for a richer taste.
  • Salt and Pepper: Essential for enhancing the natural flavors of the chicken.
  • Spice Mix: Customizable! Consider garlic powder, paprika, thyme, or your favorite spices.
  • Fresh Herbs: Optional, but a sprinkle of rosemary or parsley elevates the dish.

Pro Tips for Perfect Baked Chicken Thighs

Side view of a collection of succulent chicken dishes with vibrant colors and textures.
  • Pat Them Dry: Before seasoning, pat the chicken thighs dry with a paper towel. This helps achieve that golden, crispy skin.
  • Room Temperature: Allow the chicken to sit at room temperature for about 30 minutes before baking. It helps them cook evenly.
  • Don’t Overcrowd: Leave space on the baking sheet for hot air to circulate around the thighs, ensuring they cook evenly.
  • High Heat Baking: Start at a high temperature (around 425°F) for the first 20 minutes to get that crispy skin, then reduce the heat to finish cooking.
  • Use a Meat Thermometer: Check for doneness; chicken should reach an internal temperature of 165°F.
  • Let It Rest: Allow the chicken to rest for 5-10 minutes before serving, so juices redistribute for maximum flavor.
  • Experiment with Marinades: Marinating the chicken thighs overnight can add incredible depth of flavor.
  • Save the Drippings: Use the drippings to make a delicious gravy or sauce for your sides.

Common Mistakes and Troubleshooting

Even the best cooks can run into hiccups. Here are some common mistakes and how to avoid them:

  • Underseasoning: Don’t be shy with the spices! Chicken thighs are forgiving and can handle a good amount of seasoning.
  • Not Preheating the Oven: Ensure your oven is hot before placing the chicken in to get that crispy skin.
  • Cooking Too Long: Overcooked chicken thighs can be dry. Keep an eye on your timer!
  • Skipping the Resting Step: Cutting into the chicken too early can result in lost juices and dry meat.

Delicious Variations

If you’re feeling adventurous, try these delightful variations:

  • Honey Garlic Chicken Thighs: Add a mix of honey and garlic to your spice blend for a sweet and savory touch.
  • BBQ Glazed Thighs: Brush with your favorite barbecue sauce during the last 10 minutes of baking for a sticky glaze.
  • Herb-Crusted Thighs: Mix chopped fresh herbs like rosemary, thyme, and parsley into your olive oil before rubbing it on the chicken.
  • Spicy Chipotle Thighs: Incorporate chipotle powder or a smoky spice blend to give your chicken a kick!

Storage and Make-Ahead Instructions

Want to enjoy leftovers? Here’s how to store and prepare ahead:

  • Refrigeration: Store leftover chicken in an airtight container in the fridge for up to 4 days.
  • Freezer-Friendly: Freeze cooked chicken thighs in a freezer-safe bag for up to 3 months. Thaw in the fridge overnight before reheating.
  • Reheating: To retain juiciness, reheat in the oven at 350°F until warmed through.

Frequently Asked Questions

Here are some questions folks often ask about baked chicken thighs:

  • Can I use boneless thighs? Yes, but reduce the cooking time as they cook faster.
  • What sides pair well? Mashed potatoes, coleslaw, or roasted vegetables complement baked chicken thighs beautifully.
  • Is it okay to bake with the skin on? Absolutely! The skin adds flavor and helps keep the meat moist.
  • How do I know when they’re done? Use a meat thermometer; they should reach 165°F internally.
  • Can I marinate overnight? Yes! Marinating overnight can enhance the flavor significantly.
  • What if I don’t have olive oil? You can use any cooking oil, like vegetable or canola oil, in its place.
  • What’s the best way to serve leftovers? Leftover chicken thighs are fantastic in salads, sandwiches, or as part of a hearty soup!
  • Can I cook these in an air fryer? Yes! Air fryers work great for crispy chicken thighs, cooking at 400°F for about 25-30 minutes.

Nutrition Tips and Dietary Adaptations

This chicken dish can cater to various dietary needs:

  • Low-Carb Options: Pair with cauliflower rice or a green salad for a low-carb meal.
  • Gluten-Free: This recipe is naturally gluten-free; just ensure your spices are certified gluten-free.
  • Heart Health: Use skinless chicken thighs and limit added fats for a healthier alternative.

Equipment Recommendations

Having the right tools makes a world of difference:

  • Baking Sheet: A heavy-duty baking sheet ensures even cooking.
  • Meat Thermometer: Essential for checking doneness without cutting into the chicken.
  • Mixing Bowls: Use for marinating or mixing your spice blend.

Serving Suggestions

When it comes to enjoying your baked chicken thighs, consider these pairing ideas:

  • Classic Mashed Potatoes: Creamy potatoes make a perfect side.
  • Seasonal Roasted Vegetables: Carrots, Brussels sprouts, and zucchini complement the chicken beautifully.
  • Crisp Garden Salad: A fresh salad balances the richness of the chicken.
  • Cornbread: Serve with warm cornbread for that Southern comfort touch.

In conclusion, baking chicken thighs is not just a meal; it’s an experience that brings families together. With the right approach, you can create a dish that’s not only delicious but also filled with love and care. So, gather your ingredients, roll up your sleeves, and let the aroma of baked chicken fill your home. Happy cooking, friends! May your meals be hearty and your hearts be full!

Munchkin Time

Prep Time 15 minutes
Cook Time 30 minutes
Total Time 45 minutes
Servings 4 people
Calories 850
A delicious collection of quick and flavorful chicken and meat recipes perfect for any meal.

Ingredients

Main Ingredients

  • 2 pounds Best Oven Baked Chicken Thighs
  • 1.5 pounds Grilled Chicken Thighs with Garlic Lemon Marinade
  • 1 pound Best Swedish Meatballs and Gravy
  • 1 pound Honey Soy Chicken Thighs (Video)
  • 1 pound Baked Salmon with Lemon
  • 1 pound Grilled Ribeye Steak with Chimichurri Sauce
  • 1 cup Greek Chicken Quinoa Bowl
  • 1 pound How to Cook Ribeye Steak in the Oven (Video)
  • 1 pound Easy 30-Minute Chicken Chimichanga Recipe
  • 1 pound 30-min Oven Baked Boneless Skinless Chicken Thighs (Video)
  • 1 pound Creamy Oven Baked Chicken Thighs
  • 1 pound Grilled Greek Chicken Gyros
  • 1 pound Baked Honey Garlic Chicken Thighs
  • 1 pound Smash Chicken Burger (Video)
  • 1 pound Best Hawaiian BBQ Chicken Recipe (VIDEO)
  • 1 pound Super Easy Turkey Brine Recipe

Instructions 

  • Prepare each protein according to its specific method, ensuring proper seasoning and cooking time.
  • Serve hot with your favorite sides or sauces.

Notes

Use fresh ingredients for best flavor and adjust seasoning to taste.
Calories: 850kcal
Cost: $15
Course: Main Course
Cuisine: Various
Keyword: baked, chicken, meat

Bringing Comfort to Your Table: A Journey into Garlic Parmesan Chicken Skillet

When you think of comfort food, what comes to mind? For many, it’s the warm, inviting aroma of a home-cooked meal that wraps around you like a well-worn quilt. One dish that embodies this sentiment is the Garlic Parmesan Chicken Skillet. This beloved recipe combines juicy chicken with a rich, creamy sauce that sings with garlic and parmesan flavors. It’s a meal that not only fills your belly but also warms your heart, reminding you of family gatherings and cozy dinners. Let’s dive into this heartwarming recipe that feels just like home.

Why You’ll Love This Recipe

  • Quick and Easy: This dish comes together in under 30 minutes, making it perfect for busy weeknights when you need something delicious in a hurry.
  • One-Pan Wonder: With everything cooked in a single skillet, cleanup is a breeze. You can spend more time enjoying your meal and less time washing dishes.
  • Rich and Creamy Sauce: The combination of heavy cream and parmesan cheese creates a luxurious sauce that clings to the chicken, making every bite rich and satisfying.
  • Versatile Ingredients: The recipe is flexible; you can easily swap ingredients based on what you have on hand or your dietary preferences.
  • Family-Friendly: With its comforting flavors and creamy texture, this dish is sure to please even the pickiest eaters at your table.

Ingredients You’ll Need

Gathering the right ingredients is key to making a great parmesan chicken skillet. Here’s what you’ll need:

  • Chicken Breasts: 2 lbs boneless, skinless chicken breasts, cut into 1-inch thick pieces. This provides the protein base of the dish, ensuring a hearty and satisfying meal.
  • Olive Oil: 2 tablespoons extra virgin olive oil. Used for sautéing the chicken and vegetables, adding healthy fats and flavor.
  • Butter: 4 tablespoons unsalted butter. Contributes richness and a luxurious texture to the sauce, enhancing the overall flavor profile.
  • Garlic: 6 cloves, minced. The star flavor of the dish, providing a pungent and aromatic base that complements the parmesan beautifully. Freshly minced is recommended for the best flavor.
  • Heavy Cream: 1 cup heavy cream. Creates the creamy and decadent sauce that coats the chicken and vegetables, adding a velvety texture.
  • Chicken Broth: 1/2 cup low sodium chicken broth. Adds moisture to the sauce and helps to deglaze the skillet, intensifying the flavors.
  • Parmesan Cheese: 1 cup grated Parmesan cheese, plus extra for serving. Provides a salty, nutty, and savory flavor that is essential to the dish. Use freshly grated Parmesan for superior melting and taste.
  • Dried Italian Herbs: 1 teaspoon dried Italian herb blend (oregano, basil, thyme, rosemary, marjoram). Adds a layer of herbaceous complexity and depth of flavor to the sauce.
  • Red Pepper Flakes: 1/4 teaspoon red pepper flakes (optional). Provides a subtle hint of heat that balances the richness of the sauce and adds a touch of vibrancy.
  • Salt: To taste. Enhances the flavors of all ingredients and seasons the dish perfectly.
  • Black Pepper: Freshly ground black pepper, to taste. Adds a peppery bite and rounds out the flavors.
  • Fresh Parsley: 2 tablespoons chopped fresh parsley, for garnish (optional). Adds a fresh, bright, and herbaceous finish to the dish, visually appealing and flavor enhancing.

How to Make Garlic Parmesan Chicken Skillet

Side angle of a Garlic Parmesan Chicken Skillet with golden chicken, visible garlic, and grated parmesan on top.

Now that you have all your ingredients, let’s walk through the steps to create this delicious dish:

  • Prepare the Chicken: Begin by patting the chicken pieces dry with paper towels. This crucial step helps the chicken to brown properly in the skillet instead of steaming. Season the chicken generously on both sides with salt and freshly ground black pepper. Don’t be shy with the seasoning – it’s the foundation of the flavor.
  • Sear the Chicken: Heat 1 tablespoon of olive oil in a large skillet (preferably cast iron or stainless steel) over medium-high heat. Once the oil is shimmering and hot, carefully add the chicken pieces to the skillet in a single layer. Avoid overcrowding the pan; if necessary, work in batches to ensure proper browning. Sear the chicken for 3-4 minutes per side, until golden brown and cooked through. Using high heat initially helps to create a beautiful crust on the chicken, locking in the juices and adding a layer of texture and flavor. Ensure the internal temperature of the chicken reaches 165°F (74°C) using a meat thermometer to guarantee it’s fully cooked and safe to eat. Once cooked, remove the chicken from the skillet and set aside on a plate, covering loosely to keep warm.
  • Sauté the Garlic: In the same skillet, add the remaining 1 tablespoon of olive oil and 4 tablespoons of butter. Allow the butter to melt completely and become fragrant. Add the minced garlic to the skillet and sauté for about 1-2 minutes, or until fragrant but not browned. Be careful not to burn the garlic, as it can become bitter and ruin the flavor of the sauce. Sautéing the garlic in butter and olive oil infuses the base of the sauce with a rich, aromatic garlic flavor.
  • Create the Parmesan Sauce: Pour the heavy cream and chicken broth into the skillet with the garlic. Bring the mixture to a gentle simmer, stirring occasionally. Simmering allows the sauce to thicken slightly and the flavors to meld together beautifully. Reduce the heat to medium-low and stir in the grated Parmesan cheese, dried Italian herbs, and red pepper flakes (if using). Continue to stir until the Parmesan cheese is completely melted and the sauce is smooth and creamy. The Parmesan cheese will act as a natural thickener for the sauce, creating a luscious and velvety texture. Taste the sauce and adjust seasoning with salt and black pepper as needed. Remember that Parmesan cheese is already salty, so season cautiously and adjust to your preference.
  • Combine Chicken and Sauce: Return the cooked chicken pieces to the skillet with the creamy Parmesan sauce. Gently toss the chicken to coat it evenly with the sauce. Ensure each piece of chicken is nestled in the sauce and absorbs the flavors. Simmer for another 2-3 minutes, allowing the chicken to reheat in the sauce and the flavors to marry together even further. This final simmer ensures the chicken is heated through and infused with the delicious garlic parmesan sauce.
  • Garnish and Serve: Remove the skillet from the heat and garnish with freshly chopped parsley, if desired. The fresh parsley adds a pop of color and freshness to the rich dish. Serve immediately while hot and the sauce is creamy and luscious. This Garlic Parmesan Chicken Skillet is best enjoyed fresh, but leftovers can be stored properly and reheated.

Pro Tips for Perfecting Your Garlic Parmesan Chicken Skillet

  • Don’t Rush the Searing: Allow the chicken to brown properly. Searing adds flavor and texture, making the dish more enjoyable.
  • Use Fresh Garlic: Freshly minced garlic provides a more robust flavor compared to pre-minced or powdered garlic.
  • Adjust for Spice: If you prefer more heat, increase the amount of red pepper flakes or add a dash of hot sauce.
  • Experiment with Cheese: Try using different types of cheese, like Asiago or Pecorino Romano, for a unique twist on the flavor.
  • Make it Dairy-Free: Substitute the heavy cream with coconut cream and the parmesan with a dairy-free cheese alternative for a lighter version.
  • Let the Sauce Simmer: Giving the sauce time to simmer allows the flavors to deepen and meld together beautifully.
  • Pair with Sides: Serve alongside a fresh salad, steamed vegetables, or over a bed of rice or pasta for a complete meal.
  • Store Leftovers Properly: Allow the skillet to cool before transferring to an airtight container. Refrigerate for up to 3 days for best flavor.

Common Mistakes and Troubleshooting

Even the best of us can make mistakes in the kitchen. Here are some common pitfalls and how to avoid them:

  • Overcrowding the Skillet: This can lead to steaming instead of browning. Cook in batches if necessary.
  • Burning the Garlic: Garlic can turn bitter if overcooked. Keep a close eye on it and sauté until just fragrant.
  • Too Thick Sauce: If your sauce becomes too thick, add a splash of chicken broth or water to reach your desired consistency.
  • Undercooked Chicken: Always check the internal temperature of the chicken to ensure it reaches 165°F (74°C).

Variations on Garlic Parmesan Chicken Skillet

This recipe is wonderfully versatile. Here are some variations to try:

  • Add Vegetables: Incorporate spinach, mushrooms, or bell peppers into the skillet for added nutrition and flavor.
  • Use Chicken Thighs: Substitute chicken breasts with thighs for a juicier, more flavorful option.
  • Make it Lighter: Use Greek yogurt instead of heavy cream for a healthier, lower-calorie sauce.
  • Herb Variations: Experiment with fresh herbs like basil or thyme for a different flavor profile.

Storage and Make-Ahead Instructions

Leftovers can be just as delicious as the original meal, if stored properly:

  • Refrigerate: Store leftovers in an airtight container in the fridge for up to 3 days.
  • Freeze: For longer storage, freeze the cooled chicken and sauce in a sealed container for up to 3 months. Thaw in the fridge before reheating.
  • Reheat Gently: When reheating, do so on low heat to prevent the sauce from separating. You may need to add a splash of chicken broth to thin it out.

Frequently Asked Questions

Here are some questions folks often have about this delicious dish:

  • Can I use frozen chicken? Yes, but it’s best to thaw it first for even cooking.
  • Can I skip the butter? You can, but it adds richness to the sauce that enhances the flavor.
  • Is this dish gluten-free? Yes, as long as you use gluten-free chicken broth.
  • What can I replace the heavy cream with? Coconut cream or a dairy-free cream substitute works well.
  • How can I make this recipe dairy-free? Use coconut cream and a dairy-free cheese alternative.
  • Can I make this in advance? Yes, you can prepare the sauce ahead of time and add the chicken before serving.
  • What should I serve with this dish? It pairs well with rice, pasta, or a fresh salad.
  • Can leftovers be frozen? Yes, just store them in an airtight container for up to 3 months.

Nutrition Tips and Dietary Adaptations

This Garlic Parmesan Chicken Skillet can be adapted to fit various dietary needs:

  • Low-Carb: Serve the chicken over zucchini noodles or cauliflower rice for a low-carb option.
  • High-Protein: Pair with quinoa or a side of legumes for an extra protein boost.
  • Low-Fat Option: Substitute heavy cream with low-fat milk or a non-dairy alternative.
  • Vegetarian Twist: Replace chicken with sautéed mushrooms or chickpeas for a vegetarian version.

Kitchen Equipment Recommendations

Here are some essential tools to make this recipe a breeze:

  • Skillet: A large cast iron or stainless steel skillet is ideal for even heat distribution.
  • Meat Thermometer: To ensure your chicken is cooked to perfection.
  • Wooden Spoon: For stirring the sauce without scratching your skillet.
  • Chopping Board: A sturdy board for prepping your ingredients.

Serving Suggestions

To elevate your meal, consider these serving ideas:

  • Garnish: Top with freshly chopped parsley or additional parmesan for a beautiful finish.
  • Side Dishes: Serve with garlic bread, steamed broccoli, or a hearty salad for a complete meal.
  • Wine Pairing: A crisp white wine, such as Sauvignon Blanc, complements the flavors beautifully.

In conclusion, this Garlic Parmesan Chicken Skillet is more than just a meal; it’s an experience that brings warmth and comfort to your table. Each bite is a reminder of cherished moments spent with family and friends. So gather around, share stories, and savor the flavors of home with this delightful dish. Enjoy cooking, and remember, it’s all about the love you put into every meal!

Garlic Parmesan Chicken Skillet

Prep Time 10 minutes
Cook Time 20 minutes
Total Time 30 minutes
Servings 4 servings
Calories 650
A flavorful and creamy chicken dish featuring garlic, Parmesan, and herbs, cooked to perfection in a skillet for a quick and satisfying meal.

Ingredients

Chicken

  • 2 lbs boneless, skinless chicken breasts (cut into 1-inch pieces)
  • 2 tablespoons extra virgin olive oil
  • 4 tablespoons unsalted butter
  • 6 cloves garlic, minced
  • 1 cup heavy cream
  • 1/2 cup low sodium chicken broth
  • 1 cup grated Parmesan cheese
  • 1 teaspoon dried Italian herbs
  • 1/4 teaspoon red pepper flakes (optional)
  • to taste salt (season as needed)
  • to taste black pepper (freshly ground)
  • 2 tablespoons chopped fresh parsley (for garnish)

Instructions 

  • Pat chicken dry, season with salt and pepper. Sear in hot oil until golden and cooked through, then set aside.
  • Add butter and remaining oil to the skillet, sauté garlic until fragrant. Pour in cream and broth, simmer to thicken.
  • Stir in Parmesan, herbs, and red pepper flakes. Season with salt and pepper to taste, then return chicken to the skillet and coat with sauce. Simmer briefly.
  • Garnish with parsley and serve immediately while hot.

Notes

Use freshly grated Parmesan for best flavor and melting.
Calories: 650kcal
Cost: $15
Course: Main Course
Cuisine: American
Keyword: chicken, Garlic, Parmesan

The Heartfelt Journey to Homemade Rotisserie Chicken

Welcome to the comforting world of homemade rotisserie chicken, where the magic of flavors comes together to create a dish that feels like a warm hug from a dear friend. Imagine stepping into your kitchen, the aroma of spices filling the air, the anticipation of a perfectly cooked whole chicken that’s about to grace your dinner table. This guide isn’t just a recipe; it’s a heartfelt invitation to bring joy and nostalgia into your home through the simple act of cooking.

In this article, you’ll learn not just how to make a mouthwatering rotisserie chicken, but also why it’s a go-to meal for gatherings. With my honest, down-to-earth approach, we’ll cover everything from ingredients and cooking techniques to expert tips and variations that keep your culinary adventures vibrant and exciting. So, roll up your sleeves, and let’s dive into the world of homemade rotisserie chicken!

Why You’ll Love This Recipe

  • Unmatched Flavor: This homemade rotisserie chicken captures all the rich, savory flavors you love, with a spice blend that elevates the chicken to new heights.
  • Economical & Wholesome: Making your own rotisserie chicken is not only budget-friendly, but also allows you to control the quality of ingredients.
  • Easy to Customize: Whether you like it spicy, herby, or with a hint of sweetness, this recipe can adapt to your taste preferences.
  • Versatile Meal Options: Use the chicken in salads, sandwiches, or as the star of your dinner plate—endless possibilities await.
  • Leftovers Done Right: Enjoy delicious leftovers that can be stored and used in various recipes throughout the week.

Ingredient Breakdown for Your Rotisserie Chicken

Let’s gather our ingredients! Here’s what you’ll need to make the ultimate homemade rotisserie chicken:

  • Whole Chicken: A 3-4 lb whole chicken is ideal for juicy, tender results. You can use organic or free-range options for better flavor.
  • Olive Oil: A few tablespoons of olive oil help the spices adhere and contribute to that crispy skin.
  • Spice Blend: Combine paprika, garlic powder, onion powder, salt, and pepper for a deliciously aromatic rub.
  • Fresh Herbs: Fresh thyme, rosemary, or oregano add a vibrant touch to your chicken, enhancing the overall flavor.
  • Optional Lemon or Garlic: Stuffing the chicken with a halved lemon or garlic cloves adds extra moisture and flavor while it cooks.

Expert Tips for Perfect Rotisserie Chicken

Side view of a refreshing Pineapple Fluff Salad in a bowl, featuring colorful fruit and fluffy texture.

Before we dive into the cooking process, here are some insider tips to ensure your chicken turns out perfectly every time:

  • Pat Dry: Always pat the chicken dry with paper towels before seasoning to ensure crispy skin.
  • Brining is Key: For extra moisture, consider brining your chicken in a saltwater solution for a few hours before cooking.
  • Room Temperature: Let your chicken sit at room temperature for about 30 minutes before cooking; this helps it cook more evenly.
  • Use a Meat Thermometer: Ensure the internal temperature reaches 165°F in the thickest part of the thigh for safe and delicious results.
  • Let It Rest: Allow the chicken to rest for 10-15 minutes after cooking; this helps the juices redistribute, keeping it moist.
  • Rotate Regularly: If using a rotisserie oven, rotating the chicken ensures even cooking and that golden brown exterior.
  • Save the Bones: Don’t toss the bones! Use them to make a flavorful chicken broth that’s perfect for soups.
  • Experiment with Flavors: Don’t hesitate to try different spice combinations or marinades to find your favorite.

Common Mistakes and Troubleshooting

Even the most seasoned cooks can make mistakes. Here are common pitfalls and how to avoid them:

  • Overcooking: Keep an eye on your chicken; overcooked chicken can be dry. A meat thermometer is your best friend!
  • Skipping the Rub: Don’t skip seasoning—the rub is what gives the chicken its delicious flavor. Be generous!
  • Not Using a Roasting Pan: If you don’t have a rotisserie, a roasting pan is essential for even cooking and collecting drippings for gravy.
  • Ignoring Rest Time: Letting the chicken rest is crucial for juicy meat. Make it a non-negotiable step!

Variations to Try

Now that you’ve mastered the basics, here are some fun variations to try out:

  • Spicy Cajun: Add cayenne pepper and paprika for a zesty kick.
  • Herb & Lemon: Mix fresh herbs with lemon zest for a bright, refreshing flavor.
  • Honey Garlic: Brush the chicken with honey and minced garlic for a sweet and savory glaze.
  • Asian Inspired: Use soy sauce, ginger, and sesame oil for an Asian twist on your rotisserie chicken.

Storage and Make-Ahead Instructions

Got leftovers? Here’s how to properly store and enjoy your chicken later:

  • Refrigeration: Place leftover chicken in an airtight container in the fridge for up to 4 days.
  • Freezing: For longer storage, wrap portions tightly in plastic wrap and freeze for up to 3 months.
  • Reheating: To reheat, place chicken in the oven at 350°F until warmed through, keeping it covered to retain moisture.

Comprehensive FAQ

Here are some common questions and answers to help you on your chicken cooking journey:

  • Can I use frozen chicken? Yes, but ensure it’s fully thawed before cooking for even results.
  • What’s the best cooking method? Both oven roasting and rotisserie methods yield delicious results, but rotisserie can give that classic, crispy skin.
  • Should I remove the skin? For a healthier option, you can remove the skin before cooking, but it helps keep the meat moist during cooking.
  • Can I use chicken parts instead? Absolutely! Adjust cooking time based on the size of the pieces.
  • How do I know when it’s done? Use a meat thermometer to check for an internal temperature of 165°F.
  • What sides go well with rotisserie chicken? Mashed potatoes, steamed vegetables, or a fresh salad pair wonderfully.
  • Can I marinate the chicken? Yes, marinating adds depth of flavor. Just make sure to pat it dry before seasoning.
  • What if I don’t have a roasting pan? You can use a baking sheet with a wire rack to elevate the chicken for even cooking.

Nutritional Tips and Dietary Adaptations

This recipe is not just delicious; it can also be adjusted for various dietary needs:

  • Paleo-Friendly: Skip the sugar in any rubs and stick to natural spices and herbs.
  • Low-Carb Option: Perfect as-is, just avoid any sugary glazes.
  • Gluten-Free: Naturally gluten-free, just ensure any sauces or sides also follow suit.

Equipment Recommendations

To achieve the best results, consider having the following tools on hand:

  • Roasting Pan: Essential for even cooking and capturing drippings.
  • Meat Thermometer: A must-have for ensuring your chicken is perfectly cooked.
  • Sharp Knife: For carving the chicken with ease.

Serving Suggestions

Once your chicken is cooked and rested, it’s time to serve it up! Here are some ideas:

  • Classic Plate: Serve with mashed potatoes and green beans for a comforting dinner.
  • Wrap it Up: Use shredded chicken in wraps or sandwiches with your favorite toppings.
  • Chopped Salad: Dice leftover chicken over a fresh salad for a light lunch.

Conclusion

And there you have it, my friends! A comprehensive guide to creating your very own homemade rotisserie chicken, filled with warmth, flavor, and memories. Cooking doesn’t have to be complicated; it’s about embracing the simplicity of good ingredients and sharing the joy with those you love. So gather around the table, enjoy the fruits of your labor, and remember that every meal is a chance to create lasting memories. Happy cooking!

The Ultimate Pineapple Fluff Salad

Prep Time 10 minutes
Total Time 10 minutes
Servings 8 servings
Calories 250
A delightful and creamy pineapple fluff salad perfect for any occasion, combining sweet pineapple with fluffy whipped topping and marshmallows.

Ingredients

Dairy & Dairy Substitutes

  • 1 (20 oz) can oz crushed pineapple (drained)
  • 1 (8 oz) tub oz whipped topping
  • 1 cup cups mini marshmallows

Sweeteners & Flavorings

  • 1 teaspoon tsp vanilla extract

Instructions 

  • In a large bowl, combine the drained crushed pineapple and vanilla extract.
  • Gently fold in the whipped topping until well mixed.
  • Stir in the mini marshmallows.
  • Chill in the refrigerator for at least 1 hour before serving.

Notes

For a creamier texture, let the salad sit overnight.
Calories: 250kcal
Cost: $8
Course: Dessert
Cuisine: American
Keyword: Pineapple

Experience the Heart of Italian Cooking with Creamy Tuscan Garlic Chicken

Welcome to a culinary journey that brings the warmth of home-cooked meals right to your kitchen! This Creamy Tuscan Garlic Chicken Skillet is not just a recipe; it’s a heartfelt embrace of Italian flavors, designed to delight your taste buds and nourish your spirit. Picture a dish where tender chicken meets a luscious cream sauce, enriched with vibrant spinach and the sun-kissed flavor of sun-dried tomatoes. It’s perfect for family gatherings or a cozy weeknight dinner. Let’s dive into the deliciousness that awaits!

Why You’ll Love This Recipe

  • Quick and Easy: Prepare this dish in about 30 minutes, making it ideal for busy weeknights.
  • Decadent Flavors: The blend of cream, garlic, and sun-dried tomatoes creates a rich flavor profile that feels indulgent.
  • Versatile Ingredients: Use what’s in your fridge! Swap out chicken for shrimp or add your favorite vegetables.
  • Customizable: Alter the creaminess or spice levels to suit your family’s preferences.
  • Impressive Presentation: The vibrant colors of the dish make it a stunning centerpiece for any table.

Ingredients for Creamy Tuscan Garlic Chicken

Gather the following ingredients to create a rich and flavorful dish:

  • 4 boneless, skinless chicken breasts (about 1.5 lbs): For tender, juicy bites.
  • 4 cloves fresh garlic, minced: Adds an aromatic kick.
  • 1 cup heavy cream: The star ingredient that makes the sauce luscious.
  • 4 cups fresh baby spinach: Brightens the dish with color and nutrition.
  • 1 cup sun-dried tomatoes, chopped: Brings a sweet, tangy depth of flavor.
  • 1 cup freshly grated Parmesan cheese: Adds a salty, nutty richness.
  • 2 tsp dried basil: Infuses a warm, herbal note.
  • 2 tsp dried oregano: Complements the Tuscan flavors beautifully.
  • 2 tbsp extra virgin olive oil: For cooking and flavor.
  • Salt and pepper to taste: Essential for seasoning.

How to Make Creamy Tuscan Garlic Chicken

A flavorful skillet filled with juicy chicken breasts in creamy garlic sauce, garnished with Parmesan and herbs.

Let’s get cooking! Follow these simple steps to create a dish that you and your loved ones will cherish.

Step 1: Prepare Ingredients

Start by dicing the chicken and mincing the garlic. Having everything ready makes the cooking process smoother.

Step 2: Cook the Chicken

In a large skillet over medium heat, drizzle in the olive oil. Add the chicken and sauté until golden brown, about 5–7 minutes. Remove the chicken from the pan and set it aside.

Step 3: Sauté the Garlic

In the same skillet, add more olive oil if needed and sauté the minced garlic until fragrant, about 30 seconds. Be careful not to burn it!

Step 4: Add Spinach

Toss in the fresh spinach and cook until wilted, stirring occasionally. This step adds a vibrant color and nutritional boost.

Step 5: Make the Sauce

Pour in the heavy cream while stirring, then add the chopped sun-dried tomatoes, Parmesan cheese, dried basil, oregano, salt, and pepper. Let it simmer for 3–5 minutes until the sauce thickens slightly.

Step 6: Combine and Serve

Return the chicken to the skillet, coating it in the creamy sauce. Cook for an additional minute to warm through. Serve hot over pasta or rice, garnished with extra Parmesan if desired.

Expert Tips for Success

  • Use Fresh Ingredients: Fresh garlic and spinach make a noticeable difference in flavor.
  • Don’t Rush the Cooking: Allow the chicken to brown nicely; it adds depth to the dish.
  • Adjust Creaminess: For a lighter version, consider using half-and-half instead of heavy cream.
  • Add a Kick: Spice it up with red pepper flakes if you like some heat.
  • Make it a Meal: Serve with crusty bread or a side of roasted vegetables.
  • Leftovers Are Gold: This dish tastes even better the next day as the flavors meld.
  • Play with Herbs: Fresh herbs can elevate the dish; consider thyme or parsley.
  • Perfect Pairings: A crisp salad or garlic bread complements this meal beautifully.

Common Mistakes and Troubleshooting

Even the best cooks face challenges! Here are some common pitfalls and how to avoid them:

  • Overcooking Chicken: Keep an eye on the chicken; it should be golden and cooked through but not dry.
  • Too Thick of Sauce: If the sauce thickens too much, add a splash of chicken broth or water to loosen it up.
  • Garlic Burnt: If garlic turns bitter, start that step over—fresh garlic is key to flavor!
  • Flavorless Sauce: Always taste and adjust seasoning before serving!

Variations to Try

Feeling adventurous? Here are some delicious variations to make this dish your own:

  • Chicken and Broccoli: Add steamed broccoli for extra color and nutrition.
  • Tuscan Shrimp: Substitute chicken with shrimp for a seafood twist.
  • Vegetarian Delight: Use chickpeas in place of chicken for a hearty vegetarian option.
  • Creamy Tomato Basil: Replace sun-dried tomatoes with fresh diced tomatoes for a lighter sauce.

Storage and Make-Ahead Instructions

This dish is perfect for meal prepping! Here’s how to store it:

  • Refrigeration: Store in an airtight container for up to 3 days.
  • Freezing: This dish can be frozen for up to 2 months; just make sure to cool before freezing.
  • Reheating: Gently reheat on the stove over low heat, adding a splash of cream or broth to keep it creamy.

Frequently Asked Questions

  • Can I use chicken thighs instead of breasts? Yes, chicken thighs will add a richer flavor and tenderness.
  • What can I serve with Creamy Tuscan Garlic Chicken? It pairs well with pasta, rice, or a fresh salad.
  • Can I make this recipe ahead of time? Yes, you can prepare the sauce and chicken ahead, then combine before serving.
  • Is it possible to make this dish dairy-free? Yes, use coconut cream and nutritional yeast for a dairy-free version.
  • What if I don’t have sun-dried tomatoes? You can use fresh tomatoes or skip them altogether, though they’ll add a unique flavor.
  • How can I make it spicier? Toss in some crushed red pepper flakes for a kick.
  • Can I use frozen spinach? Yes, just make sure to thaw and drain it well before adding.
  • How do I know when the chicken is done? The internal temperature should reach 165°F (75°C).

Nutritional Tips and Dietary Adaptations

This dish can be adapted to fit various dietary needs:

  • Low-Carb: Serve over zucchini noodles or cauliflower rice.
  • Gluten-Free: Ensure any pasta or sides are labeled gluten-free.
  • High-Protein: Add extra chicken or beans for a protein boost.

Essential Equipment Recommendations

Having the right tools can make all the difference:

  • Large Skillet: A sturdy skillet allows for even cooking and browning.
  • Sharp Knife: For easy chopping and dicing of ingredients.
  • Measuring Cups and Spoons: Precision is key for great flavors.

Serving Suggestions

Serve this dish with:

  • Garlic Bread: A classic pairing that complements the creamy sauce.
  • Mixed Green Salad: Light and refreshing to balance the richness of the dish.
  • Roasted Vegetables: Seasonal veggies add color and nutrition to your meal.

Final Thoughts

This Creamy Tuscan Garlic Chicken Skillet is more than just a recipe; it’s a celebration of flavors, family, and the joy of cooking. Whether you’re hosting a gathering or simply enjoying a quiet meal at home, this dish brings the essence of comfort and tradition to your table. Remember, cooking is about love, patience, and sharing moments with those you cherish. So, gather your ingredients, roll up your sleeves, and let’s create something beautiful together!

Creamy Tuscan Garlic Chicken Skillet

Prep Time 10 minutes
Cook Time 15 minutes
Total Time 25 minutes
Servings 4 servings
Calories 550
Enjoy this rich and flavorful chicken dish with creamy sauce, sun-dried tomatoes, and spinach, perfect for a quick dinner.

Ingredients

Chicken

  • 1.5 lbs boneless, skinless chicken breasts
  • 4 cloves fresh garlic (minced)
  • 1 cup heavy cream
  • 4 cups fresh baby spinach
  • 1 cup sun-dried tomatoes (chopped)
  • 1 cup freshly grated Parmesan cheese
  • 2 tsp dried basil
  • 2 tsp dried oregano
  • 2 tbsp extra virgin olive oil
  • to taste Salt and pepper

Instructions 

  • Dice the chicken and mince the garlic.
  • Cook chicken in olive oil until golden (5–7 min), then remove.
  • Sauté garlic, add spinach, cook until wilted.
  • Stir in cream, sun-dried tomatoes, Parmesan, herbs, salt, pepper; simmer 3–5 min.
  • Return chicken to skillet, coat in sauce, cook 1 min.
  • Serve hot, garnished with extra Parmesan if desired.

Notes

For a lighter version, use half-and-half instead of heavy cream.
Calories: 550kcal
Cost: $15
Course: Main Course
Cuisine: Italian
Keyword: chicken

The Heartwarming Creamy Garlic Chicken Recipe

Welcome to the ultimate comfort food experience! This creamy garlic chicken recipe is not just a meal; it’s a journey back to the rustic warmth of home-cooked dinners, where every bite tells a story. Whether you’re cooking for family gatherings or a quiet weeknight dinner, this dish is guaranteed to bring joy to your table. With just the right balance of flavors and a creamy sauce that wraps around tender chicken, you’ll want to savor every moment.

Why You’ll Love This Recipe

  • Simple Ingredients: Made with everyday pantry staples, this recipe highlights the natural flavor of chicken without the fuss.
  • Comforting Flavors: The rich, creamy garlic sauce is reminiscent of family dinners, bringing a sense of nostalgia with every bite.
  • Quick and Easy: From prep to plate, you can whip up this dish in under an hour, perfect for busy weeknights.
  • Versatile Pairings: Serve it over mashed potatoes, pasta, or rice for a complete meal that fits any occasion.
  • Leftover Heaven: This dish tastes even better the next day, making it ideal for meal prep or leftovers.

Ingredients Breakdown

This recipe calls for a few simple ingredients that pack a punch. Here’s what you’ll need:

  • 2 large boneless skinless chicken breasts: The star of the dish. Feel free to substitute with thighs for a juicier option.
  • Salt and Pepper: Essential for seasoning the chicken to enhance its natural flavors.
  • 3 teaspoons Italian seasonings: Adds a touch of herbaceous goodness to the dish.
  • ⅓ cup flour: For dredging the chicken, this helps create a lovely crust.
  • 4 tablespoons Parmesan cheese (shredded): Brings a gourmet flavor that elevates the meal.
  • 3 tablespoons olive oil: Perfect for searing the chicken until golden brown.
  • 2 ½ cups chicken broth: The base of the sauce, adding depth and richness.
  • 1 beef bouillon cube (or 1 tsp better than bouillon): Enhances the flavor profile of the dish.
  • 1 teaspoon low sodium soy sauce (can sub Worcestershire sauce): Adds umami and a hint of sweetness.
  • 1 teaspoon onion powder: For a subtle onion flavor without the fuss of chopping.
  • ½ teaspoon EACH: Dried thyme, mustard powder: Complements the garlic beautifully.
  • 3 tablespoons butter: For richness in the sauce.
  • 10 whole cloves garlic: The star ingredient that brings the dish to life.
  • 3 tablespoons flour: To thicken the sauce.
  • ½ cup heavy cream: Adds the creamy texture we love.
  • ½ cup Parmesan cheese (optional): For an extra cheesy finish.

Cooking Steps

Side view of succulent creamy garlic chicken garnished with herbs, showcasing its creamy sauce.

Follow these simple steps to create your creamy garlic chicken:

  1. Season the chicken breasts with salt, pepper, and Italian seasonings.
  2. Dredge each breast in flour, shaking off excess.
  3. In a large skillet, heat olive oil over medium-high heat. Once hot, add the chicken and sear for about 5-7 minutes on each side until golden brown. Remove the chicken and set aside.
  4. In the same skillet, melt butter and add garlic cloves. Sauté for 1-2 minutes until fragrant, being careful not to burn the garlic.
  5. Add chicken broth, beef bouillon, soy sauce, onion powder, thyme, and mustard powder. Stir well.
  6. Return the chicken to the skillet, cover, and let simmer for 10-15 minutes until fully cooked.
  7. Remove the chicken and set aside again. Stir in heavy cream and additional Parmesan cheese, cooking for another 2-3 minutes until the sauce thickens.
  8. Return the chicken to the skillet, coating it in the creamy sauce.
  9. Serve hot, garnished with parsley if desired.

Pro Tips for Perfect Creamy Garlic Chicken

  • Perfect Searing: Ensure your skillet is hot enough before adding the chicken to achieve a golden crust without overcooking.
  • Garlic Timing: Add the garlic just before the chicken broth to prevent burning and bitterness.
  • Thickening the Sauce: If you prefer a thicker sauce, let it simmer longer or add a little more flour to the mixture.
  • Flavor Boost: Experiment with adding a splash of white wine to the broth for a gourmet touch.
  • Make It Ahead: Prepare the dish up to the point of adding cream, then refrigerate and complete before serving.
  • Herb Variations: Fresh herbs like parsley or basil can elevate the dish further and add freshness.
  • Cheese Options: Experiment with different cheeses like Gruyere or Fontina for varied flavor profiles.
  • Don’t Rush: Allow the chicken to rest for a few minutes after cooking for juicier results.

Common Mistakes and Troubleshooting

Here are some common pitfalls to avoid:

  • Overcooking the Chicken: Use a meat thermometer. Chicken should reach an internal temperature of 165°F.
  • Burning Garlic: Keep an eye on the garlic; it can turn bitter quickly.
  • Too Thin Sauce: If the sauce is too thin, mix a bit of cornstarch with water and stir it in to thicken.
  • Not Enough Seasoning: Taste as you cook and adjust seasonings as needed for a well-balanced flavor.

Variations of Creamy Garlic Chicken

Feel free to get creative with these variations:

  • Garlic Mushroom Chicken: Add sliced mushrooms alongside the garlic for an earthy twist.
  • Spinach and Garlic Chicken: Stir in fresh spinach at the end for added nutrition and color.
  • Spicy Garlic Chicken: Add red pepper flakes for a bit of heat.
  • Herbed Creamy Chicken: Mix in fresh herbs like thyme or rosemary for a fresh flavor boost.

Storage and Make-Ahead Instructions

This dish is perfect for meal prep:

  • Refrigeration: Store leftovers in an airtight container in the fridge for up to 3 days.
  • Freezing: You can freeze the cooked chicken and sauce for up to 2 months. Thaw in the fridge overnight before reheating.
  • Reheating: Reheat gently on the stove over low heat to prevent separation of the sauce.

Frequently Asked Questions

Got questions? We’ve got answers:

  • Can I use bone-in chicken? Absolutely! Just adjust the cooking time to ensure it’s cooked through.
  • What can I serve with creamy garlic chicken? Mashed potatoes, rice, or your favorite roasted vegetables make excellent sides.
  • Can I replace heavy cream? Yes, you can use half-and-half or a dairy-free alternative if needed.
  • Is this recipe gluten-free? Use gluten-free flour to make this dish suitable for a gluten-free diet.
  • How do I make the sauce spicier? Add cayenne pepper or hot sauce to the sauce for a kick of heat.
  • What’s the best way to reheat leftovers? Gently reheat in a skillet over low heat to maintain the creamy consistency.
  • Can I add more garlic? Certainly! If you love garlic, feel free to increase the amount to suit your taste.
  • How do I make it dairy-free? Substitute the heavy cream with coconut milk or another dairy-free cream for a delicious alternative.

Nutrition Tips and Dietary Adaptations

To make this dish fit your dietary needs:

  • Low-Calorie Option: Use skinless chicken breasts and reduce the amount of cream or substitute with Greek yogurt.
  • High-Protein Option: Serve with quinoa or chickpeas to boost protein content in your meal.
  • Vegetarian Version: Swap chicken with hearty vegetables like cauliflower or chickpeas and use vegetable broth.

Essential Equipment Recommendations

Here’s what you’ll need:

  • Skillet: A heavy-bottomed skillet is best for even cooking.
  • Meat Thermometer: Essential for ensuring your chicken is cooked perfectly.
  • Wooden Spoon: Great for stirring without scratching your skillet.

Serving Suggestions

To create a full meal experience:

  • Pair with Mashed Potatoes: The creamy sauce is perfect for soaking into buttery mashed potatoes.
  • Serve with Garlic Bread: A great way to mop up the delicious sauce.
  • Include a Fresh Salad: A crisp green salad balances the richness of the dish.

In conclusion, this creamy garlic chicken recipe is a testament to the comforting power of home cooking. It’s simple yet memorable, perfect for families and gatherings alike. Give it a try, and you’ll find yourself coming back to this dish again and again—just like I do. Happy cooking!

Creamy Garlic Chicken

Prep Time 10 minutes
Cook Time 20 minutes
Total Time 30 minutes
Servings 4 servings
Calories 450
A rich and flavorful dish featuring tender chicken breasts in a creamy garlic sauce, perfect for a comforting dinner.

Ingredients

Protein

  • 2 large boneless skinless chicken breasts

Seasonings

  • Salt/Pepper Salt/Pepper
  • 3 teaspoons Italian seasonings
  • 1/3 cup flour
  • 4 tablespoons Parmesan cheese (shredded)
  • 3 tablespoons olive oil
  • 2 ½ cups chicken broth
  • 1 beef bouillon cube beef bouillon cube (or 1 tsp better than bouillon)
  • 1 teaspoon low sodium soy sauce (can sub Worcestershire sauce)
  • 1 teaspoon onion powder
  • ½ teaspoon Dried thyme
  • ½ teaspoon mustard powder

Dairy & Butter

  • 3 tablespoons butter
  • 10 whole cloves garlic
  • ½ cup heavy cream
  • ½ cup Parmesan cheese (optional)

Instructions 

  • Season chicken breasts with salt, pepper, and Italian seasonings.
  • Dredge chicken in flour and cook in olive oil until golden. Remove and set aside.
  • In the same pan, sauté garlic cloves until fragrant, then add chicken broth, bouillon, soy sauce, onion powder, thyme, and mustard powder. Simmer.
  • Return chicken to the pan, add butter and heavy cream, and cook until sauce thickens. Stir in Parmesan if desired.
  • Serve hot with your favorite sides.

Notes

For a richer flavor, use freshly grated Parmesan and high-quality chicken broth.
Calories: 450kcal
Cost: $15
Course: Main Course
Cuisine: American
Keyword: chicken, creamy, Garlic