Author

Tom

Browsing

Welcome to my kitchen, where every dish tells a story and every bite is a warm embrace. Today, we’re diving into a recipe that’s close to my heart: Creamy Garlic Chicken. This dish is not just about the ingredients; it’s about the love and care we pour into our cooking. With simple, rustic flavors and a creamy sauce that hugs the chicken, this recipe is perfect for family gatherings or cozy weeknight dinners. Get ready to learn how to create a comforting meal that’s sure to become a staple in your home!

Why You’ll Love This Recipe

  • Quick and Easy: This creamy garlic chicken can be whipped up in under 30 minutes, making it perfect for busy weeknights.
  • Family Favorite: With its rich flavors and creamy sauce, this dish is a guaranteed hit with both kids and adults.
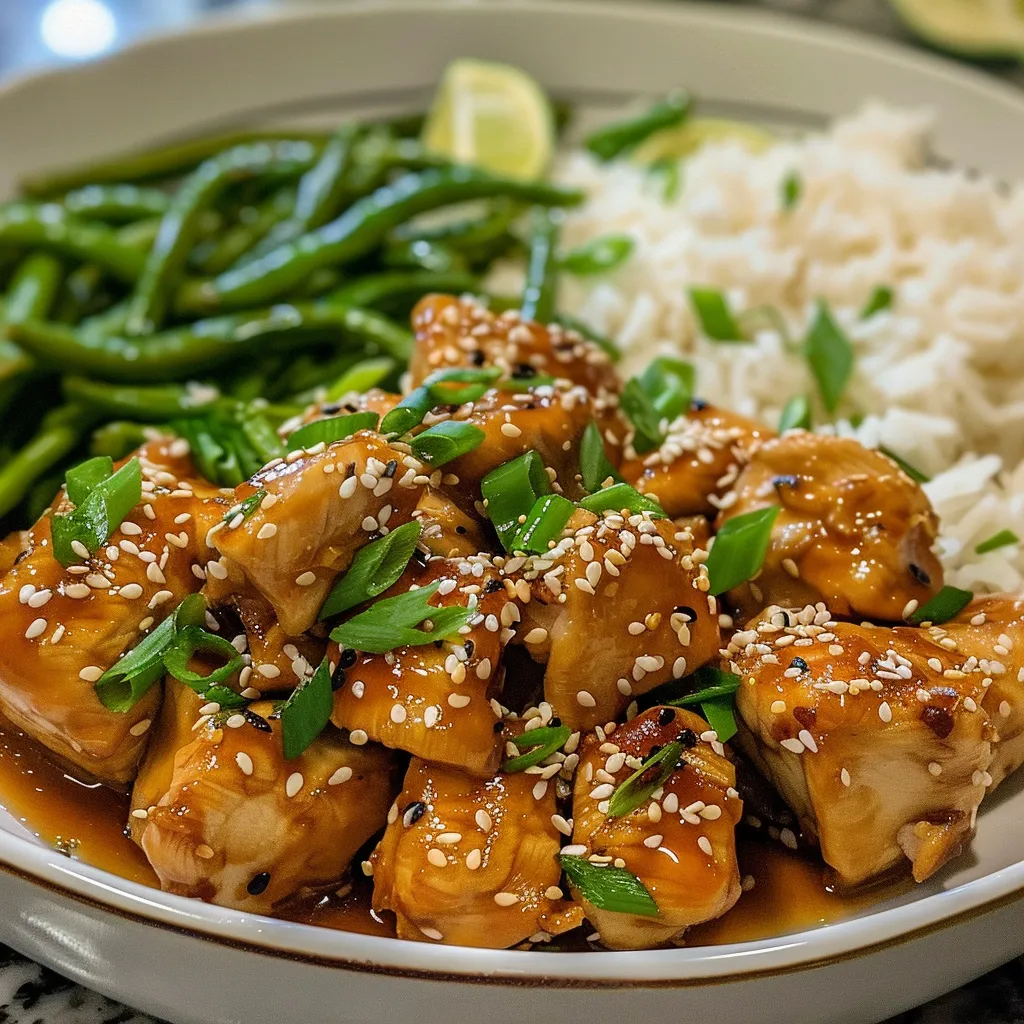
  • Versatile: Serve it over rice, pasta, or alongside crusty bread to soak up that luscious sauce.
  • Simple Ingredients: You likely have most of these ingredients in your pantry, making it an accessible recipe for everyone.
  • Comforting and Hearty: The combination of garlic and cream in this chicken recipe creates a warm, hearty meal that feels like a hug from the inside.

Ingredients You’ll Need

Here’s what you need to make this delightful dish:

  • 4 boneless, skinless chicken breasts: The star of the dish, providing a tender and juicy base.
  • Salt and pepper, to taste: Essential for enhancing the natural flavors of the chicken.
  • 1 teaspoon garlic powder: Adds a delightful garlic flavor without the fuss.
  • 1 teaspoon onion powder: Complements the garlic for a deeper flavor profile.
  • 1 tablespoon olive oil: Adds richness and prevents sticking while cooking the chicken.
  • 1 tablespoon butter: Enhances flavor and helps create a silky sauce texture.
  • 4 cloves garlic, minced: Fresh garlic gives this dish its signature taste.
  • 1 cup heavy cream: The secret to the creamy texture of the sauce.
  • 1/2 cup chicken broth: Adds depth and richness to the cream sauce.
  • Fresh parsley, for garnish: A pop of color and freshness to finish the dish.

How to Make Creamy Garlic Chicken

Let’s roll up our sleeves and get cooking! Follow these steps for a restaurant-quality meal right in your own kitchen.

Step 1: Prepare and Cook the Chicken

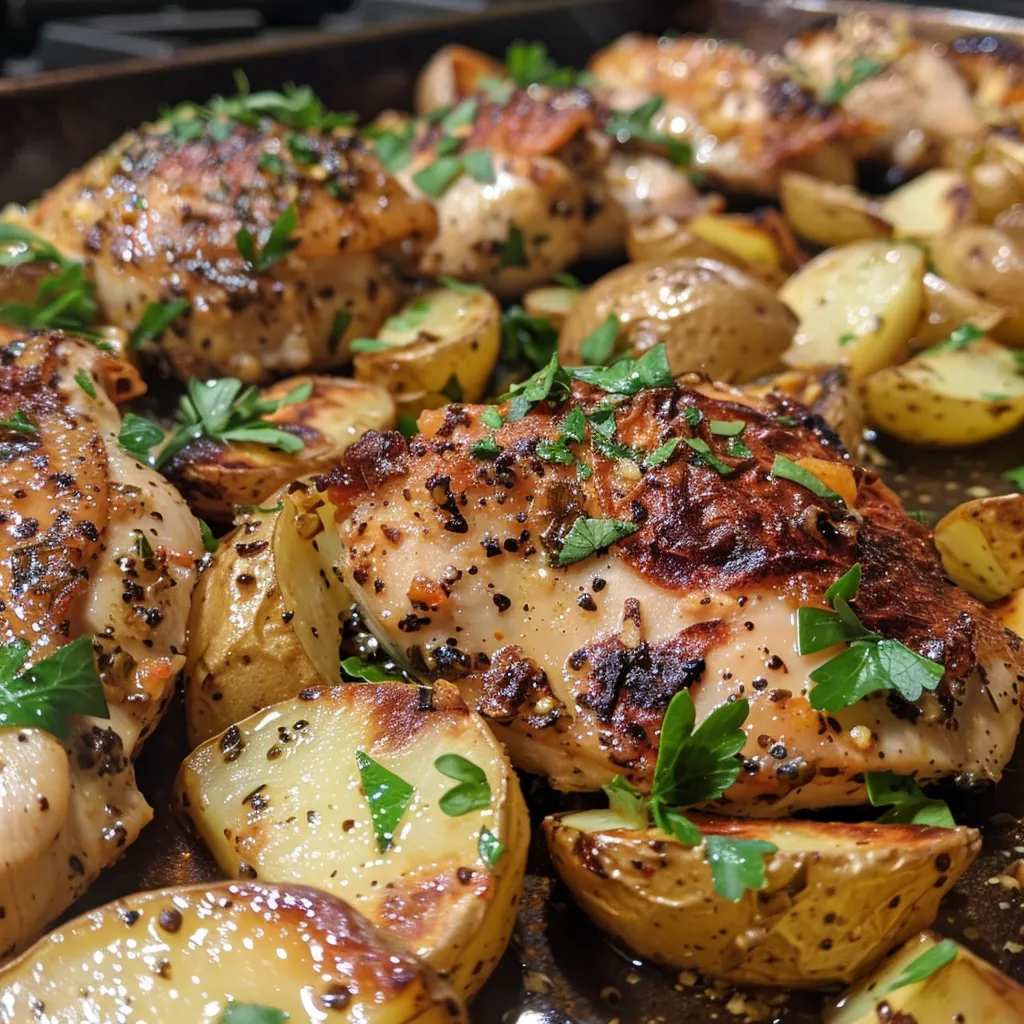
In a large skillet over medium heat, heat the olive oil and butter together until melted and hot, creating a perfect base for cooking the chicken. Pat the chicken breasts dry, then season both sides generously with salt, pepper, garlic powder, and onion powder to infuse flavor. Place the seasoned chicken breasts in the hot skillet and cook for 6-7 minutes on each side. Cook until the chicken is golden brown and reaches an internal temperature of 165°F, ensuring it’s fully cooked and juicy.

Step 2: Create the Creamy Sauce

Remove the cooked chicken from the skillet and set it aside on a plate to rest while you prepare the sauce. Add the minced garlic to the same skillet and sauté for about 1 minute until fragrant and lightly golden but not burnt. Pour in the heavy cream and chicken broth, stirring well to combine and deglaze the pan by loosening any flavorful bits stuck to the bottom. Let the cream sauce simmer gently over medium heat for 5-7 minutes or until it thickens to a creamy consistency, stirring occasionally to prevent sticking.

Step 3: Combine Chicken and Sauce

Place the chicken breasts back into the skillet with the creamy sauce and spoon sauce over them. Cook for an additional 3-4 minutes, allowing the chicken to soak up the sauce and heat through. Sprinkle freshly chopped parsley over the chicken and sauce just before serving for a burst of color and fresh herb flavor.

Pro Tips for Perfect Creamy Garlic Chicken

Side view of creamy garlic chicken with a glossy sauce and garlic pieces visible.
  • Use a Meat Thermometer: To ensure the chicken is cooked perfectly, use a meat thermometer to check for an internal temperature of 165°F.
  • Let It Rest: Allow the chicken to rest for a few minutes after cooking. This keeps it juicy and tender.
  • Substitute Ingredients: If you’re out of heavy cream, half-and-half or Greek yogurt can work in a pinch.
  • Don’t Rush the Sauce: Let the sauce simmer to allow the flavors to meld together for the best taste.
  • Fresh Garlic is Key: Always opt for fresh minced garlic for a more robust flavor compared to powdered.
  • Deglaze the Pan: The bits left in the pan after cooking the chicken add incredible flavor to the sauce—don’t skip this step!
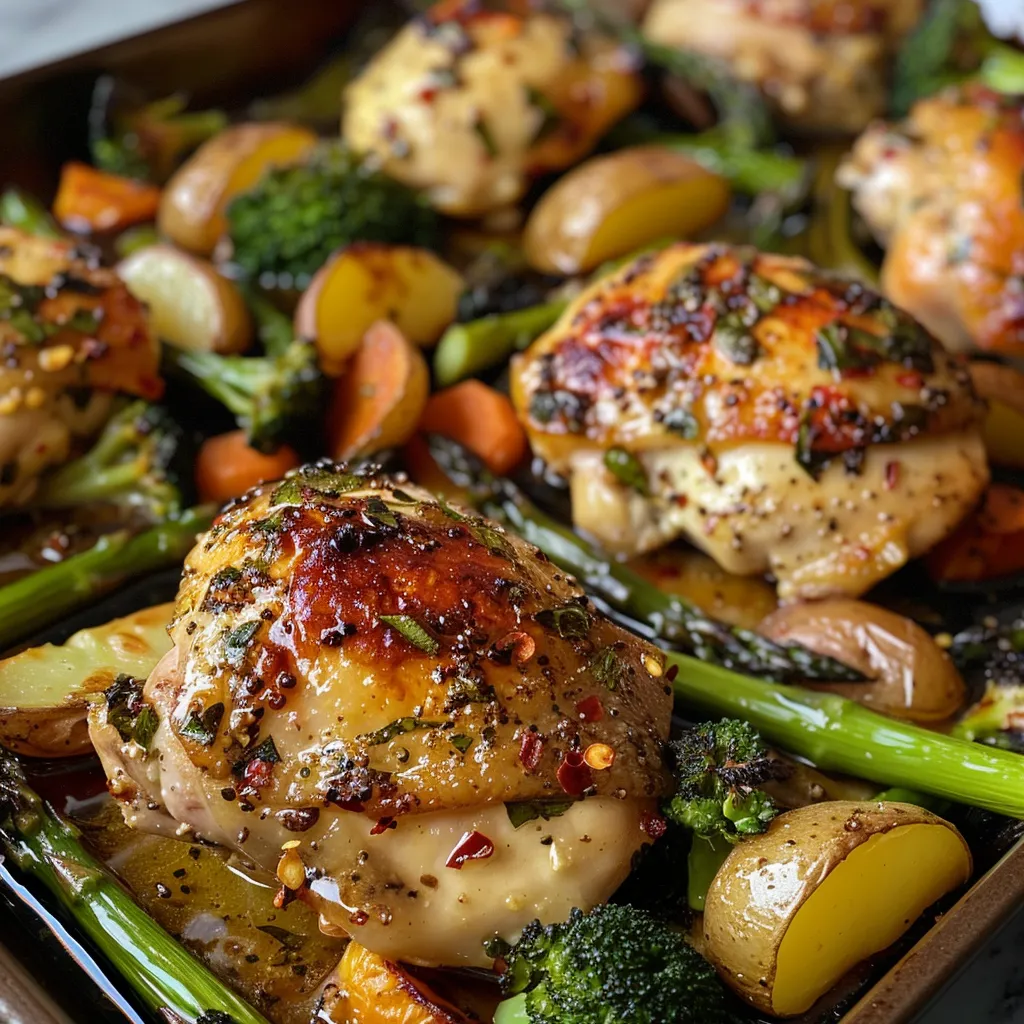
  • Variations Are Welcome: Feel free to add vegetables like spinach or mushrooms for extra nutrition and flavor.
  • Make It Spicy: Add a pinch of red pepper flakes for a little heat in the creamy sauce.

Common Mistakes and Troubleshooting

Even the best of us can face a few hiccups in the kitchen. Here’s how to avoid common mistakes:

  • Chicken Isn’t Cooking Evenly: Ensure all chicken breasts are of similar thickness for even cooking. You can pound them to an even thickness if necessary.
  • Sauce is Too Thin: If your sauce isn’t thickening, let it simmer a bit longer, or add a cornstarch slurry to help it along.
  • Burnt Garlic: Garlic can burn quickly, leading to bitterness. Keep an eye on it and sauté it just until fragrant.
  • Too Salty: If the sauce is too salty, add a splash of cream or a squeeze of lemon juice to balance it out.

Delicious Variations of Creamy Garlic Chicken

  • Creamy Garlic Mushroom Chicken: Add sliced mushrooms to the skillet when sautéing the garlic for a hearty twist.
  • Spinach and Garlic Chicken: Stir in fresh spinach with the sauce for a boost of nutrients and vibrant color.
  • Cheesy Garlic Chicken: Mix in grated parmesan or mozzarella into the sauce for an extra layer of cheesy goodness.
  • Herb-Infused Garlic Chicken: Experiment with different herbs like thyme or rosemary for a fragrant, gourmet touch.

Make-Ahead and Storage Instructions

This creamy garlic chicken can be made ahead of time for easy weeknight dinners. Here’s how to store and reheat:

  • Make Ahead: Prepare the chicken and sauce, then store them separately in airtight containers in the refrigerator for up to 3 days.
  • Reheating: Gently reheat the chicken in a skillet over low heat. Add a splash of chicken broth or cream to loosen the sauce if it has thickened.
  • Freezing: While it’s best fresh, you can freeze the cooked chicken in its sauce for up to 2 months. Thaw in the fridge overnight before reheating.

Frequently Asked Questions

  • Can I use bone-in chicken? Yes, just adjust the cooking time to ensure it reaches 165°F.
  • Is there a dairy-free option? Yes, use coconut cream or a dairy-free cream substitute for the sauce.
  • Can I add vegetables to this dish? Absolutely! Vegetables like broccoli, bell peppers, or zucchini make great additions.
  • What can I serve with creamy garlic chicken? This dish pairs beautifully with rice, pasta, or a fresh green salad.
  • How do I know when the chicken is done? A meat thermometer should read 165°F in the thickest part of the chicken.
  • Can I make this recipe spicy? Yes! Add red pepper flakes or diced jalapeños for some heat.
  • How long can I store leftovers? Leftovers can be stored in the fridge for up to 3 days.
  • What’s the best way to reheat creamy garlic chicken? Gently reheat on the stove over low heat, adding a splash of broth or cream to revive the sauce.

Nutrition Tips and Dietary Adaptations

For those watching their diet, here are some tips to enjoy this creamy garlic chicken while keeping it healthy:

  • Lean Protein: Opt for chicken thighs if you prefer a richer flavor, but keep the skin off to reduce fat.
  • Lower Calorie Option: Swap heavy cream for Greek yogurt or a low-fat cream alternative.
  • Gluten-Free Version: This recipe is naturally gluten-free, but always check your broth and any additional ingredients.
  • Vegetarian Adaptation: Substitute chicken with tofu or tempeh and use vegetable broth for a delicious plant-based meal.

Equipment Recommendations

Having the right tools can make all the difference in your cooking experience:

  • Non-stick Skillet: Ideal for cooking the chicken without sticking and for easy cleanup.
  • Meat Thermometer: An essential tool for ensuring your chicken is cooked perfectly every time.
  • Wooden Spoon: Perfect for stirring the sauce and scraping up those delicious bits from the pan.
  • Sharp Knife: A good chef’s knife will help you slice your chicken and vegetables effortlessly.

Serving Suggestions

To make your meal complete, consider these serving ideas:

  • Over Rice: Serve the creamy garlic chicken over fluffy white or brown rice for a filling meal.
  • With Pasta: Toss with fettuccine or penne for a delicious creamy garlic chicken pasta.
  • With Bread: Pair with a warm baguette or garlic bread to soak up the creamy sauce.
  • On a Salad: Slice the chicken and serve over a bed of greens for a lighter option.

At the end of the day, cooking is about sharing moments and creating memories around the table. This Creamy Garlic Chicken recipe is not just a dish; it’s a heartfelt invitation to gather your loved ones and enjoy a meal together. I hope you find joy in preparing and sharing this dish as much as I do. Happy cooking!

Creamy Garlic Chicken Recipe

Prep Time 10 minutes
Cook Time 20 minutes
Total Time 30 minutes
Servings 4 servings
Calories 550
A delicious and creamy garlic chicken dish that's quick to prepare and perfect for a satisfying meal.

Ingredients

Chicken

  • 4 pieces boneless, skinless chicken breasts
  • 1 teaspoon garlic powder
  • 1 teaspoon onion powder
  • 1 tablespoon olive oil
  • 1 tablespoon butter
  • 4 cloves garlic, minced
  • 1 cup heavy cream
  • 1/2 cup chicken broth

Garnish

  • Fresh parsley (for garnish)

Instructions 

  • Heat olive oil and butter in a skillet over medium heat.
  • Season chicken with salt, pepper, garlic powder, and onion powder, then cook 6-7 minutes per side until golden and cooked through.
  • Remove chicken; sauté garlic in the same skillet for 1 minute.
  • Add heavy cream and chicken broth, simmer until thickened, then return chicken to the skillet and cook 3-4 minutes.
  • Garnish with chopped parsley before serving.

Notes

For extra flavor, add a squeeze of lemon or some grated Parmesan cheese.
Calories: 550kcal
Cost: $15
Course: Main Course
Cuisine: American
Keyword: chicken

The Comfort of Home-Cooked Baked Cheesy Chicken Breasts

When it comes to family dinners, nothing warms the heart quite like a dish of baked cheesy chicken breasts. This recipe, simple yet satisfying, merges the goodness of tender chicken with the melted richness of mozzarella, creating a meal that’s bound to bring everyone to the table. Perfect for weeknight dinners or special gatherings, this dish embodies the warmth and comfort of home cooking. Let’s dive into the ingredients and process that make this recipe a cherished classic.

Why You’ll Love This Recipe

Here are just a few reasons why this baked chicken recipe will become a staple in your home:

  • Quick Preparation: With just 10 minutes of prep time, you can have this meal ready to bake, leaving you free to enjoy your evening.
  • Family-Friendly: This dish appeals to both kids and adults, ensuring that even the pickiest eaters will come back for seconds.
  • Flavorful Spice Blend: Our unique blend of spices not only enhances the chicken but also fills your kitchen with inviting aromas.
  • Cheesy Bliss: The layer of melted mozzarella cheese adds a creamy, gooey texture that complements the chicken perfectly.
  • Versatile Serving Options: Pair it with a side salad, mashed potatoes, or steamed vegetables for a complete meal.

Ingredients Breakdown

Let’s gather the essentials for our cheesy baked chicken:

  • 4 boneless, skinless chicken breasts: Choose fresh, high-quality chicken for the best flavor.
  • 1 tablespoon olive oil: This helps to lock in moisture and adds a rich taste.
  • 2 teaspoons smoked paprika: A key ingredient that infuses the chicken with a warm, smoky flavor.
  • 1 teaspoon garlic powder: Provides a savory base that enhances the overall taste.
  • 1 teaspoon onion powder: Adds depth and a classic savory profile.
  • 1/2 teaspoon chili powder: Gives a mild kick without overwhelming the dish.
  • 1/2 teaspoon salt: Essential for bringing out the flavors of the chicken.
  • 1/4 teaspoon black pepper: Adds a hint of heat and complexity.
  • 1.5 cups shredded mozzarella cheese: The star topping that makes this dish irresistibly cheesy.
  • 2 tablespoons fresh chopped parsley for garnish: A final touch that brightens the dish.

Pro Tips for Perfect Baked Cheesy Chicken

Succulent chicken breasts baked with a layer of melted cheese and garnished with parsley.

To ensure your baked chicken breasts turn out perfectly every time, consider these expert insights:

  • Pat the Chicken Dry: This simple step ensures that the seasoning adheres well, creating a flavorful crust.
  • Use a Meat Thermometer: Check for an internal temperature of 165°F (74°C) to guarantee juicy, tender chicken.
  • Let It Rest: Allow the chicken to rest after baking to let the juices redistribute, keeping it moist.
  • Cheese Variations: Try mixing in different cheeses like cheddar or gouda for a unique twist.
  • Double the Recipe: This dish is perfect for leftovers or meal prepping for the week.
  • Make It Ahead: Assemble the dish and refrigerate it the night before for an easy bake the next day.
  • Adjust Spice Levels: Feel free to add more chili powder or even some cayenne for an extra kick.
  • Experiment with Herbs: Fresh thyme or rosemary can elevate the flavor profile significantly.

Common Mistakes and Troubleshooting

Here are a few pitfalls to avoid when making your baked cheesy chicken:

  • Overcooking the Chicken: This can lead to dryness; always use a meat thermometer to check doneness.
  • Not Preheating the Oven: Skipping this step can result in uneven cooking.
  • Skipping the Spice Mix: Each spice adds to the flavor, so don’t skip this important step!
  • Using Wet Chicken: Moisture on the chicken will prevent the seasoning from sticking properly.

Flavor Variations

Feel free to play around with the recipe to suit your taste:

  • Italian Style: Add Italian seasoning and use fresh basil for a Mediterranean twist.
  • Buffalo Chicken: Mix in some buffalo sauce with the olive oil for a spicy flavor.
  • BBQ Chicken: Brush the chicken with your favorite BBQ sauce before adding cheese.
  • Lemon Herb Chicken: Zest some lemon and add fresh herbs like thyme for a zesty touch.

Storage and Make-Ahead Instructions

For those busy nights, this dish is great for meal prep:

  • Refrigeration: Store leftovers in an airtight container for up to 3 days.
  • Freezing: You can freeze cooked chicken for up to 2 months. Just thaw in the fridge before reheating.
  • Make-Ahead Option: Assemble the dish, cover, and refrigerate for up to 24 hours before baking.

Frequently Asked Questions

Here are answers to common questions about this recipe:

  • Can I use frozen chicken breasts? Yes, just ensure they are fully thawed before cooking.
  • What can I substitute for mozzarella? Cheddar, gouda, or even a blend of cheeses works well.
  • How do I know when the chicken is done? Use a meat thermometer to check for an internal temperature of 165°F (74°C).
  • Can I grill this chicken instead? Absolutely! Just follow the same seasoning process and grill until cooked through.
  • What sides go well with this dish? Mashed potatoes, steamed veggies, or a fresh salad are all great options.
  • Is this recipe gluten-free? Yes, as long as you ensure all your spices are gluten-free.
  • How long does it take to cook? About 25-35 minutes total, depending on your oven and chicken thickness.
  • Can I add vegetables to the baking dish? Yes, add them alongside the chicken for a one-pan meal.

Nutritional Tips and Dietary Adaptations

To make this dish fit various dietary needs:

  • Low-Carb Option: Skip the breadcrumbs and serve with a side of veggies.
  • Dairy-Free: Use a dairy-free cheese alternative for the topping.
  • Higher Protein: Serve with a side of quinoa or beans for added protein.

Essential Equipment Recommendations

For the best results, consider having these tools in your kitchen:

  • Meat Thermometer: Essential for ensuring your chicken is cooked perfectly.
  • 9×13 inch Baking Dish: Ideal for baking and serving your cheesy chicken.
  • Mixing Bowls: Handy for combining your spices and preparing the chicken.

Serving Suggestions

To complete your meal, consider these delightful pairings:

  • Garlic Mashed Potatoes: Creamy and comforting, they complement the cheesy chicken beautifully.
  • Steamed Broccoli: A healthy side that adds color and nutrients.
  • Caesar Salad: Crisp and refreshing, it balances the richness of the chicken.
  • Rice Pilaf: Fluffy rice with herbs pairs wonderfully with the flavors of the dish.

With just a handful of ingredients and a little love, you can create a meal that not only nourishes but also brings your family together. So, gather around the table, share stories, and enjoy the cozy comfort of baked cheesy chicken breasts. It’s more than just food; it’s a tradition you’ll cherish for years to come.

Cheesy Baked Chicken Breasts

Prep Time 10 minutes
Cook Time 30 minutes
Total Time 40 minutes
Servings 4 pieces
Calories 350
Juicy, flavorful chicken breasts topped with melted mozzarella cheese, baked to perfection with smoky spices.

Ingredients

Chicken

  • 4 pieces boneless, skinless chicken breasts
  • 1 tablespoon olive oil
  • 2 teaspoons smoked paprika
  • 1 teaspoon garlic powder
  • 1 teaspoon onion powder
  • 1/2 teaspoon chili powder
  • 1/2 teaspoon salt
  • 1/4 teaspoon black pepper
  • 1.5 cups shredded mozzarella cheese
  • 2 tablespoons fresh chopped parsley (for garnish)

Instructions 

  • Preheat oven to 375°F (190°C). Prepare a baking dish and pat chicken dry.
  • Mix spices in a small bowl. Coat chicken with olive oil and spice mixture, then place in dish.
  • Bake for 20-25 minutes until internal temp reaches 160°F (71°C).
  • Sprinkle cheese over chicken, bake another 5-10 minutes until melted and golden.
  • Rest for 5 minutes, garnish with parsley, then serve.

Notes

Ensure chicken reaches 165°F (74°C) before serving for safety.
Calories: 350kcal
Cost: $15
Course: Main Course
Cuisine: American
Keyword: baked, cheese, chicken

Welcome, friends! Today, I’m excited to share with you a dish that embodies the warmth and comfort of home—Sweet Spicy Sticky Chicken. This recipe combines the perfect blend of heat and sweetness, making it a favorite for family gatherings and cozy dinners alike. With just a handful of ingredients, you can create a meal that not only satisfies your hunger but also wraps you in the delightful embrace of rustic flavors. So grab your apron and let’s dive into this culinary adventure!

Why You’ll Love This Recipe

This dish is more than just a meal; it’s an experience that brings people together. Here are five reasons why you’ll love making Sweet Spicy Sticky Chicken:

  • Simple ingredients: You likely have most of these items in your pantry, making it easy to whip up on a whim.
  • Quick preparation: In under an hour, you can have a delicious, hearty meal ready to serve.
  • Flavor explosion: The combination of sweet and spicy creates a flavor profile that dances on your taste buds.
  • Versatile serving options: This chicken works beautifully over rice, in wraps, or as part of a hearty salad.
  • Perfect for gatherings: Impress your family and friends with this dish that looks as good as it tastes.

Ingredients for Sweet Spicy Sticky Chicken

Here’s what you’ll need to create this mouthwatering dish. Feel free to make substitutions based on what you have at home!

  • 4 boneless skinless chicken breasts or tenders: The star of the show, tender and juicy.
  • Salt and pepper to taste: Essential for enhancing flavors.
  • 1/2 cup chicken broth (or water): Adds moisture and depth to the sauce.
  • 2 tablespoons apple cider vinegar (or white vinegar): Balances the sweetness with a tangy kick.
  • 3 tablespoons ketchup: Acts as a base for the sauce, adding sweetness and richness.
  • 1/4 cup brown sugar, packed: Gives that irresistible sticky sweetness.
  • 2 tablespoons honey: Enhances the sweetness and adds complexity.
  • 3 tablespoons soy sauce: Infuses the dish with umami flavor.
  • 2 tablespoons chili garlic sauce: Provides the spicy kick that makes this dish sing.
  • 3 cloves garlic, minced: Aromatic and flavorful, it adds depth to the sauce.
  • 1 teaspoon fresh ginger, grated: Adds a fragrant warmth and zing.
  • 1 teaspoon cornstarch (optional, for thickening): If you prefer a thicker sauce, this will do the trick.

How to Make Sweet Spicy Sticky Chicken

Let’s get cooking! Follow these simple steps to create your delicious Sweet Spicy Sticky Chicken:

Step 1: Make the Sauce

Combine all the sauce ingredients in a saucepan. Simmer over medium heat, stirring occasionally. Once the sauce thickens, remove from heat.

Step 2: Prepare the Chicken

Season the chicken with salt and pepper. Heat a skillet or grill to medium-high heat.

Step 3: Cook the Chicken

Grill or pan-sear the chicken until cooked through (165°F internal temperature). This ensures the chicken is juicy and flavorful.

Step 4: Glaze the Chicken

Brush the chicken with the sweet spicy sauce, coating it evenly. Let it rest for a few minutes; this allows the juices to redistribute.

Step 5: Serve

Serve the chicken with rice, noodles, or in wraps. Enjoy the delightful fusion of sweet and spicy flavors!

Pro Tips for Perfect Sweet Spicy Sticky Chicken

Side view of succulent chicken breasts glazed in a sweet and spicy sauce.

Enhance your cooking experience with these expert insights:

  • Marinate for more flavor: For an even deeper flavor, marinate the chicken in the sauce for at least an hour (or overnight!).
  • Adjust the heat: If you like it spicier, add more chili garlic sauce or fresh chilies.
  • Use a meat thermometer: To ensure perfectly cooked chicken every time, use a meat thermometer to check for doneness.
  • Let it rest: Resting the chicken after cooking allows for juicier and more flavorful meat.
  • Experiment with different cuts: Feel free to use chicken thighs or drumsticks for a richer flavor.
  • Garnish with fresh herbs: Adding cilantro or green onions as a garnish can elevate the dish visually and taste-wise.
  • Pair with sides: This chicken goes wonderfully with coleslaw, steamed vegetables, or cornbread.
  • Make it a meal prep staple: This dish holds up well in the fridge, making it perfect for meal prep!

Common Mistakes and Troubleshooting

Sometimes cooking can be tricky, so here are some common mistakes to avoid:

  • Overcooking the chicken: This can lead to dry meat. Always check the internal temperature.
  • Not allowing the sauce to thicken: Patience is key when reducing the sauce; a thicker glaze is what you want!
  • Skipping the resting period: Cutting into the chicken too soon can let all the juices escape.
  • Using too much salt: Taste as you go to avoid over-seasoning.

Variations of Sweet Spicy Sticky Chicken

Feel free to mix things up with these variations:

  • Sweet and Sour Sticky Chicken: Add pineapple chunks to the sauce for a tropical twist.
  • Coconut Sticky Chicken: Replace chicken broth with coconut milk for a creamy flavor.
  • Orange Glazed Chicken: Substitute the brown sugar with orange marmalade for a fruity flair.
  • Spicy Maple Chicken: Use maple syrup instead of honey for a rich, earthy sweetness.

Storage and Make-Ahead Instructions

This dish is perfect for leftovers! Here’s how to store it:

  • Refrigeration: Store any leftovers in an airtight container in the fridge for up to 3 days.
  • Freezing: You can freeze the cooked chicken for up to 3 months. Thaw it in the fridge overnight before reheating.
  • Reheating: Reheat in the microwave or on the stovetop until heated through, ensuring it reaches 165°F again.

Comprehensive FAQ

Here are some commonly asked questions to help you along the way:

  • Can I use frozen chicken? Yes, just ensure it’s fully thawed before cooking for even results.
  • What can I serve with this chicken? It pairs beautifully with rice, quinoa, or a fresh salad.
  • Is this recipe gluten-free? Use gluten-free soy sauce to make it suitable for gluten-intolerant folks.
  • Can I make this in the oven? Absolutely! Bake at 375°F for about 25-30 minutes, basting with sauce halfway through.
  • How spicy does this recipe get? Adjust the chili garlic sauce to your preference for heat.
  • Can I double this recipe? Yes, just make sure you have a large enough pan to cook everything evenly.
  • What’s the best way to store leftovers? Keep in an airtight container; it stays fresh in the fridge for up to 3 days.
  • Can I use other meats? Certainly! This sauce works great with pork or tofu for a vegetarian option.

Nutrition Tips and Dietary Adaptations

Cooking healthy is all about balance. Here are some tips to keep in mind:

  • Lean protein: Chicken breasts are a great source of lean protein. You can also use skinless thighs for a bit more flavor.
  • Low-sugar alternatives: Use less sugar or replace it with a sugar substitute if watching your intake.
  • Incorporate veggies: Add bell peppers, broccoli, or snap peas to the dish for added nutrients and color.
  • Gluten-free option: Use gluten-free soy sauce to adapt this dish for gluten-sensitive diets.

Equipment Recommendations

To make your cooking experience smooth and enjoyable, here are a few handy tools:

  • Nonstick skillet or grill: Perfect for searing your chicken without sticking.
  • Meat thermometer: Essential for checking chicken doneness accurately.
  • Small saucepan: Ideal for simmering your sauce to perfection.
  • Good quality knives: A sharp knife makes prepping ingredients a breeze.

Serving Suggestions

This Sweet Spicy Sticky Chicken is best enjoyed in good company. Here are a few serving suggestions:

  • Over rice: Serve it over a bed of fluffy rice to soak up all that delicious sauce.
  • In wraps: Wrap it up with some fresh veggies for a delightful lunch.
  • With noodles: Pair it with stir-fried noodles for a comforting meal.
  • On a salad: Slice and serve it on a green salad for a light yet satisfying dish.

Now that you have all the tools and tips you need, it’s time to roll up your sleeves and bring this wonderful dish to life. Remember, cooking is all about sharing love and warmth with those around you. Enjoy every bite, and don’t forget to share the joy of food with your loved ones!

Sweet Spicy Sticky Chicken Recipe

Prep Time 10 minutes
Cook Time 20 minutes
Total Time 30 minutes
Servings 4 servings
Calories 350
Enjoy tender chicken glazed with a flavorful sweet and spicy sauce, perfect for a quick and delicious meal.

Ingredients

Protein

  • 4 pieces boneless skinless chicken breasts or tenders
  • 1/2 cup chicken broth (or water)
  • 2 tablespoons apple cider vinegar (or white vinegar)
  • 3 tablespoons ketchup
  • 1/4 cup brown sugar, packed
  • 2 tablespoons honey
  • 3 tablespoons soy sauce
  • 2 tablespoons chili garlic sauce
  • 3 cloves garlic, minced
  • 1 teaspoon fresh ginger, grated
  • 1 teaspoon cornstarch (optional, for thickening)

Instructions 

  • Combine all sauce ingredients in a saucepan and simmer until thickened.
  • Season chicken with salt and pepper; heat skillet or grill to medium-high.
  • Cook chicken until fully cooked (165°F internal).
  • Brush chicken with sauce to glaze, then let rest before serving.
  • Serve with rice, noodles, or wraps. Enjoy!

Notes

Adjust spice level with chili garlic sauce as desired.
Calories: 350kcal
Cost: $15
Course: Main Course
Cuisine: American
Keyword: chicken

Welcome to the Heart of Comfort Food

When it comes to cooking, nothing feels quite as comforting as a home-cooked meal that brings family and friends together. The One-Pan Honey Butter Garlic Chicken & Rice is a dish that embodies that warmth—combining juicy chicken, fluffy rice, and a sticky, sweet glaze that feels like a hug on a plate. Whether you’re preparing a weeknight family dinner or hosting friends, this recipe is sure to please. Let’s dive into the heart of this delightful dish!

Why You’ll Love This Recipe

  • Simple Ingredients: This recipe uses everyday ingredients you likely already have in your pantry, making it easy to whip up on busy nights.
  • One-Pan Convenience: Cooking everything in one skillet means less cleanup and more time to enjoy your meal with loved ones.
  • Flavor Explosion: The combination of honey, garlic, and butter creates a savory-sweet glaze that elevates the chicken and rice to new heights.
  • Versatile Dish: You can easily adjust the recipe to suit your taste preferences or dietary needs, making it a go-to for everyone.
  • Quick Cooking Time: In just about 30 minutes, you can have a delicious, home-cooked meal on the table—perfect for those hectic weeknights!

Ingredients Breakdown

Before we get cooking, let’s take a closer look at what you’ll need for this One-Pan Honey Butter Garlic Chicken & Rice.

  • 1.5 lbs boneless skinless chicken thighs: These are juicy and tender; you can also use chicken breasts if preferred, but adjust the cooking time to prevent dryness.
  • 1 cup white rice (uncooked): Long grain rice works best for a fluffy texture. Avoid instant rice, as it won’t absorb the flavors well.
  • 4 cloves garlic, minced: Fresh garlic adds depth and aroma; don’t substitute with garlic powder if you can help it.
  • 3 tablespoons honey: This is the star ingredient for sweetness that pairs beautifully with garlic.
  • 3 tablespoons unsalted butter: Adds richness and flavor; feel free to substitute with olive oil for a dairy-free version.
  • 2 cups chicken broth: Use low-sodium broth to control the saltiness of the dish.
  • 2 tablespoons soy sauce: Provides a savory umami kick that complements the honey.
  • 1 tablespoon olive oil: For searing the chicken; any neutral oil will do.
  • 2 tablespoons chopped fresh parsley: For garnish and a pop of color.
  • To taste salt and black pepper: Essential for seasoning.
  • 3 slices lemon (optional, for garnish): Adds brightness to the dish.

Step-by-Step Instructions

Juicy chicken thighs in a honey garlic sauce served over white rice, highlighted by fresh parsley.

Now that we’ve gathered our ingredients, it’s time to get cooking! Follow these easy steps for a meal that will warm your heart.

  1. Season the chicken thighs with salt and pepper. In a large skillet, heat olive oil over medium-high heat. Sear the chicken on both sides until golden and nearly cooked through. Remove and set aside.
  2. In the same skillet, reduce the heat to medium and add butter and garlic. Cook until the garlic is fragrant and just beginning to brown.
  3. Stir in the honey and soy sauce to create a sticky glaze that will coat the chicken beautifully.
  4. Add the uncooked rice and stir to coat it with the sauce. Pour in the chicken broth and mix briefly, ensuring the rice is evenly distributed.
  5. Nestle the chicken thighs back into the pan, cover, and reduce the heat to low. Simmer for 18–22 minutes, or until the rice is tender and the liquid is absorbed. Make sure to keep an eye on it to prevent burning the bottom.
  6. Uncover, fluff the rice with a fork, and sprinkle with chopped parsley. Garnish with lemon slices, if desired. Serve warm and enjoy!

Pro Tips for Success

  • Don’t Rush the Searing: Ensure the skillet is hot before adding the chicken. This will create a beautiful crust and lock in the juices.
  • Use Fresh Ingredients: Fresh garlic and quality honey make a significant difference in flavor.
  • Adjust the Sweetness: If you prefer less sweetness, reduce the amount of honey or add more soy sauce.
  • Check for Doneness: Use a meat thermometer; chicken should reach an internal temperature of 165°F (75°C).
  • Rest the Chicken: Allow the chicken to rest for a few minutes after cooking for juicier results.
  • Experiment with Herbs: Feel free to add other herbs like thyme or rosemary for a different flavor profile.
  • Make it Spicy: Add a pinch of red pepper flakes or some sliced jalapeños for a spicy kick.
  • Consider Cooking Times: If using brown rice, adjust cooking time to about 30-35 minutes, adding extra broth as needed.

Common Mistakes and Troubleshooting

Even the best cooks can run into issues. Here’s how to avoid common pitfalls:

  • Rice Not Cooking Properly: If the rice is still hard after the cooking time, add a splash of chicken broth and cover for a few more minutes.
  • Overcooked Chicken: If the chicken is dry, it likely cooked too long. Keep an eye on the time!
  • Too Salty: If the dish is too salty, balance it with a splash of vinegar or a bit of sugar.
  • Burnt Rice: If the rice sticks to the bottom, it may have been too high of a heat. Ensure you’re simmering gently.

Delicious Variations

This recipe is wonderfully versatile. Here are a few ways to mix it up:

  • Vegetable Medley: Add in some chopped bell peppers, peas, or broccoli for extra nutrients and color.
  • Honey Mustard Twist: Substitute honey with a mix of honey and Dijon mustard for a tangy flavor.
  • Curried Version: Stir in some curry powder for an exotic twist that pairs beautifully with the honey.
  • Herbed Rice: Use chicken broth infused with herbs or add fresh herbs to the rice for added flavor.

Storage and Make-Ahead Instructions

This dish is perfect for meal prep! Here’s how to store and reheat:

  • Fridge: Allow the dish to cool completely before transferring leftovers to an airtight container. It will keep well in the fridge for up to 4 days.
  • Freezer: For longer storage, you can freeze the One-Pan Honey Butter Garlic Chicken & Rice for up to 2 months. Make sure to label the container with the date for easy reference.
  • Reheating: When ready to enjoy, thaw the dish in the refrigerator overnight. Reheat gently on the stove over low heat or in the microwave until thoroughly warmed, ensuring the chicken remains juicy and the rice fluffy.

Frequently Asked Questions (FAQ)

Got questions? We’ve got answers!

  • Can I use brown rice instead of white? Yes, but adjust the cooking time to about 30-35 minutes, adding extra broth as needed.
  • What can I substitute for chicken thighs? Chicken breasts work fine, but they may turn out drier if overcooked.
  • Can I make this dish in advance? Absolutely! Prepare it ahead of time and store it in the fridge for up to 4 days or freeze it for longer storage.
  • Is this dish gluten-free? If you use gluten-free soy sauce, this dish can easily be made gluten-free.
  • How can I make this dish dairy-free? Substitute butter with olive oil or a dairy-free butter alternative.
  • Can I add other proteins? Yes! Shrimp or tofu can be great additions, but adjust cooking times accordingly.
  • What sides pair well with this dish? A simple side salad or steamed vegetables make excellent companions to this meal.
  • How do I know when the chicken is done? Use a meat thermometer; chicken should reach an internal temperature of 165°F (75°C).

Nutritional Insights and Dietary Adaptations

This dish can be tailored to meet various dietary needs:

  • Low-Carb Option: Substitute rice with cauliflower rice for a low-carb version.
  • Protein Boost: Add cooked beans or lentils for additional protein.
  • Low-Sodium Adaptation: Use low-sodium chicken broth and soy sauce to keep sodium levels in check.

Essential Equipment

Here’s what you’ll need to make this dish:

  • Large Skillet: A heavy-bottomed skillet works best for even cooking and browning.
  • Meat Thermometer: This tool ensures your chicken is cooked to perfection without overdoing it.
  • Cutting Board and Knife: For chopping ingredients efficiently.

Serving Suggestions

To make your meal even more delightful, consider pairing it with:

  • Fresh Salad: A crisp green salad with a light vinaigrette complements the dish beautifully.
  • Steamed Vegetables: Broccoli or green beans add color and nutrition to your plate.
  • Crusty Bread: A loaf of crusty bread is perfect for soaking up any leftover sauce.

Conclusion

Cooking is not just about the food; it’s about the memories we create around the table. The One-Pan Honey Butter Garlic Chicken & Rice is more than just a meal; it’s an experience that brings joy and comfort to those you love. So gather your ingredients, invite some friends or family over, and make this dish that feels like home. Happy cooking!

One-Pan Honey Butter Garlic Chicken & Rice

Prep Time 10 minutes
Cook Time 25 minutes
Total Time 35 minutes
Servings 4 servings
Calories 650
A flavorful one-pan dish combining tender chicken thighs, fragrant garlic, sweet honey, and fluffy rice for a satisfying meal.

Ingredients

Protein

  • 1.5 lbs boneless skinless chicken thighs
  • 1 cup white rice (uncooked)
  • 4 cloves garlic, minced
  • 3 tablespoons honey
  • 3 tablespoons unsalted butter
  • 2 cups chicken broth
  • 2 tablespoons soy sauce
  • 1 tablespoon olive oil
  • 2 tablespoons chopped fresh parsley
  • to taste salt salt
  • to taste black pepper black pepper
  • 3 slices lemon (optional, for garnish)

Instructions 

  • Season chicken with salt and pepper. Sear in a skillet with olive oil until golden. Remove and set aside.
  • In the same skillet, cook butter and garlic until fragrant. Stir in honey and soy sauce.
  • Add rice, coat with sauce, pour in chicken broth, then nestle chicken back in. Cover and simmer 18–22 minutes.
  • Uncover, fluff rice, sprinkle with parsley, garnish with lemon slices, and serve warm.

Notes

For extra flavor, add a squeeze of lemon before serving.
Calories: 650kcal
Cost: $15
Course: Main Course
Cuisine: American
Keyword: chicken, Garlic, rice

The Heart and Soul of Comfort Food

Welcome, friends! Today, we’re diving into a dish that warms not just the belly but the heart: the Zesty Chicken Cheesesteak Skillet. This recipe is a tribute to the simple joys of home cooking, where fresh ingredients and a dash of love come together to create something truly special. Whether you’re cooking for a family gathering or enjoying a quiet weeknight dinner, this chicken cheesesteak skillet is sure to delight. Let’s explore why this dish is a must-make in your kitchen.

Why You’ll Love This Recipe

  • Simple Ingredients: Using just a handful of fresh ingredients, this dish highlights their natural flavors without overwhelming your palate.
  • Quick and Easy: In under 30 minutes, you can whip up a hearty meal that satisfies the whole family.
  • One-Skillet Wonder: Minimal cleanup means you can spend more time enjoying your meal and less time washing dishes.
  • Customizable: Feel free to swap out ingredients based on your preference or what’s available in your pantry.
  • Comforting Flavors: The combination of tender chicken, sautéed peppers and onions, and gooey provolone cheese creates a comforting experience that feels like home.

Ingredient Breakdown

Let’s take a closer look at what you’ll need to create this mouthwatering chicken cheesesteak skillet, along with some handy substitutions:

  • Chicken: 2 pounds of boneless chicken (breast or thighs), sliced thin. If you prefer, you can use turkey or even plant-based alternatives for a lighter option.
  • Olive Oil: 2 tablespoons for sautéing. Feel free to substitute with avocado oil for a higher smoke point.
  • Onion: 1 large onion, sliced. Yellow or sweet onions work best, but red onions add a nice color and sweetness.
  • Bell Peppers: 2 bell peppers (any color), sliced. Go wild with your favorite colors or even use poblano peppers for a spicy kick!
  • Garlic: 3 cloves, minced, to add depth to the dish. You can substitute with garlic powder in a pinch.
  • Seasonings: A mix of paprika, garlic powder, black pepper, salt, and cayenne pepper provides a flavor explosion. Adjust the cayenne to control the heat level.
  • Cheese: 8 oz of provolone cheese, sliced or shredded. If provolone isn’t your favorite, try mozzarella or even cheddar for a different twist.

Step-by-Step Instructions

Close-up of a Chicken Cheesesteak Skillet featuring sliced chicken, onions, and provolone cheese.

Now that we have our ingredients prepped, let’s get cooking!

  1. Pat the chicken dry and season generously with salt, pepper, paprika, garlic powder, and cayenne. Let it sit at room temperature for 15 minutes while you prep your vegetables.
  2. Heat 1 tablespoon of olive oil in a large skillet over medium-high heat.
  3. Add the seasoned chicken and cook for 5-6 minutes until golden brown and cooked through. Remove the chicken and set aside.
  4. Add the remaining oil to the same skillet.
  5. Sauté the onions and peppers for 4-5 minutes until softened.
  6. Add minced garlic and cook for 30 seconds until fragrant.
  7. Return the chicken to the skillet and toss everything together.
  8. Ensure your chicken reaches an internal temperature of 165°F.
  9. Once everything is cooked, top with cheese slices, cover the skillet, and let it rest off the heat for 2-3 minutes, allowing the cheese to melt.

Pro Tips for Perfecting Your Skillet

  • Thinly Slice Your Chicken: This ensures quick cooking and maximum tenderness.
  • Let Chicken Rest: Allowing seasoned chicken to rest before cooking enhances flavor.
  • Don’t Overcrowd the Skillet: If your skillet is too full, your chicken won’t brown properly.
  • Experiment with Cheese: Different cheeses can alter the flavor profile dramatically—don’t hesitate to try new things!
  • Use a Lid: Covering the skillet while the cheese melts creates steam that helps it melt evenly.
  • Mix Up the Veggies: Feel free to add mushrooms, zucchini, or any of your favorite vegetables for extra nutrition.
  • Season as You Go: Taste and adjust seasonings throughout the cooking process for the best flavor.
  • Make it Spicy: Add some sliced jalapeños or hot sauce for an extra kick!

Common Mistakes and Troubleshooting

Even the best chefs have off days. Here are a few common pitfalls and how to avoid them:

  • Dry Chicken: Ensure you don’t overcook the chicken. Use a meat thermometer to check for doneness.
  • Vegetables Too Soft: If you prefer your veggies with a bit of crunch, add them to the skillet after the chicken has cooked.
  • Cheese Not Melting: If your cheese isn’t melting, cover the skillet with a lid to trap the heat.
  • Too Salty: If you find your dish too salty, add a little sugar or honey to balance the flavors.

Variations on the Classic

This chicken cheesesteak skillet is incredibly versatile. Here are a few variations to keep things interesting:

  • Buffalo Chicken Skillet: Add buffalo sauce to your cooked chicken for a spicy twist.
  • Mediterranean Skillet: Incorporate olives, feta cheese, and spinach for a Mediterranean flair.
  • BBQ Chicken Skillet: Use BBQ sauce in place of seasonings for a smoky, sweet flavor.
  • Vegetarian Skillet: Replace chicken with a hearty plant-based protein like tempeh or chickpeas, and load up on the veggies.

Storage and Make-Ahead Instructions

This dish is perfect for meal prep! Here’s how to store and reheat:

  • Refrigerator: Store leftovers in an airtight container in the fridge for up to 3 days.
  • Freezer: For longer storage, freeze the cooked chicken cheesesteak in a freezer-safe container for up to 3 months.
  • Reheating: Warm in a skillet over medium heat until heated through, adding a splash of water to keep it moist.

Frequently Asked Questions

Here are some common questions folks have about this comforting dish:

  • Can I use chicken thighs instead of chicken breasts? Absolutely! Chicken thighs will give you a juicier flavor.
  • What if I don’t have provolone cheese? You can substitute with mozzarella, cheddar, or even pepper jack for a bit of heat.
  • Can I make this dish ahead of time? Yes! Just reheat gently when ready to serve.
  • Can I use different vegetables? Certainly! Feel free to add mushrooms, zucchini, or any favorites you have on hand.
  • How can I make this dish spicier? Add sliced jalapeños or a few dashes of hot sauce to kick up the heat.
  • What’s the best way to serve this dish? Serve it in bowls with crusty bread on the side or over rice for a complete meal.
  • Can I skip the cheese? Yes, but it does add a wonderful creamy texture to the dish.
  • How do I know when the chicken is done? Use a meat thermometer to ensure it reaches an internal temperature of 165°F.

Nutritional Tips and Dietary Adaptations

This recipe can be adapted to fit various dietary needs:

  • Low-Carb Option: Skip the bread and serve over leafy greens or cauliflower rice.
  • Dairy-Free: Use a plant-based cheese or skip the cheese altogether.
  • Gluten-Free: This dish is naturally gluten-free, just ensure any pantry staples are certified gluten-free.
  • Cooking for Kids: Adjust the spice level by reducing or eliminating cayenne pepper for a kid-friendly version.

Kitchen Equipment You’ll Need

Here’s a list of essential tools that will make your cooking experience smoother:

  • Large Skillet: A good-quality skillet is essential for even cooking and browning.
  • Meat Thermometer: To ensure your chicken is cooked perfectly every time.
  • Wooden Spoon or Spatula: For stirring and serving your delicious creation.
  • Cutting Board and Knife: Essential for prepping your vegetables and chicken.

Serving Suggestions

Serve your zesty chicken cheesesteak skillet with a slice of crusty bread or over a bed of rice or quinoa. Pair it with a fresh salad or some roasted vegetables for a complete meal that’s sure to please.

In conclusion, this Zesty Chicken Cheesesteak Skillet is more than just a recipe; it’s a heartwarming dish that brings family and friends together around the table. With its hearty ingredients and rich flavors, it’s a testament to the joys of home cooking. So grab your skillet and let’s get cooking! Remember, the best meals are made with love and a sprinkle of patience. Happy cooking, y’all!

Zesty Chicken Cheesesteak Skillet

Prep Time 10 minutes
Cook Time 15 minutes
Total Time 25 minutes
Servings 4 servings
Calories 550
A quick and flavorful skillet dish combining tender chicken, colorful peppers, and melted provolone cheese for a satisfying meal.

Ingredients

Protein

  • 2 pounds boneless chicken (breast or thighs), sliced thin
  • 2 tablespoons olive oil
  • 1 large onion, sliced
  • 2 bell peppers any color, sliced
  • 3 cloves garlic, minced
  • 1 teaspoon paprika
  • 1 teaspoon garlic powder
  • 1/2 teaspoon black pepper
  • 1 teaspoon salt
  • 1/4 teaspoon cayenne pepper
  • 8 oz provolone cheese, sliced or shredded

Instructions 

  • Season chicken with salt, pepper, paprika, garlic powder, and cayenne; let sit 15 minutes.
  • Heat 1 tablespoon oil in skillet; cook chicken 5-6 minutes until browned and cooked through. Remove and set aside.
  • Add remaining oil; sauté onions and peppers 4-5 minutes until softened. Add garlic and cook 30 seconds.
  • Return chicken to skillet; toss with vegetables. Top with cheese, cover, and rest 2-3 minutes.

Notes

Use thinly sliced chicken for quick cooking and ensure cheese melts evenly.
Calories: 550kcal
Cost: $15
Course: Main Course
Cuisine: American
Keyword: Cheesesteak, chicken, Skillet

Discover the Joy of One Pan Balsamic Chicken

If you’re looking for a dish that brings the warmth of home and the simplicity of good cooking, then look no further than this One Pan Balsamic Chicken. This recipe combines tender chicken, a sweet and tangy balsamic sauce, and fresh ingredients to create a meal that feels like a hug on a plate. Perfect for family gatherings, cozy dinners, or even when you have a busy weeknight ahead, this dish is all about embracing the flavors of home while keeping things uncomplicated.

In this article, we will delve into everything you need to know about making this delightful dish. From the ingredients to the best cooking methods, you’ll find tips, variations, and serving suggestions that will elevate your dinner experience. Let’s get started!

Why You’ll Love This Recipe

This One Pan Balsamic Chicken is not just easy to make; it comes with a host of benefits that make it a go-to choice for any meal:

  • Quick to Prepare: With minimal prep time, you can have dinner on the table in less than 30 minutes.
  • One Pan Wonder: Less cleanup means more time to enjoy your meal and less time scrubbing pots and pans.
  • Flavorful Ingredients: The combination of balsamic vinegar and honey creates a sweet-tangy sauce that the chicken can soak up beautifully.
  • Versatile Options: This recipe accommodates various dietary preferences, making it perfect for family meals.
  • Perfect for Meal Prep: Cook a batch on the weekend, and you’ll have delicious leftovers ready for busy weekdays.

Ingredients Breakdown

Let’s take a closer look at the ingredients that make this dish so special. Below is the list of ingredients along with some helpful substitutions:

  • Balsamic Vinegar: This is the star of the dish. It adds a rich, tangy flavor. For a variation, you can use apple cider vinegar, but it will alter the taste slightly.
  • Honey: It balances the acidity of the balsamic vinegar. Maple syrup can be a great substitute if you’re looking for a vegan option.
  • Oil: Use avocado oil or olive oil for cooking. Both have high smoke points and add healthy fats.
  • Garlic: Fresh minced garlic adds depth. You can also use garlic powder in a pinch, but fresh is best.
  • Italian Seasoning: A blend of herbs can enhance the flavor profile. If you don’t have it, use oregano and basil.
  • Dijon Mustard: This adds a nice tanginess; yellow mustard can work in a pinch.
  • Grape Tomatoes: Fresh tomatoes bring brightness. You can substitute canned tomatoes if necessary, but fresh is ideal.
  • Fresh Mozzarella Balls: These melt beautifully over the chicken. If unavailable, shredded mozzarella will also do.
  • Fresh Basil: It provides a fresh aroma. Dried basil can be used, but the flavor won’t be as vibrant.
  • Boneless, Skinless Chicken Breasts: Pounding them to an even thickness ensures they cook uniformly. Thighs can be used for a juicier option.
  • Kosher Salt and Fresh Black Pepper: Essential for seasoning.

How to Make One Pan Balsamic Chicken

Side view of a plate featuring One Pan Balsamic Chicken, topped with fresh basil.

Now, let’s dive into the step-by-step process to create this delicious meal:

  1. In a bowl, whisk together the sauce ingredients: balsamic vinegar, honey, oil, garlic, Italian seasoning, and Dijon mustard. Season with salt and pepper to taste and set aside.
  2. In another bowl, toss together the halved tomatoes, mozzarella, and chopped basil. Season with salt and pepper to taste and set aside.
  3. Preheat your oven to 400 degrees F (200 degrees C).
  4. Heat oil in a large oven-safe skillet over medium-high heat. Season the chicken with salt and pepper and place it in the hot skillet, cooking for about 1-2 minutes on each side until golden brown.
  5. Add the balsamic sauce to the pan, bringing it to a simmer as you scrape up any brown bits from the bottom.
  6. Remove the pan from heat and layer the tomato mozzarella mixture over the chicken.
  7. Bake uncovered for 18-23 minutes or until the chicken is fully cooked through (165F internal temperature). Allow it to rest for 5 minutes before serving.

Pro Tips for Perfecting Your Dish

To make your One Pan Balsamic Chicken even better, consider the following expert tips:

  • Even Thickness: Pound your chicken to ensure even cooking, which helps avoid dry spots.
  • Marination: For deeper flavor, marinate the chicken in balsamic vinegar for up to 4 hours before cooking.
  • Don’t Skimp on Seasoning: Proper seasoning is key. Taste as you go and adjust salt and pepper accordingly.
  • Watch the Bake Time: Keep an eye on the chicken to ensure it doesn’t overcook; use a meat thermometer for precision.
  • Rest Before Serving: Allowing the chicken to rest keeps it juicy.
  • Garnish with Fresh Herbs: A sprinkle of additional fresh basil enhances flavor and presentation.
  • Include a Side: Pair it with a simple salad or crusty bread to soak up the sauce.

Common Mistakes and Troubleshooting

Even the best cooks can encounter issues. Here are some common mistakes and how to avoid them:

  • Dry Chicken: Avoid overcooking by monitoring the internal temperature closely.
  • Too Much Sauce: If your sauce is too thick, add a splash of water or broth to thin it out.
  • Burnt Garlic: Add garlic towards the end of the cooking process to prevent it from burning.
  • Using Cold Ingredients: Allow your chicken to sit at room temperature for 15-20 minutes before cooking to ensure even cooking.

Delicious Variations

Feel free to mix things up! Here are some tasty variations to consider:

  • Caprese Style: Add sliced fresh basil and balsamic glaze right before serving for a fresh twist.
  • Lemon Zest: Incorporate lemon zest into the sauce for a refreshing citrus note.
  • Spinach Addition: Toss in fresh spinach just before baking for added nutrition.
  • Spicy Kick: Add red pepper flakes to the balsamic sauce for an extra bit of heat.

Storage and Make-Ahead Instructions

This dish is perfect for meal prep. Here’s how to store it:

  • Refrigeration: Store leftovers in an airtight container for up to 4 days.
  • Freezing: This dish can be frozen in individual portions for up to 3 months. Thaw in the fridge before reheating.
  • Reheating: Gently reheat in the microwave or on the stovetop over low heat, adding a splash of broth to keep it moist.

Frequently Asked Questions

Here are some common questions about One Pan Balsamic Chicken:

  • Can I use frozen chicken? Yes, but ensure it’s fully thawed before cooking for even results.
  • What can I serve with this dish? It pairs well with rice, quinoa, or a fresh salad.
  • Can I use different types of cheese? Absolutely! Feta or goat cheese can provide a nice alternative flavor.
  • Is this dish gluten-free? Yes, all ingredients used are naturally gluten-free.
  • How do I prevent the chicken from drying out? Monitor cooking time and use a meat thermometer for best results.
  • Can I make this ahead of time? Yes, you can prepare the sauce and chicken ahead, but bake just before serving for the best texture.
  • What if I don’t have balsamic vinegar? You can substitute with apple cider vinegar, but the flavor will differ.
  • Can I add vegetables? Yes, bell peppers or zucchini can be added for extra nutrition and flavor.

Nutritional Tips and Dietary Adaptations

This One Pan Balsamic Chicken is not only delicious but can also be adapted to fit various dietary needs:

  • Low-Carb Option: Serve with a side of sautéed vegetables instead of rice.
  • Dairy-Free: Omit the mozzarella or use a dairy-free cheese alternative.
  • Keto-Friendly: Use erythritol or another low-carb sweetener instead of honey.

Essential Equipment Recommendations

To make this dish, you’ll need some basic kitchen tools:

  • Large Oven-Safe Skillet: A good quality skillet is essential for browning the chicken and finishing in the oven.
  • Whisk: For blending the sauce ingredients smoothly.
  • Meat Thermometer: To ensure your chicken is cooked perfectly.
  • Cutting Board and Knife: For chopping ingredients.

Serving Suggestions

When it comes to serving this One Pan Balsamic Chicken, consider these ideas:

  • Fresh Salad: A mixed greens salad with a light vinaigrette complements the rich flavors of the chicken.
  • Crusty Bread: A loaf of rustic bread is perfect for soaking up the balsamic sauce.
  • Roasted Vegetables: Pair it with seasonal roasted vegetables for a complete meal.

Conclusion

This One Pan Balsamic Chicken is more than just a meal; it’s an experience that brings the family together. With its ease of preparation, delightful flavors, and comforting nature, it’s bound to become a staple in your home. So, gather your loved ones, savor the moments, and enjoy this celebration of simple, heartfelt cooking. Happy cooking from your neighborly chef, Tom!

One Pan Balsamic Chicken

Prep Time 10 minutes
Cook Time 25 minutes
Total Time 35 minutes
Servings 4 servings
Calories 450
A flavorful and easy-to-make dish featuring tender chicken topped with fresh mozzarella and tomatoes, all cooked in a balsamic glaze.

Ingredients

Sauce ingredients

  • 1/3 cup balsamic vinegar
  • 2 Tbsp. honey
  • 2 Tbsp. oil, such as avocado or olive oil
  • 2 garlic cloves garlic, minced
  • 1 tsp. Italian seasoning
  • 1 Tbsp. Dijon mustard
  • 8 oz. grape tomatoes, halved
  • 8 oz. fresh mozzarella balls (ciliegine or pearls)
  • 2 Tbsp. finely chopped fresh basil
  • 2 lb. boneless, skinless, chicken breasts, pounded to even thickness
  • 2 Tbsp. avocado oil or other high-heat oil
  • to taste Kosher salt and fresh black pepper

Instructions 

  • Whisk sauce ingredients, season with salt and pepper, and set aside.
  • Toss tomatoes, mozzarella, and basil; season and set aside.
  • Preheat oven to 400°F (200°C). Heat oil in a skillet, cook chicken until golden, then add balsamic sauce and simmer.
  • Remove from heat, top chicken with tomato-mozzarella mixture, and bake for 18-23 minutes.
  • Rest for 5 minutes before serving.

Notes

Use a meat thermometer to ensure chicken reaches 165°F for safety.
Calories: 450kcal
Cost: $15
Course: Main Course
Cuisine: Italian
Keyword: chicken

Gather ’round, friends! Today, we’re diving into the heart of home cooking with a delightful recipe that brings warmth and joy to your dinner table: Healthy Sesame Chicken. This dish not only celebrates the simple yet profound flavors of chicken but also embraces the wholesome ingredients that make it a beloved staple in many households. Let’s roll up our sleeves and explore how to make this comforting meal that’s sure to become a favorite in your home.

Why You’ll Love This Recipe

This isn’t just any sesame chicken; it’s a dish that’s bursting with flavor and health benefits. Here’s why you’ll adore it:

  • Quick and Easy to Prepare: This healthy sesame chicken can be whipped up in under 30 minutes, making it perfect for busy weeknights.
  • Wholesome Ingredients: Made with lean chicken breast, fresh vegetables, and a homemade sauce that’s free from artificial additives.
  • Customizable Flavors: You can easily adjust the ingredients to suit your taste buds or dietary needs, ensuring everyone at the table is happy.
  • Perfect for Meal Prep: This dish stores well, making it a fantastic option for meal prepping—just double the recipe and enjoy leftovers throughout the week!
  • Family-Friendly: Even the pickiest eaters will fall in love with this savory dish, making it a hit for family dinners.

Ingredients

Here’s what you’ll need to create this scrumptious dish:

  • 1 lb boneless, skinless chicken breasts, cut into 1-inch cubes
  • 1/2 tablespoon avocado oil (or your choice of cooking oil)
  • 1/4 cup coconut aminos (for a soy sauce alternative)
  • 1 tablespoon honey (or maple syrup for a vegan option)
  • 1 tablespoon toasted sesame oil
  • 1/2 teaspoon ground ginger
  • 1 tablespoon garlic cloves, minced
  • 2 tablespoons rice vinegar
  • 1/4 teaspoon black pepper
  • 1 teaspoon lime zest (zest of one lime)
  • 1 tablespoon lime juice (juice of one lime)
  • 1 tablespoon sesame seeds (for garnish)
  • 2 cups cooked green beans
  • 1 cup cooked white rice (or cauliflower rice for a low-carb option)

Ingredient Substitutions

Don’t have everything on hand? Here are a few simple substitutions you can make:

  • Chicken: Substitute with tofu or shrimp for a different protein option.
  • Coconut Aminos: If you don’t have coconut aminos, use low-sodium soy sauce.
  • Honey: Agave syrup or maple syrup can work well in its place.
  • Rice Vinegar: Apple cider vinegar can be used if rice vinegar is unavailable.
  • Vegetables: Feel free to add bell peppers, broccoli, or snap peas to the mix.

How to Make Sesame Chicken

Let’s get cooking! Follow these easy steps to create your healthy sesame chicken:

  1. Prep your chicken by cutting it into small cubes. Cook the white rice and green beans according to package directions.
  2. In a large pan, heat the avocado oil over medium-high heat for about 1 minute. Add the chicken cubes and sauté until browned on all sides, approximately 10-12 minutes.
  3. While the chicken is cooking, whisk together the sauce ingredients in a bowl: coconut aminos, honey, sesame oil, ground ginger, minced garlic, rice vinegar, black pepper, lime zest, and lime juice.
  4. Once the chicken is cooked through, remove it from the pan and set aside.
  5. Pour the sauce mixture into the hot pan (no need to clean it!) and cook for 3-5 minutes over medium-high heat until it starts to bubble, stirring consistently until it thickens slightly.
  6. Add the cooked chicken back into the pan, coating it well with the sauce.
  7. Serve the sesame chicken over cooked rice and green beans, garnished with sesame seeds.

Pro Tips for the Perfect Sesame Chicken

Juicy cubed chicken coated in sesame seeds, served with cooked green beans and white rice.

Here are some expert insights to elevate your sesame chicken experience:

  • Use Fresh Ingredients: Fresh garlic and ginger will enhance the flavor profile of your dish.
  • Don’t Overcook the Chicken: Keep an eye on your chicken while cooking—overcooking can lead to dryness.
  • Adjust the Sauce to Taste: If you prefer a sweeter sauce, add a touch more honey or maple syrup.
  • Let it Rest: Allow the chicken to rest for a few minutes before serving for the best texture.
  • Make it Spicy: Add red pepper flakes or sriracha to the sauce for an extra kick!
  • Experiment with Veggies: Mix in your favorite vegetables to make the dish more colorful and nutritious.
  • Pair with Cauliflower Rice: For a low-carb option, serve with cauliflower rice instead of white rice.
  • Garnish Generously: A sprinkle of green onions or cilantro can add a fresh touch to your dish.

Common Mistakes and Troubleshooting

Even the best cooks can run into problems. Here are some common mistakes and how to avoid them:

  • Chicken Sticking to the Pan: Ensure your pan is hot enough and use enough oil to prevent sticking.
  • Too Salty Sauce: If your sauce turns out too salty, balance it with a little sugar or honey.
  • Sauce Not Thickening: If the sauce isn’t thickening, allow it to cook longer and ensure you’re stirring consistently.
  • Overcooked Veggies: Add vegetables towards the end of cooking to retain their crunchiness.

Variations on Sesame Chicken

Want to switch things up? Here are some variations you might enjoy:

  • Orange Sesame Chicken: Incorporate orange juice and zest for a citrusy twist.
  • Cashew Sesame Chicken: Toss in some roasted cashews for added crunch and flavor.
  • Teriyaki Sesame Chicken: Replace the sauce with a homemade teriyaki mix for a sweet alternative.
  • Spicy Sesame Chicken: Add sliced jalapeños or red chili paste to the sauce for a fiery kick.

Storage and Make-Ahead Instructions

Planning ahead? Here’s how to store and prep your sesame chicken:

  • Refrigeration: Store leftovers in an airtight container in the fridge for up to 4 days.
  • Freezing: You can freeze the cooked chicken in a freezer-safe container for up to 3 months. Just thaw and reheat when ready to serve.
  • Meal Prep: Prepare the chicken and sauce ahead of time, then combine and cook fresh when you’re ready to eat.

Frequently Asked Questions

Got questions? We’ve got answers! Here are some common inquiries regarding sesame chicken:

  • Can I use chicken thighs instead of breasts? Absolutely! Thighs can add more flavor and juiciness.
  • Is this recipe gluten-free? Yes, as long as you use coconut aminos instead of soy sauce, it’s gluten-free.
  • Can I add more vegetables? Definitely! Bell peppers, broccoli, and carrots are great additions.
  • What can I serve with sesame chicken? It pairs beautifully with rice, quinoa, or even a fresh green salad.
  • Can I substitute honey for a vegan option? Yes, maple syrup or agave nectar works well.
  • How spicy is this recipe? It’s mild, but you can add spice to your preference.
  • What’s the best way to reheat leftovers? Reheat in a pan over low heat to maintain the chicken’s moisture.
  • Can I make this dish in advance? Yes, you can prepare it a day ahead and reheat when serving.

Nutrition Tips and Dietary Adaptations

This healthy sesame chicken is not only delicious but also nutritious. Here are some nutrition tips to consider:

  • Protein Power: Chicken is an excellent source of lean protein, essential for muscle recovery and growth.
  • Healthy Fats: Avocado oil and sesame oil provide healthy fats that are beneficial for heart health.
  • Fiber Boost: Add more veggies for fiber, which aids digestion and keeps you full longer.
  • Low Sugar: This recipe is naturally lower in sugar compared to store-bought sauces, making it a healthier choice.

Equipment Recommendations

Here’s what you’ll need to whip up this tasty sesame chicken:

  • Non-Stick Skillet: Ideal for sautéing the chicken without sticking.
  • Whisk: For mixing your sauce ingredients together seamlessly.
  • Cutting Board: Essential for prepping your chicken and vegetables safely.
  • Measuring Cups and Spoons: To ensure your ingredient ratios are just right.

Serving Suggestions

When it comes to serving your sesame chicken, think about pairing it with:

  • White Rice: A classic choice that soaks up the delicious sauce.
  • Cauliflower Rice: A low-carb alternative that’s just as satisfying.
  • Steamed Vegetables: Fresh green beans, broccoli, or snap peas make a lovely complement.
  • Fresh Herbs: Garnish with chopped green onions or cilantro for a burst of freshness.

As we wrap up this culinary journey, I hope you feel inspired to bring the flavors of this Healthy Sesame Chicken to your dinner table. It’s not just a meal; it’s a gathering of flavors, memories, and the love of home cooking. Remember, cooking doesn’t have to be complicated; it’s about enjoying the process and sharing the fruits of your labor with those you care about. Happy cooking, friends!

Healthy Sesame Chicken

Prep Time 10 minutes
Cook Time 15 minutes
Total Time 25 minutes
Servings 4 servings
Calories 350
A flavorful and healthy sesame chicken dish that combines tender chicken with a savory sauce, served over rice and green beans.

Ingredients

Protein

  • 1 lb boneless, skinless chicken breasts (cut into 1 inch cubes)
  • 1/2 tablespoon avocado oil
  • 1/4 cup coconut aminos
  • 1 tablespoon honey
  • 1 tablespoon toasted sesame oil
  • 1/2 teaspoon ground ginger
  • 1 tablespoon garlic cloves (minced)
  • 2 tablespoons rice vinegar
  • 1/4 teaspoon black pepper
  • 1 teaspoon lime zest (zest of one lime)
  • 1 tablespoon lime juice (juice of one lime)
  • 1 tablespoon sesame seeds (for garnish)
  • 2 cups cooked green beans
  • 1 cup cooked white rice

Instructions 

  • Cut chicken into 1-inch cubes and cook rice and green beans.
  • Heat avocado oil in a pan, cook chicken until browned, then set aside.
  • Whisk together coconut aminos, honey, sesame oil, ginger, garlic, vinegar, lime zest, and lime juice to make the sauce.
  • Cook sauce in the pan until it thickens, then add chicken to coat in sauce.
  • Serve the sesame chicken over rice and green beans, garnished with sesame seeds.

Notes

For extra flavor, toast the sesame seeds before garnishing.
Calories: 350kcal
Cost: $15
Course: Main Course
Cuisine: Asian
Keyword: chicken

Welcome to a Flavorful Journey with Garlic Parmesan Chicken and Potatoes

There’s something truly special about gathering around the dinner table, sharing hearty meals filled with warmth and love. This Garlic Parmesan Chicken and Potatoes recipe embodies that spirit, bringing together juicy chicken, tender potatoes, and the comforting flavors of garlic and parmesan. With just one pan, you can create a meal that feels like home, making it perfect for busy weeknights or cozy family gatherings.

Why You’ll Love This Recipe

This one-pan dinner is not just easy to prepare; it’s also packed with benefits that make it a go-to choice for any home cook:

  • Simple Preparation: With minimal prep time, you can have this meal on the table in under an hour.
  • Flavor Explosion: The combination of garlic, parmesan, and spices ensures every bite is bursting with flavor.
  • Versatile Ingredients: This recipe allows for ingredient substitutions, making it adaptable to what you have on hand.
  • Easy Cleanup: Cooking everything on one pan means less mess and hassle afterward.
  • Comfort Food Appeal: This dish evokes feelings of warmth and nostalgia, making it perfect for family dinners.

Ingredient Breakdown

Before diving into the cooking process, let’s take a closer look at what you’ll need:

  • 4 boneless, skinless chicken breasts: For a leaner option, but feel free to swap in thighs for juiciness.
  • 1 teaspoon Italian seasoning: A fragrant blend that enhances the dish’s flavor profile.
  • ½ teaspoon smoked paprika: Adds a subtle smokiness without overwhelming heat.
  • 1.5 pounds baby Yukon Gold or red potatoes: Their creamy texture makes them perfect for roasting.
  • 4 cloves garlic, minced: Fresh is best for maximum flavor.
  • ⅓ cup grated Parmesan cheese: This brings a savory depth to the dish.
  • Olive oil, salt, and pepper: Essential for seasoning and creating that crispy texture.

Cooking Steps to Deliciousness

A close-up view of golden garlic parmesan chicken and halved Yukon Gold potatoes, on a rustic plate.

Now that you have the ingredients ready, let’s walk through the steps to create this delightful dish:

  1. Preheat the Oven: Start by preheating your oven to 400°F (200°C). Line a large baking sheet with parchment paper or lightly grease it.
  2. Prepare the Chicken: Pat the chicken dry with paper towels. In a small bowl, combine the Italian seasoning, smoked paprika, salt, and pepper. Rub the chicken with olive oil and coat evenly with the seasoning mixture.
  3. Prepare the Potatoes: In a large bowl, toss the halved potatoes with olive oil, minced garlic, parmesan, salt, and pepper until well coated.
  4. Assemble the Pan: Arrange the seasoned chicken on one side of the baking sheet and spread the potatoes on the other side in a single layer for optimal crispiness.
  5. Bake: Roast in the oven for 25-30 minutes, flipping the potatoes halfway through cooking. Ensure the chicken reaches an internal temperature of 165°F (74°C).
  6. Optional Finishing Touch: In the last 5 minutes of cooking, sprinkle extra parmesan over the chicken for a golden crust. Broil if desired.
  7. Garnish and Serve: Remove from the oven, sprinkle with fresh parsley, and serve hot.

Pro Tips for Perfect Garlic Parmesan Chicken

Here are some expert insights to ensure your dish turns out perfectly:

  • Use Fresh Ingredients: Fresh garlic and quality parmesan cheese can elevate your dish significantly.
  • Don’t Overcrowd the Pan: Giving chicken and potatoes enough space ensures even cooking and browning.
  • Experiment with Seasonings: Feel free to customize the spice blend to suit your taste.
  • Let the Chicken Rest: Allowing it to rest for a few minutes after cooking keeps it juicy.
  • Pair with a Side Salad: A fresh salad balances the richness of the dish.
  • Store Leftovers Properly: Keep any leftovers in an airtight container in the fridge.

Common Mistakes and Troubleshooting

Even the best cooks can run into a few snags. Here are some common mistakes to avoid:

  • Overcooking the Chicken: Always use a meat thermometer to check for doneness.
  • Undercooking the Potatoes: Cut them into uniform sizes to ensure they cook evenly.
  • Using Cold Ingredients: Letting the chicken come to room temperature before cooking helps it cook evenly.

Variations to Spice Things Up

Feel free to get creative with these variations:

  • Add Vegetables: Toss in some broccoli or carrots for added nutrition and color.
  • Try Different Cheeses: Swap parmesan for mozzarella or feta for a new twist.
  • Make It Spicy: Add crushed red pepper flakes to the seasoning for a kick.
  • Herb Infusion: Experiment with fresh herbs like rosemary or thyme for added flavor.

Storage and Make-Ahead Instructions

If you want to prepare this dish in advance:

  • Make Ahead: Marinate the chicken and prep the potatoes a day ahead. Store them in the fridge until ready to bake.
  • Storage: Leftovers can be stored in an airtight container in the fridge for up to 3 days. Reheat in the oven for best results.

Frequently Asked Questions

Here are some common questions about this recipe:

  • Can I use frozen chicken? Yes, but ensure it’s fully thawed before cooking.
  • What if I don’t have smoked paprika? Regular paprika can be used; just note it won’t have the same smoky flavor.
  • Can I make this recipe in advance? Absolutely! Prep and marinate ahead of time for convenience.
  • What side dishes pair well? A simple green salad or roasted vegetables make great sides.
  • Can I use other types of potatoes? Yes, feel free to experiment with red or sweet potatoes.
  • How do I know when the chicken is done? Use a meat thermometer to check for an internal temperature of 165°F (74°C).
  • Can I cook this in an air fryer? Yes, adjust the cooking time based on your air fryer’s instructions.
  • Is this recipe gluten-free? Yes, all the ingredients are naturally gluten-free.

Nutritional Tips and Dietary Adaptations

This dish can be adapted to fit various dietary needs:

  • Lower Carb Option: Replace potatoes with cauliflower for a lower-carb version.
  • Dairy-Free: Omit cheese or use a dairy-free alternative.
  • Whole30/Paleo: Skip the cheese and check labels for compliant spices.

Equipment Recommendations

To make this recipe seamless, here are some handy tools:

  • Large Baking Sheet: A sturdy baking sheet is essential for even cooking.
  • Meat Thermometer: Helps ensure your chicken is perfectly cooked.
  • Mixing Bowls: Useful for preparing your chicken and potatoes.

Serving Suggestions

When it’s time to serve, consider these ideas:

  • Garnish: Fresh parsley not only adds color but also a burst of flavor.
  • Serve with Sauce: A drizzle of balsamic glaze or a squeeze of lemon brightens the dish.
  • Pair with Wine: A light white wine complements the garlic and parmesan beautifully.

In conclusion, this Garlic Parmesan Chicken and Potatoes recipe is a testament to the beauty of simple cooking. With just a few ingredients and one pan, you can create a delicious meal that brings everyone together. So, roll up your sleeves, gather your loved ones, and enjoy the magic of home-cooked comfort food that not only satisfies the belly but also warms the heart.

Your New Favorite Weeknight Feast: Garlic Parmesan Chicken and Potatoes (One-Pan Dinner)

Prep Time 10 minutes
Cook Time 30 minutes
Total Time 40 minutes
Servings 4 servings
Calories 550
A quick and flavorful one-pan dinner featuring tender chicken breasts and crispy garlic Parmesan potatoes, perfect for weeknights.

Ingredients

Chicken

  • 4 pieces boneless, skinless chicken breasts (or thighs for extra juiciness)
  • 1 teaspoon Italian seasoning
  • 0.5 teaspoon smoked paprika
  • 0.5 teaspoon salt
  • 0.25 teaspoon black pepper
  • 1 tablespoon olive oil

Potatoes

  • 1.5 pounds baby Yukon Gold or red potatoes, halved
  • 3 tablespoons olive oil
  • 4 cloves garlic, minced
  • 0.33 cup grated Parmesan cheese
  • 0.5 teaspoon salt
  • 0.25 teaspoon black pepper
  • 1 tablespoon chopped fresh parsley

Instructions 

  • Preheat oven to 400°F (200°C). Line a baking sheet.
  • Rub chicken with olive oil and seasonings. Toss potatoes with olive oil, garlic, Parmesan, salt, and pepper.
  • Arrange chicken on one side of the sheet and potatoes on the other. Roast for 25–30 minutes, flipping potatoes halfway.
  • Ensure chicken reaches 165°F (74°C). Sprinkle Parmesan and broil for a golden crust in last 5 minutes.
  • Remove from oven, garnish with parsley, and serve hot.

Notes

For extra flavor, add a squeeze of lemon before serving.
Calories: 550kcal
Cost: $15
Course: dinner
Cuisine: American
Keyword: chicken, Garlic, Parmesan, Potatoes

Gather ‘Round for a Hearty Meal: The Magic of Sheet Pan Garlic Butter Chicken

Welcome to the kitchen, my friends! Today, we’re diving into a dish that isn’t just about feeding the body but nourishing the soul—Sheet Pan Garlic Butter Chicken and Veggies. This delightful recipe encapsulates the essence of family gatherings and the simplicity of home-cooked meals. When you roast all these ingredients together, you create a symphony of flavors that fills your home with warmth and comfort, just like a hug from an old friend. Let’s explore why this recipe is a must-try, how to make it, and all the little tips and tricks that will ensure your dinner is a hit.

Why You’ll Love This Sheet Pan Garlic Butter Chicken

This dish is a true one-pan wonder! Here are five reasons why you’ll want to make it a staple in your kitchen:

  • Easy Cleanup: With everything cooked on one sheet pan, you spend less time washing dishes and more time enjoying your meal.
  • Flavor-Packed: The combination of garlic butter and roasted vegetables makes every bite a burst of flavor.
  • Family-Friendly: This meal is perfect for picky eaters and can be easily adjusted to suit everyone’s tastes.
  • Quick Preparation: With just a few steps, you can have a delicious dinner ready in no time, making it ideal for busy weeknights.
  • Versatile Ingredients: You can switch up the veggies or chicken cuts based on what you have on hand, making it a flexible meal option.

Ingredients You’ll Need

Gathering the freshest ingredients is key to any great meal. Here’s what you’ll need for our Sheet Pan Garlic Butter Chicken:

  • 2 boneless skinless chicken breasts (or thighs): Choose thighs for a juicier option or breasts for a leaner meal.
  • 1 tbsp olive oil: Helps to crisp up the veggies and adds a heart-healthy fat.
  • 1 tsp garlic powder: A quick way to infuse that garlic flavor without the fuss of chopping.
  • 1 tsp paprika: Adds a subtle smokiness and beautiful color to the dish.
  • ½ tsp salt: Essential for enhancing the natural flavors.
  • ½ tsp black pepper: A pinch of heat to balance the richness of the butter.
  • 4 tbsp butter (melted): The star of our garlic butter sauce, adding richness and depth.
  • 3 cloves garlic (minced): Fresh garlic brings a punch of flavor that you just can’t beat.
  • 1 tbsp lemon juice: Brightens the dish and balances the richness.
  • 1 tsp Italian seasoning: A blend of herbs that complements the chicken beautifully.
  • 1 lb baby potatoes (halved): These little gems roast to perfection and soak up all the flavors.
  • 1 ½ cups broccoli florets: Adds color and nutrition to your meal.
  • 1 bunch asparagus (trimmed): A tender veggie that roasts quickly and tastes divine.
  • ½ tsp additional salt and pepper: For seasoning veggies before roasting.

How to Make Sheet Pan Garlic Butter Chicken and Veggies

Side view of a plated sheet pan meal featuring chicken breasts and vibrant veggies.

Let’s roll up our sleeves and get cooking! Here’s a step-by-step guide to creating this mouth-watering dish:

Step 1: Preheat Your Oven

Start by preheating your oven to 400°F (200°C) and lining a large sheet pan with parchment paper. This makes for easier cleanup and prevents sticking.

Step 2: Prepare the Chicken

Pat the chicken dry with paper towels. Season both sides generously with garlic powder, paprika, salt, and pepper. This ensures that every bite is flavorful.

Step 3: Make the Garlic Butter Sauce

In a small bowl, melt the butter and stir in the minced garlic, lemon juice, and Italian seasoning. This sauce is the magic that ties everything together.

Step 4: Roast the Baby Potatoes

Spread the halved baby potatoes on the pan. Drizzle with olive oil, and sprinkle with salt and pepper. Roast them in the oven for about 15 minutes, giving them a head start on cooking.

Step 5: Add Chicken and Veggies

After the potatoes have roasted, add the seasoned chicken breasts to the pan. Toss the broccoli and asparagus in half of the garlic butter sauce, then arrange them around the chicken.

Step 6: Final Roasting

Roast everything together for an additional 20-25 minutes or until the chicken reaches an internal temperature of 165°F (75°C). In the final 5 minutes, drizzle the remaining garlic butter sauce over the chicken and veggies. If you want a crispy top, broil for 2-3 minutes.

Pro Tips for Success

To make this dish even better, keep these expert insights in mind:

  • Chicken Temperature: Always check that your chicken has reached 165°F (75°C) using a meat thermometer for safe consumption.
  • Veggie Variations: Feel free to use whatever seasonal vegetables you have on hand, such as carrots or bell peppers.
  • Butter Substitutes: For a lighter option, use ghee or olive oil instead of butter in the sauce.
  • Marinate Ahead: If you have time, marinate the chicken in the garlic butter sauce for a few hours or overnight for more depth of flavor.
  • Batch Cooking: Double the recipe and cook two sheet pans at once to save time for later meals.
  • Storage: Leftovers can be stored in an airtight container in the fridge for up to 3 days.
  • Reheating: Reheat in the oven for best results, aiming for a crispy texture.
  • Meal Prep: This recipe is great for meal prep. You can cook it up and portion it out for lunches throughout the week.

Common Mistakes and Troubleshooting

Even the best chefs can run into a snag or two. Here’s how to avoid some common pitfalls:

  • Overcrowding the Pan: If there’s too much on the sheet pan, the food will steam instead of roast. Give everything enough space to breathe.
  • Inconsistent Cooking: Cut the veggies to similar sizes to ensure even cooking. This way, everything finishes at the same time.
  • Underseasoning: Don’t be shy with seasonings. Tastes can be enhanced with just a pinch of salt or a sprinkle of herbs.

Variations to Try

Want to mix things up? Here are a few tasty variations to keep it fresh:

  • Lemon Herb Chicken: Add zest from a lemon and fresh herbs like rosemary or thyme for a bright flavor profile.
  • Spicy Garlic Chicken: Mix in some red pepper flakes or a dash of hot sauce in the garlic butter sauce for a kick.
  • Asian-Inspired: Swap out the garlic butter for soy sauce and sesame oil, then add snap peas and bell peppers for an Asian twist.
  • Cheesy Chicken Bake: In the last few minutes of baking, sprinkle some shredded cheese on top for a gooey, cheesy finish.

Storage and Make-Ahead Instructions

This dish is perfect for meal prep! Here’s how to store it:

  • Refrigerate: Store leftover chicken and veggies in an airtight container for up to 3 days.
  • Freeze: You can freeze the cooked chicken and veggies for up to a month. Thaw in the fridge before reheating.
  • Make Ahead: Prepare the garlic butter sauce and chop the veggies a day in advance. Just assemble and bake when you’re ready to eat!

FAQs About Sheet Pan Garlic Butter Chicken and Veggies

Here are some common questions that folks have about this recipe:

  • Can I use frozen chicken? Yes, but ensure it’s fully thawed before baking for even cooking.
  • What sides go well with this dish? Try serving with crusty bread, rice, or a fresh salad to round out the meal.
  • Can I add more vegetables? Absolutely! Feel free to throw in your favorites, just adjust cooking times as needed.
  • How do I know when the chicken is done? Use a meat thermometer to check for an internal temperature of 165°F (75°C).
  • What if I don’t have garlic powder? You can substitute with fresh minced garlic, just double the amount to taste.
  • Is this recipe gluten-free? Yes, all the ingredients are naturally gluten-free, but ensure your seasonings are certified gluten-free.
  • Can I make this recipe in advance? Yes, you can prep the ingredients and store them in the fridge, then bake when ready to serve.
  • What’s the best way to reheat leftovers? Reheat in the oven at 350°F (175°C) for about 15 minutes or until warmed through.

Nutritional Tips and Dietary Adaptations

This dish can easily fit into a variety of dietary preferences:

  • Low-Carb Option: Substitute baby potatoes with cauliflower florets for a lower-carb alternative.
  • Dairy-Free: Use olive oil instead of butter and skip the cheese variations.
  • Vegetarian Version: Swap the chicken for hearty veggies like eggplant or mushrooms and add chickpeas for protein.

Essential Equipment Recommendations

To make your cooking experience seamless, here are a few kitchen essentials:

  • Sheet Pan: A heavy-duty sheet pan ensures even cooking and browning.
  • Meat Thermometer: An invaluable tool for checking chicken doneness.
  • Parchment Paper: This makes for easy cleanup and prevents sticking.
  • Mixing Bowls: For preparing sauces and seasoning your ingredients.

Serving Suggestions

When it’s time to serve, consider these ideas:

  • Garnishes: A sprinkle of fresh parsley or chives adds a lovely touch of color and freshness.
  • Accompaniments: Pair with a side of crusty bread or a simple green salad for a complete meal.
  • Presentation: Serve directly from the sheet pan for a rustic feel, or plate individually for a more formal touch.

Final Thoughts

Sheet Pan Garlic Butter Chicken and Veggies is more than just a meal; it’s an experience that brings family together around the table. With its simple preparation, delicious flavors, and comforting aromas, it’s bound to become a cherished recipe in your home. So gather your loved ones, share a meal, and savor the moments that matter most. Trust me, this dish will quickly become a favorite. Happy cooking!

Sheet Pan Garlic Butter Chicken and Veggies

Prep Time 10 minutes
Cook Time 30 minutes
Total Time 40 minutes
Servings 4 servings
Calories 650
A delicious and easy sheet pan meal featuring tender chicken, roasted potatoes, and fresh vegetables all coated in flavorful garlic butter.

Ingredients

Protein

  • 2 pieces boneless skinless chicken breasts (or thighs)
  • 1 tbsp olive oil
  • 1 tsp garlic powder
  • 1 tsp paprika
  • ½ tsp salt
  • ½ tsp black pepper
  • 4 tbsp butter melted
  • 3 cloves garlic minced
  • 1 tbsp lemon juice
  • 1 tsp Italian seasoning

Vegetables

  • 1 lb baby potatoes halved
  • 1 ½ cups broccoli florets
  • 1 bunch asparagus trimmed
  • 1 tbsp olive oil
  • ½ tsp salt
  • ½ tsp black pepper

Instructions 

  • Preheat oven to 400°F (200°C). Pat chicken dry and season with garlic powder, paprika, salt, and pepper.
  • Melt butter and stir in garlic, lemon juice, and Italian seasoning.
  • Roast potatoes for 15 minutes, then add chicken and toss vegetables with half the garlic butter. Arrange around chicken.
  • Roast for 20-25 minutes until chicken reaches 165°F. Drizzle remaining garlic butter in last 5 minutes. Optional broil for crispy finish.
  • Serve hot and enjoy!

Notes

For extra flavor, sprinkle fresh herbs before serving.
Calories: 650kcal
Cost: $15
Course: Main Course
Cuisine: American
Keyword: chicken, sheet pan, Vegetables

The Comfort of Oven Baked Chicken Breasts

Welcome, friend! Today, we’re diving into a dish that’s as comforting as a hug from an old friend—the oven baked chicken breast. This simple recipe not only highlights the tender juiciness of chicken but also brings the family together around the dinner table. Whether it’s a weekday meal or a Sunday gathering, oven baked chicken is a staple that never disappoints. Let’s explore why this recipe is a must-have in your kitchen.

Why You’ll Love This Recipe

  • Simple Ingredients: With just a handful of pantry staples, you can create a dish that feels like home. Fresh chicken breasts, olive oil, and a few spices are all you need.
  • Quick to Prepare: This chicken dish comes together in under 30 minutes of prep time, making it perfect for busy weeknights.
  • Versatile Flavors: You can easily adapt the seasoning to suit your family’s taste buds, whether you like it spicy, herby, or sweet.
  • Healthier Option: Baking chicken is a healthier alternative to frying, keeping it moist without the extra fat.
  • Leftovers Galore: This recipe is perfect for meal prep, yielding leftovers that taste even better the next day!

Ingredient Breakdown

Let’s look at what you’ll need to create these delicious oven baked chicken breasts.

  • 4 boneless, skinless chicken breasts (about 6–8 ounces each): This is the star of the show! Look for breasts that are plump and fresh.
  • 2 tablespoons olive oil: This helps to keep the chicken moist and adds a beautiful golden color.
  • 1 teaspoon smoked paprika: For that rich, smoky flavor that’s hard to beat.
  • 1 teaspoon garlic powder: A must-have for that aromatic essence.
  • 1 teaspoon onion powder: It complements the garlic and enhances the overall flavor.
  • 1 teaspoon dried thyme: This herb adds an earthy note that rounds out the seasoning.
  • 1 teaspoon salt: Essential for bringing out the natural flavors of the chicken.
  • ½ teaspoon ground black pepper: A touch of heat to balance the flavors.
  • ½ teaspoon chili powder (optional): If you like a little kick, this is your go-to.
  • 2 tablespoons fresh lemon juice: A squeeze of lemon brightens everything up!

Pro Tips for Perfect Oven Baked Chicken

Side view of a perfectly roasted chicken breast, showing its moist texture.

Before we get to the cooking, here are some expert tips to ensure your chicken turns out perfectly every time:

  • Pat Dry: Always pat the chicken breasts dry with paper towels before seasoning. This helps the skin crisp up beautifully.
  • Season Generously: Don’t skimp on the seasoning! Rub it all over the chicken to ensure every bite is flavorful.
  • Use a Meat Thermometer: The perfect internal temperature for chicken is 165°F (74°C). A thermometer takes the guesswork out of cooking.
  • Rest the Chicken: Let your chicken rest for at least 5 minutes after baking to keep it juicy.
  • Experiment with Marinades: For added flavor, marinate your chicken breasts overnight with olive oil, lemon juice, and herbs.
  • Try Different Cooking Oils: Besides olive oil, you can use avocado oil or melted butter for a different flavor profile.
  • Cover with Foil: If you notice the chicken browning too quickly, tent it with foil to prevent burning while cooking through.
  • Don’t Overcrowd: Give each chicken breast enough space on the baking sheet for even cooking.

Common Mistakes and Troubleshooting

Even seasoned cooks can run into hiccups. Here’s how to avoid common pitfalls:

  • Undercooking: Always check the internal temperature; undercooked chicken can be unsafe to eat.
  • Overcooking: Keep a close eye on cooking times to prevent dry chicken. Remember, thinner breasts cook faster.
  • Not Enough Flavor: If the chicken tastes bland, ensure you’re seasoning adequately and consider marinating beforehand.
  • Skipping the Resting Period: Cutting into the chicken too soon will release the juices, leading to dry meat. Patience is key!

Variations on Your Oven Baked Chicken

Feeling adventurous? Here are some variations to spice up your chicken game:

  • Herb-Crusted Chicken: Add fresh herbs like rosemary or basil to the seasoning mix for a fragrant twist.
  • Honey Mustard Chicken: Mix honey and Dijon mustard to create a sweet and tangy glaze.
  • Italian Style: Sprinkle Italian seasoning and top with marinara sauce and mozzarella cheese before baking.
  • BBQ Chicken: Slather the chicken with your favorite BBQ sauce during the last 5 minutes of baking for a smoky finish.

Storage and Make-Ahead Instructions

Planning ahead? Here’s how to store your delicious chicken:

  • Refrigerate: Store leftovers in an airtight container in the fridge for up to 4 days.
  • Freeze: Wrap unbaked chicken in foil and freeze for up to 3 months. Thaw in the fridge overnight before baking.
  • Reheat: To reheat, place chicken in a preheated oven at 350°F (175°C) for about 15 minutes, or until warmed through.

Frequently Asked Questions

Let’s tackle some common questions about oven baked chicken breasts:

  • Can I use chicken thighs instead? Yes, chicken thighs will work, but the cooking time may vary.
  • What can I serve with baked chicken? Pair it with roasted vegetables, mashed potatoes, or a fresh salad for a complete meal.
  • How do I know when the chicken is done? Use a meat thermometer to check for an internal temperature of 165°F (74°C).
  • Can I marinate the chicken overnight? Absolutely! Marinating overnight can enhance flavor and tenderness.
  • Is it okay to bake chicken with the skin on? Yes, baking with skin can add extra flavor and moisture.
  • What’s the best way to reheat leftovers? Reheat in the oven or on the stovetop to maintain moisture.
  • Can I double the recipe? You can double the recipe, but ensure there’s enough space on the baking sheet for even cooking.
  • What’s the best way to cut cooked chicken? Always cut against the grain to ensure tenderness.

Nutritional Tips and Dietary Adaptations

This oven baked chicken breast recipe is not only delicious but can also be adapted to fit various dietary needs:

  • Low-Carb Option: This recipe is naturally low in carbs, perfect for keto diets.
  • Gluten-Free: All ingredients are gluten-free; just ensure any additional sauces are also gluten-free.
  • Dairy-Free: This recipe is dairy-free, making it suitable for lactose-intolerant individuals.

Equipment Recommendations

To make your cooking experience seamless, here are some kitchen essentials:

  • Baking Sheet: A sturdy baking sheet lined with parchment paper for easy cleanup.
  • Meat Thermometer: A must-have for ensuring perfectly cooked chicken every time.
  • Mixing Bowls: For preparing your seasoning mix and marinades.

Serving Suggestions

Now that your chicken is baked to perfection, it’s time to serve it up!

  • Brighten with a Salad: Serve alongside a fresh garden salad dressed with lemon vinaigrette for a burst of freshness.
  • Comforting Sides: Pair with creamy mashed potatoes or a warm baked potato for a hearty meal.
  • Garnish with Fresh Herbs: A sprinkle of fresh parsley or thyme on top can elevate the dish visually and flavor-wise.

As we wrap up, remember that cooking is not just about the food; it’s about the love and care you put into each dish. I hope this oven baked chicken breast recipe brings warmth and joy to your family gatherings. So roll up your sleeves, gather your ingredients, and let’s create some wonderful memories around the dinner table! Happy cooking, neighbor!

Oven Baked Chicken Breast

Prep Time 10 minutes
Cook Time 20 minutes
Total Time 30 minutes
Servings 4 pieces
Calories 250
Juicy, flavorful chicken breasts baked to perfection with a simple spice rub and a splash of lemon.

Ingredients

Protein

  • 4 pieces boneless, skinless chicken breasts (about 6–8 ounces each)
  • 2 tablespoons olive oil
  • 1 teaspoon smoked paprika
  • 1 teaspoon garlic powder
  • 1 teaspoon onion powder
  • 1 teaspoon dried thyme
  • 1 teaspoon salt
  • ½ teaspoon ground black pepper
  • ½ teaspoon chili powder (optional) (for a kick)
  • 2 tablespoons fresh lemon juice

Instructions 

  • Preheat oven to 400°F (200°C) and line a baking sheet.
  • Pat chicken dry, then rub with olive oil and seasonings.
  • Place chicken on baking sheet and bake for 18–22 minutes.
  • Drizzle with lemon juice and let rest for 5 minutes before serving.

Notes

Ensure chicken reaches an internal temperature of 165°F (74°C) for safety.
Calories: 250kcal
Cost: $15
Course: Main Course
Cuisine: American
Keyword: baked, chicken, easy