Author

Tom

Browsing

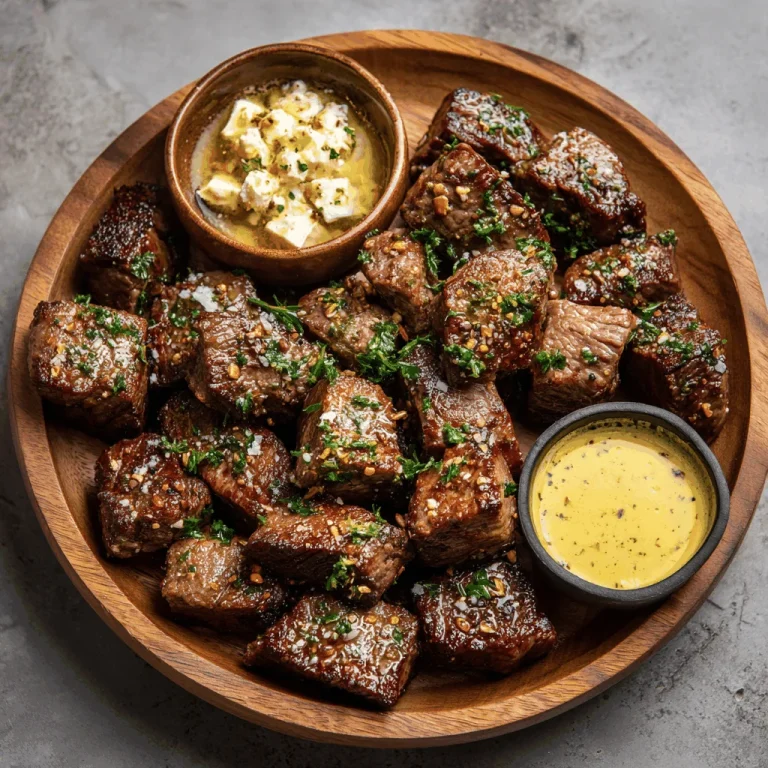
Growing up in the rural South, my life has always been intertwined with the rhythm of the farm and the warmth of a hearty meal. I remember those long summer days when my father and I would work the land, and the evenings were reserved for gathering around a table filled with dishes made with love and simplicity. Today, I want to share with you a recipe that brings back those cherished memories—Cowboy Butter Steak Bites. This dish isn’t just about food; it’s about evoking the spirit of community and the joy of sharing good times with loved ones. Every bite takes me back to those porch-side gatherings, where stories flowed as easily as the sweet tea.

Why You’ll Absolutely Love This Recipe

  • It’s so easy, it feels like a little kitchen victory!
  • Quick to prepare—perfect for those spontaneous get-togethers or cozy nights in.
  • Rich, buttery flavor that melts in your mouth.
  • A versatile dish that pairs well with just about anything—from potatoes to salads.
  • It’s a conversation starter, sure to impress your guests with its rustic charm.

Simple Ingredients for a Delicious Treat

Now, let’s talk about the stars of this dish. With just a few simple ingredients, you can whip up something truly magical. First, we have the steak—choose a top sirloin or ribeye for that tender, juicy bite. Then comes the cowboy butter, a concoction that transforms the humble steak into a flavor-packed delight. And don’t forget the olive oil, which helps to sear the steak to perfection. These ingredients are like old friends; they work together seamlessly, each enhancing the other’s strengths.

You’ll find the full ingredient list with exact measurements in the recipe card below!

Let’s Make Some Magic: Step-by-Step

Picture this: you’re standing in your kitchen, the aroma of sizzling steak filling the air. Here’s how you make it happen:

To a medium skillet over medium-high heat, add the olive oil. Once the oil is hot and shimmering, add your steak bites in a single layer. Work in batches if needed. Sear them for 1 ½ to 2 minutes without moving. Flip and cook for another 1 to 2 minutes, or until the steak reaches your desired doneness. Reduce the heat to medium. Add half of the cowboy butter directly to the pan, tossing the steak bites to coat. Cook for 1 additional minute, just until the butter is melted and the steak is evenly glazed. Melt the remaining cowboy butter in the microwave and serve on the side for dipping or drizzling.

A Few of My Favorite Tips

Here’s a little secret from my kitchen to yours: let your steak bites rest for a minute before serving. This allows the juices to redistribute, giving you that melt-in-your-mouth tenderness. And if you’re feeling adventurous, try these steak bites on the grill for a smoky twist. It’s a simple way to add extra depth to this already flavorful dish.

How I Like to Serve This

I love serving Cowboy Butter Steak Bites with a side of creamy mashed potatoes or a fresh garden salad. The buttery richness of the steak pairs beautifully with the comforting starch of the potatoes, making it a meal that feels like a warm hug. And if you’re in the mood for something different, check out my **Cowboy Butter Chicken Linguine**—it’s a delightful variation that’s sure to please.

Storing & Reheating (If There’s Any Left!)

If you happen to have leftovers, store them in an airtight container in the fridge for up to three days. To reheat, simply warm them in a skillet over medium heat until heated through. The flavors might even be more intense the next day, making for a delightful lunch or dinner.

Cowboy Butter Steak Bites

Prep Time 10 minutes
Cook Time 10 minutes
Total Time 20 minutes
Servings 4 servings
Calories 400
Deliciously seared steak bites coated in rich cowboy butter, perfect for a quick and flavorful appetizer.

Ingredients

Main Ingredients

  • 1 tablespoon extra virgin olive oil
  • 1 pound steak (cut into 1-inch pieces) (top sirloin or ribeye work well)
  • 1 recipe cowboy butter (divided)

Instructions 

  • Heat olive oil in a skillet over medium-high heat and sear steak bites for 1 ½ to 2 minutes per side.
  • Reduce heat to medium, add half of the cowboy butter, and toss to coat for 1 minute.
  • Melt remaining cowboy butter in the microwave and serve on the side.
Notes

For extra flavor, consider adding garlic or herbs to the cowboy butter.
Calories: 400kcal
Cost: $15.00
Course: Appetizer
Cuisine: American
Keyword: Steak

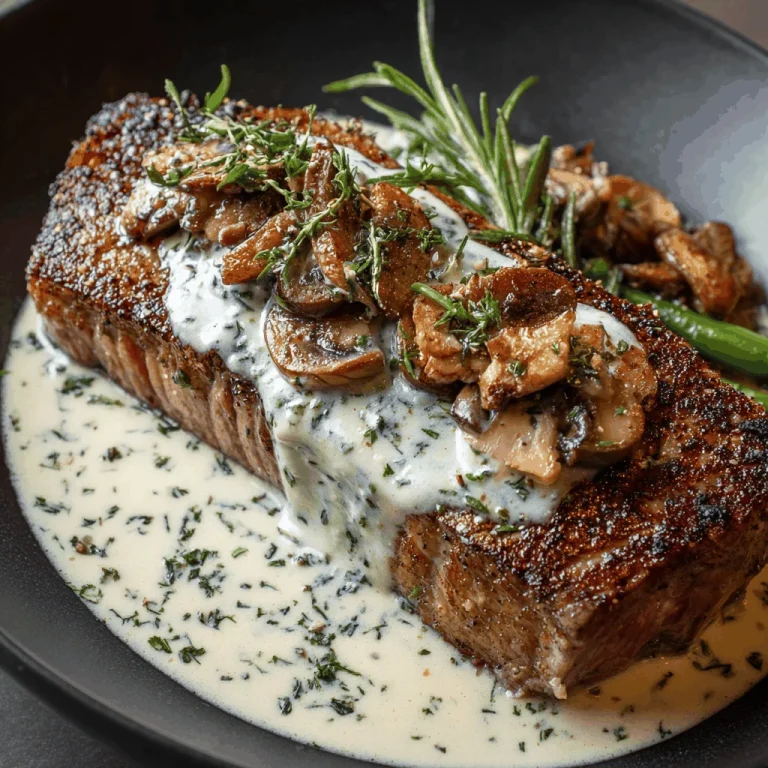
Growing up in the rural South, my life has always been intertwined with the land, the farm, and the humble chicken. Yet, every once in a while, my taste buds wander to the rich, hearty flavors of a good steak. There’s something almost magical about a perfectly seared ribeye, and when you drizzle it with a haunted bourbon garlic cream sauce, well, that’s where memories are made. This dish takes me back to those special family gatherings where laughter echoed through the air and the aroma of good cooking filled our home. Today, I’m sharing a recipe that’s sure to bring warmth to your heart and home.

Why You’ll Absolutely Love This Recipe

  • It’s so easy, it feels like a little kitchen victory every time.
  • The bourbon garlic cream sauce is a game changer—rich, creamy, and just a tad mysterious.
  • A perfect choice for a Fancy Steak Dinner that your loved ones will rave about.
  • It’s versatile enough to pair with any of your favorite Side Dishes Steak options.

Simple Ingredients for a Delicious Treat

Now, let’s talk about what makes this dish so special. Each ingredient here plays its part in creating a symphony of flavors. We start with ribeye steaks, seasoned just right with salt and pepper. The garlic cloves, minced to perfection, bring a comforting aroma that reminds me of home. And then there’s the bourbon—oh, the bourbon! It adds a depth that dances with the creamy sauce, making it one of the Best Steak Dinner Recipes you’ll ever try.

You’ll find the full ingredient list with exact measurements in the recipe card below!

Let’s Make Some Magic: Step-by-Step

First things first, season your ribeye steaks with salt and black pepper on both sides. Let them sit for about 10 minutes, just enough time to let those flavors settle in. Meanwhile, heat up some olive oil in a skillet over medium-high heat. Cook the steaks for about 4-5 minutes on each side for a nice medium-rare finish. Remember, this is your Dinner Steak, so make sure it’s just the way you like it!

Once your steaks are resting, add minced garlic to the same skillet and sauté for about a minute. Be careful not to let it burn. Next, comes the bourbon—pour it in and watch as it lifts those beautiful brown bits from the pan. Let it simmer to reduce slightly.

Reduce the heat and stir in the heavy cream, Worcestershire sauce, and Dijon mustard. Whisk it all together and let it thicken slightly. Taste the sauce and adjust the seasoning if needed. Serve by drizzling this glorious haunted bourbon garlic cream sauce over your steaks and garnish with fresh parsley.

A Few of My Favorite Tips

Here’s a little secret: Always let your steak rest after cooking. It allows the juices to redistribute, making every bite succulent. And when you’re pouring in that bourbon, take a moment to scrape up those flavorful bits at the bottom of the skillet—they’re the heart of your sauce!

How I Like to Serve This

I love serving this steak with some buttery mashed potatoes or a fresh garden salad. It’s a Dinner For Him that’s both hearty and satisfying. Pair it with a glass of your favorite red wine for a meal that’s truly unforgettable.

Storing & Reheating (If There’s Any Left!)

If you find yourself with leftovers, store the steak and sauce separately in airtight containers in the fridge. When you’re ready to enjoy it again, gently reheat the steak in a skillet over low heat and warm up the sauce in a small saucepan, stirring occasionally. Trust me, it’s just as delightful the next day!

Steak With Haunted Bourbon Garlic Cream Sauce

Prep Time 10 minutes
Cook Time 20 minutes
Total Time 30 minutes
Servings 4 servings
Calories 650
A deliciously rich steak dish topped with a creamy bourbon garlic sauce that will haunt your taste buds.

Ingredients

Meat

  • 4 pieces ribeye steaks (about 6 ounces each)
  • to taste salt
  • to taste black pepper
  • 2 tablespoons olive oil
  • 4 cloves garlic (minced)
  • 1/2 cup bourbon (use high-quality bourbon for the best flavor.)
  • 1 cup heavy cream
  • 2 tablespoons Worcestershire sauce
  • 1 tablespoon Dijon mustard
  • to taste fresh parsley (for garnish)

Instructions 

  • Season steaks with salt and pepper; let sit for 10 minutes.
  • Heat olive oil in a skillet; cook steaks for 4-5 minutes per side.
  • Sauté garlic in the same skillet for 1 minute.
  • Add bourbon, scrape skillet, and simmer for 2-3 minutes.
  • Stir in cream, Worcestershire sauce, and mustard; cook until thickened.
  • Serve steaks with sauce and garnish with parsley.

Notes

For best results, use high-quality ingredients.
Calories: 650kcal
Cost: $30
Course: Main Course
Cuisine: American
Keyword: Steak

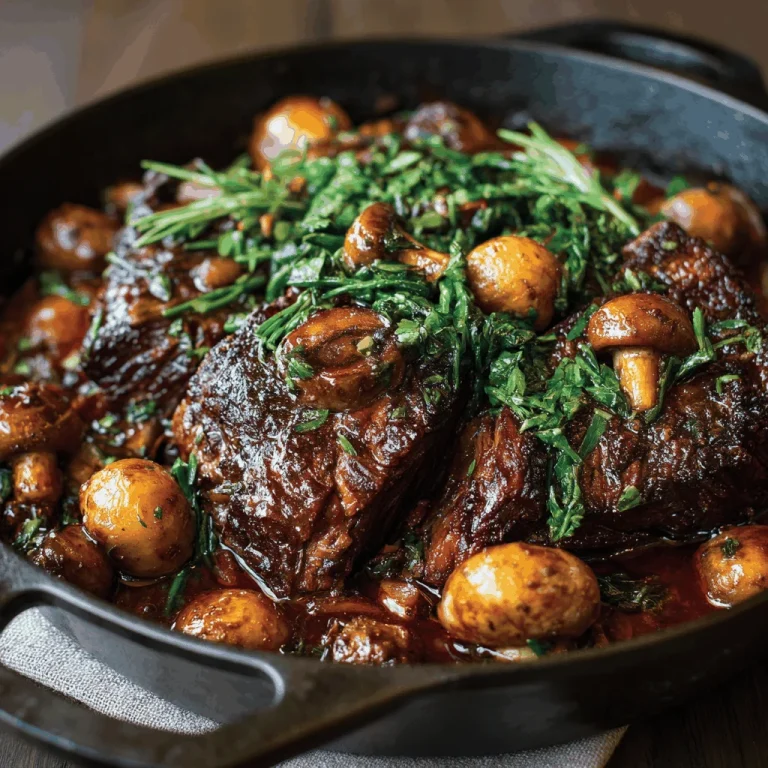
There’s something about a hearty beef stew that takes me right back to those chilly nights on our family farm. I remember my mother simmering a pot of stew on the stove, the aroma filling every corner of our home, wrapping us in warmth and love. It was a dish that brought us together after a long day of work, and to this day, it remains a comforting reminder of family and resilience. Today, I’m thrilled to share with you my beloved recipe for this soul-warming stew, a dish that’s sure to bring a taste of home to your table.

Why You’ll Absolutely Love This Recipe

  • It’s like a hug in a bowl, perfect for those chilly nights when you need a little extra warmth.
  • Simple ingredients come together to create something truly magical—no fancy techniques required.
  • It’s so easy, it feels like a little kitchen victory!
  • Perfect for family gatherings or a cozy dinner for two.
  • Leftovers (if there are any!) taste even better the next day.

Simple Ingredients for a Delicious Treat

Now, when it comes to ingredients, I believe in keeping things simple and letting each element shine. For this stew, you’ll need 1 pound of beef—whether you choose ground beef, steak, ribs, or stew meat depends on your preference. Don’t forget the seasonings to taste; a good pinch of salt, some ground black pepper, and perhaps a dash of your favorite marinade or taco seasoning can work wonders.

You’ll find the full ingredient list with exact measurements in the recipe card below!

Let’s Make Some Magic: Step-by-Step

Alright, let’s get cooking! First things first, take your beef out of the fridge. Let it sit for about 10 to 30 minutes, depending on the cut. This little trick helps the meat cook evenly. Remember, no need to wash the meat—just pat it dry, season generously, and let those flavors sink in.

Once seasoned, choose your preferred cooking method. For this stew, you’ll want to simmer those beef chunks until they’re tender, using a rich broth to bring everything together. And don’t rush it; good things come to those who wait.

A Few of My Favorite Tips

Let me share a couple of secrets with you. First, always use a meat thermometer to check your beef’s internal temperature. Aim for 140 degrees F for a juicy result. Second, let your beef rest for a few minutes after cooking. This step allows the juices to redistribute, making each bite as flavorful as the last.

How I Like to Serve This

This stew pairs beautifully with a hunk of crusty bread, perfect for soaking up every last drop of that savory broth. Sometimes, I like to serve it over a bed of fluffy mashed potatoes or alongside some hearty rice. It’s all about comfort and nourishing the soul.

Storing & Reheating (If There’s Any Left!)

Should you find yourself with leftovers, store them in an airtight container in the fridge. This stew will keep well for a few days. When you’re ready to enjoy it again, simply reheat it gently on the stove, adding a splash of broth if needed. Trust me, it’s just as delightful the next day!

55 Easy Beef Recipes

Prep Time 15 minutes
Cook Time 30 minutes
Total Time 45 minutes
Servings 4 servings
Calories 350
Discover a variety of easy beef recipes that are perfect for any occasion. From ground beef to steaks, these recipes are sure to please!

Ingredients

Beef

  • 1 pound ground beef (steak, beef ribs, or beef stew meat can be used depending on the recipe.)
  • to taste seasonings (such as keto taco seasoning or marinade depending on the recipe.)

Instructions 

  • Remove the beef from the fridge 10 to 30 minutes before cooking for even cooking.
  • Pat dry and season the beef with salt and pepper.
  • Choose the proper cooking method based on the cut of beef.
  • Cook until the internal temperature reaches 140°F (60°C) for bone-in steaks.
  • Let the beef rest for 3 to 15 minutes before slicing.

Notes

Letting the beef rest helps retain its natural juices.
Calories: 350kcal
Cost: $15.00
Course: Main Course
Cuisine: American
Keyword: beef

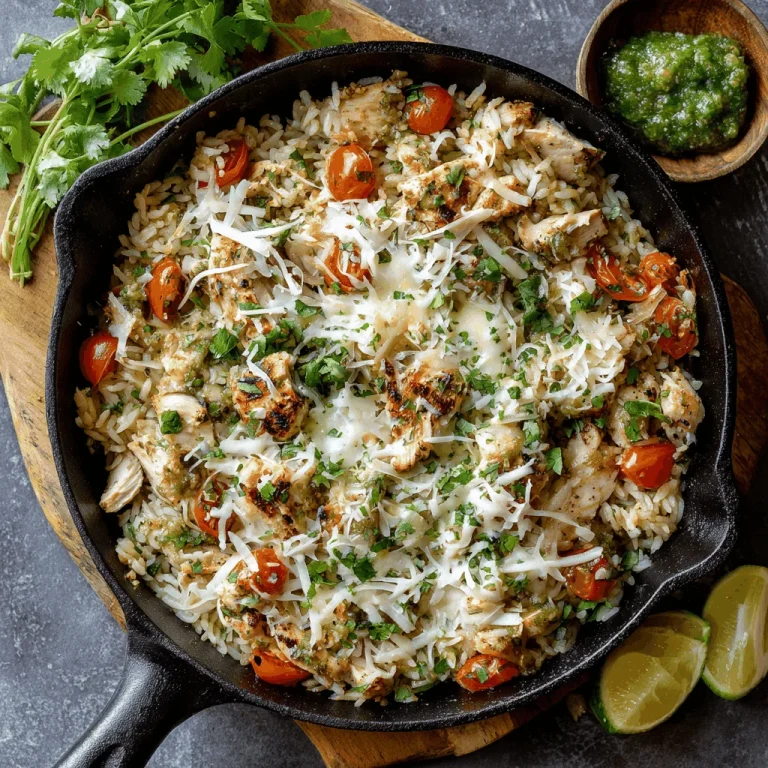
There’s something about the sound of a skillet sizzling on a stovetop that takes me back to my childhood. I’m Tom Miller, and if there’s one thing I know, it’s that a good chicken dish can turn any day around. Growing up in the rural South, my days were filled with the rhythm of farm life—collecting eggs with my dad, watching Mom whip up meals that could feed an army of cousins and neighbors. This Salsa Verde Chicken & Rice Skillet is a dish that makes me feel right at home. It’s a recipe that combines simplicity with the kind of hearty comfort that reminds me of sitting around the family table, sharing stories and laughter.

Why You’ll Absolutely Love This Recipe

  • **It’s so easy, it feels like a little kitchen victory!** You don’t need to be a seasoned chef to whip this up. Just a few steps and you’re on your way to a delicious meal.
  • **Perfect for East Week Night Dinners.** It’s quick and satisfying, making it ideal for those busy weeknights when you’re craving something home-cooked but don’t have hours to spare.
  • **A versatile dish that works as Pre Race Dinner Meals or even as part of your One Balanced Life Recipes.** Whether you’re fueling up for a big day or winding down, this dish fits the bill.
  • **The flavors are like a warm hug on a plate.** The combination of salsa verde and tender chicken is comforting and full of zest.

Simple Ingredients for a Delicious Treat

Every ingredient in this recipe tells a story. Take the humble rotisserie chicken—it’s a lifesaver for busy folks like us, offering tender, juicy meat with minimal effort. Then, there’s the salsa verde, which adds a tangy, vibrant flavor. The Monterey Jack cheese melts perfectly, adding a creamy touch that’s hard to resist. And let’s not forget the black beans and corn, bringing a touch of earthiness and sweetness that rounds out the dish beautifully. These ingredients come together to create a meal that’s more than the sum of its parts. You’ll find the full ingredient list with exact measurements in the recipe card below!

Let’s Make Some Magic: Step-by-Step

Now, let’s get that skillet going! First, you’ll want to heat a tablespoon of extra virgin olive oil in your trusty pan over medium heat. Once it’s shimmering, add in the minced garlic and diced yellow onion. There’s something about the smell of garlic and onion sizzling together that makes a kitchen feel like home, don’t you think?

Next, mix your spices in a small bowl—chili powder, sea salt, cumin, garlic powder, and a dash of black pepper. Add them to the pan to season the garlic and onion until fragrant.

Pour in the black beans, roasted corn, shredded chicken, green chiles, chicken broth, salsa verde, and rice. Stir it all together, bringing the flavors into harmony. Bring the mixture to a boil for 2-3 minutes, then lower the heat to a simmer. Put a lid on the pan and let it work its magic for about 15 minutes.

Check the rice to ensure it’s cooked through. If it needs more time, just be patient and let it simmer a bit longer. Once the rice has absorbed all that delicious liquid, turn off the heat. Sprinkle the shredded cheese over the top, replace the lid, and let it melt into gooey perfection.

Finally, garnish with fresh cilantro, slices of avocado, and a sprinkle of red pepper flakes if you’re feeling adventurous. And there you have it—comfort in a skillet.

A Few of My Favorite Tips

Here’s a little secret: if you’re a fan of extra heat, add a few jalapeño slices while you’re simmering the dish. And if you’re looking to make it a bit more filling, consider serving it with warm tortillas or a side of **The Comforting Smothered Chicken and Rice Your Family Will Love**.

How I Like to Serve This

This dish is a star on its own, but I love serving it with a simple side salad for a bit of crunch and freshness. A dollop of sour cream on top can also add a creamy contrast that’s downright delightful.

Storing & Reheating (If There’s Any Left!)

Should you find yourself with leftovers, this skillet dish stores beautifully. Just place it in an airtight container and keep it in the fridge for up to three days. When you’re ready to enjoy it again, simply reheat it on the stove over low heat, stirring occasionally until warmed through. It’s a meal that’s just as tasty the next day, making it perfect for **Meals For Leftovers**.

Salsa Verde Chicken & Rice Skillet

Prep Time 10 minutes
Cook Time 20 minutes
Total Time 30 minutes
Servings 4 servings
Calories 600
A delicious one-pan meal featuring shredded chicken, rice, and zesty salsa verde.

Ingredients

Main Ingredients

  • 2 cups shredded rotisserie chicken
  • 1 cup yellow onion, diced
  • 3 cloves garlic, minced
  • 1 tbsp extra virgin olive oil
  • 15.5 oz salsa verde
  • 1 can (4oz) diced green chiles
  • 1 cup white long grain rice
  • 2 cups chicken broth
  • 1 cup shredded monterey jack cheese
  • 1 can black beans, rinsed and drained
  • 1/2 cup roasted corn
  • 1 tsp chili powder
  • 1 tsp sea salt
  • 1/2 tsp cumin
  • 1/2 tsp garlic powder
  • dash black pepper
  • 3 tbsp cilantro
  • optional toppings: avocado, red pepper flakes

Instructions 

  • Heat olive oil in a pan over medium heat.
  • Add garlic and onion, sauté until fragrant.
  • Mix spices and add to the pan.
  • Add beans, corn, chicken, chiles, broth, salsa, and rice. Mix well.
  • Bring to a boil, then simmer for 15 minutes with lid on.
  • Top with cheese, cover to melt, then garnish with cilantro and toppings.

Notes

For extra flavor, let the dish sit for a few minutes before serving.
Calories: 600kcal
Cost: $15.00
Course: Main Course
Cuisine: Mexican
Keyword: chicken

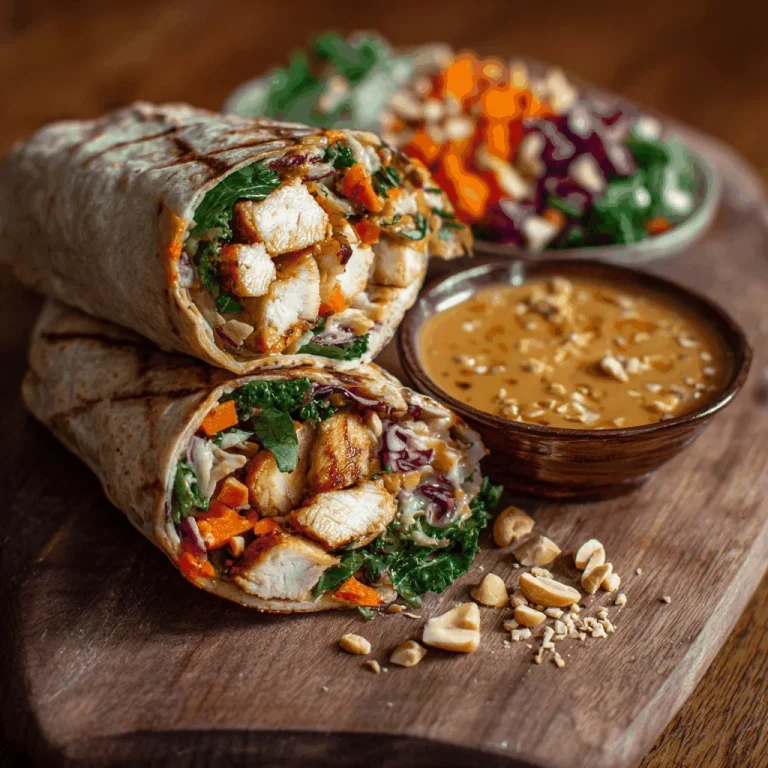
There’s a certain magic that happens when you combine the comfort of home-cooked chicken with the vibrant flavors of Thai cuisine. These Thai Peanut Chicken Wraps remind me of the simple joys of sharing a meal with family on our old wooden porch back home. Growing up in the rural South, my days were filled with the hearty aroma of fried chicken and the laughter of family gatherings. These wraps, though wrapped in the exotic allure of Thai spices, offer that same sense of warmth and community. They take me back to those weekends spent experimenting with flavors in the kitchen, always striving to create something that brings people together.

Why You’ll Absolutely Love This Recipe

  • It’s a breeze to make, perfect for those busy days when you want a quick kitchen victory!
  • The flavors are a delightful dance of savory, sweet, and spicy, just like a good story.
  • These wraps are versatile—ideal for a summer dinner or a cozy lunch recipe.
  • Every bite feels like a hug, reminding you of home and family.

Simple Ingredients for a Delicious Treat

Now, let’s talk about the heart of these wraps—the ingredients. The beauty of this recipe lies in its simplicity and the way each element sings in harmony. Peanut butter, soy sauce, and a touch of sriracha create a creamy, nutty sauce that envelops the chicken in a warm embrace. I remember my mother always saying that a good dish doesn’t need to be complicated, and this recipe proves just that. The freshness of coleslaw mix and cilantro adds a crisp contrast, while the roasted peanuts bring a satisfying crunch.

You’ll find the full ingredient list with exact measurements in the recipe card below!

Let’s Make Some Magic: Step-by-Step

Alright, folks, let’s roll up our sleeves and get cooking! Start by whisking together the peanut butter, soy sauce, brown sugar or honey, rice wine vinegar, garlic, ginger, and sriracha sauce. If the mixture feels a bit thick, a splash of water will do the trick to loosen it up. Next, in a large bowl, toss together your cooked chicken, coleslaw mix, grated carrot, cilantro, and peanuts. Drizzle that lovely dressing over and give it a good mix. Let it sit for a few minutes so those flavors can get to know each other.

Now, here’s a little tip from me to you—warm your tortillas in the microwave for about 30 seconds. It makes them pliable and easier to roll. Divide the filling evenly, wrap them up snug, and serve immediately. Trust me, the smiles on everyone’s faces will be worth it!

A Few of My Favorite Tips

Here’s a secret: if you’re feeling adventurous, try adding a bit of crushed red pepper to the dressing for an extra kick. And if you find yourself with leftover filling, it makes a fantastic topping on a bed of greens for a light salad.

How I Like to Serve This

I love serving these wraps with a side of sweet potato fries or a simple green salad. They pair beautifully with a cold glass of sweet tea, especially on a warm day. It’s a meal that feels like a celebration of flavors and simple pleasures.

Storing & Reheating (If There’s Any Left!)

Should you find yourself with leftovers, wrap them tightly in foil or store in an airtight container in the fridge. They’ll keep well for a day or two. To reheat, pop them in the microwave for a minute or two until warmed through. But honestly, these wraps are so good, you might not have any left to store!

If you enjoyed this recipe, you might also like to check out my other favorites like **Why These Cheesy Garlic Chicken Wraps Are a Family Favorite** or **Why This Bang Bang Chicken Bowl Will Steal Your Heart**. Happy cooking, y’all!

Thai Peanut Chicken Wraps

Prep Time 15 minutes
Cook Time 5 minutes
Total Time 20 minutes
Servings 4 servings
Calories 450
Delicious and easy-to-make Thai Peanut Chicken Wraps, perfect for a quick meal or snack.

Ingredients

Sauce

  • 60 ml peanut butter
  • 60 ml low-sodium soy sauce
  • 30 g brown sugar or honey
  • 30 ml rice wine vinegar
  • 7.5 g minced garlic
  • 7.5 g minced ginger
  • 5 ml sriracha sauce
  • 30 ml water (optional)
  • 2 pieces chicken fillets, cooked and chopped
  • 300 g coleslaw mix
  • 60 g grated carrot (optional)
  • 15 g chopped cilantro
  • 30 g roasted, salted peanuts
  • 4-6 pieces tortillas

Instructions 

  • Whisk together sauce ingredients in a bowl. Optionally, thin with water.
  • Mix chicken, coleslaw, carrot, cilantro, and peanuts in a bowl. Drizzle dressing and toss.
  • Heat tortillas in the microwave for 30 seconds.
  • Divide filling between tortillas, wrap tightly, and serve.

Notes

For extra flavor, let the filling sit for a few minutes before wrapping.
Calories: 450kcal
Cost: $15.00
Course: Main Course
Cuisine: Thai
Keyword: chicken

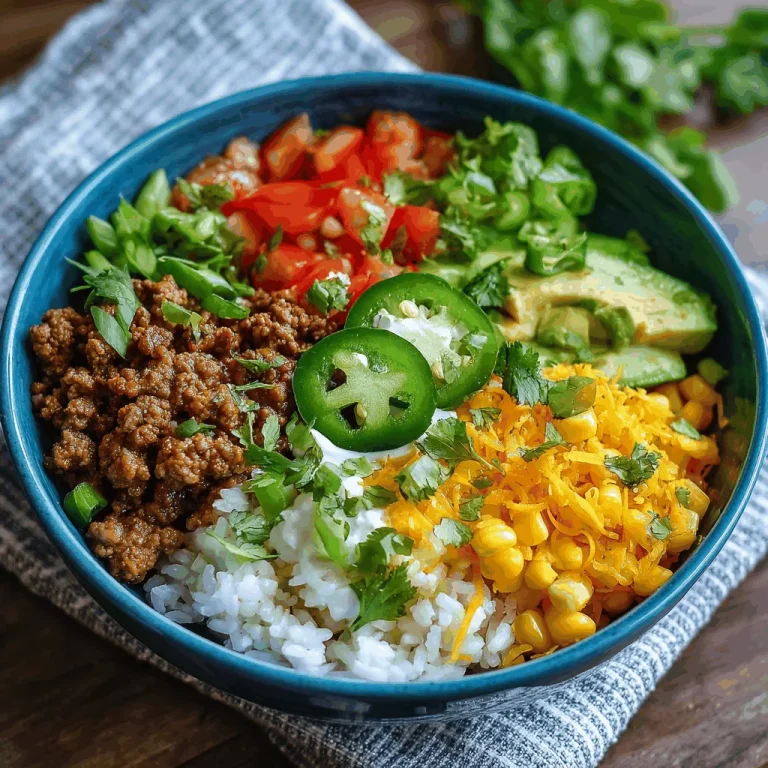
There’s something about a bowl of food that feels like a warm embrace, especially when it’s a dish that pulls you back to the heart of your roots. Picture this: a humble kitchen, the smell of spices dancing in the air, and a table surrounded by family and friends. That’s what this Taco Rice Bowl is to me—a comforting, flavorful hug in a bowl that brings memories of family gatherings and the joy of sharing a meal. Back in the day, my folks would whip up something similar when we needed a quick, hearty meal that still tasted like it took all day to cook. It’s a recipe that’s simple, yet it fills the soul, much like the easy-going rural life I grew up in.

Why You’ll Absolutely Love This Recipe

  • It’s so easy, it feels like a little kitchen victory!
  • Perfect for those “what’s for dinner?” moments, especially when you want something quick yet satisfying.
  • It’s a clean dinner for family gatherings that everyone can customize to their liking.
  • It’s packed with flavor and can easily be adapted to be a lighter meal with turkey or a hearty one with beef.

Simple Ingredients for a Delicious Treat

Now, let’s talk ingredients. Each one of these is like a trusted friend—reliable and always there to lend a hand. I love using chicken broth instead of water for the rice; it adds an extra layer of flavor that takes the dish from good to great. Ground beef is my go-to, but turkey works wonders too if you’re looking for something lighter. And don’t get me started on the taco seasoning—it’s the magic dust that ties everything together, transforming simple ingredients into a fiesta of flavors.

You’ll find the full ingredient list with exact measurements in the recipe card below!

Let’s Make Some Magic: Step-by-Step

Alright, let’s dive into making this delicious bowl. First, get your rice cooking. If you’ve chosen chicken broth, you’re already on your way to a more flavorful base. While that’s simmering, heat up some olive oil in a pan and brown your ground beef or turkey. Sprinkle in that packet of taco seasoning and let the aroma transport you to a lively Mexican kitchen.

Once your meat is cooked, toss in the black beans, corn, and diced tomatoes. Stir it all together and let it cook until everything is warmed through. By now, your rice should be done, and it’s time to assemble your bowls. Layer the rice, then the meat mixture, and top it off with shredded lettuce, cheddar cheese, and a dollop of salsa. For a little extra flair, garnish with fresh cilantro and lime wedges if you have them.

A Few of My Favorite Tips

Here’s a little secret from my kitchen to yours: if you’re in the mood for a bit of crunch, throw some crushed tortilla chips on top. And don’t be afraid to play around with toppings—avocado slices, sour cream, or even a sprinkle of pickled jalapeños can elevate your bowl to new heights.

How I Like to Serve This

Personally, I love serving this Taco Rice Bowl family-style, right in the middle of the table, with everyone helping themselves. It brings a sense of community and shared joy, much like the **Shrimp Tacos That Bring Sunshine to Any Table** and the heartwarming **Bang Bang Chicken Bowl**. I always keep a few extra lime wedges on hand for those who like a bit more zing.

Storing & Reheating (If There’s Any Left!)

If you find yourself with leftovers, this dish stores beautifully. Simply pop it in an airtight container and it’ll keep in the fridge for up to three days. For reheating, a quick zap in the microwave or a gentle warm-up on the stove will do the trick. It’s like having a ready-made meal waiting to comfort you all over again.

Taco Rice Bowl

Prep Time 15 minutes
Cook Time 30 minutes
Total Time 45 minutes
Servings 4 servings
Calories 600
A delicious and easy-to-make Taco Rice Bowl that combines savory ground meat, rice, and fresh toppings for a satisfying meal.

Ingredients

Base Ingredients

  • 1 cup uncooked white rice
  • 2 cups water or chicken broth (use chicken broth for more flavor.)
  • 1 lb ground beef or turkey (turkey for a lighter option.)
  • 1 packet taco seasoning (about 1 oz.)
  • 1 can black beans (drained and rinsed.)
  • 1 cup corn (frozen or canned.)
  • 1 cup diced tomatoes (fresh or canned.)
  • 1 cup shredded lettuce
  • 1 cup shredded cheddar cheese
  • ½ cup salsa (for topping.)
  • 2 tablespoons olive oil
  • to taste salt and pepper
  • optional fresh cilantro and lime wedges (for garnish.)

Instructions 

  • Cook the rice in water or chicken broth according to package instructions.
  • In a skillet, heat olive oil over medium heat and cook the ground meat until browned.
  • Add taco seasoning, black beans, corn, and diced tomatoes to the skillet; stir and cook until heated through.
  • Season with salt and pepper to taste.
  • Serve the meat mixture over rice and top with lettuce, cheese, salsa, and optional garnishes.

Notes

For extra flavor, consider adding avocado or jalapeños as toppings.
Calories: 600kcal
Cost: $15.00
Course: Main Course
Cuisine: Mexican
Keyword: Taco

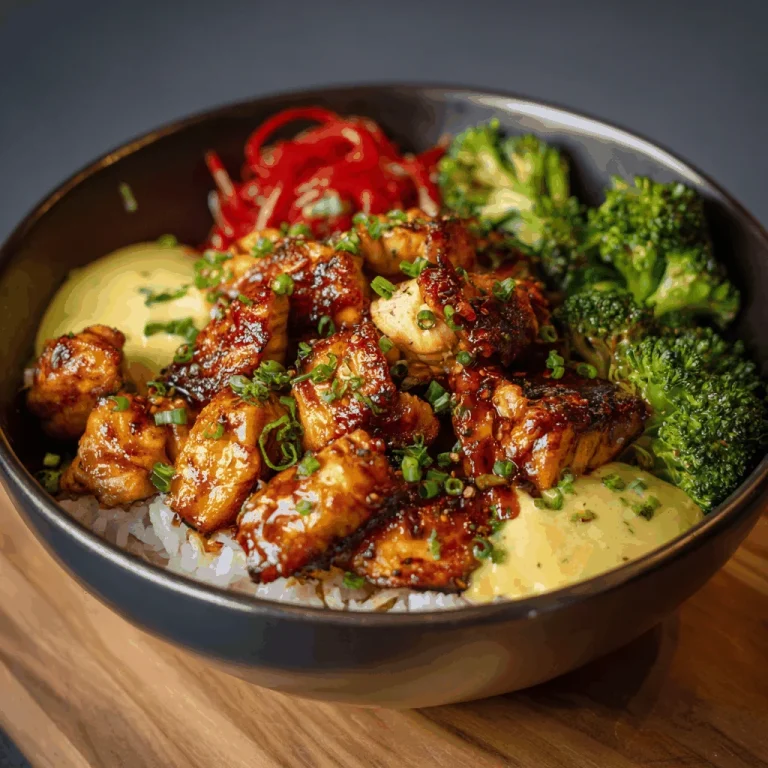
There’s something about a warm meal that feels like a hug from the inside, isn’t there? Growing up in the rural South, I’ve always found solace in the simple joys of cooking with fresh ingredients, especially chicken. Today, I want to share a recipe that brings together the heartiness of Southern cooking with a sweet and spicy twist—a dish I call the Hot Honey Chicken Bowl. This recipe reminds me of summer afternoons spent on the porch with family, where the air was filled with laughter and the aroma of simmering meals wafted through the open kitchen window.

Why You’ll Absolutely Love This Recipe

  • **It’s a breeze to make**, giving you that little kitchen victory with every bite.
  • **Sweet and spicy flavors** dance on your palate, creating a symphony of taste that’s both comforting and exciting.
  • **Versatile and healthy**, perfect for those looking for a delicious Health Dinner without the fuss.
  • **Great for meal prep**, making it an ideal choice for Easy Healthy Meal Prep or Prepped Lunches.

Simple Ingredients for a Delicious Treat

Let’s talk about the stars of our dish. Chicken fillets are like a blank canvas, ready to soak up the sweet heat of hot honey. Fresh garlic adds a rustic, earthy depth, while the mixed vegetables bring color and a satisfying crunch. The hot honey itself is a revelation, combining sweetness with a kick that warms you up from the inside out. And a splash of lime juice ties it all together with a zesty finish.

You’ll find the full ingredient list with exact measurements in the recipe card below!

Let’s Make Some Magic: Step-by-Step

All right, folks, let’s get cooking! Start by gathering your ingredients and chopping those vibrant vegetables. Pat the chicken dry and season it with a sprinkle of salt and pepper. Now, heat up some olive oil in a skillet over medium-high heat. This is where the magic begins—sear the chicken for 5-6 minutes on each side until it’s golden brown and cooked through.

In a small bowl, whisk together the hot honey, soy sauce, and lime juice. Pour this delightful concoction into the pan, letting the chicken soak up all those bold flavors. Toss in the mixed vegetables during the last few minutes of cooking, just until they’re tender yet crisp. Serve the chicken over a bed of rice or quinoa and drizzle with any extra sauce for that final touch.

A Few of My Favorite Tips

Here’s a little secret from my kitchen to yours: make sure to let the chicken rest after cooking. This keeps it juicy and allows the flavors to meld beautifully. If you like an extra kick, sprinkle some red pepper flakes on top. And remember, cooking is all about patience and love, so take your time and enjoy the process.

How I Like to Serve This

I love serving this Hot Honey Chicken Bowl with a side of cornbread or a simple Salad Pasta. The sweetness of the cornbread complements the heat of the chicken, creating a harmonious balance that makes every bite a pleasure.

Storing & Reheating (If There’s Any Left!)

Should you find yourself with leftovers, store them in an airtight container in the fridge for up to three days. To reheat, simply pop the bowl in the microwave or warm it gently on the stovetop. The flavors will be just as delightful, making it a perfect option for Healthy Lunch Meal Prep or a quick Health Dinner.

For more chicken recipes that feel like a warm embrace, check out **[Why This Bang Bang Chicken Bowl Will Steal Your Heart](https://goldenchickenrecipes.com//why-this-bang-bang-chicken-bowl-will-steal-your-heart)** or **[The Comforting Smothered Chicken and Rice Your Family Will Love](https://goldenchickenrecipes.com//the-comforting-smothered-chicken-and-rice-your-family-will-love)**. Happy cooking, y’all!

Hot Honey Chicken Bowl

Prep Time 15 minutes
Cook Time 20 minutes
Total Time 35 minutes
Servings 4 servings
Calories 600
A delicious and spicy chicken bowl topped with hot honey sauce and fresh vegetables.

Ingredients

Protein

  • 4 fillets chicken (boneless, skinless)
  • 1/2 cup hot honey
  • 4 cloves fresh garlic (minced)
  • 2 tbsp olive oil
  • 2 cups mixed vegetables ((bell peppers, broccoli, snap peas))
  • 1/4 cup low-sodium soy sauce
  • 2 tbsp fresh lime juice
  • salt and pepper (to taste)
  • 2 cups cooked rice or quinoa

Instructions 

  • Gather ingredients and chop vegetables.
  • Pat chicken dry, season with salt and pepper.
  • Heat olive oil in a skillet; sear chicken for 5-6 minutes on each side.
  • Mix hot honey with soy sauce and lime juice; add to the pan.
  • Toss in vegetables during the last few minutes of cooking.
  • Serve chicken over rice or quinoa and drizzle with extra sauce.

Notes

For extra flavor, marinate the chicken in hot honey for an hour before cooking.
Calories: 600kcal
Cost: $15.00
Course: Main
Cuisine: American
Keyword: chicken

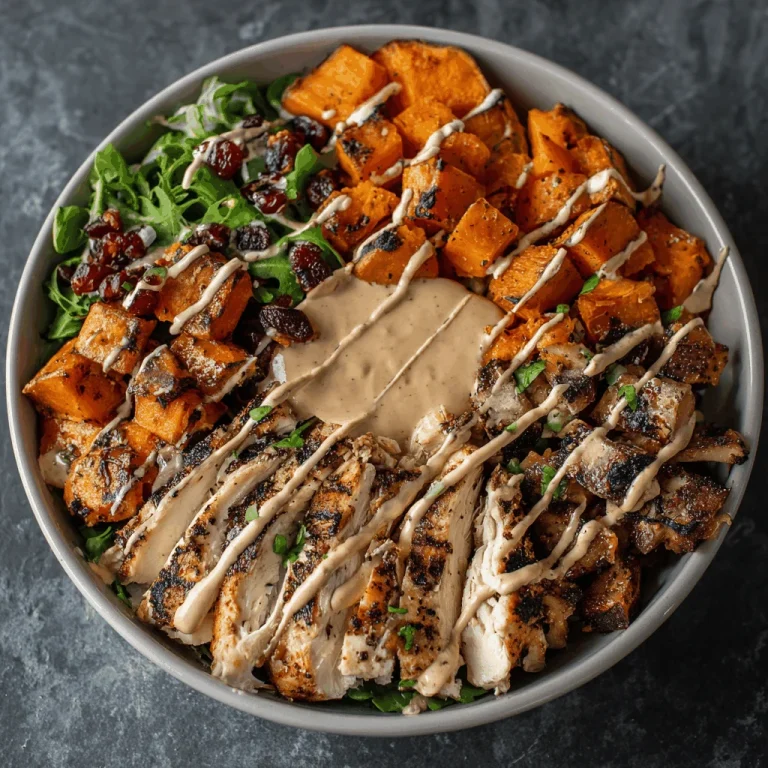
There’s a certain kind of magic that happens when you grill chicken in the South. It’s not just about the sizzling sound or the mouthwatering aroma that fills the air. It’s about the memories it evokes—like those long summer evenings when the sun dips below the horizon, and you’re surrounded by family and friends, sharing stories and laughter over a delicious meal. This Grilled Chicken & Sweet Potato Bowl is one of those dishes that takes me back to those cherished moments, bringing a sense of warmth and comfort to any evening.

Why You’ll Absolutely Love This Recipe

  • It’s so easy, it feels like a little kitchen victory!
  • Perfect for **Healthy Dinners For Weight Losing** without sacrificing flavor.
  • Every bite is a delightful mix of smoky, tangy, and savory goodness.
  • **Meals With High Fiber** thanks to sweet potatoes and optional quinoa or brown rice.
  • A versatile dish that welcomes your favorite toppings and variations.

Simple Ingredients for a Delicious Treat

When it comes to ingredients, I believe in keeping things simple and letting each element shine. The chicken, seasoned with smoked paprika and oregano, brings a smoky, herbaceous flavor that’s simply irresistible. Sweet potatoes, with their natural sweetness, pair beautifully with the tangy, creamy tahini dressing. Add some fresh greens and avocado, and you’ve got a bowl that’s as nourishing as it is delicious.

You’ll find the full ingredient list with exact measurements in the recipe card below!

Let’s Make Some Magic: Step-by-Step

Alright, let’s get started! First, we’re going to marinate the chicken. Combine your olive oil, lemon juice, Dijon mustard, minced garlic, oregano, smoked paprika, salt, and pepper in a bowl. Let your chicken soak up all those flavors for at least 30 minutes in the fridge. While that’s happening, preheat your oven to 400°F and toss your diced sweet potatoes with some olive oil, smoked paprika, garlic powder, salt, and a pinch of cayenne if you like a little heat.

Roast those sweet potatoes until they’re tender and caramelized, flipping them halfway through. Now, onto the grill! Once your chicken is marinated, pop it on the grill for some nice charred marks and cook until it’s perfectly juicy. Let it rest before slicing it up.

A Few of My Favorite Tips

Here’s a little secret: if you’re using a grill pan indoors, make sure it’s nice and hot before adding your chicken. This will help you get those beautiful grill marks and lock in the juices. And don’t forget to let the chicken rest after grilling—it’s the key to keeping it tender and juicy.

How I Like to Serve This

I love serving this Grilled Chicken & Sweet Potato Bowl over a bed of quinoa or brown rice for a hearty meal, but mixed greens work just as well for a lighter option. Top it off with some sliced avocado, crumbled feta, and a drizzle of tahini dressing for that perfect finishing touch.

Storing & Reheating (If There’s Any Left!)

If you happen to have leftovers, store them in an airtight container in the fridge for up to three days. To reheat, simply pop the chicken and sweet potatoes in the oven or microwave until warmed through. Add the fresh toppings just before serving to keep everything tasting fresh and vibrant.

For more comforting chicken recipes, check out **[The Comforting Smothered Chicken and Rice Your Family Will Love](https://goldenchickenrecipes.com//the-comforting-smothered-chicken-and-rice-your-family-will-love)** and **[Why This Bang Bang Chicken Bowl Will Steal Your Heart](https://goldenchickenrecipes.com//why-this-bang-bang-chicken-bowl-will-steal-your-heart)**.

Grilled Chicken & Sweet Potato Bowl

Prep Time 30 minutes
Cook Time 30 minutes
Total Time 1 hour
Servings 4 servings
Calories 600
A delicious and nutritious bowl featuring marinated grilled chicken and roasted sweet potatoes, perfect for a wholesome meal.

Ingredients

Chicken Marinade

  • 1.5 lbs chicken pieces or fillets (trim any excess fat.)
  • 2 tablespoons olive oil (extra virgin for best flavor.)
  • 2 tablespoons lemon juice (freshly squeezed is best.)
  • 2 large sweet potatoes (peeled and diced into 1-inch cubes.)
  • 1 cup cooked quinoa or brown rice (optional base.)

Instructions 

  • Marinate the chicken with olive oil, lemon juice, Dijon mustard, garlic, oregano, paprika, salt, and pepper. Refrigerate for at least 30 minutes.
  • Preheat oven to 400°F (200°C). Toss sweet potatoes with olive oil, smoked paprika, garlic powder, salt, and cayenne. Roast for 20-25 minutes.
  • Preheat grill to medium-high heat. Grill chicken for 5-7 minutes per side until cooked through.
  • Let chicken rest, then slice. Assemble bowls with quinoa/rice, sweet potatoes, and chicken.
  • Top with avocado, feta, and tahini dressing if desired. Serve immediately.

Notes

For extra flavor, marinate the chicken longer, but avoid more than 4 hours with lemon juice.
Calories: 600kcal
Cost: $15.00
Course: Main Course
Cuisine: American
Keyword: chicken

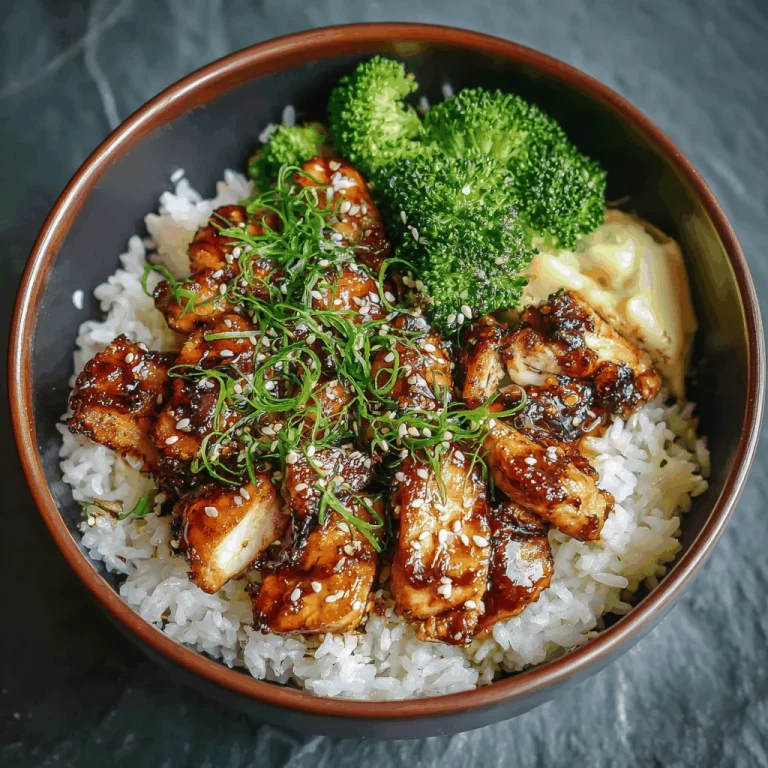
Growing up in the heart of the rural South, my life has always been intertwined with the simple joys of home-cooked meals. Every dish I create is a reminder of my roots, a nod to those early mornings spent gathering eggs with my father and the afternoons perfecting recipes with my family. Today, I’m sharing a recipe that, while a bit more modern, carries the same warmth and comfort that can make any place feel like home—the Teriyaki Chicken Rice Bowl. This dish is a delightful balance of savory and sweet, reminiscent of the comforting meals that bring people together around the table.

Why You’ll Absolutely Love This Recipe

  • It’s so easy, it feels like a little kitchen victory!
  • Perfect for those busy weeknights when you crave something hearty yet simple.
  • A wonderful way to enjoy a Comfort Bowl Recipe that’s wholesome and satisfying.
  • This dish is a real crowd-pleaser, just like my Comforting Smothered Chicken and Rice.

Simple Ingredients for a Delicious Treat

Now, let’s talk about the ingredients. The beauty of this Easy One Bowl Meal lies in its simplicity. We start with a pound of chicken fillet, diced into bite-sized pieces. Chicken has always been a staple in my kitchen, a versatile ingredient that never fails to deliver comfort.

Next, we have jasmine rice, a fragrant and fluffy base that soaks up the teriyaki sauce beautifully. The addition of broccoli and carrots not only adds a pop of color but also a delightful crunch, making it a Healthy Recipe Bowl that you can feel good about.

Don’t forget the sesame oil, which lends a nutty aroma, and the sprinkle of sesame seeds and green onions for that final touch of flavor and freshness.

You’ll find the full ingredient list with exact measurements in the recipe card below!

Let’s Make Some Magic: Step-by-Step

Alright, let’s dive into the cooking! First, heat up that sesame oil in a skillet—it’s going to smell heavenly. Toss in your diced chicken and cook until it’s beautifully browned. This is where the magic starts. Add in the teriyaki sauce and let it simmer for a couple of minutes. You’ll see the sauce thicken and cling to the chicken, creating a glossy, flavorful coating.

While the chicken is cooking, steam your broccoli and carrots until they’re tender-crisp. This little step keeps the veggies vibrant and full of life.

Now, divide your cooked jasmine rice into bowls, top with the teriyaki chicken, and nestle those bright veggies on the side. A sprinkle of sesame seeds and sliced green onions, and you’ve got yourself a bowl of comfort that’s as inviting as a Southern porch swing.

A Few of My Favorite Tips

Here’s a little secret: if you want a bit more kick, add a dash of chili flakes to the teriyaki sauce. It adds a warm, spicy note that complements the sweetness perfectly.

Another tip? Make sure your pan is nice and hot before adding the chicken. This ensures a good sear, locking in all those juices.

How I Like to Serve This

This Teriyaki Chicken Rice Bowl is a meal in itself, but if you’re feeling indulgent, serve it with a side of crispy spring rolls or a fresh cucumber salad for a refreshing contrast.

Storing & Reheating (If There’s Any Left!)

Should you find yourself with leftovers, store them in an airtight container in the fridge for up to three days. Reheat gently on the stove or in the microwave, adding a splash of water or broth to keep the chicken moist.

This bowl is a testament to the simplicity and heartiness that defines my cooking. Just like my Black Pepper Chicken, it’s a dish that embodies the spirit of home cooking—nourishing, comforting, and always made with love.

Teriyaki Chicken Rice Bowl

Prep Time 10 minutes
Cook Time 15 minutes
Total Time 25 minutes
Servings 4 servings
Calories 600
A delicious and easy-to-make Teriyaki Chicken Rice Bowl packed with flavor and nutrients.

Ingredients

Protein

  • 1 lb chicken fillet, diced

Grains

  • 2 cups cooked jasmine rice

Vegetables

  • 1 cup broccoli florets
  • 1 cup julienned carrots
  • 1/4 cup teriyaki sauce
  • 1 tbsp sesame oil

Garnish

  • sesame seeds and sliced green onions (for garnish)

Instructions 

  • Heat sesame oil in a skillet and cook chicken until browned. Add teriyaki sauce and simmer for 2–3 minutes.
  • Steam broccoli and carrots until tender-crisp.
  • Divide rice into bowls, top with chicken and veggies, and garnish with sesame seeds and green onions.

Notes

For extra flavor, marinate the chicken in teriyaki sauce for 30 minutes before cooking.
Calories: 600kcal
Cost: $12.00
Course: Main Course
Cuisine: Japanese
Keyword: chicken

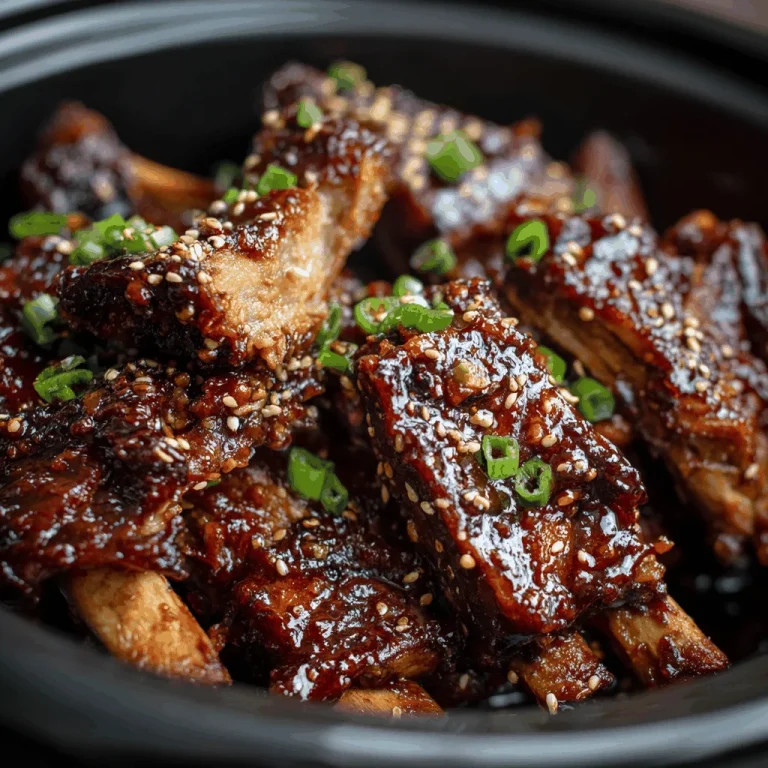
When I think back to the heart of my childhood, it’s filled with memories of family gatherings where the aroma of something delicious always hung in the air. One dish that never failed to bring us all together was my mom’s spareribs, slow-cooked to perfection. Now, after a lifetime of perfecting my own recipes, I’ve found that these Dump and Go Crockpot Honey Garlic Soy Spareribs do just the trick. They remind me of those warm, lazy Sundays on the porch with family, where the only thing more satisfying than good food was the joy of being together.

Why You’ll Absolutely Love This Recipe

  • It’s a true “set it and forget it” dish—just like a Quick And Easy Healthy Dinner Recipes Crockpot meal should be.
  • With just a handful of ingredients, it’s a breeze to make—perfect for folks looking for Easy Dinner Recipes 5 Ingredients.
  • These ribs are so tender, they practically melt in your mouth, making them a hit at any gathering.
  • It’s a great addition to any Easy Weekly Dinner Menu Ideas Families can enjoy.

Simple Ingredients for a Delicious Treat

Now, let’s talk ingredients. There’s something comforting about using a few simple, honest ingredients to create a dish that feels like a warm hug. The garlic and soy sauce bring a depth of flavor, while the honey adds a touch of sweetness that balances everything out. And don’t forget those spices—onion powder, paprika, and cumin—they give the ribs that extra oomph that’ll have folks asking for seconds.

You’ll find the full ingredient list with exact measurements in the recipe card below!

Let’s Make Some Magic: Step-by-Step

Alright, let’s roll up our sleeves and get cooking. First, you’re gonna mix up that dry rub with your onion powder, paprika, and cumin. Give those ribs a good massage with the spice mix—don’t be shy now, they need a bit of love. Next, you’ll create your marinade by mingling minced garlic with dark and sweet soy sauces and a generous helping of honey. Brush that heavenly mixture over the ribs, saving a little for later.

Once your ribs are coated, cut them in half and place them right into your slow cooker. Set it on low for 7-8 hours or high for 4-5 hours. Remember, every hour or so, give those ribs a brush with the reserved marinade to keep them juicy and full of flavor. Trust me, your patience will be rewarded.

A Few of My Favorite Tips

Here’s a little secret between friends: if you can, let the ribs marinate overnight before cooking. It makes a world of difference! Also, if you like a bit of heat, sprinkle some chili flakes into the marinade. And don’t worry if you don’t have a slow cooker; this recipe works just as well in the oven at a low temperature.

How I Like to Serve This

I love serving these ribs with a side of creamy coleslaw and some buttered cornbread. It’s a meal that’ll have you reminiscing about simpler times, just like my Gather Round for a Hearty Party Food Buffet to Remember. Add some sweet tea, and you’ve got yourself a true Southern feast.

Storing & Reheating (If There’s Any Left!)

If you’re lucky enough to have leftovers, store them in an airtight container in the fridge for up to three days. To reheat, just pop them in the oven at a low temperature until warmed through. They’re just as delightful the second time around!

Dump and Go Crockpot Honey Garlic Soy Spareribs

Prep Time 15 minutes
Cook Time 8 hours
Total Time 8 hours 15 minutes
Servings 4 servings
Calories 600
These tender and flavorful honey garlic soy spareribs are perfect for a hassle-free meal.

Ingredients

Meat

  • 1 rack baby back ribs

Seasonings

  • 4 cloves garlic (minced)
  • 60 ml dark soy sauce
  • 60 ml sweet soy sauce
  • 85 g raw honey
  • 0.5 tsp onion powder
  • 0.5 tsp paprika powder
  • 0.5 tsp cumin

Instructions 

  • Mix onion powder, paprika, and cumin; rub over ribs.
  • Combine minced garlic, dark soy sauce, sweet soy sauce, and honey; brush over ribs.
  • Cut ribs in half, place in slow cooker, and cook on low for 7-8 hours or high for 4-5 hours.
  • Brush ribs with reserved marinade every hour.

Notes

For extra flavor, let the ribs marinate overnight before cooking.
Calories: 600kcal
Cost: $15.00
Course: Main Course
Cuisine: Asian
Keyword: Ribs