Author

Tom

Browsing

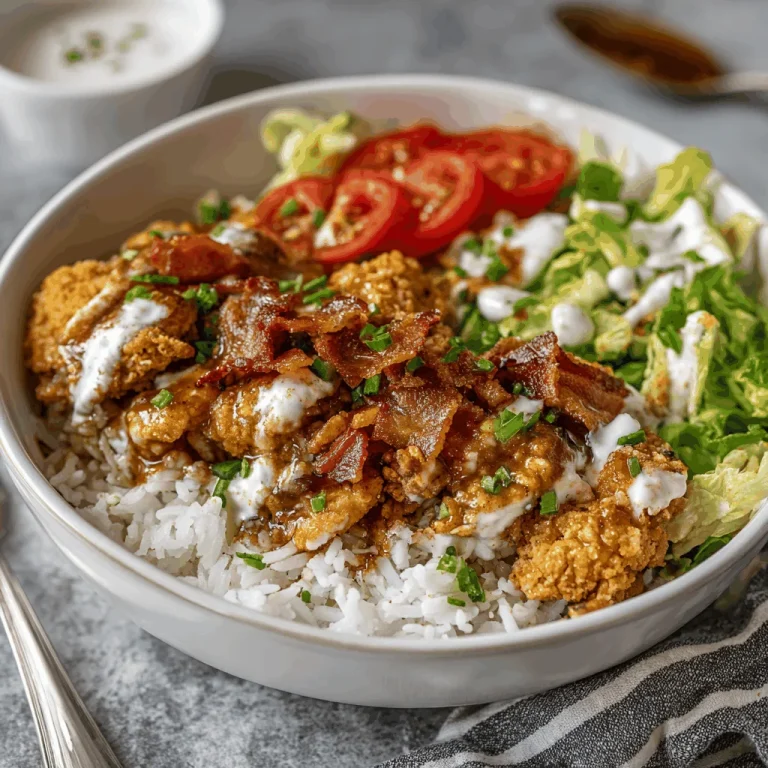
There’s something about a hearty bowl of comfort that just speaks to the soul, especially when it’s got that familiar taste of home. Growing up in the rural South, my days were filled with the aroma of chicken frying in the kitchen, a scent that meant family, laughter, and the warmth of a shared meal. These Copycat KFC Bowls take me back to those cherished days. They’re a delightful mix of simplicity and flavor, reminding me of the times spent with my family, gathered around the table, sharing stories and dreams.

Why You’ll Absolutely Love This Recipe

  • It’s quick and easy, a real Fast Dinner Recipe that feels like a little kitchen victory every time.
  • Packed with flavor, it’s a reminder that comfort can be found in simple things.
  • Using readily available ingredients, it’s the perfect Cheap Dinner Recipe for any night of the week.
  • A family favorite, it’s sure to bring smiles and full bellies to your dinner table.

Simple Ingredients for a Delicious Treat

Let’s talk about these ingredients, shall we? Each one plays its part perfectly, like a well-rehearsed band. The mashed potatoes are the heart, creamy and warm, just like the ones my momma used to make. The popcorn chicken adds a crispy bite, reminding me of the countless weekends spent perfecting our family’s fried chicken recipe. And then there’s the corn—sweet, golden, and comforting. It’s like a little nod to the fields of corn that surrounded my childhood home.

Don’t forget the gravy, that rich, savory hug that ties everything together. And finally, a sprinkle of cheddar cheese to finish it off, because what’s comfort food without a little cheese?

You’ll find the full ingredient list with exact measurements in the recipe card below!

Let’s Make Some Magic: Step-by-Step

Alright, folks, let’s get started. Imagine I’m right there with you, apron on, ready to create something wonderful. First, we’ll whip up those mashed potatoes. You can go the instant route for speed, or if you’ve got a bit more time, try making them from scratch—just like Grandma used to do.

Next, cook up that popcorn chicken until it’s golden and crispy. Meanwhile, heat your corn on the stovetop or in the microwave, whatever suits your fancy. Make your gravy using a brown gravy packet, stirring it until it’s smooth and velvety.

Now comes the fun part—assembling! Layer those mashed potatoes in your bowl, add a generous helping of corn, followed by the crispy popcorn chicken. Drizzle with that luscious gravy, and top it all off with shredded cheddar cheese. There you have it—a bowl of comfort that’s sure to warm the heart.

A Few of My Favorite Tips

Here’s a little secret from my kitchen to yours: for an extra touch of flavor, sprinkle a bit of black pepper and a pinch of garlic powder into your mashed potatoes. And if you’re feeling adventurous, mix in a spoonful of sour cream for that creamy tang.

How I Like to Serve This

These Copycat KFC Bowls are a meal in themselves, but if you’re looking to add a little something extra, serve them with a side of green beans or a fresh garden salad. It’s the perfect way to bring a bit of freshness to the table.

Storing & Reheating (If There’s Any Left!)

If you find yourself with leftovers, these bowls store beautifully. Just pop them in an airtight container and keep them in the fridge. When you’re ready to enjoy them again, a quick zap in the microwave will do the trick. They’re just as comforting the second time around!

For more comforting chicken dishes, check out The Comforting Smothered Chicken and Rice Your Family Will Love and Why This Bang Bang Chicken Bowl Will Steal Your Heart. And if you’re looking for something heartwarming, Why This Creamy Tomato Tortellini Warms My Heart Every Time might just do the trick.

Copycat KFC Bowls

Prep Time 15 minutes
Cook Time 20 minutes
Total Time 35 minutes
Servings 6 servings
Calories 600
A delicious and comforting meal that layers creamy mashed potatoes, crispy popcorn chicken, sweet corn, savory gravy, and melted cheddar cheese.

Ingredients

Base

  • 6 servings mashed potatoes (instant or homemade)
  • 1 24 oz package popcorn chicken (cooked)
  • 1 15 oz can corn (drained and heated)
  • 1 pkg beef gravy (cooked)
  • 2 cups shredded cheddar cheese

Instructions 

  • Make mashed potatoes according to package or recipe.
  • Cook popcorn chicken as per package instructions.
  • Heat corn in microwave or stovetop.
  • Prepare gravy using the packet instructions.
  • Assemble bowls with layers of potatoes, corn, chicken, gravy, and cheese.
Notes

For extra flavor, consider adding spices to the mashed potatoes.
Calories: 600kcal
Cost: $15.00
Course: Main Course
Cuisine: American
Keyword: chicken

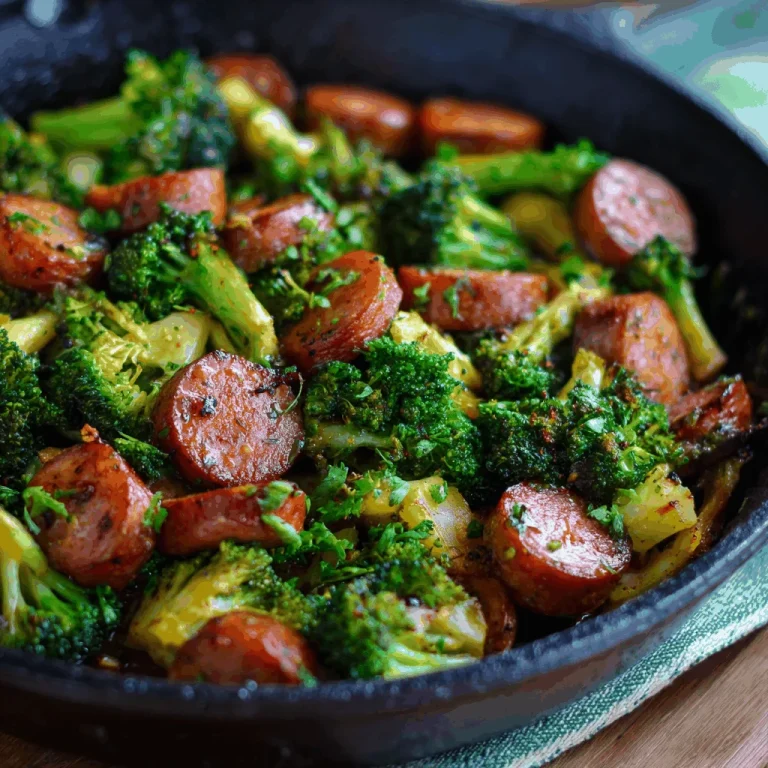
Growing up in the rural South, there were few things as comforting as a simmering skillet on the stove. The aroma would fill the kitchen, drawing family from the fields and neighbors from down the lane. Today, I’m sharing a dish that brings back those cherished memories—a Creamy Kielbasa Broccoli Skillet. It’s a recipe that warms the heart and reminds me of the simple pleasures of gathering around the table. This dish is a testament to the beauty of uncomplicated cooking, where each ingredient sings its own tune, yet together they create a symphony of flavors. Whether you’re looking for Easy Meals For Family Of 5 or just a Great Easy Dinner Idea, this skillet is sure to delight.

Why You’ll Absolutely Love This Recipe

  • It’s so easy, it feels like a little kitchen victory!
  • Ready in just 30 minutes, it’s perfect for Fast Weekday Dinners.
  • The creamy sauce is a hug in a bowl, comforting and rich.
  • Simple ingredients that you probably already have in your pantry.
  • A delightful way to sneak in those veggies for the kids.

Simple Ingredients for a Delicious Treat

Each ingredient in this dish brings its own special touch. The kielbasa adds a smoky depth, while the broccoli offers a fresh crunch. Whole milk and cheddar cheese create a rich, velvety sauce that ties everything together. I remember my mom always saying, “Tom, it’s the simple things that make life sweet,” and this recipe embodies that wisdom. Here’s what you’ll need:

  • 8 ounces of penne pasta
  • 2 cups (182 g) of fresh broccoli florets, quartered
  • 13.9-ounce ring of kielbasa sausage, cut into bite-sized slices
  • 1 1/2 cups (367.5 g) of whole milk
  • 1 1/2 cups (169.5 g) of shredded mild cheddar cheese
  • 2 tablespoons of unsalted butter
  • 1 small diced yellow onion (about 1/2 cup)
  • 1 teaspoon of minced garlic
  • Salt and pepper to taste

You’ll find the full ingredient list with exact measurements in the recipe card below!

Let’s Make Some Magic: Step-by-Step

Cooking is like storytelling, each step building on the last to create something beautiful. Let’s dive into this heartwarming dish together:

Begin by boiling the penne pasta according to the package instructions. In the last 2 minutes of the cooking time, add the broccoli florets to the pot. Drain the pasta and broccoli mixture and set it aside. In a large skillet over medium heat, melt the unsalted butter. Add the sliced kielbasa and cook until it’s lightly browned, about 5 minutes, stirring occasionally. Once the kielbasa is seared, stir in the diced onion and minced garlic. Cook for an additional 2-3 minutes, or until the onion is soft and fragrant.

In a small bowl, whisk the cornstarch into the whole milk until fully combined. Pour the milk mixture into the skillet and bring it to a simmer. Stir continuously until the sauce thickens, about 3-5 minutes. Reduce the heat to low and gradually mix in the shredded cheddar cheese. Stir until the cheese is melted and the sauce is smooth and creamy. Add the cooked pasta and broccoli to the skillet, tossing everything together until the ingredients are evenly coated in the creamy sauce. Season with salt and pepper to taste. Garnish with fresh parsley and serve hot, straight from the skillet.

A Few of My Favorite Tips

Here are a few nuggets of wisdom from my years in the kitchen:

  • Use fresh broccoli for the best crunch and flavor.
  • If you’re a fan of spice, add a pinch of red pepper flakes for a gentle kick.
  • For an extra layer of flavor, try browning the kielbasa a bit longer to caramelize those edges.

How I Like to Serve This

This dish is best enjoyed with a slice of crusty bread to mop up every bit of that creamy sauce. Pair it with a side salad for a complete meal that balances richness with freshness. It’s a perfect Easy Weekend Dinner Recipe to share with loved ones.

Storing & Reheating (If There’s Any Left!)

If you find yourself with leftovers, store them in an airtight container in the fridge for up to 3 days. Reheat gently on the stove, adding a splash of milk to bring back the creaminess. This dish is just as delightful the next day, making it a great option for Easy Meals For A Family Of 6.

For more heartwarming recipes, check out **Why This Creamy Tomato Tortellini Warms My Heart Every Time**, **The Comforting Smothered Chicken and Rice Your Family Will Love**, and **Why This Black Pepper Chicken Is My Weeknight Savior**. Each recipe is a testament to the joys of home cooking, where comfort and flavor meet.

Creamy Kielbasa Broccoli Skillet 30 Minutes Ultimate Delicious

Prep Time 10 minutes
Cook Time 20 minutes
Total Time 30 minutes
Servings 4 servings
Calories 600
This creamy kielbasa and broccoli skillet is a quick and delicious meal that comes together in just 30 minutes, perfect for busy weeknights.

Ingredients

Pasta

  • 8 ounces penne pasta

Vegetables

  • 2 cups fresh broccoli florets, quartered

Meat

  • 13.9 ounces kielbasa sausage, cut into bite-sized slices
  • 1.5 cups whole milk
  • 1.5 cups shredded mild cheddar cheese
  • 2 tablespoons unsalted butter
  • 1 small diced yellow onion ((about 1/2 cup))
  • 1 teaspoon minced garlic
  • salt and pepper to taste

Instructions 

  • Boil penne pasta; add broccoli in the last 2 minutes. Drain and set aside.
  • Melt butter in a skillet, add kielbasa, and cook until browned, about 5 minutes.
  • Add onion and garlic; cook until onion is soft, about 2-3 minutes.
  • Whisk cornstarch into milk, pour into skillet, and simmer until thickened, about 3-5 minutes.
  • Reduce heat, mix in cheddar until melted and smooth.
  • Add pasta and broccoli, toss to coat, season with salt and pepper, and serve hot.

Notes

For extra flavor, garnish with fresh parsley before serving.
Calories: 600kcal
Cost: $12.00
Course: Main Course
Cuisine: American
Keyword: Kielbasa

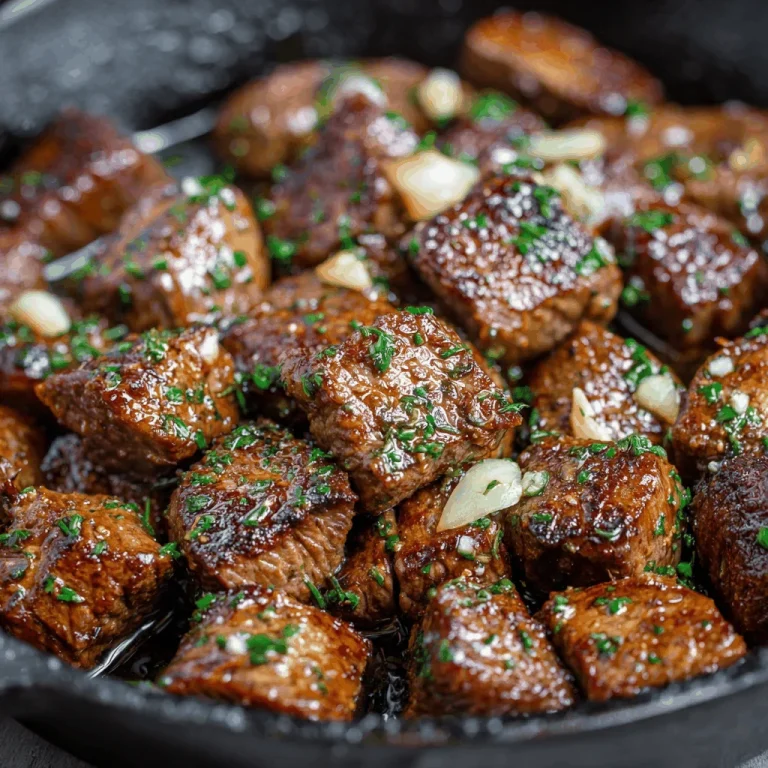
In the heart of the rural South, where the air is sweet with honeysuckle and the days stretch long under the sun, I learned that the best meals are often the simplest. Growing up, my days were filled with the rhythm of farm life, and every meal was a testament to the land we cherished. Today, I’m sharing a recipe that might surprise you—it’s not chicken! But it’s a dish that captures the same spirit of comfort and community: Garlic Butter Steak Bites and Potatoes (Tender & Crispy!). This dish takes me back to family gatherings, where laughter was abundant, and plates were always full. It’s hearty, it’s flavorful, and it’s as comforting as a Southern sunset.

Why You’ll Absolutely Love This Recipe

  • It’s so easy, it feels like a little kitchen victory!
  • Each bite is a perfect blend of savory steak and crispy potatoes.
  • The garlic butter sauce will make your kitchen smell downright irresistible!
  • It’s a versatile dish that suits any occasion, from a casual family dinner to a special gathering.

Simple Ingredients for a Delicious Treat

There’s something magical about the simplicity of this dish. Using just a handful of ingredients, you can create something truly special. The sirloin steak is tender and full of flavor, while baby potatoes provide that satisfying, crispy contrast. Add in some butter and olive oil for richness, and of course, the garlic that brings it all together with its aromatic charm. Don’t forget the dried thyme and rosemary—they add that earthy note that ties everything together.

You’ll find the full ingredient list with exact measurements in the recipe card below!

Let’s Make Some Magic: Step-by-Step

Let’s dive right in, shall we? First up, we’re going to sauté the potatoes until they’re golden. Heat up your skillet, swirl in some butter and olive oil, and let those diced baby potatoes sizzle. Sprinkle with salt, pepper, rosemary, and thyme, and let them cook until they’re fork-tender and beautifully crisp. Set them aside, keeping them warm.

Next, it’s time to sear the steak bites. In the same pan, add another pat of butter, and arrange those steak bites in a single layer. Sear them for a few minutes on each side until they’ve got a nice crust. Remove them from the pan and set them aside.

Now, we’ll make the garlic butter sauce. Lower the heat, add the last tablespoon of butter, and toss in the minced garlic. Stir for about a minute until the garlic is lightly golden.

Finally, toss it all together. Return the steak bites and potatoes to the pan, coat everything in that glorious garlic butter, and sprinkle with fresh parsley.

A Few of My Favorite Tips

Here’s a little secret: don’t rush the searing process. Let those steak bites develop a beautiful crust—it’s worth the patience, I promise. If you’re working with a smaller skillet, sear the steak in batches to avoid steaming.

How I Like to Serve This

I love serving this dish family-style, right from the skillet. It’s rustic and inviting, and there’s something about gathering around a shared dish that just feels right. Pair it with a fresh green salad or some steamed greens to balance the richness.

Storing & Reheating (If There’s Any Left!)

If you have leftovers, store them in an airtight container in the refrigerator for up to three days. To reheat, simply warm them in a skillet over low heat until heated through. This dish is just as delightful the next day!

For more inspiration, check out my other recipes like **Savor the Moment with Garlic Butter Steak Bites and Creamy Sauce** or **The Juicy Steak with Creamy Garlic Sauce That Steals Hearts**. And if you’re craving something that takes you back to the comforts of home, try **The Comforting Smothered Chicken and Rice Your Family Will Love**.

Garlic Butter Steak Bites and Potatoes (Tender & Crispy!)

Prep Time 10 minutes
Cook Time 20 minutes
Total Time 30 minutes
Servings 4 servings
Calories 600
Indulge in these savory garlic butter steak bites paired with crispy baby potatoes for a delightful meal that's quick and easy to prepare.

Ingredients

Main Ingredients

  • 500 g sirloin steak
  • 500 g baby potatoes
  • 3 tbsp butter
  • 2 tbsp olive oil
  • 4 cloves garlic (minced)
  • 1 tsp dried thyme
  • 1 tsp dried rosemary
  • to taste salt and pepper
  • 2 tbsp fresh parsley (chopped)

Instructions 

  • Sauté the potatoes in butter and olive oil until golden and fork-tender, about 10-12 minutes.
  • Sear the steak bites in the same pan for 2-3 minutes per side until browned.
  • Make the garlic butter sauce by adding minced garlic to the remaining butter in the skillet.
  • Toss the steak bites and potatoes in the garlic butter until well coated.
  • Serve warm, garnished with fresh parsley.

Notes

For extra flavor, let the steak marinate in garlic and herbs for an hour before cooking.
Calories: 600kcal
Cost: $15.00
Course: Main Course
Cuisine: American
Keyword: Steak

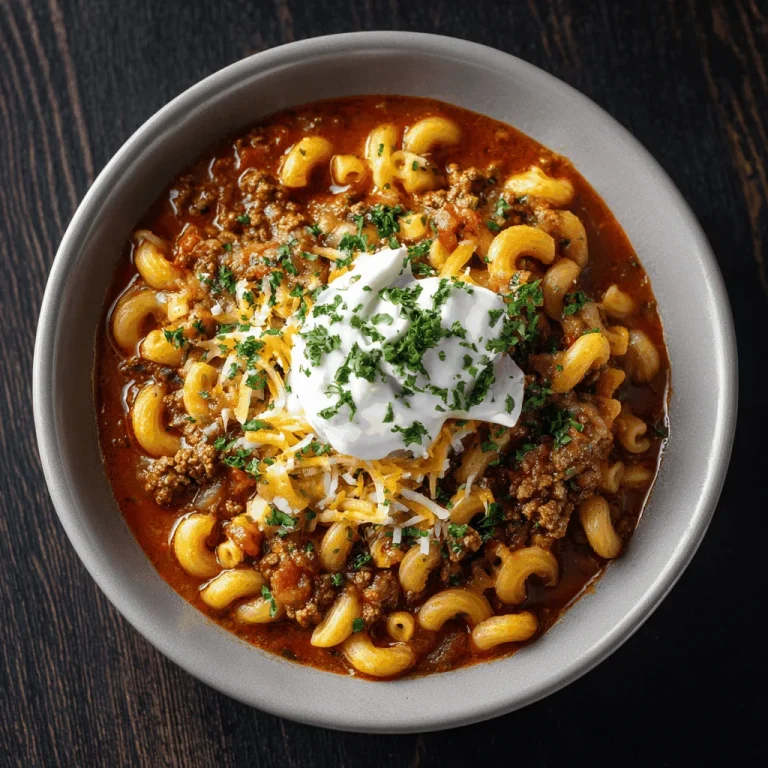
There’s something about a bowl of goulash that takes me back to my childhood, sitting around my grandma’s kitchen table in the heart of the rural South. The aroma of simmering tomatoes and warm spices would fill the room, creating a sense of comfort and belonging. This Classic Goulash with Ground Beef and Elbow Pasta is more than just a meal; it’s a hug in a bowl, a reminder of simpler times when food was made with love and shared with family.

Why You’ll Absolutely Love This Recipe

  • It’s so easy, it feels like a little kitchen victory! This recipe is straightforward and fuss-free, perfect for a cozy evening at home.
  • A hearty meal in one pot. Less cleanup means more time to enjoy with your loved ones.
  • Rich, comforting flavors. The combination of beef, pasta, and tomatoes is a classic that never goes out of style.
  • Perfect for leftovers. If you have any left, goulash tastes even better the next day!

Simple Ingredients for a Delicious Treat

Every ingredient in this dish tells a story. The ground beef, rich and flavorful, takes center stage, while the elbow pasta offers that familiar comfort we all crave. The diced tomatoes and tomato sauce create a savory base, enhanced by the aromatic onion and garlic. And let’s not forget the spices—paprika and oregano—that add just the right amount of warmth and depth. These simple ingredients come together to create a dish that’s greater than the sum of its parts.

You’ll find the full ingredient list with exact measurements in the recipe card below!

Let’s Make Some Magic: Step-by-Step

Alright, folks, let’s get cooking! Start by heating a large pot over medium heat. Toss in the ground beef and let it brown, breaking it up with a spoon as it cooks. Once it’s nice and browned, drain any excess fat if needed. Now, add the diced onion and minced garlic. Sauté them for about 3-4 minutes until the onion is soft and fragrant—there’s nothing quite like the smell of onions and garlic cooking together.

Next, stir in the diced tomatoes, tomato sauce, beef broth, paprika, oregano, salt, and black pepper. Bring this flavorful mix to a simmer. Add the uncooked elbow pasta, stir well, cover, and let it simmer for 15-18 minutes, stirring occasionally. The result? Tender pasta soaked in all those wonderful flavors. If you’re feeling indulgent, sprinkle some shredded cheddar cheese on top and let it melt before serving.

A Few of My Favorite Tips

Here’s a little secret: if you want to add a bit of a kick, try a pinch of cayenne pepper. And if you’re aiming for a creamier version, a splash of cream towards the end can work wonders. Remember, cooking is about making it your own, so don’t be afraid to experiment a bit.

How I Like to Serve This

I love pairing this goulash with a slice of crusty bread or a simple side salad. It’s a meal that warms the soul and fills the belly, perfect for those chilly evenings when you need something hearty.

Storing & Reheating (If There’s Any Left!)

In the unlikely event that you have leftovers, store them in an airtight container in the fridge for up to three days. To reheat, simply pop it in a saucepan over low heat, adding a splash of water or broth if needed to loosen it up. It’s just as delicious, if not more so, the next day!

And if you’re in the mood for more comforting dishes, check out my recipe for The Comforting Smothered Chicken and Rice Your Family Will Love or enjoy the heart-stealing flavors of The Juicy Steak with Creamy Garlic Sauce That Steals Hearts. For a tomato-based delight, Why This Creamy Tomato Tortellini Warms My Heart Every Time is a must-try!

Classic Goulash with Ground Beef and Elbow Pasta

Prep Time 10 minutes
Cook Time 25 minutes
Total Time 35 minutes
Servings 6 servings
Calories 450
A hearty and comforting dish, this classic goulash combines ground beef and elbow pasta in a rich tomato sauce.

Ingredients

Meat

  • 1 pound ground beef

Pasta

  • 2 cups elbow pasta, uncooked

Vegetables

  • 1 medium onion, diced
  • 3 cloves garlic, minced

Canned Goods

  • 1 can diced tomatoes ((15 ounces))
  • 1 can tomato sauce ((15 ounces))
  • 2 cups beef broth
  • 1 tablespoon paprika
  • 1 teaspoon dried oregano
  • 1 teaspoon salt
  • ½ teaspoon black pepper
  • 1 cup shredded cheddar cheese ((optional, for topping))

Instructions 

  • Cook ground beef in a large pot over medium heat until browned; drain excess fat.
  • Add onion and garlic; sauté for 3-4 minutes until softened.
  • Stir in tomatoes, tomato sauce, beef broth, paprika, oregano, salt, and pepper; bring to a simmer.
  • Add elbow pasta; cover and simmer for 15-18 minutes until tender.
  • Remove from heat; top with cheese if desired and let melt before serving.

Notes

For extra flavor, consider adding a splash of Worcestershire sauce.
Calories: 450kcal
Cost: $15.00
Course: Main Course
Cuisine: American
Keyword: Ground Beef

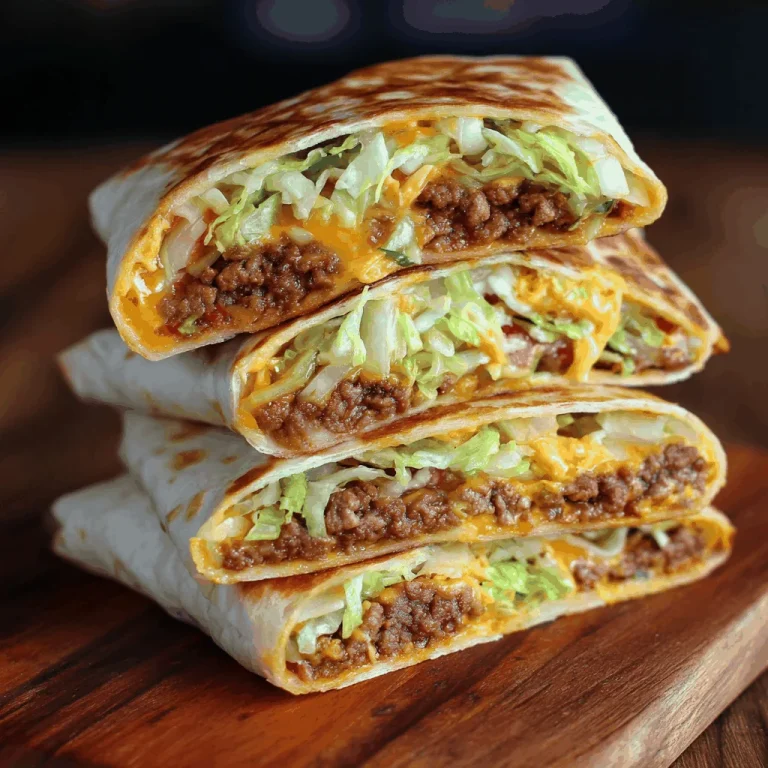
There’s something about the first bite of a Big Mac that always takes me back to summers spent on the farm. Picture this: a warm afternoon, the sun setting over endless rows of corn, and the smell of burgers sizzling on the grill. It was those simple, joyful moments that inspired my Homemade Big Mac Wraps Recipe. This dish isn’t just about taste; it’s about capturing a piece of my childhood and bringing it to your table. So, if you’re looking for Good Family Dinner Ideas that are easy to whip up, this might just be your new favorite.

Why You’ll Absolutely Love This Recipe

  • It’s a delightful twist on a classic, bringing the flavors of a beloved burger into a convenient wrap.
  • Perfect for those nights when you want Easy Dinner Ideas Using Ground Beef without compromising on taste.
  • This recipe is as quick as it is satisfying, making it one of my favorite Fast Lunch Recipes.
  • It’s a great way to get the kids involved in the kitchen—because who doesn’t love assembling their own wraps?

Simple Ingredients for a Delicious Treat

Now, let’s talk about what makes these wraps so special. You’ll need ground beef, shredded lettuce, diced onions, pickles, cheddar cheese, and a soft tortilla to wrap it all up. And let’s not forget the secret sauce—that magical combination of mayonnaise, ketchup, sweet pickle relish, and a hint of mustard. Each ingredient plays its part in creating a harmony of flavors that feel like a warm hug from home.

You’ll find the full ingredient list with exact measurements in the recipe card below!

Let’s Make Some Magic: Step-by-Step

Alright, folks, let’s get cooking! Start by browning your ground beef in a skillet over medium heat. Season it with salt and pepper, and once cooked, drain any excess fat. While your beef is cooking, whisk together the ingredients for your secret sauce in a small bowl.

Lay out your tortillas and spread a generous spoonful of sauce on each one. Sprinkle on the cheese, followed by the beef, lettuce, onions, and pickles. Roll them up tight, and there you have it—a Big Mac in wrap form, ready to devour!

A Few of My Favorite Tips

Here’s a little secret from my kitchen to yours: for an extra touch of flavor, try toasting your wraps in a dry skillet for a minute or two on each side. It adds a delightful crunch and brings out the flavors even more. And if you’re feeling adventurous, try swapping the ground beef for grilled chicken to change things up. You might even fall in love with these Cheesy Garlic Chicken Wraps as a tasty alternative!

How I Like to Serve This

These wraps are perfect on their own, but if you’re hosting a family dinner, I like to serve them with a side of crispy sweet potato fries or a simple green salad. Pair it with a cold glass of iced tea or lemonade, and you’ve got yourself a meal that feels like a sunny afternoon on the porch.

Storing & Reheating (If There’s Any Left!)

If you find yourself with leftovers, simply wrap them tightly in foil and store them in the fridge. They’ll last for up to two days. To reheat, pop them in the oven at 350°F for about 10 minutes, or until heated through. They’re just as tasty the second time around!

For more comforting recipes, check out The Creamy Garlic Parmesan Chicken Pasta That Feels Like Home or Why This Bang Bang Chicken Bowl Will Steal Your Heart. Happy cooking, and remember, the best meals are made with love and a little bit of nostalgia.

Homemade Big Mac Wraps Recipe

Prep Time 15 minutes
Cook Time 10 minutes
Total Time 25 minutes
Servings 4 servings
Calories 600
Enjoy a delicious twist on the classic Big Mac in a convenient wrap form!

Ingredients

Wrap Ingredients

  • 4 large tortillas
  • 1 lb ground beef (cooked and seasoned)
  • 1 cup shredded lettuce
  • 1 cup cheddar cheese (shredded)
  • 1/2 cup pickles (sliced)
  • 1/2 cup Big Mac sauce

Instructions 

  • Cook the ground beef and season to taste.
  • Warm the tortillas in a skillet.
  • Layer beef, lettuce, cheese, pickles, and sauce on each tortilla.
  • Wrap tightly and slice in half.
  • Serve immediately and enjoy!

Notes

Feel free to customize with your favorite toppings!
Calories: 600kcal
Cost: $10.00
Course: Main Course
Cuisine: American
Keyword: Wrap

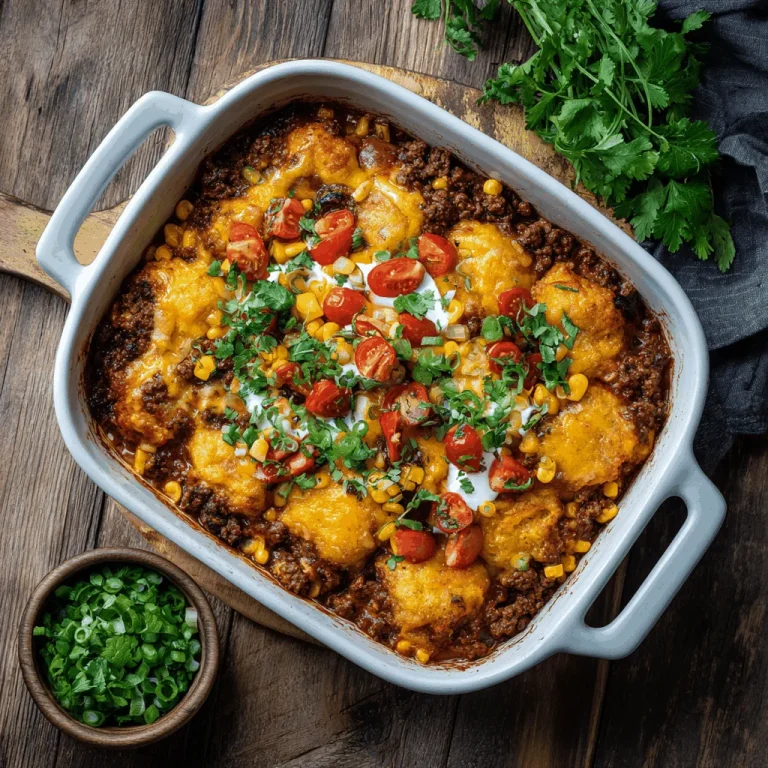
There’s something about a hearty casserole that feels like a warm hug from the inside out. Growing up in the rural South, I’ve always found comfort in dishes that bring people together around a shared table. This Cowboy Casserole is one of those recipes that takes me back to simpler times, when life was about family, friends, and the land. I remember the first time I had this dish—it was at a church potluck, and it was love at first bite. The crispy tater tots, the savory beef, and the creamy cheese brought together a symphony of flavors that felt like home. These days, whenever I whip up this Cowboy Casserole, I’m reminded of those cozy nights spent with loved ones, sharing stories and laughter over a meal that warms the heart.

Why You’ll Absolutely Love This Recipe

  • It’s so easy, it feels like a little kitchen victory!
  • The crispy tater tots on top make it irresistible.
  • Perfect for feeding a crowd during family gatherings or potlucks.
  • It’s a versatile dish that lets you play around with ingredients.
  • Full of comforting flavors that remind you of home.

Simple Ingredients for a Delicious Treat

Now let’s talk about the heart and soul of this dish—the ingredients. Each one plays a part in creating that comforting, homey taste we all crave. Starting with the ground beef, it’s the backbone of our casserole, providing a rich, savory base. The corn adds a touch of sweetness and a bit of crunch, balancing out the flavors beautifully. Then there’s the cream of mushroom soup—creamy and earthy, it ties everything together like a warm, cozy blanket. And, of course, the cheddar cheese, which melts into gooey perfection, is the cherry on top. Don’t forget the bacon, because everything’s better with a bit of bacon, right? Finally, the tater tots—crispy on the outside, soft on the inside—are the crowning glory of this dish.

You’ll find the full ingredient list with exact measurements in the recipe card below!

Let’s Make Some Magic: Step-by-Step

Alright, folks, let’s get cooking! Preheat your oven to 375 degrees and let’s start by browning our ground beef in a large skillet over medium heat. You’ll want to cook it until it’s nicely browned, breaking it up as you go. Once that’s done, it’s time to add the corn, cream of mushroom soup, half a cup of that shredded cheddar cheese, milk, sour cream, onion powder, black pepper, and our crispy bacon bits. Stir everything together until it’s well combined. Now, in a trusty 9×13 pan, layer the beef mixture, sprinkle on the rest of the cheese, and line up those tater tots on top. Pop it in the oven for about 40-45 minutes, uncovered. When it’s bubbling and golden, sprinkle a little more cheese on top and bake for another 5 minutes. There you have it—a Cowboy Casserole ready to warm your soul.

A Few of My Favorite Tips

Here’s a little secret from my kitchen to yours—if you want a bit more kick, try adding some diced jalapeños to the beef mixture. And if you’re feeling adventurous, swap out the cheddar for pepper jack cheese. For a vegetarian twist, replace the beef with black beans. Remember, recipes are guidelines, not rules, so feel free to make it your own!

How I Like to Serve This

When it comes to serving this casserole, I love to keep it simple. A fresh green salad or some Cowboy Butter Chicken Linguine on the side complements the richness of the casserole beautifully. A dollop of sour cream on top adds a nice tang, and if you’re feeling fancy, a sprinkle of fresh chives or parsley for a pop of color never hurts.

Storing & Reheating (If There’s Any Left!)

If you’re lucky enough to have leftovers, this Cowboy Casserole stores beautifully. Just cover it with foil or transfer it to an airtight container and pop it in the fridge. It’ll keep for about 3-4 days. When you’re ready to enjoy it again, reheat individual portions in the microwave, or warm the whole dish in the oven at 350 degrees until heated through. Trust me, it’s just as tasty the second time around!

Cowboy Casserole

Prep Time 15 minutes
Cook Time 50 minutes
Total Time 1 hour 5 minutes
Servings 6 servings
Calories 600
A hearty and comforting casserole packed with beef, cheese, and tater tots, perfect for family dinners.

Ingredients

Meat

  • 0.5 pound ground beef (85/15)

Vegetables

  • 1 cup corn
  • 2/3 cup condensed cream of mushroom soup
  • 1 cup cheddar cheese (shredded and divided)
  • 1/3 cup whole milk
  • 1/4 cup sour cream
  • 1 teaspoon onion powder
  • 1/2 teaspoon black pepper
  • 1/2 cup bacon (cooked and crumbled)
  • 32 ounces tater tots

Instructions 

  • Preheat oven to 375 degrees.
  • In a large skillet, cook beef over medium heat until browned.
  • Add corn, cream of mushroom soup, 1/2 cup cheese, milk, sour cream, onion powder, black pepper, and bacon; mix well.
  • Layer beef, cheese, and tater tots in a 9x13 pan; bake uncovered for 40-45 minutes.
  • Sprinkle with remaining cheese and bake another 5 minutes.

Notes

For extra flavor, consider adding diced bell peppers or jalapeños.
Calories: 600kcal
Cost: $15.00
Course: Main Dish
Cuisine: American
Keyword: beef

Growing up in the rural South, my life revolved around the clucking of chickens and the sizzle of hot oil in a cast-iron skillet. But every now and then, my culinary journey takes me beyond my Southern roots, and I find myself exploring flavors that are just as comforting and soul-stirring. Enter My Fave Birria Tacos. These beauties remind me of the community gatherings where everyone brought their own flair to the table. This recipe brings people together, much like those cherished potlucks and church suppers. When I take a bite, I’m transported to a place where stories are shared, laughter is abundant, and the food is so good it feels like a warm hug.

Why You’ll Absolutely Love This Recipe

  • It’s so easy, it feels like a little kitchen victory!
  • The flavors are deep and rich, just like a story passed down through generations.
  • This recipe is perfect for both cozy nights in and festive gatherings with friends and family.
  • The tender beef and savory broth make it a truly Yummy Meal Recipe.

Simple Ingredients for a Delicious Treat

One of the things I love most about this Homemade Birria Tacos Recipe is the simplicity of the ingredients, each bringing its own character to the dish. The mix of dried guajillo and ancho chiles with chipotle peppers in adobo creates a smoky, spicy base that’s simply irresistible. The chuck roast beef, when simmered to perfection, becomes tender enough to melt in your mouth. And don’t get me started on the fresh cilantro and shredded Oaxaca cheese that add a fresh and creamy finish. Oh, and if you’ve never dipped your taco in a rich broth, you’re in for a treat!

You’ll find the full ingredient list with exact measurements in the recipe card below!

Let’s Make Some Magic: Step-by-Step

Now, let’s roll up our sleeves and get cooking. We begin by making the chili paste, which is the heart of this dish. Remove the stems and seeds from your dried chiles, and let them soak in boiling beef stock until they’re soft and pliable. Blend them up with garlic, onion, and a medley of spices until you have a smooth, thick paste. Trust me, this paste is the secret sauce that makes these tacos unforgettable.

Next, we’re going to sear the beef until it’s golden brown. This step locks in the flavor and gives the meat a lovely caramelized exterior. Once that’s done, it’s time to let everything braise in the oven until the beef is tender enough to fall apart at the touch of a fork. The aroma filling your kitchen will be nothing short of magical.

A Few of My Favorite Tips

Here’s a little secret from me to you: don’t rush the braising process. Let the beef take its sweet time in the oven; the longer it cooks, the more tender and flavorful it becomes. And when it comes to assembling your tacos, be generous with the cheese and cilantro. They add a freshness that balances out the rich, savory beef perfectly.

How I Like to Serve This

I love serving these tacos with a side of Pico de Gallo for a burst of fresh flavor and a little kick. And of course, don’t forget the dipping sauce. It’s like a little bowl of liquid gold that elevates the taco experience to a whole new level. For a party, you could pair these with The Shrimp Tacos That Bring Sunshine to Any Table to offer a variety of flavors and textures.

Storing & Reheating (If There’s Any Left!)

If you happen to have any leftovers, store the beef and broth separately in airtight containers in the fridge. They’ll keep well for up to three days. When you’re ready to enjoy them again, reheat the beef gently on the stovetop and warm your tortillas in a dry skillet. The flavors will have deepened overnight, making for an even more delicious meal the next day.

Whether you’re hosting a gathering or enjoying a quiet night in, these Birria Tacos Authentic will bring a touch of warmth and community to your table. Bon Appetit!

My Fave Birria Tacos

Prep Time 30 minutes
Cook Time 2 hours 30 minutes
Total Time 3 hours
Servings 6 servings
Calories 600
These delicious birria tacos are packed with flavor and perfect for any occasion. Enjoy tender beef in a rich, spicy broth wrapped in warm tortillas.

Ingredients

Chili Paste Ingredients

  • 4 pieces dried guajillo peppers
  • 4 pieces dried ancho chiles
  • 4 pieces chipotle peppers in adobo

Meat Ingredients

  • 3 lbs organic chuck roast beef, chopped (chopped into medium-large chunks)

Taco Assembly Ingredients

  • 12 pieces organic corn tortillas

Instructions 

  • Make the chili paste by soaking dried chiles in beef stock, then blending with remaining ingredients until smooth.
  • Sear the beef in a dutch oven, then sauté onions and combine with chili paste, beef stock, and water.
  • Braise in the oven for 2.5 hours until beef is tender, then shred the meat.
  • Assemble tacos by dipping tortillas in broth, frying, and filling with beef, onions, and cheese.
  • Serve with dipping sauce and enjoy!

Notes

For extra flavor, let the beef marinate in the chili paste overnight.
Calories: 600kcal
Cost: $25.00
Course: Main Course
Cuisine: Mexican
Keyword: beef

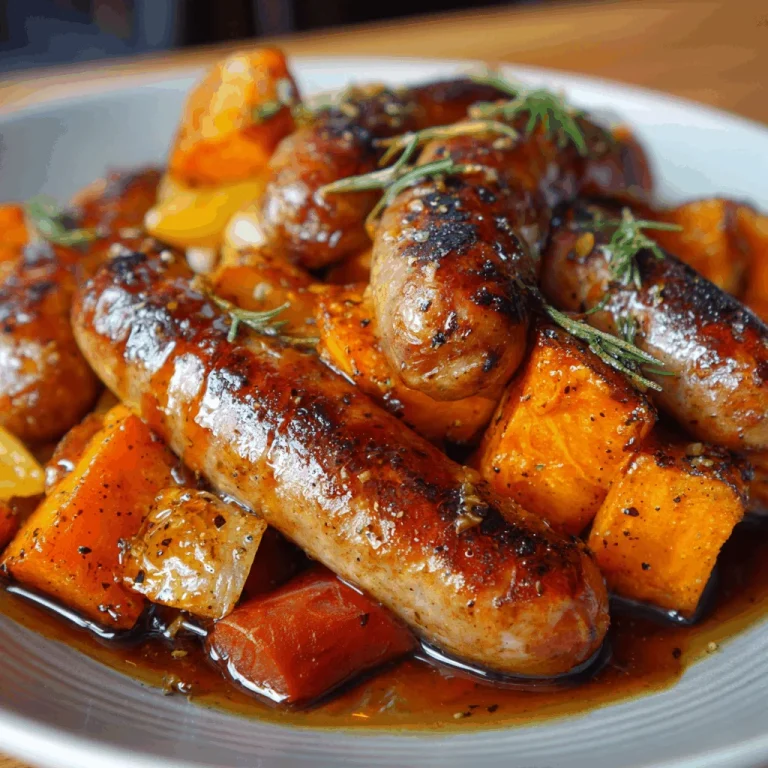
There’s something about the combination of sausage and sweet potatoes that just sings to my soul. Maybe it’s the way the hearty flavors of the sausage remind me of the early mornings on the farm, or the sweet, earthy taste of the potatoes that takes me back to those cool autumn evenings spent with family. Whatever it is, this dish brings a warmth and comfort that feels just like home. I remember my grandma, a woman of great character and an even greater cook, always saying that the best recipes are the ones that bring people together. And boy, does this one ever do that!

Why You’ll Absolutely Love This Recipe

  • It’s so easy, it feels like a little kitchen victory! With just a few steps, you’ll have a meal that tastes like you spent hours slaving over a hot stove.
  • This dish is a true one-pan wonder, making cleanup a breeze—more time to enjoy with family and less time scrubbing dishes.
  • It’s packed with flavor, from the savory sausage to the sweet, tender potatoes, all brought together with a delightful honey garlic sauce.
  • Perfect for any occasion, whether it’s a cozy dinner at home or a festive holiday gathering.

Simple Ingredients for a Delicious Treat

Let’s talk about these ingredients. Each one is a star in its own right. Sausage, whether you go for Italian or chicken, brings a hearty, meaty flavor that forms the backbone of the dish. Sweet potatoes add a natural sweetness that pairs beautifully with our savory sausage. And then there’s the sauce—a glorious mix of honey, garlic, and soy sauce, with just a hint of paprika to give it a little kick. It’s the kind of sauce that makes you want to lick your plate clean! Don’t forget the fresh parsley at the end—it adds a pop of color and a fresh flavor that ties everything together.

You’ll find the full ingredient list with exact measurements in the recipe card below!

Let’s Make Some Magic: Step-by-Step

Alright, y’all, let’s get cooking! First, we’re going to peel and cube those sweet potatoes. This is the kind of task that reminds me of sitting at the kitchen table with my mom, peeling away as we chatted about everything and nothing.

Next, heat up that olive oil in a skillet over medium heat. Add your sausage and let it brown for about 5-7 minutes. The smell of sausage sizzling in a pan is enough to make anyone’s mouth water!

Once your sausage is browned, toss in the cubed sweet potatoes and let them cook together for another 5 minutes. This is where the magic starts to happen, as the flavors begin to meld.

Now, for the sauce. In a bowl, mix together honey, minced garlic, soy sauce, paprika, salt, and pepper. Pour this over your sausage and sweet potatoes, and let it all simmer under a lid for about 10 minutes, until those sweet potatoes are tender and soaked with flavor.

Once everything’s cooked to perfection, garnish with a sprinkle of fresh parsley and serve it up!

A Few of My Favorite Tips

Here’s a little secret from me to you: if you want to add a bit more depth to your sauce, try adding a splash of apple cider vinegar. It gives the dish a tangy kick that complements the sweetness perfectly.

And if you’re looking to make this dish a bit spicier, a pinch of red pepper flakes will do the trick!

How I Like to Serve This

I love to serve this dish straight from the skillet to the table, family-style. It makes for a beautiful presentation and invites everyone to dig in and share. Pair it with a simple green salad or some crusty bread to soak up all that delicious sauce.

Storing & Reheating (If There’s Any Left!)

If you happen to have leftovers, this dish stores beautifully in an airtight container in the fridge for up to 3 days. When you’re ready to enjoy it again, simply reheat in the microwave or on the stovetop over low heat until warmed through. It’s the kind of meal that’s just as good, if not better, the second time around.

For more heartwarming recipes, check out my take on **[The Comforting Smothered Chicken and Rice Your Family Will Love](https://goldenchickenrecipes.com//the-comforting-smothered-chicken-and-rice-your-family-will-love)** or discover why **[This Creamy Tomato Tortellini Warms My Heart Every Time](https://goldenchickenrecipes.com//why-this-creamy-tomato-tortellini-warms-my-heart-every-time)**.

Sausage and Sweet Potatoes with Honey Garlic Sauce

Prep Time 10 minutes
Cook Time 20 minutes
Total Time 30 minutes
Servings 4 servings
Calories 450
A delicious and hearty dish combining savory sausage and sweet potatoes, drizzled with a flavorful honey garlic sauce.

Ingredients

Meat

  • 1 lb sausage (italian or chicken)

Vegetables

  • 2 large sweet potatoes, peeled and cubed

Sauce

  • 1/4 cup honey
  • 3 cloves garlic, minced
  • 2 tablespoons soy sauce (or tamari for gluten-free)
  • 1 tablespoon olive oil
  • 1 teaspoon paprika
  • salt and pepper, to taste
  • fresh parsley, chopped (for garnish)

Instructions 

  • Peel and cube the sweet potatoes.
  • In a skillet, heat olive oil over medium heat. Add sausage and brown for 5-7 minutes.
  • Stir in cubed sweet potatoes and cook for another 5 minutes.
  • In a bowl, mix honey, garlic, soy sauce, paprika, salt, and pepper. Pour over the sausage and sweet potatoes.
  • Cover and simmer for 10 minutes until sweet potatoes are tender.
  • Garnish with parsley and enjoy!

Notes

For a gluten-free option, use tamari instead of soy sauce.
Calories: 450kcal
Cost: $15.00
Course: Main Course
Cuisine: American
Keyword: Sausage

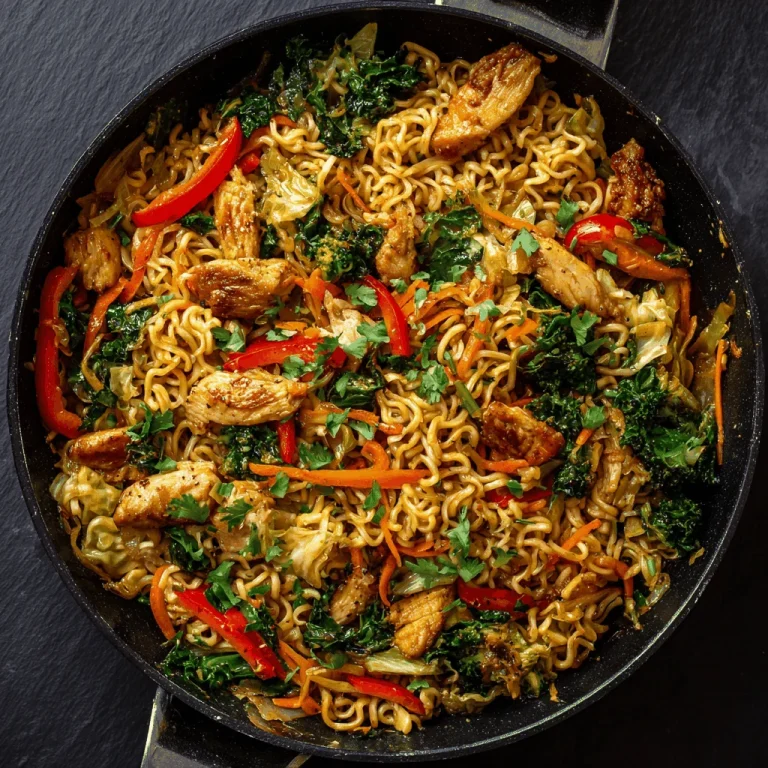
Growing up in the heart of the rural South, my life was steeped in the simple pleasures of home-cooked meals and the warmth of family gatherings. Our kitchen was always buzzing with activity, and there was never a shortage of hearty dishes to share. One such dish that brings back fond memories is this Chicken Ramen Stir Fry. It’s not just a meal; it’s a comforting embrace that reminds me of cold evenings spent around the table with loved ones, sharing stories and laughter. This recipe, with its rich flavors and simple ingredients, is a testament to the beauty of uncomplicated cooking.

Why You’ll Absolutely Love This Recipe

  • It’s a breeze to make, offering the joy of cooking without the fuss.
  • The flavors are rich and satisfying, like a warm hug in a bowl.
  • Perfect for a quick weeknight dinner or a weekend treat.
  • Uses everyday ingredients, making it accessible for any home cook.

Simple Ingredients for a Delicious Treat

One of the things I love most about this Chicken Ramen Stir Fry is how it transforms simple ingredients into a feast for the senses. With just a handful of items, you can create something truly special. The chicken, fresh from the farm, is the star here, bringing a touch of home to every bite. The vibrant red bell pepper and snap peas add a delightful crunch, while the ginger and garlic infuse the dish with warmth and depth. And let’s not forget the ramen noodles—versatile and comforting, they tie everything together beautifully.

You’ll find the full ingredient list with exact measurements in the recipe card below!

Let’s Make Some Magic: Step-by-Step

Now, let’s dive into the cooking! I’ll be right there with you, guiding you through each step.

Start by bringing a pot of water to a boil for the ramen noodles. While the water is heating, mix together the soy sauce, oyster sauce, sesame oil, sugar, and white pepper in a small bowl to create a sauce that’ll bring everything together. Set it aside for now.

Heat a tablespoon of vegetable oil in a large wok or skillet over high heat. Add your chicken pieces and stir-fry them until they’re golden brown and cooked through—about 5 to 6 minutes should do it. Once done, remove the chicken and set it aside.

In the same pan, add the remaining oil and toss in your bell pepper, snap peas, and carrot. Stir-fry them for 2 to 3 minutes until they’re crisp-tender. Add in the minced garlic, ginger, and the white parts of the green onions, letting them cook for another 30 seconds until they’re aromatic.

Meanwhile, cook the ramen noodles in the boiling water for 2 minutes—just enough to keep them slightly undercooked. Drain them well and set aside.

Now, bring everything together by adding the cooked chicken back to the pan with the vegetables. Toss in the ramen noodles and the sauce you prepared earlier. Stir-fry everything together for 2 to 3 minutes until it’s well combined and heated through. Garnish with the green parts of the sliced green onions and serve hot.

A Few of My Favorite Tips

Here’s a little secret from my kitchen to yours: always taste as you go. It’s the best way to ensure your dish is seasoned to your liking. If you like a bit of heat, feel free to add a dash of chili flakes or a splash of hot sauce. And if you’re a fan of crunchy textures, toss in some roasted peanuts or cashews before serving.

How I Like to Serve This

This dish is a meal in itself, but I love serving it with a side of pickled vegetables for a bit of tangy contrast. A simple cucumber salad or some kimchi works wonders alongside this stir fry, adding a refreshing element to each bite.

Storing & Reheating (If There’s Any Left!)

Should you have any leftovers, store them in an airtight container in the fridge for up to three days. When you’re ready to enjoy them again, simply reheat in a skillet over medium heat, adding a splash of water or broth to bring back the sauce’s silky texture. It’s a meal that holds its charm even the next day.

If you enjoyed this heartwarming dish, you might also like to try **Why This Creamy Tomato Tortellini Warms My Heart Every Time** or the **The Comforting Smothered Chicken and Rice Your Family Will Love**. For those who crave a little kick, the **Why This Bang Bang Chicken Bowl Will Steal Your Heart** is a must-try!

Chicken Ramen Stir Fry

Prep Time 10 minutes
Cook Time 15 minutes
Total Time 25 minutes
Servings 4 servings
Calories 450
A quick and delicious stir fry featuring tender chicken, colorful vegetables, and ramen noodles, all tossed in a savory sauce.

Ingredients

Noodles

  • 2 packages ramen noodles (seasoning packets discarded)

Protein

  • 1 lb chicken pieces (cut into bite-sized pieces)

Vegetables

  • 1 cup snap peas
  • 1 each red bell pepper (sliced)
  • 1 each carrot (julienned)
  • 3 cloves garlic (minced)
  • 1 tbsp ginger (minced)
  • 3 each green onions (sliced (white and green parts separated))

Sauces

  • 1/4 cup soy sauce
  • 2 tbsp oyster sauce
  • 1 tbsp sesame oil
  • 1 tsp sugar
  • 1/4 tsp white pepper

Oil

  • 2 tbsp vegetable oil

Instructions 

  • Boil water for ramen noodles.
  • Mix soy sauce, oyster sauce, sesame oil, sugar, and white pepper in a bowl.
  • Heat oil, stir-fry chicken until cooked, then set aside.
  • Stir-fry bell pepper, snap peas, and carrot until crisp-tender.
  • Add garlic, ginger, and white onions; stir-fry until fragrant.
  • Combine chicken, noodles, and sauce; stir-fry until heated through.

Notes

For extra flavor, add a dash of chili oil or sesame seeds before serving.
Calories: 450kcal
Cost: $15.00
Course: Main Course
Cuisine: Asian
Keyword: chicken

Growing up in the rural South, my life has always been intertwined with the essence of chicken. From early mornings collecting fresh eggs with my father to the countless weekends spent perfecting our family’s fried chicken recipe, chicken has been more than just a meal—it’s been a way of life. Today, I’m sharing a dish that feels like a warm hug from home: Chicken Bacon Ranch Pasta. This recipe brings together the creamy goodness of ranch, the savory delight of bacon, and the comforting taste of chicken, all wrapped up in a hearty pasta. It reminds me of family gatherings where laughter echoed through the house and the aroma of home-cooked meals filled the air. Let’s dive into this dish that’s sure to become a staple in your home as it has in mine.

Why You’ll Absolutely Love This Recipe

  • It’s so easy, it feels like a little kitchen victory!
  • The combination of chicken, bacon, and ranch is a match made in heaven.
  • Perfect for family dinners or a cozy night in.
  • It’s adaptable—add your favorite veggies or spices to make it your own.

Simple Ingredients for a Delicious Treat

When it comes to cooking, I’ve always believed in letting simple, quality ingredients shine. This Chicken Bacon Ranch Pasta Recipe is no exception. Each component plays a crucial role in building layers of flavor.

  • Cheddar Cheese: The sharpness of cheddar adds the perfect cheesy touch.
  • Bacon: Adds a smoky, savory depth that’s irresistible.
  • Chicken: Tender and juicy, it’s the heart of the dish.
  • Ranch Dressing Mix: Brings everything together with its creamy, herby notes.

You’ll find the full ingredient list with exact measurements in the recipe card below!

Let’s Make Some Magic: Step-by-Step

Imagine we’re side by side in the kitchen, aprons on, ready to create something special. Here’s how we do it:

  1. Cook the Bacon: In a large skillet over low heat, let the bacon crisp up. Keep those drippings—they’re liquid gold for flavor!
  2. Prepare the Chicken: Slice the chicken into thin pieces, season well, and sear them in the bacon drippings until golden. Let them rest before cubing.
  3. Boil the Pasta: Cook the rotini until al dente. We want it to hold up to the creamy sauce.
  4. Make the Sauce: Melt butter, sauté garlic, then add flour. Slowly whisk in the half and half, ranch seasoning, and cheese until smooth.
  5. Combine: Toss the pasta in the sauce, fold in the chicken, and sprinkle with the chopped bacon. Serve it up warm and watch the smiles appear.

A Few of My Favorite Tips

Here’s where I share a few secrets from my kitchen to yours:

  • Bacon: Cook it low and slow for maximum crispiness.
  • Chicken: Let it rest before cutting to keep it juicy.
  • Sauce: Stir continuously to prevent any lumps.

How I Like to Serve This

This dish is a meal in itself, but if you’re feeling festive, serve it with a side of crusty bread or a fresh green salad. It’s a dish that brings people together, just like a Sunday supper.

Storing & Reheating (If There’s Any Left!)

If you happen to have leftovers, store them in an airtight container in the fridge for up to three days. To reheat, add a splash of milk or cream to the pasta and warm it gently on the stove. It’ll bring back that creamy magic as if it were just made.

For more delicious chicken recipes, check out my other favorites like Why These Cheesy Garlic Chicken Wraps Are a Family Favorite and The Creamy Garlic Parmesan Chicken Pasta That Feels Like Home. And if you’re in the mood for something a bit different, Why This Bang Bang Chicken Bowl Will Steal Your Heart is a must-try!

Chicken Bacon Ranch Pasta

Prep Time 15 minutes
Cook Time 30 minutes
Total Time 45 minutes
Servings 4 servings
Calories 650
A creamy and savory pasta dish featuring chicken, bacon, and ranch flavors.

Ingredients

Dairy

  • 2 cups cheddar cheese, shredded

Meat

  • 6 strips bacon

Pasta

  • 2 cups uncooked pasta (rotini recommended)

Chicken

  • 2 small chicken fillets

Condiments

  • 2 tablespoons dry ranch dressing seasoning mix

Others

  • 2 tablespoons butter
  • 2 tablespoons flour
  • 1 tablespoon garlic, minced
  • 2 cups half and half
  • 1 teaspoon onion powder
  • 1 teaspoon italian seasoning
  • to taste salt/pepper

Instructions 

  • Cook bacon in a skillet over low heat until crisp. Set aside and chop.
  • Season chicken with salt, pepper, onion powder, and Italian seasoning. Sear in bacon drippings until cooked through.
  • Boil pasta in salted water until al dente. Drain.
  • Melt butter, sauté garlic, add flour, then gradually stir in half and half, ranch seasoning, and cheese until smooth.
  • Combine pasta, chicken, and garnish with bacon. Serve warm.

Notes

For extra flavor, consider adding vegetables like spinach or bell peppers.
Calories: 650kcal
Cost: $15.00
Course: Main Course
Cuisine: American
Keyword: chicken