Author

Tom

Browsing

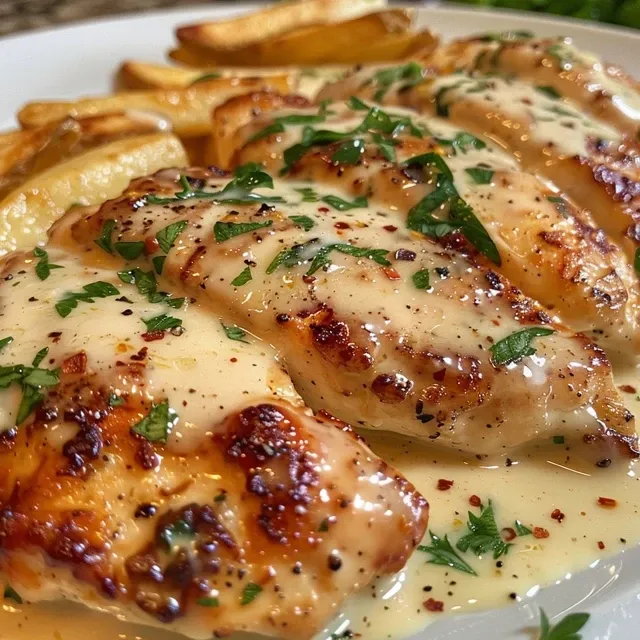
A Heartwarming Dish: The Creamy Garlic Chicken That Warms Hearts and Homes

Comfort food is more than just a meal; it’s a connection to our roots, a taste of nostalgia, and a warm embrace on a chilly evening. This creamy garlic chicken recipe embodies all of that, bringing family together around the dinner table. With its rich, creamy sauce and tender chicken, it’s a dish that’s not only delicious but also incredibly simple to make. In just under 30 minutes, you can whip up a hearty meal that will satisfy even the pickiest eaters. Let’s dive into the comforting world of creamy garlic chicken and discover why this recipe will become a staple in your kitchen.

Why You’ll Love This Creamy Garlic Chicken

This dish isn’t just food; it’s a celebration of flavors. Here are some reasons why you’ll fall in love with this creamy garlic chicken:

  • Quick and Easy: This dish comes together in under 30 minutes, making it perfect for busy weeknights.
  • Rich Flavor: The combination of garlic, cream, and chicken broth creates a deeply satisfying sauce that you’ll want to savor.
  • Customizable: You can easily adjust the ingredients to suit your taste, dietary needs, or what you have on hand.
  • Family-Friendly: Even the pickiest of eaters will appreciate the creamy, comforting flavors of this dish.
  • Leftover Magic: This chicken tastes even better the next day, perfect for meal prep or a quick lunch.

Essential Ingredients for Creamy Garlic Chicken

Before we get cooking, let’s gather our ingredients. Here’s what you’ll need:

  • 2 boneless, skinless chicken breasts (approximately 1.3 lbs): Thin-cut chicken works best for even cooking.
  • 1/2 teaspoon Italian seasoning: A wonderful blend of herbs that adds depth to the dish.
  • 1/2 teaspoon salt: Essential for seasoning the chicken.
  • 1/4 teaspoon freshly cracked black pepper: For a touch of heat.
  • 1/4 cup all-purpose flour: Helps thicken the sauce later, giving it a lovely consistency.
  • 2 tablespoons olive oil: For sautéing the chicken.
  • 2 tablespoons butter: Divided for cooking and flavor.
  • 1 whole garlic bulb (about 8-9 cloves): Fresh garlic is key for that rich flavor.
  • 1 cup chicken broth: Forms the base of the sauce.
  • 3/4 cup heavy cream: Adds a luscious texture and richness.
  • 1/2 teaspoon garlic powder: For an extra boost of garlic flavor.
  • Salt and pepper to taste: Always adjust to your liking.

How to Prepare the Perfect Creamy Garlic Chicken: Step-by-Step Guide

Close-up side view of Creamy Garlic Chicken with garlic cloves and herbs.

Now, let’s get cooking! Follow these simple steps for creamy garlic chicken that will warm your heart.

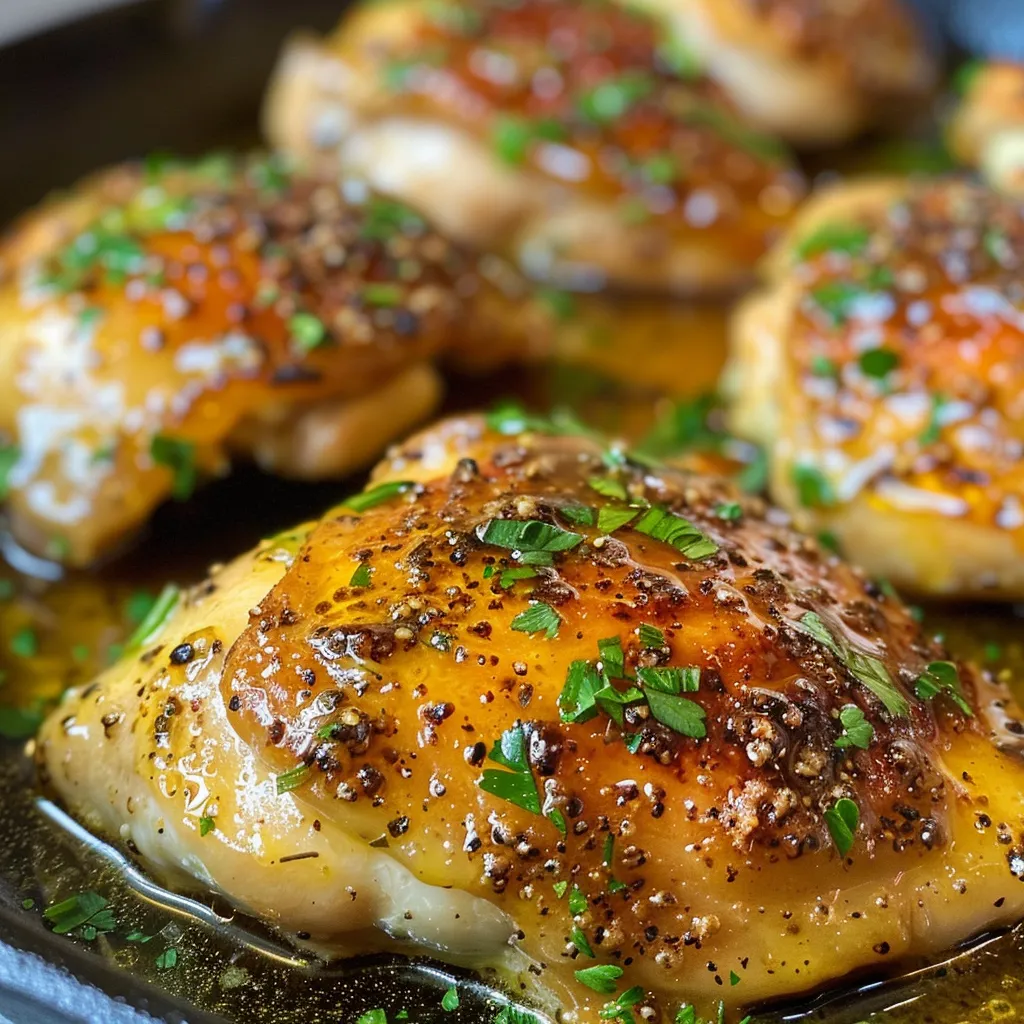
  1. Fillet each chicken breast into two thinner cutlets or use thin-cut chicken breasts for even cooking. Season the chicken with 1/2 teaspoon Italian seasoning, 1/2 teaspoon salt, and 1/4 teaspoon freshly cracked black pepper. Coat both sides of the chicken breasts with 1/4 cup all-purpose flour, rubbing it in evenly to help thicken the sauce later.
  2. In a large skillet over medium heat, add 2 tablespoons olive oil and 1 tablespoon butter. Cook the chicken on each side for about 4 minutes until it’s golden brown and cooked through. Remove the chicken and cover it to keep it warm while you make the sauce.
  3. Smash the garlic cloves from 1 whole garlic bulb with the side of a knife. In the same skillet, add the remaining 1 tablespoon butter and the smashed garlic cloves, then sauté on medium-low heat for 3 minutes until they’re lightly browned and fragrant.
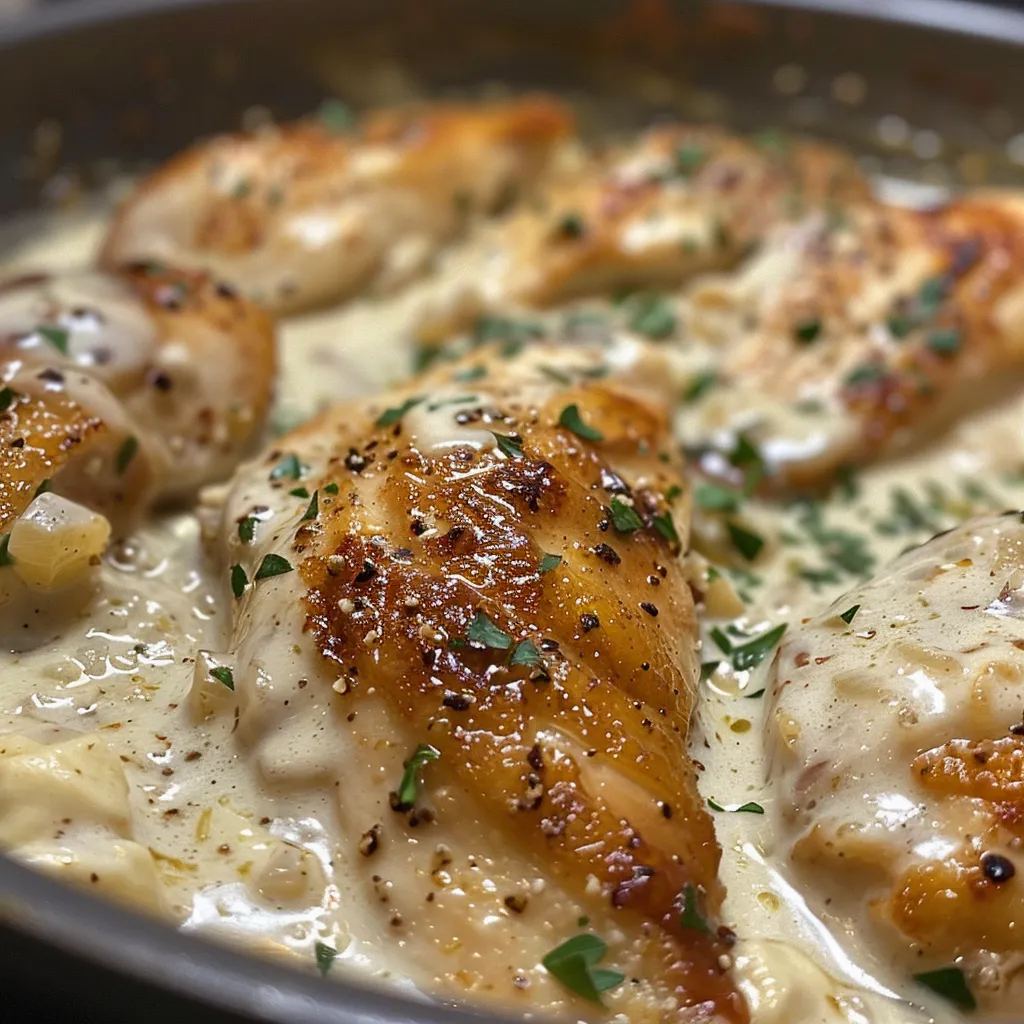
  4. Pour in 1 cup chicken broth and 3/4 cup heavy cream. Add 1/2 teaspoon garlic powder, stir well, and scrape up the browned bits from the skillet for extra flavor.
  5. Let the sauce simmer for 8-10 minutes until it’s reduced and thickened by about half. Season the sauce with salt and pepper to taste, then return the chicken to the skillet, spooning the sauce over the top. Heat through for a couple of minutes, optionally garnishing with fresh parsley, and serve immediately.

Pro Tips for Perfecting Your Creamy Garlic Chicken

Here are some expert insights to elevate your dish:

  • Perfect Chicken Texture: Ensure your chicken is at room temperature before cooking for even doneness.
  • Don’t Rush the Sauce: Allow the sauce to simmer until it thickens; this enhances the flavor significantly.
  • Use Fresh Garlic: Fresh garlic will yield a more robust flavor than jarred garlic.
  • Experiment with Herbs: Add fresh thyme or rosemary to the sauce for an aromatic twist.
  • Make It Spicy: For a kick, add a pinch of red pepper flakes to the sauce.
  • Use Bone-in Chicken: Bone-in chicken can add even more flavor to the dish if you have it on hand.
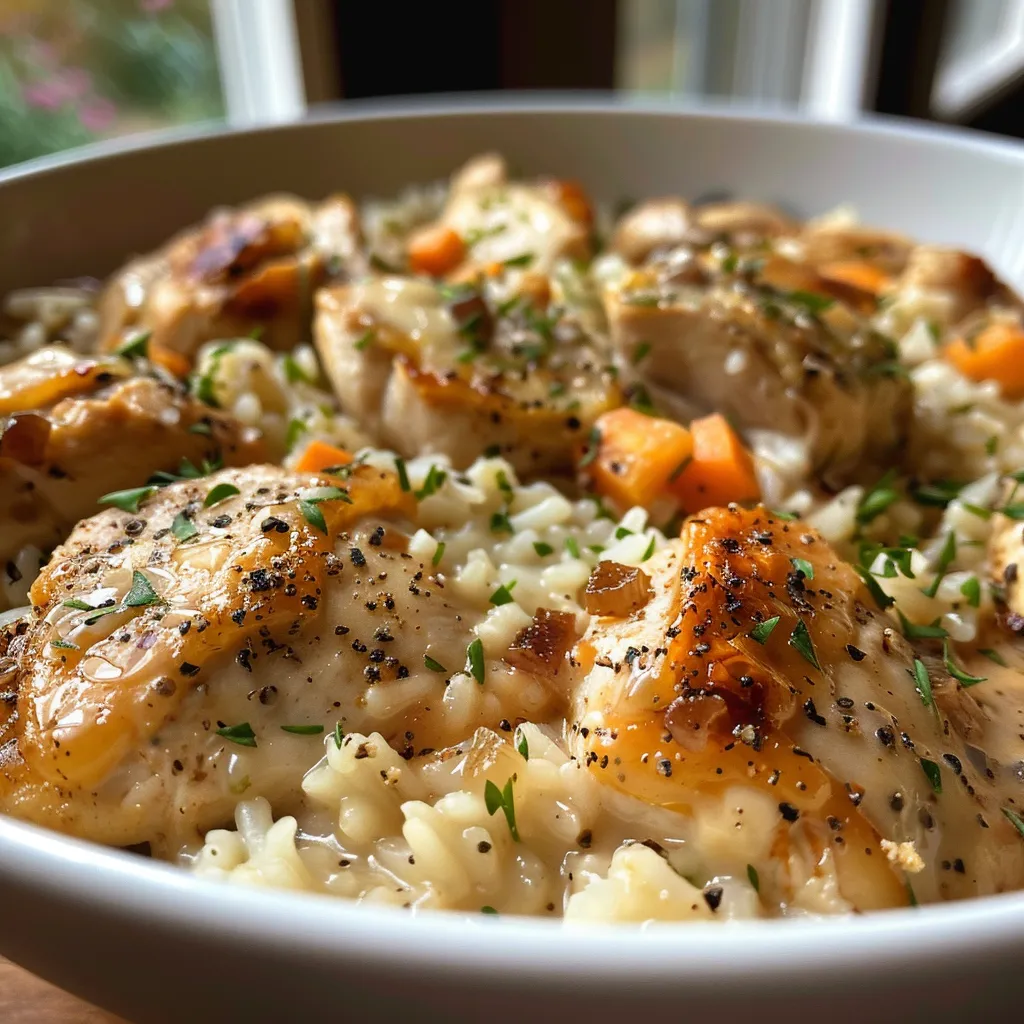
  • Perfect Pairings: Serve with crusty bread, rice, or mashed potatoes to soak up that delicious sauce.
  • Meal Prep Friendly: This dish stores well, making it perfect for meal prep or leftovers.

Common Mistakes and Troubleshooting

Even the best chefs have off days. Here’s how to avoid common pitfalls:

  • Sauce Too Thin: If your sauce isn’t thickening, add a bit more flour or let it simmer longer.
  • Overcooked Chicken: Use a meat thermometer; chicken should reach an internal temperature of 165°F.
  • Too Much Garlic: If the flavor is too strong, balance it with more cream or broth.
  • Not Enough Seasoning: Always taste before serving; adjust salt and pepper as needed.

Flavor Variations to Try

Feeling adventurous? Here are some delightful variations you can try:

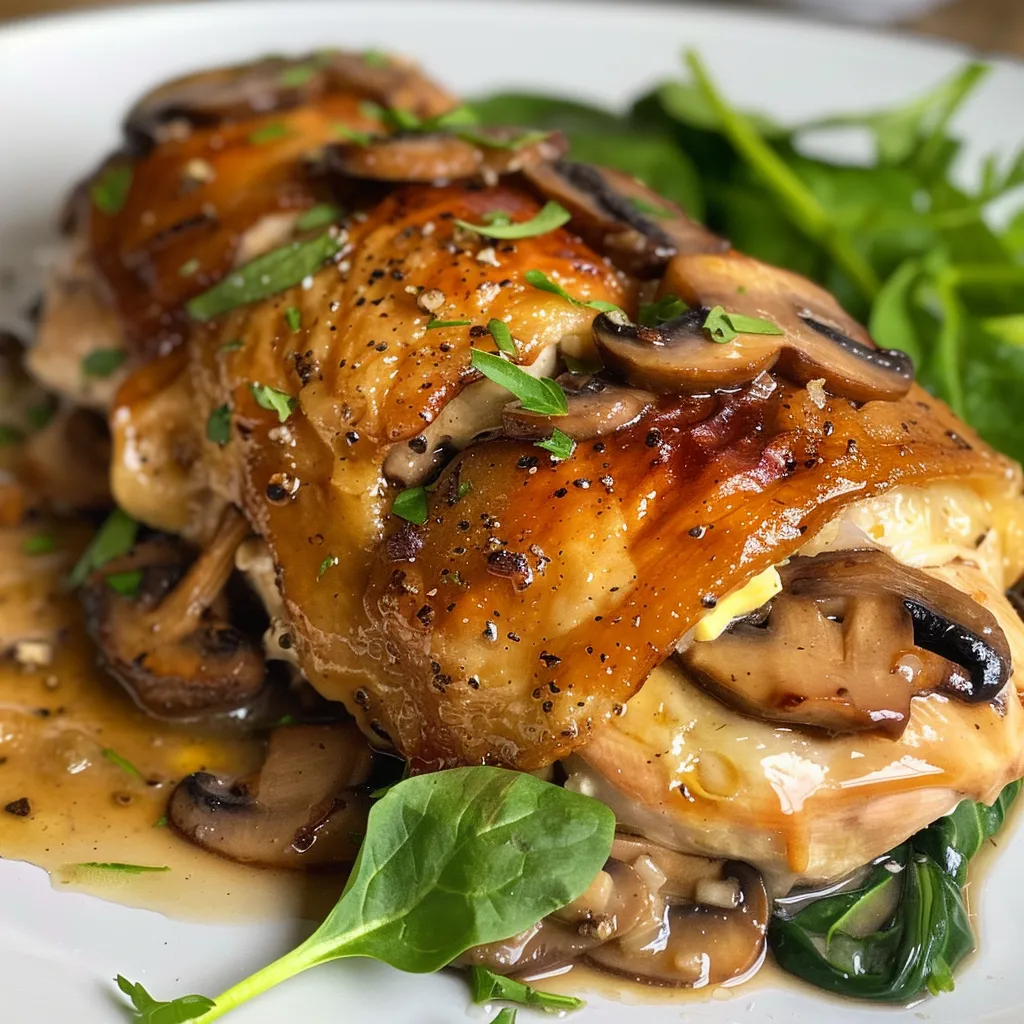
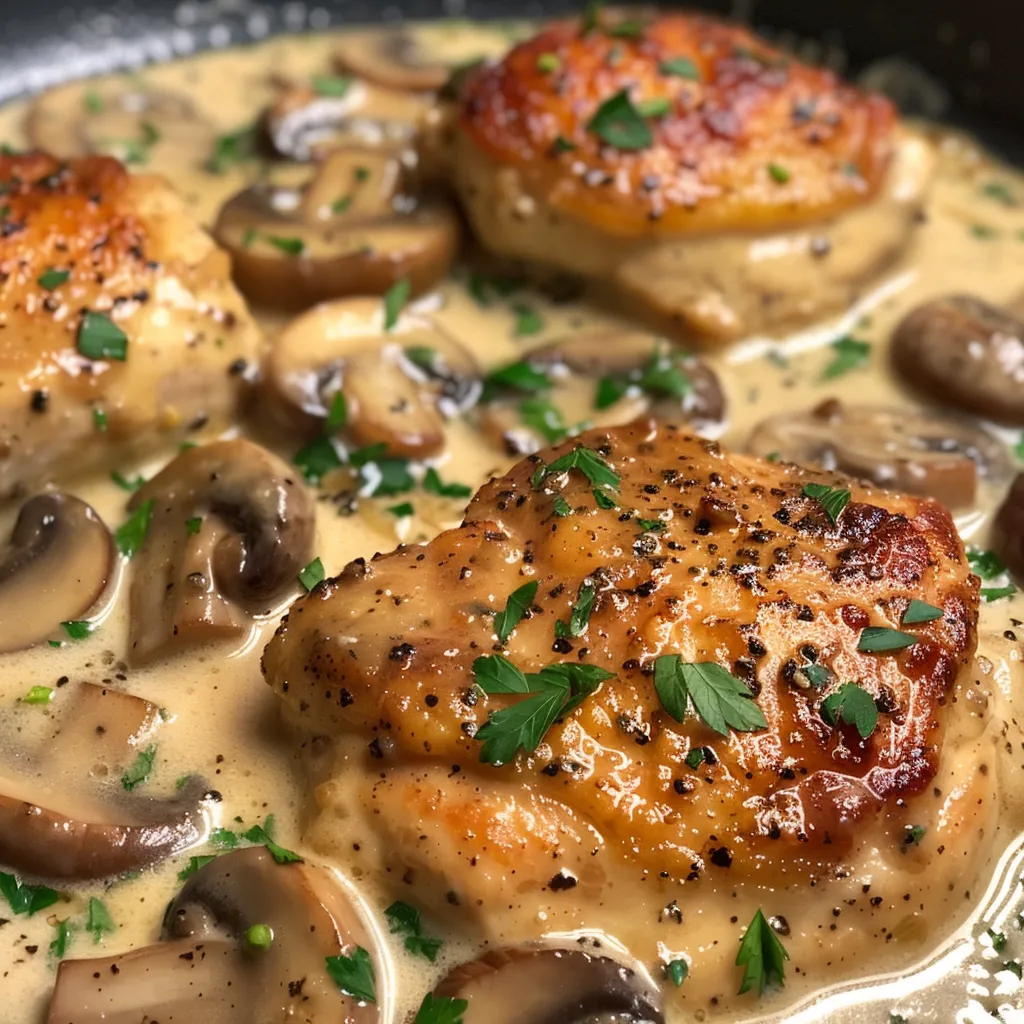
  • Mushroom Creamy Garlic Chicken: Add sliced mushrooms to the skillet with the garlic for an earthy flavor.
  • Lemon Garlic Chicken: A squeeze of lemon juice and zest brightens the dish beautifully.
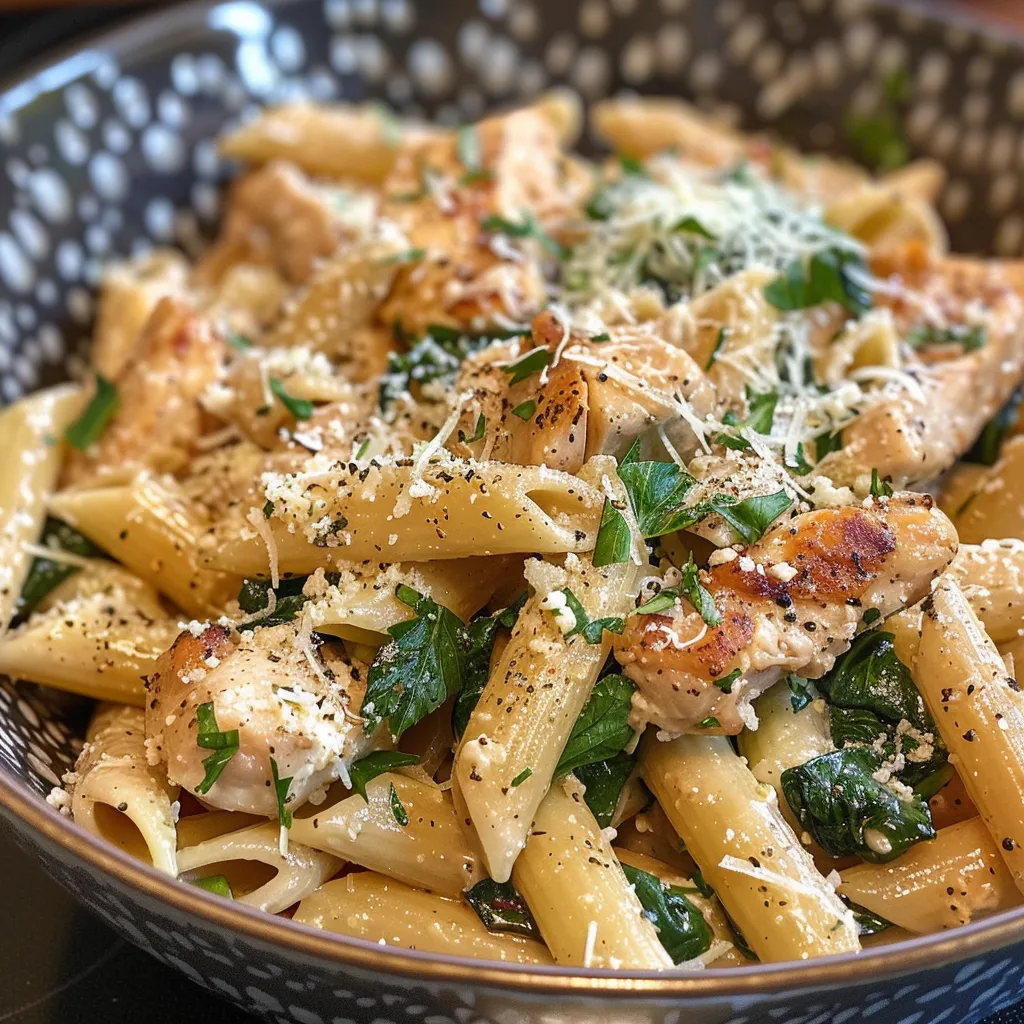
  • Spinach & Garlic Chicken: Stir in fresh spinach just before serving for added color and nutrition.
  • Sun-Dried Tomato Chicken: Mix in chopped sun-dried tomatoes for a burst of tangy flavor.

How to Store Creamy Garlic Chicken: Best Practices

Leftovers? No problem! Here’s how to safely store and reheat:

  • Refrigeration: Store in an airtight container in the fridge for up to 3 days.
  • Freezing: For longer storage, freeze in a sealed container for up to 3 months. Reheat gently on the stove.
  • Reheating: Add a splash of broth or cream when reheating to restore the sauce’s creamy texture.

FAQs: Frequently Asked Questions About Creamy Garlic Chicken

Let’s address some common questions to help you on your cooking journey:

  • What type of chicken works best for creamy garlic chicken recipes? Skinless chicken breasts or thighs work beautifully for this dish.
  • How can I thicken the creamy garlic sauce if it turns out too runny? Simmer longer, or add a cornstarch slurry for quick thickening.
  • What are some easy ways to add more flavor to creamy garlic chicken? Fresh herbs, lemon juice, or a splash of white wine can elevate the dish.
  • Can I use low-fat cream instead of heavy cream? Yes, but the sauce may not be as rich.
  • How do I know when the chicken is cooked through? Use a meat thermometer; chicken should reach an internal temperature of 165°F.
  • What side dishes pair well with creamy garlic chicken? Consider rice, mashed potatoes, or a fresh garden salad.
  • Can I make this dish ahead of time? Yes, it reheats well and can be made up to 2 days in advance.
  • Is this recipe suitable for freezing? Absolutely! Just ensure it’s stored in an airtight container.

Nutrition Tips and Dietary Adaptations

If you’re looking to lighten up your creamy garlic chicken, here are some options:

  • Low-Calorie Option: Swap heavy cream for half-and-half or Greek yogurt for a lighter sauce.
  • Gluten-Free: Use gluten-free flour or cornstarch as a thickener.
  • Dairy-Free: Replace heavy cream with coconut milk or a dairy-free cream alternative.

Equipment Recommendations

To make your cooking experience smooth and enjoyable, here are some recommended tools:

  • High-Quality Skillet: A good non-stick skillet ensures even cooking and easy cleanup.
  • Meat Thermometer: Essential for perfect chicken every time.
  • Wooden Spoon: Great for stirring and scraping up those flavorful bits from the skillet.

Serving Suggestions for Creamy Garlic Chicken

For the perfect meal, consider these serving ideas:

  • Rustic Bread: Serve with crusty bread to soak up the delicious sauce.
  • Simple Salad: A fresh green salad with a light vinaigrette balances the richness of the dish.
  • Roasted Veggies: Pair with seasonal roasted vegetables for a colorful and nutritious plate.

Conclusion: Your New Go-To Comfort Dish

This creamy garlic chicken recipe is more than just a meal; it’s an invitation to gather around the table with loved ones, sharing stories and laughter. With its rich flavors and simple preparation, it’s destined to become a family favorite. So roll up your sleeves, gather your ingredients, and get ready to whip up a dish that warms both hearts and homes. Happy cooking!

Creamy Garlic Chicken

Prep Time 10 minutes
Cook Time 20 minutes
Total Time 30 minutes
Servings 4 servings
Calories 550
A rich and flavorful dish featuring tender chicken breasts in a creamy garlic sauce, perfect for a comforting meal.

Ingredients

Protein

  • 2 pieces boneless, skinless chicken breasts (about 1.3 lbs)
  • 1/2 teaspoon Italian seasoning
  • 1/2 teaspoon salt
  • 1/4 teaspoon freshly cracked black pepper
  • 1/4 cup all-purpose flour
  • 2 tablespoons olive oil
  • 2 tablespoons butter, divided
  • 1 whole garlic bulb (about 8-9 cloves)
  • 1 cup chicken broth
  • 3/4 cup heavy cream
  • 1/2 teaspoon garlic powder
  • to taste Salt and pepper

Instructions 

  • Fillet each chicken breast into two thinner cutlets and season with Italian seasoning, salt, and pepper. Coat with flour.
  • Heat olive oil and 1 tablespoon butter in a skillet. Cook chicken until golden and cooked through, then set aside.
  • Sauté smashed garlic cloves in remaining butter until fragrant. Add chicken broth and heavy cream, then stir in garlic powder. Simmer until sauce thickens.
  • Return chicken to skillet, spoon sauce over, and heat through. Garnish with parsley if desired and serve.

Notes

For extra flavor, add fresh parsley or serve with sides like rice or vegetables.
Calories: 550kcal
Cost: $15
Course: Main Course
Cuisine: American
Keyword: chicken, creamy, Garlic

The Secret to Perfectly Juicy Oven-Baked Chicken Breast

Gather ’round, folks! Today, we’re diving into the heart of the kitchen with a beloved dish that’s a staple in many homes: oven-baked chicken breast. This simple yet flavorful recipe promises juicy chicken that’s perfect for cozy family dinners or meal prep for the week ahead. With just a few ingredients, you’ll create a dish that not only satisfies hunger but also warms the soul. Let’s roll up our sleeves and learn how to bake juicy chicken breast in the oven like a pro!

Why You’ll Love This Recipe

When it comes to chicken, this oven-baked recipe stands out for several reasons:

  • Flavorful results: With a mix of pantry staples, you’ll create a rub that infuses the chicken with zesty flavor.
  • Juicy texture: By following this method, you’ll end up with tender, juicy chicken breasts that won’t dry out.
  • Quick and easy: This recipe requires minimal prep time, making it perfect for busy weeknight meals.
  • Versatile dish: Serve it with your favorite sides or incorporate it into salads, wraps, or sandwiches.
  • Healthy option: Lean protein source that’s low in fat, perfect for those watching their diet.

Ingredients Breakdown

Here’s what you’ll need to whip up this delightful dish:

  • 2 boneless skinless chicken breasts (6–8 oz each): Look for fresh, high-quality chicken for the best flavor.
  • 1 1/2 tablespoons olive oil: This helps with browning and adds healthy fats.
  • 1 teaspoon garlic powder: For a savory kick.
  • 1/2 teaspoon paprika: Adds color and a mild smokiness.
  • 3/4 teaspoon salt: Enhances all the flavors.
  • 1/2 teaspoon black pepper: For a touch of heat.
  • 1 teaspoon dried Italian herbs: A blend of thyme, oregano, and basil works wonders.
  • 1 tablespoon lemon juice: Brightens the dish and adds a refreshing zing.

Step-by-Step Instructions to Bake Juicy Chicken Breast

Side view of succulent baked chicken breast garnished with Italian herbs.

Now that we have our ingredients ready, let’s get started on the cooking process:

  1. Preheat the oven to 400°F (204°C) and line a baking sheet with parchment paper or lightly greased foil.
  2. Pat chicken breasts dry, then pound to an even 3/4-inch thickness for uniform cooking.
  3. Brush both sides with olive oil and season evenly with garlic powder, paprika, salt, pepper, and dried Italian herbs.
  4. If desired, drizzle with lemon juice and marinate in the refrigerator for 30 minutes to 4 hours for enhanced flavor.
  5. Let the chicken rest at room temperature for 15 minutes before baking to ensure even cooking.
  6. Arrange breasts on the prepared baking sheet, leaving space for air circulation.
  7. Bake for 20 to 23 minutes or until a meat thermometer inserted into the thickest part reads 165°F (74°C).
  8. Remove from oven and let rest, tented with foil, for 5 minutes before slicing and serving.

Pro Tips for Success

To ensure your chicken turns out perfectly every time, keep these expert insights in mind:

  • Use a meat thermometer: This is essential for accuracy. The thickest part should read 165°F (74°C) to ensure it’s safe to eat.
  • Resting time matters: Allow the chicken to rest after baking; this helps the juices redistribute, keeping it moist.
  • Don’t skip the marinating: Even a short marination can enhance the flavor; longer is better!
  • Pat dry before seasoning: This helps the oil and spices adhere better for a more flavorful crust.
  • Experiment with spices: Feel free to add your favorite herbs and spices for a personal touch.
  • Use bone-in chicken: If you want even more flavor, try using bone-in, skin-on chicken breasts.
  • Don’t overcrowd the pan: Space is crucial for even cooking; if necessary, bake in batches.
  • Make it a one-pan dish: Add vegetables like carrots or potatoes around the chicken for a complete meal.

Common Mistakes and Troubleshooting

Even the best cooks make mistakes. Here are some common pitfalls and how to avoid them:

  • Dry chicken: Overcooking is the main culprit. Always use a meat thermometer for accuracy.
  • Uneven cooking: Ensure your chicken breasts are of uniform thickness for even baking.
  • Flavorless chicken: Don’t skip seasoning or marinating; it’s crucial for taste.
  • Sticking to the pan: Use parchment paper or a silicone mat to prevent sticking.

Delicious Variations

Switch things up with these tasty variations of your baked chicken:

  • Honey Garlic Chicken: Add honey and minced garlic to your marinade for a sweet and savory twist.
  • Spicy Chipotle Chicken: Incorporate chipotle powder or diced chipotle peppers for a kick.
  • Herb-Crusted Chicken: Use fresh herbs like rosemary, thyme, or dill for a fragrant alternative.
  • Asian-Inspired Chicken: Marinate in soy sauce, ginger, and sesame oil for a stir-fry flavor.

Storage and Make-Ahead Instructions

Planning ahead? Here’s how to store and prep your chicken:

  • Refrigerator: Store cooked chicken in an airtight container for up to 4 days.
  • Freezer: Freeze cooked chicken in a freezer-safe container for up to 3 months.
  • Reheating: Gently reheat in the oven at 350°F (175°C) until warmed through.
  • Make-ahead: Marinate and store chicken in the fridge the night before for a quick bake the next day.

FAQ: Your Oven-Baked Chicken Queries Answered

Let’s tackle some common questions:

  • Can I use frozen chicken breasts? It’s best to thaw them first for even cooking.
  • What’s the best side dish with baked chicken? Pair it with roasted veggies, rice, or a fresh salad.
  • How can I tell when the chicken is done? A meat thermometer is your best friend; it should register 165°F (74°C).
  • Can I bake chicken with the skin on? Yes, just adjust the cooking time for even crispiness.
  • What if my chicken is still pink inside? Return it to the oven until it reaches the safe temperature.
  • Can I marinate overnight? Absolutely! It enhances the flavor significantly.
  • How do I get crispy skin on baked chicken? Pat the skin dry and bake at a higher temperature.
  • What’s the best way to slice cooked chicken? Always slice against the grain for tenderness.

Nutrition Tips and Dietary Adaptations

This oven-baked chicken is not only delicious but can also fit into various dietary needs:

  • Low-carb option: Pair with non-starchy veggies to keep carbs low.
  • Dairy-free: This recipe is naturally dairy-free; just ensure your sides are as well.
  • Gluten-free: All ingredients used are gluten-free, making it a safe choice.
  • Paleo-friendly: Use olive oil and herbs for a clean, healthy meal.

Essential Equipment Recommendations

Here are some tools that make the process easier:

  • Meat thermometer: Essential for checking doneness and ensuring juicy chicken.
  • Baking sheet: A sturdy, rimmed baking sheet is a must.
  • Parchment paper: It makes cleanup a breeze and prevents sticking.
  • Mixing bowls: For preparing your marinade and seasoning the chicken.

Serving Suggestions

Wondering how to serve your delicious chicken? Here are some ideas:

  • Over a bed of greens: Slice and serve atop a fresh salad for a light meal.
  • In wraps or sandwiches: Add to wraps with veggies for a quick lunch.
  • With grains: Serve alongside quinoa, rice, or couscous for a hearty dinner.
  • As part of a charcuterie board: Slice thin and pair with cheeses and olives for a unique appetizer.

There you have it! The ultimate guide to baking juicy chicken breasts in the oven, from the heart of my kitchen to yours. Remember, cooking should feel like a warm hug from home—simple, comforting, and always worth sharing over good company. So gather your loved ones and enjoy the fruits of your labor, because nothing brings people together quite like a delicious meal. Happy cooking!

How to Bake Juicy Chicken Breast in the Oven

Prep Time 10 minutes
Cook Time 20 minutes
Total Time 30 minutes
Servings 2 pieces
Calories 250
This simple recipe ensures tender, juicy chicken breasts baked to perfection with minimal effort.

Ingredients

Protein

  • 2 pieces boneless skinless chicken breasts (6–8 oz each)
  • 1.5 tablespoons olive oil
  • 1 teaspoon garlic powder
  • 0.5 teaspoon paprika
  • 0.75 teaspoon salt
  • 0.5 teaspoon black pepper
  • 1 teaspoon dried Italian herbs
  • 1 tablespoon lemon juice

Instructions 

  • Preheat oven to 400°F (204°C) and prepare baking sheet.
  • Pat chicken dry, pound to 3/4-inch thickness.
  • Brush with olive oil, season with garlic powder, paprika, salt, pepper, and herbs.
  • Drizzle with lemon juice and let sit for 15 minutes.
  • Arrange on baking sheet and bake for 20-23 minutes until internal temp reaches 165°F.
  • Rest for 5 minutes, then serve.

Notes

Ensure chicken reaches 165°F for safety and juiciness.
Calories: 250kcal
Cost: $15
Course: Main Course
Keyword: baking, chicken, easy

The Comforting Charm of Creamy Garlic Chicken

Welcome, dear reader! Today, I invite you to step into my kitchen, where I’ll share with you a heartwarming recipe for creamy garlic chicken that will surely become a family favorite. This delightful dish combines simple ingredients, allowing their flavors to shine through, just the way we do things in the South. So, grab your apron and let’s get cooking!

Why You’ll Love This Recipe

There’s something truly special about this creamy garlic chicken. Let me share why I believe it’s a dish worth making:

  • Quick and Easy: Ready in just 30 minutes, it’s perfect for weeknight dinners when time is tight.
  • Rich and Flavorful: The creamy garlic sauce is a symphony of flavors that will have your taste buds dancing.
  • Affordable Ingredients: Simple pantry staples combine to create a dish that’s both comforting and budget-friendly.
  • Versatile: Pair it with rice, pasta, or your favorite veggies to create a well-rounded meal.
  • Family-Friendly: Even the pickiest eaters will love the warmth and familiarity of this dish.

Ingredients for Creamy Garlic Chicken

Let’s gather our ingredients for this creamy garlic chicken. Here’s what you’ll need:

  • 2 boneless, skinless chicken breasts (about 1.3 lbs. total) – $6.49
  • 1/2 tsp Italian seasoning – $0.05
  • 1/2 tsp salt – $0.02
  • 1/4 tsp freshly cracked black pepper – $0.02
  • 1/4 cup all-purpose flour – $0.06
  • 2 Tbsp olive oil – $0.32
  • 2 Tbsp butter, divided – $0.27
  • 1 whole garlic bulb (about 8-9 garlic cloves) – $0.64
  • 1 cup chicken broth – $0.17
  • 3/4 cup heavy cream – $1.08
  • 1/2 tsp garlic powder – $0.05
  • Salt and pepper to taste – $0.04

Total estimated cost: $8.69 (prices may vary by location)

Pro Tips for Perfect Creamy Garlic Chicken

Juicy chicken breast topped with creamy garlic sauce and Italian seasoning.

Before we dive into the cooking process, here are some expert tips to elevate your dish:

  • Use Fresh Garlic: Fresh garlic cloves offer a more robust flavor than pre-minced options.
  • Don’t Rush the Searing: Allow the chicken to develop a golden-brown crust for added flavor.
  • Simmer the Sauce: Let the sauce reduce properly to achieve that rich, creamy consistency.
  • Adjust Seasonings: Taste and adjust seasoning as needed, especially salt and pepper.
  • Experiment with Herbs: Fresh herbs like thyme or rosemary can add a delightful twist.
  • Use Heavy Cream: For a richer sauce, opt for heavy cream over half-and-half or milk.
  • Keep It Warm: Cover the chicken to keep it warm while you prepare the sauce.
  • Garnish Wisely: A sprinkle of fresh parsley adds a pop of color and freshness.

Common Mistakes to Avoid

Sometimes, we all make mistakes in the kitchen. Here are a few to watch out for:

  • Overcrowding the Pan: Avoid cooking too many chicken pieces at once; this can lead to steaming instead of searing.
  • Burning the Garlic: Keep an eye on the garlic when sautéing; it can quickly turn bitter if overcooked.
  • Not Letting It Rest: Allow the chicken to rest before slicing to keep it juicy.
  • Skipping the Flour: Coating the chicken in flour helps create a nice crust and thickens the sauce.

How to Make Creamy Garlic Chicken

Now, let’s get to the good part: cooking! Follow these steps to create your creamy garlic chicken:

  1. Using a sharp knife, carefully fillet each chicken breast into two thinner cutlets (or use thin-cut chicken breasts).
  2. Season each breast with Italian seasoning, salt, and black pepper. Then sprinkle the flour over both sides of the chicken breasts and rub it in until the chicken is evenly coated.
  3. Heat a large skillet over medium heat and add the olive oil and 1 Tbsp of butter. Once the skillet is hot, add the chicken and cook on each side until golden brown and cooked through (about 4 minutes per side). Remove the cooked chicken to a clean plate and cover to keep warm.
  4. While the chicken is cooking, peel the garlic cloves and then carefully smash them with the side of a large chef’s knife by pressing down on the side of the knife with the heel of your hand.
  5. Once the chicken is removed, to the same skillet add the remaining 1 Tbsp of butter, then add the garlic cloves. Turn the heat down to medium-low and sauté the garlic for 3 minutes or until lightly browned and fragrant.
  6. Next, pour the chicken broth and heavy cream into the skillet, then add the garlic powder. Stir and scrape up any brown bits from the bottom of the skillet. Allow the sauce to simmer in the skillet for 8-10 minutes, or until it has reduced and thickened by about 50%. Taste the sauce at this point and add salt and pepper if needed.
  7. Finally, return the cooked chicken breasts to the skillet and spoon the creamy sauce over top. Allow the chicken to heat through. Serve with fresh chopped parsley (optional), and enjoy!

Variations of Creamy Garlic Chicken

If you want to switch things up, here are a few delightful variations:

  • Spinach and Artichoke: Add fresh spinach and canned artichoke hearts to the sauce for an extra layer of flavor.
  • Mushroom Medley: Sauté sliced mushrooms with the garlic for an earthy twist.
  • Spicy Kick: Add red pepper flakes to the sauce for some heat.
  • Lemon Zest: A squeeze of fresh lemon juice at the end brightens the flavors.

Storage and Make-Ahead Instructions

If you want to prepare this dish in advance, here are some handy tips:

  • Make-Ahead: You can season and coat the chicken up to a day in advance. Just store it in the fridge.
  • Storage: Leftovers can be stored in an airtight container in the refrigerator for up to 3 days.
  • Reheating: Reheat gently on the stovetop over low heat to prevent the sauce from separating.

Frequently Asked Questions

Let’s cover some common questions about this creamy garlic chicken:

  • Can I use chicken thighs instead of breasts? Absolutely! Chicken thighs will add even more flavor, just adjust the cooking time accordingly.
  • What can I serve with creamy garlic chicken? Pair it with rice, mashed potatoes, or a fresh salad for a complete meal.
  • Can I freeze the leftovers? Yes, but the sauce may separate upon thawing. Reheat gently.
  • How can I make it dairy-free? Substitute heavy cream with coconut milk or a dairy-free cream alternative.
  • Can I use dried garlic instead of fresh? You can, but fresh garlic gives a more vibrant flavor.
  • What if I don’t have chicken broth? You can use vegetable broth or water, though it may alter the flavor slightly.
  • How spicy is this recipe? It’s mild, but you can adjust the heat by adding more spices if desired.
  • Can I add vegetables to the dish? Yes! Peas, broccoli, or bell peppers work well in this creamy sauce.

Nutritional Tips and Dietary Adaptations

For those conscious about health, here are some tips:

  • Lower Calorie Option: Use skinless chicken and reduce the amount of cream.
  • Gluten-Free: Use a gluten-free flour blend for coating the chicken.
  • Heart-Healthy: Substitute olive oil for butter and use low-fat cream or milk.

Equipment Recommendations

To make this recipe a breeze, here’s what I recommend:

  • Sharp Chef’s Knife: Essential for filleting the chicken and chopping garlic.
  • Large Skillet: A good quality skillet helps achieve that perfect sear.
  • Wooden Spoon: Great for stirring and scraping up those delicious browned bits.

Serving Suggestions

Finally, let’s talk about how to plate this dish:

  • Over Rice: Serve over fluffy white or brown rice to soak up the creamy sauce.
  • With Pasta: Toss it with fettuccine or penne for a comforting pasta dish.
  • On a Bed of Greens: Serve with a fresh salad for a lighter option.

There you have it—a rustic and hearty creamy garlic chicken recipe that warms the heart and soul! Remember, cooking is all about love and care. I hope this recipe brings you as much joy as it has brought to my family over the years. Happy cooking, neighbor!

Creamy Garlic Chicken Recipe

Prep Time 10 minutes
Cook Time 20 minutes
Total Time 30 minutes
Servings 4 servings
Calories 550
A rich and flavorful chicken dish with a creamy garlic sauce, perfect for a comforting dinner.

Ingredients

Chicken

  • 2 pieces boneless, skinless chicken breasts (about 1.3 lbs. total)
  • 0.5 tsp Italian seasoning
  • 0.5 tsp salt
  • 0.25 tsp freshly cracked black pepper
  • 0.25 cup all-purpose flour
  • 2 Tbsp olive oil
  • 2 Tbsp butter, divided
  • 1 whole garlic bulb (about 8-9 garlic cloves)
  • 1 cup chicken broth
  • 0.75 cup heavy cream
  • 0.5 tsp garlic powder
  • to taste Salt and Pepper

Instructions 

  • Fillet chicken breasts into thinner cutlets, season with Italian seasoning, salt, and pepper, then coat with flour.
  • Cook chicken in a skillet with olive oil and 1 Tbsp butter until golden and cooked through, then set aside.
  • Sauté smashed garlic cloves in the same skillet with remaining butter until fragrant, then add chicken broth, heavy cream, and garlic powder. Simmer until thickened.
  • Return chicken to skillet, spoon sauce over, and heat through. Serve with optional parsley.

Notes

For extra flavor, add fresh herbs or grated Parmesan cheese.
Calories: 550kcal
Cost: $15
Course: Main Course
Cuisine: American
Keyword: chicken, creamy, Garlic

When it comes to comfort food, few dishes evoke the warmth of home like baked chicken leg quarters. This simple yet delicious recipe invites you to gather around the table with family and loved ones, offering a hearty meal that speaks to our shared experiences. As someone who has spent a lifetime around the farm and in the kitchen, I can promise you that this recipe is not just about cooking; it’s about creating memories. Let’s dive into how to make these succulent chicken legs that are seasoned to perfection and baked to juicy goodness!

Why You’ll Love This Recipe

This recipe for oven baked chicken leg quarters is not just another chicken dish; it’s a celebration of flavor and simplicity. Here are five reasons why you’ll fall in love with it:

  • Easy Preparation: With minimal ingredients and simple steps, this recipe is perfect for any home cook, whether you’re a novice or a seasoned pro.
  • Flavorful Seasoning: The blend of spices and marinades infuses the chicken with rich flavors, ensuring every bite is bursting with taste.
  • Perfectly Juicy: Baking the chicken legs at the right temperature ensures they come out juicy and tender every time.
  • Versatile Side Dishes: This dish pairs beautifully with a variety of sides, from roasted vegetables to creamy mashed potatoes.
  • Great for Meal Prep: The leftovers (if there are any!) are ideal for sandwiches, salads, or even a quick stir-fry.

Ingredients Breakdown

Before we start cooking, let’s gather our ingredients. Here’s what you’ll need to whip up this delightful dish:

  • 4 Chicken leg quarters: Opt for organic or free-range for the best flavor.
  • 1 teaspoon Paprika: Adds a touch of smokiness and vibrant color.
  • 1/4 teaspoon Garlic granules: For that aromatic base.
  • 1/4 teaspoon Onion granules: Enhances the overall flavor profile.
  • 1/4 teaspoon Parsley: Freshness in each bite.
  • 1/4 teaspoon Rosemary: A classic herb that pairs wonderfully with chicken.
  • 1/4 teaspoon Black pepper: Adds a warm kick.
  • 1/2 tablespoon Tomato paste: For moisture and a depth of flavor.
  • 1 tablespoon Soy sauce: Introduces umami and enhances the savory notes.
  • 1 tablespoon Olive oil: Helps in distributing the seasoning evenly.
  • Salt (to taste): Essential for bringing all the flavors together.

Feel free to make substitutions based on your pantry or dietary needs; for instance, you can replace olive oil with avocado oil or omit the soy sauce for a gluten-free option.

How to Bake Chicken Leg Quarters

Let’s get our hands dirty and start cooking!

  1. In a small bowl, mix together the paprika, garlic granules, onion granules, rosemary, parsley, black pepper, tomato paste, soy sauce, salt, and olive oil.
  2. Pat the chicken legs dry with kitchen towels. Using a knife, make two slashes on each leg quarter to allow the seasoning to penetrate.
  3. Rub the seasoning mix all over the chicken, ensuring every piece is well coated. For deeper flavor, cover with clingfilm and refrigerate for one hour to marinate.
  4. Preheat your oven to 200°C/400°F. Arrange the chicken quarters in a baking dish or tray.
  5. Bake chicken legs in the oven for 45 minutes, or until the internal temperature reaches 75°C (165°F).
  6. Once baked, remove from the oven and let the chicken rest for about 5 minutes before serving.

Pro Tips for Perfect Chicken Leg Quarters

Side view of crispy skin chicken leg quarters on a white plate.

To elevate your chicken dish, consider these expert insights:

  • Use an instant-read thermometer: This kitchen tool is your best friend for ensuring perfectly cooked chicken. Aim for an internal temperature of 165°F.
  • Let it rest: Allowing the chicken to rest after baking helps the juices redistribute, making for a more succulent bite.
  • Experiment with spices: Feel free to swap out herbs and spices based on your preferences; thyme and oregano are also fantastic options.
  • Roast vegetables alongside: For a complete meal, toss some carrots, potatoes, or Brussels sprouts in the baking dish for the last 20 minutes of cooking.
  • Adjust cooking time for size: Larger chicken quarters may require additional cooking time, so keep a close eye on them.

Common Mistakes and Troubleshooting

Even the best cooks can encounter issues. Here are some common mistakes to avoid:

  • Not drying the chicken: Moist chicken skin doesn’t crisp up well. Always pat dry before seasoning.
  • Skipping the slashes: Making slashes in the chicken allows the seasoning to penetrate better—don’t skip this step!
  • Overcrowding the pan: Give the chicken space in the baking dish to allow even cooking and browning.
  • Not resting: Cutting into the chicken too soon can result in lost juices, making it dry.

Variations of Baked Chicken Leg Quarters

Want to mix things up? Here are four delicious variations to try:

  • BBQ Chicken Leg Quarters: Brush with your favorite BBQ sauce during the last 10 minutes of baking for a sticky, sweet glaze.
  • Spicy Chicken Leg Quarters: Add cayenne pepper or chili powder to the seasoning mix for a fiery kick.
  • Lemon Herb Chicken: Incorporate lemon zest and juice into the marinade for a zesty flavor.
  • Honey Mustard Chicken: Swap the soy sauce for honey mustard for a sweet and tangy twist.

Storage and Make-Ahead Instructions

Got leftovers? Here’s how to store them:

  • Refrigeration: Store cooked chicken leg quarters in an airtight container in the fridge for up to 3-4 days.
  • Freezing: For longer storage, freeze chicken in a freezer-safe container for up to 3 months. Thaw in the fridge before reheating.
  • Make-Ahead Tip: Marinate the chicken a day in advance for a more robust flavor. Just remember to let it come to room temperature before baking.

Frequently Asked Questions

Here are some common questions about baking chicken leg quarters:

  • How long to bake chicken leg quarters?: Bake at 200°C (400°F) for about 45 minutes, or until they reach an internal temperature of 165°F.
  • Can I use skinless chicken leg quarters?: Yes, but the skin helps retain moisture and adds flavor, so consider keeping it on.
  • What should I serve with baked chicken leg quarters?: They pair well with mashed potatoes, rice, or a fresh salad.
  • Can I bake chicken leg quarters from frozen?: Yes, but you’ll need to increase the cooking time and ensure the chicken reaches the safe internal temperature.
  • What if my chicken isn’t crispy?: Broil for the last few minutes of cooking for a crispy skin.
  • Is this recipe gluten-free?: Yes, if you omit the soy sauce or use a gluten-free alternative.
  • How do I know when chicken leg quarters are done?: Use an instant-read thermometer and check for an internal temperature of 165°F.
  • Can I use a different cut of chicken?: Absolutely! This recipe can work with chicken thighs or breasts, though cooking times may vary.

Nutrition Tips and Dietary Adaptations

This recipe is not only delicious but can also be adapted to fit various dietary needs:

  • Low Sodium: Reduce or omit the soy sauce and use fresh herbs instead of granulated seasonings for flavor.
  • Low Carb: Pair with steamed vegetables instead of starchy sides for a satisfying low-carb meal.
  • High Protein: Serve with a side of quinoa or lentils to boost protein intake.

Equipment Recommendations

To make this recipe a success, consider these essential tools:

  • Baking Dish: A good quality dish will ensure even cooking.
  • Meat Thermometer: Essential for checking doneness and preventing overcooking.
  • Mixing Bowls: For preparing your seasoning mix and marinating the chicken.

Serving Suggestions

To round out your meal, consider these delightful sides:

  • Garlic Mashed Potatoes: Creamy and comforting, they’re the perfect complement to the chicken.
  • Roasted Seasonal Vegetables: Carrots, zucchini, and bell peppers add color and nutrition to your plate.
  • Simple Green Salad: A fresh salad with a light vinaigrette will brighten the meal.
  • Biscuits or Cornbread: Complete this Southern-inspired meal with a warm, flaky bread.

So there you have it—a comprehensive guide to creating hearty oven baked chicken leg quarters that will warm your soul and bring comfort to your table. Every bite is a reminder of home, tradition, and the joy of cooking for those we love. Enjoy every moment in the kitchen, and don’t forget to share the love with family and friends!

Oven Baked Chicken Leg Quarters

Prep Time 10 minutes
Cook Time 45 minutes
Total Time 55 minutes
Servings 4 servings
Calories 350
Enjoy flavorful oven-baked chicken leg quarters with a simple seasoning blend, perfect for a satisfying meal.

Ingredients

Main

  • 4 pieces Chicken leg quarters
  • 1 teaspoon Paprika
  • 0.25 teaspoon Garlic granules
  • 0.25 teaspoon Onion granules
  • 0.25 teaspoon Parsley
  • 0.25 teaspoon Rosemary
  • 0.25 teaspoon Black pepper
  • 0.5 tablespoon Tomato paste
  • 1 tablespoon Soy sauce
  • 1 tablespoon Olive oil
  • to taste none Salt (as needed)

Instructions 

  • Mix paprika, garlic, onion, rosemary, parsley, black pepper, tomato paste, soy sauce, salt, and olive oil in a bowl.
  • Pat chicken dry, make 2 slashes on each piece, then rub with the seasoning mixture.
  • Arrange chicken in a baking dish and bake at 200°C (400°F) for 45 minutes.
  • Let rest for 5 minutes before serving. Enjoy!

Notes

Marinate for extra flavor if desired.
Calories: 350kcal
Cost: $12
Course: Main Course
Cuisine: international
Keyword: chicken

The Comfort of Home: Why This Recipe is a Must-Try

When it comes to family dinners, nothing beats the joy of gathering around a table filled with comforting, hearty food. This Spicy Creamy Garlic Parmesan Chicken is not just another dish; it’s a warm embrace on a plate, bringing together tender chicken fillets and a rich, spicy sauce that dances on your taste buds. Perfectly paired with crispy fries, this recipe is your go-to for a meal that feels like home. Here’s why you’ll fall in love with it:

  • Quick to Prepare: Ready in under 30 minutes, this dish is perfect for busy weeknights.
  • Rich Flavor: The combination of garlic and Parmesan creates a creamy sauce that’s bursting with flavor.
  • Versatile Pairing: Serve it with fries, pasta, or a fresh salad for a well-rounded meal.
  • Kid-Approved: The mild spice and creamy texture make it a hit with the little ones.
  • Meal Prep Friendly: Make it ahead and enjoy the flavors developing even more!

Gathering Your Ingredients

Before diving into cooking, let’s ensure you have everything you need. Here’s a detailed breakdown of the ingredients:

  • Chicken fillets: 4 pieces (about 1.5 lbs or 680 g) – Use fresh fillets for the best flavor.
  • Garlic: 4 cloves, minced – Fresh garlic is crucial for that robust flavor.
  • Heavy cream: 1 cup (240 ml) – This is the key to a rich, creamy sauce.
  • Parmesan cheese: 1 cup, grated – Opt for fresh-grated for maximum flavor.
  • Red pepper flakes: 1 teaspoon (adjust to taste) – Adds the perfect kick! Feel free to add more if you like it spicy.
  • Olive oil: 2 tablespoons – For cooking the chicken and developing flavors.
  • Salt and pepper: To taste – Essential for seasoning your chicken well.
  • Fresh parsley: For garnish, chopped – A sprinkle adds color and freshness.
  • Fries: 1 bag (frozen or homemade, about 32 oz or 900 g) – Crispy fries are a delightful sidekick.

Cooking Steps: Bringing It All Together

Now that you have your ingredients ready, let’s get cooking! Follow these simple steps to create your delicious Spicy Creamy Garlic Parmesan Chicken:

  1. Prepare the fries according to package instructions or bake homemade fries at 425°F (220°C) for 30-35 minutes until golden and crispy.
  2. In a large skillet, heat olive oil over medium heat. Season the chicken fillets with salt and pepper, then cook for 6-7 minutes on each side until golden brown and fully cooked through.
  3. In the same skillet, add minced garlic and sauté for 1 minute until fragrant, then pour in the heavy cream and bring to a gentle simmer.
  4. Stir in the grated Parmesan cheese and red pepper flakes, cooking for 2-3 minutes until the sauce thickens slightly. Don’t rush this step; patience is key to achieving that creamy consistency!
  5. Return the cooked chicken to the skillet, spoon the luscious sauce over it, and let it simmer for an additional 2-3 minutes to meld the flavors.
  6. Serve the chicken hot with crispy fries, drizzling the creamy garlic Parmesan sauce over the top, and garnishing with chopped parsley for that finishing touch.

Pro Tips for Perfecting Your Dish

Side view of spicy chicken fillets drizzled with a rich garlic and parmesan sauce.

Want to elevate your cooking game? Here are some expert insights to make this dish even better:

  • Use a meat thermometer: Ensure your chicken reaches an internal temperature of 165°F (74°C) for perfect doneness.
  • Fresh ingredients: Always opt for fresh garlic and quality Parmesan cheese to enhance flavor.
  • Adjust spice levels: Feel free to add more or less red pepper flakes depending on your heat tolerance.
  • Don’t overcook the sauce: Keep the heat low after adding cream to prevent it from curdling.
  • Let it rest: After cooking, let the chicken rest for a few minutes before serving to lock in juices.
  • Experiment with herbs: Try adding thyme or oregano for a different flavor profile.
  • Make it gluten-free: Serve with gluten-free fries or over rice for a comforting alternative.
  • Pair with wine: A glass of Chardonnay complements the creamy sauce beautifully.

Common Mistakes and Troubleshooting

Even the best of us can stumble in the kitchen. Here are some common pitfalls and how to avoid them:

  • Overcooked chicken: Always monitor cooking time and use a meat thermometer to avoid dryness.
  • Curdled sauce: Keep the heat low when adding cream and avoid boiling.
  • Too thick sauce: If your sauce thickens too much, add a splash of chicken broth or milk to loosen it.
  • Uneven seasoning: Taste as you cook and adjust the salt and pepper as needed.

Delicious Variations to Try

If you want to mix things up, here are some tasty variations of this dish:

  • Pesto Chicken: Stir in some basil pesto with the sauce for a fresh twist.
  • Cheesy Spinach Option: Add fresh spinach and extra cheese to the sauce for a hearty, veggie-packed version.
  • Lemon Garlic: Squeeze in fresh lemon juice for a zesty kick that brightens the dish.
  • Mushroom Lover’s Delight: Sauté mushrooms with the garlic for an earthy addition.

Storage and Make-Ahead Instructions

This recipe is perfect for meal prep! Here’s how to store it:

  • Refrigerate: Store leftovers in an airtight container in the fridge for up to 3 days.
  • Freeze: For longer storage, freeze the chicken in the sauce for up to 2 months. Thaw overnight in the fridge before reheating.
  • Reheat gently: Warm on the stove over low heat, adding a splash of cream to restore the sauce’s consistency.

Frequently Asked Questions

Got questions? We’ve got answers! Here are some common queries about this recipe:

  • Can I use chicken breast instead of fillets? Yes, chicken breasts work perfectly, just adjust cooking time accordingly.
  • What can I substitute for heavy cream? For a lighter option, use half-and-half or coconut cream for a dairy-free version.
  • How do I prevent the sauce from curdling? Always use low heat when adding cream and avoid boiling.
  • What side dishes go well with this chicken? Serve with pasta, rice, or a fresh salad for a complete meal.
  • Can I make this dish in advance? Absolutely! Prepare ahead and reheat for a quick dinner.
  • What can I add for more flavor? Try adding lemon zest or fresh herbs like basil or thyme.
  • Is this dish gluten-free? Yes, as long as you use gluten-free fries or a compliant side.
  • How can I make it spicier? Increase the amount of red pepper flakes or add diced jalapeños for heat.

Nutritional Insights and Dietary Adaptations

This dish isn’t just delicious; it can also be tailored to fit your dietary needs:

  • High in protein: Chicken is a great source of lean protein, perfect for muscle building.
  • Low-carb option: Serve it with steamed veggies instead of fries for a low-carb meal.
  • Vegetarian adaptation: Substitute chicken with hearty mushrooms or tofu and adjust cooking times.

Essential Equipment for Success

Make sure you have these essentials on hand:

  • Large skillet: For searing chicken and making the sauce.
  • Meat thermometer: To check chicken doneness accurately.
  • Wooden spoon: For stirring and mixing ingredients smoothly.
  • Cutting board and knife: Essential tools for prepping your ingredients.

Serving Suggestions: Making It a Meal

Now that your Spicy Creamy Garlic Parmesan Chicken is ready, here are some tasty ideas for serving:

  • With fries: Crispy fries are a classic pairing, perfect for dipping in that creamy sauce.
  • Over pasta: Serve it over your favorite pasta for a filling, comforting dish.
  • With a salad: A fresh garden salad balances the richness of the chicken.
  • Grilled veggies: Add grilled vegetables for a colorful and nutritious side.

Wrapping Up: Your New Family Favorite

This Spicy Creamy Garlic Parmesan Chicken is more than just a recipe; it’s an experience that brings family and friends together. With its rich flavors and comforting nature, it’s bound to become a staple in your home. So gather your ingredients, roll up your sleeves, and enjoy the process of creating something truly special. Happy cooking!

Chicken Fillet in Spicy, Creamy Garlic-Parmesan Sauce

Prep Time 10 minutes
Cook Time 30 minutes
Total Time 40 minutes
Servings 4 servings
Calories 650
A flavorful and creamy chicken dish served with crispy fries, perfect for a satisfying meal.

Ingredients

Protein

  • 4 pieces Chicken fillets (about 1.5 lbs or 680 g)

Seasonings

  • 4 cloves Garlic (minced)
  • 1 cup Heavy cream (240 ml)
  • 1 cup Parmesan cheese (grated)
  • 1 teaspoon Red pepper flakes (adjust to taste)

Cooking Oil

  • 2 tablespoons Olive oil

Seasonings

  • to taste Salt
  • to taste Pepper

Garnish

  • for garnish Fresh parsley (chopped)

Sides

  • 1 bag Fries (about 32 oz or 900 g)

Instructions 

  • Prepare fries according to package or bake at 425°F (220°C) for 30-35 minutes.
  • Heat olive oil in a skillet, season chicken with salt and pepper, then cook 6-7 minutes per side until golden.
  • Sauté garlic for 1 minute, add heavy cream, and simmer gently.
  • Stir in Parmesan and red pepper flakes, cook 2-3 minutes until sauce thickens.
  • Return chicken to skillet, spoon sauce over, and simmer 2-3 minutes. Serve with fries and garnish with parsley.

Notes

Adjust red pepper flakes for desired spice level.
Calories: 650kcal
Cost: $15
Course: Main Course
Cuisine: American
Keyword: chicken, Creamy Sauce

Discover the Heartwarming Joy of Mushroom-Stuffed Chicken Breast

Cooking is an art that intertwines with our memories, especially when it revolves around a humble ingredient like chicken. The Mushroom-Stuffed Chicken Breast is not just a meal; it’s a comforting embrace on a plate. In this guide, we’ll explore everything you need to know about making this delectable dish—from the ingredients to the cooking techniques, and even some clever variations that breathe new life into your kitchen repertoire. Let’s dive in and uncover the secrets behind this delightful recipe that warms the heart.

Why You’ll Love This Recipe

This Mushroom-Stuffed Chicken Breast is more than just a tasty dish. Here’s why it should become a staple in your cooking:

  • Quick & Easy Preparation: This recipe comes together swiftly, making it a perfect choice for a weeknight dinner or a special occasion. You can have it ready in about 30 minutes.
  • Flavor Explosion: The combination of savory mushrooms, garlic, and melted cheese creates a rich flavor profile that tantalizes the taste buds.
  • Health-Conscious Choice: Packed with protein and nutrients from the spinach, this dish is not only delicious but also nourishing.
  • Impress Your Guests: Serve this dish at your next gathering, and you’ll be hailed as a culinary genius, even if it was simple to make.
  • Versatile & Adaptable: With the right ingredients, you can easily customize this stuffed chicken to suit your taste or dietary preferences.

Ingredient Breakdown: What You’ll Need

Let’s gather our supplies! Here’s what you need to create this mouthwatering Mushroom-Stuffed Chicken Breast:

  • Chicken Breasts: 2 skinless and boneless (220g or 7oz each). Look for fresh, plump chicken breasts for the best texture.
  • Salt: 3/4 teaspoon to season the chicken perfectly.
  • Black Pepper: 1/4 teaspoon, freshly cracked if possible, to enhance the flavors.
  • Unsalted Butter: 2 tablespoons (30g) adds richness to the mushroom filling.
  • Mushrooms: 7 oz, sliced about 1/8″ thick (approximately 2 full cups, 200g). Cremini or button mushrooms work well.
  • Garlic: 2 cloves, finely minced for aromatic flavor.
  • Thyme Leaves: 1/2 teaspoon, fresh or dried, for an earthy touch.
  • Fresh Baby Spinach: 2 cups, provides nutrients and color.
  • Mozzarella Cheese: 3 oz (or any cheese that melts well, 80g) for that gooey texture.
  • Olive Oil: 1 tablespoon for cooking and flavor.

Smart Substitutions

A side view of a mushroom stuffed chicken breast, showcasing its delicious stuffing and melted cheese.

If you’re missing an ingredient or want to customize your dish, here are some substitutions:

  • Chicken Breasts: Substitute with chicken thighs for a juicier option.
  • Mushrooms: Any variety, like shiitake or portobello, can be used for different flavors.
  • Cheese: Try gouda, provolone, or feta for a unique twist.
  • Spinach: Kale or Swiss chard can be used as alternatives.
  • Butter: Use olive oil or margarine if you prefer a dairy-free option.

Step-by-Step Cooking Instructions

Let’s get to cooking! Follow these simple steps to create your Mushroom-Stuffed Chicken Breast:

1. Preheat the Oven

Start by preheating your oven to 375°F (190°C) so it’s ready when your chicken is stuffed and sealed.

2. Prepare the Mushroom Filling

In a skillet over medium heat, melt the butter. Add the sliced mushrooms and sauté until they are golden brown, about 5-7 minutes. Stir in the garlic and thyme, cooking for another minute until fragrant. Finally, toss in the fresh spinach and cook until wilted. Remove from heat and let it cool slightly before adding the mozzarella cheese.

3. Stuff the Chicken

Using a sharp knife, slice a pocket into the thickest part of each chicken breast. Be careful not to cut all the way through. Season the inside with salt and pepper, then fill each pocket generously with the mushroom mixture. You may secure the opening with toothpicks to keep the filling intact while it cooks.

4. Sear the Chicken

In a large oven-safe skillet, heat the olive oil over medium-high heat. Once hot, add the stuffed chicken breasts and sear for 3-4 minutes on each side until golden brown. This step locks in moisture and flavor.

5. Bake to Perfection

Transfer the skillet to the preheated oven and bake for about 20-25 minutes, or until the chicken is cooked through and reaches an internal temperature of 165°F (75°C). Let it rest for a few minutes before serving.

Common Mistakes & Troubleshooting Tips

Even the best cooks make mistakes! Here are some common pitfalls and how to avoid them:

  • Overstuffing: Don’t pack too much filling into the chicken; it can cause the chicken to split. Less is more!
  • Not sealing properly: Make sure to secure the chicken well with toothpicks or kitchen twine to prevent the filling from spilling out during cooking.
  • Under-seasoning: Always taste your filling before stuffing the chicken. Adjust the seasoning as needed for optimal flavor.
  • Cooking too quickly: If you’re searing on too high heat, the chicken may brown too quickly without cooking through. Keep an eye on it!
  • Not letting it rest: Allow the stuffed chicken to rest for a few minutes after baking. This helps the juices redistribute, making for juicier meat.

Delicious Variations to Try

Want to switch things up? Here are some variations on the classic Mushroom-Stuffed Chicken:

  • Spinach and Feta Stuffed Chicken: Substitute mozzarella with crumbled feta and mix in some sun-dried tomatoes for a Mediterranean twist.
  • Herb and Cheese Stuffed Chicken: Incorporate fresh herbs like basil or parsley with a mix of ricotta and mozzarella for a creamy, herby delight.
  • BBQ Chicken Stuffed with Cheddar: Fill with shredded rotisserie chicken, BBQ sauce, and cheddar cheese for a smoky flavor.
  • Italian-Style Stuffed Chicken: Use Italian sausage, roasted red peppers, and provolone cheese for a heartier option.

Storage and Make-Ahead Instructions

This dish can easily fit into your meal prep plans:

  • Refrigerator: Store leftover stuffed chicken in an airtight container in the fridge for up to 3-4 days.
  • Freezer: You can also freeze uncooked stuffed chicken breasts. Wrap them tightly in foil and freeze for up to 3 months. Thaw in the fridge before baking.
  • Make-Ahead: Prepare the filling a day in advance and store it in the fridge. Stuff and cook the chicken the next day for a quick dinner.

Comprehensive FAQ

Got questions? Here are some answers to help you along the way:

  • Can I use frozen chicken breasts? Yes, but thaw them completely before stuffing and cooking.
  • What can I serve with stuffed chicken? Pair it with roasted vegetables, a fresh salad, or mashed potatoes for a complete meal.
  • How do I know when chicken is cooked through? Use a meat thermometer; it should read 165°F (75°C) at the thickest part.
  • Can I grill this recipe instead? Absolutely! Just ensure the filling is secured well and grill over medium heat, turning gently.
  • What other fillings can I use? You can get creative! Try sun-dried tomatoes, artichokes, or even a creamy pesto.
  • How do I make it gluten-free? Ensure all your ingredients, especially any seasonings, are gluten-free.
  • Can I make this vegan? For a vegan version, substitute chicken with firm tofu and use vegan cheese.
  • How long can leftovers last? Properly stored, leftovers can last 3-4 days in the refrigerator.

Nutritional Tips and Dietary Adaptations

This recipe is not only delicious but can easily be adapted for various dietary needs:

  • Low-Carb/Keto: This dish is inherently low-carb, making it a perfect fit for keto diets.
  • Gluten-Free: Ensure all ingredients are verified gluten-free for those with sensitivities.
  • Dairy-Free: Substitute cheese with dairy-free alternatives to suit lactose intolerance.
  • Paleo-Friendly: Use coconut oil instead of butter and ensure your mushrooms and seasonings are compliant.

Essential Equipment Recommendations

Having the right tools makes all the difference in the kitchen. Here are my top picks:

  • Sharp Knife: For slicing the chicken and preparing vegetables.
  • Cutting Board: A sturdy board for safe food prep.
  • Skillet: An oven-safe skillet is ideal for both searing and baking the chicken.
  • Meat Thermometer: To ensure perfect doneness every time.

Serving Suggestions

Once your Mushroom-Stuffed Chicken Breast is ready, here are some ideas to elevate your meal:

  • Garnish: Fresh herbs like parsley or basil can add a pop of color and flavor.
  • Side Dishes: Pair with roasted seasonal vegetables or a refreshing cucumber salad.
  • Sauces: A light drizzle of balsamic reduction or a simple squeeze of lemon can brighten up the dish.

In closing, the Mushroom-Stuffed Chicken Breast is a dish that embodies the warmth of home cooking. Whether you’re making it for a family dinner or a cozy meal for yourself, each bite is a reminder that food, at its best, is about connection, comfort, and care. Enjoy your cooking journey, and may your kitchen be filled with joy!

Mushroom Stuffed Chicken Breast - Quick and Easy

Prep Time 10 minutes
Cook Time 20 minutes
Total Time 30 minutes
Servings 2 servings
Calories 450
A delicious and quick recipe featuring tender chicken breasts filled with savory mushrooms and melted cheese, perfect for a satisfying meal.

Ingredients

Chicken

  • 2 pieces chicken breasts (220g or 7oz each, skinless and boneless)
  • 3/4 teaspoon salt
  • 1/4 teaspoon black pepper

Butter

  • 2 tablespoons unsalted butter (30g)

Mushrooms

  • 7 oz mushrooms, sliced about 1/8" thick (approximately 200g)
  • 2 cloves garlic, finely minced
  • 1/2 teaspoon thyme leaves

Fresh Baby Spinach

  • 2 cups fresh baby spinach

Cheese

  • 3 oz mozzarella cheese, sliced (or any cheese that melts well, 80g)
  • 1 tablespoon olive oil

Instructions 

  • Preheat oven to 375°F (190°C). Slice a pocket into each chicken breast and season with salt and pepper.
  • Sauté mushrooms, garlic, and thyme in butter until tender. Add spinach and cook until wilted.
  • Stuff the chicken breasts with mushroom mixture and sliced cheese. Secure with toothpicks if needed.
  • Heat olive oil in a skillet and sear chicken for 2-3 minutes per side. Transfer to oven and bake for 15-20 minutes.
  • Remove from oven, let rest for a few minutes, then serve hot.

Notes

For extra flavor, add herbs or spices of your choice.
Calories: 450kcal
Cost: $15
Course: Main Course
Cuisine: American
Keyword: chicken, Mushrooms, stuffed

Welcome to a Hearty Dish That Feels Like Home

Ah, the comfort of a good meal! There’s nothing quite like the aroma of garlic wafting through the kitchen as you prepare a warm, inviting dish. Today, I’m excited to share a recipe that brings back memories of family dinners and cozy nights in: Easy Garlic Parmesan Chicken Pasta. This dish is not just food; it’s a celebration of flavors, community, and simple joys. With tender chicken, wholesome pasta, and a creamy garlic sauce, it’s a meal that’s sure to please everyone at your table.

This recipe is perfect for those who crave a hearty meal without spending hours in the kitchen. If you’re looking for something that’s quick to make, nutritious, and filled with rich flavors, you’ve come to the right place! So, roll up your sleeves, and let’s get cooking!

Why You’ll Love This Recipe

This dish isn’t just another pasta recipe; it’s a treasure trove of flavorful benefits. Here are some reasons why you’ll fall in love with it:

  • Quick and Easy: This meal comes together in under 30 minutes, making it ideal for busy weeknights or last-minute gatherings.
  • Comforting Flavors: The rich, creamy garlic sauce combined with savory chicken and al dente pasta creates a comforting dish reminiscent of family dinners.
  • Versatility: Whether you’re feeding a crowd or just yourself, this recipe can be easily scaled up or down according to your needs.
  • Nutritious Ingredients: With whole wheat pasta and fresh spinach, this dish offers a healthy twist on traditional comfort food.
  • Kid-Friendly: The creamy sauce and tender chicken are sure to win over even the pickiest eaters!

Ingredients Breakdown

Let’s dive into what you’ll need for this Garlic Parmesan Chicken Pasta:

  • 2 boneless, skinless chicken breasts: Cut into bite-sized pieces for even cooking.
  • 2 cups penne pasta: Whole wheat works well here, adding extra fiber and nutrition.
  • 2 tablespoons olive oil: For sautéing the chicken to golden perfection.
  • 3 cloves garlic, minced: Fresh garlic brings a robust flavor that is the heart of this dish.
  • 2 cups fresh spinach: Adds color and nutrients, making the dish more wholesome.
  • 1 cup low-fat milk or unsweetened almond milk: This will help create a creamy base without being too heavy.
  • 1/2 cup low-fat cream cheese: Adds richness and creaminess to the sauce.
  • 1/2 cup grated Parmesan cheese: The star of the dish, giving it that signature flavor.
  • 1/2 teaspoon black pepper: A touch of spice to balance the creaminess.
  • 1/2 teaspoon salt: For seasoning the chicken and pasta.
  • 1/2 teaspoon Italian seasoning: A blend that enhances the overall flavor profile.
  • Fresh parsley, chopped: For garnish and a pop of freshness.
  • Optional: Red pepper flakes: If you like a little heat with your dish!

Step-by-Step Instructions

Close-up view of penne pasta topped with chicken and parsley.

Now, let’s get to the good part—cooking! Follow these simple steps for a delightful meal:

  • Cook the pasta: Boil water in a large pot, add the penne, and cook until al dente. Reserve a splash of pasta water and then drain the rest.
  • Sauté the chicken: In a large skillet, heat the olive oil over medium heat. Add the chicken pieces and cook until they are golden brown and cooked through, about 5-7 minutes.
  • Add the garlic: Stir in the minced garlic and sauté for another minute until fragrant.
  • Create the creamy sauce: Lower the heat, then add the cream cheese and milk, stirring until the mixture is smooth and creamy.
  • Toss in spinach and pasta: Add the fresh spinach and cooked pasta to the skillet, mixing everything together until the spinach wilts.
  • Finish with Parmesan: Stir in the grated Parmesan cheese, adjust the seasoning with salt and pepper if needed, and serve hot, garnished with parsley.

Pro Tips for Perfection

Before you dig in, here are some expert tips to elevate your dish:

  • Don’t overcook the pasta: Aim for al dente to ensure it holds up well when combined with the sauce.
  • Add a splash of pasta water: If the sauce is too thick, a splash of the reserved pasta water can help achieve the right consistency.
  • Experiment with herbs: Feel free to add fresh basil or oregano for an extra flavor boost.
  • Use freshly grated cheese: For the best flavor, always opt for freshly grated Parmesan cheese instead of pre-grated.
  • Make it ahead: This dish can be prepared in advance and reheated, making it great for meal prep!
  • Customize your veggies: Add other vegetables like bell peppers or cherry tomatoes for additional nutrition and flavor.
  • Adjust the creaminess: If you prefer a lighter sauce, reduce the amount of cream cheese or substitute with Greek yogurt.
  • Check for seasoning: Always taste before serving to make sure the flavors are just right!

Common Mistakes to Avoid

Even the best cooks can make mistakes. Here are some common pitfalls to avoid:

  • Overcrowding the pan: Sauté the chicken in batches if necessary to ensure it cooks evenly.
  • Skipping the pasta water: This liquid is a secret weapon for creamy sauces; don’t forget to reserve some!
  • Not letting the garlic sauté: Garlic burns quickly; keep an eye on it to avoid bitterness.
  • Forgetting to taste: Always adjust seasoning to your preference before serving.

Variations to Try

If you’re feeling adventurous, here are some fun variations to customize your dish:

  • Spicy Garlic Parmesan Chicken Pasta: Add a teaspoon of red pepper flakes or a diced jalapeño for a spicy kick.
  • Lemon Garlic Parmesan Chicken Pasta: Squeeze in some fresh lemon juice and zest for a bright, zesty flavor.
  • Vegetarian Garlic Parmesan Pasta: Substitute chicken with sautéed mushrooms or chickpeas for a hearty vegetarian option.
  • Cheesy Garlic Parmesan Chicken Pasta: Add more cheese! Incorporate mozzarella or cheddar for an extra cheesy experience.

Storage and Make-Ahead Instructions

Got leftovers? Here’s how to store and reheat your dish:

  • Refrigerate: Store in an airtight container in the fridge for up to 3 days.
  • Freeze: To freeze, place in a freezer-safe container and consume within 2 months.
  • Reheat: To reheat, add a splash of milk or pasta water to the skillet, heat gently, and stir until warmed through.

Comprehensive FAQ

Still have questions? Here are some frequently asked ones:

  • Can I use other types of pasta? Absolutely! Any pasta shape you like will work just fine.
  • Is this recipe gluten-free? You can use gluten-free pasta and cream cheese to make it gluten-free.
  • Can I use frozen chicken? Yes, but make sure to thaw it completely before cooking for even results.
  • How can I make this dish dairy-free? Substitute cream cheese with a dairy-free alternative and use almond milk.
  • What can I serve with this dish? This pasta pairs well with a simple green salad or garlic bread.
  • How spicy is this recipe? It’s mild, but you can easily adjust the heat to your preference with red pepper flakes.
  • Can I add more vegetables? Yes! Feel free to add broccoli, zucchini, or bell peppers.
  • What’s the best way to reheat leftovers? Gently reheat on the stove with a splash of water or milk to loosen the sauce.

Nutrition Tips and Dietary Adaptations

If you’re looking to make this dish even healthier, consider these tips:

  • Increase the veggies: Add more spinach or any of your favorite vegetables to boost the nutritional content.
  • Opt for lean chicken: Use skinless chicken breasts or thighs for a healthier protein choice.
  • Watch the cheese: You can reduce the amount of cream cheese and Parmesan to cut down on calories.

Recommended Equipment

Having the right tools can make all the difference:

  • Large pot: For boiling pasta.
  • Skillet: A large skillet is essential for sautéing chicken and mixing the sauce.
  • Wooden spoon: Great for stirring and mixing without scratching your pans.
  • Measuring cups and spoons: Accurate measurements are key to a successful dish.

Serving Suggestions

For a complete meal, consider these serving ideas:

  • Garlic Bread: Serve alongside warm garlic bread for a classic combination.
  • Side Salad: A fresh garden salad with a light vinaigrette pairs beautifully.
  • Wine Pairing: Enjoy with a crisp white wine like Sauvignon Blanc or a light red like Pinot Noir.

Conclusion: A Dish Worth Sharing

There you have it, folks! A delightful recipe for Easy Garlic Parmesan Chicken Pasta that’s bound to bring joy to your table. Remember, cooking is about sharing love and creating memories, so don’t hesitate to invite friends and family to join you in the kitchen. Enjoy this hearty dish with a side of laughter and stories, and you’ll create moments that last a lifetime. Happy cooking, y’all!

Easy Garlic Parmesan Chicken Pasta

Prep Time 10 minutes
Cook Time 20 minutes
Total Time 30 minutes
Servings 4 servings
Calories 550
A quick and flavorful pasta dish featuring tender chicken, fresh spinach, and a creamy Parmesan sauce.

Ingredients

Protein

  • 2 pieces boneless, skinless chicken breasts (cut into bite-sized pieces)

Pasta

  • 2 cups penne pasta (whole wheat for extra health!)

Oils and Aromatics

  • 2 tablespoons olive oil
  • 3 cloves garlic (minced)

Vegetables

  • 2 cups fresh spinach

Dairy & Cheese

  • 1 cup low-fat milk or unsweetened almond milk
  • 1/2 cup low-fat cream cheese
  • 1/2 cup grated Parmesan cheese

Seasonings

  • 1/2 teaspoon black pepper
  • 1/2 teaspoon salt
  • 1/2 teaspoon Italian seasoning

Garnish & Optional

  • Fresh parsley, chopped (for garnish)
  • Optional Red pepper flakes (for a kick)

Instructions 

  • Cook pasta until al dente and set aside.
  • Sauté chicken in olive oil until golden and cooked through.
  • Add garlic and cook until fragrant.
  • Reduce heat, add cream cheese and milk, stirring until smooth.
  • Mix in spinach and cooked pasta, then stir in Parmesan cheese. Garnish with parsley and serve.

Notes

For extra flavor, add red pepper flakes during cooking.
Calories: 550kcal
Cost: $15
Course: Main Course
Cuisine: Italian
Keyword: chicken, Garlic, Pasta

Welcome to a Cozy Kitchen Adventure

There’s a special kind of magic that happens in the kitchen, especially when you’re cooking up something that feels like home. Today, we’re diving into a beloved dish that embodies warmth and comfort: Creamy Garlic Mushroom Chicken. This delightful creation not only satisfies your taste buds but also invites you to gather around the table with family and friends. Trust me, you’ll want to savor every bite of this dish, which brings together the richness of creamy garlic sauce with tender chicken and earthy mushrooms.

So, if you’re ready to whip up a meal that’s both simple and elegant, let’s get started!

Why You’ll Love This Recipe

This recipe stands out for several reasons, and here’s why you’ll be coming back to it time and time again:

  • Comforting flavors: The combination of garlic, cream, and mushrooms creates a sauce that feels like a warm hug on a plate.
  • Quick preparation: You can have this dish on the table in under 30 minutes, making it perfect for busy weeknights.
  • Family-friendly: With its delicious taste, even picky eaters will be asking for seconds.
  • Versatile ingredients: The ingredients are commonly found in most kitchens, and you can easily substitute others based on what you have on hand.
  • Healthy options: By using lean chicken and fresh vegetables, you can adapt this dish to fit into a balanced meal plan.

Ingredients Breakdown

Let’s take a closer look at what you’ll need to create this comforting dish:

  • 2 x 9oz/250g Chicken Breasts: Make sure they’re at room temperature for even cooking.
  • 1/4 cup / 40g Flour: This helps create a crispy coating on the chicken. You can substitute with almond flour for a gluten-free option.
  • 1 tsp EACH: Salt, Garlic Powder: Essential for seasoning and flavoring your chicken.
  • 1/2 tsp Black Pepper: Adds a touch of heat.
  • 1 tbsp EACH: Olive Oil, Butter: Use unsalted butter for controlled seasoning.
  • 9oz / 250g Baby Button Mushrooms: Sliced thinly, they provide a lovely texture and earthy flavor.
  • 3/4 cup / 180ml Heavy/Double Cream: This is where the creaminess comes from; for a lighter option, you can use half-and-half.
  • 3/4 cup / 180ml Chicken Stock: Enhances the flavor; homemade is best, but store-bought works too.
  • 1oz / 1/3cup / 30g freshly grated Parmesan: For that extra richness.
  • 2 large cloves of Garlic: Finely diced for maximum flavor.
  • 1 tbsp finely diced Fresh Parsley: Adds freshness to the dish.
  • 1 tbsp finely diced Fresh Chives: For a subtle onion flavor.
  • 1 tbsp Butter: To fry the mushrooms.
  • 1/2 – 1 tsp Lemon Juice: Brightens up the dish; adjust to taste.
  • Salt & Pepper: To taste.

Step-by-Step Cooking Instructions

Juicy chicken breasts in creamy sauce with garlic and mushrooms, side view display.

Now that we have our ingredients ready, let’s walk through the cooking process step-by-step:

  • Step 1: Slice the Chicken: Horizontally slice each chicken breast through the center to create four evenly-sized pieces. This ensures they cook through evenly.
  • Step 2: Dredge the Chicken: In a large shallow dish, mix 1/4 cup flour with 1 tsp garlic powder, salt, and 1/2 tsp black pepper. Coat each chicken breast in the flour mixture, shaking off any excess.
  • Step 3: Sear the Chicken: Heat 1 tbsp oil and 1 tbsp butter in a large pan over medium-high heat. Add the chicken and fry until golden brown, about 3-4 minutes per side, or until just cooked through. Remove and set aside.
  • Step 4: Cook the Mushrooms: In the same pan, melt 1 tbsp butter and add the mushrooms. Fry until they form a golden crust, then reduce heat to medium. Add the garlic and fry for another 1-2 minutes.
  • Step 5: Make the Sauce: Pour in the chicken stock and cream, then stir in the chives and parsley. Let it simmer for 5 minutes until the sauce thickens slightly.
  • Step 6: Combine and Serve: Stir in the Parmesan and add a gentle squeeze of lemon juice, plus salt and pepper to taste. Return the chicken to the pan, basting it in the sauce. Serve warm and enjoy!

Pro Tips for the Best Creamy Garlic Mushroom Chicken

To elevate your dish, keep these tips in mind:

  • Chicken thighs vs. breasts: Thighs are juicier and more forgiving if overcooked, while breasts are leaner.
  • Fresh herbs matter: Using fresh parsley and chives enhances flavor over dried herbs.
  • Don’t rush the sauce: Allow the sauce to simmer to develop its flavors fully.
  • Lemon juice balance: Adjust the lemon juice according to your taste; it can brighten the sauce immensely.
  • Leftover sauce magic: This sauce is great over pasta or rice, making it a versatile leftover.
  • For extra richness: Add a splash of white wine when cooking the mushrooms for a deeper flavor.
  • Adjust seasoning: Always taste and adjust the salt and pepper before serving.
  • Make-ahead option: You can prepare the chicken and sauce ahead of time and combine them just before serving.

Common Mistakes to Avoid

To ensure your dish turns out perfectly, watch out for these pitfalls:

  • Overcrowding the pan: If you add too much chicken or mushrooms at once, they will steam instead of sear.
  • Skipping the dredging: The flour helps create that lovely crust and thickens the sauce; don’t skip it!
  • Not letting the chicken rest: Allowing the chicken to rest after cooking helps keep it juicy.
  • Underestimating garlic: Fresh garlic can burn quickly, so add it later in the cooking process.

Variations to Try

Feel free to get creative with this recipe! Here are some variations to consider:

  • Swap the mushrooms: Try shiitake, portobello, or even a mix of your favorites.
  • Herb variations: Experiment with thyme or rosemary for an aromatic twist.
  • Spicy kick: Add red pepper flakes for a bit of heat.
  • Make it lighter: Use coconut cream or Greek yogurt for a healthier sauce.

Storage and Make-Ahead Instructions

If you find yourself with leftovers (which is rare with this dish!), here’s how to store it:

  • Refrigerate: Store in an airtight container for up to 3 days. Reheat gently on the stove or in the microwave.
  • Freezing: Freeze the sauce separately from the chicken for up to 2 months. Thaw and reheat when ready to serve.
  • Make-ahead: Prepare the sauce and chicken separately and combine just before serving to keep everything fresh.

Frequently Asked Questions

Let’s address some common questions about Creamy Garlic Mushroom Chicken:

  • Can I use frozen chicken?: Yes, but ensure it’s fully thawed before cooking for even cooking.
  • What can I serve with this dish?: It pairs wonderfully with rice, pasta, or crusty bread to soak up the sauce.
  • Is this dish gluten-free?: You can make it gluten-free by substituting the flour with cornstarch or almond flour.
  • Can I add other vegetables?: Absolutely! Spinach or kale would be lovely additions.
  • How do I make it dairy-free?: Use coconut cream and nutritional yeast in place of cream and Parmesan.
  • Can I make this in advance?: Yes, prepare the chicken and sauce separately and combine when ready to enjoy.
  • What’s the best way to reheat leftovers?: Gently on the stove with a splash of chicken stock to rehydrate the sauce.
  • Can I use a different protein?: This sauce works beautifully with pork or even tofu for a vegetarian option.

Nutrition Tips and Dietary Adaptations

This dish can fit into various dietary needs:

  • Lean protein: Chicken is a great source of lean protein, contributing to a balanced diet.
  • Low-carb option: Serve it over steamed vegetables instead of rice or pasta for a low-carb meal.
  • High-fiber adaptation: Add lentils or chickpeas to the sauce for increased fiber content.

Equipment Recommendations

Here’s what you’ll need to whip up this delicious dish:

  • Large skillet: A non-stick skillet works best for searing the chicken and sautéing the mushrooms.
  • Meat thermometer: Ensures your chicken is cooked through and safe to eat.
  • Sharp knife: For slicing the chicken and mushrooms easily.
  • Wooden spoon: Great for stirring and scraping up those delicious browned bits from the pan.

Serving Suggestions

Finally, consider these ideas when it’s time to serve:

  • Garnish: A sprinkle of fresh parsley or chives adds a lovely touch.
  • Accompaniments: Serve with a simple green salad or roasted vegetables for a complete meal.
  • Wine pairing: A crisp white wine like Sauvignon Blanc complements the creamy sauce beautifully.

As you gather around the table to enjoy this dish, remember that cooking is more than just making a meal; it’s about creating memories and sharing love. Creamy Garlic Mushroom Chicken is sure to become a cherished recipe in your household, just as it has in mine. Happy cooking, and may your kitchen always be filled with the warmth of home!

Creamy Garlic Mushroom Chicken

Prep Time 10 minutes
Cook Time 20 minutes
Total Time 30 minutes
Servings 4 servings
Calories 550
A rich and flavorful dish featuring tender chicken breasts in a creamy garlic mushroom sauce, perfect for a comforting dinner.

Ingredients

Protein

  • 2 oz Chicken Breasts (brought close to room temp)
  • 1/4 cup Flour (see notes)
  • 1 tsp Salt
  • 1 tsp Garlic Powder
  • 1/2 tsp Black Pepper
  • 1 tbsp Olive Oil
  • 1 tbsp Butter (preferably unsalted)

Vegetables

  • 9 oz Baby Button Mushrooms (sliced fairly thin)
  • 3/4 cup Heavy/Double Cream (at room temp)
  • 3/4 cup Chicken Stock
  • 1 oz Freshly Grated Parmesan
  • 2 cloves Garlic (finely diced)
  • 1 tbsp Fresh Parsley (finely diced, plus more to garnish)
  • 1 tbsp Fresh Chives (finely diced)
  • 1 tbsp Butter (preferably unsalted (can sub oil, for frying mushrooms))
  • 0.5-1 tsp Lemon Juice (see notes)

Seasoning

  • to taste Salt & Pepper

Instructions 

  • Slice each chicken breast horizontally to create 4 even pieces.
  • Mix flour, garlic powder, salt, and black pepper. Dredge chicken in the mixture.
  • Heat oil and butter, cook chicken until golden and cooked through. Remove and set aside.
  • Fry mushrooms in butter until golden, add garlic, then pour in stock and cream. Add herbs and simmer until slightly thickened.
  • Stir in Parmesan, add lemon juice, season with salt and pepper, then reintroduce chicken to coat with sauce. Serve hot.

Notes

For extra flavor, garnish with additional parsley and chives before serving.
Calories: 550kcal
Cost: $15
Course: Main Course
Cuisine: Western
Keyword: chicken, creamy, Mushrooms

Welcome, friends! Today, we’re diving into a recipe that not only fills your belly but also warms your heart—Baked Honey Mustard Chicken. This dish combines the rich flavors of sweet honey and zesty mustard, creating a melody on your taste buds that’s perfect for any family gathering or cozy weeknight dinner. With its straightforward preparation and comforting taste, this recipe is a reminder that cooking doesn’t have to be complicated; it just takes a little care and love.

Why You’ll Love This Recipe

This Baked Honey Mustard Chicken is more than just a meal; it’s a celebration of flavors and simplicity. Here are five reasons you’ll adore this dish:

  • Effortless Preparation: With just a few simple steps, you can have a delicious meal on the table in no time, making it perfect for busy weeknights.
  • Irresistible Flavors: The combination of honey and mustard creates a sweet and tangy glaze that’ll have your family coming back for seconds.
  • Customizable: Feel free to tweak the ingredients to suit your taste—add some heat with hot sauce or change up the mustard types!
  • Healthy and Wholesome: Made with boneless, skinless chicken breasts, this dish is a lighter option that doesn’t skimp on flavor.
  • Perfect for Meal Prep: Make a larger batch and enjoy leftovers throughout the week—this chicken keeps well in the fridge!

What You’ll Need

Gather these simple ingredients, and you’re ready to start cooking!

  • 4 boneless, skinless chicken breasts: Tender and juicy, these are the heart of the dish.
  • 1 teaspoon chicken seasoning blend: For a touch of flavor. You can use your favorite blend or salt and pepper.
  • 2 tablespoons olive oil: This helps to brown the chicken and adds richness.
  • ¼ cup honey: The star ingredient! Go for a good quality honey for the best flavor.
  • 1 tablespoon Dijon mustard: Adds a sharpness that balances the sweetness.
  • 1 tablespoon yellow mustard: For that classic mustard flavor.
  • 1 tablespoon wholegrain mustard: Offers a nice texture and additional depth.
  • ½ teaspoon white vinegar: A splash of acidity to brighten up the flavors.
  • ⅛ teaspoon paprika: For a subtle smokiness.
  • 4 sprigs fresh rosemary (optional but recommended): Adds an aromatic touch that elevates the dish.

How To Make Baked Honey Mustard Chicken

Let’s get into the heart of the matter! Follow these simple steps to create your own comforting dish:

  1. Preheat your oven to 375°F (190°C).
  2. Lightly grease a 9×13 baking dish with cooking spray and set it aside.
  3. In a skillet, heat 1½ tablespoons of olive oil over medium heat.
  4. Season the chicken breasts with the chicken seasoning blend and add them to the skillet; cook for about 2 minutes on each side until nicely browned.
  5. While the chicken cooks, prepare the honey mustard sauce by combining ½ tablespoon olive oil, honey, yellow mustard, Dijon mustard, wholegrain mustard, white vinegar, and paprika in a small mixing bowl. Whisk until well combined.
  6. Transfer the browned chicken breasts to the prepared baking dish.
  7. Pour the honey mustard sauce over the chicken, ensuring to coat each piece completely.
  8. Arrange the sprigs of rosemary among the chicken breasts for an added touch of flavor.
  9. Cover the dish with foil and bake for 20 minutes.
  10. After 20 minutes, remove the foil and continue baking for another 15 minutes, or until the chicken is cooked through—use an Instant Read Meat Thermometer to check that the internal temperature reaches 165°F (74°C).
  11. Once cooked, remove from the oven and let it rest for 5 minutes before serving.

Pro Tips for Perfect Chicken

A side profile of tender baked chicken breasts drizzled with honey mustard sauce.

To ensure your chicken turns out perfectly every time, here are some expert insights:

  • Use a Meat Thermometer: This is essential for achieving perfectly cooked chicken. Undercooked chicken is unsafe, and overcooked chicken can be dry.
  • Marinate Ahead of Time: If you have the time, marinate the chicken in the honey mustard sauce for at least an hour, or even overnight, for deeper flavors.
  • Let It Rest: Allowing the chicken to rest for a few minutes after baking helps the juices redistribute, ensuring every bite is juicy.
  • Experiment with Mustards: Feel free to try different types of mustard—spicy brown, honey mustard, or even a fruity mustard for a twist!
  • Pair with Sides: This chicken pairs beautifully with roasted vegetables, fluffy rice, or a fresh salad.
  • Leftovers: Store any leftover chicken in an airtight container; it’s great on salads or sandwiches the next day.
  • Adjust the Sweetness: If you prefer a sweeter glaze, simply increase the amount of honey.
  • Use Bone-In Chicken: For even more flavor, consider using bone-in chicken thighs, which tend to stay juicier during the cooking process.

Common Mistakes and Troubleshooting

Even the best cooks can run into a few hiccups. Here’s how to avoid common pitfalls:

  • Dry Chicken: Make sure you check the cooking time and temperature. Overcooking can lead to dryness.
  • Too Much Sweetness: If the glaze is overly sweet for your taste, balance it out with a splash more vinegar or a dash of mustard.
  • Uneven Cooking: Ensure the chicken breasts are of uniform size for even cooking. If they vary greatly in size, consider pounding them to an even thickness.
  • Sticky Glaze: If the glaze is too thick, you can add a bit of water or chicken broth to thin it out.

Delicious Variations

Cooking is all about creativity! Here are some variations you can try:

  • Honey Soy Chicken: Swap out the honey mustard for soy sauce and honey for an Asian twist.
  • Spicy Honey Mustard: Add a teaspoon of chili powder or crushed red pepper flakes for a spicy kick.
  • Citrus Infusion: Add orange or lemon zest to the honey mustard sauce for a bright, fresh flavor.
  • Herb-Infused: Mix in finely chopped fresh herbs like thyme or parsley for an added burst of flavor.

Storage and Make-Ahead Instructions

Planning ahead is key for busy lifestyles. Here’s how to store and prepare this dish:

  • Refrigeration: Store any leftovers in an airtight container in the fridge for up to 3-4 days.
  • Freezing: You can freeze the cooked chicken for up to 3 months. Thaw in the refrigerator before reheating.
  • Make-Ahead: Prepare the chicken and sauce ahead of time, then store separately in the fridge until ready to bake.

Comprehensive FAQ

Got questions? We’ve got answers! Here are some common queries about Baked Honey Mustard Chicken:

  • Can I use boneless chicken thighs instead of breasts? Yes! Boneless chicken thighs are a great alternative and will add extra juiciness to the dish.
  • What should I serve with this chicken? It pairs wonderfully with roasted vegetables, rice, or a crisp salad.
  • How can I make this dish gluten-free? Ensure the mustard and any additional seasonings are gluten-free.
  • Can I use honey substitutes? Yes! Maple syrup or agave nectar can be used, but the flavor will change slightly.
  • How do I know when the chicken is done? Use a meat thermometer to check that the internal temperature reaches 165°F (74°C).
  • Can I grill this chicken instead of baking it? Absolutely! Grill the chicken over medium heat, brushing with the honey mustard sauce as it cooks.
  • How spicy is this dish? This recipe is not spicy at all, but you can add heat by incorporating hot sauce or chili flakes.
  • What kind of honey is best? Choose a raw or local honey for the best flavor, but any good quality honey will work!

Nutrition Tips and Dietary Adaptations

Here are some nutritional insights and adaptations you might consider:

  • Low-Calorie Option: To make this dish lower in calories, use less honey and substitute with a sugar-free sweetener.
  • Whole30 Approved: If you’re following a Whole30 diet, ensure all ingredients are compliant, particularly the mustards.
  • Low-Carb Version: Serve this chicken with steamed vegetables instead of rice for a low-carb meal.

Equipment Recommendations

Having the right tools can make all the difference. Here are a few essentials:

  • Oven-Safe Skillet: A skillet that can go from stovetop to oven is ideal for searing and baking.
  • Meat Thermometer: Essential for ensuring your chicken is cooked to perfection.
  • 9×13 Baking Dish: Perfect size for this recipe, allowing the chicken to cook evenly.

Serving Suggestions

To round out your meal, consider these serving ideas:

  • Serve with Rice: A fluffy jasmine or brown rice complements the sweet and tangy chicken beautifully.
  • Add a Salad: A simple green salad with a vinaigrette balances the richness of the dish.
  • Pair with Vegetables: Roasted or steamed veggies like broccoli, green beans, or carrots are excellent choices.

So there you have it—an entire guide to making the most comforting Baked Honey Mustard Chicken! With its sweet and tangy flavors, it’s more than just a meal; it’s a memory in the making. So, gather your loved ones, fire up the oven, and let’s create something delicious together. Remember, cooking is about connection, and this dish is sure to bring joy to your table.

Baked Honey Mustard Chicken

Prep Time 10 minutes
Cook Time 35 minutes
Total Time 45 minutes
Servings 4 servings
Calories 350
A flavorful and easy baked chicken recipe glazed with a honey mustard sauce, perfect for a quick weeknight dinner.

Ingredients

Chicken

  • 4 pieces boneless, skinless chicken breasts
  • 1 teaspoon chicken seasoning blend (or to taste)
  • 2 tablespoons olive oil (divided)
  • ¼ cup honey
  • 1 tablespoon Dijon mustard
  • 1 tablespoon yellow mustard
  • 1 tablespoon wholegrain mustard
  • ½ teaspoon white vinegar
  • teaspoon paprika
  • 4 sprigs fresh rosemary (optional but recommended)

Instructions 

  • Preheat oven to 375°F (190°C). Lightly grease a baking dish.
  • Season chicken with the spice blend. Sear in 1.5 tbsp olive oil for 2 minutes per side.
  • Mix honey, mustards, vinegar, paprika, and 0.5 tbsp olive oil to make the sauce.
  • Transfer chicken to baking dish, pour sauce over, and add rosemary sprigs.
  • Cover with foil and bake for 20 minutes, then uncover and bake 15 more minutes until cooked through. Rest 5 minutes before serving.

Notes

Use a meat thermometer to ensure chicken reaches 165°F internally.
Calories: 350kcal
Cost: $15
Course: Main Course
Cuisine: American
Keyword: chicken

The Comfort of Forgotten Chicken and Rice: A Hearty Family Favorite

When it comes to home cooking, few dishes evoke the warmth and nostalgia of a family gathering quite like Forgotten Chicken and Rice. This one-pot wonder not only brings together tender chicken and creamy soups but also fills your kitchen with the comforting aroma of home. It’s an easy, no-fuss recipe that’s perfect for busy weeknights or when you’re hosting family and friends. In this guide, we’ll delve into the simplicity and satisfaction of this beloved dish, ensuring that every bite takes you back to those cherished memories around the dinner table.

Why You’ll Love This Recipe

There are countless reasons to fall in love with Forgotten Chicken and Rice. Here are just a few:

  • Easy Preparation: With just a few simple steps, you can prepare a delicious meal that practically cooks itself in the oven.
  • Hearty and Satisfying: This dish is packed with flavor, making it a filling option for the whole family.
  • Versatile Ingredients: You can customize it with your favorite vegetables or proteins, making it adaptable for various dietary needs.
  • One-Pot Wonder: Less washing up means more time spent enjoying your meal and company.
  • Perfect for Leftovers: This recipe tastes even better the next day, making it a great choice for meal prep.

Ingredients and Their Roles

To create this delicious dish, you’ll need the following ingredients:

  • 1 lb (450g) boneless, skinless chicken breasts: The star of the dish, providing lean protein and a tender texture.
  • 2 cups instant rice (white or brown): Soaks up the flavors and ensures perfectly tender grains without fuss.
  • 1 can (10.5 oz) cream of chicken soup: Adds a rich, creamy base that keeps the chicken moist.
  • 1 can (10.5 oz) cream of mushroom soup: Enhances the savory flavor profile of the dish.
  • 1 can (10.5 oz) water: Use the empty soup can for measurement, providing the right amount of liquid.
  • 1 envelope onion soup mix: A key seasoning component that elevates the dish with its robust flavor.
  • 1 tablespoon butter: For greasing the baking dish and adding a touch of richness.
  • 1 cup shredded cheddar cheese: Optional, but it adds a deliciously melty topping.
  • 1–2 cups frozen mixed vegetables: Adds color, nutrition, and texture to the meal.
  • 1 cup diced cooked chicken: Optional, for stretching the protein and adding depth.
  • Dash of black pepper, garlic powder, or paprika: For additional flavor.

Substitutions and Variations

If you find yourself missing an ingredient or want to change things up, here are some substitutions:

  • Chicken Thighs: Swap boneless breasts for thighs for a juicier option.
  • Vegetable Soup: Replace the cream of chicken and mushroom soups with your favorite vegetable soup for a vegetarian twist.
  • Brown Rice: Use brown rice for a nuttier flavor and added fiber.
  • Fresh Vegetables: Substitute frozen vegetables with fresh ones like broccoli, carrots, or bell peppers, adjusting cooking times as necessary.

Step-by-Step Preparation Guide

Side view of a serving of Forgotten Chicken and Rice topped with cheddar cheese.

Now, let’s dive into the preparation process. Follow these detailed steps to create your Forgotten Chicken and Rice masterpiece:

  • Preheat the Oven: Set your oven to 350°F (175°C). Grease a 9×13 inch casserole dish with the tablespoon of butter to prevent sticking.
  • Prepare the Base Mixture: In a large bowl, combine the cream of chicken soup, cream of mushroom soup, water, and uncooked instant rice. Stir well until evenly mixed.
  • Pour into the Baking Dish: Transfer the soup and rice mixture into the greased casserole dish and spread evenly.
  • Add Optional Ingredients: Stir in frozen vegetables or shredded cheese if desired. These add-ins can elevate the dish and make it more substantial.
  • Top with Chicken: Place the raw chicken breasts directly on top of the rice mixture. If they’re particularly thick, consider butterflying them for even cooking.
  • Sprinkle Soup Mix: Evenly sprinkle the onion soup mix over the top of the chicken. This adds both seasoning and savory depth.
  • Cover and Bake: Cover the dish tightly with aluminum foil and bake for 60 minutes. Do not lift the foil during baking—this traps the moisture and ensures the rice cooks evenly.
  • Check for Doneness: After 1 hour, remove the foil. The chicken should be fully cooked (internal temperature of 165°F/75°C), and the rice should be tender and creamy.
  • Optional Broil: For a golden top, broil the casserole uncovered for 3–5 minutes until lightly browned.
  • Let Rest and Serve: Allow to rest for 5–10 minutes before serving. This gives the casserole time to set and makes it easier to serve.

Pro Tips for Perfecting Your Dish

Here are some expert insights that can take your Forgotten Chicken and Rice to the next level:

  • Use Quality Chicken: Opt for organic or free-range chicken for better flavor and nutrition.
  • Don’t Skip the Resting Time: This crucial step helps the dish set and enhances the flavors.
  • Experiment with Seasonings: Feel free to add herbs like thyme or rosemary for extra flavor.
  • Make It Ahead: Prepare the casserole the night before and store it in the refrigerator. Just pop it in the oven when you’re ready to cook.
  • Double the Recipe: If you’re feeding a crowd, this dish can easily be doubled and cooked in a larger dish.
  • Serve with Sides: Pair with a fresh salad or crusty bread for a complete meal.
  • Freeze for Later: This dish freezes well, making it a great option for meal prep.
  • Adjust Rice Amounts: If you prefer a creamier texture, reduce the amount of rice slightly.

Common Mistakes and Troubleshooting

Even the best chefs can run into hiccups. Here are some common mistakes and how to avoid them:

  • Rice Not Cooking Properly: Ensure that the dish is covered tightly during baking to trap steam.
  • Chicken Overcooking: Use thinner cuts of chicken or butterfly thick pieces to ensure even cooking.
  • Too Much Liquid: If you find your dish too watery, reduce the amount of water added or let it bake uncovered for part of the time.
  • Flavor Lacking: Always taste and adjust seasoning before baking; remember to sprinkle onion soup mix evenly!

Storage and Make-Ahead Instructions

This dish is not only delicious fresh but also perfect for leftovers. Here’s how to store and reheat:

  • Refrigerate: Store any leftovers in an airtight container in the fridge for up to 4 days.
  • Freeze: For longer storage, freeze portions in airtight containers or freezer bags for up to 3 months.
  • Reheat: To reheat, thaw overnight in the fridge, then bake in a preheated oven at 350°F (175°C) until heated through.
  • Make-Ahead: Assemble the casserole ahead of time, cover tightly, and refrigerate until you’re ready to bake.

Frequently Asked Questions

Here are some common questions about Forgotten Chicken and Rice:

  • Can I use brown rice? Yes, but adjust the cooking time as brown rice takes longer to cook.
  • Is this dish gluten-free? Use gluten-free soups and onion soup mix for a gluten-free version.
  • Can I add vegetables? Absolutely! Fresh or frozen vegetables can be added based on your preference.
  • What can I substitute for cream of chicken soup? You can use cream of celery or a homemade soup alternative.
  • How do I know when it’s done? The chicken should reach an internal temperature of 165°F (75°C), and the rice should be tender.
  • Can this be made in a slow cooker? Yes, combine all ingredients in a slow cooker and cook on low for 6-8 hours.
  • Can I use bone-in chicken? Yes, but cooking times may vary, and you may need to adjust the liquid.
  • What can I serve with this dish? A simple green salad or roasted vegetables would pair nicely.

Nutrition Tips and Dietary Adaptations

For those watching their dietary intake, here are some tips:

  • Protein Boost: Add extra cooked chicken or beans for more protein.
  • Fiber-Rich Options: Include more vegetables for added fiber and nutrients.
  • Lower Calorie Version: Use low-fat soups and cheese to reduce calories.
  • Gluten-Free Adaptation: Ensure all ingredients are gluten-free, including the soup mix.

Equipment Recommendations

Here are some kitchen tools that will make your cooking experience smoother:

  • 9×13 inch casserole dish: Perfect size for baking this recipe.
  • Large mixing bowl: For combining your ingredients easily.
  • Aluminum foil: Essential for covering your dish while it bakes.
  • Meat thermometer: To check the chicken’s doneness.

Serving Suggestions

When it’s time to serve, consider these options:

  • Garnish with Fresh Herbs: Chopped parsley or chives add a fresh touch.
  • Pair with a Salad: A crisp garden salad balances the rich flavors of the casserole.
  • Serve with Bread: Crusty bread or dinner rolls are perfect for soaking up the creamy sauce.
  • Top with Extra Cheese: For cheese lovers, sprinkle additional cheese before serving.

In conclusion, Forgotten Chicken and Rice is more than just a meal; it’s a comforting embrace from the past, reminding us of the simple joys of home cooking. With its easy preparation and satisfying flavors, it’s a dish that will surely become a staple in your kitchen. So gather your ingredients, preheat that oven, and get ready to create a memory that your loved ones will cherish for years to come. Happy cooking!

Forgotten Chicken and Rice

Prep Time 15 minutes
Cook Time 1 hour
Total Time 1 hour 15 minutes
Servings 4 servings
Calories 650
A comforting casserole combining tender chicken, flavorful rice, and creamy soups, baked to perfection for a hearty meal.

Ingredients

Protein

  • 1 lb boneless, skinless chicken breasts

Grains

  • 2 cups instant rice (white or brown)

Canned Goods

  • 1 can cream of chicken soup (10.5 oz)
  • 1 can cream of mushroom soup (10.5 oz)
  • 1 can water (use the empty soup can for measurement, 10.5 oz)

Seasonings & Mixes

  • 1 envelope onion soup mix

Dairy & Cheese

  • 1 tablespoon butter (for greasing)
  • 1 cup shredded cheddar cheese

Vegetables

  • 1–2 cups frozen mixed vegetables

Protein Add-in

  • 1 cup diced cooked chicken (to stretch the protein)

Spices & Flavorings

  • Dash black pepper, garlic powder, or paprika (for added flavor)

Instructions 

  • Preheat oven to 350°F (175°C). Grease a 9×13 inch casserole dish with butter.
  • Mix soups, water, and rice in a large bowl. Transfer to the dish.
  • Add vegetables or cheese if desired. Place chicken on top and sprinkle with onion soup mix.
  • Cover with foil and bake for 60 minutes. Remove foil, broil for 3–5 minutes for a golden top.
  • Let rest for 5–10 minutes before serving.

Notes

Ensure chicken is fully cooked before serving. Feel free to add more vegetables or cheese for extra flavor.
Calories: 650kcal
Cost: $15
Course: Main Course
Cuisine: American
Keyword: Casserole, chicken, rice