Author

Tom

Browsing

Welcome to the Heart of Comfort Cooking

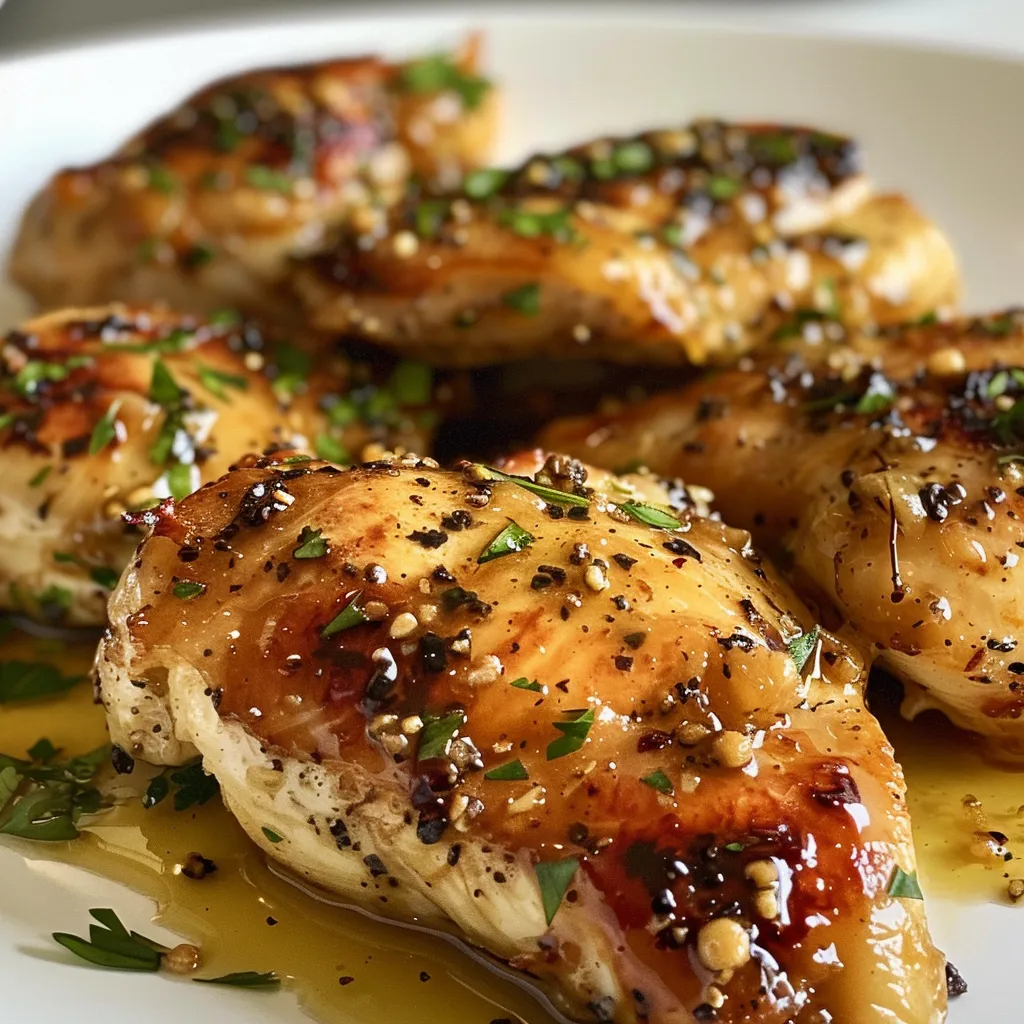
There’s something special about gathering around a table filled with dishes that speak to the soul, and that’s exactly what smothered chicken does. This cherished recipe brings warmth and nostalgia, blending simple ingredients into a dish that feels like home. Whether it’s a Sunday gathering or a casual weeknight dinner, this hearty meal promises to satisfy your hunger and your heart. In this guide, we’ll dive deep into everything you need to know about making the perfect smothered chicken, ensuring you can recreate that comforting experience in your own kitchen.

Why You’ll Love This Recipe

  • Rich Flavor: The combination of spices, creamy gravy, and tender chicken creates a dish that’s bursting with flavor.
  • Simple Ingredients: Made with everyday items you likely have in your pantry, smothered chicken proves that comfort food doesn’t have to be complicated.
  • Family-Friendly: This dish appeals to all ages, making it a great option for family dinners or gatherings.
  • Versatile Meal: Smothered chicken pairs beautifully with a variety of sides, from mashed potatoes to steamed vegetables.
  • Leftover Magic: Any leftovers can be transformed into delicious meals the next day, ensuring nothing goes to waste.

Ingredients Breakdown: What You’ll Need

Before diving into the cooking process, let’s take a closer look at the ingredients that make this dish special. Each component plays a crucial role in creating that beloved comfort food experience.

  • 2 large chicken breasts: Cut into thinner cutlets for quicker cooking and more surface area for flavor.
  • Salt & pepper: Essential for seasoning; adjust to your taste.
  • 1/2 cup flour: Used for dredging the chicken, it helps create a crispy crust and thickens the gravy.
  • 1 tablespoon garlic powder: Adds depth and a hint of sweetness.
  • 1 tablespoon onion powder: Enhances the overall flavor profile.
  • 1/2 tablespoon paprika: Gives a subtle smokiness and color.
  • 1/2 teaspoon cayenne pepper (optional): For a little kick; adjust based on your spice preference.
  • 2 tablespoons olive oil: Used for frying the chicken and enhancing flavor.
  • 2 tablespoons butter: Adds richness to the gravy.
  • 1 medium-to-large onion (sliced): The star of the gravy, providing sweetness and depth.
  • 1 cup chicken broth: The base of your gravy, infusing the dish with flavor.
  • 1 teaspoon Worcestershire sauce: Adds an umami touch.
  • 1/4 cup heavy cream: Makes the gravy creamy and luscious.

Step-by-Step Instructions: How to Make Smothered Chicken

Tender chicken breast covered in rich gravy and sliced onions.

Now that we have all the ingredients ready, let’s walk through the steps to create this heartwarming dish.

  • Prepare the Chicken: Cut the chicken breasts in half lengthwise so you have 4 thinner cutlets. Season each piece with salt and pepper on both sides.
  • Mix the Seasoning: In a bowl, combine the flour, garlic powder, onion powder, paprika, and cayenne pepper. Reserve 2 tablespoons of this mixture to use later for thickening the gravy.
  • Heat the Oil: In a skillet over medium-high heat, add olive oil. While the pan heats, dredge the chicken in the seasoned flour until well-coated.
  • Fry the Chicken: Add the chicken pieces to the skillet, cooking for about 5 minutes on each side until golden brown but not fully cooked. Transfer the chicken to a plate.
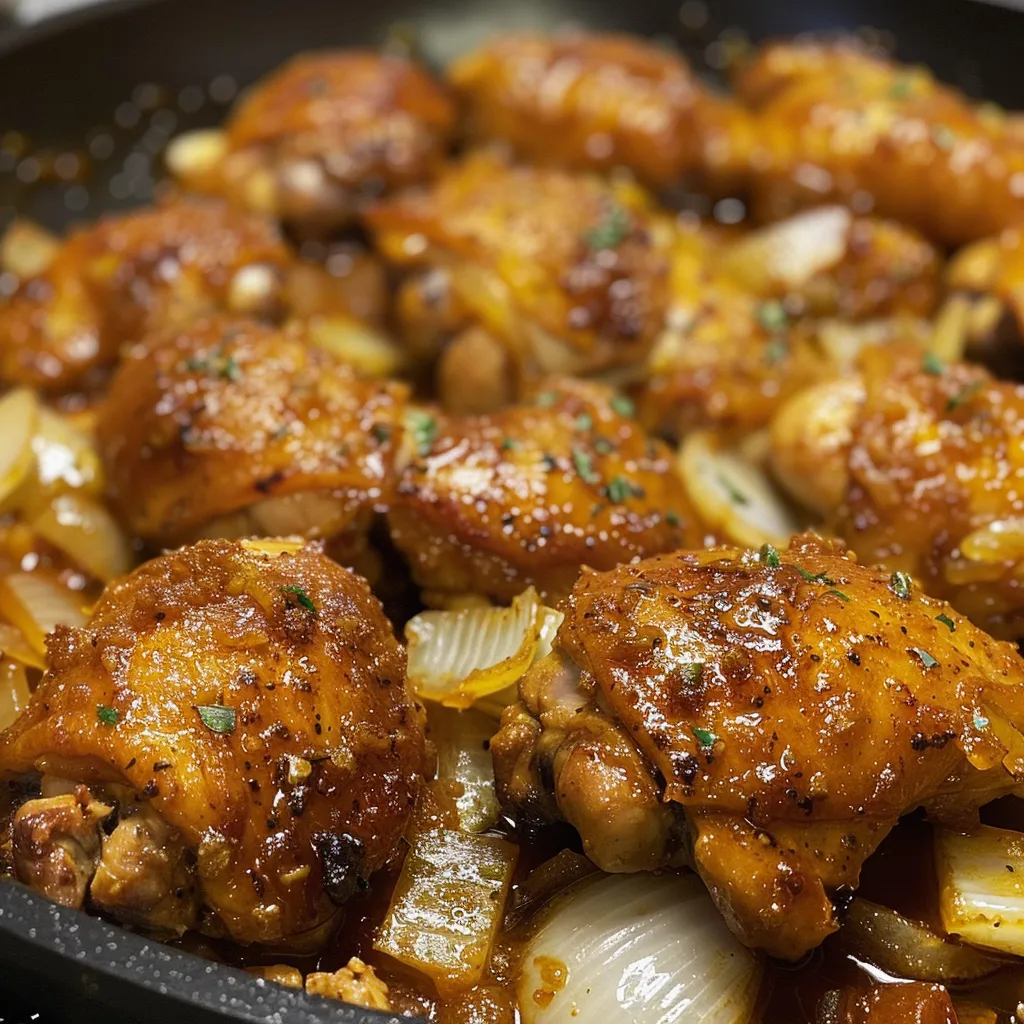
  • Sauté the Onions: Reduce the heat to medium-low and add butter to the skillet. Once melted, add the sliced onions, cooking until they soften and turn golden (about 15-20 minutes), stirring occasionally.
  • Make the Gravy: Sprinkle the reserved seasoned flour into the pan with the onions, cooking for about a minute while stirring. Gradually add chicken broth and Worcestershire sauce, scraping up any browned bits from the bottom of the pan. Stir in the cream.
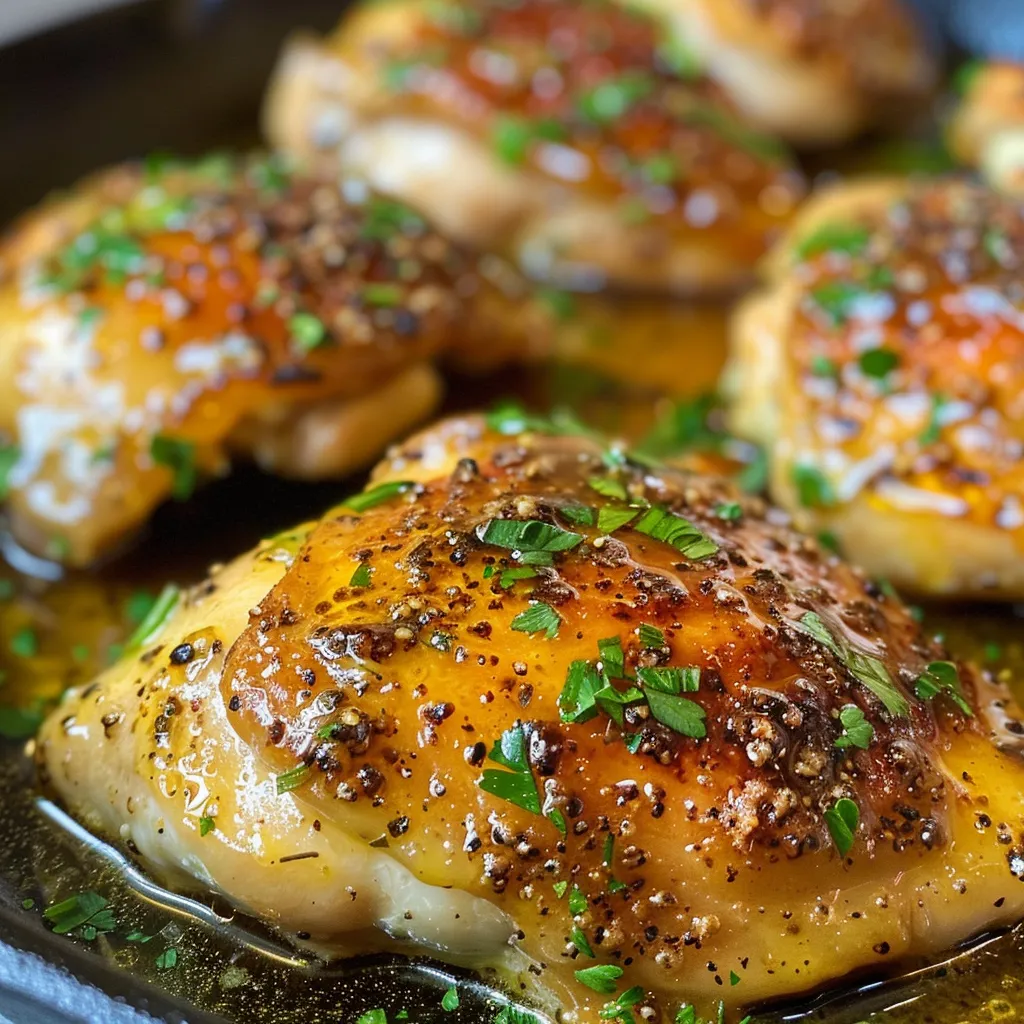
  • Return the Chicken: Add the chicken back to the skillet, cooking for an additional 5-7 minutes until the chicken is fully cooked (165°F) and the gravy thickens.
  • Final Seasoning: Taste and adjust seasoning with salt and pepper as needed. Serve immediately, and enjoy!

Pro Tips for Perfect Smothered Chicken

To elevate your smothered chicken experience, consider these expert insights:

  • Let the Chicken Rest: Allow your chicken to rest for a few minutes after frying to retain moisture.
  • Use a Cast Iron Skillet: This helps achieve a perfect sear and enhances flavor.
  • Thinly Slice Onions: The thinner the slices, the quicker they’ll caramelize, adding sweetness to your gravy.
  • Adjust the Heat: If the onions start to burn, lower the heat to avoid bitterness.
  • Leftover Gravy Storage: If you have leftover gravy, store it separately to prevent the chicken from getting soggy.
  • Experiment with Spices: Don’t hesitate to add your favorite spices to the flour mix for a personal touch.
  • Pair with Sides: Mashed potatoes, rice, or biscuits make excellent companions to soak up that delicious gravy.
  • Make Ahead: You can prepare the chicken and gravy a day in advance; just reheat before serving.

Common Mistakes and Troubleshooting

Even the best recipes can hit a snag. Here’s how to avoid common pitfalls:

  • Chicken Not Browning: Ensure your skillet is hot enough before adding the chicken to achieve a nice golden crust.
  • Gravy Too Thin: If your gravy is too thin, let it simmer longer to reduce, or add a bit more reserved flour mixed in water to thicken.
  • Overcooked Chicken: Use a meat thermometer to check for doneness at 165°F; aim for juicy, tender chicken.
  • Bitter Gravy: If the onions burn, the gravy may become bitter; always cook them gently.

Delicious Variations on Smothered Chicken

Feel free to get creative! Here are some variations to try:

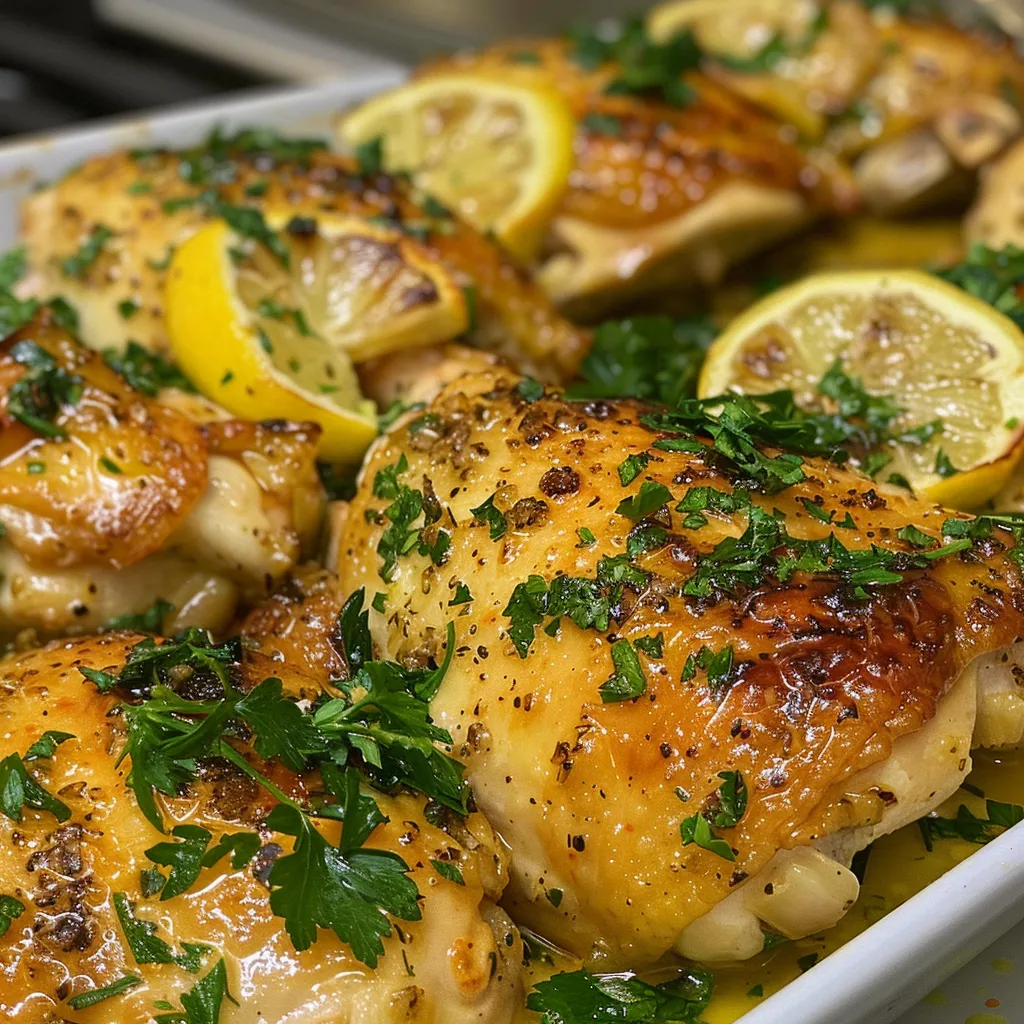
  • Smothered Chicken Thighs: Use chicken thighs instead of breasts for richer flavor and juiciness.
  • Spicy Smothered Chicken: Add diced jalapeños or hot sauce to the gravy for a fiery kick.
  • Herb-Infused Gravy: Stir in fresh herbs like thyme or rosemary into the gravy for an aromatic twist.
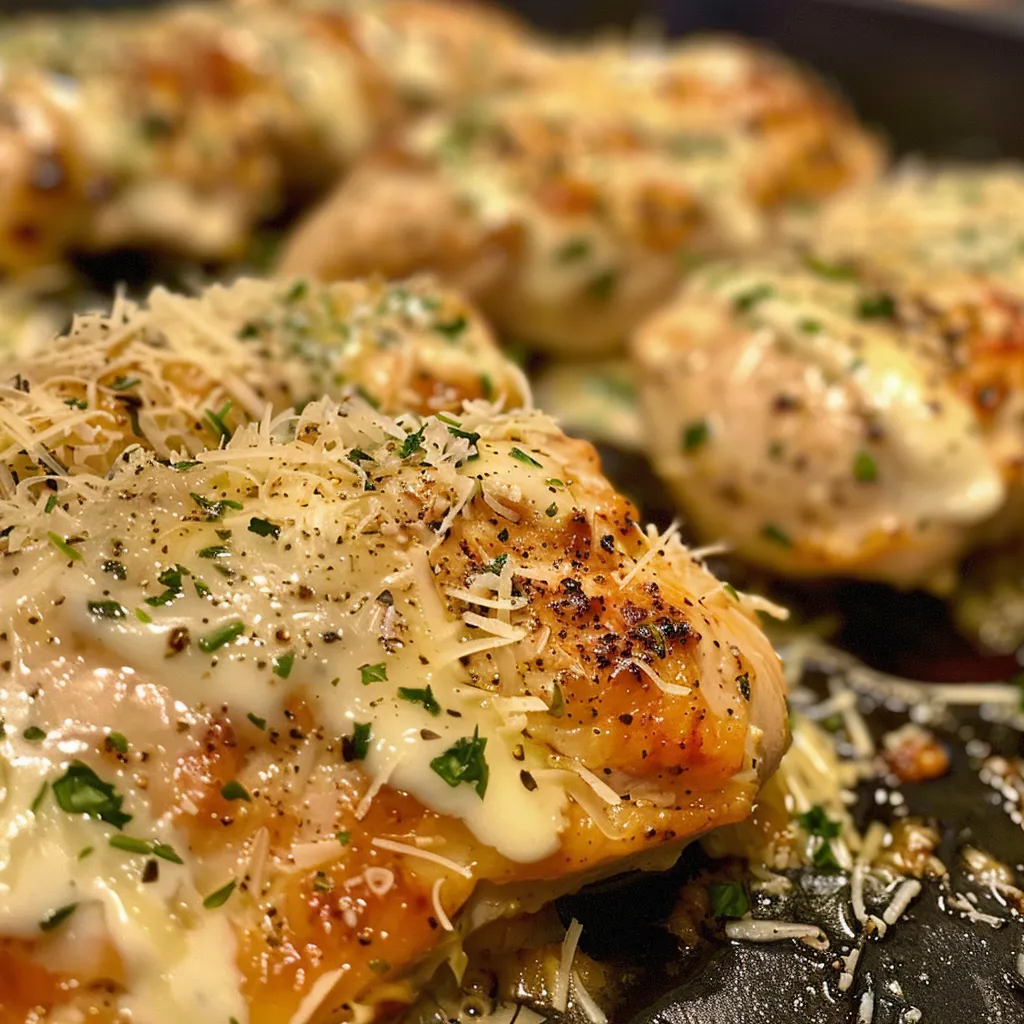
  • Cheesy Smothered Chicken: Top the chicken with cheese during the last few minutes of cooking for an indulgent finish.

Storage and Make-Ahead Instructions

If you find yourself with leftovers or want to prepare this dish in advance, here’s how to properly store and reheat:

  • Refrigeration: Store any leftover smothered chicken in an airtight container in the fridge for up to 3 days.
  • Freezing: For longer storage, freeze the chicken and gravy in a freezer-safe container for up to 3 months.
  • Reheating: To reheat, thaw in the fridge overnight, then warm gently on the stovetop or in the microwave, adding a splash of chicken broth if the gravy thickens too much.

Frequently Asked Questions

  • What type of chicken is best for smothered chicken? Chicken breasts or thighs work well, but thighs provide more flavor and moisture.
  • Can I use a different type of flour? Yes! Whole wheat flour or gluten-free blends can be used as substitutes.
  • What can I serve with smothered chicken? Classic pairings include mashed potatoes, rice, or collard greens for a true Southern experience.
  • Can I make this dish spicy? Absolutely! Add hot sauce or cayenne pepper to the gravy to kick it up a notch.
  • How do I store leftovers? Keep in an airtight container in the fridge for up to 3 days or freeze for up to 3 months.
  • Can I make smothered chicken in advance? Yes, you can prepare the chicken and gravy ahead of time; just reheat before serving.
  • What if my gravy is too thick? Add a little chicken broth or water to thin it out to your desired consistency.
  • How can I make this dish healthier? Consider using skinless chicken and reducing the amount of butter and cream in the gravy.

Nutritional Tips and Dietary Adaptations

For those watching their dietary intake, consider these adaptations:

  • Low-Carb Option: Substitute flour with almond flour or coconut flour to lower carbohydrates.
  • Dairy-Free Option: Use coconut cream or a dairy-free alternative instead of heavy cream.
  • Lower Sodium: Opt for low-sodium chicken broth and limit added salt to suit your dietary needs.

Essential Equipment for Success

Ensuring you have the right tools can make all the difference:

  • Cast Iron Skillet: Ideal for frying the chicken and making gravy due to its heat retention.
  • Meat Thermometer: To ensure your chicken reaches the safe cooking temperature.
  • Sharp Knife: For easy slicing and preparation of chicken and onions.
  • Mixing Bowls: For combining the flour and spices efficiently.

Serving Suggestions: Completing the Meal

Finish your meal with complementary sides that enhance the experience:

  • Mashed Potatoes: Creamy mashed potatoes are perfect for soaking up the rich gravy.
  • Green Beans: Lightly steamed or sautéed green beans add a fresh crunch.
  • Homemade Biscuits: Fluffy biscuits are great for mopping up leftover gravy.
  • Collard Greens: A classic Southern side dish that pairs beautifully with the flavors of smothered chicken.

Conclusion: A Dish to Cherish

Smothered chicken is more than just a recipe; it’s a heartfelt reminder of home, community, and the joy of sharing a meal with loved ones. By following this comprehensive guide, you’ll not only master the art of smothered chicken but also create delicious memories that last a lifetime. So gather your ingredients, roll up your sleeves, and let’s bring a taste of the South to your table. Happy cooking!

Smothered Chicken

Prep Time 10 minutes
Cook Time 30 minutes
Total Time 40 minutes
Servings 4 servings
Calories 450
A comforting dish featuring tender chicken breasts smothered in a rich onion gravy, perfect for a hearty meal.

Ingredients

Chicken

  • 2 large chicken breasts
  • to taste Salt & pepper
  • 1/2 cup flour
  • 1 tablespoon garlic powder
  • 1 tablespoon onion powder
  • 1/2 tablespoon paprika
  • 1/2 teaspoon cayenne pepper (see note)
  • 2 tablespoons olive oil
  • 2 tablespoons butter
  • 1 medium onion (sliced)
  • 1 cup chicken broth
  • 1 teaspoon Worcestershire sauce
  • 1/4 cup heavy/whipping cream

Instructions 

  • Slice chicken breasts in half and season with salt & pepper.
  • Mix flour, garlic powder, onion powder, paprika, and cayenne; coat chicken in seasoned flour.
  • Heat oil in skillet, cook chicken 5 minutes per side, then set aside.
  • Sauté onions in butter until golden, then stir in reserved seasoned flour and cook 1 minute.
  • Add chicken broth, Worcestershire, and cream; simmer until thickened, then return chicken to pan and cook until done.

Notes

Adjust seasoning as needed and serve hot over rice or mashed potatoes.
Calories: 450kcal
Cost: $15
Course: Main Course
Cuisine: American
Keyword: chicken

The Comfort of Home: A Hearty Chicken Garlic Parmesan Pasta Recipe

Gather ’round, friends! Today we’re diving into a dish that brings warmth to the table and fills the bellies of those you love—Chicken Garlic Parmesan Pasta. This creamy delight is not just about feeding the family; it’s about creating memories, sharing stories, and savoring the simple pleasures of a meal made with care.

With tender chicken, rich garlic flavors, and the comforting embrace of parmesan, this recipe is a go-to for weeknight dinners or special occasions. Join me as we explore why this dish will become a cherished favorite in your household.

Why You’ll Love This Recipe

  • Quick and Easy: Ready in just 30 minutes, this pasta dish is perfect for busy weeknights and ensures you spend more time enjoying dinner with family.
  • Rich and Creamy: The combination of heavy cream and parmesan creates a sauce that’s luxuriously smooth, enveloping each bite in comfort.
  • Versatile: This recipe is adaptable! Swap out ingredients or add veggies to customize it to your family’s tastes.
  • Family-Friendly: With its hearty flavors and satisfying textures, even the pickiest eaters will come back for seconds.
  • Perfect for Meal Prep: This dish stores beautifully, making it a great option for meals throughout the week.

Ingredients

Gather up these simple ingredients that you can find at any local grocery store. Each component plays a vital role in creating this delicious dish:

  • 2 tbsp olive oil (Costabile Brand; use code 15GOLDENGK for 15% off)
  • 1 1/2 lb Springer Mountain Farms chicken breast
  • 1 1/2 tsp paprika (OliveNation)
  • 1 1/2 tsp oregano
  • 1 tsp garlic powder (OliveNation)
  • 1/2 tsp thyme
  • 1/2 tsp black pepper
  • 1/2 tsp salt
  • 12 oz gluten-free farfalle pasta
  • 4 tbsp butter
  • 2 tsp dry shallots (use code 15GOLDENGK for 15% off)
  • 2 tsp Italian seasoning
  • 1/2 cup chicken broth
  • 2 tbsp gluten-free 1:1 flour
  • 3 cups heavy cream
  • 12 oz shredded parmesan
  • 1/4 cup pasta water
  • 1/2 tsp salt
  • 1 tsp garlic powder

How to Make Chicken Garlic Parmesan Pasta

Juicy Chicken Garlic Parmesan Pasta served with gluten-free farfalle and creamy sauce.

Let’s step into the kitchen and bring this recipe to life! Follow these simple instructions for a meal that’s sure to impress:

  1. In a large pot, boil the pasta according to the box instructions until al dente.
  2. In a small bowl, mix all the chicken seasonings: paprika, oregano, garlic powder, thyme, salt, and pepper.
  3. Pound the chicken slightly to thin it out, then season both sides with the mixed spices.
  4. In a large skillet, heat the olive oil over medium heat.
  5. Once hot, sear the chicken for 5 minutes on each side, then lower the heat and cover, cooking for an additional 10-12 minutes until the internal temperature reaches 165°F.
  6. Remove the chicken and set aside on a cutting board.
  7. Add the butter to the skillet, allowing it to melt, then stir in the shallots, garlic powder, and Italian seasoning, simmering for a minute.
  8. Sprinkle in the flour, scraping the bottom of the pan to create a roux.
  9. Pour in the chicken broth and heavy cream, whisking until smooth.
  10. Add in the parmesan cheese, stirring until melted and creamy.
  11. Mix in the cooked pasta, tossing to coat evenly. Add pasta water one tablespoon at a time to reach your desired sauce consistency.
  12. Slice the chicken and incorporate it into the pasta, stirring gently to combine.
  13. Serve hot, and watch your family gather ’round the table!

Pro Tips for Perfection

Every cook has a few tricks up their sleeve. Here are some expert insights to elevate your Chicken Garlic Parmesan Pasta:

  • Don’t Overcook the Chicken: Keep an eye on the internal temperature to avoid dry chicken. Aim for 165°F.
  • Use Fresh Ingredients: Fresh garlic and herbs enhance the flavor significantly compared to dried.
  • Pasta Water Magic: The starchy pasta water helps to thicken the sauce and binds it to the pasta.
  • Experiment with Cheese: Try mixing different types of cheese like mozzarella or asiago for a unique twist.
  • Adjust Creaminess: If you prefer a lighter dish, reduce the amount of cream or substitute with a lighter milk.
  • Flavor Boost: For extra flavor, add a splash of white wine to the sauce before the cream.
  • Vegetable Additions: Consider adding broccoli, spinach, or mushrooms for a hearty veggie boost.
  • Storage Tips: Store leftovers in an airtight container in the fridge for up to 3 days.

Common Mistakes and Troubleshooting

Even the best cooks make mistakes, but don’t worry! Here are some common pitfalls and how to avoid them:

  • Overcooked Pasta: Always cook pasta al dente to prevent mushiness. Remember, it will cook further in the sauce.
  • Clumpy Sauce: Whisk the cream well to prevent clumps. If it happens, a quick blend with an immersion blender can help.
  • Too Salty: If your dish ends up too salty, add a pinch of sugar to balance the flavors.
  • Chicken Not Flavored: Be generous with seasonings; don’t skimp on the spices for the chicken!

Variations to Try

Want to mix things up? Here are some delicious variations to personalize your Chicken Garlic Parmesan Pasta:

  • Spinach and Artichoke: Add cooked spinach and artichoke hearts for a creamy twist reminiscent of the beloved dip.
  • Buffalo Style: Toss in buffalo sauce for a spicy kick and top with crumbled blue cheese.
  • Mediterranean: Incorporate sun-dried tomatoes and olives for a fresh, tangy flavor.
  • Veggie Delight: Add your favorite vegetables like zucchini, bell peppers, or peas to pack in more nutrition.

Storage and Make-Ahead Instructions

This dish is a fantastic option for meal prep! Here’s how to store and reheat your Chicken Garlic Parmesan Pasta:

  • Refrigeration: Store in an airtight container in the fridge for up to 3 days.
  • Freezing: For longer storage, freeze in portions for up to a month. Thaw in the fridge overnight before reheating.
  • Reheating: Gently reheat on the stove over low heat, adding a splash of broth or water to loosen the sauce.

Frequently Asked Questions (FAQ)

Here are some common questions folks ask about this recipe:

  • Can I use a different type of pasta? Absolutely! Feel free to substitute with any pasta shape you love.
  • What if I don’t have heavy cream? You can use half-and-half or whole milk, but the sauce may be less creamy.
  • Is this recipe gluten-free? Yes! Just make sure to use gluten-free pasta and flour.
  • How do I make this dish dairy-free? Substitute with coconut cream and nutritional yeast for a cheesy flavor.
  • Can I use frozen chicken? Yes, but be sure to thaw it completely before cooking for even results.
  • How can I make it spicier? Add red pepper flakes or a splash of hot sauce into the sauce for a kick.
  • Can I add protein besides chicken? Yes! Shrimp or sausage would also be delicious in this recipe.
  • How do I make this dish vegetarian? Use mushrooms or a meat substitute instead of chicken and vegetable broth in place of chicken broth.

Nutritional Tips and Dietary Adaptations

This Chicken Garlic Parmesan Pasta can fit into various dietary needs:

  • Low Carb: Substitute pasta with spiralized zucchini or spaghetti squash.
  • High Protein: Add extra chicken or chickpeas for a protein boost.
  • Low Fat: Use less cream and replace with a mix of Greek yogurt and broth for creaminess without the calories.

Equipment Recommendations

To make your cooking experience smooth, here’s a simple list of equipment you’ll need:

  • Large Pot: For boiling pasta.
  • Large Skillet: Ideal for cooking chicken and making the sauce.
  • Measuring Cups and Spoons: For precise ingredient measurements.
  • Whisk: Essential for creating a smooth sauce.
  • Cutting Board and Knife: For slicing the chicken and prepping ingredients.

Serving Suggestions

Serve this comforting dish with:

  • Garlic Bread: A perfect pairing for soaking up all that delicious sauce.
  • Fresh Salad: A light salad with vinaigrette balances the richness of the pasta.
  • Parmesan Shavings: Garnish with fresh parmesan shavings for an elegant touch.

Conclusion

There you have it, my friends—a warm, hearty Chicken Garlic Parmesan Pasta that’s bound to bring everyone to the table. This dish is not just about nourishment; it’s about gathering, sharing, and celebrating life’s simple joys. So roll up your sleeves, gather your loved ones, and let’s make some memories over this comforting plate of goodness. Thank you for cooking with me today, and remember, the best meals are made with love!

Chicken Garlic Parmesan Pasta

Prep Time 15 minutes
Cook Time 30 minutes
Total Time 45 minutes
Servings 4 servings
Calories 850
A creamy, flavorful pasta dish featuring tender chicken and a rich Parmesan sauce, perfect for a comforting meal.

Ingredients

Protein

  • 1.5 lb Springer mountain farms chicken breast

Pasta

  • 12 oz gluten free farfalle pasta

Seasonings & Spices

  • 1.5 tsp paprika (OliveNation)
  • 1.5 tsp oregano
  • 1 tsp garlic powder (OliveNation)
  • 0.5 tsp thyme
  • 0.5 tsp black pepper
  • 0.5 tsp salt

Dairy & Broth

  • 4 tbsp butter
  • 2 tsp dry shallots ((use code 15GOLDENGK for 15% off) )
  • 2 tsp Italian seasoning
  • 0.5 cup chicken broth
  • 2 tbsp Gluten Free 1:1 Flour
  • 3 cups heavy cream
  • 12 oz shredded parmesan
  • 0.25 cup pasta water

Additional Seasonings

  • 0.5 tsp salt
  • 1 tsp garlic powder

Instructions 

  • Boil pasta until al dente, then drain.
  • Mix seasonings; season chicken and sear in olive oil for 5 minutes per side.
  • Cook chicken through, then remove and set aside.
  • Melt butter, add shallots, garlic, Italian seasoning, then stir in flour. Pour in broth and cream, whisk until smooth.
  • Stir in Parmesan, cook until thickened, then toss with pasta and sliced chicken. Serve.

Notes

Use fresh Parmesan for best flavor. Adjust pasta water to reach desired sauce consistency.
Calories: 850kcal
Cost: $15
Course: Main Course
Cuisine: American
Keyword: chicken, Parmesan, Pasta

Welcome to the Heartfelt Journey of Marry Me Chicken Pasta

Ah, Marry Me Chicken Pasta! A dish that warms the heart and fills the belly, inviting loved ones to gather around the dinner table. This creamy, flavorful delight combines tender chicken, sun-dried tomatoes, and a sprinkle of love. Whether it’s a cozy weeknight dinner or a special occasion, this recipe is perfect for creating lasting memories.

Why You’ll Love This Recipe

  • Quick and Easy: This dish comes together in about 30 minutes, making it perfect for busy weeknights.
  • Comforting Flavors: The creamy, garlicky sauce blends beautifully with sun-dried tomatoes, creating a flavor profile that’s both rich and satisfying.
  • Versatile Dish: Whether you’re serving it for a romantic dinner or a family gathering, Marry Me Chicken Pasta suits every occasion.
  • Impressive Presentation: The vibrant colors of the dish make it look gourmet, even though it’s simple to prepare.
  • Memorable Experience: The combination of ingredients creates a dish so delicious, it might just lead to a proposal!

Ingredient Breakdown

Let’s dive into the heart of this dish: the ingredients. Each plays a vital role in building layers of flavor. Here’s what you need:

  • 1 ½ pounds boneless skinless chicken breasts: Cut into 1-inch pieces for even cooking.
  • 10 ounces penne pasta: This shape holds the creamy sauce perfectly.
  • ½ teaspoon salt and ¼ teaspoon pepper: Basic seasonings that enhance the chicken’s flavor.
  • 1 tablespoon olive oil: For sautéing the chicken, adding a lovely richness.
  • 3 tablespoons butter: Gives the sauce a creamy texture and adds depth.
  • 2 teaspoons garlic (minced): A staple that brings warmth and flavor to the dish.
  • 3 tablespoons all-purpose flour: This will help thicken the sauce.
  • 2 cups chicken broth: Adds depth of flavor and moisture.
  • 1 cup heavy cream: The key to that creamy texture we all love.
  • 1 cup grated parmesan cheese: For a rich, cheesy finish.
  • 1 cup sun-dried tomatoes (drained): Adds a tangy sweetness that contrasts beautifully with the cream.
  • 1 teaspoon paprika: For a hint of smokiness.
  • 2 teaspoons dried Italian seasoning: Brings a medley of herbs to the dish.
  • Fresh basil (chopped): A bright garnish that elevates the dish visually and flavor-wise.
  • Additional parmesan cheese (optional): Because you can never have too much cheese!

Step-by-Step Instructions

Side view of a plate filled with Marry Me Chicken Pasta garnished with fresh basil.

Now that we have our ingredients ready, let’s get cooking! Follow these simple steps to create your Marry Me Chicken Pasta.

  • Cook the penne pasta according to package instructions. Drain and set aside.
  • Season the chicken pieces with salt and pepper.
  • In a large skillet, heat olive oil over medium-high heat. Add the seasoned chicken and cook for 6–8 minutes, until fully cooked. Transfer to a plate and set aside.
  • In the same skillet, melt butter over medium heat. Add minced garlic and sauté for about 30 seconds until fragrant.
  • Stir in the flour and cook for 1–2 minutes, stirring constantly to form a roux.
  • Slowly whisk in chicken broth, heavy cream, and parmesan cheese until smooth and creamy.
  • Add sun-dried tomatoes, paprika, and Italian seasoning. Taste and adjust with additional salt and pepper as needed.
  • Let the sauce simmer for a few minutes until slightly thickened.
  • Return the chicken and cooked pasta to the skillet. Toss everything together until well coated in the sauce.
  • Garnish with fresh basil and extra parmesan cheese, if desired. Serve hot.

Pro Tips for Perfecting Your Dish

To ensure your Marry Me Chicken Pasta turns out perfect every time, consider these expert tips:

  • Use fresh ingredients: Fresh garlic and herbs will enhance the flavor significantly compared to dried.
  • Don’t rush the sauce: Allow it to simmer for a few minutes; this helps develop rich flavors.
  • Adjust the thickness: If the sauce is too thick, add a splash of chicken broth or pasta water to loosen it up.
  • Variations: Feel free to add spinach or mushrooms for added nutrition and flavor.
  • Rest the chicken: Letting the chicken rest for a few minutes before cutting helps retain moisture.
  • Pair wisely: Serve with a crisp salad or some homemade garlic bread to complete the meal.
  • Substitution: If you prefer a lighter sauce, substitute half of the heavy cream with chicken broth.
  • Storage: This dish can be refrigerated for up to 3 days; simply reheat gently on the stove.

Common Mistakes and Troubleshooting

Even the best of us can stumble in the kitchen. Here are some common mistakes and how to avoid them:

  • Overcooking the chicken: Keep an eye on it; overcooked chicken can become dry. Aim for golden brown and cooked through.
  • Too thick sauce: If your sauce is too thick, don’t hesitate to add a bit more chicken broth or cream until it reaches your desired consistency.
  • Skimping on seasoning: Taste as you go! Don’t be afraid to adjust the salt and pepper to suit your preferences.

Delicious Variations to Try

Looking to switch things up? Here are a few variations to try:

  • Spicy Marry Me Chicken: Add a pinch of red pepper flakes for a kick.
  • Vegetarian Version: Substitute chicken with roasted vegetables or plant-based chicken alternatives.
  • Pasta Swap: Use spaghetti or fettuccine instead of penne for a different twist.
  • Cheesy Delight: Mix in a blend of mozzarella for an extra cheesy finish.

Storage and Make-Ahead Instructions

This dish is perfect for meal prep! Here’s how to store and reheat:

  • Refrigerate: Store leftovers in an airtight container in the fridge for up to 3 days.
  • Freeze: This pasta dish can be frozen for up to 2 months; thaw in the refrigerator overnight before reheating.
  • Reheat: Gently reheat on the stove over low heat, adding a splash of chicken broth or cream to loosen the sauce.

Frequently Asked Questions

Let’s tackle some of the most common questions about Marry Me Chicken Pasta:

  • Can I use frozen chicken? Yes, but make sure it’s fully thawed before cooking for even results.
  • Can I make the sauce ahead of time? Absolutely! Just store it separately from the pasta and combine before serving.
  • What can I serve with this dish? A fresh garden salad or garlic bread pairs beautifully.
  • How can I make it gluten-free? Use gluten-free pasta and check that your broth and other ingredients are gluten-free.
  • Can I add vegetables? Yes! Spinach, bell peppers, or zucchini make great additions.
  • Is this dish kid-friendly? Definitely! The creamy sauce and pasta are usually a hit with children.
  • How do I store leftovers? Keep in an airtight container in the refrigerator for up to 3 days.
  • What wine pairs well with this dish? A light white wine, like Pinot Grigio or Chardonnay, complements the flavors beautifully.

Nutritional Tips and Dietary Adaptations

For those mindful of nutrition, consider these adaptations:

  • Lower Fat: Substitute heavy cream with half-and-half or Greek yogurt for a lighter option.
  • Increase Fiber: Choose whole grain pasta for added fiber and nutrients.
  • Control Sodium: Use low-sodium chicken broth and adjust salt to taste.

Essential Equipment

Before we wrap up, let’s talk about the tools that make preparing this dish a breeze:

  • Large Skillet: A non-stick skillet is perfect for sautéing and making the sauce.
  • Pot for Pasta: A large pot to boil your penne pasta until al dente.
  • Measuring Cups and Spoons: For accurate ingredient measurements.
  • Wooden Spoon: Ideal for stirring your sauce without scratching your skillet.

Serving Suggestions

Lastly, let’s talk about how to serve this comforting dish:

  • Garnish: Top with fresh basil and extra parmesan for an elegant touch.
  • Accompaniments: Serve alongside a crisp salad or some toasted garlic bread to soak up that delicious sauce.
  • Presentation: For a beautiful table, serve in a large, rustic bowl and let everyone help themselves.

In conclusion, Marry Me Chicken Pasta is more than just a meal; it’s a heartfelt experience that brings family and friends together. With its creamy sauce, tender chicken, and the touch of sun-dried tomatoes, it’s a dish that promises to create memories that linger long after the last bite. So roll up your sleeves, gather your loved ones, and let’s make some magic in the kitchen. Happy cooking!

Marry Me Chicken Pasta

Prep Time 10 minutes
Cook Time 20 minutes
Total Time 30 minutes
Servings 4 servings
Calories 650
A creamy, flavorful chicken pasta dish with sun-dried tomatoes and Italian seasoning, perfect for a romantic dinner.

Ingredients

Protein

  • 1.5 pounds boneless skinless chicken breasts (cut into 1-inch pieces)
  • 10 ounces penne pasta
  • 0.5 teaspoon salt
  • 0.25 teaspoon pepper
  • 1 tablespoon olive oil
  • 3 tablespoons butter
  • 2 teaspoons garlic (minced)
  • 3 tablespoons all-purpose flour
  • 2 cups chicken broth
  • 1 cup heavy cream
  • 1 cup grated parmesan cheese
  • 1 cup sun-dried tomatoes (drained)
  • 1 teaspoon paprika
  • 2 teaspoons dried Italian seasoning

Additional

  • to taste Salt and pepper
  • for garnish Fresh basil (chopped)
  • optional Additional parmesan cheese

Instructions 

  • Cook the penne pasta according to package instructions. Drain and set aside.
  • Season chicken with salt and pepper. Cook in a skillet with olive oil until fully cooked, then set aside.
  • Melt butter in the same skillet, sauté garlic, then stir in flour to form a roux.
  • Whisk in chicken broth, heavy cream, and parmesan until smooth. Add sun-dried tomatoes, paprika, and Italian seasoning. Simmer until thickened.
  • Return chicken and pasta to the skillet, toss to coat. Garnish with basil and extra parmesan. Serve hot.

Notes

For a richer flavor, let the sauce simmer longer to thicken.
Calories: 650kcal
Cost: $15
Course: Main Course
Cuisine: American
Keyword: chicken, creamy, Pasta

Why Sticky Pantry Chicken Thighs Will Become Your Go-To Dish

When it comes to comfort food, few dishes evoke the warmth and nostalgia of a home-cooked meal quite like chicken thighs. My recipe for Sticky Pantry Chicken Thighs is not just a meal; it’s an experience that brings family and friends together around the table. With a blend of sweet and savory flavors, this dish is packed with ingredients you likely have on hand. Whether you’re cooking for a weeknight dinner or a weekend gathering, this recipe is designed to be easy to make and undeniably satisfying.

Why You’ll Love This Recipe

  • Quick and Simple: With minimal prep time and cooking time, you can whip this up in under 30 minutes without breaking a sweat.
  • Flavor Explosion: The combination of honey, soy sauce, and ketchup creates a thick, sticky sauce that coats the chicken beautifully, ensuring every bite is bursting with taste.
  • Versatile Ingredients: This recipe uses everyday pantry staples, meaning you can make it any time without a special trip to the store.
  • Family-Friendly: Kids and adults alike will love the sweet and tangy flavors, making it a perfect choice for family dinners.
  • Meal Prep Friendly: Make a larger batch and enjoy leftovers for lunch or dinner throughout the week.

Ingredient Breakdown

Let’s dive into what makes this dish shine. Here’s what you’ll need:

  • 1 tbsp oil (for frying): Choose a neutral oil like canola or vegetable oil for frying the chicken.
  • 6 chicken thigh fillets (1.5-2lb / 750g-1kg): Boneless and skinless thighs are preferred for their rich flavor and tender texture.
  • 1/2 tsp cooking/kosher salt: Essential for seasoning the chicken before cooking.
  • 1/2 tsp black pepper: Adds a subtle kick to the dish.
  • 1/2 cup water: Helps to thin out the sauce when cooking.
  • 1/3 cup ketchup (or tomato sauce): Provides the base for the sticky sauce—opt for Australian tomato sauce for a unique twist.
  • 2 tbsp soy sauce: Adds depth and umami to the flavor profile.
  • 1 tbsp dijon or American mustard: A touch of tanginess that complements the sweetness.
  • 2 tbsp hot sauce (optional): For those who like a little heat.
  • 2 tbsp vinegar (any type): Balances the sweetness of the honey and ketchup.
  • 2 1/2 tbsp honey: The star of the show that makes the sauce sticky and sweet.
  • 2 garlic cloves (crushed): Fresh garlic enhances the overall flavor.

Step-by-Step Instructions

Close-up view of succulent chicken thighs coated in a sticky glaze.

Now that you have your ingredients ready, let’s get cooking. Follow these steps to create your Sticky Pantry Chicken Thighs:

  1. Make the Sauce: In a medium bowl, whisk together the ketchup, soy sauce, mustard, vinegar, honey, and crushed garlic until well combined.
  2. Season the Chicken: Sprinkle each piece of chicken with salt and pepper to add flavor.
  3. Heat the Oil: In a large non-stick pan, heat the oil over medium-high heat until shimmering.
  4. Coat the Chicken: Dip each piece of chicken in the sauce, shaking off the excess, then place it in the hot pan. Repeat until the pan is filled but not overcrowded.
  5. Cook the First Side: Sear the chicken for about 3 minutes, or until it caramelizes and turns a deep golden brown.
  6. Flip and Cook: Turn the chicken over and cook for another 2 minutes until nearly cooked through.
  7. Add the Sauce: Pour the remaining sauce and water into the pan. Bring to a rapid simmer, stirring occasionally and scraping up any browned bits stuck to the bottom of the pan.
  8. Thicken the Sauce: Allow the sauce to thicken for about 1-2 minutes, then remove the pan from the heat. Turn the chicken in the sauce to coat it well.
  9. Serve: Place the chicken on a plate and generously spoon the sauce over the top. Enjoy your meal!

Pro Tips for Perfect Sticky Chicken Thighs

  • Use Bone-In Thighs: For even more flavor, consider using bone-in thighs. Just adjust cooking time accordingly.
  • Marinate Overnight: If you have time, marinate the chicken in the sauce overnight for deeper flavor.
  • Watch the Heat: Ensure your pan isn’t too hot to avoid burning the sauce; medium heat works best.
  • Make It Gluten-Free: Substitute soy sauce with tamari or coconut aminos if you’re avoiding gluten.
  • Experiment with Honey: Try using maple syrup instead of honey for a different flavor profile.
  • Broil for a Finish: For a crispy finish, broil the chicken for the last few minutes after cooking.
  • Pair with Fresh Herbs: Garnish with chopped parsley or cilantro for added freshness.
  • Serve with Rice: This dish pairs beautifully with steamed rice or fluffy couscous to soak up the sauce.

Common Mistakes and Troubleshooting

Cooking can sometimes feel daunting, but here are some common pitfalls to avoid:

  • Overcrowding the Pan: If you pack the chicken too tightly, it won’t sear properly. Cook in batches if necessary.
  • Not Letting the Chicken Rest: Allow the chicken to rest for a few minutes after cooking for juicier results.
  • Ignoring the Sauce: Be sure to scrape the bottom of the pan for all those delicious brown bits that add flavor.
  • Using Cold Chicken: Let your chicken sit at room temperature for about 15 minutes before cooking to ensure even cooking.

Variations to Try

Want to mix things up? Here are some variations to consider:

  • Sweet and Spicy: Add more hot sauce or some diced jalapeños to the sauce for a kick.
  • Citrus Zing: Incorporate the juice and zest of an orange or lemon for a refreshing twist.
  • Asian-Inspired: Add sesame oil and garnish with sesame seeds for an Asian flare.
  • Herbaceous Flavor: Toss in some fresh thyme or rosemary into the sauce for an aromatic touch.

Storage and Make-Ahead Instructions

If you have leftovers (which is rare!), here’s how to store them:

  • Refrigerate: Store in an airtight container for up to 3 days.
  • Freeze: For longer storage, freeze in a suitable container for up to 3 months. Thaw in the refrigerator before reheating.
  • Reheat Gently: To maintain moisture, reheat in a pan over low heat, adding a splash of water if necessary.

Frequently Asked Questions

Here are some common questions about making Sticky Pantry Chicken Thighs:

  • Can I use chicken breasts instead of thighs? Yes, but chicken breasts may dry out quicker, so adjust cooking time accordingly.
  • What can I serve with this dish? Side dishes like roasted vegetables, mashed potatoes, or a simple salad work wonderfully.
  • Can I double the recipe? Absolutely! Just ensure your pan is large enough or cook in batches.
  • Is this dish gluten-free? It can be made gluten-free by using tamari or coconut aminos instead of soy sauce.
  • Can I use a slow cooker? Yes, cook on low for 6-8 hours or high for 4 hours. Add the sauce during the last hour for best results.
  • What if I don’t have honey? You can substitute with maple syrup or brown sugar for similar sweetness.
  • How can I make this dish spicier? Increase the amount of hot sauce or add red pepper flakes to the sauce.
  • How do I know when the chicken is done? Use a meat thermometer; chicken should reach 165°F (75°C).

Nutritional Tips and Dietary Adaptations

This recipe is not only delicious but can also be adapted to fit various dietary needs:

  • Low-Carb: Serve with cauliflower rice instead of traditional rice.
  • Low-Sodium: Use low-sodium soy sauce and reduce the salt in the recipe.
  • Whole 30: Replace honey with a compliant sweetener and ensure all ingredients meet Whole 30 standards.

Essential Equipment for Cooking

To make this recipe, you will need:

  • Large Non-Stick Pan: Ideal for achieving that perfect sear and easy cleanup.
  • Whisk: For mixing the sauce ingredients thoroughly.
  • Meat Thermometer: To check that your chicken is cooked to perfection.

Serving Suggestions

For a well-rounded meal, consider these delightful pairing options:

  • Steamed Rice: White or brown rice is perfect for soaking up the sticky sauce.
  • Roasted Vegetables: Seasonal veggies roasted with olive oil and salt complement the dish beautifully.
  • Fresh Salad: A crisp green salad with a tangy vinaigrette will balance the richness of the chicken.

Conclusion

Cooking is about more than just feeding the body; it’s about nourishing the soul and creating memories. With Sticky Pantry Chicken Thighs, you’re not just making a meal; you’re bringing your loved ones together. So gather around the table, share stories, and enjoy this delightful dish that is sure to become a beloved staple in your home. Happy cooking!

Sticky Pantry Chicken Thigh recipe

Prep Time 10 minutes
Cook Time 10 minutes
Total Time 20 minutes
Servings 4 servings
Calories 350
A quick and flavorful chicken dish with a sticky, savory sauce made from pantry staples.

Ingredients

Oil

  • 1 tbsp oil (for frying)

Chicken Thigh Fillets

  • 6 pieces chicken thigh fillets (boneless, skinless)

Salt

  • 0.5 tsp cooking/kosher salt

Black Pepper

  • 0.5 tsp black pepper

Water

  • 0.5 cup water

Ketchup

  • 1/3 cup ketchup (or tomato sauce (Australian))

Soy Sauce

  • 2 tbsp soy sauce

Dijon or American Mustard

  • 1 tbsp mustard

Hot Sauce

  • 2 tbsp hot sauce (optional)

Vinegar

  • 2 tbsp vinegar (any type)

Honey

  • 2.5 tbsp honey

Garlic Cloves

  • 2 cloves garlic, crushed

Instructions 

  • Whisk sauce ingredients in a bowl.
  • Season chicken with salt and pepper.
  • Heat oil in a pan over medium-high heat.
  • Dip chicken in sauce, then cook in pan until caramelized and cooked through.
  • Add remaining sauce and water, simmer until thickened, then coat chicken. Serve with sauce.

Notes

Adjust hot sauce for desired spice level.
Calories: 350kcal
Cost: $12
Course: Main Course
Cuisine: American
Keyword: chicken, pantry, sticky

Discover the Heartwarming Magic of Melt In Your Mouth Chicken

Welcome, dear friends! Today, I’m excited to share a family favorite that has been a cherished part of our gatherings and cozy dinners at home: Melt In Your Mouth Chicken. This recipe is a delightful embrace of flavors and memories from my Southern roots, where cooking is not just an act but a celebration of love and care. With its tender chicken breasts coated in a creamy mixture of mayonnaise and Parmesan, this dish is sure to become a staple in your kitchen. Let’s dive into the steps to create a meal that feels like home.

Why You’ll Love This Recipe

  • Irresistibly Tender: The chicken turns out incredibly moist and juicy, thanks to the creamy coating that locks in flavor and moisture.
  • Quick and Easy: With just a few simple ingredients and steps, you can whip up this dish in no time—perfect for busy weeknights!
  • Versatile Flavor: The combination of garlic powder, onion powder, and optional paprika allows for customization while delivering a punch of flavor.
  • Family-Approved: This dish has won the hearts of many at family gatherings, making it a beloved recipe for all ages.
  • Meal Prep Friendly: You can prepare the chicken ahead of time, making it a convenient option for meal prep and busy days.

Ingredients for Melt In Your Mouth Chicken

Let’s gather our ingredients. This recipe requires:

  • 4 boneless, skinless chicken breasts
  • 1 cup mayonnaise (or plain Greek yogurt for a lighter version)
  • ½ cup grated Parmesan cheese
  • 1 teaspoon garlic powder
  • 1 teaspoon onion powder
  • 1 teaspoon salt
  • ½ teaspoon black pepper
  • Optional: ½ teaspoon paprika or Italian seasoning (for topping)

Step-by-Step Instructions

Close-up of a Melt In Your Mouth Chicken Breast, garnished lightly and glistening with juices.

Now that we have everything ready, let’s get cooking!

  1. Preheat your oven to 375°F (190°C). Grease a 9×13-inch baking dish or line it with parchment paper for easy cleanup.
  2. Pound the chicken breasts to an even thickness of about ¾ inch. This step is key for ensuring even cooking and tenderness.
  3. In a medium bowl, mix together the mayonnaise, Parmesan cheese, garlic powder, onion powder, salt, and pepper until smooth.
  4. Spread the mixture evenly over each chicken breast, covering the entire surface for maximum flavor.
  5. Place the coated chicken in the baking dish and sprinkle with optional paprika or Italian seasoning for an extra flavor boost.
  6. Bake uncovered for 35–45 minutes, or until the chicken reaches an internal temperature of 165°F (74°C) and the top is golden brown.
  7. Let the chicken rest for 5 minutes before serving. This allows the juices to redistribute, ensuring every bite is succulent.

Pro Tips for Perfect Melt In Your Mouth Chicken

  • Even Thickness: Always pound your chicken breasts to the same thickness for even cooking—this prevents some parts from drying out.
  • Moisture Magic: If using Greek yogurt instead of mayonnaise, add a touch of olive oil for extra moisture.
  • Make It Cheesy: For an extra cheesy flavor, mix in some shredded mozzarella or cheddar to the mayonnaise mixture.
  • Season to Taste: Feel free to adjust the seasonings based on your preference. A pinch of cayenne can add a lovely kick!
  • Resting Period: Letting the chicken rest after baking is crucial; it helps keep it juicy and tender.
  • Use a Meat Thermometer: To avoid overcooking, use a meat thermometer to check the internal temperature.
  • Storage Tip: Store leftovers in an airtight container in the fridge for up to 3 days, and reheat gently to maintain tenderness.

Common Mistakes to Avoid

Every cook learns from their mistakes, and here are some common pitfalls to watch out for:

  • Skipping the Pounding: Not pounding the chicken can lead to uneven cooking, resulting in dry parts.
  • Overbaking: Keep an eye on the chicken towards the end of baking. Overcooked chicken can become tough.
  • Not Resting: Cutting into the chicken immediately after baking will let the juices run out, making it dry.
  • Incorrect Temperature: Always ensure your oven is preheated properly for the best results.

Delicious Variations to Try

Once you’ve mastered the basic recipe, feel free to get creative! Here are some fun variations:

  • Herb Infusion: Add fresh herbs like thyme or rosemary to the mayonnaise mix for a fragrant twist.
  • Spicy Kick: Mix in some sriracha or your favorite hot sauce for a spicy version of this melt-in-your-mouth chicken.
  • Asian Flair: Substitute mayonnaise with a blend of soy sauce, ginger, and sesame oil for a unique Asian-inspired dish.
  • Cheesy Spinach: Mix in some chopped spinach and extra cheese for a comforting stuffed chicken experience.

Storage and Make-Ahead Instructions

This recipe is perfect for meal prep! Here’s how to store it:

  • Refrigeration: Store leftover chicken in an airtight container in the refrigerator for up to 3 days.
  • Freezing: You can freeze the uncooked chicken with the mayo mixture for a quick meal later. Thaw in the refrigerator before baking.
  • Reheating: Reheat in the oven at 350°F (175°C) until warmed through to keep the chicken juicy.

Comprehensive FAQ

  • Can I use chicken thighs instead of breasts? Yes, chicken thighs work great and add a richer flavor!
  • Can I make this dish ahead of time? Absolutely! You can prepare the chicken and store it in the fridge for up to 24 hours before baking.
  • What should I serve with Melt In Your Mouth Chicken? Pair it with roasted vegetables, a fresh salad, or creamy mashed potatoes for a complete meal.
  • Can I use a different cheese? Yes! Feel free to experiment with your favorite cheeses for added flavor.
  • Is this recipe gluten-free? Yes, all the ingredients listed are gluten-free, making it suitable for those with gluten sensitivities.
  • How can I make this dish spicier? Add cayenne pepper or red pepper flakes to the mayo mixture for an extra kick.
  • What’s the best way to ensure the chicken stays moist? Make sure to pound the chicken evenly and avoid overcooking it.
  • Can leftovers be frozen? Yes, you can freeze leftovers. Just ensure they’re in a well-sealed container to prevent freezer burn.

Nutritional Tips and Dietary Adaptations

This dish can easily be adapted to fit various dietary needs:

  • Low-Calorie Version: Use Greek yogurt instead of mayonnaise to lower the calories while keeping it creamy.
  • Dairy-Free Option: Substitute the mayonnaise with a dairy-free alternative and use nutritional yeast instead of Parmesan.
  • Low-Carb Version: Serve with a side of steamed vegetables instead of starchy sides for a low-carb meal.

Essential Equipment Recommendations

To make this recipe a breeze, here are a few tools you might find helpful:

  • Meat Tenderizer: A good meat tenderizer makes pounding chicken easy and effective.
  • Baking Dish: A sturdy 9×13-inch baking dish is perfect for this recipe.
  • Meat Thermometer: Essential for checking that your chicken is cooked to perfection without drying it out.

Serving Suggestions

When it comes to serving this Melt In Your Mouth Chicken, you can keep it simple or get a little fancy:

  • Classic Comfort: Serve with creamy mashed potatoes and steamed green beans for a comforting meal.
  • Fresh and Light: Pair it with a crisp salad topped with a vinaigrette for a refreshing contrast.
  • Family Feast: Add cornbread and collard greens for a traditional Southern spread that everyone will love.

Conclusion: Your New Favorite Chicken Recipe Awaits!

This Melt In Your Mouth Chicken recipe is more than just a meal; it’s a piece of my heart and heritage. It reminds me of family gatherings, laughter, and the warmth of home. I encourage you to give it a try and make it your own. Remember, cooking is all about love and sharing memories around the table. So gather your loved ones, whip up this comforting dish, and create new memories that will last a lifetime. Happy cooking, friends!

Melt In Your Mouth Chicken Breast

Prep Time 10 minutes
Cook Time 40 minutes
Total Time 50 minutes
Servings 4 pieces
Calories 350
This creamy baked chicken breast recipe is tender, flavorful, and easy to prepare, making it perfect for a quick weeknight dinner.

Ingredients

Protein

  • 4 pieces boneless, skinless chicken breasts
  • 1 cup mayonnaise (or plain Greek yogurt for lighter version)
  • 0.5 cup grated Parmesan cheese
  • 1 teaspoon garlic powder
  • 1 teaspoon onion powder
  • 1 teaspoon salt
  • 0.5 teaspoon black pepper
  • 0.5 teaspoon paprika or Italian seasoning (optional) (for topping)

Instructions 

  • Preheat oven to 375°F (190°C). Grease a baking dish.
  • Pound chicken to even thickness (~¾ inch).
  • Mix mayonnaise, Parmesan, garlic, onion, salt, and pepper until smooth.
  • Spread mixture on chicken, top with optional paprika or Italian seasoning.
  • Bake for 35–45 minutes until cooked through and golden.
  • Rest for 5 minutes before serving.

Notes

Ensure chicken reaches an internal temperature of 165°F (74°C) for safety.
Calories: 350kcal
Cost: $15
Course: Main Course
Keyword: baked, chicken, creamy

Unlock the Joy of Cooking with Lemon Garlic Chicken

Welcome to a culinary journey that embraces the warmth of home and the zest of fresh ingredients. Today, we’re diving into a dish that’s as comforting as a hug from a loved one: Lemon Garlic Chicken. This recipe is not just a meal; it’s a celebration of flavors that brings family together around the dinner table. With its bright citrus notes and savory garlic, it’s perfect for any gathering or a cozy night in. Let’s explore why this dish is a must-try for your next dinner!

Why You’ll Love This Recipe

There’s something truly special about Lemon Garlic Chicken. Here are a few reasons why this dish will become a staple in your home:

  • Quick Preparation: With a marinade time of just 30 minutes, you can have this delightful dish ready in under an hour. Perfect for busy weeknights!
  • Fresh Ingredients: The use of fresh garlic and lemons adds a vibrant, zesty flavor that elevates the chicken without overpowering it.
  • Versatile Dish: Whether you’re serving it for a family dinner or meal prepping for the week, this chicken fits seamlessly into any occasion.
  • Health-Conscious: Low in calories and high in flavor, this recipe is a healthy choice that doesn’t compromise on taste.
  • Customizable: Feel free to add your favorite herbs and spices for a personal touch. This dish adapts beautifully to your taste preferences.

Ingredient Breakdown

Let’s take a closer look at what you’ll need to whip up this delightful dish:

  • Chicken thighs or breasts (4 pieces): Thighs offer more flavor and moisture, while breasts are leaner. Choose based on your preference.
  • Fresh garlic (6 cloves, minced): The star of the show—fresh garlic is essential for that aromatic depth.
  • Juice of 2 large lemons: Freshly squeezed is key! Bottled juice just doesn’t have the same brightness.
  • Olive oil (1/4 cup): A good quality olive oil is vital for marinating and cooking.
  • Fresh parsley (1/4 cup, chopped): This herb adds a pop of color and freshness to your dish.
  • Salt and pepper: To taste, these pantry staples enhance all the flavors.
  • Optional spices: Consider adding paprika, thyme, or rosemary for extra flavor dimensions.

Pro Tips for Perfect Lemon Garlic Chicken

Close-up view of Lemon Garlic Chicken with golden-brown skin and garlic pieces.

To help you achieve the best results, here are some expert insights:

  • Marination is key: Aim to marinate for at least 30 minutes, but letting it sit for 2 hours will deepen the flavors.
  • Oven temperature: Preheating your oven to 400°F (200°C) ensures even cooking.
  • Use a meat thermometer: Check the internal temperature to reach 165°F (75°C) for perfectly cooked chicken.
  • Let it rest: After baking, allow the chicken to rest for 5 minutes to lock in juices.
  • Garnish generously: Fresh parsley not only adds beauty but also enhances the freshness of the dish.
  • Experiment with marinades: Add a splash of soy sauce or honey for a delicious twist on the flavor profile.
  • Leftovers are golden: This chicken tastes even better the next day, making it perfect for meal prep!
  • Pair with sides: Serve alongside rice, roasted vegetables, or a fresh salad for a complete meal.

Avoid These Common Mistakes

To ensure your Lemon Garlic Chicken turns out perfectly, steer clear of these pitfalls:

  • Not marinating long enough: Skipping the marination process can lead to bland chicken.
  • Overcrowding the baking dish: Give each piece space to cook evenly; otherwise, it may steam instead of roast.
  • Using dried garlic: Fresh garlic provides a depth of flavor that dried cannot match.
  • Skipping the resting period: Cutting into the chicken immediately after cooking can result in dry meat.
  • Neglecting temperature checks: Always use a meat thermometer to avoid under or overcooking.

Delicious Variations to Try

Looking to mix things up? Here are some variations on the classic Lemon Garlic Chicken:

  • Honey Mustard Lemon Chicken: Add a tablespoon of honey and a teaspoon of mustard to the marinade for a sweet and tangy twist.
  • Herb-Infused Chicken: Incorporate fresh herbs such as basil or oregano for a Mediterranean flair.
  • Spicy Lemon Garlic Chicken: Add red pepper flakes or a dash of hot sauce for an extra kick.
  • Lemon Garlic Chicken Skewers: Cube the chicken, marinate, and grill on skewers for a fun appetizer or party dish.

Storage and Make-Ahead Instructions

This recipe is perfect for meal prep! Here’s how to store your Lemon Garlic Chicken:

  • Refrigerator: Store in an airtight container for up to 3 days.
  • Freezer: For longer storage, freeze the chicken in a freezer-safe container for up to 3 months. Thaw in the refrigerator overnight before cooking.
  • Make-ahead: Marinate the chicken a day in advance and keep it in the fridge until you’re ready to bake.

Frequently Asked Questions

Here are some common questions about Lemon Garlic Chicken:

  • Can I use frozen chicken? Yes, but be sure to thaw it completely before marinating.
  • What can I serve with this dish? Great sides include roasted vegetables, quinoa, or a simple green salad.
  • Is this recipe gluten-free? Yes, all ingredients used are naturally gluten-free.
  • Can I grill the chicken instead of baking it? Absolutely! Grilling will give it a lovely char and smoky flavor.
  • How do I know when the chicken is done? Use a meat thermometer to ensure it has reached 165°F (75°C).
  • Can I make this dish in advance? Yes, it holds up well and tastes even better the next day!
  • What if I don’t have fresh lemons? You can substitute with bottled lemon juice, but fresh is always best.
  • Can I use other cuts of chicken? Yes, drumsticks or wings will work, but cooking times may vary.

Nutritional Insights and Dietary Adaptations

This Lemon Garlic Chicken is not only delicious but also a healthy option. Here are some dietary considerations:

  • Low-Calorie: Each serving is packed with flavor without the calories, making it perfect for weight management.
  • High Protein: Chicken is an excellent source of lean protein, essential for muscle repair and growth.
  • Low Carb: This recipe is naturally low in carbs, making it suitable for low-carb diets.
  • Dairy-Free: This dish contains no dairy, perfect for those with lactose intolerance.

Essential Equipment for Cooking

To make your cooking experience smooth, here’s a list of recommended tools:

  • Mixing bowl: For marinating the chicken.
  • Baking dish: A glass or ceramic dish works best for even cooking.
  • Meat thermometer: To ensure your chicken is perfectly cooked.
  • Cutting board: Essential for prepping your ingredients.
  • Chef’s knife: A sharp knife makes all your chopping and mincing easier.

Serving Suggestions

For a complete and satisfying meal, consider these serving suggestions:

  • Over Rice: Serve the chicken over a bed of fluffy rice to soak up the delicious marinade.
  • With Veggies: Pair with steamed or roasted seasonal vegetables for a colorful plate.
  • On a Salad: Cut the chicken into slices and serve it over a fresh salad for a light meal.
  • With Bread: A crusty baguette or garlic bread complements the dish beautifully and is perfect for sopping up the juices.

Final Thoughts: Embrace the Comfort of Home Cooking

Cooking is more than just a task; it’s a way to express love and care for those around us. This Lemon Garlic Chicken recipe embodies that sentiment, bringing together fresh ingredients and hearty flavors that remind us of home. Whether you’re cooking for family, friends, or just for yourself, this dish is sure to bring warmth and joy to your table. So grab your apron, and let’s get cooking!

Lemon Garlic Chicken

Prep Time 10 minutes
Cook Time 30 minutes
Total Time 40 minutes
Servings 4 servings
Calories 250
A flavorful and easy lemon garlic chicken recipe perfect for a quick dinner or meal prep.

Ingredients

Protein

  • 4 pieces Chicken thighs or breasts
  • 6 cloves Fresh garlic (minced)
  • 2 large Lemons (freshly squeezed)
  • 0.25 cup Olive oil
  • 0.25 cup Fresh parsley (chopped)
  • to taste Salt and pepper
  • optional Spices: Paprika, thyme, or rosemary (Optional spices for flavor)

Instructions 

  • Mix minced garlic, lemon juice, olive oil, salt, and pepper. Marinate chicken for 30 minutes.
  • Preheat oven to 400°F (200°C).
  • Place chicken in a baking dish, pour marinade over it, and bake for 25-30 minutes.
  • Let rest for 5 minutes, then garnish with chopped parsley before serving.

Notes

For extra flavor, add spices like paprika or thyme during marination.
Calories: 250kcal
Cost: $15
Course: Main Course
Cuisine: international
Keyword: chicken, Garlic, Lemon

Welcome to the Heart of Home Cooking

There’s something magical about honey mustard chicken that takes us back to our roots. This recipe doesn’t just promise a meal; it offers a slice of comfort, reminiscent of gathering around the dinner table with loved ones. With a delightful blend of sweetness and tang, this dish shines with flavors that are both familiar and satisfying. Whether you’re hosting a family gathering or enjoying a cozy weeknight dinner, this recipe is your ticket to a heartwarming experience that will leave you and your guests craving more.

Why You’ll Love This Recipe

There are plenty of reasons to fall in love with this honey mustard chicken recipe:

  • Family-Friendly: This dish is a hit with both kids and adults, making it perfect for any family table.
  • Simple Ingredients: You can easily find all the ingredients in your pantry, minimizing the fuss and maximizing flavor.
  • Quick Preparation: From prep to plate, this recipe takes under an hour, ideal for busy weeknights.
  • Versatile Dish: Whether baked, grilled, or sautéed, this honey mustard chicken can be adapted to your cooking style.
  • Leftover Friendly: Enjoy the flavors the next day; this dish reheats beautifully, making it a go-to for meal prep.

Ingredients You Will Need

For the best honey mustard chicken, gather the following:

  • 4 medium chicken breasts (4 oz each, boneless, skinless)
  • 1 teaspoon paprika
  • 1 teaspoon ground mustard seed
  • 1/4 teaspoon cayenne pepper (or to taste)
  • 1/2 teaspoon kosher salt
  • 1/8 teaspoon ground pepper
  • 2 tablespoons olive oil (divided)
  • 1/4 cup honey
  • 3 tablespoons chicken stock
  • 2 tablespoons Dijon mustard
  • 1 tablespoon whole grain mustard
  • 1 teaspoon white vinegar
  • 1 teaspoon sriracha sauce (or to taste)
  • A small handful of fresh thyme (to garnish)

How to Make Honey Mustard Chicken

Juicy chicken breast coated in honey mustard sauce, garnished with thyme.

Let’s dive into the steps to bring this delicious dish to life:

1. Prepare the Mustard Sauce

In a small bowl, combine:

  • 1/4 cup honey
  • 3 tablespoons chicken stock
  • 2 tablespoons Dijon mustard
  • 1 tablespoon whole grain mustard
  • 1 teaspoon white vinegar
  • 1 teaspoon sriracha sauce

Set this savory sauce aside, allowing the flavors to meld.

2. Season the Chicken

In another bowl, mix:

  • 1 teaspoon paprika
  • 1 teaspoon ground mustard seed
  • 1/4 teaspoon cayenne pepper
  • 1/2 teaspoon kosher salt
  • 1/8 teaspoon ground pepper

Rub this spice blend thoroughly over the chicken breasts, ensuring even coverage for that perfect flavor.

3. Sear the Chicken

Preheat a non-stick pan over medium heat. Add:

  • 2 tablespoons olive oil

Once hot, sear the chicken on both sides for about 2 minutes until golden brown.

4. Bake to Perfection

While searing, preheat your oven to 375°F. Transfer the chicken to an oven-safe dish and pour the honey mustard sauce over it. Bake for:

  • 15-25 minutes (depending on the size of your chicken breasts)

Ensure the internal temperature reaches 165°F. Once done, garnish with fresh thyme and serve warm.

Expert Tips for Perfect Honey Mustard Chicken

To elevate your dish, consider these pro tips:

  • Marinate Overnight: For deeper flavor, marinate the chicken in the mustard sauce overnight. It makes the chicken even juicier.
  • Use a Meat Thermometer: To avoid undercooking or overcooking, use a meat thermometer for precise temperature checks.
  • Rest Before Serving: Let the chicken rest for about 5-10 minutes after baking to allow the juices to redistribute.
  • Experiment with Mustards: Mix and match different kinds of mustard for unique twists—try spicy brown, honey mustard, or even whole grain.
  • Don’t Skip the Thyme: Fresh thyme adds an aromatic touch that enhances the dish’s overall flavor.
  • Side Pairing: This chicken pairs wonderfully with roasted vegetables or a fresh salad.

Common Mistakes and Troubleshooting

Watch out for these common pitfalls:

  • Overcooking: Keep an eye on the cooking time. Overcooked chicken can become dry and less enjoyable.
  • Too Much Sauce: While the sauce is delicious, too much can overpower the chicken. Use just enough to coat.
  • Skipping the Searing: Searing adds flavor and texture. Don’t skip this step for the best results.

Variations of Honey Mustard Chicken

Mix things up with these four tasty variations:

  • Grilled Honey Mustard Chicken: Skip the oven and grill the chicken for a smoky flavor.
  • Honey Mustard Chicken Thighs: Substitute chicken breasts for thighs for a richer taste and juicier texture.
  • Honey Mustard Chicken Salad: Chop the cooked chicken and toss it with greens, nuts, and a honey mustard vinaigrette.
  • Honey Mustard Glazed Vegetables: Use the same sauce to roast vegetables for a delightful side.

Storage and Make-Ahead Instructions

This dish is perfect for meal prep. Here’s how to store it:

  • Refrigerate: Store leftovers in an airtight container in the fridge for up to 3-4 days.
  • Freeze: You can freeze the cooked chicken for up to 3 months. Thaw in the fridge before reheating.
  • Reheat: To reheat, bake at 350°F until warmed through, about 10-15 minutes.

Frequently Asked Questions

Here are some common queries about honey mustard chicken:

  • Can I use frozen chicken? Yes, but thaw completely before cooking for even cooking.
  • Is this recipe gluten-free? Ensure that your mustard and chicken stock are gluten-free to cater to dietary restrictions.
  • Can I make this in a slow cooker? Absolutely! Cook on low for 4-6 hours, adding the sauce halfway through.
  • What sides go well with honey mustard chicken? Roasted potatoes, green beans, or a simple salad complement this dish beautifully.
  • Can I use other meats? Yes, this marinade works well with pork or tofu, providing versatility.
  • How can I make it spicier? Add more sriracha or cayenne to the sauce for an extra kick.
  • What’s the best way to serve it? Serve warm with fresh herbs sprinkled on top for a beautiful presentation.
  • Can I use honey substitutes? Yes, agave or maple syrup can replace honey for a different flavor profile.

Nutritional Tips and Dietary Adaptations

This honey mustard chicken can fit into various dietary needs:

  • Low-Carb Option: Serve with steamed vegetables instead of grains for a low-carb meal.
  • High-Protein: This dish is naturally high in protein, perfect for muscle recovery.
  • Dairy-Free: The recipe is already dairy-free, making it suitable for lactose-intolerant individuals.

Equipment Recommendations

To make this recipe seamless, you’ll need:

  • Non-stick skillet: For perfect searing without sticking.
  • Oven-safe dish: Essential for transferring chicken from stovetop to oven.
  • Meat thermometer: To ensure your chicken is cooked to perfection.

Serving Suggestions

Complete your meal with:

  • Fresh Salad: A crisp side salad adds balance to the rich flavors of the chicken.
  • Roasted Vegetables: Seasonal veggies roasted to enhance their natural sweetness pair beautifully.
  • Rice or Quinoa: Serve with a side of rice or quinoa to soak up the delicious sauce.

Conclusion

This honey mustard chicken recipe is more than just a dish; it’s a testament to the joy of cooking and sharing meals. With its simple ingredients and heartwarming flavors, you’ll not only impress your family but also create memories that last a lifetime. So gather those ingredients, embrace the warmth of home cooking, and enjoy a meal that truly tastes like homecoming. Happy cooking!

Honey Mustard Chicken

Prep Time 10 minutes
Cook Time 20 minutes
Total Time 30 minutes
Servings 4 pieces
Calories 350
A flavorful and easy-to-make chicken dish glazed with a tangy honey mustard sauce, perfect for a quick dinner.

Ingredients

Chicken

  • 4 pieces chicken breasts (boneless, skinless) (4 oz each)
  • 1 teaspoon paprika
  • 1 teaspoon ground mustard seed
  • 0.25 teaspoon cayenne pepper (or to taste)
  • 0.5 teaspoon kosher salt
  • 0.125 teaspoon ground pepper
  • 2 tablespoons olive oil (divided)
  • 0.25 cup honey
  • 3 tablespoons chicken stock
  • 2 tablespoons dijon mustard
  • 1 tablespoon wholegrain mustard
  • 1 teaspoon white vinegar
  • 1 teaspoon sriracha sauce (or to taste)

Garnish

  • a small handful fresh thyme (to garnish)

Instructions 

  • Mix honey, chicken stock, dijon, wholegrain mustard, vinegar, and sriracha to make the sauce.
  • Rub chicken with spices and sear in 1 tablespoon olive oil until golden, about 2 minutes per side.
  • Preheat oven to 375°F (190°C). Transfer chicken to dish, pour sauce over, and bake for 15-25 minutes.
  • Check internal temperature; it should read 165°F. Garnish with thyme and serve.

Notes

Ensure chicken is cooked through for safety and optimal flavor.
Calories: 350kcal
Cost: $15
Course: Main Course
Cuisine: American
Keyword: chicken, honey, mustard

Unveiling the Comfort of Sticky Chicken Bowls

When you think of comfort food, what comes to mind? For many, it’s a steaming bowl of something hearty and heartwarming, and that’s exactly what our Sticky Chicken Bowls deliver. This recipe isn’t just about food; it’s about the warmth of home and the love that goes into cooking. Picture tender pieces of chicken coated in a sweet-savory sauce, vibrant broccoli, and fluffy rice, all coming together to create a meal that feels like a hug from the inside out. In this article, we’ll dive deep into this recipe, exploring its benefits, variations, and everything you need to know to create your own version of this classic dish.

Why You’ll Love This Recipe

This dish is not just another meal; it’s an experience that brings joy and satisfaction. Here are five reasons why you should whip up this Sticky Chicken Bowl:

  • Quick and Easy: With minimal prep and cook time, this recipe allows you to enjoy a wholesome meal on busy nights without the stress.
  • Flavor Explosion: The combination of the sticky sauce and spices creates a flavor profile that tantalizes your taste buds and leaves you wanting more.
  • Customizable: Whether you prefer a little more heat or a milder flavor, you can easily adjust the ingredients to suit your palate.
  • Healthy Ingredients: Packed with protein from chicken and vitamins from broccoli, this recipe is a nutritious option for dinner.
  • Perfect for Meal Prep: Make a big batch on the weekend and enjoy hearty lunches or dinners throughout the week.

Ingredient Breakdown

Let’s take a closer look at what you’ll need for this delightful dish, along with some substitutions you might consider:

  • Rice (2 cups uncooked): The foundation of your bowl. You can use jasmine for fragrance, brown for added fiber, or even cauliflower rice for a low-carb option.
  • Broccoli (2 small heads, chopped): Adds color and nutrition. Feel free to substitute with other veggies like bell peppers or snap peas if you prefer.
  • Chicken (3 large breasts): The star of the dish, providing protein. You can swap it for thighs for a juicier option or even tofu for a vegetarian version.
  • Olive oil (2 tbsp): Used for cooking the chicken. Avocado oil works as a great alternative.
  • Seasonings: A mix of salt, pepper, chili powder, smoked paprika, onion powder, and oregano brings depth to the chicken.
  • Sticky Sauce Ingredients: Soy sauce, honey, rice vinegar, minced garlic, sriracha, sesame oil, ground ginger, and arrowroot powder for thickening. Each can be adjusted to taste—consider using tamari for a gluten-free option.
  • Spicy Mayo: A blend of mayo, sriracha, and water. Adjust the sriracha to control the heat level.
  • Sesame seeds: For garnishing, adding a nice crunch and flavor.

Step-by-Step Cooking Instructions

A vibrant sticky chicken bowl showcasing juicy chicken and fresh vegetables.

Now that you have all your ingredients ready, let’s get cooking:

  1. Cook the rice according to package instructions and set aside.
  2. Chop broccoli into small florets and set aside.
  3. Slice chicken breasts into strips and season with salt, pepper, paprika, chili powder, onion powder, and oregano.
  4. Heat olive oil in a skillet over medium heat. Add chicken and cook until golden brown and fully cooked through, about 7-10 minutes.
  5. Steam or sauté broccoli in the same pan (or separately) until tender, about 3-5 minutes.
  6. In a bowl, whisk together the sticky sauce ingredients until well combined. Pour the sauce over the cooked chicken in the skillet and simmer until thickened, about 3-5 minutes.
  7. For the spicy mayo, combine mayo, sriracha, and a little water in a bowl until it reaches a pourable consistency.
  8. Assemble your bowls: Start with a base of rice, then add the chicken, broccoli, and drizzle with spicy mayo. Top with sesame seeds for added crunch.

Pro Tips for Perfect Sticky Chicken Bowls

To ensure your dish turns out perfectly every time, keep these expert tips in mind:

  • Meal Prep: Cook a double batch and store it in airtight containers in the fridge for easy meals throughout the week.
  • Thicken the Sauce: If your sauce isn’t thickening, let it simmer a bit longer. The arrowroot slurry will help achieve the desired consistency.
  • Flavor Depth: Consider marinating the chicken in the sauce for a few hours or overnight for even more flavor.
  • Fresh Ingredients: Use fresh garlic and ginger for the best flavor in your sauce.
  • Adjust Spice Levels: If you prefer a milder dish, reduce the amount of sriracha in the sauce and mayo.
  • One-Pan Wonder: For easier cleanup, consider using a non-stick skillet or an air fryer for the chicken.
  • Make it Saucy: If you love extra sauce, double the sticky sauce recipe to drizzle generously.
  • Garnish Wisely: Fresh herbs like cilantro or green onions can elevate your dish’s flavor and presentation.

Common Mistakes and Troubleshooting

Even the best cooks can run into issues. Here are some common mistakes and how to avoid them:

  • Overcooking Chicken: To prevent dry chicken, always cook until just done and check with a meat thermometer (165°F).
  • Sticky Sauce Issues: If your sauce is too thin, let it simmer longer; if too thick, add a splash of water or broth to loosen it.
  • Undercooked Rice: Follow package instructions carefully, and fluff the rice to ensure it cooks evenly.

Variations to Try

Don’t hesitate to make this dish your own! Here are some creative variations:

  • Teriyaki Chicken Bowls: Swap the sticky sauce for a homemade teriyaki sauce for a sweeter flavor profile.
  • Spicy Thai Chicken: Add Thai red curry paste to the sauce for a delightful kick.
  • Vegetarian Delight: Replace chicken with chickpeas or tofu and add more vegetables like bell peppers and carrots.
  • BBQ Chicken Bowls: Use BBQ sauce instead of the sticky sauce for a smoky flavor.

Storage and Make-Ahead Instructions

This dish is perfect for make-ahead meals. Here’s how to store it:

  • Refrigeration: Store leftovers in an airtight container in the fridge for up to 4 days.
  • Freezing: You can freeze the cooked chicken and sauce separately for up to 3 months. Thaw in the fridge overnight before reheating.
  • Reheating: To reheat, warm the chicken and sauce in a skillet over medium heat until heated through, adding a splash of water if the sauce is too thick.

Nutrition Tips and Dietary Adaptations

For those who are health-conscious or have specific dietary needs, consider the following:

  • Gluten-Free: Use tamari instead of soy sauce to keep it gluten-free.
  • Low-Carb: Substitute rice with cauliflower rice or zucchini noodles for a low-carb alternative.
  • Low-Calorie: Reduce the amount of honey in the sauce and use less mayo in the spicy mayo.

Equipment Recommendations

Having the right tools can make cooking this dish easier:

  • Non-Stick Skillet: Ideal for cooking chicken evenly without sticking.
  • Rice Cooker: To perfectly cook rice without any fuss.
  • Whisk: For mixing the sticky sauce and spicy mayo smoothly.

Serving Suggestions

To elevate your Sticky Chicken Bowls, consider these serving ideas:

  • Fresh Herbs: Sprinkle fresh cilantro or green onions on top for added flavor.
  • Additional Crunch: Add roasted nuts or seeds for a delightful crunch.
  • Side Dishes: Serve with a side of Asian slaw or a cucumber salad for a refreshing contrast.

Frequently Asked Questions

Here are some common questions about this sticky chicken recipe:

  • Q: Can I use chicken thighs instead of breasts? A: Yes, boneless skinless thighs work great and are often more flavorful.
  • Q: What can I substitute for honey? A: Maple syrup or agave nectar can be used as a sweetener.
  • Q: How spicy is this dish? A: You can adjust the spice level by altering the amount of sriracha used.
  • Q: Can I make this dish vegetarian? A: Absolutely! Substitute chicken with tofu or chickpeas for a delicious vegetarian option.
  • Q: How do I store leftovers? A: Refrigerate in an airtight container for up to 4 days or freeze for up to 3 months.
  • Q: Is this recipe gluten-free? A: It can be made gluten-free by using tamari instead of soy sauce.
  • Q: What rice works best? A: Jasmine rice is a great choice for its flavor and texture, but feel free to use brown or cauliflower rice.
  • Q: How can I make it healthier? A: Opt for less honey, use more vegetables, and consider using less mayo in the spicy sauce.

In conclusion, the Sticky Chicken Bowls are more than just a meal; they embody the warmth of home cooking. They remind us that food can bring us together, nourish our bodies, and create lasting memories. So gather your ingredients, invite your loved ones, and enjoy the simple joy that this dish brings. Happy cooking!

Sticky Chicken Bowls Recipe

Prep Time 10 minutes
Cook Time 20 minutes
Total Time 30 minutes
Servings 4 servings
Calories 650
A flavorful and easy-to-make chicken bowl featuring tender chicken, broccoli, and a sticky sauce, topped with spicy mayo and sesame seeds.

Ingredients

Rice

  • 2 cups uncooked rice

Broccoli

  • 2 small heads broccoli (chopped)

Chicken

  • 3 large chicken breasts
  • 2 tbsp olive oil
  • 1 tsp salt
  • 1/2 tsp pepper
  • 1 tsp chili powder
  • 1 tsp smoked paprika
  • 1 tsp onion powder
  • 1 tsp oregano
  • 1/2 cup soy sauce
  • 1/2 cup honey
  • 1/4 cup rice vinegar
  • 3 cloves garlic (minced)
  • 2 tbsp sriracha
  • 2 tsp sesame oil
  • 1 tsp ground ginger
  • 2 tsp arrowroot powder mixed with water (to make slurry (sub cornstarch))
  • 1/2 cup mayo
  • 1 tbsp sriracha (for mayo)
  • 2-3 tbsp water (to thin mayo)

Toppings

  • to taste sesame seeds (for topping)

Instructions 

  • Cook rice and set aside.
  • Season chicken, cook until golden.
  • Steam or sauté broccoli until tender.
  • Mix sauce ingredients, simmer until thickened, then add to chicken.
  • Prepare spicy mayo and assemble bowls with rice, chicken, broccoli, drizzle mayo, and top with sesame seeds.

Notes

Adjust spice levels and toppings as desired.
Calories: 650kcal
Cost: $15
Course: Main Course
Cuisine: Asian
Keyword: broccoli, chicken, rice

There’s something about the warm, sweet aroma of honey mustard chicken wafting through the kitchen that brings back memories of family gatherings. This baked honey mustard chicken recipe combines simple ingredients to create a dish that’s not only easy to make but also deliciously heartwarming. In this article, I’ll guide you through every step, sharing tips and tricks learned from years of cooking and a deep love for home-cooked meals. Whether you’re a seasoned chef or a newcomer to the kitchen, you’ll find this dish to be a delightful addition to your dinner table.

Why You’ll Love This Recipe

  • Quick and Easy: With just a few simple steps, you can have a delicious meal ready in no time.
  • Family-Friendly: The sweet and tangy flavors appeal to both kids and adults, making it perfect for family dinners.
  • Versatile: This recipe works well with various sides, from roasted veggies to creamy mashed potatoes.
  • Make-Ahead Option: You can prepare the marinade in advance, saving you time on busy weeknights.
  • Healthier Choice: Using skinless chicken breasts keeps this dish lighter without sacrificing flavor.

Ingredients Breakdown

Before we dive into the cooking, let’s take a closer look at the ingredients you’ll need:

  • 4 boneless skinless chicken breasts: About 2-2½ pounds. This is the star of the dish, so choose fresh, quality chicken for the best flavor.
  • 1/2 cup honey: Look for a good quality honey; it makes all the difference in sweetness and flavor.
  • 1/3 cup Dijon mustard: This provides that signature tang that balances the sweetness of the honey.
  • 3 tablespoons olive oil: Adds moisture and richness to the dish.
  • 2 tablespoons yellow mustard: Enhances the flavor and adds a bit of zest.
  • 1 tablespoon white vinegar: Helps to cut through the sweetness and adds a little acidity.
  • 1 teaspoon paprika: For a touch of smokiness and color.
  • 1 teaspoon dried parsley: A simple herb that adds freshness.
  • ½ teaspoon salt and black pepper: Essential for enhancing flavors.

Instructions: How to Make Your Chicken Shine

Follow these steps for perfectly baked honey mustard chicken:

  1. Preheat your oven to 375°F (190°C). Grease a 9×13-inch baking dish with cooking spray.
  2. Place the chicken breasts in the baking dish, ensuring they are laid out evenly.
  3. In a medium bowl, whisk together the honey, Dijon mustard, olive oil, yellow mustard, vinegar, paprika, parsley, salt, and pepper.
  4. Pour the honey mustard mixture over the chicken, making sure each piece is well coated. Turn the chicken over to ensure it’s completely covered.
  5. Bake for 45-55 minutes. Halfway through, flip the chicken and spoon some sauce over the top. The chicken is done when its internal temperature reaches 165°F (75°C).
  6. Remove from the oven and serve hot, drizzling any remaining sauce over the chicken.

Pro Tips for the Perfect Honey Mustard Chicken

Close-up of golden-brown Baked Honey Mustard Chicken breasts.
  • Marinate: If time allows, marinate the chicken in the honey mustard sauce for 30 minutes to deepen the flavors.
  • Oven Thermometer: Use an oven thermometer to ensure your oven is at the correct temperature for even cooking.
  • Resting Time: Let the chicken rest for about 5 minutes after baking. This helps retain moisture.
  • Use a Meat Thermometer: For best results, check the internal temperature to avoid overcooking.
  • Experiment with Mustards: Feel free to mix different types of mustard for a unique flavor.
  • Add Garlic: For an extra depth of flavor, consider adding minced garlic to the honey mustard mixture.
  • Fresh Herbs: Garnish with fresh parsley or thyme for added color and flavor just before serving.
  • Layered Flavor: For a deeper flavor, sear the chicken in a skillet before baking.
  • Side Pairing: Serve with roasted vegetables or a light salad to complement the dish.

Common Mistakes and Troubleshooting

Even the best of us can make a few errors in the kitchen. Here are some common mistakes and how to avoid them:

  • Overcooking: Always check the internal temperature. Chicken can dry out quickly, so aim for 165°F (75°C).
  • Uneven Cooking: Make sure the chicken breasts are of even thickness for uniform cooking.
  • Not Enough Sauce: If you love sauce, consider doubling the marinade for extra flavor.
  • Skipping the Marinade: If you have time, marinating the chicken can enhance the flavor immensely.

Variations to Try

Feeling adventurous? Here are a few variations to switch things up:

  • Honey Mustard Chicken Thighs: Substitute chicken breasts with thighs for a richer flavor.
  • Honey Mustard Glazed Salmon: Use the same marinade for salmon fillets for a seafood twist.
  • Spicy Honey Mustard: Add a pinch of cayenne or red pepper flakes for a spicy kick.
  • Honey Mustard Veggies: Roast some veggies with the same marinade for a colorful side dish.

Storage and Make-Ahead Instructions

This dish can be made ahead and stored for later. Here’s how:

  • Refrigerator: Store leftovers in an airtight container for up to 4 days.
  • Freezing: You can freeze the cooked chicken for up to 3 months. Thaw in the fridge before reheating.
  • Make-Ahead: Prepare the marinade and coat the chicken a day in advance. Store in the fridge until ready to bake.

Frequently Asked Questions

  • Can I use frozen chicken breasts? Yes, but they will require longer baking time. Ensure they reach the proper internal temperature.
  • What can I serve with honey mustard chicken? Roasted vegetables, rice, or a simple green salad pair beautifully.
  • How do I know when the chicken is done? Use a meat thermometer to check; it should read 165°F (75°C).
  • Can I make this recipe gluten-free? Yes, use gluten-free mustard and ensure all other ingredients are gluten-free.
  • Can I use another type of mustard? Absolutely! Try whole grain or spicy mustard for a different flavor.
  • How long can I store leftovers? In the fridge, leftovers can last up to 4 days.
  • Can I grill this chicken instead? Yes, it’s fantastic on the grill! Just BBQ until cooked through, flipping occasionally.
  • What’s the best way to reheat leftovers? Reheat in the oven at a low temperature to keep it from drying out.

Nutritional Tips and Dietary Adaptations

For a healthier take on this dish, consider these adaptations:

  • Low-Calorie Option: Use less honey and substitute with a sugar-free sweetener if desired.
  • Whole30-Friendly: Ensure all ingredients, especially the mustard, comply with Whole30 guidelines.
  • Heart-Healthy Variation: Use skinless chicken breasts and reduce oil to cut back on fat.

Equipment Recommendations

Having the right tools can make a world of difference. Here are a few essentials:

  • 9×13 Baking Dish: A good quality dish ensures even cooking and easy serving.
  • Meat Thermometer: This handy tool takes the guesswork out of cooking chicken.
  • Whisk: For mixing your marinade thoroughly.

Serving Suggestions

How you plate your dish can enhance the dining experience. Consider these suggestions:

  • Garnish: Fresh herbs like parsley or thyme add a pop of color and flavor.
  • Pairing: Serve with fluffy rice or a refreshing side salad for balance.
  • Presentation: Arrange the chicken on a platter, drizzled with sauce, for an inviting look.

In conclusion, this honey mustard chicken recipe is more than just a meal; it’s a way to bring family together. With its blend of sweet and tangy flavors, it’s sure to become a favorite in your home just as it has in mine. So gather your loved ones, whip up this dish, and create some delicious memories around the dinner table!

Baked Honey Mustard Chicken

Prep Time 10 minutes
Cook Time 50 minutes
Total Time 1 hour
Servings 4 servings
Calories 350
A delicious and easy baked chicken recipe coated in a sweet and tangy honey mustard sauce, perfect for a quick weeknight dinner.

Ingredients

Chicken

  • 4 pieces boneless skinless chicken breasts (about 2-2½ pounds)
  • 1/2 cup honey
  • 1/3 cup dijon mustard
  • 3 tablespoons olive oil
  • 2 tablespoons yellow mustard
  • 1 tablespoon white vinegar
  • 1 teaspoon paprika
  • 1 teaspoon dried parsley
  • ½ teaspoon salt
  • ½ teaspoon black pepper

Instructions 

  • Preheat oven to 375°F (190°C). Prepare a baking dish and spray with cooking spray.
  • Arrange chicken breasts in the dish. Mix honey, mustard, oil, vinegar, paprika, parsley, salt, and pepper.
  • Pour sauce over chicken, turning to coat evenly. Spoon extra sauce if desired.
  • Bake for 45-55 minutes, flipping and spooning sauce halfway through, until internal temperature reaches 165°F (74°C).

Notes

Ensure chicken reaches 165°F for safe consumption.
Calories: 350kcal
Cost: $15
Course: Main Course
Cuisine: American
Keyword: chicken, honey, mustard

Welcome to the Heart of Comfort: Nostalgic Oven Baked Chicken Breast

Ah, the simple joy of a home-cooked meal! Nothing says comfort like a juicy oven-baked chicken breast, rich with flavors and memories. This recipe not only brings back the warmth of family gatherings but also offers a delicious way to enjoy a meal that’s both satisfying and easy to prepare. In less than an hour, you can create a dish that rivals any fancy restaurant—all while using ingredients you probably already have in your pantry. Let’s dive in and bring that rustic charm to your dinner table!

Why You’ll Love This Recipe

  • Quick and Easy: With just a few simple steps, you can have a flavorful chicken dish ready in under 30 minutes of cooking time.
  • Flavor Packed: The combination of spices and the addition of butter make this chicken breast incredibly juicy and full of flavor.
  • Perfect for Meal Prep: Cook a batch and enjoy throughout the week; it stores and reheats beautifully.
  • Versatile: This recipe pairs wonderfully with a variety of sides like roasted vegetables, rice, or a fresh salad.
  • Family-Friendly: A dish that pleases both kids and adults, turning mealtime into a cherished family moment.

Ingredients Breakdown

Here’s what you’ll need to create this heartwarming dish:

  • 2 pounds chicken breast (boneless and skinless): The star of the show! You can use thighs for a juicier option.
  • 1 tablespoon olive oil: Helps keep the chicken moist and adds a lovely flavor.
  • 1 tablespoon light brown sugar: A touch of sweetness balances the seasoning.
  • 2 teaspoons garlic powder: For that aromatic touch that enhances the overall flavor.
  • 2 teaspoons onion powder: Adds depth to the seasoning blend.
  • 1 teaspoon ground paprika: For a hint of smokiness and color.
  • 1 teaspoon Italian seasoning: A blend of herbs that brings a rustic Italian flair to the dish.
  • 1 teaspoon salt: Essential for flavor enhancement.
  • 1/4 teaspoon ground black pepper: Adds a subtle kick without overpowering the dish.
  • 1 tablespoon butter (diced): A final touch that makes the chicken luscious and rich.

Step-by-Step Instructions

Close-up side view of tender chicken breast, glistening with seasonings and olive oil.

Follow these easy steps to achieve the perfect oven-baked chicken breast:

  1. Prep: Preheat your oven to 400°F (200°C). Lightly grease a 9×13 inch casserole dish with a bit of olive oil or cooking spray.
  2. Flatten: Place your chicken breasts between two pieces of plastic wrap. Using a rolling pin or the flat side of a mallet, pound the chicken to about 0.5 – 0.75 inch thickness. This helps in even cooking.
  3. Season: Rub olive oil all over the flattened chicken breasts. In a small bowl, combine all the remaining ingredients except for the butter. Sprinkle this mixture generously over the chicken, rubbing it in gently to ensure all flavors meld.
  4. Bake: Arrange the seasoned chicken in the prepared casserole dish. Top each breast with a slice of diced butter. Bake in the preheated oven for about 18-20 minutes or until the internal temperature reaches 165°F (75°C). For a nice golden finish, broil for an additional 1-3 minutes.
  5. Serve: Enjoy immediately, letting the flavors settle in your heart and belly.

Expert Tips for the Best Chicken

Here are some pro tips to elevate your chicken game:

  • Brine the Chicken: Soaking your chicken in a saltwater solution for a few hours before cooking helps it retain moisture.
  • Use Fresh Herbs: Fresh herbs like thyme or rosemary can be added for an aromatic touch.
  • Let it Rest: Allow the chicken to rest for 5-10 minutes after baking. This helps the juices redistribute for a juicier bite.
  • Experiment with Seasonings: Feel free to swap out the spices for your favorites, like cumin or chili powder, to give it a different flavor profile.
  • Oven Thermometer: Use an oven thermometer to ensure your oven is at the correct temperature for even cooking.
  • Check for Doneness: Invest in a meat thermometer; it’s the best way to ensure your chicken is perfectly cooked without drying it out.
  • Use a Variety of Cuts: This recipe works beautifully with chicken thighs, drumsticks, or even a whole chicken; just adjust cooking times accordingly.
  • Pan Drippings: Save the pan drippings for a delicious gravy or sauce to drizzle over the chicken.

Common Mistakes to Avoid

Let’s ensure you avoid any hiccups with your chicken:

  • Overcooking: Keep a close eye on the time and use a meat thermometer to avoid dry chicken.
  • Skipping Seasoning: Don’t rush the seasoning. Take your time to rub it in for maximum flavor.
  • Not Preheating the Oven: Always preheat your oven; this ensures even cooking from the start.
  • Using Cold Chicken: Allow your chicken to come to room temperature before cooking for a more even cook.

Delicious Variations to Try

Switch things up with these delightful variations:

  • Herb & Lemon: Add fresh lemon juice and zest along with herbs for a bright flavor.
  • Honey Garlic: Mix honey with garlic for a sweet and savory twist.
  • Buffalo Style: Brush with buffalo sauce before baking for a spicy kick.
  • BBQ Glaze: Brush with your favorite BBQ sauce during the last 5 minutes of baking for a smoky finish.

Storage and Make-Ahead Instructions

This chicken is perfect for meal prep:

  • Refrigerator: Store leftovers in an airtight container for up to 4 days. Reheat in the oven or microwave.
  • Freezer: Wrap tightly in plastic wrap and then foil; freeze for up to 3 months. Thaw overnight in the fridge before reheating.
  • Make-Ahead: You can prepare the chicken and season it a day in advance. Just bake it fresh on the day you want to serve it!

Frequently Asked Questions

Here are some common queries about this recipe:

  • Can I use frozen chicken breasts? Yes, but make sure to thaw them completely before cooking for even results.
  • What should I serve with my baked chicken? Great sides include mashed potatoes, steamed veggies, or a crisp salad.
  • How do I know when the chicken is done? Use a meat thermometer; chicken should reach 165°F (75°C).
  • Can I marinate the chicken? Absolutely! Marinating for a few hours or overnight will enhance the flavors.
  • What’s the best way to reheat leftovers? Reheat in the oven at 350°F (175°C) for best results.
  • Can I grill this chicken instead? Yes, grilling it will add a lovely smoky flavor! Just monitor the cooking time closely.
  • How can I make this dish lower in fat? Opt for skinless chicken breasts and reduce the amount of butter used.
  • What if I don’t have garlic powder? You can use fresh minced garlic; just adjust the amount to taste.

Nutritional Tips and Dietary Adaptations

This recipe is naturally healthy, but here are some adaptations:

  • Low-Carb: Serve with steamed vegetables instead of grains.
  • Dairy-Free: Omit the butter and replace with olive oil or a plant-based alternative.
  • Gluten-Free: This recipe is gluten-free as written; just ensure all spices are certified gluten-free.

Essential Equipment for a Perfect Bake

Having the right tools can make all the difference:

  • Baking Dish: A sturdy 9×13 inch casserole dish for even cooking.
  • Meat Thermometer: For checking doneness without cutting into the meat.
  • Plastic Wrap and Mallet: To flatten the chicken for even cooking.
  • Mixing Bowls: For combining your seasoning and prepping your ingredients.

Serving Suggestions

Pair your oven-baked chicken breast with:

  • Roasted Vegetables: A mix of seasonal veggies adds color and nutrients.
  • Fresh Salad: A light, crisp salad balances the richness of the chicken.
  • Risotto or Rice: Fluffy grains soak up the delicious juices.

In conclusion, this nostalgic oven-baked chicken breast recipe is more than just a meal; it’s a celebration of home, comfort, and the simple joys of cooking. With a little care and love, you can create a dish that warms the heart and nourishes the soul. So gather your family around the table, share stories, and enjoy the fruits of your labor—because at the end of the day, cooking is about connection, and nothing connects us quite like a hearty meal. Happy cooking!

Oven Baked Chicken Breast

Prep Time 10 minutes
Cook Time 20 minutes
Total Time 30 minutes
Servings 4 pieces
Calories 250
Enjoy tender, flavorful oven-baked chicken breasts with a simple seasoning and a buttery finish.

Ingredients

Protein

  • 2 pounds chicken breast (boneless and skinless)
  • 1 tablespoon olive oil
  • 1 tablespoon light brown sugar
  • 2 teaspoons garlic powder
  • 2 teaspoons onion powder
  • 1 teaspoon ground paprika
  • 1 teaspoon Italian seasoning
  • 1 teaspoon salt
  • 0.25 teaspoon ground black pepper
  • 1 tablespoon butter (diced)

Instructions 

  • Preheat oven to 400°F (200°C). Grease a 9x13 inch dish.
  • Pound chicken to 0.5-0.75 inch thick, rub with olive oil.
  • Mix remaining seasonings, sprinkle over chicken, then top with butter slices.
  • Bake for 18-20 minutes until internal temp reaches 165°F, then broil 1-3 minutes until browned.

Notes

Ensure chicken reaches 165°F for safe consumption.
Calories: 250kcal
Cost: $15
Course: Main Course
Cuisine: American
Keyword: baked, chicken, easy