Author

Tom

Browsing

The Heart of Family Cooking: Why This Chicken Quesadilla Recipe Stands Out

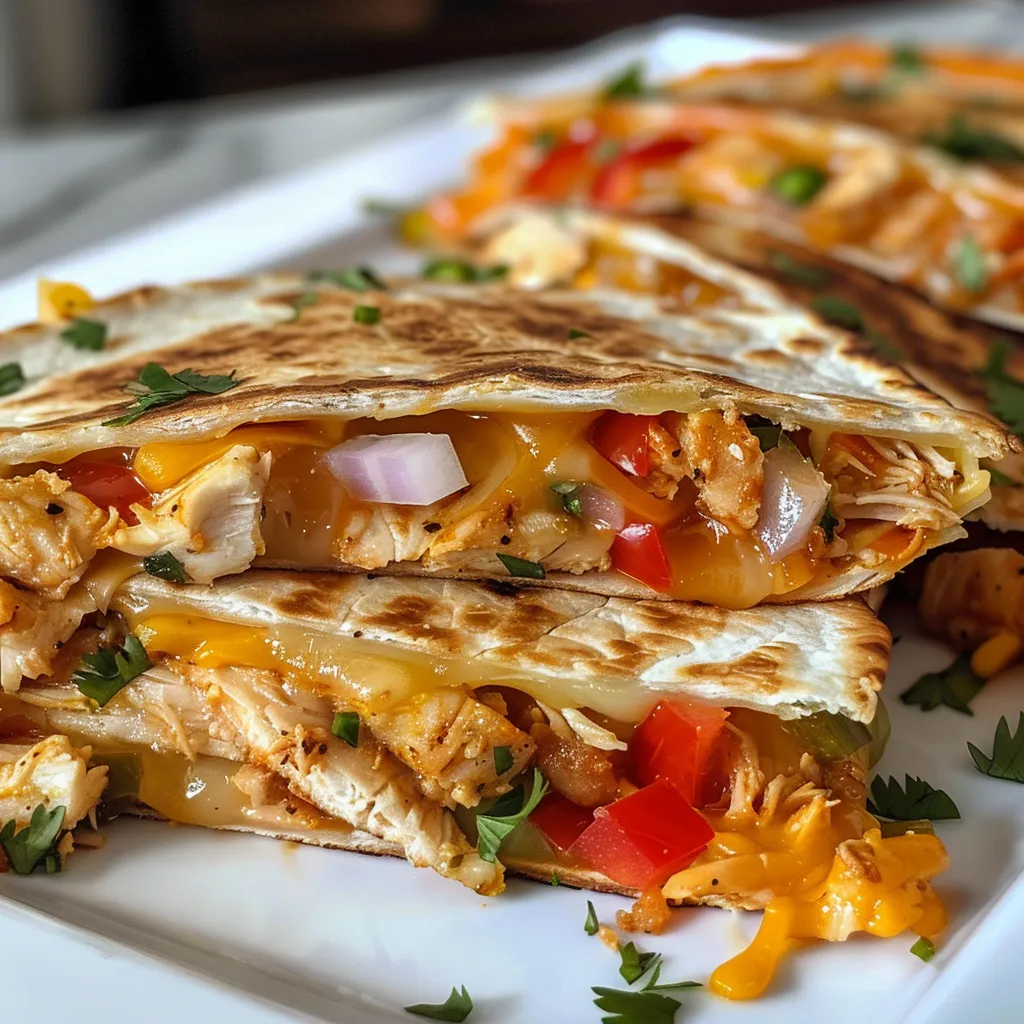
Gather around the table, folks! Today, we’re diving into a recipe that transcends mere cooking; it’s about warmth, memories, and the joy of sharing a meal with those you love. Our family favorite chicken quesadilla is a dish that brings everyone together, filled with seasoned chicken, ooey-gooey cheese, and fresh veggies—comfort food at its finest!

This chicken quesadilla recipe is not only simple but also versatile and satisfying. Whether you’re looking to whip up a quick weeknight dinner or impress guests at your next family gathering, this dish works perfectly for all occasions. Let’s get started!

Why You’ll Love This Recipe

  • Fast and Easy: With just a few simple ingredients, you can have a delicious meal ready in under 30 minutes, making it ideal for busy weeknights.
  • Customizable: Feel free to mix and match ingredients to suit your taste or dietary needs; this recipe is a blank canvas for your creativity.
  • Kid-Approved: The cheesy goodness and crispy texture make this a favorite for children and adults alike—perfect for family dinners.
  • Perfect for Leftovers: Leftover quesadillas can be easily reheated for lunch the next day, ensuring nothing goes to waste.
  • Great for Meal Prep: Prepare the fillings ahead of time and assemble when you’re ready to cook for a hassle-free dinner.

Ingredient Breakdown for the Perfect Quesadilla

To create the ultimate chicken quesadilla, you’ll need the following ingredients:

  • 4 large flour tortillas (10-inch): These work best for folding and filling, but corn tortillas can be used for a gluten-free option.
  • 2 cups cooked chicken breast, shredded: You can use leftover chicken or a rotisserie chicken for convenience; it saves on prep time!
  • 1½ cups Mexican cheese blend (shredded): This adds authentic flavor and melty goodness to your dish.
  • ½ cup Monterey Jack cheese (shredded): Known for its smooth melting properties, this cheese enhances the quesadilla’s texture.
  • 1 medium bell pepper, diced: Any color works well—red, green, or yellow can add a splash of color and flavor.
  • ½ medium red onion, finely diced: Small uniform pieces cook better and add a sweet depth of flavor.
  • 2 tablespoons olive oil or butter: For cooking the quesadillas to a perfect golden brown.
  • 1 teaspoon chili powder: This adds a kick and depth to the seasoned chicken.
  • ½ teaspoon cumin: A key spice for authentic Mexican flavor.
  • ½ teaspoon garlic powder: For an extra layer of flavor.
  • Salt and pepper to taste: Essential for seasoning to your liking.

How to Make Your Family Favorite Chicken Quesadilla

A delicious chicken quesadilla with a golden-brown tortilla, showcasing shredded chicken and bell peppers.

Now that we have our ingredients ready, let’s dive into the steps to create this delicious chicken quesadilla:

  • Perfect Seasoning Blend: Mix shredded chicken with chili powder, cumin, garlic powder, salt, and pepper until evenly coated. This step adds incredible flavor depth to every bite and transforms basic chicken into restaurant-quality filling.
  • Uniform Cuts for Even Cooking: Dice bell pepper and red onion into small, uniform pieces about ¼-inch in size. Smaller pieces cook faster and distribute more evenly throughout the quesadilla, ensuring every bite has perfect balance.
  • Layer for Maximum Flavor: Lay tortilla flat and add half of the Mexican cheese blend to one half of the surface. Top with seasoned chicken, diced vegetables, Monterey Jack cheese, then remaining Mexican cheese. Fold tortilla over to create a half-moon shape.
  • The Secret to Crispy Outside, Melty Inside: Heat oil in a large skillet over medium heat. Cook quesadilla for 3-4 minutes per side until golden brown and cheese is completely melted. Don’t rush—medium heat ensures perfect browning without burning.
  • Patience Creates Perfect Slices: Let quesadillas rest for 2-3 minutes before cutting. This allows the cheese to set slightly, preventing all the filling from spilling out when you slice. This step is crucial for clean presentation.
  • Restaurant-Style Presentation: Cut into triangular wedges using a sharp knife or pizza cutter. Serve immediately while the cheese is still perfectly gooey and hot. Garnish with fresh cilantro and serve with sour cream, guacamole, and salsa.

Expert Tips for the Best Chicken Quesadilla

  • Use Fresh Ingredients: Fresh vegetables and high-quality cheese make a noticeable difference in flavor.
  • Don’t Overfill: While it’s tempting to pile on the fillings, overstuffing can lead to messy quesadillas that won’t cook evenly.
  • Experiment with Spices: Feel free to add additional spices such as smoked paprika or cayenne for extra heat.
  • Cooking Temperature Matters: Keep your skillet on medium heat to ensure the quesadillas cook through without burning the outside.
  • Try Different Cheeses: A blend of cheeses can enhance the flavor; consider mixing in some sharp cheddar or pepper jack.
  • Use a Non-Stick Skillet: This will help prevent sticking and make flipping easier.
  • Make Them Ahead: You can prepare quesadillas ahead of time and store them in the fridge until you’re ready to cook.
  • Serve with Dips: Pair your quesadillas with homemade salsa, sour cream, or guacamole for added flavor.

Common Mistakes and Troubleshooting

Even the best cooks can make mistakes. Here are some common pitfalls and how to avoid them:

  • Too Much Heat: Cooking on high heat can burn the tortillas. Always stick to medium heat for the best results.
  • Not Letting Them Rest: Cutting quesadillas too soon can cause the filling to spill. Give them a few minutes to set!
  • Using Cold Ingredients: Cold cheese and chicken don’t melt and heat evenly. Make sure your ingredients are at room temperature before cooking.
  • Using the Wrong Tortillas: Flour tortillas are best for quesadillas. If using corn, ensure they are sturdy enough to hold the filling.

Variations to Try

Feel free to get creative! Here are some delicious variations to consider:

  • Veggie Quesadilla: Replace chicken with sautéed mushrooms, zucchini, and spinach for a vegetarian option.
  • BBQ Chicken Quesadilla: Mix shredded chicken with BBQ sauce for a sweet and tangy twist.
  • Breakfast Quesadilla: Add scrambled eggs and breakfast sausage for a hearty morning meal.
  • Spicy Jalapeño Quesadilla: Incorporate sliced jalapeños for an extra kick that heat lovers will enjoy.

Storing and Make-Ahead Instructions

If you have leftovers or want to prep ahead of time, here’s how to store and reheat:

  • Storing: Allow cooked quesadillas to cool completely, then wrap in plastic wrap or foil and store in the refrigerator for up to 3 days.
  • Freezing: To freeze, wrap individual quesadillas in foil, then place them in a freezer bag. They can be frozen for up to 2 months.
  • Reheating: Reheat in a skillet over medium heat until warmed through, or pop them in the oven at 350°F (175°C) for about 10-15 minutes.
  • Make-Ahead: You can prepare the filling a day in advance and store it in an airtight container in the fridge until you’re ready to assemble and cook.

Frequently Asked Questions (FAQs)

  • Can I use corn tortillas instead of flour? Absolutely! Just ensure they are sturdy enough to hold the fillings.
  • What can I substitute for chicken? Try shredded beef, turkey, or even black beans for a vegetarian option.
  • How do I make my quesadillas crispy? Cook on medium heat and allow enough time for the cheese to melt and the tortillas to brown.
  • Can I make these in advance? Yes, the fillings can be prepared ahead of time, and the quesadillas can be stored in the fridge or freezer.
  • What type of cheese is best for quesadillas? A blend of Mexican cheese and Monterey Jack is perfect for that gooey, melty texture.
  • Can I add more vegetables? Definitely! Feel free to include any vegetables you enjoy, such as spinach, mushrooms, or corn.
  • What to serve with quesadillas? Pair with salsa, guacamole, sour cream, or a fresh salad for a complete meal.
  • How do I know when my quesadilla is done? Look for a golden brown color on both sides and ensure the cheese is melted inside.

Nutritional Tips and Dietary Adaptations

This chicken quesadilla can be adapted to fit various dietary needs:

  • Gluten-Free: Use gluten-free tortillas to make this dish accessible for those with gluten sensitivities.
  • Low-Carb: Try using lettuce wraps instead of tortillas for a lighter, low-carb option.
  • Dairy-Free: Substitute cheese with dairy-free cheese alternatives or avocado for creaminess.
  • High Protein: Add additional protein sources like black beans or pinto beans for a protein-packed meal.

Equipment Recommendations

Here’s what you’ll need to make this recipe a success:

  • Large Skillet: A non-stick skillet is ideal for cooking quesadillas without sticking.
  • Sharp Knife: For cutting your quesadillas into perfect wedges.
  • Spatula: A wide spatula helps in flipping your quesadillas without spilling the filling.
  • Mixing Bowl: For mixing your seasoned chicken and vegetables together.

Serving Suggestions

To elevate your meal, consider these serving ideas:

  • Garnish with Fresh Herbs: A sprinkle of cilantro or parsley adds a fresh touch.
  • Serve with Dips: Complement with your favorite dips like salsa, guacamole, or sour cream.
  • Pair with a Side Salad: A light salad can balance the richness of the quesadillas.
  • Offer a Variety of Salsas: Different types of salsas can cater to various taste preferences, from mild to spicy.

Bringing It All Together

Cooking is all about connection, and this chicken quesadilla recipe is a heartfelt reminder of that. As you gather your ingredients and prepare this dish, think of the warmth it will bring to your table. Remember, cooking doesn’t have to be complicated; it’s about sharing love through food. So, roll up your sleeves, get your family involved, and enjoy every moment spent together. Happy cooking!

Family Favorite Chicken Quesadilla Recipe

Prep Time 10 minutes
Cook Time 10 minutes
Total Time 20 minutes
Servings 4 servings
Calories 550
A delicious and easy-to-make chicken quesadilla perfect for family dinners or casual gatherings. Packed with flavorful seasoned chicken and melty cheese, it's a crowd-pleaser.

Ingredients

Tortillas

  • 4 large flour tortillas (10-inch) (Work best for folding and filling)
  • 2 cups cooked chicken breast, shredded (Can use rotisserie chicken for convenience)
  • 1.5 cups Mexican cheese blend, shredded (For authentic flavor)
  • 0.5 cup Monterey Jack cheese, shredded (Ensures smooth melting)
  • 1 medium bell pepper, diced (Any color works well)
  • 0.5 medium red onion, finely diced (Small uniform pieces cook better)
  • 2 tablespoons olive oil or butter (For cooking the quesadillas)
  • 1 teaspoon chili powder (For seasoning the chicken)
  • 0.5 teaspoon cumin (Adds authentic Mexican flavor)
  • 0.5 teaspoon garlic powder (For depth of flavor)
  • to taste salt and pepper (For seasoning)

Instructions 

  • Mix shredded chicken with chili powder, cumin, garlic powder, salt, and pepper until evenly coated.
  • Dice bell pepper and red onion into small, uniform pieces about ¼-inch in size.
  • Layer tortilla with half of the cheese, seasoned chicken, diced vegetables, then remaining cheese. Fold in half.
  • Heat oil in skillet over medium heat. Cook quesadilla 3-4 minutes per side until golden and cheese melts.
  • Let rest for 2-3 minutes, then cut into wedges. Serve hot with garnishes.

Notes

Ensure cheese is fully melted before serving for best texture.
Calories: 550kcal
Cost: $15
Course: Main Course
Cuisine: Mexican
Keyword: chicken

Discover the Soul of Honey Mustard Chicken

Welcome, friends! Today, we’re diving into a dish that warms not just the belly, but the heart—Honey Mustard Chicken. This recipe is a beautiful blend of sweet and tangy that comes together effortlessly, inviting family and friends to gather around the table. With tender chicken breasts coated in a luscious honey mustard sauce, it’s a comforting meal that echoes the simplicity of home-cooked goodness. Let’s explore why this dish deserves a spot in your kitchen.

Why You’ll Love This Recipe

Honey Mustard Chicken is more than just a meal; it’s a heartwarming experience. Here are five reasons why this recipe stands out:

  • Quick Cooking Time: Ready in under 30 minutes, this dish is perfect for busy weeknights without sacrificing flavor.
  • Flavor Harmony: The combination of honey and mustard creates a sweet and tangy sauce that complements the chicken perfectly.
  • Kid-Friendly: The mild flavors make it a hit with kids, encouraging them to try new tastes.
  • Versatile Pairings: Serve it alongside roasted potatoes, steamed veggies, or a fresh salad for a complete meal.
  • Meal Prep Friendly: This dish can be made ahead of time and reheated, making it an ideal option for family gatherings or meal prepping.

Ingredient Breakdown

Let’s gather our ingredients and get ready to create this heartwarming dish. Here’s what you’ll need:

  • 2 tablespoons olive oil: A healthy fat that adds richness to the dish.
  • 2 large boneless skinless chicken breasts: The star of the show! Thinly sliced for even cooking.
  • Lemon pepper seasoning: Adds a zesty kick to enhance the chicken’s flavor.
  • 1/3 cup all-purpose flour: For dredging the chicken, creating a beautiful crust.
  • 1 ½ tablespoons butter: For a rich, buttery sauce.
  • 2 cloves garlic (minced): Gives a warm, aromatic flavor.
  • ¾ cup chicken broth: For a savory base in our sauce.
  • 2 tablespoons yellow mustard: The tangy component of our sauce.
  • 1 tablespoon Dijon mustard: Adds depth and complexity to the flavor.
  • 3 tablespoons honey: The sweet counterpart that balances the tanginess of the mustard.
  • ½ teaspoon EACH: dried dill weed, parsley, Italian seasoning: For a hint of herbal freshness.
  • 1/3 cup heavy cream: To create a luscious, creamy texture.

Pro Tips for Perfect Honey Mustard Chicken

Side view of tender chicken breasts drizzled with honey mustard sauce.

Before we get cooking, here are some expert insights to elevate your dish:

  • Even Thickness: Slice the chicken into uniform thickness for consistent cooking. This helps to avoid dry edges.
  • Let it Rest: After cooking, allow the chicken to rest for a few minutes to retain its juices.
  • Adjust Sweetness: Feel free to tweak the honey amount in the sauce to suit your taste; everyone has their preference!
  • Use Fresh Ingredients: Fresh garlic and herbs can significantly enhance the dish’s flavor.
  • Don’t Rush the Sauce: Allow the sauce to simmer gently to develop its full flavor.
  • Pairing Suggestions: Consider serving with roasted vegetables or a light salad to balance the richness of the dish.
  • Storage Tips: Store leftovers in an airtight container for up to 3 days in the fridge.
  • Make It Ahead: Prepare the sauce ahead of time and simply reheat when ready to serve.

Common Mistakes and Troubleshooting

Even the best chefs can hit a snag! Here are common pitfalls and how to avoid them:

  • Overcooking the Chicken: Keep an eye on the cooking time; the chicken should be golden and cooked through without being dry.
  • Too Thick Sauce: If your sauce is too thick, add a splash of chicken broth to loosen it up.
  • Unbalanced Flavors: If the mustard flavor is too strong, add a little more honey to balance it out.
  • Not Enough Creaminess: If you prefer a creamier sauce, increase the heavy cream slightly for a richer texture.
  • Skipping the Seasoning: Seasoning at each stage enhances the overall flavor; don’t forget to sprinkle a little salt and pepper!

Variations to Try

If you’re feeling adventurous, here are some delightful variations:

  • Honey Mustard Chicken Thighs: Swap chicken breasts for thighs for a juicier, more flavorful option.
  • Spicy Honey Mustard: Add a pinch of cayenne pepper or a drizzle of hot sauce for a spicy kick.
  • Herbed Honey Mustard: Mix in fresh herbs like thyme or rosemary for an aromatic twist.
  • Honey Mustard Casserole: Layer the chicken with rice and vegetables in a casserole dish, then bake until bubbly.

Storage and Make-Ahead Instructions

This Honey Mustard Chicken is perfect for meal prep! Here’s how to store and prepare it ahead of time:

  • Refrigerate: Store leftovers in an airtight container for up to 3 days.
  • Freeze: Freeze cooked chicken in a freezer-safe container for up to 2 months. Thaw overnight in the fridge before reheating.
  • Make-Ahead Sauce: Prepare the honey mustard sauce in advance and store it in the fridge. Just reheat and pour over cooked chicken when ready to serve.

Comprehensive FAQ

Here are some frequently asked questions about this recipe:

  • Can I use bone-in chicken? Yes, but adjust cooking time accordingly, ensuring the chicken is fully cooked.
  • Is this recipe gluten-free? Substitute all-purpose flour with a gluten-free alternative for a gluten-free dish.
  • What sides pair well with Honey Mustard Chicken? Roasted potatoes, green beans, or a crisp salad are all excellent choices.
  • Can I make this dish in the oven? Yes, sear the chicken first and then transfer it to a preheated oven to finish cooking.
  • How do I know when the chicken is done? Use a meat thermometer to ensure the internal temperature reaches 165°F (75°C).
  • Can I use other mustards? Absolutely! Feel free to experiment with different varieties of mustard to find your favorite flavor.
  • How can I make this dish dairy-free? Substitute heavy cream with coconut cream or a dairy-free alternative.
  • What’s the best way to reheat leftovers? Gently reheat in a skillet over low heat, adding a splash of chicken broth to keep it moist.

Nutrition Tips and Dietary Adaptations

This Honey Mustard Chicken can easily be adapted to fit various dietary needs:

  • Low-Carb Option: Serve with cauliflower rice instead of traditional sides for a low-carb meal.
  • Dairy-Free: Use coconut milk or a dairy-free cream substitute to make the sauce.
  • Low-Fat Option: Substitute heavy cream with low-fat yogurt for a lighter sauce.

Equipment Recommendations

To prepare this dish, you’ll need the following kitchen tools:

  • Large Skillet: For searing the chicken and making the sauce.
  • Meat Mallet: To flatten the chicken for even cooking.
  • Spatula: For stirring and serving.
  • Meat Thermometer: To ensure the chicken is cooked to the perfect temperature.

Serving Suggestions

Ready to serve up this comforting dish? Here are some suggestions for creating a delightful meal:

  • Roasted Veggies: Pair with seasonal roasted vegetables for a colorful plate.
  • Rice or Quinoa: Serve over a bed of fluffy rice or quinoa to soak up the delicious sauce.
  • Fresh Salad: A crisp green salad with a light vinaigrette complements the richness of the chicken.

Conclusion

There you have it, folks! This Honey Mustard Chicken is not just a recipe; it’s a chance to gather your loved ones and share a meal filled with warmth and memories. With its simple ingredients and heartfelt preparation, it’s bound to become a family favorite. So roll up your sleeves, gather those ingredients, and let’s make a meal that brings everyone together. Happy cooking!

Honey Mustard Chicken

Prep Time 15 minutes
Cook Time 20 minutes
Total Time 35 minutes
Servings 4 servings
Calories 450
A flavorful chicken dish with a honey mustard sauce, perfect for a quick and satisfying meal.

Ingredients

Main ingredients

  • 2 tablespoons olive oil
  • 2 large boneless skinless chicken breasts
  • 1/3 cup all-purpose flour
  • 1 ½ tablespoons butter
  • 2 cloves garlic (minced)
  • ¾ cup chicken broth
  • 2 tablespoons yellow mustard
  • 1 tablespoon Dijon mustard
  • 3 tablespoons honey
  • ½ teaspoon dried dill weed
  • ½ teaspoon parsley
  • ½ teaspoon Italian seasoning
  • 1/3 cup heavy cream

Instructions 

  • Slice chicken in half, pound to ½ inch thick, and pat dry.
  • Season with Lemon Pepper, dredge in flour, and sear in olive oil until golden. Set aside.
  • Melt butter, cook garlic, add flour, then stir in chicken broth gradually.
  • Add mustards, honey, seasonings, bring to boil, then stir in heavy cream. Return chicken and simmer 5 minutes.

Notes

Adjust honey or mustard to taste for desired sweetness or tang.
Calories: 450kcal
Cost: $15
Course: Main Course
Cuisine: American
Keyword: chicken

Welcome to the Heart of Home Cooking

In the world of home cooking, few ingredients are as versatile and beloved as chicken. Today, I’m excited to share with you my treasured recipe for Juicy Baked Chicken Breast—a dish that not only brings family together but does so in just 30 minutes! This recipe is perfect for busy weeknights when you need a hearty meal that’s both simple and satisfying.

Why You’ll Love This Recipe

When it comes to chicken, this baked chicken breast recipe stands out for several reasons:

  • Quick and Easy: Ready in just 30 minutes, making it perfect for a weeknight dinner.
  • Moist and Flavorful: The combination of spices ensures that every bite is packed with flavor.
  • Healthy Option: Lean protein that fits well into a balanced diet.
  • Family-Friendly: Even picky eaters will love this simple yet delicious preparation.
  • Versatile: Pair it with your favorite sides or use it in salads, sandwiches, or wraps!

Ingredients Breakdown

Here’s what you’ll need for the Juicy 30-Minute Baked Chicken Breast:

  • 4 medium-sized chicken breasts – about 2 pounds, or 7-8 ounces each (or two large chicken breasts, cut in half horizontally so you have 4 thin pieces).
  • 1 teaspoon garlic powder.
  • 1 teaspoon onion powder.
  • 1 teaspoon paprika.
  • 1 teaspoon dried parsley.
  • 1/2 teaspoon dried mustard.
  • 1/2 teaspoon chili powder (optional for a kick).
  • 1 1/2 teaspoons kosher salt, or to taste.
  • 1/4 teaspoon black pepper.
  • 2 tablespoons olive oil or avocado oil.

Ingredient Substitutions

If you don’t have all the spices on hand, don’t worry! Here are some substitutions you can make:

  • Paprika: Use smoked paprika for a deeper flavor.
  • Olive Oil: Can be replaced with melted butter for a richer taste.
  • Spices: Experiment with your favorite seasoning blends!

Expert Tips for Perfect Chicken

Side view of perfectly baked chicken breast garnished with spices on a plate.

To ensure your chicken breast comes out perfect every time, consider these expert tips:

  • Even Thickness: Pound the chicken breasts to an even thickness to promote even cooking and prevent dryness.
  • Resting Time: Let the chicken rest for a few minutes after baking to lock in the juices.
  • Thermometer Check: Use a meat thermometer to ensure the chicken reaches an internal temperature of 165°F.
  • Marinate: For extra flavor, marinate the chicken for a few hours or overnight.
  • Use Fresh Herbs: Fresh herbs can elevate the flavor of your chicken even more.
  • Try Citrus: A squeeze of lemon or lime juice before serving brightens the dish.
  • Don’t Overcrowd: Bake in batches if necessary to avoid steaming the chicken.
  • Pan Juices: Brush the chicken with pan juices before serving for added moisture.

Common Mistakes and Troubleshooting

Even seasoned cooks can make mistakes. Here are common pitfalls and how to avoid them:

  • Overcooking: Always monitor cooking time; chicken can dry out quickly if overcooked.
  • Skipping the Rest: Don’t skip resting the chicken; it’s crucial for maintaining moisture.
  • Not Seasoning: Don’t skimp on seasoning. Chicken needs flavor, so be generous!

Variations to Try

Feeling adventurous? Here are some fun variations to this recipe:

  • Herb-Crusted: Add chopped fresh herbs like rosemary or thyme to the seasoning mix for a fresh twist.
  • Honey Garlic: Mix honey and minced garlic for a sweet glaze.
  • BBQ Style: Brush with your favorite BBQ sauce during the last 5 minutes of baking.
  • Stuffed Chicken: Stuff the chicken breasts with spinach and feta before baking for a delicious twist.

Storage and Make-Ahead Instructions

This baked chicken is perfect for meal prep! Here’s how to store it:

  • Refrigeration: Store leftovers in an airtight container for up to 4 days.
  • Freezing: Freeze cooked chicken for up to 3 months. Thaw in the fridge before reheating.
  • Make-Ahead: Prepare the chicken and season it a day in advance for quick baking later.

Frequently Asked Questions

Here are some common questions about baked chicken breasts:

  • Can I use frozen chicken breasts? Yes, but thaw them completely before baking for even cooking.
  • What’s the best way to reheat chicken? Reheat in the oven at a low temperature or in the microwave with a splash of water to keep it moist.
  • How do I know when the chicken is done? Use a meat thermometer; it should read 165°F in the thickest part.
  • Can I bake chicken with skin on? Absolutely! Just adjust cooking time as needed.
  • What should I serve with baked chicken? Pair it with roasted vegetables, rice, or a fresh salad for a complete meal.
  • Can I double the recipe? Yes, just ensure your baking dish has enough space for all the chicken.
  • How can I make it spicier? Add more chili powder or even cayenne pepper to the seasoning mix.
  • Is this recipe gluten-free? Yes, all the ingredients listed are gluten-free!

Nutrition Tips and Dietary Adaptations

For those mindful of dietary needs, here are some tips:

  • Paleo-Friendly: This recipe is already paleo-friendly as it uses whole ingredients.
  • Low-Carb: Perfect for low-carb diets; pair with non-starchy vegetables.
  • Dairy-Free: Naturally dairy-free, making it suitable for various dietary restrictions.

Equipment Recommendations

To make this recipe a breeze, here’s some equipment you’ll find handy:

  • Meat Pounder: For even cooking, a meat pounder or rolling pin is essential.
  • Baking Dish: A large baking dish or rimmed baking sheet works best.
  • Meat Thermometer: A reliable meat thermometer ensures your chicken is cooked perfectly.

Serving Suggestions

Finally, here are some delightful ways to serve your baked chicken:

  • With Sides: Serve with mashed potatoes, steamed broccoli, or a vibrant salad.
  • In Wraps: Slice the chicken and use it in wraps with veggies and your favorite sauce.
  • On Salads: Add sliced chicken to a bed of greens for a healthy lunch option.

Conclusion: Bringing Family Together

Cooking is about sharing love, and this Juicy Baked Chicken Breast recipe embodies just that. With its simple preparation and delicious flavors, it’s bound to become a staple in your home. So gather your family around the table, share stories, and enjoy every bite of this comforting dish. Happy cooking, friends!

Juicy 30-Minute Baked Chicken Breast

Prep Time 10 minutes
Cook Time 20 minutes
Total Time 30 minutes
Servings 4 pieces
Calories 250
This quick and easy baked chicken breast recipe delivers juicy, flavorful meat in just 30 minutes, perfect for a healthy weeknight dinner.

Ingredients

Chicken

  • 4 pieces medium-sized chicken breasts (about 2 pounds total)
  • 1 teaspoon garlic powder
  • 1 teaspoon onion powder
  • 1 teaspoon paprika
  • 1 teaspoon dried parsley
  • 0.5 teaspoon dried mustard
  • 0.5 teaspoon chili powder (optional)
  • 1.5 teaspoons kosher salt (or to taste)
  • 0.25 teaspoon black pepper
  • 2 tablespoons olive oil or avocado oil

Instructions 

  • Preheat oven to 425°F (220°C) and lightly grease a baking dish.
  • Pound chicken breasts to even thickness or cut in half horizontally.
  • Toss chicken with spices and oil until coated. Arrange in baking dish.
  • Bake for 18-20 minutes until internal temperature reaches 165°F (74°C).
  • Rest briefly, then slice and serve with pan juices.

Notes

Ensure chicken is cooked through for safety and juiciness.
Calories: 250kcal
Cost: $15
Course: Main Course
Cuisine: American
Keyword: baked, chicken, quick

Welcome to the Comfort of Home Cooking

There’s something heartwarming about a well-cooked chicken dish that brings back memories of family gatherings and cozy evenings. This recipe for Melt-In-Your-Mouth Chicken Breasts is not just about food; it’s about creating moments that taste like home. With just a handful of simple ingredients, you can whip up a dish that leaves everyone asking for seconds. Let’s dive into the warmth of this recipe, where every bite is a reminder of love and care.

Why You’ll Love This Recipe

This recipe isn’t just another chicken dish; it’s a celebration of flavor, ease, and nostalgia. Here are a few reasons why you’ll want to make this your go-to chicken recipe:

  • Unbelievably Tender: The creamy mixture not only adds flavor but locks in moisture, ensuring your chicken is juicy and tender.
  • Simple Ingredients: With just a few pantry staples, you can create a dish that feels gourmet without any fuss.
  • Quick Preparation: From prep to oven, this dish takes minimal time, perfect for busy weeknights or unexpected guests.
  • Perfect for Meal Prep: This chicken is great for making ahead, so you can enjoy leftovers throughout the week.
  • Versatile Serving Options: Pair it with your favorite sides, and you’ve got a meal that fits any occasion—be it a family dinner or a cozy gathering with friends.

Ingredients You’ll Need

Gather these simple ingredients to create your melt-in-your-mouth chicken:

  • 4 boneless, skinless chicken breasts
  • 1 cup mayonnaise
  • ½ cup grated Parmesan cheese
  • 1 teaspoon garlic powder
  • 1 teaspoon onion powder
  • 1 teaspoon paprika
  • ½ teaspoon salt
  • ½ teaspoon black pepper
  • 1 teaspoon dried parsley (optional, for garnish)

Substitutions: If you’re looking to mix things up, consider these alternatives:

  • Greek Yogurt: Swap mayonnaise for Greek yogurt for a healthier twist.
  • Cheddar Cheese: Use shredded cheddar instead of Parmesan for a different flavor profile.
  • Herbs: Fresh herbs like thyme or rosemary can replace dried parsley for a more vibrant taste.

Step-by-Step Instructions for Melt-In-Your-Mouth Chicken

Side view of succulent chicken breast on a plate, showcasing its tender texture.

Follow these simple steps to create your delicious chicken:

  • Step 1: Preheat the Oven
    Start by preheating your oven to 375°F (190°C). This ensures even cooking and helps the chicken turn out perfectly tender. While the oven heats up, line a baking dish with parchment paper or lightly grease it with cooking spray to prevent sticking.
  • Step 2: Prepare the Creamy Mixture
    In a medium-sized bowl, combine mayonnaise, Parmesan cheese, garlic powder, onion powder, paprika, salt, and black pepper. Mix everything together until you get a smooth, creamy consistency. This mixture is the secret to keeping the chicken incredibly moist while adding a deliciously rich flavor.
  • Step 3: Coat the Chicken
    Place the chicken breasts in the prepared baking dish. Using a spoon or spatula, evenly spread the creamy mixture over the top of each piece of chicken. Make sure to coat the entire surface—this will help create that golden, slightly crispy topping once baked.
  • Step 4: Bake to Perfection
    Transfer the dish to the preheated oven and bake for 35–40 minutes, or until the chicken is fully cooked and reaches an internal temperature of 165°F (75°C). The top should turn slightly golden and bubbly.
  • Step 5: Let It Rest & Serve
    Once out of the oven, let the chicken rest for a couple of minutes before serving. This helps the juices redistribute, ensuring each bite is as tender and flavorful as possible. Garnish with dried parsley for a pop of color and an extra touch of flavor.

Pro Tips for Perfect Melt-In-Your-Mouth Chicken

To ensure your chicken turns out perfectly every time, keep these tips in mind:

  • Use Thin-Cut Chicken Breasts: Thin-cut chicken breasts or tenders cook faster and more evenly, reducing baking time by 10-15 minutes.
  • Pat the Chicken Dry: Rinse and pat the chicken breasts dry with paper towels before adding sauce to help it stick better.
  • Don’t Skip the Resting Time: Allowing the chicken to rest after baking is crucial for juicy results.
  • Keep an Eye on the Temperature: Use a meat thermometer to ensure your chicken reaches 165°F (75°C) for safety and optimal texture.
  • Experiment with Spices: Feel free to add your favorite spices to the creamy mixture for a personal touch.

Common Mistakes and Troubleshooting

Even the best cooks can run into a few bumps. Here’s how to avoid common pitfalls:

  • Overcooking: Keep a close eye on the chicken’s internal temperature—overcooked chicken can become dry and tough.
  • Insufficient Coating: Ensure the creamy mixture completely coats the chicken for the best flavor and texture.
  • Skipping the Resting Time: Don’t rush to cut into the chicken right away; let it rest to keep it juicy.

Variations to Try

Switch things up with these creative variations:

  • Herb-Infused Chicken: Add fresh herbs like thyme or oregano to the creamy mixture for an aromatic touch.
  • Spicy Kick: Mix in a teaspoon of cayenne pepper or hot sauce for a spicy version.
  • Cheesy Delight: Incorporate different cheeses like mozzarella or gouda for a cheesy twist.
  • Vegetable Add-ins: Add spinach or sun-dried tomatoes to the creamy mixture for a flavorful, nutritious boost.

Storage and Make-Ahead Instructions

This dish is perfect for meal prep. Here’s how to store and reheat:

  • Refrigeration: Store leftovers in an airtight container in the fridge for up to 3 days.
  • Freezing: Freeze cooked chicken in an airtight container for up to 2 months. Thaw in the fridge overnight before reheating.
  • Reheating: Reheat in the oven at 350°F (175°C) until warmed through, or microwave in short intervals until hot.

Frequently Asked Questions

Here are some common questions about this recipe:

  • Can I make Melt-In-Your-Mouth Chicken ahead of time?
    Yes, you can prepare the chicken and creamy mixture ahead of time, then bake it just before serving.
  • What can I serve with this dish?
    This chicken pairs well with mashed potatoes, steamed vegetables, or a fresh garden salad.
  • Can I use chicken thighs instead of breasts?
    Absolutely! Chicken thighs will also work well with this recipe, just adjust the cooking time as needed.
  • Is this recipe gluten-free?
    Yes, all the ingredients used are gluten-free, making it perfect for those with gluten sensitivities.
  • Can I use low-fat mayonnaise?
    Yes, low-fat mayonnaise is a great alternative if you’re watching your calories.
  • What’s the best way to know when the chicken is done?
    Using a meat thermometer is the best way to ensure your chicken is fully cooked.
  • Is it okay to double this recipe?
    Definitely! Just make sure your baking dish has enough space for the chicken to cook evenly.
  • Can I add vegetables to the baking dish?
    Yes, you can add vegetables like broccoli or carrots to roast alongside the chicken for a complete meal.

Nutritional Tips and Dietary Adaptations

This recipe can easily be adapted for different dietary needs:

  • Low-Carb: Replace mayonnaise with avocado for a creamy, low-carb option.
  • High-Protein: Serve alongside quinoa or chickpeas for an extra protein boost.
  • Dairy-Free: Use a dairy-free mayonnaise to keep it dairy-free and still delicious.

Equipment Recommendations

To make this recipe easier, here’s what you’ll need:

  • 9×13-inch Baking Dish: Perfect size for this recipe and easy to clean.
  • Mixing Bowl: A medium-sized bowl for mixing the creamy mixture.
  • Meat Thermometer: Ensure your chicken is cooked to perfection every time.

Serving Suggestions

Enjoy your melt-in-your-mouth chicken with these delightful pairings:

  • Classic Mashed Potatoes: For a comforting side that complements the creaminess of the chicken.
  • Garden Salad: A fresh salad adds a light contrast to the rich chicken.
  • Steamed Broccoli: A healthy, colorful addition that balances the meal.

Conclusion: Bringing It All Together

This Melt-In-Your-Mouth Chicken Breast recipe is a true testament to the beauty of simple cooking. It’s easy, comforting, and full of flavor, making it perfect for any occasion. Whether you’re cooking for a family dinner or prepping for the week ahead, this dish will surely warm your heart and fill your stomach. So gather your loved ones, share a plate, and savor the moments that make life truly special. Happy cooking!

Melt-In-Your-Mouth Chicken Breast

Prep Time 10 minutes
Cook Time 40 minutes
Total Time 50 minutes
Servings 4 pieces
Calories 350
This creamy baked chicken recipe delivers tender, flavorful breasts with a golden topping, perfect for a quick and satisfying meal.

Ingredients

Chicken

  • 4 pieces boneless, skinless chicken breasts
  • 1 cup mayonnaise
  • ½ cup grated Parmesan cheese
  • 1 teaspoon garlic powder
  • 1 teaspoon onion powder
  • 1 teaspoon paprika
  • ½ teaspoon salt
  • ½ teaspoon black pepper
  • 1 teaspoon dried parsley (optional, for garnish)

Instructions 

  • Preheat oven to 375°F (190°C). Line a baking dish.
  • Mix mayonnaise, Parmesan, garlic, onion, paprika, salt, and pepper until smooth.
  • Spread mixture over chicken breasts and place in dish.
  • Bake for 35–40 minutes until cooked through and golden.
  • Rest briefly, garnish with parsley, and serve.

Notes

Ensure chicken reaches an internal temperature of 165°F (75°C) for safety.
Calories: 350kcal
Cost: $15
Course: Main Course
Keyword: baked, chicken, creamy

Transform Your Weeknight Dinners with Garlic Butter Baked Chicken

There’s something about a hearty chicken dish that transforms a simple weeknight dinner into a heartwarming occasion. That’s exactly what this Garlic Butter Baked Chicken Breast recipe offers. It’s not just about cooking; it’s about bringing family together around the dinner table, sharing stories, and enjoying the warm memories that come with a lovingly prepared meal. Whether you’re a seasoned chef or just starting your culinary journey, this recipe is designed to be simple yet deeply satisfying.

In this article, we’ll take a deep dive into the ingredients, cooking techniques, and tips that will help you master this delicious dish. So roll up your sleeves and let’s get cooking!

Why You’ll Love This Recipe

  • Quick and Easy: This recipe takes less than 30 minutes to prepare, making it perfect for busy weeknights.
  • Flavorful Garlic Butter: The rich garlic butter sauce infuses the chicken with incredible flavor, creating a dish that feels gourmet.
  • Juicy and Tender: Searing the chicken before baking locks in moisture, ensuring every bite is succulent.
  • Versatile: This recipe works with chicken breasts, thighs, or even drumsticks, making it adaptable for whatever you have on hand.
  • Meal Prep Friendly: Cook a batch on the weekend and enjoy leftovers throughout the week—perfect for quick lunches or dinners.

Ingredients Needed for Garlic Butter Baked Chicken

Before you start cooking, gather the following ingredients:

  • 3 boneless skinless chicken breasts: The star of our dish, providing a lean protein base.
  • 4 tbsp unsalted butter, melted: Adds richness and flavor to the garlic butter sauce.
  • 1 tbsp olive oil: For searing the chicken, enhancing flavor and texture.
  • 2 cloves garlic, minced: The key ingredient that brings that wonderful aroma and taste.
  • 1 tsp Italian seasoning: A blend of herbs that complements the garlic perfectly.
  • 1 tbsp fresh parsley, chopped: For a fresh garnish that adds color and flavor.
  • ½ tsp paprika: Adds depth and a hint of smokiness to the dish.
  • ¼ tsp paprika (for sauce): Enhances the garlic butter sauce with a beautiful color.
  • Salt and black pepper to taste: Essential for seasoning and bringing out the chicken’s natural flavors.

Optional Substitutions

Side view of succulent garlic butter chicken breast on a plate with parsley.

If you don’t have all the ingredients on hand, here are some substitutions:

  • Butter: Use ghee or margarine if you want a dairy-free option.
  • Chicken thighs: If you prefer darker meat, chicken thighs are a great substitute and stay moist during cooking.
  • Fresh herbs: Feel free to substitute parsley with thyme or rosemary for different flavor profiles.
  • Olive oil: Can be replaced with avocado oil or melted coconut oil, depending on your preference.

How to Make Garlic Butter Baked Chicken

Now that you have your ingredients ready, follow these simple steps:

  1. Preheat oven to 400°F (200°C).
  2. Pat chicken breasts dry with a paper towel and season both sides with salt, pepper, and ½ tsp paprika.
  3. In an oven-safe skillet, heat olive oil over medium heat. Sear the chicken for 1–2 minutes per side until golden brown.
  4. In a bowl, mix melted butter, minced garlic, chopped parsley, Italian seasoning, and ¼ tsp paprika.
  5. Pour the garlic butter mixture over the chicken in the skillet.
  6. Transfer the skillet to the oven and bake for 20–25 minutes or until the internal temperature reaches 165°F (75°C).
  7. Remove from the oven and spoon the garlic butter over the chicken before serving.

Pro Tips for Juicy Chicken

  • Let it Rest: After baking, allow the chicken to rest for 5 minutes before cutting—this helps retain juices.
  • Use a Meat Thermometer: For perfectly cooked chicken, use a meat thermometer to check the internal temperature.
  • Don’t Skip the Sear: Searing the chicken locks in moisture and adds a beautiful golden crust.
  • Season Generously: Ensure you season the chicken well with salt and pepper to enhance flavors.
  • Experiment with Spices: Try adding different spices like cumin or chili powder for a unique twist.
  • Cover with Foil: If the chicken starts to brown too much while baking, cover it loosely with foil.
  • Use Fresh Ingredients: Fresh garlic and herbs make all the difference in flavor.
  • Batch Cook: Double the recipe and freeze half for a quick meal later.

Common Mistakes to Avoid

  • Not Patting Dry: Skipping this step can lead to steamed chicken instead of a nice sear.
  • Overcooking: Using a thermometer can prevent the chicken from drying out.
  • Skipping Rest Time: Cutting into the chicken right away lets the juices escape.
  • Using Cold Chicken: Letting chicken come to room temperature before cooking helps it cook evenly.

Variations to Try

Looking to mix things up? Here are some delightful variations:

  • Garlic Herb Butter Chicken: Add fresh thyme or rosemary to the garlic butter for an herbal twist.
  • Spicy Garlic Chicken: Incorporate red pepper flakes into the garlic butter for a kick.
  • Honey Garlic Chicken: Drizzle honey over the chicken before baking for a sweet glaze.
  • Lemon Garlic Chicken: Add lemon juice and zest to the butter for a refreshing flavor boost.

Storing and Reheating Garlic Butter Baked Chicken

This dish is perfect for meal prep! Here’s how to store and reheat it:

  • Refrigeration: Store leftovers in an airtight container in the fridge for up to 4 days.
  • Freezing: To freeze, wrap chicken tightly in plastic wrap and aluminum foil; it will keep for up to 3 months.
  • Reheating: Reheat in the oven at 350°F (175°C) until warmed through, or in the microwave for a quick option.

Comprehensive FAQ About Garlic Butter Baked Chicken Breast

  • Can I use chicken thighs instead of chicken breasts? Yes, chicken thighs are a great substitute and will yield a juicier result.
  • How do I prevent the chicken from drying out when baking? Ensure you don’t overcook it; use a meat thermometer to check for doneness.
  • What’s a good side dish for this chicken? Serve it with roasted vegetables, mashed potatoes, or a fresh salad for a complete meal.
  • Can I make this recipe ahead of time? Absolutely! Prepare the chicken and garlic butter, then bake when ready to serve.
  • What if I don’t have an oven-safe skillet? You can transfer the seared chicken to a baking dish before adding the garlic butter.
  • How can I make this recipe healthier? Use less butter or substitute with olive oil, and pair it with a side of veggies.
  • What can I do with leftover garlic butter? Use it to sauté vegetables or drizzle over pasta for added flavor.
  • Is this recipe gluten-free? Yes, all the ingredients listed are gluten-free!

Nutritional Information and Dietary Adaptations

This Garlic Butter Baked Chicken is not only delicious but also packed with nutrition. Each serving contains a good amount of protein and essential vitamins. Here are some dietary adaptations:

  • Low-Carb/Keto: Perfect as is, just skip any starchy sides.
  • Paleo: Use ghee instead of butter, and enjoy with plenty of veggies.
  • Whole30: Ensure all ingredients meet Whole30 standards, particularly the butter replacement.
  • Gluten-Free: This recipe is naturally gluten-free, making it safe for those with gluten sensitivities.

Equipment Recommendations

A few essential tools will make your cooking experience smoother:

  • Oven-Safe Skillet: Ideal for searing and baking in one dish.
  • Meat Thermometer: Ensures your chicken is cooked to the perfect internal temperature.
  • Mixing Bowl: For combining the garlic butter ingredients easily.
  • Spatula or Tongs: Helpful for flipping the chicken during the searing process.

Serving Suggestions

To round out your meal, consider pairing this Garlic Butter Baked Chicken with:

  • Roasted Vegetables: Carrots, zucchini, or Brussels sprouts complement the flavors beautifully.
  • Mashed Potatoes: Rich, buttery mashed potatoes soak up the garlic butter perfectly.
  • Fresh Salad: A light salad with vinaigrette adds a refreshing contrast.
  • Rice or Quinoa: Serve with a side of rice or quinoa to soak up the delicious garlic butter sauce.

As you sit down to enjoy this meal, remember that cooking is about more than just food; it’s about bringing people together and creating memories. So gather your loved ones, serve up some Garlic Butter Baked Chicken, and enjoy the warmth that fills your home. Happy cooking!

Garlic Butter Baked Chicken Breast Recipe

Prep Time 10 minutes
Cook Time 25 minutes
Total Time 35 minutes
Servings 4 servings
Calories 350
This flavorful baked chicken breast is infused with garlic and herbs, making it a perfect quick and satisfying meal.

Ingredients

Chicken

  • 3 pieces boneless skinless chicken breasts
  • 4 tbsp unsalted butter, melted
  • 1 tbsp olive oil
  • 2 cloves garlic, minced
  • 1 tsp Italian seasoning
  • 1 tbsp fresh parsley, chopped
  • ½ tsp paprika
  • ¼ tsp paprika (for sauce)
  • to taste Salt and black pepper

Instructions 

  • Preheat oven to 400°F (200°C). Season chicken with salt, pepper, and ½ tsp paprika.
  • Heat olive oil in an oven-safe skillet and sear chicken 1-2 minutes per side until golden.
  • Mix melted butter, garlic, parsley, Italian seasoning, and ¼ tsp paprika in a bowl.
  • Pour garlic butter mixture over chicken and transfer skillet to oven.
  • Bake for 20-25 minutes until internal temperature reaches 165°F (74°C). Spoon garlic butter over chicken before serving.

Notes

Ensure chicken reaches an internal temperature of 165°F for safety.
Calories: 350kcal
Cost: $15
Course: Main Course
Cuisine: American
Keyword: baked, chicken, Garlic

Welcome to the Heart of Comfort Cooking

Gather ’round, friends! Today, we’re diving into a recipe that’s as comforting as a warm hug on a chilly evening—Baked Honey Mustard Chicken. This dish is more than just a combination of sweet honey and tangy mustard; it’s a celebration of simple, rustic ingredients that come together to create a meal bursting with flavor and warmth. With roots in family traditions and the rich culinary heritage of the South, this recipe is your ticket to a cozy dinner that will have everyone asking for seconds.

Why You’ll Love This Recipe

Let me share a few reasons why this Baked Honey Mustard Chicken will become a cherished favorite in your kitchen:

  • Quick and Easy: With just a handful of ingredients and straightforward steps, you can whip this up in no time, making it perfect for weeknight dinners.
  • One-Pan Wonder: This recipe is baked in a single dish, which means easy cleanup—less time scrubbing pots and pans and more time enjoying your meal.
  • Rich Flavor Profile: The combination of honey and mustard creates a delightful balance of sweet and tangy, perfect for satisfying your taste buds.
  • Versatile Dish: Pair it with roasted vegetables or a fresh salad, and you have a complete meal that’s both nourishing and delightful.
  • Family-Friendly: This dish is a hit with both kids and adults, ensuring that everyone at the table is happy and satisfied.

Ingredient Breakdown

Let’s take a closer look at the ingredients that make this dish special:

  • Chicken Breasts: 4 boneless, skinless chicken breasts are ideal for this recipe. They cook evenly and absorb the flavors beautifully.
  • Salt and Pepper: Essential for seasoning, these staples enhance the natural flavors of the chicken.
  • Paprika and Garlic Powder: These spices add depth and warmth, creating a flavorful base for your chicken.
  • Dijon Mustard: ⅓ cup is the star of the sauce, providing that sharp tang that pairs so well with honey.
  • Honey: ¼ cup for sweetness. Using high-quality honey will elevate the dish’s overall flavor.
  • Whole Grain Mustard: 2 tablespoons introduce texture and a delightful bite to the sauce.
  • Olive Oil: 1 tablespoon helps to moisten the chicken and assists in creating a lovely glaze.
  • Fresh Parsley: Optional for garnish, it adds a pop of color and freshness to the finished dish.

Feel free to explore substitutions based on what you have in your pantry. For example, if you only have chicken thighs, they work beautifully too!

How to Make Baked Honey Mustard Chicken

Side angle of tender chicken breasts coated in honey mustard glaze on a plate.

Now, let’s roll up our sleeves and get cooking! Follow these steps to create a dish that’s sure to become a staple in your home.

  1. Preheat the Oven: Start by preheating your oven to 375°F (190°C). Lightly grease a baking dish or line it with parchment paper for easy cleanup.
  2. Season the Chicken: Pat the chicken breasts dry with paper towels. Season both sides generously with salt, pepper, paprika, and garlic powder. This simple step enhances the flavor before the sauce even touches it.
  3. Make the Honey Mustard Sauce: In a small mixing bowl, whisk together the Dijon mustard, honey, whole grain mustard, and olive oil. The sauce should be smooth and golden with visible mustard seeds.
  4. Pour and Coat: Place the seasoned chicken breasts in the baking dish. Pour the honey mustard sauce over the top, making sure each piece is well coated. Use a spoon or brush to spread it evenly.
  5. Bake to Perfection: Bake uncovered for 30–35 minutes, or until the internal temperature reaches 165°F (74°C). Baste with sauce once or twice during cooking for maximum flavor.
  6. Rest and Garnish: Remove from the oven and let the chicken rest for 5 minutes. Spoon extra sauce from the dish over the top and garnish with fresh parsley if desired.

Pro Tips for Perfect Baked Honey Mustard Chicken

To ensure your dish comes out perfectly every time, consider these expert insights:

  • Use Quality Ingredients: The better the honey and mustard, the better your sauce will be. Opt for organic or locally sourced options if available.
  • Don’t Skip the Resting Period: Letting the chicken rest after baking allows the juices to redistribute, ensuring moist, tender meat.
  • Baste for Flavor: Basting the chicken halfway through cooking keeps it juicy and enhances the flavor of the sauce.
  • Check Temperature: Always use a meat thermometer to check for doneness. It helps avoid overcooking.
  • Add Heat: If you like a bit of spice, consider adding a pinch of red pepper flakes to the honey mustard sauce for an extra kick.
  • Experiment with Mustards: Try different mustard varieties, like spicy brown or yellow mustard, to find your favorite flavor combination.
  • Make it a Meal: Serve with sides like roasted veggies, rice, or a fresh green salad for a complete meal.
  • Marinate for Extra Flavor: If you have time, marinate the chicken in the sauce for 30 minutes before baking for deeper flavor.

Common Mistakes and Troubleshooting

Even the best cooks make mistakes from time to time. Here’s how to troubleshoot common issues:

  • Dry Chicken: If your chicken turns out dry, it may have been overcooked. Always use a meat thermometer to ensure the correct internal temperature.
  • Too Much Sauce: If the sauce is overpowering, consider reducing the amount of mustard or adding more honey to balance the flavors.
  • Uneven Cooking: Ensure the chicken pieces are of similar size for even cooking. If they’re different sizes, use a meat mallet to pound them to an even thickness.

Variations to Try

Feel free to customize this recipe to suit your taste! Here are some variations:

  • Honey Garlic Chicken: Swap out the mustard for minced garlic and add soy sauce for an Asian-inspired twist.
  • Herb-Infused Chicken: Add fresh herbs like thyme or rosemary to the sauce for a fragrant flavor boost.
  • Spicy Honey Mustard Chicken: Mix in some hot sauce or cayenne pepper to the honey mustard sauce for a fiery kick.
  • Mustard Herb Crust: For a crunchy texture, add breadcrumbs mixed with herbs on top of the chicken before baking.

Storage and Make-Ahead Instructions

Want to prepare ahead of time? Here’s how:

  • Make-Ahead: You can prepare the chicken and sauce a day in advance. Store them separately in the fridge until ready to bake.
  • Storage: Leftover baked chicken can be stored in an airtight container in the fridge for up to 3 days. Reheat gently in the oven to maintain moisture.
  • Freezing: If you want to make this dish ahead of time, you can freeze the sauce and uncooked chicken together. Thaw it in the fridge overnight before baking.

Frequently Asked Questions

We’ve compiled some of the most common questions about this recipe:

  • Can I use bone-in chicken? Yes, bone-in chicken can be used, but cooking times may vary.
  • What can I serve with this dish? Roasted veggies, mashed potatoes, or a fresh salad pair beautifully with honey mustard chicken.
  • Can I grill this chicken? Absolutely! This marinade works well for grilling. Just reduce the cooking time.
  • How do I know when the chicken is done? Use a meat thermometer; the internal temperature should reach 165°F (74°C).
  • Can I make this gluten-free? Yes! Ensure your mustard and other ingredients are certified gluten-free.
  • What type of mustard should I use? Dijon mustard is recommended for its balance of flavor, but feel free to experiment with others.
  • Can I add vegetables to the baking dish? Yes! Add veggies like carrots or bell peppers to roast alongside the chicken.
  • How long does it take to bake chicken breasts? Typically, it takes about 30-35 minutes in a preheated oven.

Nutritional Tips and Dietary Adaptations

This recipe can easily be adapted to meet various dietary needs:

  • Low-Carb Option: Serve with cauliflower rice or steamed broccoli to keep it low-carb.
  • Reduced Sugar: Use a sugar-free honey alternative for a lower-sugar version.
  • High-Protein: Pair with quinoa or legumes for an added protein boost.

Essential Equipment for Success

Here’s what you’ll need to make this dish a success:

  • Oven: A reliable oven is crucial for even cooking.
  • Baking Dish: A 9×13 inch baking dish works well for this recipe.
  • Meat Thermometer: This tool is essential for checking the chicken’s doneness.
  • Mixing Bowl: For whisking together your sauce.
  • Whisk: A good whisk ensures your sauce is smooth and well combined.

Serving Suggestions

To complete your meal, consider these serving ideas:

  • Roasted Vegetables: Carrots, zucchini, and bell peppers make a colorful and nutritious side.
  • Rice Pilaf: A fluffy rice pilaf pairs wonderfully with the rich sauce.
  • Crusty Bread: Serve with a loaf of crusty bread to soak up every drop of the delicious sauce.
  • Fresh Salad: A simple green salad with a light vinaigrette balances the richness of the chicken.

Conclusion

There you have it, friends! A heartwarming recipe for Baked Honey Mustard Chicken that’s sure to become a beloved fixture at your dinner table. With its delightful blend of flavors, ease of preparation, and comforting nature, this dish embodies the spirit of home cooking. So gather your loved ones, share a meal, and create new memories around the table. Happy cooking, and remember—the best meals are made with love!

Baked Honey Mustard Chicken

Prep Time 10 minutes
Cook Time 35 minutes
Total Time 45 minutes
Servings 4 pieces
Calories 350
A flavorful and easy baked chicken recipe glazed with a tangy honey mustard sauce, perfect for a quick dinner.

Ingredients

Chicken

  • 4 pieces boneless, skinless chicken breasts
  • ½ teaspoon paprika
  • ½ teaspoon garlic powder
  • cup Dijon mustard
  • ¼ cup honey
  • 2 tablespoons whole grain mustard
  • 1 tablespoon olive oil

Garnish

  • to taste Fresh chopped parsley (optional)

Instructions 

  • Preheat oven to 375°F (190°C). Grease a baking dish.
  • Season chicken with salt, pepper, paprika, and garlic powder. Mix Dijon mustard, honey, whole grain mustard, and olive oil to make the sauce.
  • Place chicken in dish, pour sauce over, and spread evenly.
  • Bake uncovered for 30–35 minutes, basting once or twice.
  • Rest for 5 minutes, then garnish with parsley if desired.

Notes

For extra flavor, baste the chicken with sauce during baking.
Calories: 350kcal
Cost: $15
Course: Main Course
Cuisine: American
Keyword: chicken, honey, mustard

Welcome to a Hearty Home-Cooked Delight

Let’s gather ‘round the kitchen table and dive into a dish that’s perfect for busy weeknights but feels downright special. Introducing the One Pot Creamy Cajun Sausage Pasta. This recipe is not just a meal; it’s a celebration of rich flavors, simple ingredients, and the beauty of cooking without the fuss. In just 30 minutes, you’ll have a warm, comforting dish that brings everyone together, making it a fantastic option for families, friends, or just a quiet night in. With smoky sausage, vibrant veggies, and a creamy sauce that clings to every piece of pasta, this dish is sure to become a staple in your kitchen.

Why You’ll Love This Recipe

This recipe isn’t just about filling bellies; it’s about heart and soul. Here are a few reasons why you’ll adore it:

  • Quick and Easy: Ready in just 30 minutes, perfect for those hectic weeknights.
  • One Pot Wonder: Minimal cleanup means more time to enjoy your meal.
  • Flavor Packed: Smoky sausage and zesty Cajun seasoning deliver bold flavors with every bite.
  • Customizable: Make it your own with various proteins or veggies based on what you have on hand.
  • Comfort Food: Creamy, rich, and satisfying—this dish wraps you in a warm hug with every forkful.

Ingredients You’ll Need

Here’s what you’ll need to bring this dish to life. Each ingredient plays a crucial role in creating a well-rounded flavor profile.

  • 10 ounces smoked sausage: Andouille or kielbasa work wonders for that authentic taste.
  • 4 ounces pasta: Penne or rigatoni are perfect choices for holding onto the creamy sauce.
  • 2 tablespoons Cajun seasoning: A blend of spices that provides a kick—store-bought or homemade.
  • 1 tablespoon olive oil: For sautéing and adding richness.
  • 1 cup diced bell peppers: Use a colorful mix to enhance both flavor and presentation.
  • 1/2 cup diced onion: Adds sweetness and depth to the dish.
  • 2 cups low-sodium chicken broth: The foundation of your sauce—adjust for desired thickness.
  • 1 cup heavy cream: For that luxurious, creamy texture.
  • 1 cup shredded Parmesan cheese: A finishing touch that ties all the flavors together.
  • 1/2 teaspoon garlic powder: For that aromatic flavor boost.
  • 1/4 teaspoon cayenne pepper: Optional, for those who like a bit more heat.
  • 1 cup fresh spinach: Toss it in for added color and nutrition.
  • Chopped parsley: For garnishing and a fresh finish.

How to Make One Pot Creamy Cajun Sausage Pasta

A bowl of one pot creamy Cajun sausage pasta, featuring sausage slices and a creamy sauce.

Let’s roll up our sleeves and get cooking! This step-by-step guide will have you savoring your meal in no time.

  • Step 1: Brown the Sausage – Heat the olive oil in a large pot over medium heat. Add the sliced sausage, cooking until browned and slightly crispy.
  • Step 2: Sauté the Veggies – Toss in the diced onions and bell peppers, stirring until they soften up, about 3-4 minutes.
  • Step 3: Bring on the Garlic and Cajun Seasoning – Add the garlic powder and Cajun seasoning, stirring until fragrant—about 30 seconds.
  • Step 4: Add Pasta, Broth, and Tomatoes – Pour in the chicken broth and bring the mixture to a boil. Add the pasta and ensure it’s submerged in the liquid.
  • Step 5: Simmer Until Tender – Reduce heat and let it simmer, stirring occasionally, until the pasta is cooked al dente, roughly 8-10 minutes.
  • Step 6: Thicken the Sauce – If you prefer a thicker sauce, let it simmer for a few more minutes. You can add a bit more broth if it gets too thick.
  • Step 7: Finish with Cream and Parmesan – Stir in the heavy cream and Parmesan cheese, mixing until smooth and creamy.
  • Step 8: Garnish and Serve – Stir in fresh spinach until wilted. Garnish with parsley before serving.

Substitutions and Additions

This recipe is as flexible as your culinary creativity allows. Here are some substitutions you can make:

  • Protein Swap: Use chicken breast or shrimp for a different protein source.
  • Pasta Variation: Swap out the pasta for whole wheat or gluten-free options to suit dietary needs.
  • Vegetable Boost: Add mushrooms, zucchini, or kale for extra nutrition.
  • Spice it Up: Increase the cayenne pepper or add diced jalapeños for an extra kick.

Tips for Success

Follow these pro tips to ensure your dish turns out perfect every time:

  • Don’t Rinse Your Pasta: The starch helps the sauce adhere better, creating a creamier dish.
  • Taste as You Go: Adjust seasoning based on your preference throughout the cooking process.
  • Use Fresh Ingredients: Fresh veggies and spices make a significant difference in flavor.
  • Store Leftovers Properly: Keep in an airtight container in the fridge for up to 3 days.
  • Reheat Gently: When reheating, add a splash of chicken broth to loosen the sauce.
  • Make Ahead: Prep your ingredients in advance and throw them together when it’s time to cook.
  • Garnish Generously: A sprinkle of fresh herbs elevates the dish’s appearance and flavor.
  • Experiment! Don’t hesitate to try new ingredients or spices to find your favorite version.

How to Store One Pot Creamy Cajun Sausage Pasta

Leftovers? You bet! Here’s how to store and reheat your delicious creation:

  • In the Fridge: Store in an airtight container for up to 3 days. Reheat on the stove over low heat, adding a splash of broth if necessary.
  • In the Freezer: Freeze in portions for up to 2 months. Thaw overnight in the fridge before reheating.
  • Make-Ahead Tip: You can sauté the sausage and veggies ahead of time, then add the remaining ingredients when ready to cook.

Frequently Asked Questions

Got questions? Let’s clear them up:

  • Can I use a different type of sausage? Absolutely! Any smoked sausage will work, or you can use chicken sausage for a lighter option.
  • What if I don’t have heavy cream? You can substitute with half-and-half or milk, but it may not be as creamy.
  • Can I make this vegetarian? Sure! Replace the sausage with plant-based sausage and use vegetable broth instead.
  • My sauce is too thick/thin. How do I fix it? For a thick sauce, add a bit more broth; if it’s too thin, let it simmer longer to reduce.
  • Can I make this in advance? Yes, but the pasta will absorb the sauce, so consider making the sauce and pasta separately.
  • What type of pasta works best? Penne and rigatoni are great choices, but feel free to use any pasta you have on hand.
  • Is it okay to add more vegetables? Absolutely! Feel free to toss in any of your favorite vegetables.
  • How can I make it spicier? Add more Cajun seasoning or toss in some crushed red pepper flakes.

Nutrition Tips and Dietary Adaptations

Keeping it healthy? Here are some tips to adapt this dish:

  • Lighten It Up: Use lower-fat cream or yogurt to reduce calories.
  • Whole Grain Pasta: Opt for whole grain or lentil pasta for added fiber.
  • Veggie Boost: Increase the amount of vegetables for additional vitamins and minerals.

Equipment Recommendations

To make your cooking experience smoother, here’s what you’ll need:

  • Large Pot or Dutch Oven: A sturdy pot for even cooking and easy stirring.
  • Sharp Knife: For chopping vegetables with ease.
  • Wooden Spoon: Perfect for stirring your delicious concoction.
  • Measuring Cups and Spoons: To keep your ingredients precise.

Serving Suggestions

Here’s how to elevate your meal:

  • Pair with Garlic Bread: Nothing beats a warm slice of garlic bread to soak up that creamy sauce.
  • Serve with a Side Salad: A fresh green salad balances the richness of the pasta.
  • Top with More Parmesan: A sprinkle of fresh Parmesan adds extra flavor.

Conclusion

So there you have it—the One Pot Creamy Cajun Sausage Pasta that promises to bring a touch of joy to your dinner table. It’s a dish that embodies comfort, flavor, and simplicity, reminding us that cooking doesn’t have to be complicated to be delicious. Whether it’s a family gathering or a quiet dinner for one, this recipe will surely create lasting memories. So, gather your ingredients, and let’s make some magic happen in the kitchen!

One Pot Creamy Cajun Sausage Pasta (30-Minutes)

Prep Time 10 minutes
Cook Time 20 minutes
Total Time 30 minutes
Servings 4 servings
Calories 650
This quick and flavorful Cajun sausage pasta is cooked in one pot, combining smoky sausage, creamy sauce, and vibrant vegetables for a satisfying meal in just 30 minutes.

Ingredients

Meat

  • 10 ounces smoked sausage (Andouille or kielbasa)

Pasta

  • 4 ounces pasta (penne or rigatoni)

Seasonings

  • 2 tablespoons Cajun seasoning

Oils

  • 1 tablespoon olive oil

Vegetables

  • 1 cup diced bell peppers (mixed colors)
  • 1/2 cup diced onion

Liquids

  • 2 cups low-sodium chicken broth ((add more if needed))
  • 1 cup heavy cream

Cheese

  • 1 cup shredded Parmesan cheese

Spices

  • 1/2 teaspoon garlic powder
  • 1/4 teaspoon cayenne pepper (optional, for extra spice)

Optional Greens

  • 1 cup fresh spinach (optional)

Garnish

  • Chopped parsley for garnish Chopped parsley

Instructions 

  • Sauté sausage, bell peppers, and onion in olive oil until browned.
  • Add Cajun seasoning, garlic powder, cayenne, and cook for 1 minute.
  • Pour in chicken broth and bring to a boil, then add pasta and cook until al dente.
  • Stir in heavy cream and Parmesan cheese, simmer until thickened.
  • Add spinach (if using) and cook until wilted. Garnish with parsley before serving.

Notes

For extra spice, add more cayenne pepper to taste.
Calories: 650kcal
Cost: $15
Course: Main Course
Cuisine: Cajun
Keyword: Sausage

Discover the Joy of Szechuan Chicken

Welcome, friend! If you’re looking to spice up your weeknight meals, you’ve come to the right place. This **30-minute Szechuan Chicken** is not just a recipe; it’s an experience that brings warmth and comfort to the dinner table. With a delightful blend of flavors, this dish is perfect for busy families wanting to enjoy a home-cooked meal that’s bursting with joy. Let’s dive into the world of Szechuan Chicken and explore how easy it is to create a scrumptious meal that your loved ones will rave about!

Why You’ll Love This Recipe

There are plenty of reasons to fall in love with this **Szechuan chicken** dish. Here are just a few:

  • Quick and Easy: Ready in just 30 minutes, this dish is perfect for those hectic weeknights when time is short, but you still want something delicious.
  • Flavor Explosion: The combination of **Szechuan peppercorns**, soy sauce, and chili garlic sauce creates a flavor profile that’s rich, spicy, and utterly satisfying.
  • Customizable: You can easily tweak this recipe by adding your favorite vegetables or adjusting the spice level to cater to your family’s preferences.
  • Perfect for Meal Prep: This dish is great for meal planning. Make a big batch and enjoy it throughout the week.
  • Comfort Food: With its bold flavors and hearty ingredients, this Szechuan Chicken embodies the comfort of home-cooked meals.

Ingredient Breakdown

Let’s take a closer look at the ingredients that make this dish truly special:

  • Chicken Breasts: 1 lb of boneless chicken breast, cut into bite-sized pieces. You can substitute with thighs for a juicier texture.
  • Cornstarch: 2 tablespoons to create a crispy coating—perfect for that delightful crunch.
  • Vegetable Oil: 2 tablespoons for stir-frying. Feel free to use peanut oil for an extra layer of flavor.
  • Garlic & Ginger: 3 cloves minced garlic and a 1-inch piece of minced ginger provide aromatic depth.
  • Bell Peppers: Half of each red and green bell pepper adds color and sweetness to balance the spice.
  • Szechuan Peppercorns: 1 teaspoon crushed for that signature numbing heat. If unavailable, black pepper can work in a pinch.
  • Soy Sauce: 2 tablespoons for umami richness.
  • Rice Vinegar: 1 tablespoon adds a tangy note that brightens the dish.
  • Chili Garlic Sauce: 1 tablespoon for heat. Adjust according to your spice tolerance.
  • Hoisin Sauce: 1 tablespoon brings sweetness and complexity to the sauce.
  • Sesame Oil: 1 teaspoon for a nutty flavor that rounds out the dish.
  • Sugar: 1 teaspoon to balance the savory and spicy elements.
  • Salt: To taste, ensuring every ingredient shines.
  • Optional Garnishes: Chopped peanuts or cashews and sliced green onions add a delightful finishing touch.
  • Serving Suggestions: Serve with steamed rice or noodles for a complete meal.

How to Make Szechuan Chicken

Side angle of a plate featuring Szechuan chicken garnished with peanuts and vibrant vegetables.

Now that we’ve gathered our ingredients, let’s get cooking. Follow these simple steps:

  1. In a mixing bowl, toss the chicken pieces with cornstarch and a pinch of salt until evenly coated.
  2. Heat vegetable oil in a large skillet or wok over medium-high heat. Add the chicken and stir-fry until golden and cooked through, about 4-5 minutes. Remove the chicken from the pan and set aside.
  3. Add a little extra oil if needed, then stir-fry the garlic, ginger, and Szechuan peppercorns (or black pepper) for 30 seconds until fragrant.
  4. Add the bell peppers and cook for 2-3 minutes until slightly tender but still crisp.
  5. Return the chicken to the pan. Pour in the soy sauce, rice vinegar, chili garlic sauce, hoisin, sesame oil, sugar, and green onions. Stir everything well to coat.
  6. Let the sauce simmer for 2-3 minutes until it thickens and coats the chicken evenly.
  7. Taste and adjust salt as needed. Serve hot over rice or noodles, garnished with optional peanuts or cashews and extra green onion.

Pro Tips for Perfect Szechuan Chicken

To ensure your Szechuan Chicken turns out perfectly, keep these tips in mind:

  • Use Fresh Ingredients: Fresh garlic and ginger will elevate the flavor significantly.
  • Don’t Overcrowd the Pan: Cook the chicken in batches if necessary to achieve that perfect sear.
  • Adjust Spice Levels: If you’re sensitive to heat, start with less chili garlic sauce and add more as needed.
  • Marinate the Chicken: For added flavor, marinate the chicken in soy sauce and a bit of cornstarch for 30 minutes before cooking.
  • Experiment with Veggies: Broccoli, snap peas, or carrots can be great additions to this dish.
  • Use a Wok: If you have one, a wok provides the best heat distribution for stir-frying.
  • Check for Thickeners: If the sauce isn’t thickening, a slurry of cornstarch and water can help.
  • Serve Immediately: This dish is best enjoyed fresh and hot, so serve it right after cooking!

Common Mistakes and Troubleshooting

If you encounter any hiccups while making your Szechuan Chicken, here are some common issues and how to solve them:

  • Sauce Too Thin: If your sauce isn’t thickening, consider adding a cornstarch slurry or cooking it longer to evaporate excess liquid.
  • Chicken Not Crispy: Ensure your oil is hot enough before adding the chicken, and avoid overcrowding the pan.
  • Too Spicy: If the heat is overwhelming, add a bit more sugar or serve with a side of rice to balance it out.
  • Flavor Lacking: Adjust with more soy sauce or hoisin for depth; taste as you go!

Variations on Szechuan Chicken

Feeling adventurous? Here are some delicious variations of this recipe to try:

  • Vegetable Stir-Fry: Replace chicken with tofu or a medley of your favorite vegetables for a plant-based version.
  • Spicy Garlic Chicken: Add more chili garlic sauce and serve with extra garlic for a fiery kick.
  • Honey Szechuan Chicken: Add a tablespoon of honey for a sweet twist that complements the heat.
  • Peanut Szechuan Chicken: Incorporate crushed peanuts into the sauce for added texture and nutty flavor.

Storage and Make-Ahead Instructions

If you want to make this dish ahead of time or store leftovers, follow these guidelines:

  • Make-Ahead: You can prep the chicken and chop the vegetables in advance, storing each in the refrigerator for up to 24 hours.
  • Leftover Storage: Store any leftover Szechuan Chicken in an airtight container in the fridge for up to 3 days.
  • Freezing: For longer storage, freeze in a freezer-safe container for up to 3 months. Thaw in the fridge before reheating.
  • Reheating: Reheat on the stovetop over medium heat, adding a splash of water or broth to loosen the sauce.

Nutrition Tips and Dietary Adaptations

This recipe is not only delicious but can be tailored to fit various dietary needs:

  • Low-Carb Option: Serve with cauliflower rice instead of traditional rice or noodles.
  • Gluten-Free: Substitute soy sauce with tamari or coconut aminos for a gluten-free dish.
  • Dairy-Free: This recipe is naturally dairy-free; feel free to enjoy without any modifications.
  • Increased Fiber: Add more vegetables like broccoli or snow peas to increase fiber content.

Equipment Recommendations

To make your cooking experience smoother, here are some tools I recommend:

  • Wok or Large Skillet: A good quality wok or a large skillet is essential for stir-frying.
  • Cutting Board: A sturdy cutting board for chopping vegetables and chicken.
  • Chef’s Knife: A sharp knife will make quick work of cutting your ingredients.
  • Measuring Cups and Spoons: Accurate measurements ensure your dish turns out just right.
  • Mixing Bowl: For tossing the chicken with cornstarch and seasoning.

Serving Suggestions

Now that your Szechuan Chicken is ready, here are some ideas for serving:

  • With Steamed Rice: A classic pairing that soaks up the flavorful sauce beautifully.
  • Over Noodles: Serve it on a bed of noodles, like lo mein or rice noodles, for a hearty meal.
  • Side Salad: A crisp cucumber salad can provide a refreshing contrast to the spiciness.
  • With Egg Rolls: Serve alongside homemade or store-bought egg rolls for a complete Asian-inspired feast.

Frequently Asked Questions

Here are some common questions about Szechuan Chicken:

  • Can I use frozen chicken? Yes, just ensure it’s fully thawed before cooking.
  • What if I don’t have Szechuan peppercorns? Black pepper can be a substitute, though the flavor will differ slightly.
  • Can I make this dish vegetarian? Absolutely! Substitute chicken with tofu or your favorite vegetables.
  • How spicy is Szechuan Chicken? The spice level can vary; adjust the chili garlic sauce to your preference.
  • Can I double the recipe? Yes, just be sure not to overcrowd the pan when cooking the chicken.
  • How should I store leftovers? Keep in an airtight container in the fridge for up to 3 days.
  • Can I use other peppers? Yes, feel free to experiment with different bell peppers or even spicy varieties!
  • What goes well with Szechuan Chicken? Steamed rice, noodles, or a fresh salad are all excellent choices.

Conclusion

And there you have it, folks! A hearty and comforting dish that’s not only quick to prepare but also packed with flavor. This **30-minute Szechuan Chicken** is sure to become a staple in your kitchen, bringing joy around the dinner table. Remember, cooking is all about sharing love through food, so gather your loved ones, serve up a plate of this delightful dish, and enjoy the flavors of home. Happy cooking!

30-Minute Szechuan Chicken Delight

Prep Time 10 minutes
Cook Time 15 minutes
Total Time 25 minutes
Servings 4 servings
Calories 350
A quick and flavorful Szechuan chicken dish with bold spices and vibrant vegetables, perfect for a weeknight dinner.

Ingredients

Protein

  • 1 lb chicken breast, cut into bite-sized pieces

Dry ingredients

  • 2 tablespoons cornstarch

Oils and sauces

  • 2 tablespoons vegetable oil
  • 2 tablespoons soy sauce
  • 1 tablespoon rice vinegar
  • 1 tablespoon chili garlic sauce
  • 1 tablespoon hoisin sauce
  • 1 teaspoon toasted sesame oil
  • 1 teaspoon sugar

Vegetables

  • 1/2 red bell pepper red bell pepper, sliced
  • 1/2 green bell pepper green bell pepper, sliced
  • 2 green onions green onions, sliced

Aromatics

  • 3 cloves garlic, minced
  • 1-inch ginger, minced ginger, minced

Spices

  • 1 teaspoon Szechuan peppercorns (crushed) or black pepper Szechuan peppercorns (crushed) or black pepper

Garnish & Serve

  • Optional peanuts or cashews peanuts or cashews for garnish
  • Steamed rice or noodles for serving Steamed rice or noodles

Instructions 

  • Toss chicken with cornstarch and salt. Cook in hot oil until golden, then set aside.
  • Stir-fry garlic, ginger, and Szechuan peppercorns until fragrant.
  • Add bell peppers; cook 2-3 minutes. Return chicken, add sauces, green onions, and stir to coat.
  • Simmer 2-3 minutes until sauce thickens. Adjust salt if needed. Serve over rice or noodles, garnished as desired.

Notes

For extra crunch, garnish with peanuts or cashews before serving.
Calories: 350kcal
Cost: $15
Course: Main Course
Cuisine: Szechuan
Keyword: chicken

Welcome to the Heart of Comfort Food: Creamy Tomato Garlic Pasta

There’s something about a warm, creamy bowl of pasta that feels like a hug from the inside. We all crave comfort food, and this Creamy Tomato Garlic Pasta taps into that nostalgia, bringing together simple ingredients that whisper stories of home and warmth. If you’re looking for a dish that’s not only easy to make but also rich in flavor and tradition, you’ve landed in the right place. Let’s dive into a recipe that celebrates the beauty of cooking with love and care.

Why You’ll Love This Recipe

This Creamy Tomato Garlic Pasta is more than just a quick meal; it’s a delightful experience filled with flavor and comfort. Here are a few reasons why this dish will become your go-to:

  • Quick and Easy: Ready in just 30 minutes, this recipe is perfect for busy weeknights when you want something satisfying without spending hours in the kitchen.
  • Simple Ingredients: With just a handful of pantry staples, you can create a dish that feels gourmet. No need for complicated techniques—just good old-fashioned cooking.
  • Rich Flavor: The combination of garlic, tomatoes, and cream creates a sauce that’s bursting with flavor, making every bite a comforting delight.
  • Customizable: This recipe serves as a fantastic base; feel free to add your favorite proteins or veggies to make it your own.
  • Family-Friendly: Even the pickiest eaters will love the creamy texture and rich taste, making it a hit at the dinner table.

Gathering Your Ingredients

Before we get started, let’s take a look at what you’ll need for this Creamy Tomato Garlic Pasta. Each ingredient plays a crucial role in creating that comforting flavor profile we all adore.

  • 8 oz pasta: Penne or fettuccine works beautifully, but feel free to use your favorite type.
  • 4 cloves fresh garlic: Minced for maximum flavor; garlic is the backbone of this dish.
  • 1 can (14.5 oz) diced tomatoes: Look for no added sugar for a healthier option.
  • 1 cup heavy cream: This adds that luscious, creamy texture.
  • 1/2 cup grated Parmesan cheese: A must for that cheesy finish.
  • 2 tbsp extra virgin olive oil: For sautéing the garlic and creating a flavor base.
  • Salt and pepper: To taste, enhancing all the flavors.

Cooking Instructions: How to Make This Creamy Delight

Side view of fettuccine pasta mixed in creamy tomato sauce with garlic.

Now that we have our ingredients, it’s time to get cooking! Follow these steps, and you’ll have a bowl of creamy goodness ready in no time.

  1. Boil a large pot of salted water and cook the pasta until al dente, about 8-10 minutes. Drain and reserve a bit of the cooking water.
  2. While the pasta cooks, heat olive oil in a skillet over medium heat. Sauté minced garlic until fragrant and golden brown (about 2 minutes).
  3. Add diced tomatoes with their juices to the skillet; simmer for 5 minutes until slightly thickened.
  4. Reduce heat and stir in heavy cream; let bubble gently for 2 minutes.
  5. Mix in grated Parmesan cheese until melted; season with salt and pepper.
  6. Combine the drained pasta with the sauce, adding reserved cooking water if needed for consistency.
  7. Serve hot, garnished with extra Parmesan if desired.

Pro Tips for the Perfect Creamy Tomato Garlic Pasta

Now that you know how to whip up this dish, here are some expert insights to elevate your cooking:

  • Cook Pasta Al Dente: Undercook the pasta slightly so it doesn’t become mushy when combined with the sauce.
  • Fresh Ingredients: Use fresh garlic and quality tomatoes for the best flavor.
  • Experiment with Cheese: Try substituting Parmesan with Pecorino Romano for a sharper taste.
  • Herbs Add Flavor: Fresh basil or parsley can brighten up the dish; sprinkle them on top just before serving.
  • Make it a Meal: Add cooked chicken, shrimp, or sautéed vegetables to make it heartier.
  • Adjust the Creaminess: For a lighter version, try using half-and-half or a splash of vegetable broth.
  • Save Leftovers: Store any leftover pasta in an airtight container for easy reheating.
  • Play with Spices: A pinch of red pepper flakes adds a nice kick if you like a bit of heat.

Common Mistakes and Troubleshooting

Even the best cooks can run into a few snags. Here are some common mistakes to avoid:

  • Overcooking the Pasta: Keep a close eye on your pasta; you want it al dente for the best texture.
  • Skipping the Salting Step: Don’t forget to salt your pasta water; it enhances the flavor of the pasta.
  • Neglecting to Reserve Pasta Water: This starchy water helps adjust the sauce’s consistency and makes it cling better to the pasta.

Delicious Variations to Try

This recipe is versatile, allowing for plenty of variations. Here are a few to consider:

  • Spinach and Feta: Add fresh spinach during the last minute of cooking, and sprinkle crumbled feta on top for a Mediterranean twist.
  • Sun-Dried Tomato and Chicken: Incorporate shredded rotisserie chicken and sun-dried tomatoes for added protein and flavor.
  • Mushroom and Thyme: Sauté sliced mushrooms with the garlic and finish with a touch of fresh thyme for an earthy flavor.
  • Vegetarian Delight: Load up on your favorite seasonal vegetables like zucchini and bell peppers for a vibrant dish.

Storage and Make-Ahead Instructions

This dish is great for meal prep! Here’s how to store and reheat:

  • Refrigeration: Store leftovers in an airtight container in the fridge for up to 3 days.
  • Freezing: This pasta can be frozen for up to 2 months. Thaw in the refrigerator overnight before reheating.
  • Reheating Tips: Warm in a skillet over low heat, adding a splash of water or broth to loosen the sauce.

Frequently Asked Questions

Here are some common questions about this Creamy Tomato Garlic Pasta:

  • Can I use fresh tomatoes instead of canned? Yes, but you’ll need to cook them down longer to achieve the right consistency.
  • What can I substitute for heavy cream? You can use half-and-half or even a non-dairy milk alternative, though the texture will differ.
  • Is this recipe gluten-free? Absolutely! Just swap the pasta with a gluten-free alternative.
  • How can I make this dish spicier? Add red pepper flakes or diced jalapeños to the sauce.
  • Can I make this dairy-free? Yes! Substitute heavy cream with a dairy-free alternative and omit the cheese.
  • What’s the best way to reheat leftovers? Reheat gently on the stove, adding a bit of reserved pasta water to keep it creamy.
  • How can I enhance the flavors? A splash of balsamic vinegar or a pinch of sugar can help balance the acidity of the tomatoes.
  • Can I prepare this ahead of time? Yes, you can make the sauce in advance and combine it with freshly cooked pasta when ready to serve.

Nutritional Tips and Dietary Adaptations

Cooking doesn’t just have to be about taste—it can also be about health! Here are some adaptation tips:

  • Lower Calorie Option: Use less cream and more broth for a lighter sauce.
  • Boosting Fiber: Add in some cooked lentils or chickpeas for added protein and fiber.
  • Low-Carb Version: Swap pasta for zucchini noodles or spaghetti squash for a healthier twist.

Essential Equipment for Your Kitchen

To make this recipe a breeze, here’s what you might need:

  • Large Pot: For boiling pasta.
  • Skillet: A good-quality skillet is essential for sautéing.
  • Measuring Cups and Spoons: Accurate measurements ensure perfect results.
  • Colander: For draining your pasta.

Serving Suggestions

Now that you’ve made this creamy delight, how do you serve it? Here are a few ideas:

  • Garnish with Fresh Herbs: A sprinkle of fresh basil or parsley adds color and flavor.
  • Pair with a Side Salad: A crisp garden salad complements the creamy pasta beautifully.
  • Serve with Garlic Bread: Don’t forget the garlic bread for that extra touch of comfort!

Final Thoughts

This Creamy Tomato Garlic Pasta isn’t just a meal; it’s a celebration of comfort, simplicity, and love for good food. With its rich flavors and easy preparation, it’s bound to become a staple in your kitchen. So go ahead, gather your ingredients, and let this dish bring warmth to your table. Happy cooking!

Creamy Tomato Garlic Pasta

Prep Time 10 minutes
Cook Time 15 minutes
Total Time 25 minutes
Servings 4 servings
Calories 550
A quick and flavorful pasta dish with a creamy tomato garlic sauce, perfect for a comforting meal.

Ingredients

Pasta

  • 8 oz penne or fettuccine pasta
  • 4 cloves fresh garlic, minced
  • 1 can (14.5 oz) diced tomatoes (no added sugar)
  • 1 cup heavy cream
  • 1/2 cup grated Parmesan cheese
  • 2 tbsp extra virgin olive oil
  • to taste Salt and pepper

Instructions 

  • Cook pasta in salted boiling water until al dente, about 8-10 minutes.
  • Heat olive oil and sauté garlic until fragrant, about 2 minutes.
  • Add diced tomatoes and simmer for 5 minutes.
  • Stir in heavy cream and cook for 2 minutes.
  • Mix in Parmesan, season with salt and pepper, then combine with pasta.

Notes

Reserve some pasta water to adjust sauce consistency if needed.
Calories: 550kcal
Cost: $12
Course: Main Course
Cuisine: Italian
Keyword: Pasta

Discover the Comfort of Creamy Mushroom Chicken

Welcome to the heartwarming world of Creamy Mushroom Chicken, a dish that not only tantalizes the taste buds but also brings family and friends together around the dinner table. As someone who has spent countless hours in the kitchen, I can assure you that this recipe is a celebration of simple ingredients and straightforward techniques. From the tender chicken to the luscious cream sauce, this dish embodies the essence of home-cooked love. Let’s dive deep into why this recipe is a must-try and how you can make it your own!

Why You’ll Love This Recipe

  • Hearty Comfort Food: This creamy mushroom chicken is the epitome of comfort food—rich, satisfying, and perfect for sharing with loved ones.
  • Simple Ingredients: Made with everyday ingredients, you likely have most of what you need right in your pantry or fridge.
  • Quick and Easy: In under 30 minutes, you can whip up a delicious meal that feels indulgent without the fuss.
  • Versatile Dish: Whether served over rice, pasta, or with a side of crusty bread, this recipe adapts to whatever you have on hand.
  • Kid-Friendly: The creamy sauce and tender chicken are sure to please even the pickiest eaters at your table.

Gather Your Ingredients

Before we get cooking, let’s gather our ingredients. This comforting dish relies on a handful of staples, each playing a key role in creating that rich, creamy sauce.

  • 2 large chicken breasts: Slice them in half to create thinner cutlets that cook evenly and quickly.
  • Salt & pepper: Essential for seasoning, these staples enhance the natural flavors of the chicken.
  • Flour: For dredging the chicken, creating a beautiful golden crust that adds texture.
  • 2 tablespoons olive oil: This is for sautéing the chicken, giving it a lovely flavor.
  • 2 tablespoons butter: Adds richness to the sauce and enhances the taste of the mushrooms.
  • 12 ounces mushrooms: Cremini or white mushrooms work beautifully, adding depth to the dish.
  • 1/4 teaspoon Italian seasoning: A blend of herbs that complements the mushrooms and chicken.
  • 3 cloves garlic: Minced, to infuse the dish with aromatic flavor.
  • 1/2 cup chicken broth: This helps deglaze the pan and creates a flavorful base for the sauce.
  • 1/2 teaspoon lemon juice: A splash of acidity that brightens the dish.
  • 1/2 teaspoon Dijon mustard: Adds a subtle tang that elevates the sauce.
  • 1 cup heavy/whipping cream: The star ingredient that makes the sauce rich and creamy.

Cooking Instructions: Let’s Make It Together!

Juicy chicken breast topped with creamy mushroom sauce, viewed from the side.

Now that we have all our ingredients ready, it’s time to bring this creamy goodness to life. Follow these step-by-step instructions, and you’ll be enjoying a delicious meal in no time.

  1. Prepare the Chicken: Cut your chicken breasts in half lengthwise to make four thinner cutlets. Season both sides generously with salt and pepper, then coat them in flour, shaking off any excess.
  2. Cook the Chicken: Heat olive oil in a skillet over medium-high heat. Once the pan is hot, add the chicken cutlets. Cook for about 4-5 minutes on each side until they are golden brown. Once cooked, remove the chicken from the pan and set it aside.
  3. Cook the Mushrooms: In the same skillet, add the butter. Once it melts, add the sliced mushrooms and Italian seasoning. Cook, stirring occasionally, until the mushrooms release their moisture and develop a nice sear, about 5-7 minutes.
  4. Build the Sauce: Remove the mushrooms from the skillet (you can place them on the same plate as the chicken). Add minced garlic, chicken broth, lemon juice, and Dijon mustard to the pan. Stir well and let it reduce by half, around 3-4 minutes.
  5. Add the Cream: Pour in the heavy cream, then return the chicken and mushrooms to the pan. Allow the chicken to simmer in the sauce for an additional 5 minutes until cooked through and the sauce thickens a bit. Season with more salt and pepper to taste.

Pro Tips for Perfect Chicken

  • Even Sizing: Ensure your chicken pieces are of even thickness for consistent cooking.
  • Use a Meat Thermometer: Check for doneness at 165°F to ensure perfectly cooked chicken every time.
  • Don’t Rush the Sauce: Allow the cream to simmer for a few minutes to thicken up nicely.
  • Experiment with Mushrooms: Try different varieties like shiitake, portobello, or button mushrooms for unique flavors.
  • Fresh Herbs: Add fresh herbs like parsley or thyme just before serving for a pop of color and freshness.
  • Deglaze Thoroughly: Scrape up those flavorful bits from the bottom of the pan when making the sauce; they add depth to the flavor.
  • Make It Ahead: This dish can be prepared ahead of time and reheated gently on the stove.
  • Leftover Versatility: Use leftover creamy mushroom chicken in wraps, salads, or pasta dishes for a quick meal.

Common Mistakes and Troubleshooting

  • Overcooking the Chicken: Keep a close eye on cooking times to avoid dry chicken; remember, it continues cooking while resting.
  • Too Thin Sauce: If the sauce is not thickening, let it simmer longer to reduce.
  • Flour Clumping: Ensure to coat the chicken evenly with flour to avoid clumps in the sauce.
  • Seasoning Imbalance: Taste the sauce before serving and adjust seasoning as needed; flavors can intensify as it cooks.

Delicious Variations to Try

This creamy mushroom chicken is versatile! Here are some delightful variations to consider:

  • Spinach and Artichoke Mushroom Chicken: Add fresh spinach and artichoke hearts for a Mediterranean twist.
  • Garlic Parmesan Mushroom Chicken: Stir in grated Parmesan cheese for an extra rich flavor.
  • Herbed Mushroom Chicken: Use fresh herbs like rosemary and thyme for an aromatic touch.
  • Spicy Mushroom Chicken: Add a pinch of red pepper flakes for a bit of heat in the sauce.

Storing and Reheating

Want to save some for later? Here’s how to store and reheat your creamy mushroom chicken:

  • Refrigeration: Store leftovers in an airtight container in the fridge for up to 3 days.
  • Freezing: This dish can be frozen in a sealed container for up to 3 months. To reheat, thaw in the refrigerator overnight.
  • Reheating: Gently reheat on the stove over low heat, stirring frequently until warmed through to avoid separation of the sauce.

FAQs About Creamy Mushroom Chicken

  • Can I use frozen chicken? Yes, but be sure to thaw it completely before cooking for even results.
  • What can I serve with creamy mushroom chicken? It pairs wonderfully with rice, mashed potatoes, or a fresh salad.
  • Is this recipe gluten-free? Substitute the flour with a gluten-free option like cornstarch or almond flour.
  • Can I use other types of mushrooms? Absolutely! Feel free to experiment with your favorite varieties.
  • How do I make this dish lighter? Use half-and-half instead of heavy cream for a lighter sauce.
  • What’s the best way to reheat leftovers? Gently on the stove over low heat, stirring frequently.
  • Can I add vegetables? Yes! Peas, broccoli, or bell peppers can be added for extra nutrition and flavor.
  • How can I enhance the flavor further? A splash of white wine before adding the cream can elevate the dish significantly.

Nutrition Tips and Dietary Adaptations

This creamy mushroom chicken can be adapted to fit various dietary needs:

  • Low-Carb/Keto: Use cauliflower rice as a base instead of traditional grains.
  • Dairy-Free: Substitute heavy cream with coconut cream or a nut-based cream alternative.
  • Low-Calorie: Use skinless chicken breasts and reduce the amount of cream for a lighter version.
  • High-Protein: Serve with a side of lentils or chickpeas for an extra protein boost.

Essential Equipment for Success

To make this creamy mushroom chicken, you’ll need:

  • Non-stick Skillet: For even cooking and easy cleanup.
  • Meat Thermometer: To ensure chicken is cooked perfectly every time.
  • Cutting Board and Knife: For preparing your chicken and vegetables with ease.
  • Measuring Cups and Spoons: For precise ingredient measurements.

Serving Suggestions

When it comes time to serve, consider these delightful pairings:

  • Over Rice or Pasta: The creamy sauce is perfect for soaking into fluffy rice or pasta.
  • With Crusty Bread: Serve with warm, crusty bread to soak up that delicious sauce.
  • Accompanied by a Side Salad: A fresh salad balances the richness of the dish beautifully.
  • With Steamed Vegetables: Bright, steamed veggies add color and nutrients to your meal.

In conclusion, this Creamy Mushroom Chicken is more than just a recipe; it’s a delightful experience that brings warmth and comfort to your table. With simple ingredients and straightforward steps, it embodies the spirit of home cooking. Whether you’re a seasoned chef or a kitchen novice, I promise this dish will become a beloved staple in your household. Enjoy the cooking process, cherish the flavors, and savor the moments shared around your dinner table. Happy cooking!

Creamy Mushroom Chicken

Prep Time 10 minutes
Cook Time 20 minutes
Total Time 30 minutes
Servings 4 servings
Calories 650
A rich and flavorful dish featuring tender chicken breasts in a creamy mushroom sauce, perfect for a comforting meal.

Ingredients

Protein

  • 2 large chicken breasts
  • Salt & pepper (to taste) Salt & pepper (to taste)
  • Flour (for dredging) Flour (for dredging)

Oils & Fats

  • 2 tablespoons tablespoons olive oil
  • 2 tablespoons tablespoons butter

Mushrooms

  • 12 ounces ounces mushrooms (cremini or white, sliced)

Seasonings

  • 1/4 teaspoon teaspoon Italian seasoning
  • 3 cloves cloves garlic (minced)

Liquids

  • 1/2 cup cups chicken broth
  • 1/2 teaspoon teaspoon lemon juice
  • 1/2 teaspoon teaspoon Dijon mustard
  • 1 cup cups heavy/whipping cream

Instructions 

  • Slice chicken breasts in half, season with salt & pepper, and dredge in flour.
  • Heat oil in a skillet, cook chicken 4-5 minutes per side until golden, then set aside.
  • Melt butter, cook mushrooms with Italian seasoning until browned, then remove.
  • Add garlic, chicken broth, lemon juice, and mustard; simmer until reduced by half.
  • Stir in cream, add chicken and mushrooms, cook until heated through and sauce thickens.

Notes

Serve with rice or pasta for a complete meal.
Calories: 650kcal
Cost: $15
Course: Main Course
Cuisine: American
Keyword: chicken, cream, Mushroom