Author

Tom

Browsing

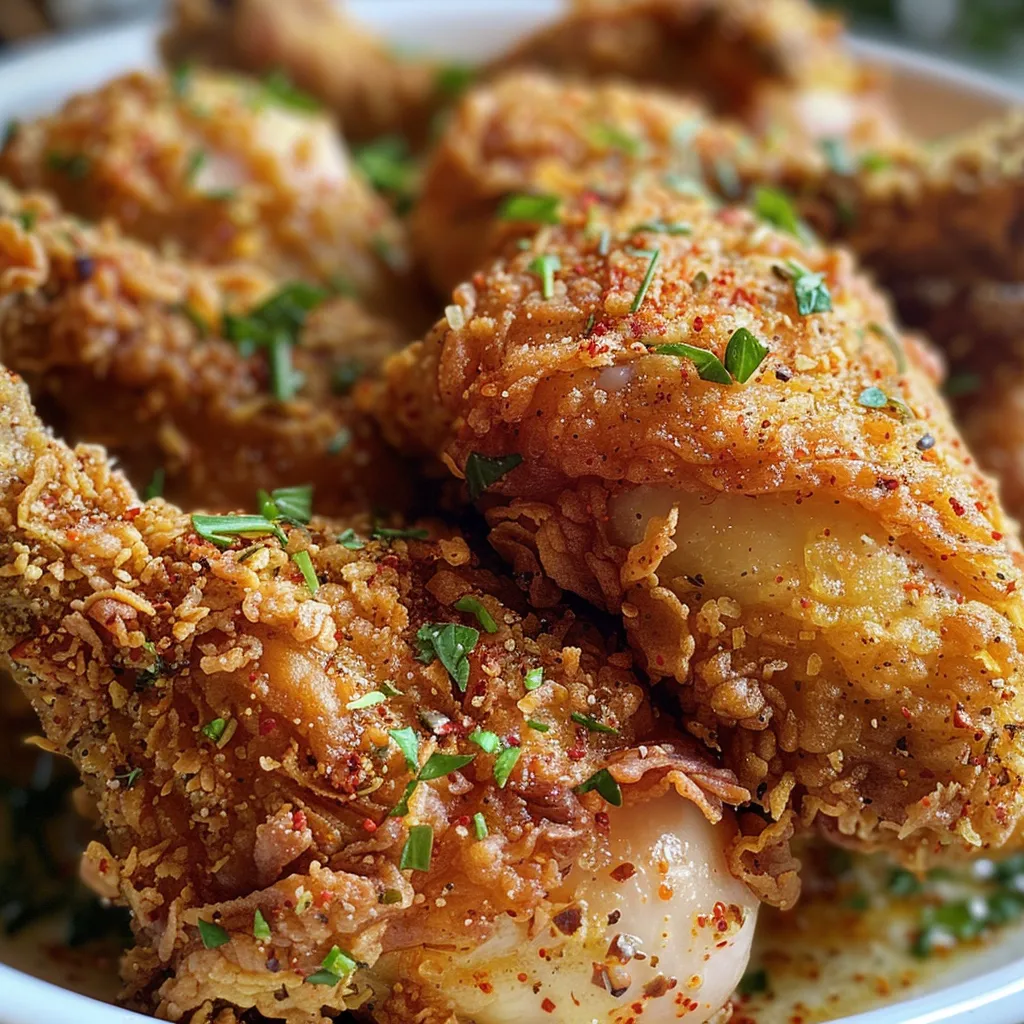
Welcome to the heart of Southern cooking, where the aroma of freshly fried chicken fills the air, and every bite brings back cherished memories. If you’re looking for a fried chicken recipe that’s not only crispy but also incredibly flavorful, you’ve come to the right place. This recipe is inspired by my grandma’s time-tested method, ensuring that your chicken comes out golden and delicious every time. Let’s dive into the art of making Southern fried chicken that’ll have your family asking for seconds. Here’s the secret: it’s all about the right ingredients, a little patience, and a whole lot of love.

Why You’ll Love This Recipe

This recipe isn’t just about cooking; it’s about creating a meal that resonates with warmth and nostalgia. Here are five reasons you’ll fall in love with this Southern fried chicken:

  • Irresistible Crunch: The double-coating technique ensures a crispy texture that shatters with every bite.
  • Juicy Insides: Soaking the chicken in buttermilk guarantees tender, flavorful meat that stays juicy.
  • Family Tradition: This recipe is rooted in my grandma’s kitchen, making it a perfect way to connect with family history.
  • Simple Ingredients: You don’t need fancy equipment or hard-to-find ingredients—just a few staples from your pantry.
  • Versatile Dish: Enjoy it on its own, in a sandwich, or as part of a hearty meal with sides.

Ingredients to Gather

Before we get to cooking, let’s gather our ingredients. Here’s what you’ll need:

  • 1 whole chicken, cut into pieces: Opt for bone-in and skin-on for the best flavor and texture.
  • 2 cups buttermilk: This is essential for marinating the chicken, making it tender and flavorful.
  • 2 cups all-purpose flour: The base for your crispy coating.
  • 1 tbsp salt: For seasoning and enhancing flavors.
  • 1 tbsp black pepper: Adds a nice kick.
  • 1 tbsp paprika: Gives the chicken a beautiful color and a mild spice.
  • 1 tsp garlic powder: For that comforting, savory depth.
  • 1 tsp onion powder: Complements the garlic and adds sweetness.
  • 1/2 tsp cayenne pepper: Adjust to your spice preference for a little heat.
  • Vegetable oil for frying: Choose an oil with a high smoke point, like canola or peanut oil.

How to Make Southern Fried Chicken

Now, let’s get to the good stuff—the cooking! Follow these steps to create your masterpiece:

  • Step 1: Marinate the Chicken: Place your chicken pieces in a large bowl and cover them with buttermilk. Allow it to soak for at least one hour (or overnight for best results). This step is crucial for achieving juicy, tender meat.
  • Step 2: Prepare the Flour Coating: In a separate bowl, combine flour, salt, black pepper, paprika, garlic powder, onion powder, and cayenne. Mix well to ensure even seasoning throughout.
  • Step 3: Heat the Oil: In a deep skillet, heat your oil to 350°F (175°C). Use enough oil to cover the chicken pieces halfway for even frying.
  • Step 4: Coat the Chicken: Remove the chicken from the buttermilk, letting the excess drip off, then dredge each piece in the flour mixture until well-coated. For extra crunch, double-coat the chicken by dipping it back in buttermilk and then again in the flour.
  • Step 5: Fry to Golden Perfection: Fry the chicken in batches, cooking for 12-15 minutes per side or until golden brown and crispy. Use a thermometer to check that the internal temperature reaches 165°F (75°C).
  • Step 6: Drain and Serve: Once cooked, let the chicken drain on paper towels to remove excess oil. Serve hot and enjoy!

Pro Tips for the Best Fried Chicken

Juicy Southern fried chicken, cut into pieces, with a crunchy texture.

Here are some expert insights to elevate your fried chicken game:

  • Use a Cast Iron Skillet: It retains heat well, ensuring consistent frying temperatures.
  • Don’t Overcrowd the Pan: Fry in batches to maintain the oil temperature and achieve a crispy crust.
  • Let It Rest: After frying, allow the chicken to rest for a few minutes to let the juices redistribute.
  • Experiment with Seasonings: Don’t hesitate to adjust spices to suit your taste—try adding some thyme or rosemary for a twist.
  • Temperature Control: Use a thermometer to monitor oil temperature, keeping it steady at around 350°F (175°C).
  • Let the Chicken Come to Room Temperature: Before frying, let your chicken sit for about 30 minutes to ensure even cooking.
  • Use Leftover Buttermilk: If you have leftover buttermilk, use it in pancakes or biscuits for a delicious breakfast!
  • Double-Coating: For an extra crunchy texture, double-coat the chicken as mentioned earlier.

Common Mistakes and Troubleshooting

Even the best can have hiccups in the kitchen. Here are some common issues and how to fix them:

  • Chicken Turns Out Greasy: This usually happens if the oil is not hot enough. Make sure to preheat the oil properly and fry in small batches.
  • Coating Falls Off: Ensure the chicken is well-coated in buttermilk before dredging in flour. Letting it rest before frying can also help.
  • Chicken is Dry: This could be due to overcooking. Use a meat thermometer to check for doneness and avoid leaving it in the oil too long.
  • Not Crispy Enough: If your chicken isn’t crispy, consider double-coating or checking the temperature of your frying oil.

Variations to Try

Once you’ve mastered the classic recipe, why not switch it up? Here are some delightful variations:

  • Spicy Fried Chicken: Add more cayenne or a splash of hot sauce to the buttermilk marinade for a fiery kick.
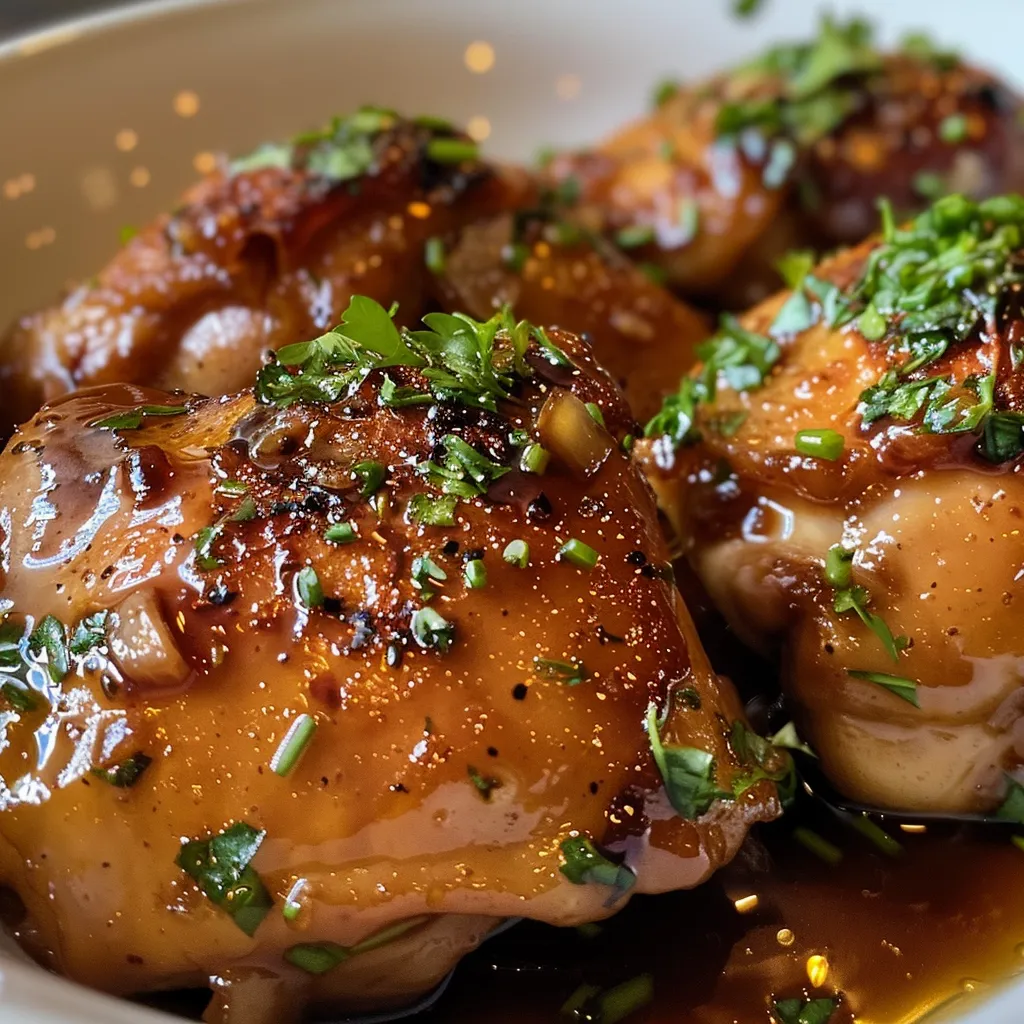
  • Honey Garlic Fried Chicken: Drizzle honey and garlic sauce over the fried chicken for a sweet and savory twist.
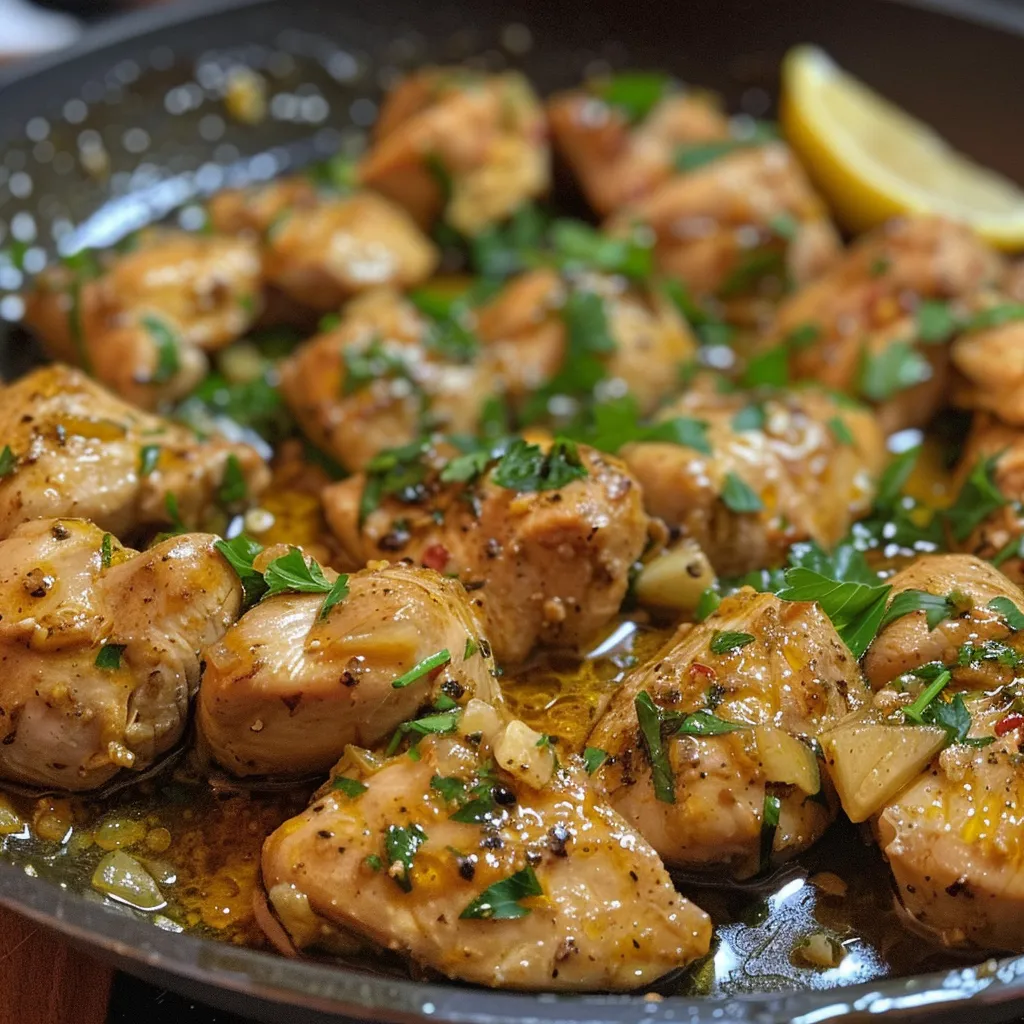
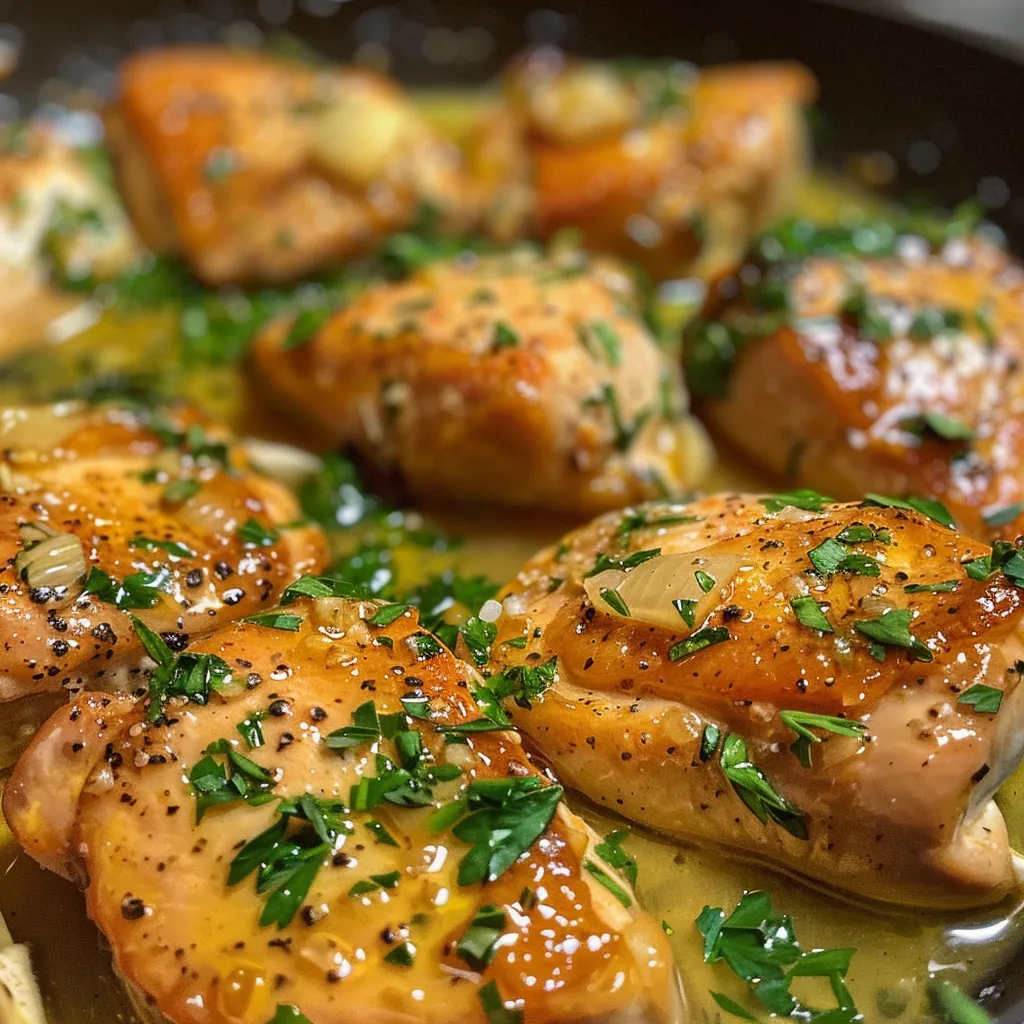
  • Herb-Infused Fried Chicken: Incorporate finely chopped fresh herbs like rosemary or thyme into the flour mixture.
  • Southern-Style Hot Chicken: After frying, toss the chicken in a spicy sauce made from hot sauce and melted butter.

Storing and Reheating Fried Chicken

If you have leftover chicken (if there’s any!), here’s how to store and reheat it:

  • Storing: Place leftover chicken in an airtight container in the fridge for up to 3 days. For longer storage, freeze it in a freezer-safe bag or container for up to 3 months.
  • Reheating: To keep it crispy, reheat the chicken in an oven at 375°F (190°C) for about 15-20 minutes or until heated through. Avoid using the microwave, as it can make the coating soggy.

Frequently Asked Questions

Here are some common questions about making fried chicken:

  • Can I use skinless chicken? While you can, the skin adds flavor and helps achieve that crispy texture.
  • What if I don’t have buttermilk? You can make a substitute by mixing milk with a tablespoon of vinegar or lemon juice. Let it sit for a few minutes before using.
  • How do I know when the chicken is done? Use a meat thermometer to ensure the internal temperature reaches 165°F (75°C).
  • Can I bake the chicken instead of frying? Yes, for a healthier option, bake it at 400°F (200°C) for about 40-45 minutes, flipping halfway through.
  • What sides pair well with fried chicken? Classic sides include coleslaw, mashed potatoes, cornbread, and green beans.
  • Can I use other meats? Absolutely! The same technique works well for other types of poultry or even pork chops.
  • What oil is best for frying? Use oils with a high smoke point, such as vegetable, canola, or peanut oil.
  • How can I make it gluten-free? Substitute all-purpose flour with a gluten-free flour blend.

Nutritional Tips and Dietary Adaptations

For those watching their diet, here are some tips to make this dish healthier:

  • Use Skinless Chicken: Opt for skinless pieces to reduce fat content.
  • Air Frying: Consider using an air fryer for a lower-fat alternative that still delivers crunch.
  • Whole Wheat Flour: Substitute all-purpose flour with whole wheat flour for added fiber.
  • Portion Control: Serve smaller portions with plenty of healthy sides to maintain balance.

Recommended Equipment

Here’s what you’ll need to successfully make this recipe:

  • Cast Iron Skillet: Perfect for frying, ensuring even heat distribution.
  • Meat Thermometer: Essential for checking chicken doneness.
  • Mixing Bowls: For marinating and mixing ingredients.
  • Slotted Spoon: Ideal for removing chicken from the hot oil.
  • Paper Towels: For draining excess oil after frying.

Serving Suggestions

When it comes to serving fried chicken, consider these classic accompaniments:

  • Coleslaw: The crunch and creaminess of coleslaw perfectly balance the richness of fried chicken.
  • Biscuits: Fluffy biscuits are great for mopping up any leftover juices or gravy.
  • Green Beans: Freshly cooked green beans add a pop of color and nutrition to your meal.
  • Potato Salad: A creamy potato salad complements the crispy chicken beautifully.

There you have it! A comprehensive guide to making Grandma’s perfectly crispy Southern fried chicken. This recipe is not just about food; it’s about bringing family together and creating lasting memories. So gather your loved ones, fire up that skillet, and enjoy the delicious results of your hard work. Remember, cooking is all about love, patience, and sharing those beautiful moments around the table. Happy frying!

Crispy Southern Fried Chicken: Grandma’s Irresistible 3-Step Secret

Prep Time 1 hour
Cook Time 15 minutes
Total Time 1 hour 15 minutes
Servings 4 servings
Calories 450
This classic fried chicken recipe delivers crispy, flavorful goodness with a simple 3-step process, perfect for a comforting family meal.

Ingredients

Main

  • 1 whole chicken, cut into pieces
  • 2 cups buttermilk
  • 2 cups all-purpose flour
  • 1 tbsp salt
  • 1 tbsp black pepper
  • 1 tbsp paprika
  • 1 tsp garlic powder
  • 1 tsp onion powder
  • 1/2 tsp cayenne pepper
  • Vegetable oil for frying vegetable oil (enough for deep frying)

Instructions 

  • Soak chicken in buttermilk for at least 1 hour.
  • Mix flour, salt, pepper, paprika, garlic, onion, and cayenne.
  • Heat oil to 350°F (175°C).
  • Coat chicken in flour mixture and fry in batches for 12-15 minutes until golden and crispy.
  • Drain on paper towels and serve hot.

Notes

Ensure oil temperature remains steady for crispy results.
Calories: 450kcal
Cost: $15
Course: Main Course
Cuisine: Southern American
Keyword: fried chicken

A Taste of Home: Your Ultimate Guide to Butter Chicken

Welcome to a culinary journey that will warm your heart and home! Today, we’re diving into the rich, creamy world of butter chicken. This beloved dish is more than just a meal; it’s a celebration of flavors and traditions that brings families together. Whether you’re a seasoned cook or just starting out in the kitchen, this easy homemade butter chicken recipe is designed to nurture your cooking spirit while delivering a plateful of comfort.

Why You’ll Love This Recipe

There are countless reasons to fall in love with this butter chicken recipe. Here are just a few:

  • Quick and Easy: With simple ingredients and straightforward steps, you can prepare this dish in under an hour.
  • Family-Friendly: The creamy sauce and tender chicken appeal to all ages—perfect for family dinners!
  • Customizable Heat: Adjust the spice levels to suit your taste—everyone can enjoy their ideal version.
  • Meal Prep Friendly: Make it ahead of time and simply reheat when you’re ready to serve.
  • Comfort Food at Its Best: The rich, buttery sauce is like a warm hug on a plate, making it perfect for cozy nights in.

Ingredients You’ll Need

To craft this delightful homemade butter chicken, gather the following ingredients:

  • 1 ½ pounds skinless boneless chicken thighs: These are juicy and soak up flavors beautifully.
  • 1 teaspoon salt: Essential for enhancing the overall flavor.
  • 1 teaspoon garlic powder: Provides a subtle, aromatic background.
  • 1 teaspoon sweet paprika: Adds color and a touch of sweetness.
  • ½ teaspoon curry powder: Infuses warmth and depth to the dish.
  • 1 tablespoon Greek yogurt: Helps tenderize the chicken and adds tanginess.
  • 3 tablespoons vegetable oil: For frying the chicken to perfection.
  • 3 tablespoons butter (divided): Adds that essential creamy richness.
  • 6 cloves garlic (minced): The aromatic foundation of your sauce.
  • 1 medium onion (diced): Provides sweetness and body to the sauce.
  • 1 15-ounce can tomato sauce: The base of our rich and tangy sauce.
  • 1 teaspoon sugar: Balances the acidity of the tomatoes.
  • 1 teaspoon salt (adjust to taste): Always taste as you go!
  • ½ teaspoon black pepper: Adds a subtle heat.
  • 2 cups heavy cream: The secret to that luscious, creamy sauce.
  • ½ teaspoon cayenne pepper (optional): For those who like a bit of heat!
  • 1 teaspoon garam masala: A fragrant spice blend that elevates the dish.
  • ½ teaspoon curry powder: Enhances the curry flavor.
  • ¼ cup freshly chopped parsley (optional): A lovely garnish for color.
  • Naan bread: Perfect for scooping up that delicious sauce.
  • Steamed rice: A classic pairing to soak up every drop.

How to Make Your Butter Chicken

Side view of a plate featuring butter chicken with naan and rice.

Now that you have your ingredients ready, let’s walk through the steps of creating this quick easy homemade dish:

  1. In a bowl, mix the chicken with salt, garlic powder, paprika, curry powder, and Greek yogurt. Cover and refrigerate for at least 15 minutes.
  2. In a large skillet, heat vegetable oil and 1 tablespoon of butter over medium heat. Sauté garlic and onion until fragrant and golden.
  3. Add the tomato sauce, sugar, salt, black pepper, heavy cream, cayenne pepper, garam masala, and curry powder to the skillet. Simmer for a few minutes until well combined.
  4. In another pan, cook the marinated chicken until browned and cooked through. This will ensure your chicken is juicy and flavorful.
  5. Add the cooked chicken to the sauce, stirring in the remaining butter. Allow it to simmer for a few more minutes, letting those flavors meld together.
  6. Garnish with chopped parsley and serve hot with naan bread and steamed rice.

Pro Tips for Perfect Butter Chicken

To elevate your cooking game, consider these expert insights:

  • Choose Thighs: Chicken thighs are more forgiving than breasts, staying juicy even if cooked a little longer.
  • Marinate Longer: For deeper flavors, marinate the chicken for a few hours or overnight.
  • Use Fresh Ingredients: Fresh garlic and spices can make a world of difference in flavor.
  • Adjust Consistency: If the sauce is too thick, add a splash of water or chicken broth to reach your desired consistency.
  • Make it Ahead: This dish tastes even better the next day, as the flavors continue to develop.
  • Experiment with Spices: Don’t be afraid to try your hand at different spice blends to find your favorite flavor profile.
  • Garnish Wisely: Fresh herbs not only add flavor but also a beautiful presentation.
  • Serve with Sides: Pair with a refreshing cucumber salad or a side of roasted vegetables for a complete meal.

Common Mistakes and Troubleshooting

Even the best cooks can encounter hiccups! Here are some common mistakes and how to avoid them:

  • Overcooked Chicken: Keep an eye on your chicken. It’s done when it reaches 165°F. Use a meat thermometer for accuracy.
  • Too Much Spice: Start with small amounts of cayenne and adjust gradually. You can always add more, but it’s hard to take it out!
  • Thin Sauce: If your sauce is too thin, let it simmer longer to reduce or add a little cornstarch mixed with water to thicken.
  • Flat Flavors: Taste as you go! Adjust salt, sugar, and spices to balance the flavors.

Variations to Try

Feeling adventurous? Here are some delightful variations on this classic dish:

  • Butter Chicken with Vegetables: Add bell peppers, peas, or spinach for a colorful, nutritious boost.
  • Butter Chicken Curry: Add additional spices like cumin and coriander for a deeper flavor profile.
  • Grilled Butter Chicken: Grill the marinated chicken before adding it to the sauce for a smoky flavor.
  • Vegan Butter Chicken: Substitute chicken with tofu or chickpeas and use coconut milk instead of cream for a plant-based version.

Storage and Make-Ahead Instructions

Planning to make this dish ahead of time? Here’s how to store and reheat it:

  • Refrigerator: Store leftovers in an airtight container for up to 3 days. Reheat gently on the stovetop or in the microwave.
  • Freezer: You can freeze the butter chicken for up to 2 months. Thaw overnight in the fridge before reheating.
  • Make-Ahead: Marinate the chicken a day in advance for maximum flavor, and prepare the sauce ahead of time to save on cooking time.

Comprehensive FAQ

Got questions? Let’s address some common queries:

  • Can I use chicken breasts instead of thighs? Yes, but be careful not to overcook them, as they can dry out.
  • Is butter chicken spicy? It can be! Adjust the cayenne pepper to control the heat level.
  • Can I use canned tomato sauce? Absolutely! It’s a great time-saver and works well in this recipe.
  • What can I serve with butter chicken? Naan bread and steamed rice are traditional accompaniments, but feel free to get creative with sides!
  • Can I make this dish dairy-free? Yes, substitute heavy cream with coconut cream and use a vegan butter alternative.
  • How can I make it healthier? Use less oil and cream, and add more vegetables to boost nutrition.
  • What’s the origin of butter chicken? Butter chicken, or “Murgh Makhani,” originated in India and is a staple of North Indian cuisine.
  • How long does it take to marinate? At least 15 minutes, but longer is always better for flavor.

Nutrition Tips and Dietary Adaptations

This dish can be adapted to fit various dietary needs:

  • Low-Carb: Serve with cauliflower rice instead of regular rice.
  • Gluten-Free: Ensure your naan is gluten-free or serve with rice.
  • High-Protein: Pair with a protein-rich side like lentil salad.

Equipment Recommendations

Here’s what you’ll need for this recipe:

  • Large Skillet: A good non-stick skillet is perfect for cooking the chicken and sauce.
  • Meat Thermometer: Ensures your chicken is cooked to perfection.
  • Mixing Bowls: For marinating and mixing your ingredients.

Serving Suggestions

Present your butter chicken in style with these serving ideas:

  • Garnish: A sprinkle of fresh parsley or cilantro can brighten up the dish.
  • Plating: Serve in a shallow bowl with naan on the side for a rustic look.
  • Pairing: Complement with a refreshing cucumber salad or a light yogurt raita.

Conclusion

Cooking is a journey, and with this quick easy homemade butter chicken recipe, you’re not just making dinner; you’re creating memories. Each spoonful brings the warmth of home and the richness of tradition to your table. So gather your loved ones, and enjoy this comforting dish that’s as easy as it is delicious. Thank you for joining me today—happy cooking!

Quick & Easy Homemade Butter Chicken Recipe

Prep Time 20 minutes
Cook Time 30 minutes
Total Time 50 minutes
Servings 4 servings
Calories 550
A flavorful and creamy butter chicken made quickly at home, perfect for a satisfying meal.

Ingredients

Meat

  • 1.5 pounds skinless boneless chicken thighs, cut into bite-sized chunks
  • 1 teaspoon salt
  • 1 teaspoon garlic powder
  • 1 teaspoon sweet paprika
  • 0.5 teaspoon curry powder
  • 1 tablespoon Greek yogurt
  • 3 tablespoons vegetable oil
  • 3 tablespoons butter, divided
  • 6 cloves garlic, minced
  • 1 medium onion, diced
  • 1 15-ounce can tomato sauce
  • 1 teaspoon sugar
  • 1 teaspoon salt (adjust to taste)
  • 0.5 teaspoon black pepper
  • 2 cups heavy cream
  • 0.5 teaspoon cayenne pepper (optional for heat)
  • 1 teaspoon garam masala
  • 0.25 cup freshly chopped parsley (optional, for garnish)

Naan bread

Steamed rice

Instructions 

  • Mix chicken with salt, garlic powder, paprika, curry powder, and Greek yogurt. Refrigerate for 15 minutes.
  • Sauté garlic and onion in oil and 1 tablespoon butter. Add tomato sauce, sugar, spices, and cream; simmer briefly.
  • Cook marinated chicken until browned and cooked through.
  • Add chicken to sauce, stir in remaining butter, and simmer for a few minutes.
  • Garnish with parsley and serve with naan and rice.

Notes

For extra heat, add more cayenne pepper to taste.
Calories: 550kcal
Cost: $15
Course: Main Course
Cuisine: Indian
Keyword: Butter Chicken

Bringing Comfort Home: The Heart of Chicken with Cream of Chicken Soup

When it comes to comfort food, few dishes evoke the warmth of home like Chicken with Cream of Chicken Soup. This recipe is not just about the ingredients; it’s a celebration of family traditions, simple cooking methods, and the joy of sharing a hearty meal with loved ones. As someone who grew up on a Southern farm, I can tell you that this dish embodies everything we cherish about home-cooked meals. Packed with flavor and made from everyday ingredients, it’s a dish that tells a story—a story of care, patience, and love.

In this guide, I’ll take you through every step of creating this cozy dish, sharing tips, variations, and even a few stories along the way. So, grab your apron and let’s get cooking!

Why You’ll Love This Recipe

  • Hearty and Satisfying: This dish is like a warm hug on a plate, perfect for chilly nights or family gatherings.
  • Quick Preparation: Ready in under an hour, this recipe is ideal for busy weeknights when you crave something comforting without spending all day in the kitchen.
  • Budget-Friendly: With simple pantry staples like chicken breasts and cream of chicken soup, this meal won’t strain your wallet.
  • Kid-Approved: The creamy sauce and optional cheddar cheese make this dish a favorite among children, ensuring everyone leaves the table happy.
  • Versatile Serving Options: Whether served over rice, pasta, or alongside mashed potatoes, this dish adapts to your family’s tastes perfectly.

Ingredients Breakdown

Let’s dive into what you’ll need for this cozy chicken dish, along with handy substitutions and additions to elevate your meal.

  • 4 boneless, skinless chicken breasts: The star of the dish. Feel free to substitute with thighs for a juicier bite.
  • 1 can (10.5 oz) cream of chicken soup: This creamy base is key. You can use homemade cream of chicken soup for a fresher taste or opt for a low-sodium version.
  • 1/2 cup chicken broth: Adds depth of flavor; vegetable broth can be used as a vegetarian option.
  • 1/2 cup heavy cream or milk: For creaminess, use milk for a lighter dish or heavy cream for a richer flavor.
  • 1 teaspoon garlic powder: A must for flavor; fresh garlic can also be used for a more robust taste.
  • 1 teaspoon onion powder: Enhances the savory notes; diced onions can be sautéed for a fresh flavor.
  • 1/2 teaspoon paprika: Adds a lovely color and mild heat; smoked paprika can give a wonderful twist.
  • Salt and black pepper to taste: Essential for seasoning to your preference.
  • 2 tablespoons butter or olive oil: For sautéing the chicken to golden perfection.
  • 1/2 cup shredded cheddar cheese (optional): For an extra layer of cheesy goodness.
  • 1 teaspoon dried parsley or fresh parsley for garnish: Adds a touch of color and freshness to the dish.

Step-by-Step Instructions

Close-up of succulent chicken topped with a rich cream of chicken soup.

Now that we have our ingredients ready, let’s walk through the steps to make this comforting dish.

  • Step 1: Season the Chicken – Generously season both sides of the chicken breasts with garlic powder, onion powder, paprika, salt, and black pepper.
  • Step 2: Sear the Chicken – In a large skillet, heat butter or olive oil over medium heat. Add the chicken breasts and cook for 3-4 minutes per side until golden brown. Remove from the pan and set aside.
  • Step 3: Make the Creamy Sauce – In the same skillet, add the cream of chicken soup, chicken broth, and heavy cream or milk. Stir until well combined and let it simmer for 2-3 minutes.
  • Step 4: Combine Chicken and Sauce – Return the chicken to the skillet, ensuring it’s well coated with the creamy sauce. Cover and simmer on low heat for 20-25 minutes until the chicken is cooked through.
  • Step 5: Add Cheese (Optional) – If using cheddar cheese, sprinkle it over the chicken during the last few minutes of cooking. Cover the skillet and let the cheese melt for 2-3 minutes.
  • Step 6: Garnish and Serve – Sprinkle dried or fresh parsley on top for a pop of color. Serve warm over rice, pasta, or mashed potatoes.

Pro Tips for Perfection

  • Don’t Overcook the Chicken: Keep an eye on your chicken; it’s best to use a meat thermometer to ensure it reaches 165°F without drying out.
  • Use Fresh Ingredients: Whenever possible, use fresh garlic and herbs for enhanced flavor.
  • Let It Rest: After cooking, let your chicken rest for a few minutes before serving to allow the juices to redistribute.
  • Experiment with Flavors: Feel free to add your favorite vegetables, like broccoli or bell peppers, to the skillet for added nutrition.
  • Adjust Creaminess: If you prefer a thinner sauce, add a bit more chicken broth or milk.
  • Make it Ahead: This dish can be prepped ahead of time and cooked just before serving for a hassle-free dinner.
  • Freezing Tips: This dish freezes well. Just make sure to cool it completely before transferring to a freezer-safe container.

Common Mistakes and Troubleshooting

Even the best of us make mistakes in the kitchen. Here are some common pitfalls and how to avoid them:

  • Chicken is Dry: This usually happens from overcooking. Use a meat thermometer to prevent this.
  • Too Salty: If the dish turns out too salty, balance it with a bit more cream or broth.
  • Not Creamy Enough: If your sauce lacks creaminess, consider adding more heavy cream or milk.
  • Burning the Sauce: Keep the heat low and stir often to prevent sticking.

Variations to Try

Here are a few fun twists on the classic recipe to keep things exciting:

  • Chicken and Broccoli Bake: Add steamed broccoli for a complete meal in one dish.
  • Cheesy Chicken Pasta: Serve over cooked pasta and mix in some extra cheese for a creamy pasta dish.
  • Spicy Chicken with Cream Sauce: Add a pinch of cayenne pepper for a little kick.
  • Vegetable Medley: Incorporate your favorite veggies such as carrots and peas for a hearty twist.

Storage and Make-Ahead Instructions

This dish is perfect for make-ahead meals. Here’s how to store it:

  • Refrigerate: Store it in an airtight container in the fridge for up to 3-4 days.
  • Freeze: To freeze, let it cool completely, then transfer to a freezer-safe container. It can be frozen for up to 3 months.
  • Reheat: When ready to enjoy, thaw overnight in the fridge and reheat on the stovetop or in the microwave until warmed through.

Frequently Asked Questions

  • Can I use frozen chicken?: Yes, but it will need a longer cooking time. Ensure it reaches 165°F in the center.
  • Is this recipe gluten-free?: It can be made gluten-free by using gluten-free cream of chicken soup and ensuring your broth is also gluten-free.
  • What can I serve with this dish?: It pairs wonderfully with rice, mashed potatoes, or a fresh salad.
  • How can I make it healthier?: Use skinless chicken breasts, low-fat cream, and add more vegetables.
  • Can I make this dish in a slow cooker?: Absolutely! Just layer the ingredients in the slow cooker and cook on low for 4-6 hours.
  • What herbs can I add?: Fresh thyme, rosemary, or sage can add wonderful flavor.
  • How do I know when the chicken is done?: A meat thermometer should read 165°F at the thickest part of the chicken.
  • Can I substitute the cream of chicken soup?: Yes, you can use homemade or even cream of mushroom soup for a different flavor.

Nutritional Tips and Dietary Adaptations

This dish can be easily adapted for various dietary needs:

  • Low-Calorie Version: Use chicken breast, low-fat milk, and reduce the amount of cheese.
  • Dairy-Free Option: Substitute the cream and cheese with non-dairy alternatives like coconut milk and nutritional yeast.
  • Whole30/Paleo Friendly: Use homemade cream of chicken soup made with compliant ingredients.

Equipment Recommendations

To make this recipe, you’ll need:

  • Large Skillet: For searing and saucing your chicken.
  • Meat Thermometer: To ensure your chicken is perfectly cooked.
  • Airtight Containers: For storing leftovers or making ahead.

Serving Suggestions

When serving Chicken with Cream of Chicken Soup, consider:

  • Over Rice: A classic choice, the creamy sauce pairs beautifully with fluffy rice.
  • With Pasta: Tossing the chicken with pasta makes for a comforting meal.
  • Alongside Mashed Potatoes: A heartwarming combination that is sure to please.
  • With a Side Salad: A fresh green salad can balance the richness of the dish.

And there you have it—a comprehensive guide to making a dish that warms the heart and home. Chicken with Cream of Chicken Soup is more than just a recipe; it’s a way to bring people together, share stories, and create lasting memories around the dinner table. I hope you enjoy making it as much as I do. Happy cooking!

Chicken with Cream of Chicken Soup

Prep Time 10 minutes
Cook Time 25 minutes
Total Time 35 minutes
Servings 4 servings
Calories 450
A comforting and easy-to-make chicken dish simmered in a creamy sauce, perfect for a cozy dinner.

Ingredients

Protein

  • 4 pieces boneless, skinless chicken breasts
  • 1 can cream of chicken soup (10.5 oz can)
  • 0.5 cup chicken broth
  • 0.5 cup heavy cream or milk
  • 1 teaspoon garlic powder
  • 1 teaspoon onion powder
  • 0.5 teaspoon paprika
  • to taste Salt and black pepper
  • 2 tablespoons butter or olive oil
  • 0.5 cup shredded cheddar cheese (optional for extra flavor)
  • 1 teaspoon dried parsley or fresh parsley (for garnish)

Instructions 

  • Season chicken with garlic powder, onion powder, paprika, salt, and pepper.
  • Cook chicken in butter or oil for 3-4 minutes per side; set aside.
  • In the same pan, add soup, broth, and cream; simmer 2-3 minutes.
  • Return chicken to pan, cover, and simmer 20-25 minutes until cooked.
  • If using cheese, sprinkle on top and melt for 2-3 minutes.
  • Garnish with parsley and serve warm over rice, pasta, or potatoes.

Notes

For a richer flavor, use heavy cream and shredded cheese.
Calories: 450kcal
Cost: $15
Course: Main Course
Cuisine: American
Keyword: chicken

The Secret to Perfectly Crispy Fried Chicken Wings

When it comes to comfort food, few dishes evoke the warmth of home quite like crispy fried chicken wings. Whether it’s family gatherings or casual get-togethers, these juicy, finger-lickin’ good wings are sure to be a hit! In this guide, you’ll discover the secrets behind achieving that perfect crisp and flavor in your chicken wings. Let’s dive into the heart of this recipe and learn how to make these delectable creations that will leave your guests coming back for seconds.

Why You’ll Love This Recipe

  • Incredible Flavor: Each wing is marinated with a blend of seasonings, making every bite burst with flavor.
  • Perfectly Crispy: The two-stage frying technique ensures an amazing crust that keeps the wings crispy for longer.
  • Customizable: This recipe allows for variations, so you can tweak the flavors to your liking.
  • Quick Preparation: With about an hour of marinating and under thirty minutes of cooking, you can have these wings ready in no time.
  • Family Favorite: These wings are loved by everyone, making them perfect for gatherings, game days, or a cozy night in.

Ingredients Breakdown

To make these crispy fried chicken wings, you’ll need the following ingredients:

  • 8 chicken wings: Look for fresh or frozen, but ensure they are thawed before cooking.
  • 200 ml milk: Whole milk works best for marinating, but you can also use buttermilk for extra tang.
  • 1 tsp salt: Essential for seasoning the wings.
  • 1 tsp black pepper: For a touch of heat and flavor.
  • 1 tsp chili powder: Adds a subtle kick; adjust to taste.
  • 2 eggs: These will help bind the flour to the chicken.
  • 2 tbsp flour: For an initial coating to hold the crispy crust.
  • 2 tbsp cornstarch: My secret for achieving extra crispiness.
  • Oil for frying: Use vegetable oil or peanut oil for frying at high temperatures.

Step-by-Step Instructions

Juicy and golden-brown fried chicken wings arranged appetizingly.

Follow these detailed steps to create your crispy fried chicken wings:

  • Prepare the Wings: Poke small holes in the chicken wings. This helps the marinade penetrate deeper.
  • Marinate: In a bowl, combine the salt, black pepper, chili powder, and milk. Add the wings and mix everything well. Marinate for at least 1 hour.
  • Prepare the Coating: After marinating, drain half of the milk. In the same bowl, add 2 eggs, 1 tablespoon of flour, and 1 tablespoon of cornstarch. Mix until the wings are evenly coated.
  • Make the Dry Coating: In a separate bowl, mix equal parts flour and cornstarch to create the crispy coating.
  • Coat the Wings: Take each marinated wing and thoroughly coat it in the flour-cornstarch mixture. Shake off any excess flour.
  • Heat the Oil: In a large pot, heat oil to 350°F (175°C). Make sure the wings have enough space to fry; overcrowding will lead to soggy wings.
  • First Fry: Fry the wings for about 8-10 minutes or until golden brown. Remove and let them rest on a rack.
  • Second Fry: Increase the oil temperature to 375°F (190°C) and fry the wings again for another 3-5 minutes for extra crispiness.
  • Serve: Serve hot with your favorite dipping sauce or enjoy them plain!

Pro Tips for the Best Fried Chicken Wings

  • Let Wings Come to Room Temperature: Allowing the wings to sit out for 10-15 minutes before frying helps achieve even cooking.
  • Use a Thermometer: Keep an eye on oil temperature to ensure the wings fry perfectly without burning.
  • Don’t Skimp on the Cornstarch: This is the secret to a truly crispy texture. Use it generously in your coating.
  • Rest the Wings: Letting the wings rest after the first fry allows the steam to escape, which prevents sogginess.
  • Experiment with Flavors: Use different spices in the marinade or add sauces after frying for varied tastes.

Common Mistakes and Troubleshooting

Even the best chefs have off days. Here are common pitfalls to avoid:

  • Overcrowding the Pan: This lowers the oil temperature, resulting in greasy wings. Fry in batches if necessary.
  • Not Drying the Wings: Excess moisture on the wings can lead to a soggy coating. Pat them dry before marinating.
  • Skipping the Two-Stage Frying: This crucial step is what gives you that crunchy texture—don’t skip it!
  • Ignoring Temperature: Ensure your oil is hot enough. If it’s too cold, your wings will absorb too much oil.
  • Not Resting the Wings: Skipping the resting period after frying can lead to a loss of crispy texture.

Variations to Try

Mix things up with these delicious variations on the classic fried chicken wings:

  • Buffalo Style: Toss fried wings in your favorite buffalo sauce and serve with blue cheese dressing.
  • Sweet and Spicy: Add honey and sriracha to the marinade for a sweet and fiery twist.
  • Garlic Parmesan: After frying, toss wings in melted butter, minced garlic, and grated parmesan cheese.
  • Asian-Inspired: Marinate wings in soy sauce, ginger, and sesame oil for a flavorful twist.

Storage and Make-Ahead Instructions

If you have leftovers (though I doubt you will!), here’s how to store them:

  • Refrigerate: Allow wings to cool completely before placing them in an airtight container. They can be stored in the fridge for up to 3 days.
  • Freeze: For longer storage, freeze cooked wings in a single layer before transferring to a freezer-safe container. They can last up to 3 months.
  • Reheat: For the best texture, reheat in the oven at 375°F (190°C) for about 10-15 minutes until they’re hot and crispy again.

Frequently Asked Questions

Here are some common questions about making the best fried chicken wings:

  • Can I make this recipe with other pieces of chicken? Absolutely! This recipe works well with drumsticks or thighs, just adjust the cooking time accordingly.
  • What’s the secret ingredient for crispy fried chicken wings? Cornstarch is key! It helps create that crunchy exterior.
  • Can I bake chicken wings instead of frying? Yes, for a healthier option, bake them at 425°F (220°C) for about 40-45 minutes, flipping halfway through.
  • How long should you brine chicken wings? A brining time of 30 minutes to 1 hour is ideal for flavor and moisture.
  • What’s the best oil temperature for frying wings? Aim for 350°F (175°C) for the first fry and 375°F (190°C) for the second.
  • Can I use frozen chicken wings? Yes, just make sure to thaw them completely before marinating.
  • How do I make my wings extra spicy? Add cayenne pepper or hot sauce to the marinade for an extra kick.
  • What should I serve with fried chicken wings? Classic sides include celery sticks, carrot sticks, and creamy dipping sauces like ranch or blue cheese.

Nutrition Tips and Dietary Adaptations

For those watching their diet, here are some tips:

  • Low-Carb Option: Skip the flour and cornstarch and use almond flour for a keto-friendly version.
  • Gluten-Free: Use gluten-free flour blends in place of regular flour.
  • Healthier Frying: Consider air frying your wings for a lower-fat alternative with the same great taste.

Equipment Recommendations

To ensure your cooking process is smooth, here’s what I recommend:

  • Deep Fryer: If you fry often, a deep fryer will give you consistent heating and temperature control.
  • Heavy-Bottomed Pot: If you’re frying on the stovetop, a heavy pot prevents temperature drops.
  • Thermometer: A cooking thermometer is invaluable for checking oil temperature.
  • Cooling Rack: Let your fried wings rest on a rack to keep them crisp.

Serving Suggestions

To elevate your wing experience, consider these serving ideas:

  • Pair with Dipping Sauces: Serve with ranch, blue cheese, or a spicy sriracha mayo.
  • Garnish: Sprinkle with chopped green onions or sesame seeds for an extra touch.
  • Serve with Sides: Consider coleslaw, potato wedges, or a fresh garden salad to round out the meal.

In Conclusion

Now that you have the ultimate guide to making crispy fried chicken wings, it’s time to gather your ingredients and get cooking! Remember, the joy of preparing these wings lies in the love and care you put into the process. Every bite should remind you of family, tradition, and the simple pleasures of home cooking. So, roll up your sleeves, heat that oil, and let the good times roll!

Crispy Fried Chicken Wings 🍗✨ (Juicy & Finger-Lickin’ Good!)

Prep Time 15 minutes
Cook Time 20 minutes
Total Time 35 minutes
Servings 4 pieces
Calories 350
Enjoy these crispy, juicy chicken wings with a flavorful marinade and crunchy coating, perfect for any occasion.

Ingredients

Main

  • 8 pieces chicken wings
  • 200 ml milk
  • 1 tsp salt
  • 1 tsp black pepper
  • 1 tsp chili powder
  • 2 eggs eggs
  • 2 tbsp flour
  • 2 tbsp cornstarch
  • Oil for frying oil (for deep frying)

Instructions 

  • Poke small holes in the wings, then marinate with salt, pepper, chili powder, and milk for 1 hour.
  • Remove half of the milk, add eggs, flour, and cornstarch; mix until wings are coated.
  • Mix equal parts flour and cornstarch to make the crispy coating.
  • Coat each wing thoroughly in the flour-cornstarch mixture, shaking off excess.
  • Fry wings until golden, then increase oil temperature and fry again for extra crispiness.

Notes

For extra crispiness, double fry the wings and serve hot with dipping sauce.
Calories: 350kcal
Cost: $15
Course: Appetizer
Cuisine: American
Keyword: Chicken Wings

Discover the Heart of Home Cooking

Welcome to the comforting embrace of home cooking, where every meal tells a story and brings families together. Today, we’re diving into a dish that embodies warmth and simplicity: One Pan Garlic Parmesan Chicken Pasta. This delightful recipe combines tender chicken, hearty pasta, and a creamy garlic sauce, all cooked in one pan for minimal cleanup and maximum flavor. If you’re looking to create a meal that feels like a warm hug from your kitchen, you’ve come to the right place.

With just a handful of ingredients and straightforward steps, this dish is perfect for weeknight dinners or special gatherings. Whether you’re a seasoned cook or just starting out, let’s uncover why this recipe will quickly become a staple in your home.

Why You’ll Love This Recipe

  • One-pan convenience: Everything cooks in a single skillet, making it easy to whip up dinner without a mountain of dishes to wash afterward.
  • Comfort food at its best: The creamy garlic parmesan sauce envelops the pasta and chicken, creating a dish that’s as satisfying as it is delicious.
  • Quick preparation: In just about 30 minutes, you can have a hearty meal on the table that tastes like it took hours to prepare.
  • Customizable: Feel free to add your favorite vegetables or switch out the pasta type to suit your family’s tastes.
  • Leftover-friendly: This dish keeps well in the fridge, making it perfect for meal prep or enjoying the next day.

Ingredients for One Pan Garlic Parmesan Chicken Pasta

Gather the following ingredients to create this delicious meal:

  • 4 boneless, skinless chicken breasts (about 680g)
  • 8 oz (225g) of penne or rotini pasta
  • 4 cloves of fresh garlic, minced
  • 2 cups of low-sodium chicken broth (480ml)
  • 1 cup of heavy cream (240ml)
  • 1 cup of freshly grated Parmesan cheese (100g)
  • 2 tablespoons of olive oil (30ml)
  • 2 cups of fresh spinach (optional, about 60g)

**Substitutions**: You can use chicken thighs instead of breasts for a juicier option. If you prefer a lighter sauce, substitute half of the heavy cream with milk or a dairy-free alternative. For a gluten-free option, swap the pasta for gluten-free varieties.

How to Make One Pan Garlic Parmesan Chicken Pasta

Juicy chicken breasts served in a creamy garlic parmesan sauce with pasta.

Follow these simple steps to create your dish:

  1. Heat olive oil in a large skillet over medium heat. Season the chicken with salt and pepper, then cook for about 6 minutes per side until golden brown. Remove from the pan and let it rest.
  2. In the same skillet, sauté minced garlic for about 1 minute until fragrant. Be careful not to burn it!
  3. Add the pasta and chicken broth; bring to a boil, cover, and simmer for about 10 minutes until the pasta is al dente.
  4. Lower the heat and stir in heavy cream and Parmesan cheese until well combined.
  5. Slice the rested chicken and return it to the skillet along with the spinach if using; toss gently to coat with the sauce.
  6. Serve warm, garnished with extra Parmesan if desired.

Pro Tips for Perfect Garlic Parmesan Chicken Pasta

  • Don’t overcook the chicken: Aim for a golden exterior while keeping the inside juicy. Use a meat thermometer to ensure it reaches 165°F (74°C).
  • Use fresh garlic: Freshly minced garlic gives the best flavor compared to pre-minced options.
  • Grate your own Parmesan: Freshly grated cheese melts better and has a more robust flavor than pre-packaged options.
  • Let the sauce simmer: Allowing the sauce to cook for a few minutes helps it thicken and become more flavorful.
  • Don’t skip the spinach: If you have it on hand, adding spinach boosts nutrition and adds a lovely color contrast.
  • Adjust the creaminess: If you prefer a lighter dish, reduce the amount of heavy cream or substitute with half and half.
  • Save some pasta water: If the sauce is too thick, add a splash of reserved pasta water to achieve your desired consistency.
  • Experiment with herbs: Adding fresh or dried herbs like thyme, basil, or oregano can elevate the flavor profile.

Avoid Common Mistakes

Even the best of us can make mistakes in the kitchen. Here are common pitfalls to watch out for:

  • Overcrowding the pan: If your skillet is too crowded, the chicken won’t brown properly. Cook in batches if necessary.
  • Forgetting to season: Don’t skip on salt and pepper; they enhance the dish’s flavor significantly.
  • Cooking pasta too long: Al dente pasta holds up better in the dish and absorbs the sauce without becoming mushy.
  • Ignoring the resting time: Letting the chicken rest after cooking allows the juices to redistribute, keeping it moist.

Delicious Variations to Try

Feel free to get creative with this recipe. Here are some variations to suit your taste:

  • Vegetable Medley: Add bell peppers, zucchini, or broccoli to the skillet for more nutrients and flavor.
  • Spicy Kick: Toss in red pepper flakes or diced jalapeños to bring some heat to the dish.
  • Mushroom Lover’s: Sauté sliced mushrooms with the garlic for a rich umami flavor.
  • Herb-Infused: Stir in fresh herbs like parsley or basil right before serving for a burst of freshness.

Storing and Make-Ahead Instructions

Planning ahead? Here’s how to store your Garlic Parmesan Chicken Pasta:

  • **Refrigerate**: Store leftovers in an airtight container in the fridge for up to 3 days.
  • **Reheat**: Warm gently on the stovetop over low heat, adding a splash of chicken broth or water to loosen the sauce.
  • **Freezing**: Freeze portions in airtight containers for up to 2 months, though the texture may slightly change upon reheating.

Frequently Asked Questions

  • Can I use frozen chicken? Yes, but ensure it’s fully thawed before cooking for even cooking.
  • What type of pasta works best? Penne or rotini are great choices, but you can use any pasta you prefer.
  • Can I make it dairy-free? Substitute heavy cream with coconut milk and use a dairy-free cheese alternative.
  • How do I know when the chicken is done? A meat thermometer should read 165°F (74°C) in the thickest part of the chicken.
  • What can I serve this with? A side salad or garlic bread pairs wonderfully with this dish.
  • Can I add more cheese? Absolutely! Feel free to sprinkle more Parmesan on top before serving.
  • Is this recipe kid-friendly? Yes, the creamy sauce and pasta are usually a hit with kids.
  • Can I use other proteins? Yes, shrimp or sausage can be great alternatives to chicken.

Nutritional Tips and Dietary Adaptations

This dish is not only delicious but can be adapted to fit various dietary needs:

  • Low-carb option: Substitute pasta with zucchini noodles or spaghetti squash.
  • Gluten-free: Use gluten-free pasta to accommodate dietary restrictions.
  • Heart-healthy: Use olive oil sparingly and opt for low-fat cream options.

Essential Equipment

To make this recipe, you’ll need:

  • Large skillet: A good-quality skillet ensures even cooking and browning.
  • Meat thermometer: Helps you check the chicken’s doneness without cutting it open.
  • Wooden spoon or spatula: Perfect for stirring without damaging your skillet.

Serving Suggestions

This dish is best served warm and can be garnished with:

  • Extra grated Parmesan: A sprinkle on top adds a touch of elegance and flavor.
  • Fresh herbs: A handful of chopped parsley or basil brightens the dish.
  • Cracked black pepper: A dash of fresh pepper adds a bit of zing.

Conclusion

There you have it—the ultimate comfort food that’s simple enough for a weeknight but delicious enough for a special occasion. One Pan Garlic Parmesan Chicken Pasta is more than just a meal; it’s a celebration of home, family, and the joy of cooking. So gather your loved ones, serve up a plate, and relish the flavors of togetherness. Happy cooking, my friends!

One Pan Garlic Parmesan Chicken Pasta

Prep Time 10 minutes
Cook Time 20 minutes
Total Time 30 minutes
Servings 4 servings
Calories 650
A quick and creamy chicken pasta dish cooked in one pan, perfect for a satisfying weeknight dinner.

Ingredients

Protein

  • 4 pieces boneless, skinless chicken breasts ((about 680g))
  • 8 oz penne or rotini pasta ((225g))
  • 4 cloves fresh garlic, minced
  • 2 cups low-sodium chicken broth ((480ml))
  • 1 cup heavy cream ((240ml))
  • 1 cup freshly grated Parmesan cheese ((100g))
  • 2 tbsp olive oil ((30ml))
  • 2 cups fresh spinach ((about 60g, optional))

Instructions 

  • Heat olive oil in a skillet, cook chicken 6 mins per side, then rest.
  • Sauté garlic in the same skillet for 1 min.
  • Add pasta and broth, boil, cover, and simmer 10 mins until al dente.
  • Stir in cream and Parmesan until combined.
  • Slice chicken, add to skillet with spinach, toss gently.
  • Serve warm, garnished with extra Parmesan if desired.

Notes

For a lighter version, use half and half instead of heavy cream.
Calories: 650kcal
Cost: $15
Course: Main Course
Cuisine: American
Keyword: chicken, Garlic, Pasta

Welcome to the Heart of Comfort Cooking

Gather round, friends! Today, we’re diving into a cherished dish that has been a staple on dinner tables across the South for generations—Easy Juicy Lemon Garlic Skillet Chicken. This recipe is not just about a meal; it’s about the warmth of home, the laughter of family, and the simple joys that come from a well-cooked chicken. With a tantalizing combination of lemon and garlic, this dish brightens up your evening and fills your home with delightful aromas. So, roll up your sleeves, and let’s get cooking!

Why You’ll Love This Recipe

This lemon garlic chicken isn’t just another chicken dish; it’s a celebration of flavor and ease! Here are just a few reasons why you’ll want to add this to your regular rotation:

  • Quick & Easy: With simple ingredients and straightforward steps, you can whip this up on a busy weeknight without breaking a sweat.
  • Flavorful & Juicy: The marinade infuses the chicken with a zesty punch, ensuring every bite is bursting with flavor.
  • Versatile: Pair it with rice, pasta, or a fresh salad, and you’ve got a complete meal that suits any palate.
  • Healthy & Wholesome: Packed with lean protein and fresh ingredients, this dish keeps your family nourished.
  • Perfect for Meal Prep: Make a double batch and enjoy leftovers throughout the week!

Ingredients You’ll Need

Before we dive into the cooking, let’s gather our ingredients. Here’s what you’ll need for our lemon garlic skillet chicken:

  • 4 pieces Boneless, skinless chicken breasts: Choose these for quick cooking and easy slicing.
  • 1 teaspoon Salt: A simple seasoning to enhance natural flavors.
  • 1 teaspoon Pepper: Adds just the right amount of seasoning.
  • 2 tablespoons Olive oil: Use extra virgin for the best flavor.
  • 4 cloves Fresh garlic: Mince finely for maximum flavor.
  • 1/4 cup Lemon juice: Freshly squeezed for brightness.
  • 1 tablespoon Lemon zest: Adds aroma and color.
  • 1/2 cup Chicken broth: Provides depth to the sauce.
  • 2 tablespoons Butter: Swirl in at the end for richness.
  • 2 tablespoons Fresh parsley: Chopped for garnish.
  • 1/4 teaspoon Red pepper flakes: For an optional hint of heat.

How to Make Lemon Garlic Skillet Chicken

Side view of succulent chicken breasts garnished with parsley and lemon wedges.

Ready to get started? Here’s a step-by-step guide to crafting this delightful dish:

  1. Prepare the Chicken: Season the chicken breasts with salt and pepper on both sides.
  2. Heat the Skillet: In a large skillet, heat the olive oil over medium-high heat until shimmering.
  3. Add the Chicken: Carefully place the chicken in the skillet and cook for 5-7 minutes per side until golden brown and cooked through. Remove the chicken and set aside.
  4. Make the Sauce: In the same skillet, add minced garlic and sauté for about 30 seconds until fragrant. Be careful not to burn it!
  5. Add Lemon: Pour in the chicken broth, lemon juice, and lemon zest. Scrape the bottom of the skillet to deglaze, mixing in all the delicious bits.
  6. Finish with Butter: Stir in butter until melted and the sauce is smooth.
  7. Return Chicken: Place the chicken back into the skillet, spooning sauce over it. Let it simmer for 2-3 minutes to soak in the flavors.
  8. Garnish and Serve: Sprinkle fresh parsley and red pepper flakes on top before serving.

Pro Tips for Perfecting Your Skillet Chicken

To ensure your lemon garlic chicken turns out perfectly every time, keep these tips in mind:

  • Choose the Right Chicken: Boneless, skinless chicken breasts are ideal for this recipe, but thighs can also work beautifully.
  • Uniform Size: Ensure all chicken pieces are of similar thickness for even cooking.
  • Let It Rest: After cooking, allow the chicken to rest for a few minutes to keep it juicy.
  • Don’t Rush the Sear: A good sear requires patience. Let the chicken develop a nice golden crust before flipping.
  • Experiment with Fresh Herbs: Feel free to add rosemary or thyme for added depth.
  • Adjust the Heat: If you like a little kick, increase the red pepper flakes to your taste.
  • Use a Good Skillet: A heavy-bottomed skillet, preferably cast iron, helps distribute heat evenly.
  • Deglaze Properly: Don’t skip the deglazing step; it’s essential for flavorful sauce!

Common Mistakes and Troubleshooting

Even the best of us make mistakes in the kitchen. Here are some common pitfalls and how to avoid them:

  • Overcooking Chicken: Use a meat thermometer to check that chicken reaches 165°F; this ensures it’s perfectly cooked without being dry.
  • Burning Garlic: Always watch garlic closely; it can go from fragrant to burnt in a matter of seconds.
  • Too Much Acid: If the sauce is too tart, balance it with a touch of honey or sugar.
  • Not Enough Flavor: Adjust seasonings to your taste; don’t hesitate to add more salt or herbs.

Delicious Variations to Try

Feeling adventurous? Here are some delightful variations to keep things interesting:

  • Honey Garlic Variation: Add a tablespoon of honey to the sauce for a sweeter twist.
  • Herb-Infused Chicken: Use a mix of fresh herbs like thyme and rosemary for a fragrant finish.
  • Mushroom Addition: Sauté sliced mushrooms with the garlic for an earthy flavor.
  • Spicy Lemon Garlic Chicken: Add more red pepper flakes or a dash of cayenne for extra heat.

Storage and Make-Ahead Instructions

This lemon garlic chicken is perfect for meal prep or leftovers. Here’s how to store it:

  • Refrigeration: Store leftovers in an airtight container in the refrigerator for up to 3 days.
  • Freezing: Freeze cooked chicken in an airtight container for up to 3 months—thaw overnight in the fridge before reheating.
  • Reheating: Gently reheat the chicken in a skillet over low heat, adding a splash of chicken broth to keep it moist.

Frequently Asked Questions

Got questions? We’ve got answers! Here are some common queries about this recipe:

  • Can I use frozen chicken? Yes, but make sure to thaw it completely before cooking.
  • What can I serve with this chicken? It pairs beautifully with rice, mashed potatoes, or a fresh garden salad.
  • Can I make this recipe gluten-free? Absolutely! Just make sure your chicken broth is gluten-free.
  • How can I make this dish dairy-free? Omit the butter and use a dairy-free alternative or additional olive oil.
  • What if I don’t have lemon juice? You can substitute with lime juice or even a bit of vinegar in a pinch.
  • Is it possible to grill this chicken? Definitely! Follow the same marinade and grill for about 6-8 minutes on each side.
  • Can I add vegetables? Yes, add vegetables like asparagus or green beans in the last few minutes of cooking!
  • What type of skillet is best? A cast iron or stainless-steel skillet works best for even heat distribution.

Nutritional Tips and Dietary Adaptations

For those watching their diet, here are some tips to keep your meal healthy:

  • Lean Protein: Opt for skinless chicken breasts to reduce fat content.
  • Increase Veggies: Serve with a side of steamed vegetables for added nutrients.
  • Whole Grains: Pair with quinoa or brown rice for a wholesome meal.
  • Low Sodium Options: Use low-sodium chicken broth to control salt intake.

Essential Equipment for Success

To make your cooking experience smooth, here’s a list of essential tools:

  • Skillet: A high-quality skillet, preferably cast iron or non-stick.
  • Meat Thermometer: Ensures chicken is cooked perfectly every time.
  • Cutting Board: A sturdy cutting board for prepping ingredients.
  • Sharp Knife: A sharp knife for easy slicing of chicken and vegetables.

Serving Suggestions

Now that your skillet chicken is ready, here are some serving ideas:

  • With Crusty Bread: Serve alongside warm, crusty bread to soak up the delicious sauce.
  • Over Rice: Spoon the chicken and sauce over a bed of fluffy rice for a complete meal.
  • In a Salad: Slice and toss it into a fresh salad for a hearty lunch option.
  • With Pasta: Pair it with spaghetti or fettuccine for a comforting pasta dish.

Conclusion: A Dish to Remember

This Easy Juicy Lemon Garlic Skillet Chicken is more than just a meal; it’s a reminder of the love and care that goes into every home-cooked dish. As you gather around the table with family and friends, savor each bite and share stories that warm the heart. Remember, cooking isn’t complicated; it’s about enjoying the process and creating memories. Happy cooking, y’all!

Easy Juicy Lemon Garlic Skillet Chicken You’ll Crave Tonight

Prep Time 10 minutes
Cook Time 15 minutes
Total Time 25 minutes
Servings 4 servings
Calories 350
This flavorful skillet chicken combines zesty lemon, garlic, and herbs for a juicy, satisfying meal that's quick to prepare.

Ingredients

Protein

  • 4 pieces Boneless, skinless chicken breasts (Choose for quick cooking and easy slicing.)
  • 1 teaspoon Salt (Simple seasoning to enhance natural flavors.)
  • 1 teaspoon Pepper (Simple seasoning to enhance natural flavors.)
  • 2 tablespoons Olive oil (Use extra virgin for the best flavor.)
  • 4 cloves Fresh garlic cloves (Mince finely for maximum flavor.)
  • 0.25 cup Lemon juice (Freshly squeezed for brightness.)
  • 1 tablespoon Lemon zest (Adds aroma and color.)
  • 0.5 cup Chicken broth (Provides depth to the sauce.)
  • 2 tablespoons Butter (Swirl in at the end for richness.)
  • 2 tablespoons Fresh parsley (Chopped for garnish.)
  • 0.25 teaspoon Red pepper flakes (For an optional hint of heat.)

Instructions 

  • Season chicken breasts with salt and pepper.
  • Heat olive oil in a skillet over medium heat and cook chicken until golden and cooked through, about 6-7 minutes per side.
  • Add minced garlic and red pepper flakes; cook for 1 minute until fragrant.
  • Pour in lemon juice, chicken broth, and lemon zest; simmer for 3-4 minutes to reduce slightly.
  • Stir in butter and chopped parsley; serve chicken with the sauce spooned over.

Notes

For extra flavor, marinate the chicken in lemon juice and garlic for 30 minutes before cooking.
Calories: 350kcal
Cost: $15
Course: Main Course
Cuisine: American
Keyword: chicken

Welcome to the cozy world of homemade cooking, where simple ingredients come together to create a dish that feels like a warm hug on a chilly evening. Today, we’re diving into the heart of comfort food with a recipe that has become a staple in my home: the Creamy Garlic Parmesan Chicken Pasta. With tender chicken, rich garlic flavors, and a velvety cream sauce, this dish is perfect for family dinners and weeknight cravings alike. In just a few steps, you’ll learn how to bring this heavenly meal to your table.

Why You’ll Love This Recipe

This recipe is not just about taste; it’s about the experience, the memories, and the smiles it brings to the family table. Here are five reasons why you’ll adore this creamy chicken pasta:

  • Quick and Easy: Ready in just 30 minutes, making it a savior for busy weeknights.
  • Family-Friendly: Even picky eaters will find it hard to resist the creamy, cheesy goodness.
  • Comforting Flavors: The rich garlic parmesan sauce wraps around every piece of pasta, delivering warmth with every bite.
  • Versatile: This dish pairs well with a variety of sides and can be easily customized to suit your family’s tastes.
  • Meal Prep Friendly: Make a big batch to enjoy leftovers throughout the week, saving you time and effort.

Ingredients You’ll Need

Here’s what you’ll need to whip up this delightful dish:

  • Boneless, skinless chicken breast — 2 large, cut into 1-inch cubes
  • Twisted pasta (fusilli) — 1 lb (450 g), or penne/rotini
  • Unsalted butter — 3 Tbsp, divided
  • Fresh garlic, minced — 4–5 cloves
  • Heavy cream — 1 ½ cups
  • Chicken broth — ½ cup
  • Grated Parmesan cheese — 1 cup (freshly grated preferred)
  • Italian seasoning — 1 tsp, divided
  • Red pepper flakes — ¼ tsp, optional
  • Fine salt & black pepper — to taste
  • Fresh parsley, chopped — 2 Tbsp, for garnish

How to Make Creamy Garlic Parmesan Chicken Pasta

Follow these straightforward steps to create your creamy garlic parmesan chicken pasta:

  • Boil pasta: Bring a large pot of salted water to a rolling boil. Cook pasta until al dente per package directions. Reserve ½ cup pasta water; drain.
  • Season & sear chicken: Pat chicken dry. Season with salt, pepper, and ½ tsp Italian seasoning. In a large skillet over medium-high heat, melt 1 Tbsp butter. Sear chicken 3–4 minutes per side until golden and cooked through. Transfer to a plate (keep juices).
  • Build garlic cream base: Lower heat to medium. Add remaining 2 Tbsp butter. Stir in garlic and red pepper flakes; cook 30–60 seconds until fragrant.
  • Deglaze & simmer: Pour in chicken broth, scraping browned bits. Stir in heavy cream and remaining ½ tsp Italian seasoning. Simmer gently 2–3 minutes to thicken slightly.
  • Melt Parmesan: Reduce heat to low. Gradually sprinkle in Parmesan, stirring until fully melted and sauce is velvety smooth.
  • Combine: Return chicken (and juices) to the skillet. Add drained pasta. Toss until evenly coated. If sauce is thick, stir in splashes of reserved pasta water until glossy and clinging to the pasta.
  • Finish & serve: Taste and adjust salt/pepper. Garnish with chopped parsley and serve immediately.

Pro Tips for a Perfect Pasta

Juicy chunks of chicken and twisted pasta in a creamy garlic sauce.

Want to elevate your dish even further? Here are some expert insights:

  • Use freshly grated Parmesan: For the best flavor and texture, always opt for freshly grated cheese over pre-packaged.
  • Don’t skip the pasta water: The reserved pasta water helps to adjust the sauce’s consistency while adding flavor.
  • Customize your proteins: Swap the chicken for shrimp or sautéed vegetables for a delicious twist.
  • Make it spicy: Add more red pepper flakes or a dash of hot sauce for a kick.
  • Garnish generously: Fresh herbs like basil or thyme can brighten up the dish and add a pop of color.
  • Check for seasoning: Always taste your sauce before serving to ensure it’s seasoned to perfection.
  • Let it rest: Allow the dish to sit for a few minutes before serving to let the flavors meld.
  • Pair with a salad: A simple green salad on the side complements the richness of the pasta beautifully.

Common Mistakes and Troubleshooting

Even the best cooks make mistakes. Here’s how to avoid common pitfalls:

  • Overcooking the pasta: Always follow package instructions and taste for doneness.
  • Too thick sauce: If your sauce becomes too thick, gradually stir in a bit of reserved pasta water until it reaches the desired consistency.
  • Burnt garlic: Garlic can turn bitter if overcooked. Keep an eye on it while sautéing.
  • Insufficient seasoning: Don’t be shy with the salt and pepper; they enhance the natural flavors of the dish.

Variations to Try

Bored of the same old recipe? Here are some creative twists:

  • Vegetarian Option: Replace chicken with sautéed mushrooms and spinach for a hearty meatless meal.
  • One-Pot Wonder: Cook the pasta and chicken together in the same pot for easy clean-up.
  • Cheesy Baked Pasta: Transfer the finished pasta to a baking dish, top with more cheese, and broil until bubbly.
  • Herb-Infused Sauce: Add fresh herbs like thyme or rosemary into the sauce for an aromatic lift.

Storage and Make-Ahead Instructions

Planning ahead? Here’s how to store and reheat your creamy chicken pasta:

  • Refrigeration: Store any leftovers in an airtight container in the fridge for up to 3 days.
  • Freezing: This dish can be frozen for up to 2 months. To reheat, thaw overnight in the fridge and warm gently on the stovetop.
  • Make-ahead: Prepare the sauce in advance and just cook the pasta and chicken on the day you plan to serve.

Nutrition Tips and Dietary Adaptations

Looking to make this recipe healthier? Consider these adaptations:

  • Lower fat: Use half-and-half instead of heavy cream, or replace with a plant-based cream for a lighter version.
  • Gluten-free: Swap the pasta for gluten-free options like quinoa or rice noodles.
  • Protein boost: Add chickpeas or lentils for extra protein while keeping it vegetarian.

Equipment Recommendations

To make the cooking process smoother, here’s what you’ll need:

  • Large pot: For boiling the pasta, choose a pot that can hold 4-6 quarts.
  • Skillet: A large skillet (preferably non-stick) is best for sautéing the chicken and making the sauce.
  • Wooden spoon: Ideal for stirring and scraping the bottom of the skillet.

Serving Suggestions

Pair your creamy garlic parmesan chicken pasta with these delightful sides:

  • Garlic Bread: A crusty loaf slathered in garlic butter makes for a perfect accompaniment.
  • Simple Salad: A fresh garden salad with a light vinaigrette balances the richness of the pasta.
  • Roasted Vegetables: Tossed with olive oil and herbs, roasted veggies add color and nutrition to your meal.

Frequently Asked Questions

Got questions? Here are some common queries about this recipe:

  • Can I use frozen chicken? Yes, but make sure it’s fully thawed before cooking for even results.
  • What type of pasta works best? Twisted pasta like fusilli holds the sauce well, but you can use any pasta shape you prefer.
  • Can I make this dish dairy-free? Absolutely! Substitute heavy cream with coconut cream or a dairy-free alternative and skip the cheese.
  • Is it ok to reheat leftovers? Yes, just warm gently on the stovetop and add a splash of broth or cream to loosen the sauce.
  • How can I add more vegetables? Feel free to toss in some sautéed spinach, broccoli, or bell peppers for added nutrition.
  • Can I make this pasta ahead of time? Yes, prepare the sauce in advance and store it separately from the pasta until you’re ready to serve.
  • How spicy is this recipe? With the red pepper flakes, it has a mild kick. Feel free to adjust or omit based on your preference.
  • What should I do if my sauce is too thick? Stir in reserved pasta water gradually until you reach the desired creamy consistency.

Conclusion

There you have it, folks—a heartwarming, creamy garlic parmesan chicken pasta recipe that speaks to the soul. It’s simple, satisfying, and sure to become a cherished favorite in your home. So gather your loved ones, whip up this delightful dish, and enjoy the warmth and joy that comes from sharing a meal together. Happy cooking!

The Ultimate Creamy Garlic Parmesan Chicken Pasta You'll Crave Every Week

Prep Time 10 minutes
Cook Time 20 minutes
Total Time 30 minutes
Servings 4 servings
Calories 650
This creamy garlic Parmesan chicken pasta is a flavorful, comforting dish perfect for weekly dinners. Quick to prepare and irresistibly delicious.

Ingredients

Protein

  • 2 large boneless, skinless chicken breast (cut into 1-inch cubes)

Pasta

  • 1 lb twisted pasta (fusilli)

Dairy & Fats

  • 3 Tbsp unsalted butter (divided)
  • 4–5 cloves fresh garlic, minced
  • 1 ½ cups heavy cream
  • ½ cup chicken broth
  • 1 cup Grated Parmesan cheese (preferably freshly grated)
  • 1 tsp Italian seasoning (divided)
  • ¼ tsp Red pepper flakes (optional)
  • to taste Fine salt & black pepper

Garnish

  • 2 Tbsp fresh parsley, chopped (for garnish)

Instructions 

  • Cook pasta in salted boiling water until al dente, then drain and reserve ½ cup pasta water.
  • Season chicken with salt, pepper, and ½ tsp Italian seasoning. Sear in 1 Tbsp butter until golden and cooked through, then set aside.
  • In the same skillet, melt remaining butter, cook garlic and red pepper flakes until fragrant, then add chicken broth and cream. Simmer to thicken.
  • Reduce heat, gradually add Parmesan until smooth. Return chicken and drained pasta, toss to coat, adding reserved pasta water if needed.
  • Adjust seasoning, garnish with parsley, and serve immediately.

Notes

For extra flavor, sprinkle additional Parmesan or fresh herbs before serving.
Calories: 650kcal
Cost: $15
Course: Main Course
Cuisine: Italian
Keyword: chicken, Pasta

The Heart of Honey Garlic Chicken: A Soulful Introduction

Picture this: the sun setting over a warm Southern evening, the air filled with the sweet and savory aroma of honey garlic chicken simmering on the stovetop. This dish is more than just a recipe; it’s a celebration of simple ingredients that come together to create something truly magical. In this article, we’ll dive deep into the art of making honey garlic chicken breasts that will not only nourish your body but also warm your heart and home.

Whether you’re cooking for a family gathering or just treating yourself to a comforting meal, this honey garlic chicken recipe is designed for ease and flavor. Let’s uncover the secrets to this classic dish and transform your kitchen into a haven of cherished memories and mouthwatering aromas.

Why You’ll Love This Recipe

This honey garlic chicken recipe is perfect for anyone who appreciates the beauty of easy home-cooked meals. Here’s why you’ll adore it:

  • Quick and Easy: With just a handful of ingredients, you can have a delicious meal ready in under 30 minutes, making it perfect for busy weeknights.
  • Sweet and Savory Balance: The combination of honey and garlic creates a rich sauce that elevates the chicken, balancing sweetness with the umami of soy sauce.
  • Versatile Dish: This recipe allows for endless variations, whether you prefer it spicy or with added veggies, making it adaptable to your taste.
  • Family-Friendly: Kids and adults alike will love this dish, making it a perfect choice for family dinners or gatherings.
  • Healthy and Wholesome: Chicken breasts are lean and packed with protein, and when paired with wholesome ingredients, this meal is as nutritious as it is delicious.

Ingredient Breakdown: What You Need

Before we start cooking, let’s take a closer look at the star ingredients of this honey garlic chicken recipe:

  • 2 large chicken breasts: Choose boneless, skinless chicken breasts for a tender and juicy final dish. You can also substitute with chicken thighs for a richer flavor.
  • 4 cloves garlic: Fresh garlic is essential for that aromatic punch. You can adjust the amount based on your love for garlic.
  • 2 tablespoons soy sauce: This adds a savory depth to the sauce, complementing the sweetness of the honey.
  • 2 tablespoons honey: Use local honey if possible; it adds a unique flavor and supports local beekeepers.

When making substitutions, you can consider using:

  • Rice vinegar: A splash of rice vinegar can brighten the sauce if you prefer a tangy twist.
  • Maple syrup: If you’re looking for a different sweetness, maple syrup works beautifully in place of honey.
  • Ginger: Adding fresh ginger can introduce a warm spice element to the dish.

Pro Tips for Perfect Honey Garlic Chicken

Side shot of tender chicken breasts coated in a glossy honey garlic sauce.

Let’s ensure your honey garlic chicken is nothing short of extraordinary. Here are some expert insights:

  • Marinate the Chicken: If time allows, marinate your chicken breasts in soy sauce and honey for 30 minutes to amplify flavor.
  • High Heat Searing: Sear the chicken over medium-high heat to achieve a crispy outside while keeping the inside juicy.
  • Reduce the Sauce: Allow the sauce to simmer and reduce for a thicker consistency that clings beautifully to the chicken.
  • Rest the Chicken: After cooking, let the chicken rest for a few minutes to retain its juices before slicing.
  • Experiment with Garnishes: Fresh herbs like cilantro or green onions can add a lovely finish to your dish.
  • Pair with Sides: Serve with rice or steamed vegetables to round out the meal.
  • Use Quality Ingredients: Fresh, high-quality ingredients make all the difference in achieving the best flavor.
  • Adjust Sweetness: Feel free to tweak the honey quantity based on your sweetness preference.

Avoid These Common Mistakes

Even the best cooks can stumble. Here are some common pitfalls to avoid:

  • Overcooking the Chicken: Keep an eye on your chicken; overcooking can lead to dryness. Aim for an internal temperature of 165°F.
  • Not Prepping Ingredients: Have all your ingredients measured and ready to go before you start cooking to streamline the process.
  • Skipping the Rest: Don’t skip the resting period after cooking; this is crucial for juicy chicken.

Delicious Variations to Try

Looking to switch things up? Here are some delightful variations of honey garlic chicken:

  • Spicy Honey Garlic Chicken: Add red pepper flakes or sriracha to the sauce for a spicy kick.
  • Honey Garlic Chicken Stir-Fry: Toss in your favorite vegetables like bell peppers and broccoli for a complete stir-fry dish.
  • Honey Garlic Chicken Skewers: Cut the chicken into cubes, marinate, and skewer with veggies to grill for a summer BBQ.
  • Honey Garlic Chicken Thighs: Use chicken thighs instead of breasts for a richer, juicier dish.

Storage and Make-Ahead Instructions

Got leftovers? Here’s how to store and reheat your honey garlic chicken:

  • Refrigerating: Store cooked chicken in an airtight container in the fridge for up to 3-4 days.
  • Freezing: Freeze the chicken in a freezer-safe container for up to 3 months. Thaw in the fridge before reheating.
  • Reheating: Reheat in a skillet over low heat, adding a splash of water or broth to keep it moist.

Frequently Asked Questions

Let’s address some common queries about honey garlic chicken:

  • Can I use frozen chicken? Yes, but make sure to thaw it completely before cooking for even results.
  • What can I serve with honey garlic chicken? This dish pairs wonderfully with rice, quinoa, or a fresh salad.
  • Is this recipe gluten-free? Use gluten-free soy sauce to make this dish suitable for gluten-sensitive diets.
  • How do I know when the chicken is cooked? Use a meat thermometer; chicken should reach an internal temperature of 165°F.
  • Can I make this in advance? Yes, you can prepare the sauce ahead of time and store it in the fridge.
  • Can I add vegetables? Absolutely! Bell peppers, snap peas, and broccoli are excellent additions.
  • How can I make it sweeter? Add more honey to the sauce while it simmers to enhance sweetness.
  • What’s the best way to serve it? Drizzle extra sauce over the chicken and garnish with sesame seeds or green onions for a beautiful presentation.

Nutritional Insights and Dietary Adaptations

This honey garlic chicken recipe is not only comforting but also nutritious. Here are some tips for making it fit various dietary needs:

  • Low-Carb: Serve with cauliflower rice instead of regular rice for a low-carb meal.
  • Low-Sodium: Use low-sodium soy sauce to reduce the salt content.
  • Vegan Option: Substitute chicken with tofu or tempeh and use agave nectar instead of honey.

Essential Equipment for Cooking

To make your cooking experience seamless, ensure you have the following tools:

  • Skillet: A heavy-bottomed skillet is ideal for searing the chicken evenly.
  • Meat Thermometer: This tool helps you check the chicken’s doneness accurately.
  • Spatula: A good spatula will help you flip the chicken without tearing.

Serving Suggestions

To complete your meal, consider these delightful serving ideas:

  • With Rice: Serve over steamed jasmine or brown rice to soak up the delicious honey garlic sauce.
  • Fresh Salad: Pair with a crisp green salad for a refreshing contrast.
  • Crusty Bread: Offer some crusty bread on the side to mop up the sauce.

Now that you have the tools, tips, and knowledge to create this heartwarming honey garlic chicken, gather your loved ones and enjoy a meal that’s bound to become a cherished tradition in your home. Cooking is about love, patience, and the joy of sharing great food. Happy cooking!

Honey Garlic Chicken Breasts

Prep Time 10 minutes
Cook Time 15 minutes
Total Time 25 minutes
Servings 4 pieces
Calories 350
Enjoy tender chicken breasts glazed with a sweet and savory honey garlic sauce, perfect for a quick and flavorful meal.

Ingredients

Protein

  • 2 large chicken breasts

Flavorings

  • 4 cloves garlic (minced)
  • 2 tablespoons soy sauce
  • 2 tablespoons honey

Instructions 

  • Sear the chicken and remove from the skillet.
  • Make the honey garlic sauce, then return the chicken to the pan.
  • Simmer until the sauce thickens and the chicken is cooked through.

Notes

Use a meat thermometer to ensure chicken is cooked to 165°F (74°C).
Calories: 350kcal
Cost: $12
Course: Main Course
Cuisine: American
Keyword: chicken, Garlic, honey

The Comforting Allure of Garlic Butter Chicken

Gather ’round, friends! There’s something magical about a dish that brings people together, and this Garlic Butter Chicken is just that. With its tender chicken breasts bathed in a rich garlic butter sauce, this recipe feels like a warm embrace on a chilly evening. As you savor each bite, you’re transported back to family dinners, laughter echoing in the kitchen, and the simple joy of sharing food with loved ones. In this guide, you’ll discover not just a recipe but a heartfelt experience that invites you to create memories around the table.

Why You’ll Love This Recipe

This Garlic Butter Chicken isn’t just a meal; it’s a celebration of flavors and comfort. Here’s why you’ll fall in love:

  • Quick and Easy: With just a handful of ingredients and a simple cooking method, you can have dinner on the table in under 30 minutes.
  • Rich Flavor: The combination of garlic and butter creates a savory sauce that enhances the chicken’s natural taste.
  • Versatile Dish: Perfect for family meals, date nights, or gatherings with friends. Serve it with rice, pasta, or a fresh salad.
  • Healthy Option: Using chicken breasts keeps the dish lean, while the garlic adds health benefits and flavor without extra calories.
  • Comfort Food Vibes: Each bite feels like home, reminding you of cozy evenings spent with family and good conversation.

Ingredient Breakdown

Let’s talk about the star players in this dish. Here’s everything you need to make this delicious Garlic Butter Chicken:

  • Chicken Breasts: 2x 9oz/250g, brought close to room temperature. This ensures even cooking and juiciness.
  • Plain/All-Purpose Flour: 1/4 cup / 40g, for dredging and achieving that beautiful golden crust.
  • Chicken Stock: 1/2 cup / 120ml, to create a flavorful sauce that complements the chicken.
  • Unsalted Butter: 6 tbsp / 90g, divided into tbsp chunks. This is key for that rich, buttery sauce.
  • Garlic: 2 cloves, minced or finely diced. Fresh garlic is essential for that bold flavor.
  • Fresh Parsley: 1 tbsp, finely diced, to add a pop of color and freshness.
  • Olive Oil: 1 tbsp, used for searing the chicken to perfection.
  • Garlic Powder: 1 tsp, enhancing the garlic flavor.
  • Salt and Black Pepper: To taste, for seasoning the chicken and sauce.
  • Lemon: 1, divided into 4 wedges for serving, adding a zesty finish.

Step-by-Step Instructions

Side view of Garlic Butter Chicken garnished with parsley and lemon wedges.

Now that we’ve gathered our ingredients, let’s dive into the cooking process!

  • 1. Prepare the Flour Mixture: In a shallow dish, combine the flour, garlic powder, salt, and black pepper.
  • 2. Butterfly the Chicken: Slice the chicken breasts through the center to create 4 even pieces. Dredge each piece in the flour mixture, ensuring an even coat.
  • 3. Sear the Chicken: Heat olive oil and 1 tbsp of butter in a large skillet over medium-high heat. Cook the chicken until golden brown, about 3-5 minutes per side.
  • 4. Make the Garlic Butter Sauce: Reduce the heat to medium, add minced garlic to the pan, and sauté for 1-2 minutes until fragrant. Pour in the chicken stock and scrape the bottom of the pan to release all that flavor.
  • 5. Add Butter and Simmer: Add the remaining butter to the pan and whisk until melted. Stir in fresh parsley and season with salt and pepper to taste.
  • 6. Combine and Serve: Return the chicken to the skillet, spoon sauce over the top, and let it simmer for a few minutes. Serve with lemon wedges for a fresh squeeze of citrus.

Pro Tips for Garlic Butter Chicken Perfection

To ensure your Garlic Butter Chicken turns out just right, keep these expert tips in mind:

  • Temperature Matters: Let your chicken sit at room temperature before cooking. This ensures even cooking throughout.
  • Don’t Skimp on Butter: The butter is what makes this dish luxurious. Use unsalted butter for better control over the saltiness.
  • Don’t Rush the Garlic: Garlic burns easily, so keep an eye on it while sautéing. You want it golden, not brown.
  • Use a Meat Thermometer: Ensure your chicken reaches an internal temperature of 165°F (74°C) for safety and tenderness.
  • Double the Sauce: If you love extra sauce, feel free to double the ingredients for the sauce. It’s perfect for drizzling over rice or pasta.
  • Rest the Chicken: Letting the chicken rest for a few minutes after cooking helps retain its juices.
  • Experiment with Herbs: Try adding thyme, rosemary, or even a pinch of red pepper flakes for a different flavor profile.
  • Pair Wisely: Garlic Butter Chicken pairs beautifully with steamed vegetables or a fresh garden salad.

Common Mistakes and Troubleshooting

Even the best of us can run into issues while cooking. Here are some common mistakes and how to troubleshoot them:

  • Chicken Overcooked: If the chicken is dry, it may have been cooked too long. Always check for doneness with a meat thermometer.
  • Sauce Too Thin: If your sauce doesn’t thicken, let it simmer longer to reduce it, or add a touch of cornstarch mixed with water.
  • Burnt Garlic: If your garlic turns bitter, it’s best to start over as it can ruin the dish. Always watch the garlic closely.
  • Uneven Cooking: Ensure the chicken pieces are evenly sized for consistent cooking.

Variations to Try

Want to mix things up? Here are some delicious variations of this Garlic Butter Chicken:

  • Herb-Infused: Add fresh herbs like thyme or rosemary to the garlic butter for a fragrant twist.
  • Spicy Garlic Butter: Incorporate crushed red pepper flakes or a dash of hot sauce for a heat kick.
  • Garlic Parmesan Chicken: Stir in grated Parmesan cheese into the sauce for a creamy, cheesy version.
  • Honey Garlic Chicken: Add a tablespoon of honey to the butter mixture for a sweet and savory glaze.

Storage and Make-Ahead Instructions

Want to prepare this dish in advance? Here’s how to store and reheat:

  • Refrigeration: Store leftover Garlic Butter Chicken in an airtight container in the refrigerator for up to 3 days.
  • Freezing: You can freeze the cooked chicken in a freezer-safe container for up to 2 months. Thaw in the refrigerator before reheating.
  • Reheating: Reheat in a skillet over medium heat, adding a splash of chicken stock to keep it moist.

Frequently Asked Questions (FAQs)

Here are some common questions about Garlic Butter Chicken:

  • Can I use chicken thighs instead of breasts? Yes, chicken thighs work beautifully and provide a richer flavor.
  • What can I serve with Garlic Butter Chicken? It pairs well with rice, mashed potatoes, or fresh vegetables.
  • Can I make this dish dairy-free? Substitute the butter with a dairy-free alternative and adjust the stock accordingly.
  • How do I make the sauce thicker? Allow it to simmer longer or add a cornstarch slurry to thicken.
  • Is it okay to use pre-minced garlic? Fresh garlic gives the best flavor, but pre-minced will work in a pinch.
  • Can I add vegetables to the dish? Absolutely! Broccoli or spinach can be added during the last few minutes of cooking.
  • How long does it take to cook the chicken? Generally, it takes about 6-10 minutes total, depending on thickness.
  • What’s the best way to store leftovers? Keep them in an airtight container in the fridge for up to 3 days.

Nutritional Tips and Dietary Adaptations

This Garlic Butter Chicken is not just delicious; it’s nutritious too! Here are some tips for adapting the recipe to fit various dietary needs:

  • Low-Carb Option: Serve with steamed vegetables instead of starches for a low-carb meal.
  • Dairy-Free: Use plant-based butter alternatives and chicken stock to make this dish dairy-free.
  • Gluten-Free: Substitute flour with cornstarch or a gluten-free flour blend for dredging.
  • Paleo-Friendly: Use grass-fed butter and serve with leafy greens for a paleo-approved meal.

Equipment Recommendations

For this Garlic Butter Chicken recipe, here’s what you’ll need:

  • Skillet: A large, heavy-bottomed skillet works best for even cooking.
  • Meat Thermometer: Ensure perfectly cooked chicken every time.
  • Wooden Spoon: Ideal for scraping the flavorful bits off the pan.
  • Shallow Dish: For dredging the chicken in flour.

Serving Suggestions

To elevate your Garlic Butter Chicken experience, consider these serving ideas:

  • Over Rice: Serve it over fluffy white or brown rice to soak up the delicious sauce.
  • Pasta Delight: Toss it with your favorite pasta for a hearty meal.
  • Fresh Salad: Pair with a crisp garden salad for a refreshing contrast.
  • Garlic Bread: Serve with garlic bread for extra indulgence and to soak up the sauce.

Conclusion

There you have it, friends! This Garlic Butter Chicken recipe is more than just a dish; it’s a way to bring warmth and comfort to your table. Whether it’s a weeknight family dinner or a special occasion, this recipe is sure to please. So gather your loved ones, whip up this delightful meal, and create memories that will last a lifetime. Remember, cooking is not just about the food; it’s about the love and care you put into it. Happy cooking!

Garlic Butter Chicken

Prep Time 10 minutes
Cook Time 15 minutes
Total Time 25 minutes
Servings 4 servings
Calories 550
A flavorful and easy-to-make chicken dish with garlic, butter, and herbs, perfect for a quick dinner.

Ingredients

Protein

  • 2 pieces Chicken Breasts (brought close to room temp)
  • 1/4 cup Plain / All Purpose Flour
  • 1/2 cup Chicken Stock
  • 6 tbsp Unsalted Butter (divided into tbsp chunks)
  • 2 cloves Garlic (minced/finely diced)
  • 1 tbsp Fresh Parsley (finely diced)
  • 1 tbsp Olive Oil
  • 1 tsp Garlic Powder
  • 1 tsp Salt (plus more to taste)
  • 1/2 tsp Black Pepper (plus more to taste)
  • 1 whole Lemon (divided into 4 wedges to serve)

Instructions 

  • Mix 1/4 cup flour with 1 tsp garlic powder, salt, and black pepper in a shallow dish.
  • Butterfly chicken breasts to make 4 even pieces, then dredge in the flour mixture and set aside.
  • Heat 1 tbsp butter and 1 tbsp olive oil in a pan over medium-high heat. Cook chicken until golden and cooked through, about 3-5 mins per side. Remove and set aside.
  • Lower heat, add garlic, and cook 1-2 mins until fragrant. Pour in stock, scrape pan, then add remaining 5 tbsp butter, whisk until melted. Stir in parsley, season with salt and pepper.
  • Simmer sauce until slightly thickened, then return chicken to pan, spoon sauce over, and serve with lemon wedges.

Notes

Serve with extra sauce and lemon for added flavor.
Calories: 550kcal
Cost: $15
Course: Main Course
Cuisine: American
Keyword: Butter, chicken, Garlic

Welcome, friends! Today, we’re diving into a recipe that’s close to my heart and my kitchen—a delicious Garlic Butter Chicken Skillet. This dish marries tender chicken with aromatic garlic and a creamy sauce, creating a meal that warms the soul and brings family together around the dinner table. Whether you’re a seasoned chef or a beginner, this easy skillet chicken recipe is perfect for any occasion, from cozy weeknights to festive gatherings.

Why You’ll Love This Recipe

There’s so much to love about this easy skillet chicken dish! Here are just a few reasons why it’ll become a staple in your home:

  • Simple Ingredients: With just a handful of everyday ingredients, you can create a meal that tastes like it came from a fancy restaurant.
  • Quick Prep Time: This recipe takes only 5 minutes to prep and about 15 minutes to cook, making it a perfect choice for busy weeknights.
  • One-Pan Wonder: Enjoy the ease of cooking and cleaning up with just one skillet—less mess, more flavor!
  • Customizable: Feel free to add your favorite vegetables or herbs to make it your own. The flavors are versatile and forgiving!
  • Comforting Flavor: This dish is the ultimate comfort food, with creamy garlic butter that wraps around the chicken, making it irresistible.

Ingredients You’ll Need

Let’s gather what you need for this hearty meal. Below is the ingredient list, along with some helpful substitutions:

  • 1.5 lbs boneless skinless chicken thighs or breasts: Chicken thighs will yield juicier results, but breasts are leaner and work just as well.
  • 1 teaspoon salt: Essential for enhancing flavor; feel free to adjust to taste.
  • 1/2 teaspoon black pepper: A pinch of spice to balance the dish.
  • 5 cloves garlic, minced: The star of the show! Fresh garlic gives the best flavor.
  • 3 tablespoons butter: Adds richness; you can substitute with olive oil for a lighter option.
  • 1 tablespoon olive oil: For searing the chicken; a high smoke point oil like canola works too.
  • 1/2 cup chicken broth: Homemade or store-bought; it enhances the sauce’s depth.
  • 1/2 cup heavy cream: For that creamy texture; half-and-half can be used for a lighter version.
  • 2 tablespoons chopped fresh parsley or chives: Fresh herbs brighten the dish; dried herbs work too, just use less.
  • 1/2 teaspoon paprika (optional): Adds a touch of color and flavor; can be omitted if you prefer.

How to Make Garlic Butter Chicken Skillet

Now that we have our ingredients ready, let’s walk through the steps to create this mouthwatering dish. Follow along, and don’t worry if it’s your first time—you got this!

  • 1. Heat olive oil in a large skillet over medium-high heat. Season chicken with salt and pepper.
  • 2. Sear the chicken until golden brown on each side, about 4–5 minutes per side. Remove and set aside.
  • 3. Reduce heat to medium, melt butter in the skillet, and sauté garlic for 1–2 minutes until fragrant.
  • 4. Pour in chicken broth and scrape any browned bits from the pan. Simmer for 2–3 minutes.
  • 5. Add heavy cream and stir. Let simmer until the sauce thickens slightly.
  • 6. Return chicken to the skillet and coat with sauce. Simmer for 3–4 more minutes until cooked through.
  • 7. Garnish with fresh parsley or chives and serve hot.

Pro Tips for Perfect Garlic Butter Chicken

Side view of a sizzling Garlic Butter Chicken dish in a skillet on a table.

To ensure your dish turns out perfectly every time, consider these expert tips:

  • Don’t overcrowd the pan: If your skillet isn’t large enough, cook in batches to ensure even cooking.
  • Let chicken rest: Allow the chicken to rest for a few minutes after cooking to retain its juices.
  • Adjust seasoning: Taste your sauce before serving; it may need a pinch more salt or pepper.
  • Mind the heat: Keep an eye on the garlic; it can burn quickly, turning bitter.
  • Use a meat thermometer: Chicken should reach an internal temperature of 165°F for safety and perfection.
  • Experiment with herbs: Try thyme, rosemary, or oregano for different flavor profiles.
  • Make it spicy: Add red pepper flakes for a touch of heat if you like things spicy!
  • Pair with sides: This dish goes wonderfully with rice, pasta, or a fresh salad to complete your meal.

Common Mistakes and Troubleshooting

Even the best cooks make mistakes! Here are common pitfalls and how to avoid them:

  • Overcooking the chicken: This can lead to dry, tough meat. Use a thermometer, as mentioned before.
  • Burning the garlic: If it gets too dark, start over to keep that fresh garlic flavor.
  • Too thin of a sauce: If your sauce isn’t thickening, let it simmer longer, or add a splash of cornstarch mixed with water.
  • Not enough flavor: Always taste and adjust seasoning throughout the cooking process.
  • Skipping fresh herbs: Dried herbs can be a substitute, but fresh adds a vibrant touch that can’t be matched.

Variations of Garlic Butter Chicken Skillet

If you want to switch things up a bit, try one of these variations:

  • Vegetable Additions: Toss in some spinach, bell peppers, or zucchini for added nutrition and color.
  • Cheesy Garlic Butter Chicken: Stir in grated Parmesan or mozzarella for a creamy, cheesy twist.
  • Mushroom Garlic Butter Chicken: Add sliced mushrooms when sautéing the garlic for an earthy flavor.
  • Honey Garlic Chicken: Drizzle some honey into the sauce for a sweet and savory combination.

Storage and Make-Ahead Instructions

This dish is perfect for meal prep! Here’s how to store it and reheat:

  • Refrigerator: Store in an airtight container for up to 3 days. Reheat in the microwave or skillet.
  • Freezer: Freeze in a suitable container for up to 3 months. Thaw overnight in the fridge before reheating.
  • Make-Ahead: Prepare the sauce and chicken separately a day in advance, then combine and reheat just before serving.

Frequently Asked Questions

Here are some common questions folks ask about this hearty dish:

  • Can I use frozen chicken?: Yes, but make sure to thaw it completely before cooking for even results.
  • Is this recipe gluten-free?: Yes, as long as you use gluten-free chicken broth and ensure all other ingredients are gluten-free.
  • Can I make this dairy-free?: Substitute butter with a dairy-free alternative and use coconut cream instead of heavy cream.
  • What can I serve with this dish?: Serve it over rice, pasta, or alongside crusty bread to soak up the delicious sauce.
  • How do I know when the chicken is done?: Use a meat thermometer; it should read 165°F in the thickest part.
  • Can I double the recipe?: Absolutely! Just make sure your skillet is large enough to accommodate the chicken.
  • Can I use bone-in chicken?: Yes, but adjust cooking times accordingly; bone-in chicken will take longer to cook.
  • What’s the best way to reheat leftovers?: Reheat gently on the stove over low heat to prevent drying out.

Nutrition Tips and Dietary Adaptations

This dish is packed with protein and flavor, making it a wonderful choice for a balanced meal! Here are a few tips:

  • Protein Boost: Pair with a side of quinoa or lentils for an extra protein punch.
  • Vegetable Power: Add more veggies to your skillet for fiber and nutrients.
  • Low-Calorie Option: Use skinless chicken breasts and reduce the amount of butter and cream for a lighter dish.
  • Heart-Healthy: Opt for olive oil instead of butter to keep the heart in mind.

Equipment Recommendations

To make this recipe a breeze, here are some kitchen tools that can help:

  • Cast Iron Skillet: Excellent heat retention and perfect for searing chicken.
  • Meat Thermometer: A must-have for ensuring your chicken is cooked safely.
  • Wooden Spoon: Ideal for scraping up those delicious browned bits from the pan.
  • Chopping Board and Knife: Essential for prepping your ingredients efficiently.

Serving Suggestions

To round out your meal, consider these delightful serving ideas:

  • Fresh Salad: A crisp green salad balances the richness of the chicken.
  • Garlic Bread: Homemade or store-bought, perfect for soaking up sauce.
  • Roasted Vegetables: Add seasonal veggies for a colorful and nutritious side.
  • Couscous or Quinoa: Light and fluffy grains that complement the chicken beautifully.

In conclusion, my friends, cooking doesn’t have to be complicated. This Garlic Butter Chicken Skillet is a perfect reminder that with just a few simple ingredients and a little love, you can create a meal that feels like home. So gather your loved ones, set the table, and enjoy the warmth and laughter that surrounds a hearty meal. Happy cooking!

Texas Roadhouse-Style Garlic Butter Chicken Skillet

Prep Time 10 minutes
Cook Time 20 minutes
Total Time 30 minutes
Servings 4 servings
Calories 450
This flavorful skillet features tender chicken cooked in a rich garlic butter sauce, inspired by Texas Roadhouse's signature style.

Ingredients

Protein

  • 1.5 lbs boneless skinless chicken thighs or breasts
  • 1 teaspoon salt
  • 1/2 teaspoon black pepper
  • 5 cloves garlic, minced
  • 3 tablespoons butter
  • 1 tablespoon olive oil
  • 1/2 cup chicken broth
  • 1/2 cup heavy cream
  • 2 tablespoons chopped fresh parsley or chives
  • 1/2 teaspoon paprika (optional)

Instructions 

  • Heat olive oil in a skillet and season chicken with salt and pepper. Sear until golden, then set aside.
  • Reduce heat, melt butter, and sauté garlic for 1–2 minutes until fragrant.
  • Pour in chicken broth, scrape browned bits, and simmer 2–3 minutes.
  • Add heavy cream, stir, and simmer until sauce thickens. Return chicken to coat and cook 3–4 minutes.
  • Garnish with parsley or chives and serve hot.

Notes

For extra flavor, add a pinch of paprika before serving.
Calories: 450kcal
Cost: $15
Course: Main Course
Cuisine: American
Keyword: Butter, chicken, Garlic