Author

Tom

Browsing

A Taste of Autumn: Discover the Heartwarming Harvest Chicken Salad

As the leaves begin to change and the air turns crisp, there’s a certain comfort that comes with the flavors of autumn. This Harvest Chicken Salad captures the essence of the season with its delightful combination of roasted sweet potatoes, crunchy apples, and a luscious maple Dijon dressing. Whether you’re hosting a family gathering or simply indulging in a cozy night at home, this salad is the perfect tribute to the bounty of fall.

Why You’ll Love This Recipe

This isn’t just another chicken salad. Here are five reasons why this recipe will become a staple in your kitchen:

  • Comforting Flavors: The sweet potatoes paired with apples and cranberries create a comforting harmony that’s perfect for chilly evenings.
  • Nutritious Ingredients: Packed with high-quality ingredients like chicken breasts, fresh spinach, and healthy fats from nuts and avocado oil, this salad is a wholesome meal.
  • Quick Preparation: In under 30 minutes, you can whip up a fresh and satisfying dish that’s great for meal prep.
  • Versatile Serving Options: Serve it as a main dish, a side, or even as a filling for a wrap—this salad adapts to your needs.
  • Make-Ahead Friendly: Perfect for busy weeks, you can prepare the components in advance and assemble just before serving.

Ingredient Breakdown

Let’s dive into the ingredients that make this dish shine, along with some helpful substitutions:


Salad Dressing Shaker

★ Recommended Kitchen Tool

Salad Dressing Shaker

Make this recipe even easier with a quality Salad Dressing Shaker — a must-have kitchen staple!


🛒 Check Price on Amazon →

As an Amazon Associate, we earn from qualifying purchases.
  • Avocado Oil: A healthy fat choice. If you don’t have it, feel free to substitute with olive oil or another light oil.
  • Sweet Potato: Adds sweetness and texture. You can swap it for butternut squash if desired.
  • Red Onion: For a bit of sharpness. Yellow or shallots can be used as alternatives.
  • Chicken Breasts: The heart of the salad. Rotisserie chicken is a great time-saver if you prefer not to cook your own.
  • Fresh Spinach: Provides greens and nutrients. Kale or arugula could be used for a different flavor.
  • Dried Cranberries: For sweetness and a chewy texture. Raisins or chopped apples work well if you want a change.
  • Apples: Crisp and refreshing. Any tart variety, such as Granny Smith, will do.
  • Walnuts or Pecans: Toasted nuts add crunch. Feel free to omit them for a nut-free option.
  • Mayo: For creaminess. You can use Greek yogurt as a lighter substitute.
  • Maple Syrup: Adds natural sweetness. Honey can be an alternative if you prefer.
  • Dijon Mustard: For a bit of tang. Any mustard will work, but Dijon adds a special depth.
  • Apple Cider Vinegar: Brightens up the dressing. White wine vinegar can be used if you’re out.

Expert Tips for Perfecting Your Salad

['Close-up view of a vibrant Harvest Chicken Salad with diced sweet potatoes, cranberries, and walnuts.', 'Side perspective of a colorful salad featuring chicken, spinach, and apple, drizzled with creamy dressing.', 'Detailed shot of a hearty chicken salad, highlighting fresh ingredients like spinach, diced apples, and nuts.', 'Appetizing Harvest Chicken Salad served in a bowl, showcasing its colorful ingredients and dressing.']

Now that you have your ingredients ready, here are some pro tips to ensure your Harvest Chicken Salad turns out perfectly:

  • Chop Uniformly: Cut all ingredients into similar sizes for even mixing and easier eating.
  • Season Generously: Don’t be shy with salt and pepper; they enhance the flavor of every ingredient.
  • Let Dressing Marinate: Allow the dressing to sit for 10-15 minutes before tossing it with the salad for maximum flavor.
  • Roast Until Tender: Make sure your sweet potatoes are fork-tender for the best texture.
  • Cool Chicken: Let the chicken cool slightly before adding to the salad to prevent wilting the greens.
  • Mix Just Before Serving: To keep the salad fresh, assemble all the components and add the dressing right before serving.
  • Garnish for Appeal: A sprinkle of nuts or fresh herbs on top before serving can elevate the presentation.
  • Make It a Meal: Pair the salad with a slice of crusty bread or a cup of soup for a complete meal.

Common Mistakes to Avoid

Even the best recipes can go awry. Here are some common pitfalls to watch out for:

  • Overcooking Chicken: Ensure your chicken is cooked to 165°F but still juicy; avoid dry chicken by checking frequently.
  • Skipping the Dressing: Don’t forget to dress your salad! It enhances flavor and ties all ingredients together.
  • Adding Dressing Too Early: This can make your salad soggy. Dress just before serving for the best texture.
  • Forgetting to Toast Nuts: Toasting adds a deeper flavor; don’t skip this step if you want that extra crunch.

Variations to Try

If you’re looking to shake things up, try these fun variations:

  • Southwestern Twist: Add black beans, corn, and a lime vinaigrette for a zesty flair.
  • Asian Flair: Incorporate shredded cabbage, sesame oil, and a soy-based dressing for an exotic touch.
  • Fruity Delight: Swap out cranberries for pomegranate seeds and add feta cheese for a sweet-salty combo.
  • Grilled Version: Grill the chicken and veggies for a smoky flavor that pairs beautifully with the dressing.

How to Store and Make Ahead

This salad is not only delicious fresh but also makes a great make-ahead meal. Here’s how to store it:

  • Storage: Keep leftovers in an airtight container in the fridge for up to 3 days. If possible, store the dressing separately to maintain freshness.
  • Make Ahead: Prepare the sweet potatoes, chicken, and dressing in advance. Combine just before serving for optimal taste.

Frequently Asked Questions

Here are some common questions about the Harvest Chicken Salad:

  • Can I use leftover chicken? Absolutely! Leftover rotisserie chicken works wonderfully in this salad.
  • Is this salad gluten-free? Yes! All ingredients are gluten-free as listed.
  • Can I add more vegetables? Yes! Feel free to incorporate your favorites, like bell peppers or cucumbers.
  • How can I make this vegan? Substitute chicken with chickpeas or tofu and use vegan mayo.
  • What’s the best way to serve this salad? It’s delicious on its own, but you can serve it on a bed of greens or in a wrap.
  • Can I freeze this salad? It’s best enjoyed fresh, but you can freeze the chicken and sweet potatoes separately.
  • How do I make it more filling? Serve it with quinoa or farro for added fiber and heartiness.
  • What dressing pairs well? The maple Dijon dressing is perfect, but a balsamic vinaigrette also complements the flavors.

Nutritional Insights and Dietary Adaptations

This salad is not only tasty but also packed with nutrients:

  • High Protein: Chicken provides a great source of lean protein that helps keep you full.
  • Rich in Fiber: Sweet potatoes and spinach contribute dietary fiber essential for digestion.
  • Healthy Fats: Nuts and avocado oil offer heart-healthy fats that are good for your overall health.
  • Low in Added Sugar: The natural sweetness from maple syrup and fruits keeps added sugars low.

Equipment Recommendations

To make this recipe a breeze, consider having the following tools handy:

  • Sharp Knife: For easy chopping of vegetables and chicken.
  • Cutting Board: A sturdy surface is essential for safe and efficient prep.
  • Mixing Bowl: A large bowl to combine all your ingredients comfortably.
  • Baking Sheet: For roasting sweet potatoes and onions evenly.
  • Skillet: A non-stick skillet for cooking the chicken to perfection.

Serving Suggestions

This Harvest Chicken Salad can be served in various ways:

  • On a Bed of Greens: Serve it atop a mix of greens for a refreshing salad experience.
  • In a Wrap: Use whole grain or spinach wraps to make a delicious, portable meal.
  • With a Side of Bread: Pair it with crusty bread or a warm baguette for a comforting dinner.
  • As a Picnic Delight: Perfect for picnics, pack it in jars or containers for easy transport and serving.

In conclusion, this Harvest Chicken Salad is not just a dish; it’s a celebration of the rich flavors of fall. With its balance of sweet and savory, crunchy and creamy, this recipe brings warmth and comfort to your table. So, gather your ingredients, don your apron, and let’s create a meal that’s sure to be a favorite in your home. Happy cooking!

Harvest Chicken Salad With Maple Dijon Dressing

Prep Time 10 minutes
Cook Time 20 minutes
Total Time 30 minutes
Servings 4 servings
Calories 480
A vibrant and nutritious salad combining roasted sweet potatoes, tender chicken, fresh greens, and a sweet-savory maple Dijon dressing.

Ingredients

Vegetables

  • 2 teaspoons avocado oil (divided)
  • 1 medium sweet potato (peeled and diced into 1-inch pieces (~2 cups))
  • 1 small red onion (diced (~1 cup))
  • 1 lb pounds raw chicken breast (cubed)
  • 5 ounces fresh spinach (4 large handfuls)
  • ½ cup dried cranberries
  • 1 medium apple (diced (about 1 cup))
  • ½ cup chopped walnuts or pecans (toasted)

Dressing

  • ¼ cup mayo
  • 3 tablespoons avocado oil
  • 3 tablespoons pure maple syrup
  • 1 tablespoon dijon mustard
  • 1 teaspoon apple cider vinegar
  • ¼ teaspoon fine salt
  • ¼ teaspoon black pepper

Instructions 

  • Preheat oven to 375°F (190°C). Roast sweet potatoes and red onion with 1 teaspoon avocado oil, salt, and pepper for 15-18 minutes.
  • Cook chicken in a skillet with remaining 1 teaspoon avocado oil until internal temperature reaches 165°F (74°C), about 3-4 minutes per side.
  • Whisk dressing ingredients in a small bowl until combined. Toss spinach, cranberries, apple, and nuts in a large bowl. Add cooked chicken and roasted vegetables, then drizzle with dressing and toss gently.

Notes

Serve immediately or store leftovers in an airtight container for up to 3 days.
Calories: 480kcal
Cost: $15
Course: Salad
Cuisine: American
Keyword: chicken, maple, Salad

Transform Your Gathering with Shredded Chicken Enchiladas

Nothing brings people together quite like a hearty plate of shredded chicken enchiladas. This recipe, with its creamy sour cream sauce, is designed to make your family gatherings feel like a festive celebration. Imagine the aroma wafting through your kitchen as you prepare this comforting dish, reminding you of simpler times spent with loved ones. So, roll up your sleeves, gather your ingredients, and let’s create a meal that’s not just food, but a memory in the making.

Why You’ll Love This Recipe

Here’s why this recipe should be your go-to for any occasion:

  • Comforting flavors: The combination of shredded chicken and creamy sauce warms the heart and soul, making it an ideal comfort food.
  • Easy to prepare: With straightforward steps, you can whip these enchiladas up in no time, leaving you free to enjoy the company of your guests.
  • Perfect for leftovers: These enchiladas taste just as good the next day, making them a fantastic option for meal prep.
  • Customizable: Add your favorite spices or ingredients to make this dish uniquely yours.
  • Family-friendly: Mild yet flavorful, this dish is sure to please even the pickiest eaters.

Ingredients You’ll Need

Gathering the right ingredients is the first step in creating perfect chicken enchiladas. Here’s what you’ll need:


Professional Chef Knife Set

★ Recommended Kitchen Tool

Professional Chef Knife Set

Make this recipe even easier with a quality Professional Chef Knife Set — a must-have kitchen staple!


🛒 View on Amazon →

As an Amazon Associate, we earn from qualifying purchases.
  • 1 lb. boneless, skinless chicken breasts: The star of the show, tender and juicy.
  • 2 cups chicken broth: Adds depth of flavor to the chicken.
  • 1 tsp. chili powder: For a hint of warmth.
  • 1/2 tsp. garlic powder: A must for that savory essence.
  • 1/2 tsp. onion powder: Complements the garlic beautifully.
  • 1/2 tsp. ground cumin: Brings a warm, earthy flavor.
  • 1/2 tsp. salt: Enhances all the flavors.
  • 2 tbsp. butter: Creates a rich sauce.
  • 2 tbsp. all-purpose flour: For thickening the sauce.
  • 1 1/2 cups chicken broth: More for the creamy sauce.
  • 1 cup sour cream: The creamy base of our sauce.
  • 1 (4 oz.) can diced green chiles: Adds a lovely pop of flavor.
  • 1/4 tsp. garlic powder: Just a touch for the sauce.
  • Salt to taste: Always adjust to your liking.
  • 8 small flour tortillas: The perfect vessel for our filling.
  • 1 1/2 cups shredded cheese: Monterey Jack or a Mexican blend works great!

How to Make Shredded Chicken Enchiladas with Sour Cream Sauce

['Close-up view of shredded chicken enchiladas topped with sour cream sauce and cheese.', 'Side angle shot of enchiladas filled with shredded chicken and garnished with green chiles.', 'Delicious shredded chicken enchiladas, drizzled with creamy sour cream sauce and melted cheese.', 'A tempting plate of shredded chicken enchiladas, revealing tender chicken and a smooth white sauce.']

Now that you have everything ready, let’s dive into the cooking process:

Step 1: Cook the Chicken

Simmer your chicken breasts in a pot with chicken broth and seasonings. Let them poach gently for about 15-20 minutes until they’re tender and fully cooked. Shredding the chicken is a breeze—just use two forks or a hand mixer to get the job done. Set it aside.

Step 2: Make the Creamy Sauce

In a saucepan, melt the butter over medium heat, whisk in the flour to create a roux. It’ll look like a thick paste—this is your cue to slowly whisk in the chicken broth. Keep stirring until it thickens slightly, about 3-5 minutes. Lower the heat and stir in the sour cream, green chiles, and garlic powder. Warm it through, but don’t let it boil.

Step 3: Fill the Enchiladas

Lay out your tortillas and distribute the shredded chicken and about a cup of the shredded cheese among them. Roll them snugly and place them seam-side down in a greased 9×13-inch baking dish.

Step 4: Pour on the Sauce

Cover those rolled beauties with the luscious sour cream sauce. Ensure every inch is coated to keep the enchiladas nice and moist in the oven.

Step 5: Top and Bake

Finally, sprinkle the remaining cheese on top and bake uncovered at 375°F for 20–25 minutes. You’re looking for melty cheese and just a hint of golden edges.

Let the enchiladas sit for a few minutes before serving. This helps everything set up a bit, making them easier to scoop out.

Pro Tips for Perfect Enchiladas

Enhance your cooking experience with these expert insights:

  • Chicken choices: Feel free to use rotisserie chicken for a quicker prep time. Just shred and mix it in.
  • Homemade sauce: If you have the time, making your own enchilada sauce can add layers of flavor.
  • Cheese options: Experiment with different cheeses like cheddar or pepper jack for a kick.
  • Vegetable add-ins: Consider adding sautéed onions, bell peppers, or even corn for extra texture and taste.
  • Spice it up: For those who like heat, add jalapeños or hot sauce to the filling.
  • Freezing instructions: Prepare your enchiladas in advance and freeze them. Just bake them straight from the freezer, adding a few extra minutes to the cooking time.
  • Serving garnishes: Top with fresh cilantro, avocado slices, or a sprinkle of lime juice for a fresh finish.
  • Make it a fiesta: Pair with a side of Mexican rice or a fresh salad to round out the meal.

Common Mistakes and Troubleshooting

Even seasoned cooks run into hiccups. Here’s how to avoid common pitfalls:

  • Overfilling tortillas: It can lead to messy enchiladas. Stick to about 1/4 cup filling per tortilla.
  • Not sealing the seams: Make sure your enchiladas are seam-side down, or they may unroll during baking.
  • Excessive baking time: Keep an eye on them to avoid drying out the enchiladas.
  • Unbalanced flavors: Always taste and adjust seasoning to suit your palate before serving.

Variations to Try

Make this dish your own with these delicious twists:

  • Vegetarian Enchiladas: Swap the chicken for black beans or lentils, and load up on veggies.
  • Buffalo Chicken Enchiladas: Mix shredded chicken with buffalo sauce for a spicy kick.
  • Breakfast Enchiladas: Fill tortillas with scrambled eggs, cheese, and salsa for a hearty breakfast option.
  • Seafood Enchiladas: Use shredded crab or shrimp instead of chicken for a coastal twist.

Storage and Make-Ahead Instructions

Want to save some for later? Here’s how:

  • Refrigerate: Store any leftovers in an airtight container for up to 3 days.
  • Freeze: These enchiladas freeze beautifully. Just wrap them tightly and store them for up to 3 months.
  • Reheat: To enjoy leftovers, reheat in the oven at 350°F until warmed through or microwave for a quicker option.

Frequently Asked Questions

Here are some common questions about this delightful dish:

  • Can I use corn tortillas instead of flour? Yes, but corn tortillas may require a light frying to prevent cracking.
  • What can I serve with enchiladas? Mexican rice, refried beans, or a fresh salad are great options.
  • How can I make this dish spicier? Add diced jalapeños or a splash of hot sauce to the filling.
  • Can I prepare these enchiladas in advance? Absolutely! Assemble them and store in the fridge for up to 24 hours before baking.
  • What if I don’t have sour cream? Greek yogurt is a great substitute.
  • How do I know when they’re done? Look for bubbly cheese and golden edges for the perfect bake.
  • Can I use a different protein? Ground turkey or beef can also make excellent fillings.
  • Is this dish gluten-free? Use gluten-free tortillas and check that your broth is certified gluten-free.

Nutritional Tips and Dietary Adaptations

Making your meal healthier is easy with these tips:

  • Low-fat options: Use low-fat sour cream and cheese for a lighter version.
  • Whole grain tortillas: Opt for whole wheat tortillas for added fiber.
  • Increase veggies: Add more vegetables like spinach or zucchini to boost nutrients.

Equipment Recommendations

Here are a few kitchen essentials to make your cooking experience smoother:

  • 9×13-inch baking dish: Perfect for holding all those delicious enchiladas.
  • Medium saucepan: Ideal for making your creamy sauce.
  • Shredding tools: A hand mixer or two forks for effortless shredding of chicken.

Serving Suggestions

Make your meal complete with these serving ideas:

  • Garnishes: Top with chopped cilantro, avocado slices, or a dollop of sour cream.
  • Side dishes: Serve with Mexican rice, beans, or a fresh garden salad.
  • Beverages: Pair with a refreshing margarita or a chilled Mexican soda.

In conclusion, these Shredded Chicken Enchiladas with sour cream sauce are more than just a recipe; they’re a way to gather friends and family around the table. So, whether it’s a casual weeknight dinner or a special occasion, remember that cooking is about creating connections. Enjoy every bite, and let the flavors tell your story.

Shredded Chicken Enchiladas with Sour Cream Sauce

Prep Time 20 minutes
Cook Time 30 minutes
Total Time 50 minutes
Servings 4 servings
Calories 650
A flavorful and creamy enchilada dish featuring tender shredded chicken and a rich sour cream sauce, perfect for a comforting meal.

Ingredients

Chicken

  • 1 lb boneless, skinless chicken breasts
  • 2 cups chicken broth
  • 1 tsp chili powder
  • 0.5 tsp garlic powder
  • 0.5 tsp onion powder
  • 0.5 tsp ground cumin
  • 0.5 tsp salt
  • 2 tbsp butter
  • 2 tbsp all-purpose flour
  • 1.5 cups chicken broth
  • 1 cup sour cream
  • 1 can diced green chiles (4 oz.)
  • 0.25 tsp garlic powder
  • to taste salt
  • 8 small flour tortillas
  • 1.5 cups shredded cheese ((Monterey Jack or Mexican blend))

Instructions 

  • Simmer chicken in broth with seasonings until tender, then shred.
  • Melt butter, whisk in flour, then gradually add broth and cook until thickened.
  • Stir in sour cream, chiles, and garlic powder; warm without boiling.
  • Fill tortillas with chicken and cheese, roll up, and place in baking dish.
  • Pour sauce over enchiladas, top with remaining cheese, and bake at 375°F for 20-25 minutes.
  • Let sit briefly before serving to set.

Notes

For extra flavor, add chopped cilantro or a squeeze of lime before serving.
Calories: 650kcal
Cost: $15
Course: Main Course
Cuisine: Mexican
Keyword: chicken

Welcome, friend! If you’re looking for a recipe that brings warmth and comfort to your dinner table, you’ve come to the right place. This Slow Cooker Maple Dijon Chicken is not just a dish; it’s a celebration of simple ingredients that come together to create a symphony of flavors. Perfect for busy weeknights or cozy family gatherings, this recipe will remind you that cooking can be as heartwarming as sharing stories around the dinner table.

With the rich tang of Dijon mustard paired with the sweetness of pure maple syrup, this dish is bound to become a staple in your home. But before we get to the nitty-gritty of the recipe, let’s explore why you’ll love this easy-to-make meal.

Why You’ll Love This Recipe

  • Effortless Preparation: Just mix a few ingredients in your slow cooker, set it, and forget it. Perfect for those busy days when you need a reliable meal.
  • Flavorful Delight: The combination of maple syrup and Dijon mustard creates a rich, savory sauce that’s sure to impress your family and friends.
  • Versatile Ingredients: You can use boneless, skinless chicken breasts or thighs, and it works beautifully with a variety of side dishes.
  • Healthy and Wholesome: Packed with lean protein and the goodness of real ingredients, this dish supports a balanced diet without sacrificing taste.
  • Make-Ahead Friendly: Prepare it in advance and let the slow cooker do the work, so you can focus on what matters most—spending time with loved ones.

Ingredients

Here’s what you’ll need to create this delightful dish:


Air Fryer XL

★ Recommended Kitchen Tool

Air Fryer XL

Make this recipe even easier with a quality Air Fryer XL — a must-have kitchen staple!


🛒 View on Amazon →

As an Amazon Associate, we earn from qualifying purchases.
  • 1 1/2 pounds boneless, skinless chicken breasts (about 3-4 large pieces)
  • 1/4 cup Dijon mustard
  • 1/4 cup pure maple syrup
  • 1 Tablespoon apple cider vinegar
  • Salt to taste
  • 1/2 cup fresh parsley, chopped (for garnish, optional)
  • Fresh ground black pepper to taste

Pro Tips for Perfectly Cooked Chicken

  • Don’t Rush the Cooking: Allow the chicken to cook on low for 3-5 hours for the most tender results.
  • Check for Doneness: Use a meat thermometer to ensure the internal temperature reaches 165°F.
  • Adjust the Sauce: If you prefer a thicker sauce, remove the chicken after cooking and let the sauce simmer uncovered for a few minutes.
  • Add Extra Flavor: A splash of lemon juice right before serving can brighten the flavors beautifully.
  • Garnish Wisely: Fresh herbs like parsley not only add color but also enhance the overall flavor of the dish.

How to Make Slow Cooker Maple Dijon Chicken

['Close-up of juicy Slow Cooker Maple Dijon Chicken garnished with fresh parsley.', 'Side view of tender chicken breasts drizzled with maple syrup and Dijon mustard.', 'Glazed chicken dish with a vibrant sauce, showcasing a mix of herbs and spices.', 'Succulent Slow Cooker Maple Dijon Chicken on a plate, highlighted by a savory glaze.']

Follow these simple steps to create your very own Maple Dijon Chicken:

  1. In the bowl of your slow cooker, stir together the Dijon mustard, maple syrup, and apple cider vinegar.
  2. Add the chicken to the slow cooker. Sprinkle with salt and use tongs to flip the chicken until it’s evenly coated in the sauce.
  3. Cover and cook on low for 3-5 hours, until the chicken is cooked through and tender.
  4. Once done, top the cooked chicken with chopped parsley and a pinch of fresh ground black pepper.
  5. Serve immediately with your favorite side dishes—mashed potatoes and steamed vegetables work wonderfully!

Common Mistakes and Troubleshooting

Even the best cooks can run into a few hiccups, so here’s how to troubleshoot:

  • Chicken Is Dry: This can happen if it’s cooked for too long. Always check the doneness around the 3-hour mark.
  • Sauce Too Thin: If the sauce isn’t thick enough, remove the chicken and let the sauce cook uncovered for a bit to reduce.
  • Too Salty: If you find the dish too salty, add a splash of vinegar or a bit more maple syrup to balance it out.

Variations to Try

Feel free to play around with this recipe! Here are some fun variations:

  • Maple Dijon Chicken Thighs: Use chicken thighs for a richer flavor and juicier texture.
  • Add Vegetables: Toss in carrots or potatoes for a complete one-pot meal.
  • Spicy Kick: Add a teaspoon of crushed red pepper flakes for a little heat.
  • Herb Infusion: Mix in fresh thyme or rosemary for an aromatic twist.

Storage and Make-Ahead Instructions

You can easily make this meal ahead of time. Here’s how:

  • Store Leftovers: Keep any leftovers in an airtight container in the refrigerator for up to 4 days.
  • Freezing: You can freeze the cooked chicken in the sauce for up to 3 months. Thaw overnight in the fridge before reheating.
  • Make Ahead: Prepare all the ingredients in advance, and just toss them in the slow cooker when you’re ready to cook.

Frequently Asked Questions

Here are some questions I often get about this recipe:

  • Can I use frozen chicken? Yes, but you’ll need to extend the cooking time by an hour or so.
  • What can I serve with this dish? Pair it with rice, mashed potatoes, or a fresh salad to complement the flavors.
  • Can I substitute the maple syrup? Honey can work as a substitute, but it will alter the flavor slightly.
  • Is this recipe gluten-free? Yes, as long as you ensure your Dijon mustard is gluten-free.
  • What type of mustard can I use? You can try whole grain mustard for a different texture and flavor.
  • How do I know when the chicken is done? The chicken is done when it reaches an internal temperature of 165°F.
  • Can I double the recipe? Absolutely! Just make sure your slow cooker is large enough to accommodate the extra chicken.
  • How can I make this recipe spicier? Add some chili powder or hot sauce to the mix for a spicy twist!

Nutrition Tips and Dietary Adaptations

This recipe supports a wholesome diet, but here are some tips to make it even healthier:

  • Lower the sodium: Opt for low-sodium Dijon mustard.
  • Add fiber: Incorporate legumes or whole grains as a side.
  • Vegetarian Option: Substitute chicken with hearty vegetables like portobello mushrooms or cauliflower.
  • Low-carb adaptation: Serve it over a bed of steamed greens instead of rice or potatoes.

Equipment Recommendations

To make this recipe shine, here’s what I recommend:

  • Slow Cooker: A good quality slow cooker makes all the difference in achieving tender chicken.
  • Meat Thermometer: To ensure perfectly cooked chicken every time.
  • Stirring Utensil: Use a sturdy spoon or tongs for easy mixing and serving.

Serving Suggestions

To round out your meal, consider these delightful side dishes:

  • Steamed Green Beans: Their crunch complements the tender chicken perfectly.
  • Garlic Mashed Potatoes: Creamy and comforting, they soak up the delicious sauce.
  • Quinoa Salad: A light and nutritious option to balance the richness of the chicken.

So there you have it! With this Slow Cooker Maple Dijon Chicken recipe, you’re not just making dinner; you’re creating memories. Whether it’s a weeknight meal or a Sunday gathering, may your table be filled with laughter, love, and the aroma of good food. Happy cooking, neighbor!

Slow Cooker Maple Dijon Chicken

Prep Time 10 minutes
Cook Time 4 hours
Total Time 4 hours 10 minutes
Servings 4 servings
Calories 250
A flavorful and easy slow cooker dish featuring tender chicken breasts coated in a sweet and tangy maple Dijon sauce.

Ingredients

Protein

  • 1.5 pounds boneless, skinless chicken breasts (about 3-4 large pieces)
  • 0.25 cup Dijon mustard
  • 0.25 cup pure maple syrup
  • 1 tablespoon apple cider vinegar
  • to taste Salt
  • 0.5 cup fresh parsley, chopped (for garnish (optional))
  • to taste Fresh ground black pepper

Instructions 

  • Mix Dijon mustard, maple syrup, and apple cider vinegar in the slow cooker.
  • Add chicken and salt; flip to coat. Cover and cook on low for 3-5 hours.
  • Garnish with chopped parsley and black pepper. Serve immediately.

Notes

Use fresh parsley for best flavor, and adjust salt and pepper to taste.
Calories: 250kcal
Cost: $15
Course: Main Course
Cuisine: American
Keyword: chicken, maple, Slow Cooker

Discover the Comfort of Maple Pecan-Crusted Chicken

Welcome, friends! Today, we’re diving into a dish that not only warms the heart but also reminds us of home—Maple Pecan-Crusted Chicken. This recipe combines the earthy sweetness of maple syrup with the delightful crunch of pecans, creating a meal that’s as comforting as a Sunday dinner on the porch. Whether you’re new to cooking or a seasoned chef, you’ll find that making this dish isn’t complicated; it’s all about letting these simple, wholesome ingredients shine.

Why You’ll Love This Recipe

  • Heartwarming flavors: The blend of maple syrup and pecans brings a sweet-savory balance that’s hard to resist.
  • Quick and easy preparation: With a total cook time of just about 30 minutes, it’s perfect for busy weeknights.
  • Impressive presentation: The golden-brown pecan crust makes this dish not only delicious but beautiful on your dinner table.
  • Versatile serving options: Enjoy it with a fresh salad, roasted veggies, or even a hearty grain like quinoa.
  • Family-friendly: This recipe is sure to please the pickiest eaters, making it a great choice for family gatherings.

Ingredients You’ll Need

To get started, gather the following ingredients. Don’t hesitate to make substitutions based on what you have on hand!

  • 1 (1/2″) piece ginger: Peeled and grated for a fresh zing.
  • 4 cloves garlic: Grated to infuse the chicken with aromatic goodness.
  • 1 lemon: Zested and halved for brightness in flavor.
  • 2 tbsp. Dijon mustard: Adds a tangy kick.
  • 2 tbsp. pure maple syrup: This is your star ingredient, bringing sweetness and moisture to the dish.
  • 1 tbsp. chopped fresh thyme: A lovely herb that complements the chicken beautifully.
  • 1/2 tsp. smoked paprika: For an extra layer of flavor.
  • 4 tbsp. extra-virgin olive oil: Essential for cooking and keeping the chicken moist.
  • Kosher salt: To season the chicken perfectly.
  • 2 (6- to 8-oz.) boneless, skinless chicken breasts: The main event!
  • Freshly ground black pepper: To taste.
  • 2/3 c. finely chopped raw pecans: The crunchy topping that makes this dish unforgettable.

How to Make Maple Pecan-Crusted Chicken

['Close-up of juicy Maple Pecan-Crusted Chicken, showcasing golden-brown crust and garnished with fresh thyme.', 'Side view of Maple Pecan-Crusted Chicken, highlighting the crunchy texture and succulent meat.', 'Detailed close-up of Maple Pecan-Crusted Chicken, with visible pecans and a drizzle of maple syrup.', 'Appetizing Maple Pecan-Crusted Chicken, displaying its rich colors and garnishing elements.']

Follow these simple steps to create a dish that sings with flavor:


Nonstick Grill Pan

★ Recommended Kitchen Tool

Nonstick Grill Pan

Make this recipe even easier with a quality Nonstick Grill Pan — a must-have kitchen staple!


🛒 View on Amazon →

As an Amazon Associate, we earn from qualifying purchases.
  • Step 1: Preheat your oven: Arrange a rack in the center of the oven and preheat to 400°F. Place a large ovenproof skillet inside to preheat as well.
  • Step 2: Prepare the ginger mixture: In a large bowl, whisk together the grated ginger, garlic, lemon zest, juice from half the lemon, Dijon mustard, maple syrup, thyme, smoked paprika, 2 tablespoons of olive oil, and 1/2 teaspoon of salt.
  • Step 3: Prepare the chicken: Pat the chicken dry and slice each breast in half lengthwise to create four pieces. Season with salt and pepper, then toss in the ginger mixture until well coated.
  • Step 4: Coat with pecans: Carefully remove the hot skillet from the oven, adding the remaining 2 tablespoons of olive oil. Place the chopped pecans in a shallow dish. One piece at a time, press one side of the chicken into the pecans, gently adhering them to the chicken. Transfer to the hot skillet, pecan side up.
  • Step 5: Bake to perfection: Bake the chicken in the preheated oven until cooked through, about 15 to 17 minutes. Use an instant-read thermometer to ensure it reaches 165°F at its thickest part.
  • Step 6: Garnish and serve: Top the baked chicken with the reserved ginger mixture and fresh thyme. Slice the remaining half lemon into wedges and serve alongside for an extra burst of flavor.

Pro Tips for Making Maple Pecan-Crusted Chicken

  • Pat the chicken dry: This helps the marinade adhere better and ensures a crispy crust.
  • Use room temperature ingredients: Bringing your chicken and eggs to room temperature helps them cook evenly.
  • Adjust the seasoning: Don’t hesitate to taste and adjust the seasoning of your marinade—add more salt, pepper, or even a pinch of cayenne for heat.
  • Let it rest: After baking, let your chicken rest for a few minutes before slicing. This keeps it juicy!
  • Experiment with nuts: While pecans are a classic choice, feel free to use walnuts or almonds for a different flavor and texture.
  • Make a mustard sauce: Drizzle some extra Dijon mustard mixed with maple syrup over the chicken for an added flavor boost.
  • Try fresh herbs: Thyme is lovely, but rosemary or sage can also bring a wonderful aroma to this dish.
  • Use a meat thermometer: This ensures your chicken is perfectly cooked without being dry.

Common Mistakes and Troubleshooting

Even the best of us make mistakes in the kitchen! Here are some common pitfalls to avoid:

  • Overcooking the chicken: Always check the internal temperature. Overcooked chicken can become dry.
  • Inadequate seasoning: Don’t skimp on the salt and pepper; they enhance the natural flavors of the dish.
  • Not preheating the skillet: A hot skillet is crucial for achieving a nice sear on your chicken.
  • Skipping the rest time: Allowing the chicken to rest retains moisture and flavor.

Variations to Try

Looking for ways to switch it up? Here are some delightful variations on this recipe:

  • Maple Mustard Sauce: Whisk together maple syrup and Dijon mustard to create a zesty drizzle.
  • Stuffed Chicken: Stuff the chicken with cream cheese and spinach before coating it with pecans.
  • Spicy Pecan Crust: Add cayenne pepper or crushed red pepper flakes to the pecan coating for a little heat.
  • Herb-Infused Oil: Use rosemary or basil-infused olive oil for a fragrant twist.

Storage and Make-Ahead Instructions

Want to prepare ahead of time? Here’s how to store and reheat your Maple Pecan-Crusted Chicken:

  • Make ahead: Marinate the chicken up to 24 hours in advance. Just keep it covered in the fridge until you’re ready to bake.
  • Storage: Store leftover chicken in an airtight container in the fridge for up to 3 days.
  • Reheating: Reheat in the oven at 350°F to maintain the crispy texture. Avoid microwaving as it can make the crust soggy.

Frequently Asked Questions

  • Can I use chicken thighs instead of breasts? Absolutely! Thighs will add extra flavor and moisture.
  • Is there a gluten-free option? Yes! Just ensure your pecans and mustard are certified gluten-free.
  • What can I serve with this dish? Pair it with a fresh garden salad, roasted vegetables, or creamy mashed potatoes.
  • How can I make this dish dairy-free? This recipe is already dairy-free, but always check your mustard and any sauces for hidden dairy.
  • Can I freeze the leftovers? Yes, you can freeze cooked chicken for up to 3 months. Just thaw in the fridge before reheating.
  • What’s the best way to store leftovers? Keep in an airtight container in the fridge for up to 3 days.
  • Can this recipe be made in an air fryer? Yes! Cook at 375°F for about 12-15 minutes, or until the chicken reaches 165°F.
  • What can I substitute for maple syrup? Honey or agave syrup can be used in a pinch, but will alter the flavor slightly.

Nutritional Tips and Dietary Adaptations

This Maple Pecan-Crusted Chicken can be adapted for various dietary needs:

  • Low-carb option: Substitute the maple syrup with a low-carb sweetener like erythritol.
  • Paleo-friendly: Ensure all ingredients, particularly the mustard, are compliant with your paleo diet.
  • Whole30 compliant: Use compliant mustard and avoid any added sugars in your syrup.
  • Protein boost: Serve with a side of quinoa or lentils to increase your protein intake.

Equipment Recommendations

To make this recipe as seamless as possible, here are a few tools I recommend:

  • Ovenproof skillet: Essential for both searing and baking.
  • Meat thermometer: Ensures your chicken cooks perfectly every time.
  • Grater: For the ginger and garlic, a microplane works wonders!
  • Mixing bowls: A variety of sizes helps in preparing your ingredients easily.

Serving Suggestions

Finally, let’s talk about how to plate this beauty:

  • Fresh greens: Serve it over a bed of arugula or spinach for a fresh bite.
  • Seasonal vegetables: Roasted carrots, Brussels sprouts, or green beans complement the dish perfectly.
  • Grain base: Serve with a side of quinoa or rice for a fulfilling meal.
  • Garnish: A sprinkle of fresh thyme or a drizzle of extra maple mustard sauce can elevate your presentation.

In conclusion, this Maple Pecan-Crusted Chicken is more than just a recipe; it’s a way to bring comfort and warmth to your table. Each bite tells a story of home, family, and the simple joys of cooking. So gather your loved ones, cook with care, and enjoy the delicious flavors that remind us of where we come from. Happy cooking, friends!

Maple Pecan-Crusted Chicken

Prep Time 15 minutes
Cook Time 17 minutes
Total Time 32 minutes
Servings 4 pieces
Calories 350
A flavorful chicken dish featuring a sweet maple and pecan crust, perfect for a satisfying meal with a hint of sweetness and crunch.

Ingredients

Ginger, garlic, lemon zest, lemon juice, mustard, syrup, thyme, paprika, oil, salt

  • 1 piece ginger, peeled, grated
  • 4 cloves garlic, grated
  • 1 lemon lemon, zested, halved
  • 2 tbsp Dijon mustard
  • 2 tbsp pure maple syrup
  • 1 tbsp chopped fresh thyme (plus more for serving)
  • 0.5 tsp smoked paprika
  • 4 tbsp extra-virgin olive oil, divided
  • Kosher salt Kosher salt
  • 2 6- to 8-oz. boneless, skinless chicken breasts
  • Freshly ground black pepper black pepper (to taste)
  • 2/3 c. finely chopped raw pecans

Instructions 

  • Preheat oven to 400°F and heat a skillet.
  • Mix ginger, garlic, lemon zest, juice, mustard, syrup, thyme, paprika, 2 tbsp oil, and salt. Refrigerate 1/4 cup of this mixture.
  • Pat chicken dry, halve lengthwise, season with salt and pepper, then coat with remaining ginger mixture.
  • Heat skillet with 2 tbsp oil, press chicken into pecans, and cook pecan side up until browned.
  • Bake until chicken reaches 165°F, about 15-17 minutes. Serve with reserved ginger mixture, thyme, and lemon wedges.

Notes

Ensure chicken is cooked to the proper temperature for safety and best flavor.
Calories: 350kcal
Cost: $15
Course: Main Course
Cuisine: American
Keyword: chicken, maple, Pecan

Discover the Heart of Southern Cooking

Welcome to my kitchen, where the rich aromas of Southern comfort food come alive! Today, I’m excited to share a recipe that’s close to my heart: Bourbon Peach Chicken. This dish marries juicy chicken fillets with the sweetness of ripe peaches and a hint of bourbon, creating a symphony of flavors that will have your family and friends gathering around the table. It’s not just about food; it’s about connection, warmth, and the simple joys that come from sharing a meal. So, grab your apron, and let’s get cooking!

Why You’ll Love This Recipe

  • Unforgettable Flavor: The combination of sweet peaches and bourbon creates a sauce that elevates the chicken, making each bite a flavorful experience.
  • Quick and Easy: With just a few simple steps, you can have a delicious meal on the table in under an hour.
  • Perfect for Any Occasion: Whether it’s a family dinner or a gathering with friends, this dish is sure to impress.
  • Healthier Comfort Food: Using fresh ingredients and lean chicken fillets makes this dish a wholesome choice.
  • Versatile Pairings: This Bourbon Peach Chicken pairs beautifully with a variety of sides, from salads to crusty bread, making it a flexible option for any meal.

Ingredients Breakdown

Let’s dive into the ingredients you’ll need to create this delightful dish:

  • 2 chicken fillets: Choose skinless for a lighter option or bone-in for extra flavor.
  • 2 tbsp olive oil: A staple for sautéing; use extra virgin for the best flavor.
  • 1 tbsp unsalted butter: Adds richness to the dish.
  • 4 garlic cloves (minced): Fresh garlic brings a wonderful aroma and depth of flavor.
  • 1 small onion (finely chopped): Sweet onion complements the peaches beautifully.
  • 1 tsp pickled green peppercorns (finely chopped): Adds a unique tang; feel free to substitute with capers if needed.
  • 4 ripe peaches (cut into 1/2 inch/2.5 cm thick slices): The star of the dish! Sweet, juicy peaches are best when in season.
  • 1 tbsp fresh thyme leaves: Enhances the dish’s earthiness.
  • 1 tsp salt and 1 tsp black pepper: Basic seasonings that elevate the flavor.
  • 1 tsp sweet paprika: A touch of sweetness and color.
  • 1 cup chicken broth: Use low-sodium for a healthier option.
  • ¼ cup bourbon: The spirit that brings this dish together. Use a quality bourbon for the best flavor.
  • 1 tsp brown sugar: Balances the tartness of the peaches.
  • 2 tbsp whole grain mustard: Adds a subtle kick.
  • 1 tbsp balsamic vinegar: A touch of acidity enhances the sauce.
  • 2 tbsp low sodium soy sauce: Adds umami depth.
  • 1 tsp crushed red pepper flakes: For those who like a little heat!

Pro Tips for Perfect Bourbon Peach Chicken

['Close-up of juicy Bourbon Peach Chicken with golden peaches and herbs.', 'Delicious Bourbon Peach Chicken featuring tender chicken fillets and fresh peaches.', 'Side view of Bourbon Peach Chicken dish garnished with thyme and garlic.', 'Appetizing Bourbon Peach Chicken with caramelized peaches and a rich sauce.']

Before we jump into the cooking process, here are some tips to ensure your Bourbon Peach Chicken turns out just right:


Air Fryer XL

★ Recommended Kitchen Tool

Air Fryer XL

Make this recipe even easier with a quality Air Fryer XL — a must-have kitchen staple!


🛒 Check Price on Amazon →

As an Amazon Associate, we earn from qualifying purchases.
  • Choose ripe peaches: Look for peaches that yield slightly to pressure for optimal sweetness and juiciness.
  • Don’t rush the searing: Make sure your skillet is hot enough to get a good sear on the chicken, enhancing its flavor.
  • Deglaze with care: Use a splash of bourbon to deglaze the skillet, scraping up all those delicious browned bits for extra flavor.
  • Watch the peaches: Sauté them just long enough to soften; you want them to retain their shape and not turn to mush.
  • Adjust seasoning: Taste the sauce before serving and adjust salt and pepper to your liking.
  • Serve warm: This dish is best enjoyed fresh, so serve it immediately for the best experience.
  • Pair wisely: Complement with simple sides like crusty bread or a fresh garden salad to balance the flavors.
  • Substitutions are okay! Don’t hesitate to swap ingredients based on what you have—cooking is all about improvisation!

Common Mistakes and Troubleshooting

We all make mistakes in the kitchen, but learning from them is what makes us better cooks. Here are some common pitfalls and how to avoid them:

  • Overcooking the chicken: Ensure your chicken is cooked through but still juicy. Use a meat thermometer (165°F/75°C) for precision.
  • Peaches turning to mush: Don’t sauté them for too long; they should be tender but still hold their shape.
  • Too salty sauce: If your sauce is too salty, add a splash of water or more peaches to balance it out.
  • Not enough flavor: If you find the sauce lacking, consider adding more bourbon or spices to enhance the taste.

Variations to Try

Want to mix things up? Here are some delicious variations of the Bourbon Peach Chicken that you can try:

  • Grilled Version: Marinate the chicken in the bourbon sauce before grilling for a smoky flavor.
  • Peach Bourbon Stir-fry: Use sliced chicken and peaches in a quick stir-fry for a speedy weeknight meal.
  • Slow Cooker Delight: Combine all ingredients in a slow cooker and let it cook on low for 6-8 hours for tender, flavorful chicken.
  • Bourbon Peach Glaze: Reduce the sauce after cooking to make a glaze for drizzling over grilled chicken.

Storage and Make-Ahead Instructions

This dish can be prepared in advance, making it perfect for busy weeknights or meal prep. Here’s how to store and reheat:

  • Refrigeration: Store leftovers in an airtight container in the fridge for up to 3 days.
  • Freezing: Freeze in a sealed container for up to 3 months. Thaw in the fridge overnight before reheating.
  • Reheating: Reheat gently on the stove over low heat or in the microwave, adding a splash of chicken broth to maintain moisture.
  • Make-ahead tips: Prepare the sauce a day ahead and store it in the fridge for enhanced flavors.

Frequently Asked Questions

Here are some commonly asked questions about making Bourbon Peach Chicken:

  • Can I use frozen peaches? Yes, but fresh peaches are recommended for best flavor and texture.
  • What can I substitute for bourbon? If you prefer not to use alcohol, try using apple cider or peach juice for a similar sweetness.
  • Is this recipe gluten-free? Yes, by using gluten-free soy sauce or omitting it altogether.
  • Can I make this dish in advance? Absolutely! It tastes even better the next day.
  • What sides pair well with this dish? Consider serving with a crisp salad, rice, or mashed potatoes.
  • How do I know when the chicken is done? Use a meat thermometer to check that it reaches an internal temperature of 165°F (75°C).
  • Can I double the recipe? Yes, just ensure your skillet is large enough or cook in batches.
  • Is it necessary to deglaze the pan? While not mandatory, deglazing enriches the sauce with incredible flavor.

Nutritional Information and Dietary Adaptations

Cooking with health in mind is important. Here’s a breakdown of the nutritional information and options for dietary adaptations:

  • Calories: Approximately 350 calories per serving (based on 2 fillets and sauce).
  • Protein: A great source of lean protein, providing about 30g per serving.
  • Low-carb option: Serve over steamed vegetables instead of rice for a low-carb meal.
  • Vegetarian version: Substitute chicken with firm tofu or mushrooms and adjust cooking times accordingly.

Equipment Recommendations

Having the right tools can make all the difference in your cooking experience. Here are some essentials:

  • Non-stick skillet: Ideal for searing the chicken without sticking.
  • Meat thermometer: Ensures your chicken is cooked perfectly every time.
  • Cutting board: A sturdy surface for chopping your ingredients.
  • Wooden spoon: Perfect for mixing and deglazing without scratching your skillet.

Serving Suggestions

Now that you’ve prepared this delightful Bourbon Peach Chicken, here are some serving suggestions to elevate your meal:

  • Crusty Bread: Serve with a warm loaf of crusty bread to soak up the delicious sauce.
  • Fresh Salad: A light salad with mixed greens, nuts, and a simple vinaigrette pairs beautifully.
  • Rice or Quinoa: Serve over fluffy rice or quinoa to balance the sweetness of the dish.
  • Wine Pairing: A chilled rosé or a light white wine complements the flavors perfectly.

As you gather around the table to savor this Bourbon Peach Chicken, remember that cooking is more than just a process; it’s a way to connect, to share stories, and to create memories. Enjoy the warmth of this Southern classic, and don’t forget to pass it on to the next generation. Happy cooking!

Bourbon Peach Chicken

Prep Time 10 minutes
Cook Time 20 minutes
Total Time 30 minutes
Servings 4 servings
Calories 350
A flavorful dish combining tender chicken with sweet peaches and a bourbon-infused sauce, perfect for a summer dinner.

Ingredients

Chicken

  • 2 pieces chicken fillets
  • 2 tbsp olive oil
  • 1 tbsp unsalted butter
  • 4 cloves garlic (minced)
  • 1 small onion (finely chopped)
  • 1 tsp pickled green pepper corns (finely chopped)
  • 4 ripe peaches peaches (cut into 1/2 inch slices)
  • 1 tbsp fresh thyme leaves (more for serving)
  • 1 tsp salt
  • 1 tsp black pepper
  • 1 tsp sweet paprika
  • 1 cup chicken broth
  • ¼ cup bourbon
  • 1 tsp brown sugar
  • 2 tbsp whole grain mustard
  • 1 tsp black pepper
  • 1 tbsp balsamic vinegar
  • 2 tbsp low sodium soy sauce
  • 1 tsp crushed red pepper flakes

Instructions 

  • Mix bourbon sauce ingredients and set aside.
  • Season chicken with salt, pepper, and paprika. Cook in olive oil and butter until browned, about 5-7 minutes per side. Remove and keep warm.
  • Sauté garlic, onion, and green pepper corns until fragrant, 1-2 minutes. Deglaze with a splash of bourbon sauce.
  • Add peaches and thyme, cook 3-5 minutes. Pour bourbon sauce, bring to boil, add chicken, and simmer 3-5 minutes.
  • Adjust seasoning, garnish with extra thyme and black pepper. Serve with bread and salad.

Notes

Use fresh peaches for best flavor and adjust cooking time to prevent overcooking the peaches.
Calories: 350kcal
Cost: $15
Course: Main Course
Cuisine: American
Keyword: bourbon, chicken, peach

Discover the Comfort of a Hearty Chicken and Sweet Potato Bowl

Welcome to a delightful culinary journey where simple ingredients transform into a heartwarming meal. This Crispy Chicken and Roasted Sweet Potato Bowl embodies the essence of home-cooked comfort food. Packed with flavor and nutrition, it’s perfect for any day of the week. Imagine tender chicken, perfectly roasted sweet potatoes, and vibrant broccoli coming together in a dish that not only nourishes your body but also warms your soul.

Let’s dive into why this recipe is a must-try for anyone who cherishes good food made with love.

Why You’ll Love This Recipe

This bowl isn’t just another meal; it’s a celebration of wholesome ingredients and rustic flavors. Here are some reasons why you’ll adore this recipe:


Nonstick Grill Pan

★ Recommended Kitchen Tool

Nonstick Grill Pan

Make this recipe even easier with a quality Nonstick Grill Pan — a must-have kitchen staple!


🛒 Check Price on Amazon →

As an Amazon Associate, we earn from qualifying purchases.
  • High in Protein: Each serving provides a generous amount of protein, thanks to the chicken breast, helping you stay full and satisfied for hours.
  • Nutrient-Dense: With sweet potatoes and broccoli, this dish is packed with vitamins and minerals, offering a healthy balance.
  • Quick and Easy: This recipe can be whipped up in under an hour, making it perfect for busy weeknights.
  • Versatile: You can customize the bowl with your favorite veggies or sauces, allowing endless variations.
  • Meal Prep Friendly: Prepare components in advance for quick assembly throughout the week.

Ingredients

To whip up this amazing bowl, you’ll need the following ingredients:

  • Boneless Skinless Chicken Breast: The star of the show, providing lean protein.
  • 1 Small Sweet Potato (Peeled and Cubed): Adds a touch of sweetness and a hearty texture.
  • 1 Cup Broccoli Florets: A nutrient powerhouse that complements the dish beautifully.
  • 1 Tbl Olive Oil: For roasting the sweet potatoes and cooking the chicken.
  • 1/2 Tsp Each Garlic Powder and Paprika: These spices add depth and flavor.
  • Salt/Pepper to Taste: Essential for seasoning your dish to perfection.
  • 1 Tbl Balsamic Vinegar (For Drizzling): A tangy finish that elevates the flavors.
  • 1 Tbl Fat-Free Plain Greek Yogurt (For Topping): A creamy addition that balances the meal.
  • Balsamic Glaze, Optional: For those who want a touch of sweetness.

How to Make Your Crispy Chicken and Roasted Sweet Potato Bowl

['Close-up of a bowl featuring crispy chicken, roasted sweet potato, and broccoli.', 'Side view of a delicious crispy chicken bowl with vibrant sweet potatoes and green broccoli.', 'Juicy crispy chicken served with colorful roasted sweet potatoes and a drizzle of balsamic vinegar.', 'A healthy bowl showcasing succulent chicken, cubed sweet potatoes, and broccoli florets.']

Now, let’s get to the fun part—cooking! Follow these simple steps to create your own comforting bowl.

  • Step 1: Prepare the Sweet Potatoes: Preheat your oven to 400°F. Toss the sweet potato cubes with olive oil, garlic powder, paprika, salt, and pepper. Spread them evenly on a baking sheet and roast for 20-25 minutes, flipping halfway through until they’re tender and crispy.
  • Step 2: Cook the Chicken: While the sweet potatoes are roasting, season the chicken breast with salt, pepper, and a little paprika. Spray a non-stick skillet with cooking spray and cook the chicken over medium heat for 6-7 minutes on each side until golden brown and cooked through. Let it rest before slicing.
  • Step 3: Steam the Broccoli: Steam the broccoli florets until tender, about 5-7 minutes. This keeps them vibrant and nutritious.
  • Step 4: Assemble the Bowl: In your favorite bowl, add the roasted sweet potatoes, steamed broccoli, and sliced crispy chicken. Drizzle with balsamic vinegar or glaze and top with a dollop of fat-free Greek yogurt. Garnish with fresh parsley for a lovely presentation.

This recipe serves one but can easily be doubled or tripled for family meals. Enjoy this delicious bowl that’s just as satisfying as it is nutritious!

Expert Tips for Perfecting Your Bowl

To elevate your cooking game, here are some expert tips to consider:

  • Marinate the Chicken: If you have time, marinate your chicken in the spices for a few hours or overnight for extra flavor.
  • Use Fresh Ingredients: Fresh produce not only tastes better but also provides more nutrients.
  • Cook in Batches: Make extra roasted sweet potatoes and chicken for quick meals later in the week.
  • Experiment with Spices: Feel free to swap out spices or add your favorites like cumin or chili powder for a kick.
  • Use Leftover Vegetables: This bowl is a great way to use up leftover veggies in your fridge, making it versatile and zero-waste.
  • Healthy Cooking Techniques: Try grilling the chicken instead of pan-frying for a lighter option.
  • Adjust to Taste: If you prefer a creamier texture, use a bit more Greek yogurt on top.
  • Watch the Sweet Potatoes: Keep an eye on them as roasting times can vary based on your oven and potato size.

Common Mistakes and Troubleshooting

Even the best cooks can make mistakes. Here’s how to avoid them:

  • Overcooking Chicken: Ensure your chicken is cooked to an internal temperature of 165°F to avoid dryness.
  • Undercooking Sweet Potatoes: If they’re not crispy, give them a few extra minutes in the oven.
  • Too Much Seasoning: Start with less salt and pepper; you can always add more later.
  • Skipping the Resting Step: Letting the chicken rest prevents juices from running out when you slice it.

Variations to Try

Feel free to customize this bowl to fit your mood or dietary needs:

  • Southwestern Style: Add black beans, corn, and top with avocado slices for a southwestern twist.
  • Asian-Inspired: Use soy sauce and sesame oil, and add snap peas and carrots.
  • Italian Flair: Incorporate Italian herbs, cherry tomatoes, and a sprinkle of mozzarella cheese.
  • Vegetarian Option: Substitute chicken with chickpeas or grilled tofu for a plant-based dish.

Storage and Make-Ahead Instructions

This dish is perfect for meal prep. Here’s how to store it:

  • Refrigeration: Store in an airtight container in the fridge for up to 4 days.
  • Freezing: You can freeze the chicken and sweet potatoes separately for up to 3 months. Reheat in the oven or microwave.
  • Make-Ahead: Roast sweet potatoes and cook chicken in advance, then assemble bowls fresh throughout the week.

Frequently Asked Questions

Here are some common questions regarding this recipe:

  • Can I use skin-on chicken? Absolutely! Skin-on chicken will add extra flavor and moisture, just adjust cooking times.
  • What if I don’t have sweet potatoes? Regular potatoes or even butternut squash work well as substitutes.
  • Can I make this vegan? Yes, simply replace chicken with tofu or tempeh and omit yogurt.
  • Is this recipe gluten-free? Yes, all ingredients used are naturally gluten-free.
  • How can I make it spicier? Add cayenne pepper or your favorite hot sauce to the chicken seasoning.
  • Can I add cheese? Yes! Adding cheese like feta or Parmesan can enhance the flavor.
  • What’s the best way to reheat this bowl? For best results, reheat in the oven to maintain crispiness.
  • How do I know when my chicken is done? Use a meat thermometer; it should read 165°F when fully cooked.

Nutrition Tips and Dietary Adaptations

For a well-rounded meal, consider these nutrition tips:

  • Balance Your Plate: Pair this bowl with a side salad to increase fiber intake.
  • Adjust Portion Size: Modify ingredient amounts based on your daily caloric needs.
  • Incorporate Whole Grains: Serve over quinoa, brown rice, or farro for added fiber.

Essential Equipment Recommendations

Here’s what you’ll need to make your cooking experience smooth:

  • Baking Sheet: A sturdy baking sheet is essential for roasting sweet potatoes.
  • Non-Stick Skillet: Perfect for cooking the chicken without sticking.
  • Steamer Basket: Ideal for steaming broccoli to keep it bright and nutritious.

Serving Suggestions

To make your meal even more delightful, consider these serving suggestions:

  • Garnish: Fresh herbs like parsley or cilantro can brighten up the dish.
  • Add Crunch: Topping with toasted nuts or seeds can add a lovely texture.
  • Pair with Sauce: A tahini drizzle or spicy yogurt sauce can take the flavor up a notch.

In conclusion, this Crispy Chicken and Roasted Sweet Potato Bowl is more than just a meal; it’s a hearty reminder of the simple pleasures in life. With its comforting flavors and wholesome ingredients, it’s perfect for any occasion—be it a busy weeknight or a cozy family dinner. So, gather your loved ones, share stories over this delightful dish, and create lasting memories around the dinner table. Happy cooking!

Crispy Chicken and Roasted Sweet Potato Bowl

Prep Time 10 minutes
Cook Time 25 minutes
Total Time 35 minutes
Servings 1 serving
Calories 450
A delicious and healthy bowl combining crispy chicken, roasted sweet potatoes, and steamed broccoli, drizzled with balsamic and topped with Greek yogurt.

Ingredients

Protein

  • 1 piece Boneless Skinless Chicken Breast
  • 1 small Sweet Potato (Peeled and cubed)
  • 1 cup Broccoli Florets
  • 1 Tbl Olive Oil
  • 1/2 tsp Garlic Powder
  • 1/2 tsp Paprika
  • to taste Salt/Pepper
  • 1 Tbl Balsamic Vinegar (For drizzling)
  • 1 Tbl Fat Free Plain Greek Yogurt (For topping)
  • Optional Balsamic Glaze

Instructions 

  • Preheat oven to 400°F (200°C). Toss sweet potato cubes with olive oil, garlic powder, paprika, salt, and pepper. Spread on a baking sheet and roast for 20-25 minutes.
  • Season chicken with salt, pepper, and paprika. Cook in a skillet over medium heat for 6-7 minutes per side until golden. Rest and slice.
  • Steam broccoli until tender, about 5-7 minutes. Assemble bowl with sweet potatoes, broccoli, and sliced chicken. Drizzle with balsamic and top with Greek yogurt.
  • Garnish with parsley if desired. Serve immediately.

Notes

For extra flavor, add fresh herbs or a squeeze of lemon.
Calories: 450kcal
Cost: $15
Course: Main Course
Cuisine: American
Keyword: chicken, healthy, Sweet Potato

Discover the Heartwarming Joy of Chicken Mini Pies

Gather around, friends! Today, I’m excited to share a delightful recipe that speaks to the heart and comforts the soul: Chicken Mini Pies. These little hand-held treasures are brimming with tender chicken, fresh herbs, and a creamy filling that’ll take you back to family gatherings and cozy evenings at home. They’re not just a meal; they’re a cherished tradition that brings us all together. With roots deeply planted in the rustic charm of Southern cooking, this recipe will guide you every step of the way.

Why You’ll Love This Recipe

Here are just a few reasons why this Chicken Mini Pies recipe is truly a keeper:

  • Comfort Food at Its Best: These mini pies encapsulate the warmth of home cooking, perfect for any gathering or a cozy night in.
  • Versatile Filling Options: You can easily swap in your favorite vegetables or use leftover chicken for a quick meal.
  • Family-Friendly: Kids and adults alike will love the bite-sized portions, making them perfect for little hands.
  • Make-Ahead Friendly: Prepare ahead of time and freeze for a quick dinner solution on busy nights.
  • Easy to Customize: From spices to fillings, you can tweak this recipe to suit your family’s tastes.

Ingredient Breakdown

Let’s dive into the ingredients that make these Chicken Mini Pies so special. Here’s what you’ll need:


Air Fryer XL

★ Recommended Kitchen Tool

Air Fryer XL

Make this recipe even easier with a quality Air Fryer XL — a must-have kitchen staple!


🛒 Shop This Tool →

As an Amazon Associate, we earn from qualifying purchases.
  • For the Dough:
    – 300 gr Mehl, Type 405
    – 1 ½ TL getrockneter Salbei, Thymian, und Rosmarin
    – ¾ TL Salz
    – 200 gr kalte Butter
    – 1 Ei, ggf. kaltes Wasser
  • For the Filling:
    – 500 gr Hähnchenbrust
    – Butter für die Pfanne
    – 1 Zwiebel
    – 1 Knoblauchzehe
    – 1 Stange Lauch/Porree
    – 1 EL Mehl, Type 405
    – 100 gr Schmand
    – 100 gr Sahne
    – 100-200 gr Milch
    – 1 TL Cayennepfeffer
    – 1 TL scharfes Paprikagewürz
    – 1 Bund Schnittlauch
    – 150 gr geriebener Gouda/Cheddar oder Gruyère
    – 1 Ei zum Bestreichen

Substitutions: If you’re short on ingredients, here are a few swaps you can make:

  • Butter: Use margarine or a vegan butter substitute.
  • Chicken: Rotisserie chicken works beautifully in a pinch; just shred it and toss it in.
  • Herbs: Feel free to use fresh herbs instead of dried, adjusting the amounts to taste.
  • Cheese: Swap gouda or cheddar with mozzarella for a milder flavor.

How to Make Chicken Mini Pies

['Close-up of a golden-brown chicken mini pie with flaky crust.', 'Side view of juicy chicken mini pies, showcasing crispy pastry and filling.', 'Handheld chicken mini pie, highlighting the flaky exterior and savory filling.', 'A plate of freshly baked chicken mini pies with an inviting golden crust.']

Now that we have our ingredients prepped, let’s get cooking! Follow these simple steps to whip up your Chicken Mini Pies:

1. Prepare the Dough

In a large mixing bowl, combine the flour, dried herbs, and salt. Cut in the cold butter until the mixture resembles coarse crumbs. Then, add the egg and mix until a dough forms. Wrap in plastic wrap and refrigerate for at least 30 minutes.

2. Make the Filling

In a skillet, melt some butter over medium heat. Add diced chicken and brown it. Remove and set aside. In the same pan, add more butter, then sauté the chopped onion and garlic until translucent. Add sliced leeks, cooking for another couple of minutes.

3. Combine Ingredients

Return the chicken to the skillet and sprinkle with flour. Stir in the sour cream, cream, and milk. Add the spices and let it simmer until the mixture thickens, about 15 minutes. Stir in chopped chives and cheese, allowing it to melt.

4. Assemble the Mini Pies

Preheat your oven to 200°C (about 400°F). Roll out the dough on a floured surface and cut into circles. Place a spoonful of filling onto half of the circles, brush edges with water, and top with the remaining circles. Seal them well and cut slits for steam. Brush with beaten egg for a golden finish.

5. Bake

Place the mini pies on a lined baking sheet and bake for 20 minutes or until golden brown. These little beauties can be enjoyed warm or at room temperature.

Pro Tips for Perfect Mini Pies

Here are some expert insights to ensure your Chicken Mini Pies turn out perfectly:

  • Chill the Dough: Keeping the dough cold will help maintain its flakiness when baked.
  • Don’t Overfill: Be generous, but keep the filling moderate to avoid spilling during baking.
  • Test for Doneness: The pies should be golden brown; adjust baking time as needed based on your oven.
  • Serve with Dipping Sauce: A side of gravy or ranch dressing can enhance the experience.
  • Try Different Cheeses: Experiment with different cheeses for varied flavors.
  • Freeze for Later: These mini pies freeze well; just bake from frozen, adding a few more minutes to the baking time.
  • Make Them Mini or Large: You can alter the size to cater to your needs, perfect for parties or family dinners.
  • Pair with a Salad: Fresh greens go wonderfully with these mini pies for a balanced meal.

Common Mistakes and Troubleshooting

Even the best cooks can run into hiccups. Here are some common mistakes and how to avoid them:

  • Dough Too Sticky: If your dough is too sticky, add a touch more flour while working it.
  • Filling Too Watery: If the filling is too runny, cook it longer to thicken or add more flour.
  • Pies Sticking to the Pan: Use parchment paper and ensure the dough is properly chilled.
  • Undercooked Filling: Always ensure your chicken is thoroughly cooked before assembling your pies.

Variations to Try

Feeling adventurous? Here are a few variations to give your Chicken Mini Pies a fresh twist:

  • Buffalo Chicken Mini Pies: Add hot sauce and blue cheese for a zesty kick.
  • Mushroom and Spinach: A vegetarian twist with mushrooms, spinach, and ricotta.
  • Curried Chicken: Mix in curry powder for a flavorful spin.
  • Cheesy Broccoli: Add steamed broccoli and extra cheese for a veggie-packed version.

Storage and Make-Ahead Instructions

These Chicken Mini Pies are perfect for meal prep:

  • Refrigerator: Store in an airtight container for up to 3 days.
  • Freezer: Freeze uncooked pies on a tray, then transfer to a freezer bag. Bake directly from the freezer.
  • Reheating: Reheat in a preheated oven at 180°C (about 350°F) until warmed through, about 15 minutes.

Frequently Asked Questions

Here are some common questions about Chicken Mini Pies:

  • Can I use store-bought pie crust? Yes, for a quicker option, store-bought crust works well.
  • How long do these mini pies last? They last up to 3 days in the fridge and can be frozen for longer storage.
  • What’s the best way to freeze them? Freeze uncooked on a tray before transferring to a freezer bag for easier handling.
  • Can I make these vegetarian? Absolutely! Substitute chicken with your choice of veggies or legumes.
  • What spices can I add? Feel free to experiment with your favorite spices to give it a personal touch.
  • How do I get a golden crust? Brush with egg wash before baking for that beautiful golden finish.
  • What can I serve with these pies? A fresh salad or a side of gravy complements these pies beautifully.
  • Can I use leftover chicken? Yes, rotisserie chicken is a great option for a quick filling!

Nutritional Tips and Dietary Adaptations

To cater to various dietary needs, here are a few tips:

  • Gluten-Free: Use gluten-free flour for the dough to accommodate gluten sensitivities.
  • Low-Fat Option: Swap heavy cream for Greek yogurt to reduce calories.
  • High-Protein: Add beans or lentils to the filling for a protein boost.

Recommended Equipment

To make these mini pies, you’ll need:

  • Mixing Bowl: A large bowl for combining ingredients.
  • Rolling Pin: Essential for rolling out the dough.
  • Cookie Cutter: A round cutter or glass for shaping the dough.
  • Baking Sheet: A sturdy sheet for baking your mini pies.
  • Sharp Knife: For cutting slits in the dough.

Serving Suggestions

These Chicken Mini Pies shine brightest when served with:

  • Fresh Salad: A simple green salad with vinaigrette balances the richness of the pies.
  • Gravy or Dipping Sauce: A side of homemade gravy enhances the comfort food experience.
  • Pickles or Relish: A tangy side adds a nice contrast to the savory flavors.

In closing, Chicken Mini Pies are more than just food; they’re a celebration of tradition, love, and the simple joys of cooking. So gather your loved ones, roll up your sleeves, and create these delightful bites that are sure to become a cherished family favorite. Happy cooking, y’all!

Handliche Mini-Pies mit Hähnchenfüllung

Prep Time 30 minutes
Cook Time 20 minutes
Total Time 50 minutes
Servings 8 pieces
Calories 350
Diese leckeren Mini-Pies mit cremiger Hähnchenfüllung sind perfekt als Snack oder Hauptgericht. Einfach zuzubereiten und vielseitig genießbar.

Ingredients

Mürbeteig

  • 300 g Mehl, Type 405
  • 1.5 TL getrockneter Salbei
  • 1.5 TL getrockneter Thymian
  • 1.5 TL getrockneter Rosmarin
  • 0.75 TL Salz
  • 200 g kalte Butter
  • 1 Ei Ei (ggf. kaltes Wasser)

Füllung

  • 500 g Hähnchenbrust
  • 1 Zwiebel Zwiebel
  • 1 Knoblauchzehe Knoblauchzehe
  • 1 Stange Lauch/Porree
  • 1 EL Mehl, Type 405
  • 100 g Schmand
  • 100 g Sahne
  • 150 g geriebener Gouda/Cheddar oder Gruyère
  • 1 TL getrockneter Salbei
  • 1 TL Thymian
  • 1 TL Rosmarin
  • 1 TL Cayennepfeffer
  • 1 TL scharfes Paprikagewürz
  • nach Geschmack Salz, Pfeffer
  • 1 Bund Schnittlauch
  • 150 g geriebener Gouda/Cheddar oder Gruyère
  • 1 Ei Ei zum Bestreichen

Instructions 

  • Mehl, Gewürze und Salz vermengen, Butter einarbeiten, Ei hinzufügen, zu Teig formen, kühlen.
  • Hähnchen in Stücke schneiden, anbraten, Zwiebel, Knoblauch und Lauch dünsten, mit Mehl bestäuben, ablöschen, würzen, köcheln lassen, bis cremig.
  • Teig ausrollen, Kreise ausstechen, Füllung auf Hälfte verteilen, Ränder befeuchten, Deckel aufsetzen, Ränder andrücken, mit Gabel verzieren, einschneiden, mit Ei bestreichen.
  • Mini-Pies bei 200°C ca. 20 Minuten goldbraun backen.

Notes

Für eine knusprige Kruste den Teig gut kühlen und nicht zu lange kneten.
Calories: 350kcal
Cost: $15
Course: Hauptgericht, Snack
Cuisine: Deutsch
Keyword: Hähnchen, Mini-Pies

A Comforting Taste of Home

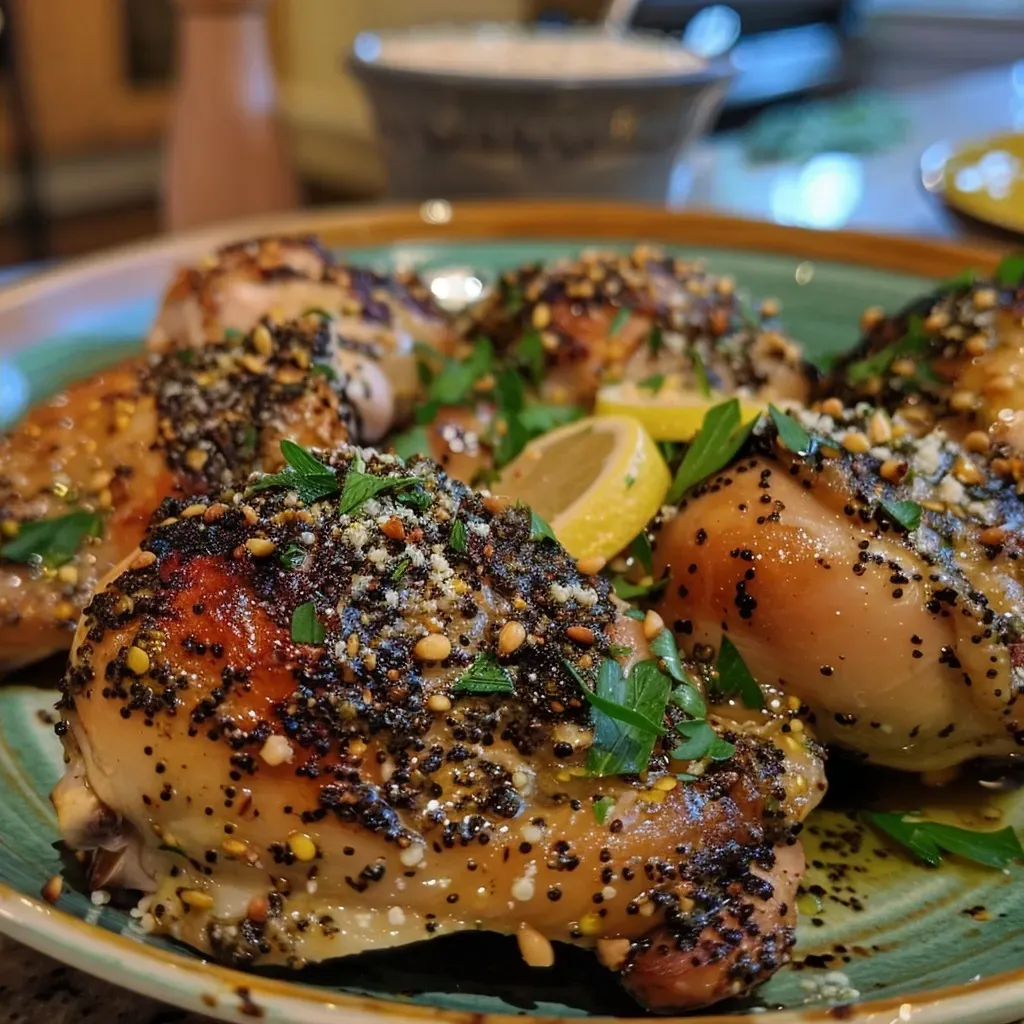
Welcome to a culinary journey that takes you straight to the heart of home-cooked goodness. This **Za’atar Chicken** with **Lemon Tahini Sauce** is not just a dish; it’s a story of family, tradition, and the warmth of shared meals. Perfect for gatherings, this recipe whispers of the good times spent around the table, celebrating flavors that bring comfort and joy. With its aromatic spices and zesty sauce, this dish is a beautiful blend of simplicity and depth, making it an ideal choice for any occasion.

Why You’ll Love This Recipe

There’s more to this Za’atar Chicken than meets the eye. Here are five reasons why this dish will become a staple in your kitchen:

  • Rich Flavor Profile: The za’atar spice mix enhances the chicken’s natural flavors, offering a delightful Middle Eastern twist that elevates your meal.
  • Easy Preparation: With straightforward steps and minimal ingredients, this recipe fits perfectly into a busy lifestyle—ideal for weeknight dinners or special occasions.
  • Healthy and Nutritious: This dish features lean chicken thighs, packed with protein, paired with tahini that offers healthy fats, making it a balanced meal.
  • Versatile Serving Options: Whether served with rice, salad, or pita bread, the possibilities are endless for pairing this dish with your favorite sides.
  • Make-Ahead Friendly: Marinate the chicken in advance to save time, and enjoy the flavors that develop overnight.

Ingredient Breakdown

Let’s dive into what you’ll need for this flavorful dish:


Digital Meat Thermometer

★ Recommended Kitchen Tool

Digital Meat Thermometer

Make this recipe even easier with a quality Digital Meat Thermometer — a must-have kitchen staple!


🛒 Check Price on Amazon →

As an Amazon Associate, we earn from qualifying purchases.
  • 1.5 lbs boneless skinless chicken thighs: Juicy and tender, these thighs soak up the marinade beautifully.
  • 2 tbsp lemon juice: Freshly squeezed lemon juice adds a bright, zesty flavor that cuts through the richness.
  • 4 cloves garlic (minced): Garlic brings aromatic depth, enhancing the overall flavor.
  • 1/4 cup extra virgin olive oil: This adds moisture and richness to the chicken.
  • 2 tbsp za’atar: A Middle Eastern spice blend that infuses the chicken with earthy, herby notes.
  • 1/2 tsp salt: Essential for bringing out the flavors of all ingredients.
  • 2 tbsp chopped parsley (garnish): Fresh parsley adds a pop of color and freshness.
  • 1/4 cup tahini: This sesame paste creates a creamy sauce that complements the chicken perfectly.
  • 2-3 tbsp water: Adjusts the consistency of the tahini sauce.

Substitutions: If you don’t have tahini, you can use Greek yogurt for a creamy alternative. For a different taste, try chicken breasts or drumsticks instead of thighs.

How to Make Za’atar Chicken

[

Now, let’s get cooking! Follow these simple steps to create a dish that’s sure to impress:

  • Marinate the Chicken: In a bowl, whisk together the lemon juice, minced garlic, olive oil, za’atar, and salt. Place the chicken thighs in a Ziploc bag or bowl, pour the marinade over, ensuring the chicken is well-coated. Let it marinate in the fridge for at least 1 hour, ideally overnight.
  • Prepare the Tahini Sauce: Combine tahini, lemon juice, garlic, and salt in a blender. Add 2 tablespoons of water and blend until light and fluffy. Adjust the thickness by adding more water if necessary. Set aside in the fridge until ready to serve.
  • Grill the Chicken: Preheat your grill or grill pan to medium-high heat and lightly oil the grate. Grill the marinated chicken for about 6 minutes on each side, brushing with excess marinade. The internal temperature should reach 165°F.
  • Serve with Garnish: Once cooked, transfer the chicken to a platter. Garnish with chopped parsley and serve with the tahini sauce either drizzled on top or on the side for dipping.

Pro Tips for Perfect Za’atar Chicken

To ensure your chicken turns out perfectly every time, keep these expert insights in mind:

  • Marinate Longer: For the best flavor, marinate the chicken overnight. This allows the spices to penetrate deeply.
  • Use Fresh Ingredients: Fresh lemon juice and garlic make a significant difference in flavor compared to bottled options.
  • Check Doneness: Use a meat thermometer to ensure your chicken is fully cooked; it should reach an internal temperature of 165°F.
  • Grill Marks: For those beautiful grill marks, don’t move the chicken too soon. Let it sear properly before flipping.
  • Experiment with Spices: Feel free to add your favorite spices to the marinade for a personalized touch.
  • Rest Before Serving: Let the chicken rest for a few minutes after grilling to lock in the juices.
  • Adjust Consistency of Sauce: If your tahini sauce is too thick, simply add more water until you reach your desired consistency.
  • Prep Ahead: You can prepare the tahini sauce up to two days in advance for convenience.

Common Mistakes and Troubleshooting

Even the best cooks make mistakes sometimes! Here’s how to avoid common pitfalls:

  • Overcooking Chicken: Keep an eye on the grill time. Overcooked chicken can become dry.
  • Too Salty: Be cautious with the salt in both the marinade and tahini sauce. You can always adjust later, but it’s hard to fix too much salt.
  • Thick Tahini Sauce: If your tahini sauce is too thick, gradually add water until it reaches the desired consistency.
  • Uneven Marination: Ensure all chicken pieces are evenly coated with marinade for consistent flavor.

Variations of Za’atar Chicken

Feel like mixing things up? Here are some variations you can try:

  • Spicy Za’atar Chicken: Add cayenne pepper or red pepper flakes to the marinade for a kick of heat.
  • Honey-Lemon Glaze: Mix honey with the lemon juice for a sweet and tangy glaze.
  • Roasted Za’atar Chicken: Instead of grilling, roast the chicken in the oven at 400°F for about 25-30 minutes.
  • Za’atar Chicken Wraps: Slice the grilled chicken and serve it in pita bread with fresh veggies and tahini sauce.

Storage and Make-Ahead Instructions

This dish is perfect for prepping ahead of time!

  • Leftovers: Store any leftover chicken in an airtight container in the fridge for up to 3 days.
  • Freezing: You can freeze the marinated chicken for up to 3 months. Thaw in the fridge before cooking.
  • Reheating: Reheat chicken in a skillet over medium heat until warmed through, or in the oven at 350°F for about 10 minutes.

Frequently Asked Questions

Here are some common questions about making Za’atar Chicken:

  • Can I use chicken breasts instead of thighs? Yes, chicken breasts work well but may require less cooking time.
  • How can I make this dish gluten-free? Ensure your za’atar blend is gluten-free, and serve with gluten-free sides.
  • What can I serve with Za’atar Chicken? It pairs wonderfully with tabbouleh, rice, or a fresh salad.
  • What if I don’t have za’atar? You can make a homemade blend using thyme, oregano, sesame seeds, and sumac.
  • Can I grill this in the oven? Absolutely! Use the broiler setting to replicate a grill-like finish.
  • How long should I marinate the chicken? For best results, marinate overnight, but at least one hour is necessary.
  • Is tahini sauce healthy? Yes, tahini is a great source of healthy fats and protein.
  • How long does tahini sauce last in the fridge? Homemade tahini sauce can last up to 2 weeks when stored properly in an airtight container.

Nutrition Tips and Dietary Adaptations

This recipe is packed with nutrients while still being delicious:

  • Protein Power: Each serving is loaded with protein, making it great for muscle repair and overall health.
  • Healthy Fats: The olive oil and tahini provide heart-healthy fats that are essential for wellness.
  • Low Carb Option: Serve with a side of roasted vegetables instead of grains for a low-carb meal.
  • Vegan Adaptation: Substitute chicken with grilled vegetables or tofu and use a tahini sauce to keep the flavors intact.

Equipment Recommendations

To make this recipe a success, you’ll need:

  • Grill or Grill Pan: Essential for achieving that beautiful char on the chicken.
  • Blender: For making the tahini sauce smooth and creamy.
  • Meat Thermometer: To accurately check the doneness of the chicken.

Serving Suggestions

Here are some tasty ideas for serving your Za’atar Chicken:

  • With Grains: Serve over fluffy couscous or quinoa to soak up the flavors.
  • In Salads: Slice the chicken and toss it in a fresh salad with greens, tomatoes, and cucumbers.
  • With Dips: Pair with hummus or baba ganoush for a delightful appetizer spread.

Conclusion

There you have it! This **Za’atar Chicken** with **Lemon Tahini Sauce** is more than just a meal; it’s a celebration of flavors, traditions, and memories. Whether you’re cooking for family or friends, this recipe embodies the essence of comfort food that brings everyone together. So fire up that grill, gather your loved ones, and enjoy a dish that’s sure to become a cherished favorite in your home. Happy cooking!

Za'atar Chicken with Lemon Tahini Sauce

Prep Time 10 minutes
Cook Time 12 minutes
Total Time 22 minutes
Servings 4 servings
Calories 350
Enjoy tender, flavorful chicken thighs marinated in za'atar and served with a creamy lemon tahini sauce for a delicious Middle Eastern-inspired meal.

Ingredients

Marinade

  • 1.5 lbs boneless skinless chicken thighs
  • 2 tbsp lemon juice
  • 4 cloves garlic (minced)
  • 1/4 cup extra virgin olive oil
  • 2 tbsp za'atar
  • 1/2 tsp salt

Garnish & Sauce

  • 2 tbsp chopped parsley
  • 1/4 cup tahini
  • 2 tbsp lemon juice
  • 1 clove garlic
  • 2-3 tbsp water (adjust for desired consistency)
  • 1/4 tsp salt

Instructions 

  • Whisk together lemon juice, minced garlic, olive oil, za'atar, and salt to make the marinade. Coat chicken thighs and marinate in the fridge for at least 1 hour.
  • Blend tahini, lemon juice, garlic, salt, and water until light and fluffy. Chill until ready to serve.
  • Preheat grill to medium-high. Grill chicken for 6 minutes per side, brushing with marinade. Check for internal temp of 165°F.
  • Transfer chicken to a platter, garnish with parsley, and serve with tahini sauce drizzled on top or on the side.

Notes

Marinate the chicken overnight for maximum flavor. Adjust water in tahini sauce for desired consistency.
Calories: 350kcal
Cost: $15
Course: Main Course
Cuisine: Middle Eastern
Keyword: chicken, Lemon, Zaatar

Discover the Heartwarming High Protein Stuffed Shells Recipe

Gather around the table, friends! Today, we’re diving into the world of comfort food with a hearty recipe that’s not just delicious but also packed with nutrition. These high protein stuffed shells are a testament to how simple ingredients can come together to create a dish that warms the heart and nourishes the body. Perfect for family dinners or special occasions, this recipe is all about love, community, and bringing everyone together.

Why You’ll Love This Recipe

This dish is more than just a meal; it’s a celebration of flavors and textures that will have your family asking for seconds. Here’s why you’ll adore these high protein stuffed shells:

  • Protein-Packed Goodness: With ground turkey and ricotta cheese, each serving delivers a satisfying dose of protein, making it a fantastic choice for a hearty meal.
  • Family-Friendly: Kids and adults alike will love the cheesy, savory filling, making it a perfect dinner option for everyone.
  • Versatility: This recipe allows for various substitutions, letting you tailor it to your family’s tastes or dietary needs.
  • Easy to Prepare: With simple steps and minimal fuss, these stuffed shells are a breeze to whip up, even on a busy weeknight.
  • Make-Ahead Friendly: You can prepare it in advance and bake it just before serving, perfect for busy schedules!

Ingredients for High Protein Stuffed Shells

Let’s gather the ingredients to make this delightful dish. Here’s what you’ll need:


Professional Chef Knife Set

★ Recommended Kitchen Tool

Professional Chef Knife Set

Make this recipe even easier with a quality Professional Chef Knife Set — a must-have kitchen staple!


🛒 See Deals on Amazon →

As an Amazon Associate, we earn from qualifying purchases.
  • 1 tablespoon olive oil: For sautéing and flavor.
  • 1 pound ground turkey: Lean protein that adds richness.
  • 1 jar (24 oz) marinara sauce: Opt for a low-sugar option for a healthier twist.
  • 1 tablespoon Italian seasoning: A mix of herbs that brings warmth.
  • Salt and pepper: To taste, enhancing all the flavors.
  • 20 jumbo pasta shells: The vessel for our delicious filling.
  • 15 oz ricotta cheese: Creamy and comforting.
  • 1/4 cup grated parmesan cheese: For sprinkling and added flavor.
  • 1/2 cup shredded mozzarella cheese: The melty topping you’ll love.
  • 1 egg: Binds the filling together.
  • 2 cups fresh spinach, chopped: Nutrient-dense and colorful.
  • 1 tablespoon Italian seasoning: Enhances the filling.
  • 1/4 teaspoon red pepper flakes (optional): For a touch of heat.
  • 3/4 teaspoon sea salt: Brings out the flavors.
  • Pepper: To taste, for a little kick.

Step-by-Step Instructions

['Close-up view of high protein stuffed shells topped with melted cheese and marinara sauce.', 'Juicy stuffed pasta shells filled with ricotta cheese and spinach, garnished with parmesan.', 'Side view of baked stuffed shells, showcasing the rich filling and vibrant sauce.', 'Delicious pasta shells filled with ground turkey and cheese, presented on a plate.']

Now that we have our ingredients, let’s get cooking! Follow these straightforward steps to create your high protein stuffed shells:

Step 1: Preheat and Prepare

Preheat your oven to 375°F (190°C). While it’s warming up, get a large pot of salted water boiling for the pasta shells.

Step 2: Cook the Jumbo Pasta Shells

Once the water is boiling, carefully add the jumbo pasta shells. Cook according to the package instructions until al dente. Drain and set aside to cool.

Step 3: Prepare the Filling

In a large skillet, heat the olive oil over medium heat. Add the ground turkey, cooking until it’s browned and cooked through. Stir in the spinach, Italian seasoning, salt, and pepper, and cook until the spinach is wilted. Remove from heat, and let it cool slightly before mixing in the ricotta, egg, and half of the mozzarella and parmesan cheeses.

Step 4: Stuff the Shells

With a spoon, carefully stuff each cooked pasta shell with the turkey and cheese mixture, placing them in a baking dish as you go.

Step 5: Assemble and Bake

Pour marinara sauce over the stuffed shells, ensuring they are well coated. Sprinkle the remaining mozzarella and parmesan cheese on top. Cover the dish with foil and bake for 25 minutes. Remove the foil and bake for an additional 10-15 minutes, or until the cheese is bubbly and golden.

Step 6: Serve and Enjoy

Once baked to perfection, let the dish cool for a few minutes before serving. Garnish with fresh herbs if desired, and dig in with your loved ones!

Pro Tips for Perfecting Your High Protein Stuffed Shells

Here are some expert insights to ensure your high protein stuffed shells turn out delicious every time:

  • Don’t Overcook the Pasta: Aim for al dente; they’ll continue cooking in the oven.
  • Use Fresh Ingredients: Fresh spinach and herbs make a noticeable difference.
  • Experiment with Cheeses: Mix in different cheeses like feta or goat cheese for unique flavors.
  • Make It Vegetarian: Substitute ground turkey with sautéed mushrooms or lentils for a plant-based version.
  • Freeze for Later: These stuffed shells freeze well before baking—perfect for meal prep!
  • Spice It Up: Add more red pepper flakes or diced jalapeños for an extra kick.
  • Layering is Key: Ensure each shell is well coated in sauce to prevent them from drying out.
  • Garnish Thoughtfully: Fresh basil or parsley adds a pop of color and flavor.

Common Mistakes and Troubleshooting

Even the best home cooks can face hiccups. Here’s how to avoid common pitfalls with this recipe:

  • Dry Filling: Make sure to mix in enough ricotta and egg to keep the filling moist.
  • Shells Falling Apart: Handle cooked shells gently to prevent breakage.
  • Not Enough Sauce: Ensure every shell is generously coated to keep them moist during baking.

Variations to Try

Feel free to get creative with this recipe! Here are some fun variations:

  • Mexican Style: Use taco seasoning, black beans, and corn for a south-of-the-border twist.
  • Cheesy Spinach: Add extra cheese and spinach to the filling for a creamier texture.
  • Buffalo Chicken: Swap turkey for shredded buffalo chicken for a spicy kick.
  • Seafood Delight: Use crab meat or shrimp for a luxurious filling.

Storage and Make-Ahead Instructions

If you want to prepare these stuffed shells ahead of time, consider these tips:

  • Refrigerate: Assemble the dish and cover it tightly with foil; it can be stored in the fridge for up to 2 days.
  • Freeze: For longer storage, freeze the stuffed shells before baking. Thaw overnight in the fridge before baking.

Frequently Asked Questions

Let’s tackle some common questions about this high protein stuffed shells recipe:

  • Can I use different meat? Yes, you can substitute ground chicken, beef, or even plant-based meat alternatives.
  • How do I make it gluten-free? Use gluten-free jumbo pasta shells and ensure all other ingredients are gluten-free.
  • How can I make it dairy-free? Use dairy-free cheese alternatives and omit the egg.
  • What sides pair well with stuffed shells? A fresh salad or garlic bread complement the dish wonderfully.
  • Can I reheat leftovers? Yes, reheat in the oven or microwave until warmed through.
  • How long do leftovers last? They can last in the fridge for up to 3-4 days.
  • Can I use a different sauce? Absolutely, try Alfredo or pesto for a different flavor profile.
  • How do I know when they are done baking? The cheese should be melted and bubbly, and the sauce should be simmering.

Nutritional Tips and Dietary Adaptations

To enhance the nutritional value of your high protein stuffed shells, consider these tips:

  • Add Vegetables: Incorporate finely chopped bell peppers, zucchini, or carrots into the filling.
  • Choose Lean Meats: Opt for lean ground turkey or chicken to keep the dish lighter.
  • Whole Wheat Shells: Use whole wheat or legume-based shells for added fiber.

Essential Equipment for Success

Before you start cooking, make sure you have these kitchen essentials:

  • Large Pot: For boiling the pasta shells.
  • Skillet: For cooking the filling.
  • Baking Dish: To hold the stuffed shells while baking.
  • Mixing Bowl: For combining the filling ingredients.
  • Spoon or Spatula: For stuffing the shells and mixing.

Serving Suggestions

Here are a few ideas to elevate your meal:

  • Fresh Herbs: Garnish with basil, parsley, or even a sprinkle of fresh oregano for a burst of flavor.
  • Crusty Bread: Serve alongside a loaf of crusty Italian bread or garlic knots for a complete meal.
  • Side Salad: A simple green salad with a light vinaigrette balances the richness of the dish.

In conclusion, these heartwarming high protein stuffed shells are sure to become a family favorite, offering a delightful blend of flavors and textures that embody the spirit of home cooking. Remember, cooking is about sharing love and making memories at the table. So gather your loved ones, put on your apron, and enjoy every delicious bite of this comforting dish!

High Protein Stuffed Shells: A Delicious and Nutritious Meal for Any Occasion

Prep Time 15 minutes
Cook Time 30 minutes
Total Time 45 minutes
Servings 4 servings
Calories 550
Enjoy these hearty stuffed shells packed with protein, spinach, and flavorful cheeses for a satisfying meal.

Ingredients

olive oil

  • 1 tablespoon olive oil

ground turkey

  • 1 pound ground turkey

marinara sauce

  • 1 jar marinara sauce (24 oz)

Italian seasoning

  • 1 tablespoon Italian seasoning

Salt and pepper

  • to taste Salt and pepper

jumbo pasta shells

  • 20 pieces jumbo pasta shells

ricotta cheese

  • 15 oz ricotta cheese

parmesan cheese

  • 1/4 cup grated parmesan cheese (plus extra for sprinkling)

mozzarella cheese

  • 1/2 cup shredded mozzarella cheese

egg

  • 1 egg egg

fresh spinach

  • 2 cups fresh spinach, chopped

red pepper flakes

  • 1/4 teaspoon red pepper flakes (optional, for heat)

sea salt

  • 3/4 teaspoon sea salt

pepper

  • to taste pepper

Instructions 

  • Cook pasta shells according to package instructions; drain and set aside.
  • In a skillet, heat olive oil and cook ground turkey until browned; add marinara, Italian seasoning, salt, and pepper. Simmer for 10 minutes.
  • Mix ricotta, Parmesan, mozzarella, egg, spinach, red pepper flakes, salt, and pepper in a bowl.
  • Stuff cooked shells with cheese mixture and place in a baking dish. Top with remaining marinara and extra Parmesan.
  • Bake at 375°F (190°C) for 20-25 minutes until bubbly and golden.

Notes

For extra flavor, sprinkle additional Parmesan before serving.
Calories: 550kcal
Cost: $15
Course: Main Course
Cuisine: Italian
Keyword: cheese, Pasta, Protein

The Heartwarming Delight of Chicken Taquitos

Gather ’round, friends! Today, we’re diving into the comforting world of chicken taquitos. These delightful little rolls are filled with tender, seasoned chicken and a medley of flavors, all wrapped up in a crispy tortilla. Perfect for a family gathering or a cozy night in, this recipe brings joy and warmth to the table. Let’s embark on this flavorful journey together, where every bite tells a story of home and heritage.

Why You’ll Love This Recipe

Chicken taquitos are more than just a dish; they embody the essence of comfort food. Here are a few reasons you’re going to adore this recipe:

  • Quick and Easy: This recipe comes together in no time, making it perfect for busy weeknights or impromptu gatherings.
  • Versatile Filling: The filling can be customized with various ingredients, allowing you to use whatever you have on hand.
  • Freezer-Friendly: Make a big batch and freeze them for quick meals later. Just pop them in the oven or air fryer for a fresh snack anytime!
  • Crispy Perfection: Frying the taquitos gives them that golden-brown crispiness that everyone loves, creating a delightful contrast to the tender filling.
  • Family-Friendly: Kids and adults alike will enjoy these taquitos, making them a hit at any family gathering or party!

Ingredient Breakdown

Now, let’s get into what you’ll need to create these scrumptious chicken taquitos. Here’s the detailed list of ingredients, along with some handy substitutions:


Nonstick Grill Pan

★ Recommended Kitchen Tool

Nonstick Grill Pan

Make this recipe even easier with a quality Nonstick Grill Pan — a must-have kitchen staple!


🛒 Check Price on Amazon →

As an Amazon Associate, we earn from qualifying purchases.
  • 1/2 cup oil (divided): Choose vegetable or canola oil for frying. You can also use olive oil for a healthier option.
  • 1/3 cup diced tomato: Fresh tomatoes work best, but canned tomatoes can be used in a pinch.
  • 1/4 cup diced onion: Yellow or white onions add a nice sweetness; red onions can bring a bit of sharpness.
  • 1 tablespoon minced garlic: Fresh garlic will elevate the flavor, but garlic powder can be a quick substitute.
  • 1/2 teaspoon cumin: This spice brings warmth; use coriander for a different flavor profile.
  • 1/2 teaspoon smoked paprika: For a smoky touch; regular paprika can also work if you prefer less smokiness.
  • 1/4 teaspoon salt: Adjust to taste; seasoned salt can add an extra kick.
  • 1/4 teaspoon black pepper: Freshly cracked pepper enhances the flavor, but pre-ground works too.
  • 1 cup cooked and shredded chicken: Leftover rotisserie chicken is perfect, or you can poach chicken breasts for a fresh filling.
  • 1/2 cup Mexican crema (or sour cream): This adds creaminess; Greek yogurt can be a healthier alternative.
  • 1 1/2 cups shredded cheese: Use a blend of Mexican cheese or sharp cheddar for added flavor.
  • 12 corn tortillas (or flour tortillas): Corn tortillas offer a traditional touch, while flour tortillas provide a softer texture.

How to Make Chicken Taquitos

['Close-up view of crispy chicken taquitos filled with shredded chicken and topped with cheese.', 'Side angle of golden-brown chicken taquitos garnished with fresh tomatoes and creamy sauce.', 'Delicious chicken taquitos arranged on a plate, showcasing the juicy filling and crispy exterior.', 'Appetizing chicken taquitos viewed from the side, highlighting their texture and toppings.']

Let’s roll up our sleeves and get cooking! Here’s a step-by-step guide to creating these tasty taquitos:

  1. In a large skillet, heat 1 tablespoon of oil over medium heat. Cook the diced tomato, onion, and minced garlic for about 3 minutes until softened.
  2. Season the mixture with cumin, smoked paprika, salt, and black pepper. Stir well and add the shredded chicken, crema, and cheese. Remove from heat.
  3. Take a tortilla and place about 2 heaping tablespoons of filling along one side, not in the center. Roll it up tightly.
  4. In a deep skillet, heat the remaining oil to 350°F. Carefully place the taquitos seam side down in the hot oil.
  5. Brown all sides, then remove and place them on paper towels to drain excess oil. Repeat with the remaining tortillas.
  6. Serve the taquitos immediately, topped with your favorite garnishes!

Pro Tips for the Best Chicken Taquitos

To ensure your chicken taquitos turn out perfectly, here are some expert insights:

  • Don’t Overcrowd the Pan: Frying too many at once can lower the oil temperature, leading to soggy taquitos.
  • Use Fresh Tortillas: If possible, use freshly made tortillas for the best flavor and texture.
  • Seal the Edges: To prevent the filling from leaking out, you can seal the edges of the tortilla with a little water.
  • Temperature Matters: Make sure your oil is hot enough before frying; test it with a small piece of tortilla—if it sizzles, you’re ready.
  • Experiment with Fillings: Don’t hesitate to mix in beans, cheese, or vegetables for added nutrition and flavor.
  • Try Air Frying: For a healthier version, air fry the taquitos at 400°F for 10-12 minutes, flipping halfway through.
  • Garnish Wisely: Fresh cilantro, avocado, or a squeeze of lime can elevate the flavor of your taquitos.
  • Make Ahead: Prepare the filling ahead of time, and assemble just before frying to save time.

Common Mistakes and Troubleshooting

Even the best cooks can run into issues. Here are some common mistakes to avoid:

  • Filling Too Much: Overstuffing the taquitos can lead to breakage; keep the filling to about 2 tablespoons per tortilla.
  • Not Heating Oil Enough: If the oil isn’t hot enough, the taquitos will absorb too much oil and become greasy.
  • Using Cold Tortillas: Cold tortillas can crack; warm them briefly before rolling to make them pliable.
  • Not Checking for Doneness: Frying time varies; keep an eye on them to achieve that perfect golden brown.

Variations to Try

Feeling adventurous? Here are some delicious variations to make this recipe your own:

  • Spicy Chicken Taquitos: Add jalapeños or a splash of hot sauce to the filling for a spicy kick!
  • Vegetarian Taquitos: Swap the chicken for black beans, corn, and peppers for a hearty plant-based option.
  • Cheesy Spinach Taquitos: Mix in some fresh spinach and extra cheese for a creamy, veggie-packed filling.
  • BBQ Chicken Taquitos: Use pulled BBQ chicken instead of seasoned chicken for a smoky, tangy flavor.

Storage and Make-Ahead Instructions

To ensure your taquitos remain fresh and delicious:

  • Storage: Store leftover cooked taquitos in an airtight container in the refrigerator for up to 3 days.
  • Freezing: Freeze uncooked taquitos in a single layer on a baking sheet. Once frozen, transfer them to a freezer bag for up to 3 months.
  • Reheating: Reheat in the oven at 375°F for about 10-15 minutes or in the air fryer at 350°F until heated through.

Comprehensive FAQ

Here are some frequently asked questions to guide you through your taquito-making adventure:

  • Can I use flour tortillas instead of corn? Yes, flour tortillas work well but will yield a softer texture.
  • What can I serve with chicken taquitos? Guacamole, salsa, or a fresh salad make excellent sides.
  • How do I make taquitos crispy without frying? Air frying is a great alternative for a crispy texture without the extra oil.
  • Can I bake taquitos instead of frying them? Yes, bake them at 400°F for about 15-20 minutes, flipping halfway through.
  • What kind of cheese is best for chicken taquitos? A blend of Mexican cheeses or sharp cheddar adds great flavor.
  • How do I ensure the filling doesn’t fall out? Make sure to roll the taquitos tightly and seal the edges.
  • Can I make taquitos ahead of time? Yes, prepare the filling in advance and assemble before frying for quick meals.
  • What’s the best way to reheat taquitos? Reheat in the oven or air fryer for the best texture.

Nutrition Tips and Dietary Adaptations

For those looking to make healthier choices:

  • Lean Protein: Use skinless chicken breasts or turkey for a leaner filling.
  • Dairy Alternatives: Opt for low-fat cheese or dairy-free alternatives if you’re lactose intolerant.
  • Whole Grain Tortillas: Choose whole wheat or corn tortillas for added fiber.

Equipment Recommendations

Here’s what you’ll need to make your chicken taquitos:

  • Skillet: A deep skillet is ideal for frying; a cast-iron skillet provides even heat.
  • Spatula: Use a slotted spatula for easy flipping and draining.
  • Tongs: Handy for placing and removing taquitos from hot oil.
  • Measuring Cups and Spoons: Accurate measurements ensure the best flavor.

Serving Suggestions

Time to dish up! Here are some ideas to serve alongside your chicken taquitos:

  • Fresh Salsa: A vibrant tomato salsa adds a refreshing contrast.
  • Guacamole: Creamy guacamole is a classic pairing.
  • Mexican Crema: Drizzle some over the top for extra richness.
  • Chopped Cilantro: Fresh cilantro brightens the dish and adds flavor.

So there you have it, folks! A comprehensive guide to crafting your own chicken taquitos that are sure to become a family favorite. With each crispy bite, you’ll feel the warmth of home and the joy of sharing. Now, grab your ingredients, roll up your sleeves, and let’s make some memories in the kitchen!

Taquitos de Pollo (Chicken Taquitos)

Prep Time 10 minutes
Cook Time 15 minutes
Total Time 25 minutes
Servings 4 servings
Calories 350
Enjoy these crispy, flavorful chicken taquitos, perfect for a quick snack or meal with your favorite toppings.

Ingredients

oil

  • 1/2 cup oil (divided)
  • 1/3 cup diced tomato
  • 1/4 cup diced onion
  • 1 tablespoon minced garlic
  • 1/2 teaspoon cumin
  • 1/2 teaspoon smoked paprika
  • 1/4 teaspoon salt
  • 1/4 teaspoon black pepper
  • 1 cup cooked and shredded chicken
  • 1/2 cup Mexican crema (or sour cream)
  • 1 1/2 cups shredded cheese
  • 12 corn tortillas corn tortillas (or flour tortillas)

Instructions 

  • Heat 1 tablespoon of oil in a skillet. Cook tomato, onion, and garlic for 3 minutes, then add cumin, paprika, salt, and pepper. Stir in chicken, sour cream, and cheese, then remove from heat.
  • Place 2 tablespoons of filling on a tortilla and roll tightly along one side.
  • Heat remaining oil to 350°F (175°C) in a deep skillet.
  • Place taquitos seam side down, brown all sides, then remove. Repeat with remaining tortillas.
  • Serve immediately with your favorite toppings.

Notes

Ensure oil is hot enough before frying to achieve crispy taquitos.
Calories: 350kcal
Cost: $15
Course: Appetizer, Main Course
Cuisine: Mexican
Keyword: chicken, Taquitos