Author

Tom

Browsing

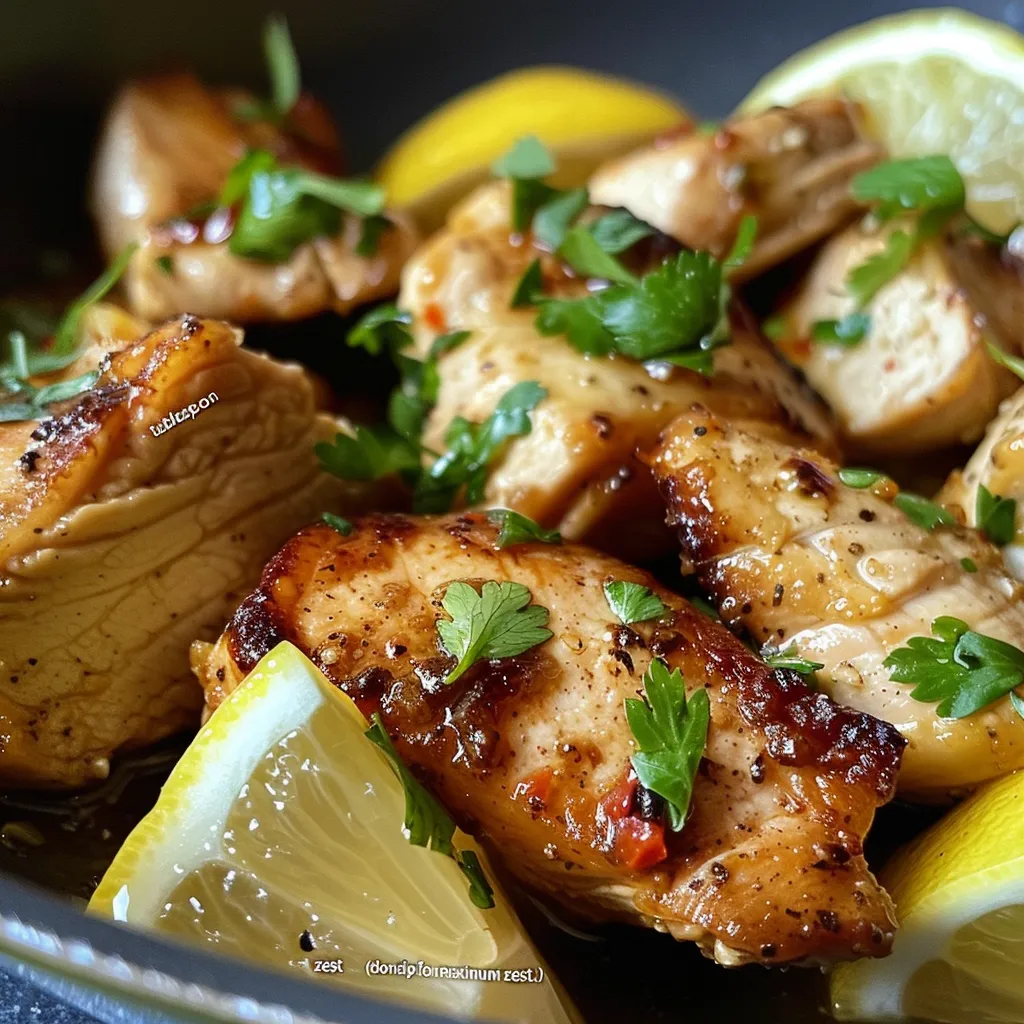
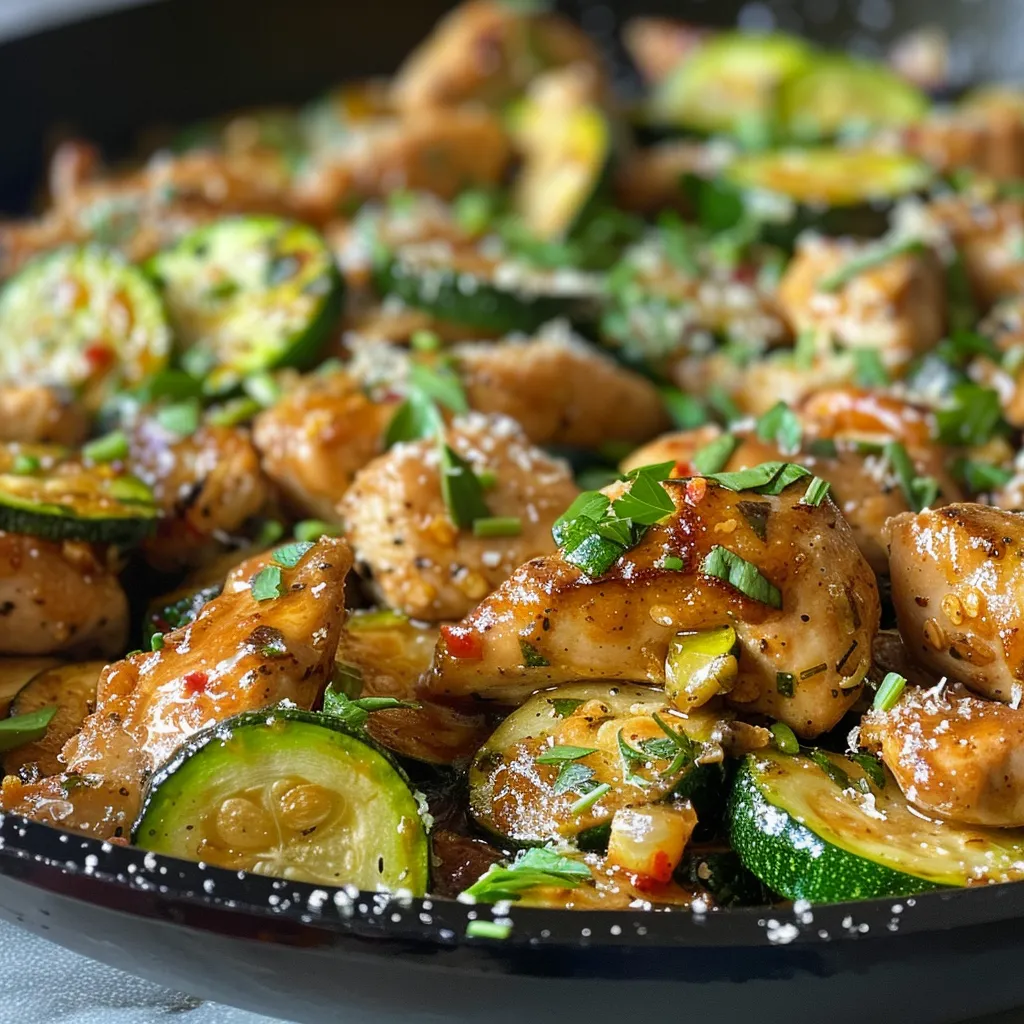
Welcome, friends! Today, we’re diving into a dish that not only warms your belly but also your soul: the Chicken and Zucchini Skillet. This meal brings together the simplicity of tender chicken, fresh zucchini, and a medley of flavors that remind us of home-cooked goodness. Whether you’re cooking for a family gathering or just whipping up a weeknight dinner, this recipe is sure to become a cherished part of your culinary repertoire.

Why is this dish so special? Well, it’s not just about the ingredients; it’s about the love and care you put into every bite. So, grab your skillet and let’s get cooking!

Why You’ll Love This Recipe

  • Quick and Easy: This dish comes together in about 30 minutes, making it perfect for busy weeknights.
  • One-Pan Wonder: Easy cleanup means more time enjoying your meal and less time scrubbing dishes.
  • Healthy and Nutritious: Packed with protein and vitamins, this meal is a wholesome choice for any family.
  • Customizable: Whether you prefer chicken breasts or thighs, or want to add more veggies, this recipe is flexible!
  • Comforting Flavors: The blend of herbs and cheese creates a flavor profile that feels like a warm hug on a plate.

Detailed Ingredient Breakdown

Let’s take a closer look at the ingredients that make this Chicken and Zucchini Skillet a standout dish:

  • 1.5 lbs boneless skinless chicken breast: Cut into bite-sized pieces for even cooking. You can substitute with thighs for a juicier option.
  • 2 medium zucchinis: Chopped to add a fresh, crisp texture. Feel free to use yellow squash or bell peppers if you prefer.
  • 1 tablespoon olive oil: For sautéing and adding healthy fats. Avocado oil is a great alternative.
  • 2 cloves garlic, minced: Adds aromatic depth to the dish.
  • Salt and pepper: To taste; essential for enhancing flavors.
  • Italian seasoning: A mix of herbs like oregano and basil, giving that classic Italian flair.
  • Red pepper flakes (optional): For a little heat; adjust according to your preference.
  • 1/4 cup freshly grated Parmesan cheese: For a savory finish that melts beautifully into the dish.
  • 1 tablespoon chopped fresh parsley (optional): Adds a pop of color and freshness.

Pro Tips for Perfecting Your Skillet

Here are some expert insights to elevate your cooking experience:

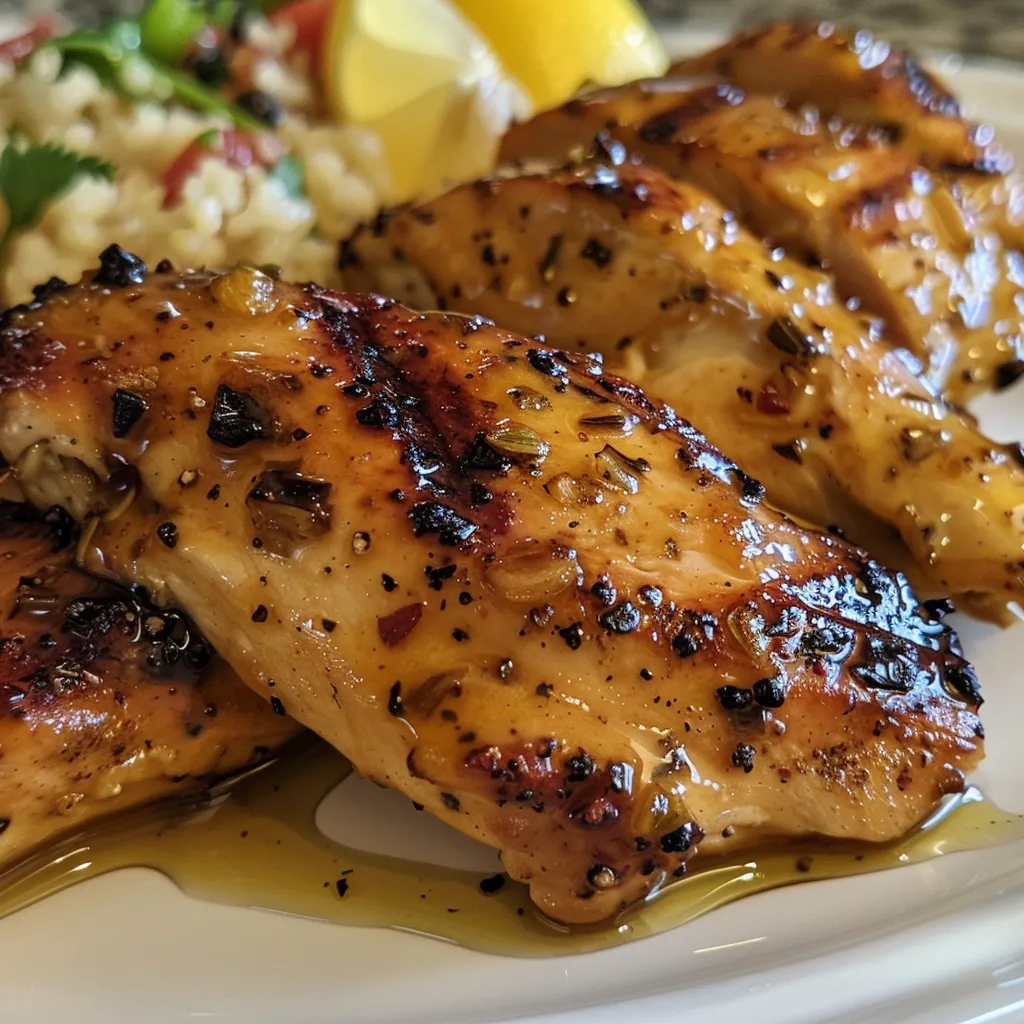
  • Use a hot skillet: Ensure your skillet is hot before adding the chicken. This helps achieve a nice sear and locks in moisture.
  • Don’t overcrowd the pan: Cook in batches if necessary. Overcrowding can lead to steaming instead of browning.
  • Let it rest: Allow the chicken to rest for a few minutes after cooking for juicier meat.
  • Experiment with spices: Add your favorite spices or herbs to tailor the dish to your taste.
  • Keep zucchini al dente: Cook just until tender to maintain a slight crunch, which adds great texture.
  • Finish with cheese off heat: Stir in Parmesan after removing from heat for a creamier sauce.
  • Make-ahead option: You can prepare the chicken and chop veggies ahead of time for a quick weeknight meal.
  • Pair with a side: Serve with a salad or crusty bread to soak up the delicious juices.

Common Mistakes and Troubleshooting

Juicy chicken pieces and vibrant zucchini arranged in a pan, garnished with parsley.

Even the best of us can make a mistake in the kitchen. Here’s how to avoid common pitfalls:

  • Overcooking the chicken: Watch the clock! Chicken should be cooked to an internal temperature of 165°F.
  • Not seasoning adequately: Don’t skimp on salt and pepper; they are crucial for flavor.
  • Skipping the resting period: Resting helps retain juices. Don’t skip this step!
  • Burning the garlic: Add garlic towards the end of cooking to avoid burning and bitterness.
  • Using watery zucchini: If overcooked, zucchini can become mushy. Keep an eye on cooking time!

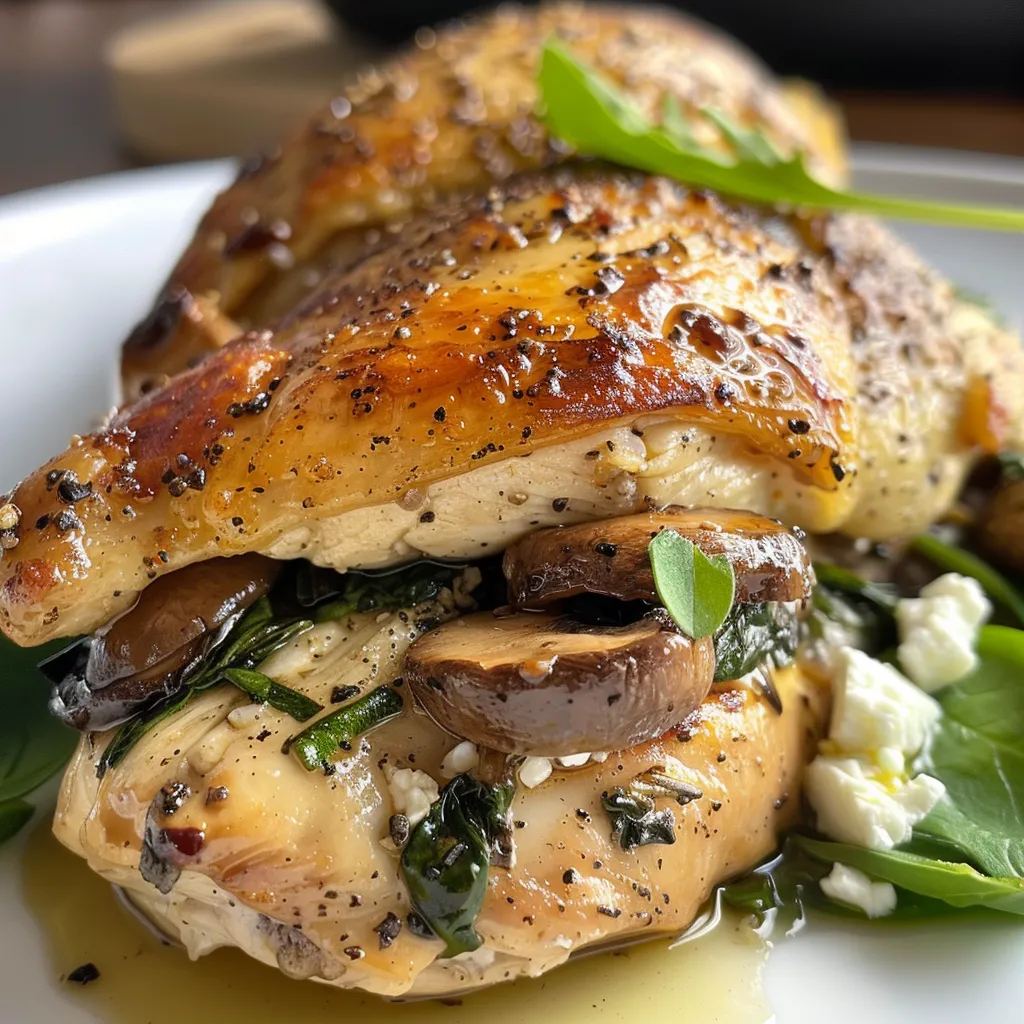
Variations of the Chicken and Zucchini Skillet

This dish is highly adaptable. Here are some fun variations to consider:

  • Chicken and Zucchini with Tomatoes: Toss in some cherry tomatoes for a burst of sweetness.
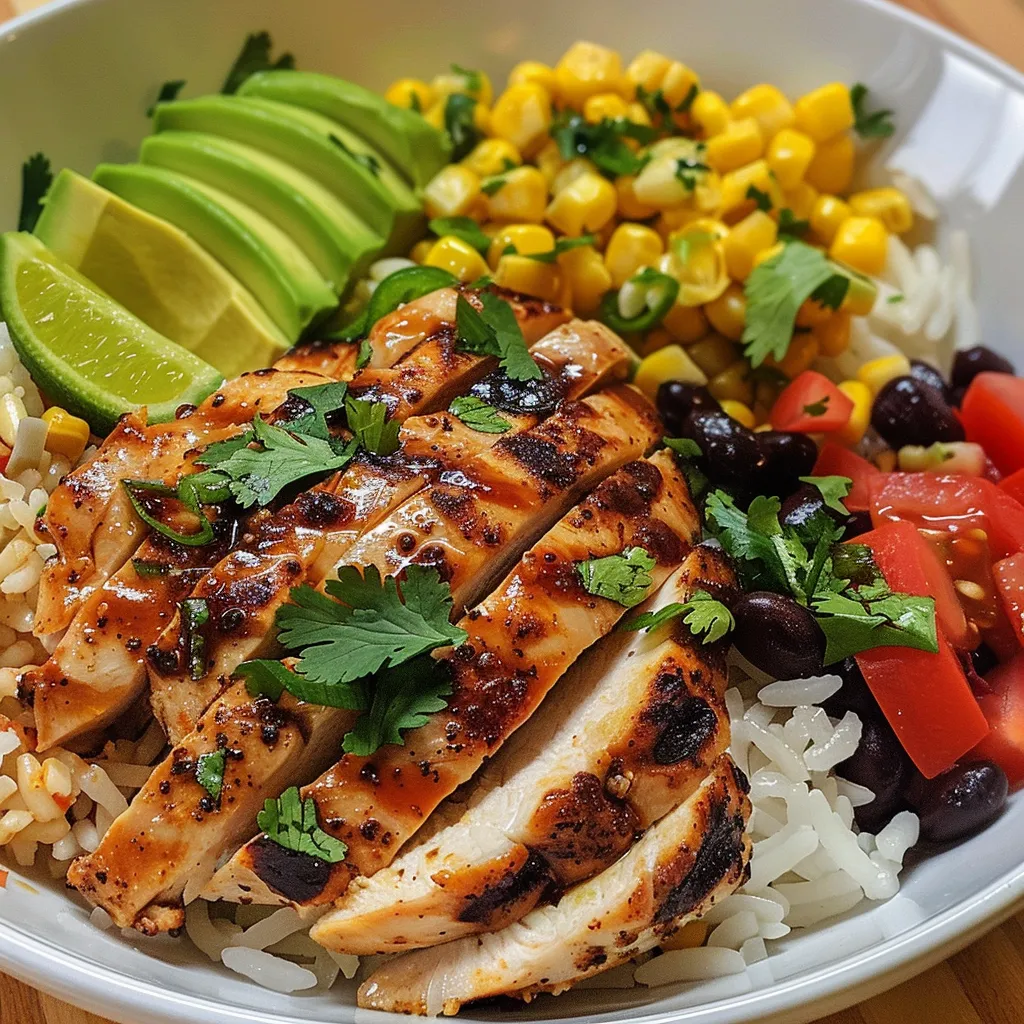
  • Mexican-Inspired: Add black beans, corn, and taco seasoning for a zesty twist.
  • Pasta Addition: Stir in cooked pasta for a heartier meal.
  • Vegetarian Version: Substitute chicken with chickpeas or tofu for a plant-based option.

Storage and Make-Ahead Instructions

This Chicken and Zucchini Skillet is perfect for meal prep:

  • Refrigeration: Store leftovers in an airtight container for up to 3 days.
  • Freezing: You can freeze the cooked dish for up to 2 months. Reheat gently on the stove or microwave.
  • Make-Ahead: Pre-cook the chicken and chop the zucchini and garlic. Store separately in the fridge until ready to cook.

Comprehensive FAQ

Here are some frequently asked questions about the Chicken and Zucchini Skillet:

  • Can I use frozen chicken? Yes, but make sure to thaw it completely before cooking for even results.
  • What can I substitute for zucchini? Yellow squash, bell peppers, or broccoli work well.
  • Is this dish gluten-free? Absolutely! All ingredients are naturally gluten-free.
  • Can I make this dish dairy-free? Yes, simply omit the Parmesan or use a dairy-free alternative.
  • How long does it take to cook? The entire dish comes together in about 30 minutes.
  • Can I double the recipe? Yes, just be mindful of pan space; you might need to cook in batches.
  • What should I serve with this dish? Pair it with rice, quinoa, or a fresh salad for a complete meal.
  • Can I use different herbs? Yes, feel free to experiment with your favorite fresh or dried herbs!

Nutritional Tips and Dietary Adaptations

This Chicken and Zucchini Skillet is not only delicious but also nutritious:

  • High in Protein: Chicken provides a great source of lean protein essential for muscle health.
  • Low in Calories: Zucchini is low in calories, making this dish a great option for weight management.
  • Rich in Vitamins: Zucchini is packed with vitamins A and C, boosting your immune system.
  • Heart-Healthy Fats: Olive oil contributes healthy fats that are good for your heart.

Equipment Recommendations

To make this dish, you’ll need some basic kitchen equipment:

  • Non-stick skillet: Essential for easy cooking and cleanup.
  • Sharp knife: For chopping chicken and veggies efficiently.
  • Cutting board: A sturdy surface for all your prep work.
  • Meat thermometer: To ensure your chicken is cooked perfectly every time.

Serving Suggestions

When it comes to serving this dish, think about balance and variety:

  • With Bread: Serve with crusty bread to soak up the delicious juices.
  • On a Bed of Greens: Serve over a bed of fresh spinach or arugula for added nutrients.
  • Garnished with Fresh Herbs: Sprinkle more parsley or basil on top for a fresh finish.

In conclusion, the Chicken and Zucchini Skillet is not just a dish; it’s a celebration of home, family, and the simple joys of cooking. Remember, the heart of cooking lies in the love you pour into it. So gather your loved ones, share a hearty meal, and create memories that will last a lifetime. Happy cooking, friends!

Chicken and Zucchini Skillet

Prep Time 10 minutes
Cook Time 15 minutes
Total Time 25 minutes
Servings 4 servings
Calories 350
A quick and flavorful skillet dish combining tender chicken, fresh zucchini, and savory Parmesan cheese for a satisfying meal.

Ingredients

Protein

  • 1.5 lbs boneless skinless chicken breast (cut into bite-sized pieces)

Vegetables

  • 2 medium zucchinis (chopped)

Other ingredients

  • 1 tablespoon olive oil
  • 2 cloves garlic (minced)
  • 0.5 teaspoon salt
  • 0.25 teaspoon black pepper
  • 0.5 teaspoon Italian seasoning
  • 0.25 teaspoon red pepper flakes (optional)
  • 0.25 cup freshly grated Parmesan cheese
  • 1 tablespoon chopped fresh parsley (optional)

Instructions 

  • Heat olive oil in a skillet over medium-high heat. Add chicken, season with salt, pepper, and Italian seasoning; cook for 5-6 minutes until no longer pink.
  • Add minced garlic and cook for 1 minute until fragrant.
  • Stir in chopped zucchini and red pepper flakes; cook for 5-7 minutes until zucchini is tender but crisp.
  • Remove from heat, sprinkle with Parmesan cheese and parsley. Serve immediately.

Notes

For extra flavor, add a squeeze of lemon before serving.
Calories: 350kcal
Cost: $15
Course: Main Course
Cuisine: American
Keyword: chicken, Skillet, Zucchini

Welcome to the Heart of Comfort Cooking

When it comes to cooking, few things are as satisfying as a well-prepared chicken dish. Today, we’re diving into a family-favorite that brings warmth to any dinner table: Garlic Lemon Chicken Thighs. This recipe combines juicy chicken thighs with vibrant flavors of garlic and lemon, creating a dish that not only tantalizes the taste buds but also warms the heart. Whether you’re looking for a quick weeknight meal or a dish to impress guests, this recipe checks all the boxes. Let’s explore how to make this delightful dish and why it’s sure to become a staple in your kitchen.

Why You’ll Love This Recipe

This isn’t just any chicken recipe; it’s a celebration of simple ingredients and heartfelt cooking. Here are several reasons why you’ll adore this dish:

  • Quick and Easy: With just a handful of ingredients and a few simple steps, you can have dinner on the table in no time.
  • Flavorful Marinade: The combination of garlic and lemon creates a marinade that infuses the chicken with zesty goodness.
  • Versatile Options: This recipe can be adapted to fit various dietary needs, including low-carb and gluten-free diets.
  • Family-Friendly: Kids and adults alike will love the juicy, tender chicken that’s bursting with flavor.
  • Perfect for Meal Prep: These chicken thighs are great for batch cooking, allowing you to enjoy leftovers throughout the week.

Ingredients You’ll Need

Before we get cooking, let’s gather our ingredients. Here’s what you’ll need:

  • 1 pound Boneless Skinless Chicken Thighs: Juicy and tender, these are the ideal choice for marinating and grilling.
  • 1/4 cup Fresh Cilantro: Adds a bright herbaceous note; substitute with parsley for a milder flavor.
  • 4 tablespoons Olive Oil: Essential for marinating; helps keep chicken moist during cooking; a neutral oil can also work.
  • 2 tablespoons Fresh Lemon Juice: Best if freshly squeezed for maximum flavor.
  • 1 tablespoon Lemon Zest: Don’t skip this; it enhances the dish’s brightness.
  • 4 cloves Minced Garlic: Fresh garlic gives the best flavor; can substitute with garlic powder in a pinch.
  • 1 teaspoon Chili Powder: Adds warmth; swap with paprika for a milder spice.
  • 1/4 teaspoon Chili Flakes: Add for more spice or omit for a milder dish.
  • 1/2 teaspoon Ground Cumin: Optional, but it adds depth to the flavor.
  • 1 teaspoon Kosher Salt: Essential for enhancing flavors.
  • 1/2 teaspoon Ground Black Pepper: Essential for seasoning.
  • 1 teaspoon Instant Chicken Bouillon: Enhances savory notes.
  • 2 pieces Lemon Wedges: For freshening up the dish at serving time.
  • 2 tablespoons Extra Cilantro: For garnish.

How to Make Garlic Lemon Chicken Thighs

Side photo of browned chicken thighs coated in garlic and lemon zest.

Now that we have our ingredients, let’s get to cooking! Follow these simple steps for a delicious dinner:

  1. Prepare the Marinade: In a bowl, combine the olive oil, lemon juice, lemon zest, minced garlic, chili powder, chili flakes, cumin, salt, pepper, and chicken bouillon. Mix well to create a flavorful marinade.
  2. Marinate the Chicken: Place the chicken thighs in a resealable plastic bag or shallow dish and pour the marinade over them. Seal or cover, then refrigerate for at least 30 minutes (or up to 2 hours for maximum flavor).
  3. Preheat Your Oven or Grill: If baking, preheat your oven to 400°F (200°C). If grilling, preheat your grill to medium-high heat.
  4. Cook the Chicken: If baking, place the marinated chicken thighs on a baking sheet lined with parchment paper. Bake for 25-30 minutes or until the internal temperature reaches 165°F (74°C). If grilling, cook for about 6-8 minutes per side, or until fully cooked.
  5. Serve: Let the chicken rest for a few minutes before serving. Garnish with fresh cilantro and lemon wedges for extra flavor.

Expert Tips for Perfect Chicken Thighs

To ensure your Garlic Lemon Chicken Thighs turn out perfectly every time, consider these expert tips:

  • Use Fresh Ingredients: Fresh garlic and lemon make a noticeable difference in flavor.
  • Don’t Overcook: Chicken thighs are forgiving, but overcooking can lead to dryness. Use a meat thermometer to check doneness.
  • Let It Rest: Allow chicken to rest after cooking; this helps retain juices.
  • Customize the Spice: Adjust the chili powder and flakes to your preferred spice level.
  • Try Different Herbs: Experiment with other herbs like thyme or rosemary for different flavor profiles.
  • Marinate Longer: For an even more flavorful dish, marinate overnight if your schedule allows.
  • Use a Cast Iron Skillet: For a beautiful sear and even cooking, cast iron is a fantastic choice.
  • Pair with Sides: Serve with roasted veggies or a fresh salad for a complete meal.

Common Mistakes and Troubleshooting

Cooking can sometimes be tricky, so here are some common mistakes and how to avoid them:

  • Not Marinating Long Enough: Short marination time may result in less flavor. Aim for at least 30 minutes.
  • Skipping the Resting Period: Cutting into the chicken right away can cause juices to escape, making it dry.
  • Underestimating Cooking Time: Always check the internal temperature to avoid undercooking.
  • Using Old Spices: Ensure your spices are fresh for the best flavor.

Variations to Try

Feeling adventurous? Here are some variations to keep things fresh:

  • Honey Garlic Lemon Chicken: Add honey to the marinade for a sweet twist.
  • Spicy Sriracha Lemon Chicken: Mix in some Sriracha for an extra kick.
  • Herb-Infused Chicken: Add chopped fresh herbs like basil or oregano to the marinade.
  • Garlic Parmesan Chicken: Sprinkle grated Parmesan on top before baking for a cheesy crust.

Storage and Make-Ahead Instructions

If you want to prepare this dish ahead of time, here’s how to store it:

  • Refrigerator: Store leftover chicken in an airtight container in the fridge for up to 3 days.
  • Freezer: Freeze marinated chicken thighs in a freezer-safe bag for up to 3 months. Thaw in the refrigerator before cooking.
  • Reheating: Reheat in the oven or microwave until warmed through. To maintain texture, avoid reheating on high.

Frequently Asked Questions

Here are some common questions about Garlic Lemon Chicken Thighs:

  • Can I use chicken breasts instead of thighs? Yes, but adjust cooking time as breasts cook faster.
  • What can I serve with this dish? Roasted vegetables, rice, or a fresh salad pair beautifully.
  • Can I make this dish in advance? Absolutely! Marinate the chicken ahead of time and cook when ready.
  • Is this recipe gluten-free? Yes, all ingredients are gluten-free.
  • Can I use dried herbs instead of fresh? Yes, just reduce the quantity as dried herbs are more potent.
  • How can I add more lemon flavor? Increase the lemon juice and zest in the marinade.
  • What’s the best way to know when the chicken is done? Use a meat thermometer to ensure it reaches 165°F (74°C).
  • Can I grill this recipe? Yes, grilling adds a wonderful smoky flavor!

Nutritional Tips and Dietary Adaptations

This dish is packed with protein and can be easily modified for various diets:

  • Low-Carb: Pair with cauliflower rice or steamed vegetables for a low-carb meal.
  • Whole30/Paleo: Omit the chicken bouillon and ensure all ingredients are compliant.
  • Dairy-Free: This recipe is inherently dairy-free, making it a great option for those with lactose intolerance.

Essential Equipment for Cooking

Here’s what you’ll need to whip up this dish:

  • Mixing Bowl: For preparing the marinade.
  • Whisk: To mix the marinade ingredients thoroughly.
  • Cooking Thermometer: For checking chicken doneness.
  • Baking Sheet or Grill: Your choice of cooking method!
  • Resealable Bag: For marinating the chicken.

Serving Suggestions

To elevate your dining experience, consider these serving ideas:

  • Garnish: Fresh cilantro and lemon wedges brighten the plate.
  • Side Dishes: Pair with a refreshing cucumber salad or garlic mashed potatoes.
  • Beverage Pairing: Serve with a chilled white wine or sparkling water with lemon.

Conclusion: A Recipe for Heart and Home

Cooking is about sharing love and creating memories, and this Garlic Lemon Chicken Thighs recipe embodies that spirit. With its vibrant flavors and comforting aroma, it’s sure to become a cherished dish in your home. So gather your loved ones around the table, share stories, and enjoy the simple pleasure of a home-cooked meal. Happy cooking, my friends!

Garlic Lemon Chicken Thighs Quick, Zesty Dinner Delight

Prep Time 10 minutes
Cook Time 20 minutes
Total Time 30 minutes
Servings 4 servings
Calories 350
Enjoy a flavorful and quick dinner with tender chicken thighs marinated in zesty lemon and garlic, perfect for a satisfying weeknight meal.

Ingredients

Protein

  • 1 pound Boneless Skinless Chicken Thighs (Juicy and tender, ideal for marinating and grilling.)

Herbs & Greens

  • 0.25 cup Fresh Cilantro (Can substitute with parsley.)

Oils & Liquids

  • 4 tablespoons Olive Oil (Essential for marinating helps keep chicken moist.)
  • 2 tablespoons Fresh Lemon Juice (Best if freshly squeezed.)
  • 1 tablespoon Lemon Zest (Don’t skip for maximum zest.)

Spices & Seasonings

  • 4 cloves Minced Garlic (Can replace with garlic powder.)
  • 1 teaspoon Chili Powder (Adds warmth swap with paprika for milder spice.)
  • 0.25 teaspoon Chili Flakes (Add for more spice or omit for milder dish.)
  • 0.5 teaspoon Ground Cumin (Optional.)
  • 1 teaspoon Kosher Salt (Essential for enhancing flavors.)
  • 0.5 teaspoon Ground Black Pepper (Essential for seasoning.)
  • 1 teaspoon Instant Chicken Bouillon (Enhances savory notes.)

Garnish & Extras

  • 2 pieces Lemon Wedges (For freshening up the dish at serving time.)
  • 2 tablespoons Extra Cilantro (For garnish.)

Instructions 

  • Mix olive oil, lemon juice, lemon zest, garlic, chili powder, chili flakes, cumin, salt, pepper, and bouillon to create a marinade.
  • Marinate chicken thighs in the mixture for at least 30 minutes.
  • Grill or pan-fry the chicken until cooked through and golden brown.
  • Serve with lemon wedges and garnish with extra cilantro.

Notes

For extra flavor, let the chicken marinate longer or add a splash of white wine during cooking.
Calories: 350kcal
Cost: $15
Course: Main Course
Cuisine: international
Keyword: chicken, Garlic, Lemon

The Ultimate Comfort Food: Mushroom and Spinach Stuffed Chicken Breast

Cooking is more than just a routine; it’s a way to connect with our roots and share warmth with those we love. Today, I’m excited to share a dish that embodies that spirit: the Mushroom and Spinach Stuffed Chicken Breast. This hearty recipe is not just about the flavors but the stories and memories tied to each bite. Picture a family gathering around the dinner table, the aroma of baked chicken filling the air, and laughter echoing as everyone digs in. With each stuffed chicken breast, you’re not just serving a meal; you’re bringing people together.

This recipe is perfect for anyone looking to impress at their next gathering or simply enjoy a cozy dinner at home. Here’s what you’ll discover in this article:

  • Why You’ll Love This Recipe
  • Ingredient Breakdown
  • Pro Tips for Perfect Stuffed Chicken
  • Common Mistakes and Troubleshooting
  • Variations to Try
  • Storage and Make-Ahead Instructions
  • Frequently Asked Questions
  • Nutritional Insights and Dietary Adaptations
  • Recommended Equipment
  • Serving Suggestions

Why You’ll Love This Recipe

Gather ’round, friends! Here are a few reasons why this Mushroom and Spinach Stuffed Chicken Breast will become your new go-to dish:

  • Impressive Presentation: This dish looks elegant enough for a fancy dinner but is simple enough for a weeknight meal. Your family and friends will be impressed!
  • Flavor Fusion: Earthy mushrooms, vibrant spinach, and creamy feta cheese come together to create a flavor explosion that’s hard to resist.
  • Nutritious and Wholesome: Packed with protein and vitamins, this dish balances healthy ingredients without sacrificing taste.
  • Easy to Prepare: With just a few steps, you’ll have a delicious meal ready to go. Even if you’re a novice in the kitchen, you can tackle this one with confidence!
  • Perfect for Leftovers: If you’re lucky enough to have leftovers, this stuffed chicken reheats beautifully and makes for a fantastic lunch!

Ingredient Breakdown

Let’s gather our ingredients! Here’s what you’ll need for the Mushroom and Spinach Stuffed Chicken Breast:

  • 4 large boneless skinless chicken breasts: These are the stars of the dish. Try to pick chicken breasts that are even in size for uniform cooking.
  • 1 Tbsp avocado oil: A healthy fat to help sauté our filling and keep the chicken moist.
  • 1 medium onion, finely chopped: Adds a sweet and savory base to the stuffing.
  • 16 ounces chopped mushrooms: Use your favorite variety; I love button or cremini for their earthy flavor.
  • 5 ounces baby spinach: Fresh spinach adds color and nutrients.
  • 3 cloves garlic, minced: A must for depth of flavor.
  • 6 ounces feta cheese: Creamy and tangy, it brings the stuffing together.
  • Spices: Sea salt, paprika, garlic powder, and black pepper for seasoning.

Feel free to customize this recipe! Here are some substitutions you might consider:

  • Chicken Thighs: For a juicier option, use boneless skinless chicken thighs instead.
  • Olive Oil: If you prefer, olive oil can replace avocado oil in the recipe.
  • Goat Cheese: Swap feta with goat cheese for a tangy twist.
  • Mixed Greens: Instead of spinach, try kale or Swiss chard for a different flavor profile.

Pro Tips for Perfect Stuffed Chicken

Close-up side view of a freshly cooked Mushroom and Spinach Stuffed Chicken Breast.

Ready to tackle this recipe? Here are some expert tips to ensure your stuffed chicken turns out beautifully:

  • Make a Deep Pocket: Create a deep pocket in each chicken breast for maximum stuffing capacity.
  • Sauté the Filling: Always sauté your filling ingredients first; it enhances their flavors and ensures even cooking.
  • Don’t Overstuff: While it’s tempting, overstuffing can lead to a messy outcome. Fill just to the brim.
  • Secure with Toothpicks: Use toothpicks to hold the filling inside, but be sure to remove them before serving!
  • Check Internal Temperature: Cook chicken until it reaches an internal temperature of 165°F for safety and juiciness.

Common Mistakes and Troubleshooting

Even the best cooks can have a hiccup in the kitchen. Here are some common mistakes to avoid:

  • Chicken Breasts Too Thick: If your chicken breasts are too thick, they may not cook evenly. Consider pounding them to an even thickness.
  • Filling Not Seasoned: Don’t forget to season your filling! Taste as you go to ensure it’s flavorful.
  • Not Letting It Rest: After baking, let your chicken rest for about 5 minutes before slicing. This helps the juices redistribute.

Variations to Try

Feel free to mix things up! Here are a few variations to keep things interesting:

  • Italian Twist: Add sun-dried tomatoes and mozzarella cheese to the stuffing for an Italian flair.
  • Southwestern Style: Mix in black beans, corn, and pepper jack cheese for a spicy kick.
  • Herbal Infusion: Incorporate fresh herbs like basil or thyme into your stuffing for an aromatic touch.
  • Cheesy Spinach Artichoke: Add artichoke hearts and cream cheese for a cheesy, decadent filling.

Storage and Make-Ahead Instructions

If you want to prepare this meal in advance, here are some helpful tips:

  • Make-Ahead: You can prepare the stuffing a day in advance. Just cover and refrigerate it until you’re ready to stuff the chicken.
  • Freezing: Stuffed chicken can be frozen before baking. Wrap tightly and freeze for up to 3 months. Thaw in the refrigerator overnight before baking.
  • Reheating: To reheat leftovers, bake in a 350°F oven until warmed through, about 20-25 minutes.

Frequently Asked Questions

Here are some common questions about this recipe:

  • Can I use frozen chicken breasts? Yes, just ensure they are fully thawed before stuffing.
  • What can I serve with stuffed chicken? This chicken pairs wonderfully with roasted vegetables, mashed potatoes, or a fresh salad.
  • How do I know when the chicken is done? Use a meat thermometer to check for an internal temperature of 165°F.
  • Can I use other types of cheese? Absolutely! Feel free to experiment with different melting cheeses.
  • Is this recipe gluten-free? Yes! All the ingredients are gluten-free as long as you use gluten-free cheese.
  • Can I make this recipe dairy-free? Yes! Substitute the feta with a dairy-free cheese alternative.
  • How long will leftovers last? Stored in an airtight container, leftovers will last about 3-4 days in the refrigerator.
  • Can I grill the stuffed chicken? Yes, grilling is an excellent option! Just ensure the chicken is cooked through.

Nutritional Insights and Dietary Adaptations

This Mushroom and Spinach Stuffed Chicken Breast is not only delicious but offers great nutritional benefits:

  • High in Protein: Chicken breasts are an excellent source of lean protein, essential for muscle repair and growth.
  • Rich in Vitamins: Spinach provides a generous amount of vitamins A, C, and K, along with iron and calcium.
  • Low Carb Option: This dish is low in carbohydrates, making it suitable for those on a keto or low-carb diet.

Recommended Equipment

Before you get started, here’s what you’ll need:

  • Sharp Knife: For cutting pockets in the chicken breasts.
  • Large Non-Stick Skillet: Perfect for sautéing your filling ingredients.
  • Casserole Dish: To bake your stuffed chicken to perfection.
  • Meat Thermometer: A must-have for checking the doneness of your chicken.

Serving Suggestions

To complete your meal, try serving the stuffed chicken with:

  • Garlic Mashed Potatoes: Creamy and comforting, they pair well with the savory chicken.
  • Roasted Seasonal Vegetables: A colorful addition that adds nutrients and flavor.
  • Simple Green Salad: A fresh salad balances the richness of the stuffed chicken.
  • Crusty Bread: Perfect for soaking up any delicious juices on your plate.

Conclusion

Cooking is about more than just feeding our bodies; it’s about nourishing our souls and creating connections. This Mushroom and Spinach Stuffed Chicken Breast is a wonderful way to do just that. Whether you’re celebrating a special occasion or enjoying a quiet dinner at home, this dish is sure to bring warmth and joy to your table. So gather your ingredients, follow the steps, and enjoy every delicious bite with those you love.

Mushroom and Spinach Stuffed Chicken Breast

Prep Time 15 minutes
Cook Time 35 minutes
Total Time 50 minutes
Servings 4 pieces
Calories 450
A delicious and healthy stuffed chicken breast recipe filled with sautéed mushrooms, spinach, and feta cheese, perfect for a satisfying meal.

Ingredients

Main ingredients

  • 4 pieces boneless skinless chicken breasts
  • 1 Tbsp avocado oil
  • 1 tsp Sea salt
  • 1.5 tsp Paprika
  • 1.5 tsp Garlic Powder
  • 0.25 tsp black pepper
  • 1 medium onion, finely chopped
  • 16 ounces mushrooms, chopped
  • 3 cloves garlic, minced
  • 5 ounces baby spinach
  • 6 ounces feta cheese
  • 0.25 tsp sea salt to taste

Instructions 

  • Heat 1 tablespoon of avocado oil in a skillet over medium-high heat. Add chopped onion and sauté for 3-5 minutes until fragrant and softened.
  • Add chopped mushrooms, cover, and cook for 5 minutes until mushrooms release liquid. Remove lid, add garlic and spinach, cook until spinach wilts, then stir in feta cheese.
  • Preheat oven to 375°F (190°C). Cut a slit or pocket into each chicken breast. Drizzle with avocado oil, season with salt, paprika, garlic powder, and black pepper.
  • Stuff each chicken breast with the mushroom and spinach mixture. Secure with toothpicks if desired. Place in a greased casserole dish.
  • Bake for 30-35 minutes until chicken is cooked through. Serve hot with your favorite sides.

Notes

Use toothpicks to secure the filling if needed. Adjust seasoning to taste.
Calories: 450kcal
Cost: $15
Course: Main Course
Keyword: chicken, Mushrooms, Spinach, stuffed

Gather ‘round, friends! Today, we’re diving into a dish that’s bound to steal the spotlight at your next barbecue: Easy Grilled Honey Mustard Chicken. This recipe is not just about flavor; it’s about creating memories with family and friends, all centered around the grill. With juicy chicken breasts slathered in a sweet and tangy honey mustard glaze, each bite takes you straight to the heart of home cooking. Let’s explore how to make this delightful dish that’s perfect for all occasions.

Why You’ll Love This Recipe

This Easy Grilled Honey Mustard Chicken is more than just a meal; it’s a celebration of flavors and togetherness. Here’s why you’ll fall in love with it:

  • Quick and Easy: With simple ingredients and minimal prep time, you can whip this dish up in about 30 minutes, making it perfect for busy weeknights or impromptu gatherings.
  • Flavorful Glaze: The combination of honey and mustard creates a delightful balance of sweet and tangy that enhances the natural flavors of the chicken.
  • Versatile Dish: This recipe works just as well for a casual family dinner as it does for a festive barbecue with friends. You can easily scale it up or down!
  • Healthy Option: With lean chicken breasts and wholesome ingredients, this dish is a healthy choice that doesn’t skimp on flavor.
  • Perfect for Leftovers: Any leftover chicken can be used in salads, sandwiches, or wraps, making it a fantastic meal prep option.

Ingredients for Easy Grilled Honey Mustard Chicken

Let’s gather our ingredients and set the stage for a fantastic grilling experience. Here’s what you’ll need:

  • 4 chicken breasts: Pounded to a uniform 1-inch thickness for even grilling.
  • Oil for the grill: I recommend Pompeian grapeseed oil due to its high smoke point, but any neutral oil will do.
  • ½ cup whole grain mustard: I prefer Maille for its robust texture, but choose your favorite.
  • ½ cup honey: This adds the sweetness that balances the mustard’s tang.
  • 1 lemon: Juiced to yield about 1.5 tablespoons for a pop of acidity.
  • 2 garlic cloves: Minced to enhance flavor.
  • ½ tsp paprika: For a touch of warmth.
  • ¾ tsp salt: Adjust to your taste.
  • ¼ tsp cayenne: A little heat to spice things up.
  • ¼ tsp red pepper flakes: Optional, for those who like an extra kick.
  • 1 tbsp extra-virgin olive oil: For marinating the chicken.
  • 1 tsp dried thyme: Adds a lovely herbaceous note.

How to Make Easy Grilled Honey Mustard Chicken

Now that we have everything ready, let’s get to cooking! Here’s a step-by-step guide on how to create this mouthwatering dish:

Step 1: Make the Glaze

In a bowl, whisk together the whole grain mustard, honey, lemon juice, minced garlic, paprika, salt, cayenne, red pepper flakes, and dried thyme until well combined. Reserve 4 tablespoons of this glaze in a separate bowl for later use.

Step 2: Marinate the Chicken

Coat the chicken breasts with the larger portion of the glaze, ensuring each piece is fully covered. Let it marinate at room temperature for 30-45 minutes. This step is crucial—it allows the flavors to permeate the chicken!

Step 3: Preheat the Grill

While the chicken is marinating, preheat your grill to medium-high heat, around 400-425°F. Oil the grill grates with grapeseed oil to prevent sticking.

Step 4: Grill the Chicken

Place the marinated chicken on the grill, cooking for about 6-7 minutes without moving it. This allows for those beautiful grill marks and seals in the moisture. Flip the chicken and grill the other side for another 6-7 minutes or until the internal temperature reaches 165°F.

Step 5: Brush and Rest

Transfer the grilled chicken to a clean plate, brush with the reserved glaze, and let it rest for 5 minutes before serving. This resting period allows the juices to redistribute, ensuring a juicy bite.

Step 6: Serve and Enjoy

Serve the chicken on plates or a serving platter, enjoying the warm glaze that adds shine and flavor. Pair it with your favorite sides for a complete meal.

Pro Tips for Grilling Success

Juicy grilled chicken with a honey mustard glaze on a white plate.

To ensure your grilled honey mustard chicken turns out perfectly, keep these expert tips in mind:

  • Use a meat thermometer: This ensures your chicken is cooked perfectly without drying it out.
  • Let the chicken rest: Resting after grilling is crucial for juicy results.
  • Don’t skip the marinating step: The longer you marinate, the more flavorful your chicken will be.
  • Customize your glaze: Feel free to add herbs or spices to the glaze for a personal touch.
  • Grill vegetables alongside: Bell peppers, zucchini, and corn make great sides and can be grilled at the same time.
  • Use indirect heat: If your grill has hot spots, consider using indirect heat to prevent burning.
  • Keep the grill lid closed: This helps maintain heat and speeds up cooking time.
  • Experiment with different mustards: Try Dijon or spicy brown mustard for different flavor profiles!

Common Mistakes and Troubleshooting

Even the best chefs make mistakes! Here are some common pitfalls and how to avoid them:

  • Under marinating: Skimping on marination time can lead to bland chicken. Aim for at least 30 minutes.
  • Overcooking: Keep an eye on the grill temperature and use a thermometer to check for doneness.
  • Skipping the resting phase: Cutting into the chicken right away can cause juices to run out. Patience is key!
  • Using cold chicken: Grilling chicken straight from the fridge can result in uneven cooking. Let it come to room temperature first.

Variations of Honey Mustard Chicken

This recipe is versatile! Here are some delicious variations you can try:

  • Honey Mustard Chicken Skewers: Cut chicken into cubes, marinate, and grill on skewers with bell peppers and onions for a fun twist.
  • Honey Mustard Chicken Salad: Chop leftover grilled chicken and toss it with mixed greens, nuts, and a honey mustard vinaigrette.
  • Honey Mustard Chicken Wrap: Use grilled chicken slices in a wrap with lettuce, tomatoes, and tangy mustard sauce for a quick lunch.
  • Spicy Honey Mustard Chicken: Add more cayenne pepper or hot sauce to the glaze for those who like a little heat!

Storage and Make-Ahead Instructions

If you’re planning ahead, here’s how to store your grilled honey mustard chicken:

  • Refrigeration: Store leftover chicken in an airtight container in the fridge for up to 4 days.
  • Freezing: Freeze grilled chicken in freezer-safe bags for up to 3 months. Thaw in the refrigerator before reheating.
  • Make-Ahead: You can marinate the chicken a day ahead and keep it in the fridge until you’re ready to grill.

Frequently Asked Questions

Here are some common questions about this recipe:

  • Can I use chicken thighs instead of breasts? Absolutely! Just adjust the cooking time, as thighs may take a little longer.
  • What’s the best way to know if chicken is done? Use a meat thermometer. Chicken is safe to eat at an internal temperature of 165°F.
  • Can I substitute the honey? Yes, maple syrup or agave nectar can be used for a different sweetness profile.
  • What should I serve with honey mustard chicken? Pair it with grilled vegetables, a fresh salad, or some cornbread for a true Southern feast.
  • Can I make the glaze ahead of time? Yes, you can prepare the glaze a day in advance and store it in the refrigerator.
  • Is this recipe suitable for meal prep? Definitely! It stores well and is delicious reheated.
  • How spicy is this recipe? It’s mild, but you can adjust the cayenne and red pepper flakes to your taste.
  • Can I use a grill pan instead of an outdoor grill? Yes, a grill pan on the stovetop will work just fine!

Nutrition Tips and Dietary Adaptations

This dish can be adapted to fit various dietary needs:

  • Low-Carb: Serve with a side salad instead of bread or rice to keep it low-carb.
  • Gluten-Free: Ensure all ingredients, especially mustard and sauces, are gluten-free.
  • Dairy-Free: This recipe is naturally dairy-free, making it suitable for those with lactose intolerance.
  • High-Protein: Enjoy with a side of quinoa or legumes for a protein-packed meal.

Equipment Recommendations

To make this grilled honey mustard chicken, you’ll need a few essential tools:

  • Grill: A charcoal or gas grill works best for that authentic grilled flavor.
  • Meat thermometer: Essential for ensuring your chicken is cooked perfectly.
  • Mixing bowls: For preparing your marinade and glaze.
  • Basting brush: For applying the glaze while grilling.

Serving Suggestions

To round out your meal, consider these serving suggestions:

  • Grilled Vegetables: Zucchini, bell peppers, and corn are tasty and complement the chicken beautifully.
  • Coleslaw: A refreshing coleslaw adds crunch and balances the sweetness of the chicken.
  • Potato Salad: A classic choice that pairs perfectly with grilled meats.
  • Fresh Bread: Serve with warm cornbread or garlic bread to soak up any extra glaze.

Final Thoughts

There you have it—your guide to making the most scrumptious Easy Grilled Honey Mustard Chicken! This dish is all about simplicity and celebrating the flavors of the ingredients. Whether you’re cooking for a crowd or just for yourself, remember that cooking is a journey of love. So fire up that grill, gather your loved ones, and enjoy the fruits of your labor. Happy grilling!

Easy Grilled Honey Mustard Chicken Recipe

Prep Time 10 minutes
Cook Time 15 minutes
Total Time 25 minutes
Servings 4 pieces
Calories 350
A flavorful and easy-to-make grilled chicken with a honey mustard glaze, perfect for a quick dinner or outdoor gathering.

Ingredients

Protein

  • 4 pieces chicken breasts (pounded to 1-inch thickness)
  • 1 tbsp Pompeian grapeseed oil (for grilling)
  • 0.5 cup whole grain mustard (Maille preferred)
  • 0.5 cup honey
  • 1.5 tablespoons lemon juice (about 1.5 tablespoons)
  • 2 cloves garlic (minced)
  • 0.5 tsp paprika
  • 0.75 tsp salt
  • 0.25 tsp cayenne
  • 0.25 tsp red pepper flakes
  • 1 tbsp extra-virgin olive oil
  • 1 tsp dried thyme

Instructions 

  • Whisk together mustard, honey, lemon juice, garlic, paprika, salt, cayenne, red pepper flakes, and thyme to make the glaze. Reserve 4 tablespoons.
  • Coat chicken with most of the glaze and let sit at room temperature for 30-45 minutes.
  • Preheat grill to 400-425°F, oil grates with grapeseed oil.
  • Grill chicken 6-7 minutes per side until internal temperature reaches 165°F. Brush with reserved glaze and rest for 5 minutes.
  • Serve hot, enjoying the shiny, flavorful glaze.

Notes

Ensure chicken reaches 165°F for safe consumption.
Calories: 350kcal
Cost: $15
Course: Main Course
Keyword: chicken, Grilled, honey, mustard

Discover the Comfort of Spicy Korean Chicken

Welcome, friend! Today, I’m excited to share with you a dish that warms the heart and tantalizes the taste buds—Spicy Korean Chicken. This flavorful recipe is not just a meal; it’s a delightful journey into the vibrant world of Korean cuisine. The fusion of sweet and spicy notes with tender chicken will make this a family favorite in no time. Let’s dive into the comforting details of this dish that celebrates simplicity and care in cooking.

Why You’ll Love This Recipe

  • Packed with Flavor: The marriage of gochujang, honey, and spices creates a bold flavor profile that dances on your palate.
  • Easy to Prepare: Simple ingredients and straightforward steps make this dish approachable for cooks of all levels.
  • Versatile Serving Options: Enjoy it over rice, in lettuce wraps, or with a side of stir-fried veggies—the possibilities are endless!
  • Healthier Alternative: This recipe is lighter than traditional fried chicken yet still delivers all the satisfaction.
  • Meal Prep Friendly: Make a large batch and enjoy it throughout the week—perfect for busy days!

Ingredients You’ll Need

Gather these ingredients to create your Spicy Korean Chicken:

  • 4 boneless, skinless chicken thighs or chicken breasts: Chicken thighs offer more flavor, but breasts work just as well.
  • 1 tablespoon vegetable oil: For cooking the chicken.
  • 2 tablespoons gochujang: This Korean chili paste is the star of the show, bringing heat and depth.
  • 1 tablespoon soy sauce: Adds a savory umami flavor to balance the sweetness.
  • 1 tablespoon honey: Enhances the sweetness and caramelization during cooking.
  • 1 teaspoon sesame oil: For a nutty aroma that enriches the dish.
  • 1 teaspoon rice vinegar: To brighten the flavors and add acidity.
  • 2 cloves garlic, minced: Fresh garlic infuses amazing flavor.
  • 1 teaspoon grated ginger: Adds warmth and spice.
  • ½ teaspoon red pepper flakes: Adjust according to your heat preference.
  • 1 teaspoon sesame seeds: For garnish and added texture.
  • 2 green onions, sliced: Fresh onions add a pop of color and flavor.

How to Make Spicy Korean Chicken

Side view of tender Spicy Korean Chicken with a glossy red glaze, showcasing minced garlic and green onions.

Follow these simple steps to create your dish:

Step 1: Prepare the Marinade

In a bowl, whisk together gochujang, soy sauce, honey, sesame oil, rice vinegar, garlic, ginger, and red pepper flakes. This marinade is where the magic happens!

Step 2: Marinate the Chicken

Place your chicken in a large zip-top bag and pour the marinade over it. Seal the bag and massage the marinade into the chicken. Let it marinate in the fridge for at least 30 minutes, or up to overnight for deeper flavor.

Step 3: Cook the Chicken

Heat vegetable oil in a skillet over medium-high heat. Remove chicken from marinade (reserve the marinade) and cook for about 5-7 minutes on each side, or until the internal temperature reaches 165°F. Pour the reserved marinade into the skillet and simmer for a few minutes until thickened.

Step 4: Garnish and Serve

Remove from heat, sprinkle with sesame seeds and sliced green onions, and serve hot over rice or in lettuce wraps.

Pro Tips for Perfect Spicy Korean Chicken

  • Marinate Longer: If you have time, letting the chicken marinate overnight enhances the flavors even more.
  • Use a Meat Thermometer: To ensure your chicken is perfectly cooked, use a meat thermometer to check for an internal temperature of 165°F.
  • Adjust Heat Levels: If you prefer less heat, reduce the amount of gochujang and red pepper flakes.
  • Rest Before Slicing: Let the chicken rest for a few minutes after cooking to keep it juicy.
  • Experiment with Vegetables: Add bell peppers, zucchini, or broccoli to the skillet during the last few minutes of cooking for added nutrients.
  • Explore Alternative Proteins: This marinade works well with tofu or shrimp for a different twist.
  • Make Ahead: This chicken can be cooked ahead of time and reheated for quick meals during the week.
  • Storage Tips: Store leftover chicken in an airtight container in the refrigerator for up to 3 days.

Common Mistakes and Troubleshooting

Even the best cooks make mistakes! Here are a few common issues and how to avoid them:

  • Too Salty: If the dish tastes too salty, you may have added too much soy sauce. Balance it with a bit more honey or sugar.
  • Dry Chicken: Overcooked chicken can dry out. Use a meat thermometer to ensure you don’t overcook it.
  • Bland Marinade: Adjust the balance of sweet, spicy, and salty to suit your taste buds.

Variations to Try

You can easily customize this recipe to suit your preferences:

  • Spicy Korean Chicken Bowl: Serve over rice with pickled vegetables and a fried egg on top.
  • Gochujang Tofu: Substitute chicken with firm tofu for a vegetarian option.
  • Korean Chicken Tacos: Use the chicken in soft tortillas with slaw and avocado.
  • BBQ Version: Grill the marinated chicken for a smoky flavor.

Storage and Make-Ahead Instructions

This dish is perfect for meal prep! Here’s how to store it:

  • Refrigerator: Store cooked chicken in an airtight container for up to 3 days.
  • Freezer: Freeze marinated chicken in a zip-top bag for up to 3 months. Thaw in the refrigerator before cooking.
  • Reheating: Reheat in a skillet over low heat or in the microwave until warmed through.

Frequently Asked Questions

  • Can I use chicken breasts instead of thighs? Yes, chicken breasts will work but may be less juicy.
  • What if I can’t find gochujang? Look for alternatives like sriracha or red pepper paste, but the flavor will differ.
  • Can I make this dish gluten-free? Yes, substitute soy sauce with tamari or coconut aminos.
  • How spicy is gochujang? Gochujang has a unique heat; start with a small amount and adjust to taste.
  • Is this recipe suitable for kids? Yes, adjust the spice levels to suit your family’s taste.
  • How can I make this dish vegetarian? Substitute chicken with tofu or tempeh and use vegetable broth instead of chicken broth.
  • What’s the best way to serve this chicken? It’s wonderful over rice or in lettuce wraps with fresh veggies.
  • Can I grill the chicken instead of pan-frying? Absolutely! Just ensure your grill is preheated and oiled to prevent sticking.

Nutritional Tips and Dietary Adaptations

For those mindful of nutrition, here are some tips:

  • Lower Sugar: Reduce honey to cut down on sugar without sacrificing flavor.
  • Increase Veggies: Add more vegetables to your dish for added nutrients and fiber.
  • Protein Alternatives: Use lean cuts or plant-based proteins to suit dietary needs.

Equipment Recommendations

To make your cooking experience easier, here are some must-have tools:

  • Non-stick Skillet: Perfect for cooking the chicken evenly without sticking.
  • Meat Thermometer: Essential for ensuring perfectly cooked chicken every time.
  • Mixing Bowls: Useful for marinating and mixing ingredients.
  • Zip-top Bags: Ideal for marinating chicken without mess.

Serving Suggestions

Serve your Spicy Korean Chicken alongside:

  • Steamed Rice: White or brown rice absorbs the sauce beautifully.
  • Fresh Salad: A light cucumber salad balances the dish’s richness.
  • Kimchi: A traditional Korean side that adds a spicy crunch.

In closing, Spicy Korean Chicken isn’t just a recipe; it’s a heartfelt dish that resonates with warmth and community. As you gather around the table with loved ones, let this meal remind you of the simple joys of cooking together. Enjoy the journey, and happy cooking!

Spicy Korean Chicken

Prep Time 10 minutes
Cook Time 15 minutes
Total Time 25 minutes
Servings 4 servings
Calories 350
Enjoy this flavorful and spicy Korean-inspired chicken dish that's quick to prepare and packed with bold flavors.

Ingredients

Protein

  • 4 pieces boneless, skinless chicken thighs or chicken breasts
  • 1 tablespoon vegetable oil
  • 2 tablespoons gochujang Korean chili paste
  • 1 tablespoon soy sauce
  • 1 tablespoon honey
  • 1 teaspoon sesame oil
  • 1 teaspoon rice vinegar
  • 2 cloves garlic, minced
  • 1 teaspoon grated ginger
  • ½ teaspoon red pepper flakes (adjust to taste)
  • 1 teaspoon sesame seeds
  • 2 green onions sliced

Instructions 

  • Mix gochujang, soy sauce, honey, sesame oil, rice vinegar, garlic, ginger, and red pepper flakes in a bowl.
  • Marinate chicken with the sauce for at least 10 minutes.
  • Heat vegetable oil in a skillet over medium heat and cook chicken until browned and cooked through, about 7-10 minutes per side.
  • Sprinkle sesame seeds and sliced green onions on top before serving.

Notes

Adjust red pepper flakes to control spiciness.
Calories: 350kcal
Cost: $12
Course: Main Course
Cuisine: Korean
Keyword: chicken

Welcome to a Flavorful Journey with Honey Lime Chicken Bowls

If you’re looking for a dish that brings the warmth of home and the brightness of summer to your table, you’ve found it with this Honey Lime Chicken Bowl. This recipe is more than just food; it’s a celebration of flavors—sweet honey, zesty lime, and tender chicken that come together in perfect harmony. Whether you’re cooking for a family gathering or a quiet weeknight dinner, this recipe is simple yet satisfying, making it a staple in your home.

With roots deep in Southern cooking, this dish encapsulates the love and care we pour into our meals. It’s about using fresh ingredients and letting their natural flavors shine. So, pull up a chair, and let’s dive into why you’ll love this recipe, how to make it, and a few tricks to make sure it’s perfect every time.

Why You’ll Love This Recipe

  • Bright and Balanced Flavor: The combination of honey and lime creates a glaze that’s both sweet and tangy, ensuring every bite is bursting with flavor.
  • Quick and Easy Preparation: With minimal prep and cooking time, this dish is perfect for busy weeknights when you need a delicious meal in a hurry.
  • Customizable Ingredients: Feel free to swap out ingredients based on what you have on hand. This bowl can easily accommodate your favorite veggies and grains.
  • Meal Prep Friendly: These bowls store well, making them ideal for meal prep. You can enjoy a nutritious lunch or dinner throughout the week without the hassle.
  • Family-Friendly: Kids and adults alike will love this hearty dish, making it a hit at the dinner table.

Ingredient Breakdown

Let’s take a closer look at what you’ll need to make your Honey Lime Chicken Bowl shine:

  • 1½ lbs boneless skinless chicken breasts or thighs: Thighs provide more flavor and moisture, while breasts are leaner. Choose what suits your taste!
  • 2 tablespoons olive oil: This helps to cook the chicken evenly and adds a touch of richness.
  • ½ teaspoon salt and black pepper: Essential for seasoning and enhancing the dish’s overall flavor.
  • ½ teaspoon paprika: Adds a subtle smokiness to the chicken.
  • ⅓ cup honey: The star ingredient that brings sweetness and depth to the sauce.
  • Zest of 1 lime: This adds a fragrant note that brightens the dish.
  • ¼ cup fresh lime juice: Provides the necessary tang to balance the sweetness of the honey.
  • 2 cloves garlic, minced: Infuses the chicken with aromatic flavor.
  • 1 tablespoon soy sauce: A touch of umami that rounds out the flavor profile.
  • ½ teaspoon chili flakes (optional): For those who enjoy a little heat; adjust based on your preference.
  • 3 cups cooked white rice or rice of choice: Acts as a hearty base for the bowl.
  • 1 cup corn kernels: Adds sweetness and crunch.
  • 1 cup black beans, drained and rinsed: A great source of protein and texture.
  • 1 avocado, sliced: Creamy avocado elevates the dish and adds healthy fats.
  • Fresh cilantro, chopped for garnish: A pop of freshness to finish the dish.

How to Make Your Honey Lime Chicken Bowl

Close-up of a Honey Lime Chicken Bowl with colorful ingredients and garnished cilantro.
  1. Prepare the Marinade: In a bowl, combine honey, lime zest, lime juice, minced garlic, soy sauce, and chili flakes. Mix well and set aside.
  2. Season the Chicken: Pat the chicken dry, then season with salt, pepper, and paprika. This step is crucial for flavor.
  3. Cook the Chicken: In a skillet, heat olive oil over medium-high heat. Add the chicken and cook until golden brown and cooked through, about 6-7 minutes per side.
  4. Add the Sauce: Pour the honey-lime marinade over the chicken in the skillet and simmer for an additional 2-3 minutes, allowing the sauce to thicken slightly and coat the chicken.
  5. Assemble Your Bowls: Start with a base of rice, then add sliced chicken, corn, black beans, and avocado. Drizzle with extra sauce if desired and garnish with cilantro.

Pro Tips for Perfect Results

  • Let it Marinate: For the best flavor, allow the chicken to marinate for at least 30 minutes or up to overnight in the fridge.
  • Use Fresh Ingredients: Fresh lime juice and zest make a significant difference in flavor compared to bottled alternatives.
  • Check Internal Temperature: Ensure the chicken reaches an internal temperature of 165°F for safe consumption.
  • Customize Your Rice: Try using brown rice, quinoa, or cauliflower rice for a different twist.
  • Don’t Overcrowd the Pan: Cook chicken in batches if necessary; overcrowding can lead to steaming rather than searing.
  • Keep it Colorful: Add a variety of colorful vegetables like bell peppers or cherry tomatoes for added nutrition and visual appeal.
  • Make it Ahead: Prepare the chicken and rice in advance to save time during the week.
  • Adjust the Sweetness: Modify the amount of honey based on your sweetness preference.

Common Mistakes and Troubleshooting

No dish is without its hiccups. Here are some common mistakes to avoid and tips for troubleshooting:

  • Dry Chicken: Overcooking can lead to dryness. Keep an eye on cooking times and use a meat thermometer.
  • Insufficient Flavor: Ensure you season the chicken properly before cooking, and don’t skip the marinade.
  • Soggy Rice: If you’re using pre-cooked rice, make sure it’s not overly wet. Fluff with a fork before serving.
  • Too Saucy: If the sauce is too thin, let it simmer longer to reduce and thicken before serving.

Variations on the Honey Lime Chicken Bowl

Feeling adventurous? Here are some variations to try:

  • Sweet and Spicy: Add a diced jalapeño to the marinade for a kick.
  • Coconut Rice: Use coconut milk instead of water for cooking your rice for a tropical twist.
  • Vegetarian Option: Replace chicken with grilled tofu or chickpeas for a plant-based bowl.
  • Mediterranean Flair: Swap lime for lemon and add olives, feta cheese, and roasted red peppers.

Storage and Make-Ahead Instructions

This dish is perfect for meal prep. Here’s how to store it:

  • Refrigeration: Store in an airtight container in the fridge for up to 4 days. Reheat in the microwave.
  • Freezing: You can freeze the cooked chicken and sauce for up to 2 months. Just thaw and reheat when ready to eat.

Frequently Asked Questions

  • Can I use frozen chicken? Yes, just ensure it is fully thawed before marinating and cooking.
  • What can I substitute for honey? Maple syrup or agave nectar can be good alternatives.
  • Is this dish gluten-free? Use tamari instead of soy sauce to keep it gluten-free.
  • Can I add more vegetables? Absolutely! Feel free to add any of your favorites.
  • How can I make this dish spicier? Increase the amount of chili flakes or add sliced jalapeños.
  • Can I use brown rice instead of white? Yes, brown rice works wonderfully and adds extra fiber.
  • What’s the best way to reheat leftovers? Microwave until heated through; add a splash of water to prevent drying out.
  • How do I know when the chicken is cooked? Use a meat thermometer to check for an internal temperature of 165°F.

Nutritional Tips and Dietary Adaptations

This dish can be easily adapted to meet various dietary needs:

  • Low-Carb: Substitute rice with cauliflower rice or a bed of greens.
  • Dairy-Free: This recipe is naturally dairy-free, making it suitable for those with lactose intolerance.
  • High-Protein: Add more beans or choose chicken thighs to increase the protein content.

Equipment Recommendations

Here’s what you’ll need to whip up this delightful dish:

  • Skillet: For cooking the chicken to golden perfection.
  • Mixing Bowls: To prepare the marinade and combine ingredients.
  • Meat Thermometer: To ensure your chicken is cooked safely without being overdone.
  • Rice Cooker: Optional, but handy for perfectly cooked rice every time.

Serving Suggestions

Serve your Honey Lime Chicken Bowl with:

  • Fresh Salad: A simple side salad of mixed greens, tomatoes, and cucumbers pairs wonderfully.
  • Crusty Bread: A loaf of rustic bread is perfect for sopping up any extra sauce.
  • Chilled Beverage: Consider pairing with iced tea or lemonade for a refreshing complement.

Your Honey Lime Chicken Bowl is more than a meal; it’s a heartfelt dish that brings the warmth of home cooking to your table. It’s uncomplicated yet flavorful, making it an easy choice for any occasion. So gather your ingredients, invite your loved ones to the table, and enjoy a dish that’s sure to become a cherished favorite in your home.

Honey Lime Chicken Bowl

Prep Time 10 minutes
Cook Time 20 minutes
Total Time 30 minutes
Servings 4 servings
Calories 550
A vibrant and flavorful bowl combining tender chicken with zesty lime and sweet honey, served over rice with fresh toppings.

Ingredients

Protein

  • 1.5 lbs boneless skinless chicken breasts or thighs
  • 2 tablespoons olive oil
  • 0.5 teaspoon salt
  • 0.5 teaspoon black pepper
  • 0.5 teaspoon paprika
  • 0.33 cup honey
  • Zest of 1 lime lime zest
  • 0.25 cup fresh lime juice
  • 2 cloves garlic minced
  • 1 tablespoon soy sauce
  • 0.5 teaspoon chili flakes (optional)

Carbohydrates

  • 3 cups cooked white rice or rice of choice
  • 1 cup corn kernels
  • 1 cup black beans drained and rinsed

Fats

  • 1 avocado sliced

Garnish

  • Fresh cilantro chopped cilantro (for garnish)

Instructions 

  • Marinate chicken with lime zest, lime juice, garlic, soy sauce, honey, and spices for 10 minutes.
  • Cook chicken in olive oil until browned and cooked through, about 8-10 minutes.
  • Warm the rice and prepare the corn, black beans, and sliced avocado.
  • Slice cooked chicken and assemble bowls with rice, chicken, corn, beans, and avocado. Garnish with cilantro.

Notes

For extra flavor, add a squeeze of lime before serving.
Calories: 550kcal
Cost: $15
Course: Main Course
Cuisine: Fusion
Keyword: chicken

Discover the Sunshine in Every Bite: Tropical Chicken Salad

Welcome to a taste of paradise! This Tropical Chicken Salad with Mango Dressing is more than just a meal; it’s a celebration of flavors that whisk you away to sun-kissed shores. The vibrant colors and fresh ingredients remind us that cooking is an art of simplicity, where every bite tells a story. Whether you’re hosting a gathering or looking for a refreshing meal at home, this dish is your ticket to culinary bliss. Let’s dive into this recipe and uncover why it’s a must-try!

Why You’ll Love This Recipe

  • Vibrant flavors: The combination of ripe mango, zesty lime, and creamy avocado brings a burst of tropical freshness to your plate.
  • Quick and easy: With a prep time of just 30 minutes, you can whip up a delightful dish without spending hours in the kitchen.
  • Healthy and nutritious: Packed with lean protein, healthy fats, and plenty of veggies, this salad is as good for your body as it is for your taste buds.
  • Versatile serving options: Enjoy it as a main dish, a side, or even as a filling for wraps and sandwiches.
  • Perfect for meal prep: Make it ahead of time for a quick lunch or dinner throughout the week, saving you time without sacrificing taste.

Ingredient Breakdown

Let’s take a closer look at the ingredients that make this salad shine, along with some great substitutions if you want to mix things up:

  • Chicken breasts: The star of our salad, you can use grilled, roasted, or even rotisserie chicken for convenience.
  • Lime juice: Freshly squeezed gives the best flavor, but bottled lime juice works in a pinch.
  • Avocado oil: A good source of healthy fats; alternatively, you can use olive oil.
  • Spices: Garlic powder, paprika, chipotle powder, and red pepper flakes add layers of flavor—feel free to adjust based on your taste preferences.
  • Romaine lettuce: Crunchy and refreshing; spinach or kale can also be great alternatives.
  • Cherry tomatoes: Sweet and juicy; you can substitute with chopped regular tomatoes.
  • Bell pepper: The orange variety adds a sweet hint; red or yellow bell peppers work beautifully too.
  • Mango: Fresh mango is ideal, but frozen mango chunks will also do the trick.
  • Macadamia nuts: Add a delightful crunch; pecans or walnuts can be substituted for a different twist.
  • Coconut flakes: Toasted for extra flavor; you can skip them if you prefer.

Pro Tips for the Perfect Tropical Chicken Salad

Side angle of a Tropical Chicken Salad topped with fresh mango slices, cherry tomatoes, and avocado, showcasing a rainbow of ingredients.

Here are some expert insights to elevate your salad game:

  • Marinate your chicken: Letting the chicken sit in the marinade overnight enhances flavor and tenderness.
  • Grilling secrets: For the juiciest chicken, let it rest after grilling to keep the juices locked in.
  • Make it creamy: If you like a richer dressing, mix in a dollop of Greek yogurt or sour cream for a creamy twist.
  • Mix your greens: Combine romaine with arugula or mixed salad greens for added texture and flavor.
  • Chill before serving: Allow the salad to chill for at least an hour before serving to meld the flavors together.
  • Customize the spice level: Adjust the chipotle and red pepper flakes to suit your heat preference.
  • Fresh herbs: Toss in some chopped cilantro or mint for an extra layer of freshness.
  • Serving size: This recipe serves four, but it’s easily doubled for larger gatherings.

Avoid These Common Mistakes

Even the best chefs make mistakes! Here are some common pitfalls to watch out for:

  • Overcooking the chicken: Keep an eye on your chicken as it grills to prevent dryness; aim for an internal temperature of 165°F.
  • Using unripe mango: A green mango won’t provide the sweetness and flavor the recipe needs—choose ripe, fragrant mangoes!
  • Skipping the marinating step: Don’t rush this key step—it makes all the difference in flavor.
  • Not toasting coconut flakes: Toasting enhances their flavor; skip this step at your own peril!
  • Ignoring the resting time: Letting the chicken rest after grilling ensures it remains juicy.

Variations to Try

Feeling adventurous? Here are some tasty variations to explore:

  • Spicy Tropical Chicken Salad: Add diced jalapeños for an added kick.
  • Fruit-Forward Salad: Mix in additional fruits like pineapple or kiwi for a sweeter profile.
  • Crunchy Quinoa Salad: Toss in cooked quinoa for a satisfying, protein-packed twist.
  • Vegan Version: Replace chicken with grilled tofu and use a plant-based yogurt for the dressing.

Storage and Make-Ahead Instructions

This salad is perfect for meal prep! Here’s how to store it:

  • Refrigeration: Store in an airtight container for up to three days. Keep the dressing separate until ready to serve to prevent sogginess.
  • Freezing: It’s best enjoyed fresh, but you can freeze the cooked chicken separately for later use.
  • Make-ahead tips: Prepare the chicken and dressing a day in advance to save time on serving day.

Frequently Asked Questions

Got questions? We’ve got answers! Here are some common FAQs:

  • Can I use frozen chicken? Yes, just ensure it’s fully thawed before marinating and grilling.
  • What if I don’t like coconut? You can replace coconut milk with regular milk or a dairy-free alternative.
  • How do I make it gluten-free? All ingredients in this recipe are naturally gluten-free—just double-check your labels.
  • Can I use other nuts? Absolutely! Feel free to swap macadamia nuts for your favorite nut or seed.
  • Is this salad suitable for kids? Yes! It’s a fun way to introduce them to new flavors—just adjust the spices accordingly.
  • How can I add more protein? Consider adding chickpeas or boiled eggs for extra protein.
  • Can I make it in advance? Yes, but keep the dressing separate until serving for best results.
  • What’s the best way to serve leftovers? Serve chilled, or toss it into a wrap for a delicious on-the-go lunch.

Nutrition Tips and Dietary Adaptations

Here are some ways to make this salad even healthier:

  • Incorporate more veggies: Add a variety of colorful vegetables for added nutrients and fiber.
  • Opt for leaner cuts: Use chicken thighs if you prefer darker meat or lower-fat options.
  • Control portion sizes: Serve in smaller bowls for mindful eating, especially if you’re watching your calories.
  • Go for whole ingredients: Choose whole food ingredients to maximize nutritional benefits.

Equipment Recommendations

Make your cooking experience smooth and enjoyable with the right tools:

  • Grill or grill pan: Essential for that perfect char on your chicken.
  • High-powered blender: A Vitamix or similar blender makes for a smooth and creamy dressing.
  • Sharp knife: For easy chopping of veggies and slicing chicken.
  • Mixing bowls: Use these for marinating and assembling your salad.

Serving Suggestions

When it comes to serving your Tropical Chicken Salad, the possibilities are endless:

  • On a bed of greens: Serve it over a generous pile of your favorite salad greens for a fresh and light meal.
  • In a wrap: Use a tortilla or lettuce wrap for a portable lunch option.
  • With a side of rice: Pair with coconut rice or quinoa for a complete meal.
  • As a party platter: Make a large batch and serve it as a crowd-pleasing dish at gatherings.

In conclusion, this Tropical Chicken Salad with Mango Dressing is not just a recipe; it’s a journey of flavors that brings comfort and joy to any table. With its vibrant ingredients and simple preparation, it embodies the heart of home cooking. Gather your loved ones, share a meal, and let the sunshine in every bite. Happy cooking, friends!

Tropical Chicken Salad with Mango Dressing

Prep Time 20 minutes
Cook Time 20 minutes
Total Time 40 minutes
Servings 4 servings
Calories 550
A vibrant and refreshing salad combining grilled chicken, fresh vegetables, and a creamy mango-lime dressing for a tropical flavor explosion.

Ingredients

Chicken

  • 1 pound chicken breasts
  • 2 tablespoons lime juice
  • 1.5 tablespoons avocado oil
  • 1 teaspoon garlic powder
  • 1 teaspoon paprika powder
  • 0.5 teaspoon chipotle powder
  • 0.5 teaspoon red pepper flakes

Salt and pepper

  • to taste salt and pepper
  • 8 cups chopped romaine lettuce (2 heads, approx 470 grams)
  • 2 cups cherry tomatoes, halved (300 grams)
  • 1 large orange bell pepper (roughly chopped, approx 200 grams)
  • 1 cup diced mango (175 grams)
  • 0.5 cup macadamia nuts, roughly chopped
  • 1 large avocado, sliced (150 grams)
  • 0.33 cup coconut flakes

Oil for sautéing

  • 0.67 cup coconut flakes (for toasted flakes)
  • 0.67 cup lite coconut milk (2/3 cup, approx 160 ml)
  • 1 tablespoon lime juice
  • 0.25 teaspoon chipotle powder

Salt to taste

  • to taste salt

Instructions 

  • Marinate chicken with lime juice, oil, and spices overnight or at least 2 hours.
  • Grill chicken over medium-high heat for 15-20 minutes until cooked through. Rest and slice.
  • Blend coconut milk, mango, lime juice, chipotle, and salt until smooth for dressing.
  • Toast coconut flakes in a pan over medium-low heat until golden, about 1-2 minutes.
  • Assemble salads with veggies, top with sliced chicken, toasted coconut, and drizzle with dressing.

Notes

For extra flavor, marinate chicken longer and adjust salt to taste.
Calories: 550kcal
Cost: $15
Course: Main Course, Salad
Cuisine: Tropical
Keyword: chicken, Mango, Salad

Discover the Heartwarming Flavors of Thai Sweet Chili Chicken

Welcome to a culinary experience that brings the warmth of home cooking right to your kitchen! Today, we’re diving into the delightful world of Thai Sweet Chili Chicken. This dish combines tender chicken pieces with the sweet and spicy embrace of chili sauce, garlic, and a splash of zesty lime juice. With its balance of flavors and comforting aroma, this dish is perfect for family dinners or casual gatherings with friends. Let’s get started on this flavorful journey together!

Why You’ll Love This Recipe

  • Quick and Easy: With just a few simple steps and ingredients, you can whip up this dish in under 30 minutes, making it an excellent choice for busy weeknights.
  • Versatile: Whether you’re serving it with rice, noodles, or a fresh salad, this chicken dish pairs beautifully with various sides.
  • Flavor Explosion: The combination of sweet chili sauce, garlic, and lime juice creates a symphony of flavors that will tantalize your taste buds.
  • Family-Friendly: Even picky eaters will love this dish. The sweetness of the chili sauce is appealing to children and adults alike.
  • Make Ahead: This dish can be marinated in advance, allowing the flavors to deepen and making dinner prep a breeze!

Ingredients Breakdown

Here’s what you’ll need for this mouthwatering Thai Sweet Chili Chicken:

  • 1 lb chicken breast: Cut into bite-sized pieces. You can also use chicken thighs for a richer flavor.
  • 1/2 cup Thai sweet chili sauce: This sauce is the star of the show, bringing a perfect balance of sweetness and heat.
  • 2 cloves garlic: Minced to add a delightful aromatic touch.
  • 1 tablespoon lime juice: A splash of acidity to brighten the flavor.
  • 1 tablespoon soy sauce: Adds depth and umami to the dish.
  • 1 tablespoon vegetable oil: For cooking the chicken.
  • Salt and pepper: To taste.
  • Chopped green onions: For garnish, adding a fresh and vibrant touch.

Pro Tips for Success

Side view of chicken breast pieces glazed with Thai sweet chili sauce and garnished.
  • Perfect Texture: Marinating the chicken for at least 30 minutes ensures it stays juicy and flavorful.
  • High Heat Cooking: Searing the chicken on high heat gives it a beautiful golden crust while keeping it moist inside.
  • Adjusting Spice Levels: If you like it spicier, add a pinch of crushed red pepper or a drizzle of sriracha when cooking.
  • Substitutions: Feel free to use coconut aminos for a gluten-free option or adjust the sweet chili sauce based on your preference.
  • Using Leftovers: This dish tastes even better the next day, making it a great option for meal prep!
  • Garnishing: Fresh cilantro makes an excellent addition, enhancing the dish’s aroma and flavor.
  • Cooking in Batches: If cooking for a crowd, double the recipe and serve it in a large bowl for family-style dining.
  • Serving Temperature: Serve this dish hot for the best experience; the flavors are most vibrant when freshly cooked.

Common Mistakes to Avoid

Even the best of us can make a few missteps in the kitchen, so here are some common mistakes to steer clear of:

  • Overcooking the Chicken: Cooking the chicken for too long can lead to dryness. Aim for a golden crust and tender meat.
  • Not Marinating: Skipping the marination step can result in less flavorful chicken. Give it time to soak up the flavors!
  • Using Low-Quality Sauce: The flavor of the sweet chili sauce significantly affects the dish. Invest in a good quality sauce for the best results.
  • Skipping the Lime Juice: Lime juice isn’t just for flavor; it also helps tenderize the chicken. Don’t leave it out!

Delicious Variations

Feeling adventurous? Here are some tasty variations to try:

  • Thai Sweet Chili Tofu: Substitute chicken with firm tofu for a vegetarian twist.
  • Sweet Chili Shrimp: Swap chicken for shrimp for a quick and elegant seafood dish.
  • Vegetable Stir-Fry: Add mixed vegetables like bell peppers, broccoli, and snap peas to the chicken for added nutrition and color.
  • Spicy Pineapple Chicken: Add chunks of pineapple to the mix for a sweet and tangy flavor combination that pairs well with the chili sauce.

Storage and Make-Ahead Instructions

You can easily make this dish ahead of time. Here’s how:

  • Refrigeration: Store any leftovers in an airtight container in the fridge for up to 3 days.
  • Freezing: For longer storage, freeze the cooked chicken for up to 2 months. Thaw in the fridge overnight before reheating.
  • Marinating Ahead: You can marinate the chicken up to 24 hours in advance for maximum flavor.
  • Reheating: Reheat in a skillet over medium heat until warmed through, adding a splash of water if needed to prevent drying out.

Frequently Asked Questions (FAQ)

  • Can I use frozen chicken? Yes, but make sure to thaw it completely before marinating and cooking.
  • What if I can’t find sweet chili sauce? You can make a quick homemade version by mixing sugar, vinegar, and chili flakes.
  • How do I know when the chicken is done? The chicken should reach an internal temperature of 165°F. Use a meat thermometer for accuracy.
  • Can I double the recipe? Absolutely! Just ensure your pan is large enough for even cooking.
  • Is this dish gluten-free? Yes, if you use gluten-free soy sauce or coconut aminos.
  • What can I serve with Thai Sweet Chili Chicken? It pairs well with jasmine rice, noodles, or a fresh green salad.
  • Can I make this in a slow cooker? Yes, just combine the ingredients in a slow cooker and cook on low for 4-6 hours.
  • What’s the best way to store leftovers? Keep them in an airtight container in the refrigerator for up to three days.

Nutrition Tips and Dietary Adaptations

This dish can be made healthier or adapted to fit specific dietary needs:

  • Lower Calorie: Use skinless chicken breast and a sugar-free sweet chili sauce to cut down on calories.
  • Protein Boost: Pair with quinoa or brown rice for an added protein punch.
  • Vegetarian Option: Substitute chicken with chickpeas or lentils for a protein-rich plant-based meal.

Essential Equipment Recommendations

For this recipe, you will need:

  • Skillet or Frying Pan: A non-stick skillet works best for even cooking and easy cleanup.
  • Measuring Cups and Spoons: Accurate measurements are key to balancing flavors.
  • Spatula or Tongs: For flipping the chicken without breaking it apart.

Serving Suggestions

This dish shines when served with:

  • Steamed Jasmine Rice: A perfect base to soak up the sweet chili sauce.
  • Fresh Cucumber Salad: To add a refreshing crunch alongside the sweet chicken.
  • Spring Rolls: These make a great appetizer or side, complementing the flavors of the dish.

In closing, Thai Sweet Chili Chicken is not just a meal; it’s a warm embrace from the kitchen, filled with love and tradition. I hope you enjoy making this dish as much as I enjoy sharing it with you. Remember, cooking is about letting simple ingredients shine and creating memories around the table. Happy cooking!

Thai Sweet Chili Chicken

Prep Time 10 minutes
Cook Time 15 minutes
Total Time 25 minutes
Servings 4 servings
Calories 350
Enjoy this flavorful Thai-inspired dish featuring tender chicken glazed in sweet chili sauce, perfect for a quick and delicious meal.

Ingredients

Protein

  • 1 lb chicken breast (cut into bite-sized pieces. Using chicken thighs is an option for richer flavor.)
  • 0.5 cup Thai sweet chili sauce (This sauce is the star of the show.)
  • 2 cloves garlic (minced. Adds aromatic touch.)
  • 1 tablespoon lime juice (To brighten the flavor.)
  • 1 tablespoon soy sauce (For depth of flavor.)
  • 1 tablespoon vegetable oil (For cooking.)
  • to taste salt and pepper
  • chopped green onions (For garnish.)

Instructions 

  • Heat vegetable oil in a skillet over medium heat.
  • Add chicken and cook until browned, about 5-7 minutes.
  • Stir in garlic, lime juice, soy sauce, and sweet chili sauce; cook for another 3-4 minutes.
  • Season with salt and pepper to taste.
  • Garnish with chopped green onions and serve hot.

Notes

Adjust the amount of chili sauce for desired spice level.
Calories: 350kcal
Cost: $12
Course: Main Course
Cuisine: Thai
Keyword: chicken

Discover the Heart of Comfort Food with Our Crispy Chicken Ranch Snack Wrap

Welcome to a culinary journey that brings you back to the simple joys of home cooking. Our Crispy Chicken Ranch Snack Wrap is more than just a meal; it’s a celebration of flavors that remind you of cherished family gatherings and the warmth of a rustic kitchen. Packed with crispy chicken strips, fresh greens, and a drizzle of creamy ranch dressing, this easy-to-make wrap is perfect for any occasion, whether it’s a quick lunch or a hearty snack. Dive in and relish the comforting flavors of home with every bite!

Why You’ll Love This Recipe

Let me tell you why this crispy chicken ranch snack wrap will quickly become a favorite in your household:

  • Quick and Easy Preparation: In just a few simple steps, you can whip up a delicious wrap that’s ready to satisfy your hunger.
  • Family-Friendly: With flavors that appeal to all ages, this wrap is perfect for lunchboxes, picnics, or casual dinners.
  • Customizable: Feel free to mix and match ingredients based on your family’s preferences or what you have on hand.
  • Comforting Flavors: Each bite is filled with the crispy goodness of chicken, fresh veggies, and creamy ranch that brings a smile to your face.
  • Healthier Snack Option: Skip the fast-food drive-thru and enjoy a homemade wrap that’s packed with nutrition.

Ingredients Breakdown

To make this delightful wrap, you’ll need the following ingredients:

  • 1 large tortilla: A soft wrap perfect for holding all the goodies. You can choose whole wheat or spinach tortillas for added nutrition.
  • 1 cup crispy chicken strips: You can use store-bought or homemade fried chicken tenders for that perfect crunch.
  • 1/2 cup shredded lettuce: For a fresh crunch, feel free to swap this with spinach or arugula.
  • 1/4 cup diced tomatoes: Adds a juicy burst of flavor. You can also use diced cucumbers for a refreshing twist.
  • 1/4 cup shredded cheddar cheese: Provides a creamy texture. Consider using pepper jack for a spicy kick.
  • 2 tablespoons ranch dressing: The creamy ranch dressing ties everything together beautifully. You can make your own or use your favorite store-bought variety.

How to Make the Perfect Wrap

Side view of a deliciously wrapped tortilla filled with crispy chicken, lettuce, and ranch dressing.

Follow these simple steps to create your Crispy Chicken Ranch Snack Wrap:

  1. Warm the Tortilla: Heat a skillet over medium heat and warm the tortilla for about 1 minute until soft and pliable.
  2. Add the Chicken: Place the crispy chicken strips in the center of the tortilla.
  3. Layer the Veggies: Top the chicken with shredded lettuce, diced tomatoes, and cheddar cheese.
  4. Drizzle with Ranch: Generously drizzle ranch dressing over the ingredients.
  5. Wrap It Up: Fold the sides of the tortilla over the filling and roll it up tightly, ensuring no filling escapes.
  6. Slice and Serve: Cut the wrap in half and serve with extra ranch dressing on the side if desired.

Expert Tips for Success

Here are some expert insights to help you achieve the best results:

  • Use Fresh Ingredients: Fresh, high-quality ingredients will elevate the flavor of your wrap and make it truly memorable.
  • Let the Chicken Cool: If using hot chicken, allow it to cool slightly before assembling to prevent the tortilla from becoming soggy.
  • Layer Properly: Place ingredients in the right order—wet ingredients on the bottom and dry ingredients on top—to avoid soggy wraps.
  • Experiment with Flavors: Don’t hesitate to add your favorite herbs or spices to the chicken for an extra flavor boost.
  • Wrap Tightly: Ensuring a tight wrap will help keep all the delicious fillings inside and make for easier eating.
  • Consider a Panini Press: For an extra crispy finish, consider pressing your wrap in a panini maker or skillet with a heavy pot on top.

Common Mistakes and Troubleshooting

Even the best cooks make mistakes now and then. Here are common pitfalls to avoid:

  • Soggy Wraps: Always layer wet ingredients like ranch dressing on top of drier ones to prevent the tortilla from getting soggy.
  • Too Much Filling: While it’s tempting to load up on fillings, too much can lead to a messy wrap. Stick to a moderate amount for easier handling.
  • Overcooked Chicken: Ensure your chicken is cooked just right—juicy and tender but not dry. If using frozen tenders, follow the package instructions for optimal results.

Delicious Variations

Your crispy chicken ranch snack wrap is versatile—here are some variations to keep things fresh:

  • Buffalo Chicken Ranch Wrap: Swap out the ranch dressing for buffalo sauce for a spicy twist.
  • Veggie-Only Wrap: Skip the chicken and load up on fresh veggies like bell peppers, cucumbers, and carrots for a satisfying vegetarian option.
  • Tex-Mex Style: Add black beans, corn, and avocado for a southwestern flair, topped with salsa instead of ranch.
  • Maple Bacon Ranch Wrap: Add crispy bacon and a touch of maple syrup for a sweet and savory combination.

Storage and Make-Ahead Instructions

If you want to prepare your wraps in advance, here’s how to store them:

  • Refrigerate: Store assembled wraps in an airtight container in the refrigerator for up to 2 days. Wrap them in parchment paper to keep them fresh.
  • Freezing: You can freeze the chicken separately and assemble the wraps fresh when you’re ready to eat.

Frequently Asked Questions

Here are answers to some common questions:

  • Can I use frozen chicken tenders? Absolutely! Just follow the cooking instructions on the package for crispy results.
  • What can I substitute for ranch dressing? Try Greek yogurt mixed with herbs for a healthier alternative or your favorite vinaigrette for a different flavor.
  • How do I keep my wrap from getting soggy? Layer ingredients properly, with wet ones on top, and consider using a thicker tortilla for better structure.
  • Can I make this wrap gluten-free? Yes! Use gluten-free tortillas and check that your chicken strips are gluten-free as well.
  • What other vegetables can I add? Feel free to add sliced bell peppers, cucumbers, or even olives for added crunch and flavor.
  • How long will leftovers last? Leftover wraps can be stored in the fridge for up to 2 days, but they are best enjoyed fresh.
  • Can I use a different type of cheese? Certainly! Feta or pepper jack cheese can add unique flavors to your wrap.
  • Is this recipe suitable for meal prep? Yes! Just keep the components separate until you’re ready to assemble for the freshest flavor.

Nutritional Tips and Dietary Adaptations

This wrap is not just delicious but can also be tailored to meet different dietary needs:

  • Low-Carb Version: Use lettuce wraps instead of tortillas for a low-carb alternative.
  • Dairy-Free Option: Substitute cheese with avocado and use dairy-free ranch dressing.
  • Protein Boost: Add beans or chickpeas for extra protein and fiber.

Essential Equipment Recommendations

To make your cooking experience smoother, here’s what I recommend having on hand:

  • Non-stick Skillet: For warming tortillas and ensuring easy cooking without sticking.
  • Sharp Knife: For slicing the wrap cleanly without squishing the ingredients.
  • Cutting Board: A sturdy surface for assembling your wraps.

Serving Suggestions

Serve your crispy chicken ranch snack wrap alongside:

  • Fresh Fruit: A bowl of seasonal fruit adds a refreshing side.
  • Chips or Veggies: A side of tortilla chips or cut veggies with extra ranch makes for a delightful crunch.
  • Pickles: A few pickles can add a tangy contrast that complements the flavors well.

Conclusion

There you have it, folks! Your very own Crispy Chicken Ranch Snack Wrap recipe, a true testament to the beauty of comfort food. With its rich flavors, easy preparation, and endless variations, you’ll find this wrap not only satisfies your hunger but also warms your heart with memories of home. So gather your loved ones, whip up these wraps, and enjoy a delicious meal that feels like a hug on a plate. Happy cooking!

Crispy Chicken Ranch Snack Wrap

Prep Time 5 minutes
Cook Time 2 minutes
Total Time 7 minutes
Servings 1 wrap
Calories 450
A quick and delicious snack wrap featuring crispy chicken, fresh veggies, and ranch dressing, perfect for on-the-go.

Ingredients

tortilla

  • 1 large tortilla

crispy chicken strips

  • 1 cup crispy chicken strips

lettuce

  • 1/2 cup shredded lettuce

diced tomatoes

  • 1/4 cup diced tomatoes

shredded cheddar cheese

  • 1/4 cup shredded cheddar cheese

ranch dressing

  • 2 tablespoons ranch dressing

Instructions 

  • Warm the tortilla in a skillet for 1 minute.
  • Place chicken strips in the center of the tortilla.
  • Add lettuce, tomatoes, and cheese on top of the chicken.
  • Drizzle ranch dressing over the filling.
  • Fold sides and roll up tightly, then slice and serve.

Notes

For extra flavor, add some hot sauce or your favorite herbs.
Calories: 450kcal
Cost: $8
Course: Snack
Keyword: chicken, ranch, Wrap

If you’re searching for a quick, satisfying meal that brings the warmth of home cooking to your table, look no further than these Buffalo Chicken Flatbread Wraps. This recipe is not only bursting with flavor but also incredibly easy to whip up, making it the perfect choice for busy weeknights or casual gatherings. Combining tender chicken, zesty buffalo sauce, and fresh toppings, these wraps are sure to please everyone around the dinner table.

Why You’ll Love This Recipe

  • Quick Preparation: Whip up these wraps in just 20 minutes, ideal for a fast dinner or lunch solution.
  • Versatile Ingredients: Use whatever chicken you have on hand—rotisserie chicken works beautifully, or you can cook fresh chicken breasts.
  • Customizable Toppings: Adjust the toppings to your liking—add more veggies or different cheeses for a personal touch.
  • Perfect for Meal Prep: These wraps can be prepared ahead of time, making them a convenient option for busy schedules.
  • Crowd-Pleaser: With their bold buffalo flavor, these wraps are sure to be a hit at parties and family gatherings.

Ingredients Breakdown

Here’s what you’ll need to create these delicious wraps, along with some handy substitutions:

  • 2 cups cooked chicken breast: Shredded or diced; rotisserie chicken works great, or you can grill or bake your own.
  • 1/2 cup buffalo sauce: Adjust to your heat preference; the more you add, the spicier it gets!
  • 1 tbsp butter: Melted, for a richer buffalo flavor (optional).
  • 1/2 tsp garlic powder: Adds a depth of flavor to the chicken.
  • 4 large flatbreads: Soft flatbreads work best for rolling; consider whole wheat for a healthier option.
  • 1/2 cup ranch or blue cheese dressing: Provides a creamy contrast to the spicy buffalo sauce.
  • 1 cup shredded cheese: Mozzarella or Monterey Jack is recommended, but feel free to use your favorite cheese.
  • 1 cup shredded lettuce: Adds a refreshing crunch.
  • 1/2 cup tomatoes: Diced; you can use cherry tomatoes for a sweeter touch.
  • 1/4 cup red onion: Thinly sliced for a bit of zing.
  • Avocado: Sliced, for creaminess; it’s optional but highly recommended!
  • Celery: Finely chopped for a classic buffalo crunch.
  • Green onions: Sliced, for garnish and added flavor.

Step-by-Step Instructions

Follow these simple steps to make your Buffalo Chicken Flatbread Wraps:

  • Mix the buffalo chicken: In a bowl, toss the cooked chicken with buffalo sauce, melted butter (if using), and garlic powder until evenly coated.
  • Warm the chicken: Heat a skillet over medium heat. Add the buffalo chicken and warm it for 2-3 minutes until hot. Turn off the heat.
  • Warm the flatbreads: In a dry skillet, warm each flatbread for 20-30 seconds per side until pliable. This helps prevent tearing when rolling.
  • Assemble: Spread dressing down the center of each flatbread. Add shredded cheese, then spoon on warm buffalo chicken. Top with lettuce, tomatoes, red onion, and avocado/celery if using. Don’t overfill for easier rolling.
  • Wrap tightly: Fold the bottom edge up slightly, fold in both sides, then roll tightly into a wrap.
  • Optional toast: Place wraps seam-side down in a skillet over medium heat and toast for 1-2 minutes per side until lightly golden and sealed.
  • Serve: Slice in half and serve immediately for the best texture. Add extra dressing on the side if desired.

Pro Tips for the Perfect Wrap

Close-up of Buffalo Chicken Flatbread Wraps showcasing shredded chicken and vibrant vegetables.

To ensure your Buffalo Chicken Flatbread Wraps turn out perfectly every time, consider these expert tips:

  • Use quality chicken: Freshly cooked or high-quality rotisserie chicken makes a big difference in flavor.
  • Adjust the heat: If you prefer a milder wrap, start with less buffalo sauce and add more to taste.
  • Experiment with cheeses: Try mixing cheeses, like adding a bit of blue cheese for extra flavor.
  • Make it a meal: Serve with a side of veggies or a simple salad for a complete meal.
  • Wrap tightly: The tighter you wrap, the less likely your filling will spill out.
  • Don’t skip the toasting: Toasting the wraps not only seals them but also adds a delightful crispness.

Common Mistakes and Troubleshooting

Here are some common pitfalls to avoid when making your wraps:

  • Overfilling: Stuffing too much filling can lead to a messy wrap that won’t hold together. Keep it simple!
  • Cold chicken: Make sure your chicken is warm before assembling to ensure everything melds together nicely.
  • Ignoring the warming step: Warming the flatbreads is crucial for a good wrap—don’t skip this step!

Variations to Try

Feeling adventurous? Here are some tasty variations you might want to explore:

  • BBQ Chicken Flatbread: Swap buffalo sauce for your favorite BBQ sauce for a different flavor profile.
  • Veggie-Loaded Wrap: Add extra veggies like bell peppers, cucumbers, or spinach to increase nutrition.
  • Spicy Buffalo Cauliflower: For a vegetarian twist, use roasted buffalo cauliflower instead of chicken.
  • Cheesy Spinach & Chicken: Mix in some cooked spinach and a blend of cheeses for a creamy texture.

Storage and Make-Ahead Instructions

For those looking to meal prep, here’s how to store your wraps:

  • Refrigeration: Wrap tightly in plastic wrap or foil to keep them fresh for up to 3 days.
  • Freezing: These wraps freeze well! Wrap tightly and store in a freezer-safe bag for up to 3 months. Thaw in the fridge overnight before warming.
  • Make-ahead: You can prepare the filling a day in advance. Store in the fridge and assemble the wraps just before serving.

Frequently Asked Questions

Here are some common questions about this recipe:

  • Can I use frozen chicken? Yes, just ensure it’s fully cooked and shredded before mixing it with the buffalo sauce.
  • What can I substitute for flatbreads? Tortillas or pita bread work well if you’re out of flatbreads.
  • Is this recipe gluten-free? Use gluten-free flatbreads or tortillas and ensure the buffalo sauce is gluten-free.
  • How spicy is the buffalo sauce? It varies by brand; taste before adding to the chicken to control the heat level.
  • Can I make this vegetarian? Absolutely! Use roasted veggies or tofu instead of chicken for a delicious vegetarian option.
  • What sides pair well with these wraps? Fresh veggies, a light salad, or sweet potato fries make excellent accompaniments.
  • How do I make it dairy-free? Use dairy-free cheese and ranch dressing alternatives.
  • Can I use other sauces instead of buffalo? Yes, feel free to experiment with different sauces like teriyaki or honey mustard!

Nutritional Tips and Dietary Adaptations

This recipe can easily fit into various dietary preferences:

  • Low-Carb: Use lettuce wraps instead of flatbreads for a low-carb option.
  • High-Protein: Add more chicken or beans to increase the protein content.
  • Low-Fat: Opt for low-fat ranch or blue cheese dressing and reduce the amount of cheese used.

Equipment Recommendations

Here’s what you’ll need for this recipe:

  • Large skillet: For warming the chicken and toasting the wraps.
  • Mixing bowl: To combine the buffalo chicken ingredients.
  • Tongs or spatula: For easy handling of the wraps.

Serving Suggestions

These Buffalo Chicken Flatbread Wraps can be served in a variety of ways:

  • With extra dressing: Serve with additional ranch or blue cheese dressing for dipping.
  • On a platter: Cut wraps in half and arrange them on a platter for easy sharing.
  • With sides: Pair with crunchy veggies, a fresh salad, or potato chips for a complete meal.

In conclusion, these Buffalo Chicken Flatbread Wraps are more than just a meal—they’re a celebration of flavors, simplicity, and comfort. Whether it’s a family dinner or a casual gathering with friends, this dish captures the heart of home cooking. So gather your ingredients, roll up your sleeves, and enjoy a bite of something truly special. Happy cooking!

Buffalo Chicken Flatbread Wraps Quick Dinner Hack

Prep Time 10 minutes
Cook Time 10 minutes
Total Time 20 minutes
Servings 4 wraps
Calories 650
A quick and flavorful dinner option featuring spicy buffalo chicken wrapped in soft flatbreads, perfect for a satisfying meal in minutes.

Ingredients

Chicken and Sauces

  • 2 cups cooked chicken breast shredded or diced rotisserie works great
  • 0.5 cup buffalo sauce (adjust to heat preference)
  • 1 tbsp butter (melted, optional for richer flavor)
  • 0.5 tsp garlic powder

Flatbreads

  • 4 large flatbreads (soft flatbread works best for rolling)

Dressing and Cheese

  • 0.5 cup ranch dressing or blue cheese dressing
  • 1 cup shredded mozzarella or Monterey Jack

Vegetables and Garnishes

  • 1 cup shredded lettuce
  • 0.5 cup diced tomatoes
  • 0.25 cup thinly sliced red onion

Additional Toppings

  • to taste sliced avocado, chopped celery, sliced green onions (optional)

Instructions 

  • Toss cooked chicken with buffalo sauce, melted butter (optional), and garlic powder until coated.
  • Warm buffalo chicken in a skillet over medium for 2-3 minutes until hot.
  • Warm flatbreads in a dry skillet for 20-30 seconds per side until pliable.
  • Spread dressing on each flatbread, add cheese, then top with buffalo chicken, lettuce, tomatoes, and red onion. Add avocado and celery if desired.
  • Fold the flatbread into a wrap, then toast seam-side down in a skillet for 1-2 minutes until golden and sealed. Slice and serve immediately.

Notes

Keep the wraps loose enough to roll easily, and enjoy immediately for best texture.
Calories: 650kcal
Cost: $12
Course: dinner
Keyword: Buffalo Chicken, Flatbread, quick