Author

Tom

Browsing

The Joy of Crunchy Cornflake Chicken Tenders

Welcome, friends! Today, we’re diving into a dish that brings comfort and joy to weeknight dinners—Crunchy Cornflake Chicken Tenders. This recipe is all about simple ingredients and straightforward methods, ensuring you can whip it up without any fuss. With a crispy cornflake coating that seals in moisture, these tenders are sure to become a family favorite. Let’s get started, shall we?

Why You’ll Love This Recipe

Before we roll up our sleeves and get cooking, let me share why this recipe is a gem in your culinary repertoire:

  • Crunchy texture: The cornflake coating gives these tenders an irresistible crunch that everyone loves.
  • Quick preparation: From start to finish, you can have these tenders ready in about 30 minutes, perfect for busy weeknights.
  • Family-friendly: Kids and adults alike will enjoy these flavorful chicken strips, making them ideal for family gatherings.
  • Versatile serving options: Serve them as a main dish, in wraps, or as a party appetizer—there’s no wrong way!
  • Easy to customize: This recipe can be tweaked with different spices or dipping sauces to suit your taste.

Ingredients You’ll Need

Here’s what you need to get started:

  • 1 lb chicken tenders: Boneless and skinless, perfect for quick cooking.
  • 2 cups cornflakes, crushed: These provide that crunchy coating.
  • 1/2 cup all-purpose flour: Helps the coating to stick.
  • 2 large eggs, beaten: Acts as a binder for the breadcrumbs.
  • 1 teaspoon garlic powder: For added flavor.
  • 1 teaspoon paprika: Adds a subtle smokiness.
  • 1 teaspoon salt: Essential for seasoning.
  • 1/2 teaspoon black pepper: A little kick for flavor.
  • 1/4 teaspoon cayenne pepper (optional): For those who like it spicy.
  • Cooking spray or vegetable oil: To ensure a golden, crispy finish.

How to Make Crunchy Cornflake Chicken Tenders
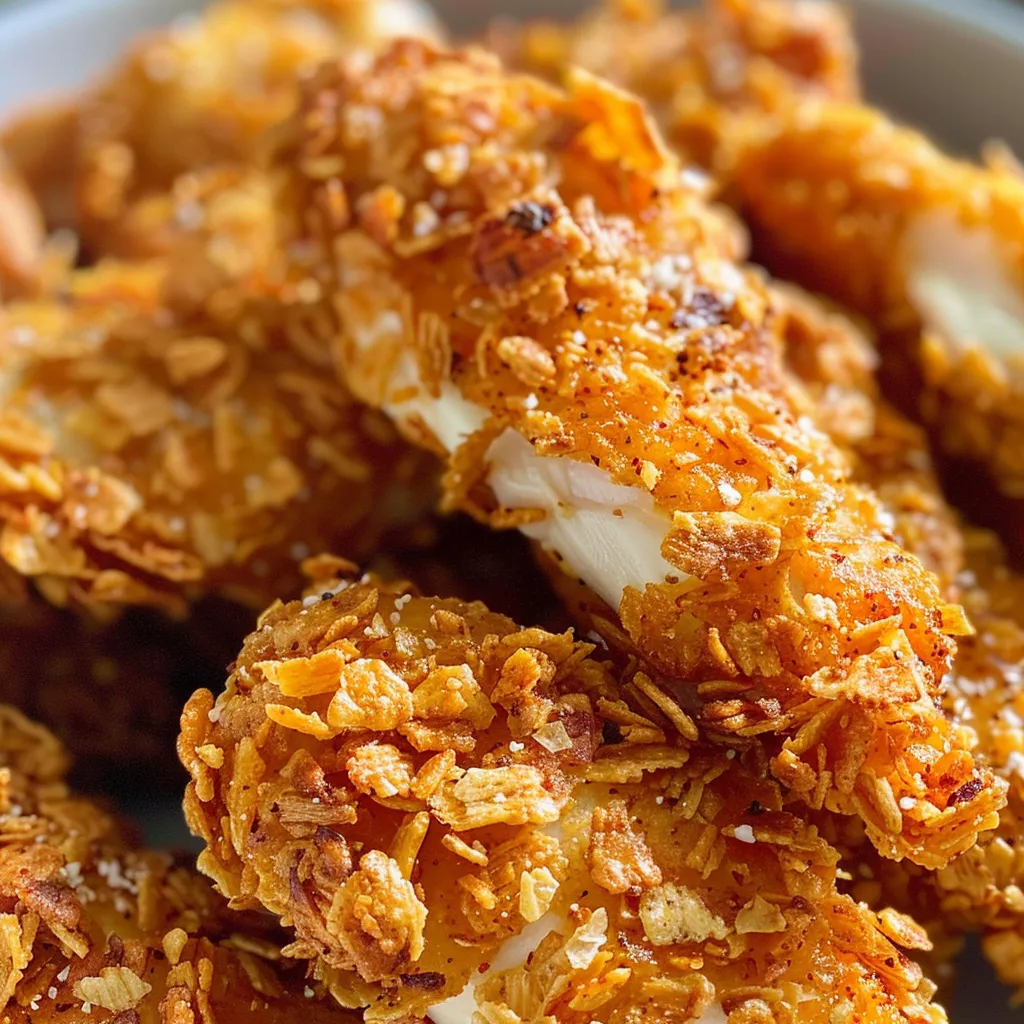
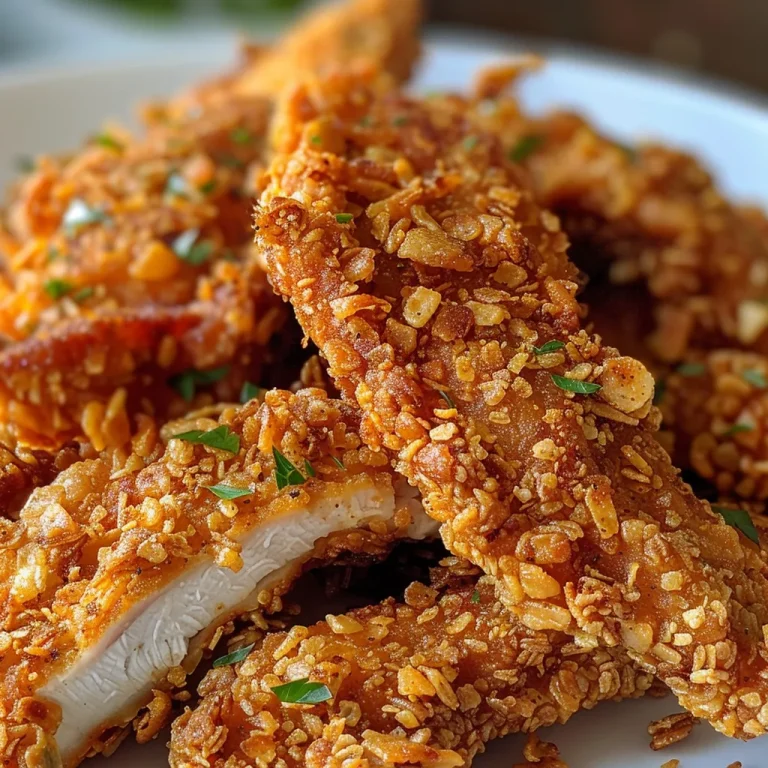
Close-up of golden-brown chicken tenders coated in cornflakes.

Now, let’s dive into the simple steps of making these delicious tenders.

Step 1: Preheat Your Oven

Preheat your oven to 400°F (200°C). This temperature is crucial for achieving that perfect crispiness.

Step 2: Prepare Your Baking Sheet

Line a baking sheet with parchment paper or lightly coat it with cooking spray to prevent sticking.

Step 3: Set Up Your Breading Station

In three bowls, prepare your breading station:

  • In the first bowl, mix the flour with garlic powder, paprika, salt, black pepper, and optional cayenne.
  • In the second bowl, beat the eggs.
  • In the third bowl, pour in the crushed cornflakes.

Step 4: Coat Your Chicken

Take each chicken tender and coat it in the flour mixture, then dip it into the beaten eggs, and finally roll it in the crushed cornflakes. Press down slightly to ensure they adhere well.

Step 5: Arrange on Baking Sheet

Place the coated chicken tenders on the prepared baking sheet, ensuring they are spaced apart for even cooking.

Step 6: Bake Until Perfectly Crisp

Lightly spray the tops of the chicken tenders with cooking spray or drizzle a little vegetable oil over them. Bake in the preheated oven for 20-25 minutes, or until they are golden brown and have reached an internal temperature of 165°F (75°C).

Step 7: Let Them Rest

Allow the tenders to cool for a few minutes before serving. This resting time helps them stay juicy.

Pro Tips for Success

To ensure your chicken tenders turn out perfectly, keep these tips in mind:

  • Use fresh ingredients: Fresh chicken and spices will elevate the flavor.
  • Pound the chicken: For even cooking, you can lightly pound the chicken tenders to an even thickness.
  • Double coat: For extra crunch, consider double-dipping in the egg and cornflakes.
  • Check doneness: Always use a meat thermometer to check that the chicken has reached a safe internal temperature.
  • Let them cool: Allow them to cool slightly before serving to let the coating set.
  • Save leftovers: If you have any leftovers, store them in an airtight container to maintain their crunch.

Common Mistakes and Troubleshooting

Here are a few common pitfalls to avoid:

  • Skipping the flour: Don’t skip the flour coating; it helps the egg wash stick to the chicken.
  • Overcrowding the baking sheet: Give your tenders room to breathe on the baking sheet; overcrowding can lead to steaming instead of crisping.
  • Not preheating the oven: Always preheat your oven to ensure that the tenders cook evenly and get crispy.

Variations to Try

Feel free to switch things up with these tasty variations:

  • Spicy Buffalo Style: Toss the baked tenders in buffalo sauce for a spicy kick.
  • Herb-Infused: Add dried herbs like thyme or oregano to the cornflake mixture for an aromatic twist.
  • Parmesan Crust: Mix grated Parmesan cheese into the cornflakes for added richness.
  • Gluten-Free Option: Substitute the all-purpose flour with almond flour and use gluten-free cornflakes.

Storage and Make-Ahead Instructions

If you’re planning ahead, here’s how to store and prepare your chicken tenders:

To store leftovers, place them in an airtight container in the refrigerator for up to 3 days. Reheat in the oven at 350°F (175°C) for about 10-15 minutes to regain crispiness.

To make ahead, you can bread the chicken tenders and freeze them before baking. Just make sure to freeze them in a single layer before transferring them to a freezer bag. When ready to cook, bake from frozen, adding a few extra minutes to the cooking time.

FAQs About Crunchy Cornflake Chicken Tenders

Here are some frequently asked questions to help you out:

  • Can I use chicken breasts instead of tenders? Yes, just slice them into strips.
  • How do I make them extra crispy? Double-coating or using a higher oven temperature can help achieve more crunch.
  • Can I bake these in an air fryer? Yes, set your air fryer to 400°F and cook for about 10-15 minutes.
  • What dipping sauces pair well? Honey mustard, ranch, or barbecue sauce are great choices!
  • Is this recipe suitable for meal prep? Absolutely! They store well and can be reheated easily.
  • How do I know when they’re done? Check for an internal temperature of 165°F with a meat thermometer.
  • Can I freeze these after cooking? Yes, cooked tenders can be frozen for later use, just reheat them in the oven.
  • Are these tenders gluten-free? You can easily make them gluten-free by using gluten-free flour and cornflakes.

Nutritional Tips and Dietary Adaptations

While these crunch-tastic chicken tenders are a treat, here are a few tips to keep them balanced:

  • Add veggies: Serve with a side of roasted or steamed veggies for a complete meal.
  • Whole grain options: Use whole wheat flour for a healthier breading option.
  • Low-sodium alternatives: Use lower-sodium seasonings and sauces to keep the dish heart-healthy.

Equipment Recommendations

To make your cooking experience smoother, here’s what I recommend:

  • Baking sheet: A sturdy baking sheet is essential for even cooking.
  • Parchment paper: Helps with easy cleanup and prevents sticking.
  • Meat thermometer: To ensure your chicken is cooked perfectly every time.
  • Mixing bowls: A set of medium-sized mixing bowls for your breading station is helpful.

Serving Suggestions

Finally, let’s talk about how to serve these delightful tenders:

  • With a side of fries: Classic comfort food—crispy fries go hand in hand with chicken tenders.
  • In a wrap: Roll them up in a tortilla with lettuce, tomato, and ranch dressing for a quick lunch.
  • As an appetizer: Serve them with a variety of dipping sauces at your next gathering.
  • On a salad: Slice them over a fresh green salad for a hearty meal.

As we wrap this up, I hope you feel inspired to try making these Crunchy Cornflake Chicken Tenders. Cooking should always feel like a warm hug—simple, satisfying, and full of flavor. Grab those ingredients and enjoy a delightful meal that feels like home!
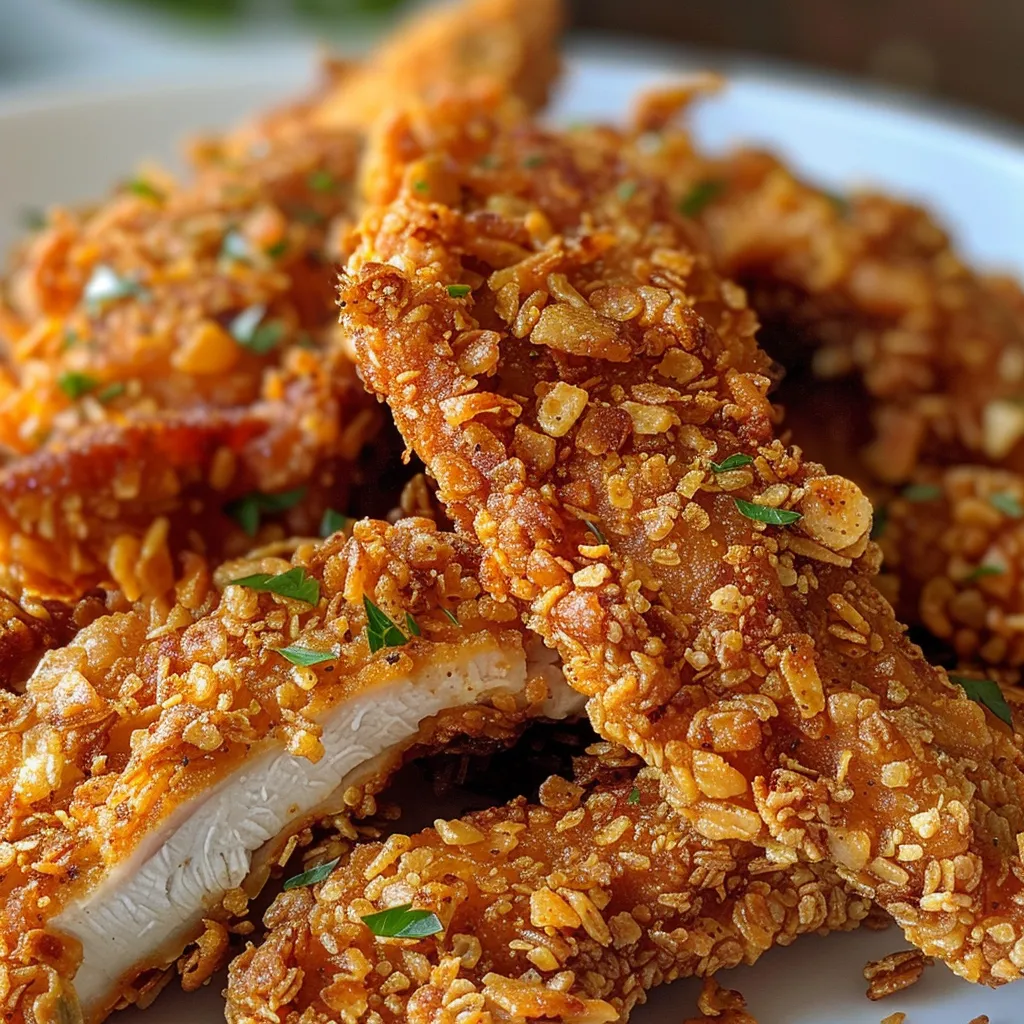
Crunchy Cornflake Chicken Tenders

Prep Time 10 minutes
Cook Time 20 minutes
Total Time 30 minutes
Servings 4 pieces
Calories 350
Enjoy crispy, flavorful chicken tenders coated with crushed cornflakes, baked to perfection for a healthier twist.

Ingredients

Protein

  • 1 lb chicken tenders

Breading

  • 2 cups cornflakes, crushed
  • 0.5 cup all-purpose flour
  • 2 large eggs, beaten
  • 1 teaspoon garlic powder
  • 1 teaspoon paprika
  • 1 teaspoon salt
  • 0.5 teaspoon black pepper
  • 0.25 teaspoon cayenne pepper (optional)

Cooking spray or vegetable oil

  • as needed cooking spray or vegetable oil

Instructions 

  • Preheat oven to 400°F (200°C). Prepare a baking sheet with parchment paper or spray.
  • Mix flour with garlic powder, paprika, salt, black pepper, and cayenne in one bowl. Beat eggs in another. Place crushed cornflakes in a third bowl.
  • Coat each chicken tender in flour mixture, dip in eggs, then roll in crushed cornflakes, pressing to adhere.
  • Arrange tenders on the prepared baking sheet, spaced apart. Lightly spray or drizzle with oil.
  • Bake for 20-25 minutes until golden and internal temperature reaches 165°F (75°C). Cool briefly before serving.
Notes

For extra crunch, press cornflakes firmly onto the chicken.
Calories: 350kcal
Cost: $15
Course: Main Course
Cuisine: American
Keyword: baked, chicken, crunchy

Elevate Your Taco Night with Chicken Taco Lettuce Wraps

When it comes to comfort food, few dishes can compete with the heartwarming, satisfying nature of chicken taco lettuce wraps. These delicious wraps combine the rich flavors of seasoned chicken with the crisp freshness of lettuce, offering a guilt-free way to enjoy your favorite taco night without the carbs of traditional tortillas. Perfect for family gatherings or a cozy evening at home, these wraps are not just a meal; they are a celebration of simple, wholesome ingredients that bring people together.

In this guide, we’ll explore everything you need to know about crafting the best chicken taco lettuce wraps. From ingredients and cooking techniques to variations and serving suggestions, we’ve got you covered. Let’s dive into the world of these lettuce wraps that promise to take your taco night to new heights!

Why You’ll Love This Recipe

  • Low-Carb Delight: Enjoy all the flavors of tacos without the guilt, making it perfect for those on a low-carb diet.
  • Quick and Easy: With just a few simple steps, you can whip up this satisfying meal in under 30 minutes, perfect for busy weeknights.
  • Customizable: Make it your own! Add your favorite toppings or switch up the protein for a new twist.
  • Fresh Ingredients: Packed with veggies like avocado and tomatoes, these wraps are a healthy choice that your body will thank you for.
  • Kid-Friendly: Fun to assemble and eat, making it an enjoyable meal for both kids and adults alike!

Ingredients Breakdown

Here’s what you’ll need to create these delicious chicken taco lettuce wraps:

  • 1 pound chicken breast (Boneless, skinless): The star of the show! Tender and juicy, perfect for grilling or sautéing.
  • 2 tablespoons taco seasoning: Adds a burst of flavor. Feel free to use store-bought or homemade.
  • 2 cloves garlic, minced: Enhances the savory profile of the chicken.
  • 2 tablespoons olive oil: For cooking the chicken, adding richness and moisture.
  • 8 leaves Butter Lettuce: The ideal wrap; soft and pliable with a subtle sweetness.
  • 1 avocado, diced: Creamy and nutritious, a perfect complement to the chicken.
  • 1 tomato, diced: Adds freshness, color, and a bit of acidity.
  • 1/4 cup onion, diced: For an additional crunch and flavor.
  • 1/2 cup cilantro, loosely packed: Brightens up the dish with its fresh flavor.
  • 1/2 cup Greek yogurt or sour cream: Creamy topping that brings everything together. You can also use mayo.
  • 2 tablespoons olive oil: For the creamy sauce.
  • 1 jalapeño (optional): For those who like a little heat!
  • 1 clove garlic, minced: Adds depth to the sauce.
  • Juice of 1/2 lime: Brightens the dish and adds acidity.
  • 1 pinch of salt: Enhances all the flavors.

Step-by-Step Instructions

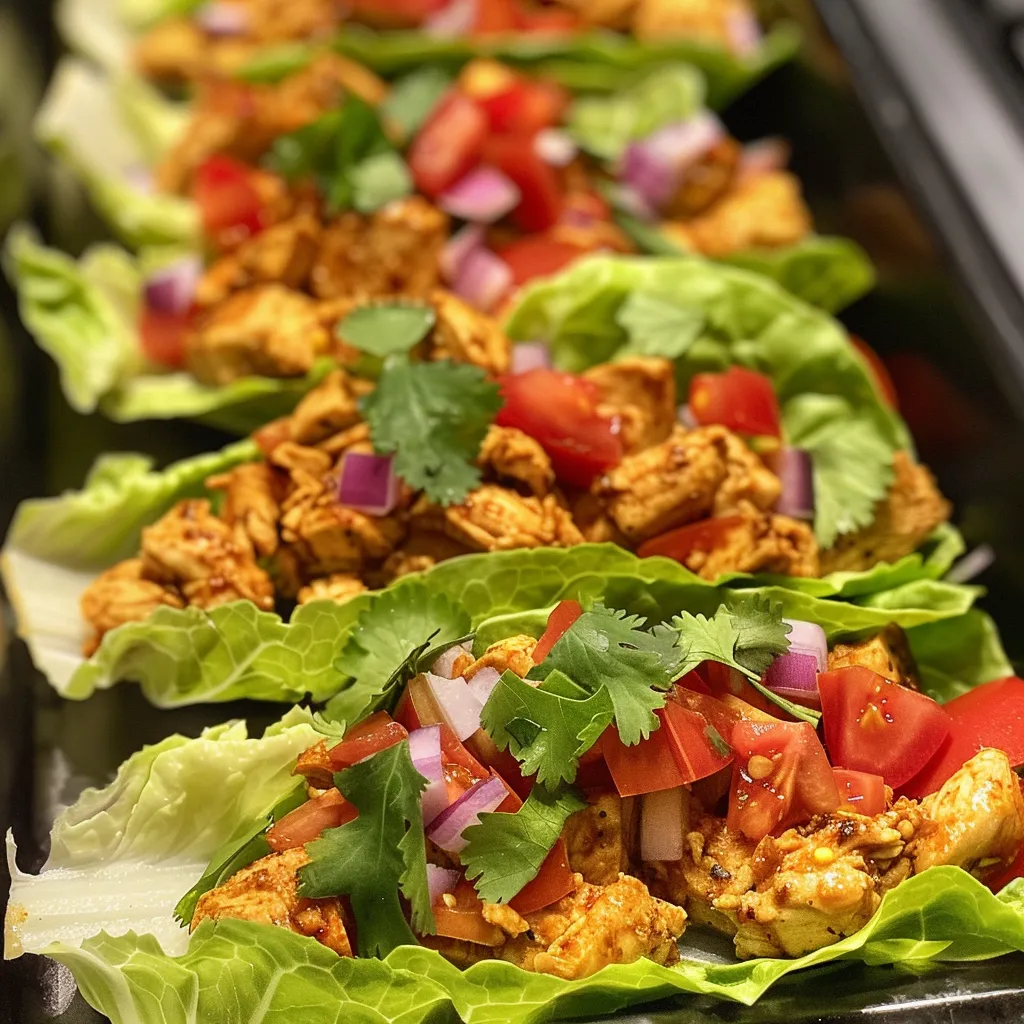
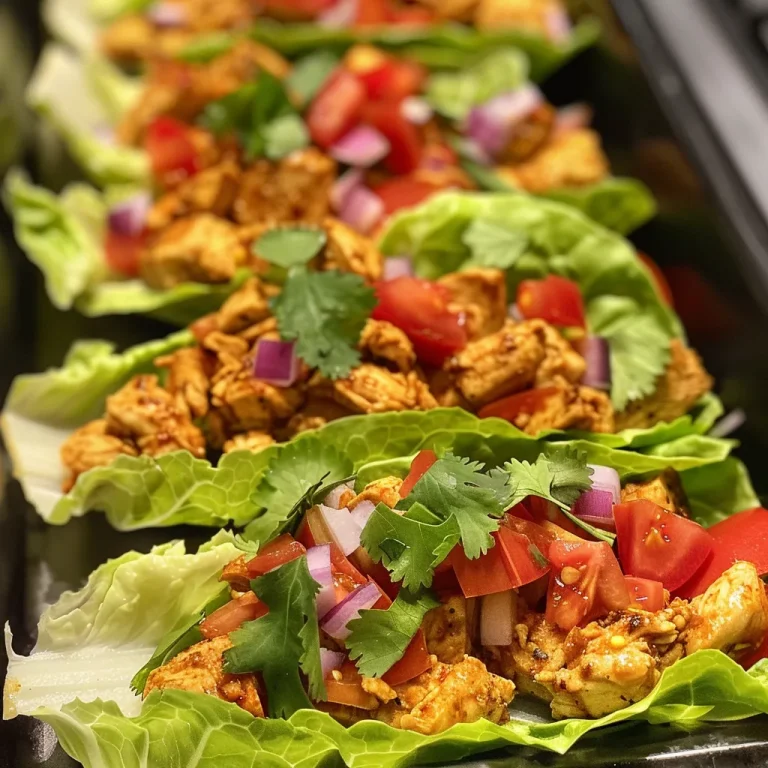
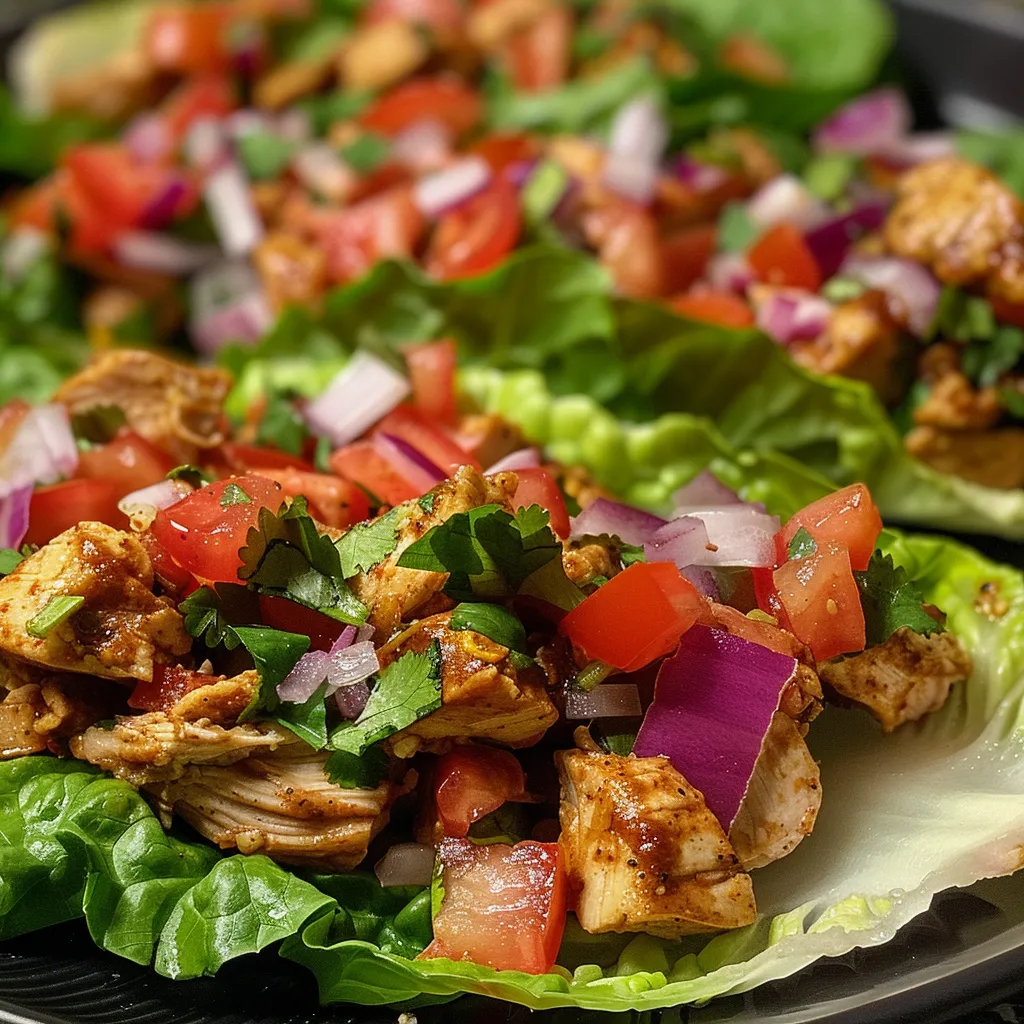
Side angle of chicken taco lettuce wraps filled with seasoned chicken, cilantro, and lime juice.

Ready to start cooking? Follow these straightforward steps to create your chicken taco lettuce wraps:

1. Prepare the Chicken

In a bowl, combine the chicken breast with taco seasoning, minced garlic, and 1 tablespoon of olive oil. Mix well to coat the chicken evenly. Allow it to marinate for at least 15 minutes for maximum flavor.

2. Cook the Chicken

Heat a skillet over medium-high heat and add the remaining tablespoon of olive oil. Once hot, add the marinated chicken. Cook for about 6-7 minutes on each side or until the chicken is no longer pink and reaches an internal temperature of 165°F. Remove from heat and let it rest for a few minutes before slicing into strips.

3. Make the Creamy Sauce

In a small bowl, mix together Greek yogurt (or sour cream), minced garlic, lime juice, and a pinch of salt. Stir until well combined. If you like it spicy, chop some jalapeño and mix it in!

4. Assemble Your Wraps

Take a leaf of butter lettuce and place a few strips of chicken in the center. Top with diced avocado, tomato, onion, and cilantro. Drizzle with the creamy sauce. Fold the lettuce over the filling and enjoy!

Pro Tips for Perfect Chicken Taco Lettuce Wraps

  • Marinate for Flavor: Allow the chicken to marinate longer for deeper flavor penetration—up to an hour if you can!
  • Control the Heat: Adjust the spiciness of the sauce by controlling the jalapeño and adding more or less to suit your taste.
  • Use Fresh Ingredients: Fresh vegetables make all the difference. Opt for ripe avocados and firm tomatoes for the best flavor and texture.
  • Don’t Overcrowd the Pan: Cook the chicken in batches if needed. This helps achieve a nice sear and prevents steaming.
  • Experiment with Ingredients: Feel free to swap out chicken for turkey, beef, or even plant-based proteins and keep the flavors interesting!
  • Make Ahead: Prep the chicken and sauce in advance. Store separately in the fridge for an easy assembly later.
  • Use Various Lettuce Types: While butter lettuce is great, you can also try iceberg or romaine for a different crunch.
  • Garnish Wisely: Consider adding toppings like shredded cheese, fresh lime wedges, or chopped jalapeños for extra flavor.

Common Mistakes and Troubleshooting

Even the best cooks can encounter a few bumps in the road. Here are some common pitfalls and how to avoid them:

  • Overcooked Chicken: Always use a meat thermometer to ensure your chicken is cooked through but not dry.
  • Soggy Wraps: If you’re prepping ahead, store the sauce and toppings separately to keep the lettuce crispy.
  • Bland Flavor: Don’t skimp on seasoning! Taste as you go and adjust flavors as needed.
  • Too Much Filling: Resist the urge to overstuff your wraps. A little filling goes a long way!

Variations to Try

Here are a few variations to keep your chicken taco lettuce wraps exciting:

  • BBQ Chicken Lettuce Wraps: Swap taco seasoning for BBQ sauce and top with coleslaw for a Southern twist.
  • Buffalo Chicken Lettuce Wraps: Use buffalo sauce instead of taco seasoning for a spicy kick. Top with blue cheese crumbles.
  • Vegetarian Option: Replace chicken with roasted chickpeas or grilled portobello mushrooms for a hearty vegetarian meal.
  • Fish Tacos: Use grilled shrimp or white fish seasoned with lime and cilantro for a delightful seafood version.

Storage and Make-Ahead Instructions

If you have leftovers or want to prep in advance, here’s how to store your chicken taco lettuce wraps:

  • Refrigeration: Store cooked chicken in an airtight container for up to 3 days. Keep the sauce and fresh toppings separate to maintain freshness.
  • Freezing: While it’s not ideal for lettuce, you can freeze the cooked chicken for up to 2 months. Thaw and reheat before serving.
  • Prep Ahead: You can marinate the chicken and prepare the sauce a day ahead. Just assemble the wraps when you’re ready to eat!

FAQ: Your Chicken Taco Lettuce Wrap Queries Answered

  • Can I use other types of lettuce? Yes! Iceberg and romaine are excellent alternatives, offering a satisfying crunch.
  • Can I make these wraps vegan? Absolutely! Substitute chicken with tofu or tempeh and use a vegan yogurt for the sauce.
  • How do I make my chicken more flavorful? Marinate the chicken longer and consider adding citrus zest or additional spices.
  • What’s the best way to serve these wraps? Serve with a side of chips and salsa or a fresh salad for a complete meal.
  • Can I prepare the sauce in advance? Yes! The sauce can be made up to 3 days ahead and stored in the fridge.
  • Are these wraps gluten-free? Yes, as long as you use gluten-free taco seasoning!
  • How do I make these wraps spicier? Add diced jalapeños or a splash of hot sauce to the chicken or sauce for an extra kick.
  • What can I serve with these wraps? Consider serving with sides like Mexican corn salad or a refreshing cucumber salad.

Nutritional Tips and Dietary Adaptations

Adapt this recipe to suit various dietary needs:

  • Low-Carb: The use of lettuce instead of tortillas makes this a perfect low-carb option.
  • Dairy-Free: Swap Greek yogurt for a dairy-free alternative or simply omit it for a lighter wrap.
  • Paleo: This recipe is naturally paleo-friendly, just ensure your taco seasoning is compliant.
  • Keto-Friendly: Rich in protein and low in carbs, making it suitable for a keto diet.

Essential Equipment Recommendations

To create the best chicken taco lettuce wraps, consider these essential tools:

  • Non-stick skillet: Ideal for cooking chicken without sticking and easy cleanup.
  • Meat thermometer: Ensures your chicken is perfectly cooked every time.
  • Sharp knife: For precise cutting of vegetables and chicken.
  • Mixing bowls: Necessary for marinating and mixing your ingredients.

Serving Suggestions

Serve your chicken taco lettuce wraps with a variety of sides and garnishes:

  • Fresh Lime Wedges: A squeeze of lime brightens up the flavors.
  • Side Salads: A refreshing salad balances the richness of the wraps.
  • Chips and Salsa: A classic pairing that complements the meal beautifully.
  • Guacamole: A must-have for avocado lovers!

In conclusion, these chicken taco lettuce wraps are not just a meal; they are a heartfelt reminder of the joy of cooking with simple, wholesome ingredients. With their low-carb benefits and endless customization options, they are sure to become a staple in your home. So gather your loved ones, share a laugh, and enjoy the comfort of these delightful wraps together. Happy cooking!

Chicken taco lettuce wraps

Prep Time 15 minutes
Cook Time 10 minutes
Total Time 25 minutes
Servings 4 servings
Calories 350
Enjoy these fresh and flavorful chicken lettuce wraps, perfect for a quick and healthy meal.

Ingredients

Protein

  • 1 pound chicken breast, boneless, skinless
  • 2 tablespoons taco seasoning
  • 2 cloves garlic, minced
  • 2 tablespoons olive oil, divided

Vegetables & Fruits

  • 8 leaves butter lettuce, rinsed
  • 1 diced avocado
  • 1 diced tomato
  • 0.25 cup onion, diced
  • 0.5 cup cilantro, loosely packed
  • 0.5 cup Greek Yogurt or sour-cream or mayo
  • 2 tablespoons olive oil

Spicy & Seasonings

  • 1 optional jalapeno (optional)
  • 1 clove garlic, minced
  • 1 half lime juice of 1/2 lime
  • Pinch pinch salt

Instructions 

  • Season chicken with taco seasoning and minced garlic, then cook in 1 tablespoon olive oil until cooked through.
  • While chicken cooks, prepare toppings: dice avocado and tomato, chop onion and cilantro.
  • Mix Greek yogurt with minced garlic, chopped cilantro, lime juice, and salt to make the sauce.
  • Slice cooked chicken and assemble wraps with lettuce leaves, chicken, vegetables, and sauce.
  • Drizzle with remaining olive oil and serve immediately.

Notes

For extra flavor, add a squeeze of lime or hot sauce.
Calories: 350kcal
Cost: $12
Course: Main Course
Cuisine: Mexican
Keyword: chicken

Welcome to Your New Favorite Comfort Dish

When it comes to comfort food, few things can compare to a hearty One-Pan Garlic Butter Chicken Bowl. This dish brings together the wholesome goodness of tender chicken, vibrant vegetables, and the delightful richness of garlic butter. Whether you’re preparing a cozy family dinner or a quick weeknight meal, this recipe is designed to nourish your body and warm your heart. In this guide, you’ll discover everything you need to know about perfecting this dish, from ingredient selections to cooking techniques and variations.

Why You’ll Love This Recipe

This garlic butter chicken bowl is more than just a meal; it’s a celebration of flavors and textures that come together seamlessly. Here are just a few reasons why you’ll want to make this dish:

  • One-Pan Wonder: Easy cleanup is a bonus! Everything cooks in one pan, making it perfect for busy weeknights.
  • Quick Cooking Time: You can whip this dish up in under an hour, so you won’t be spending all evening in the kitchen.
  • Flavor Explosion: The combination of garlic butter and roasted vegetables creates a symphony of flavors in every bite.
  • Healthy Ingredients: Packed with protein and colorful veggies, this meal is as nutritious as it is delicious.
  • Customizable: Feel free to tweak the recipe with your favorite vegetables or proteins, making it perfect for any palate.

Ingredients for Your One-Pan Garlic Butter Chicken Bowl

Here’s what you’ll need to create this delightful dish:

  • 1 pound chicken breast: You can also use thighs for a juicier texture.
  • 4 cloves garlic, minced: Freshly minced garlic provides an aromatic punch that can’t be beaten.
  • 4 tablespoons butter: This is what makes the dish rich and creamy.
  • 2 tablespoons olive oil: Helps to roast the vegetables to perfection.
  • 3 cups mixed vegetables: Broccoli, bell peppers, and zucchini work wonderfully, but feel free to use what you have on hand.
  • Salt and pepper to taste: Essential for bringing out all the flavors.
  • 1 cup of protein of choice: Options include quinoa, chickpeas, or your favorite beans.

Step-by-Step Instructions: Creating Your One-Pan Garlic Butter Chicken Bowl

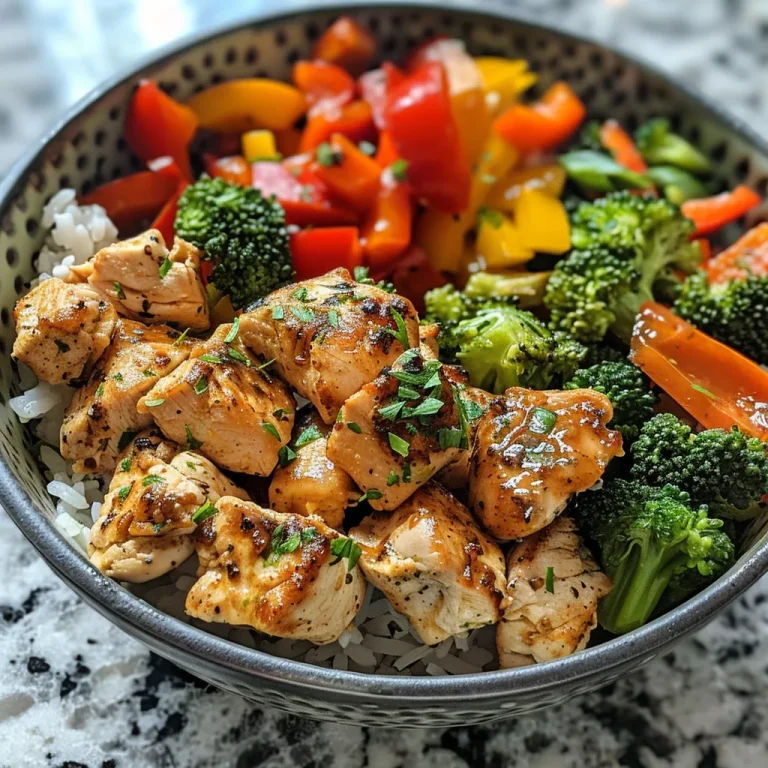
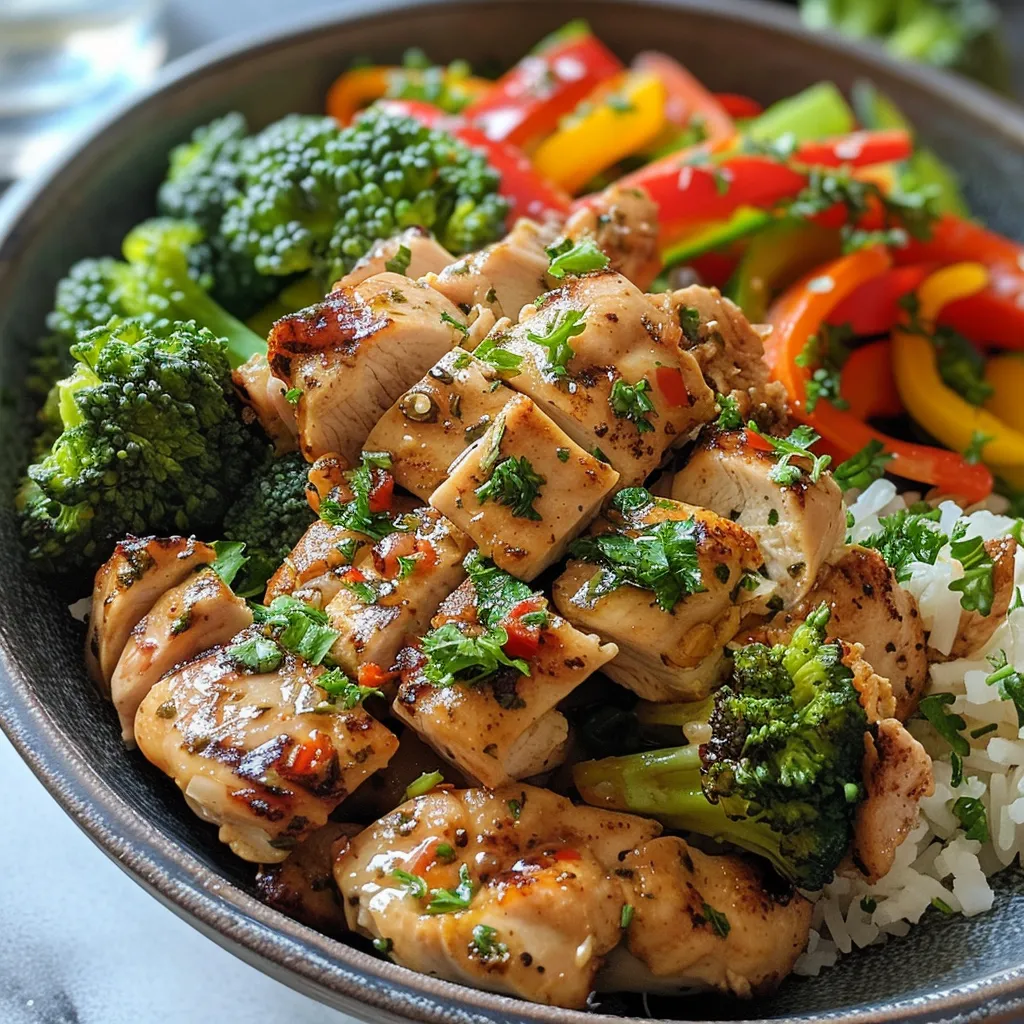
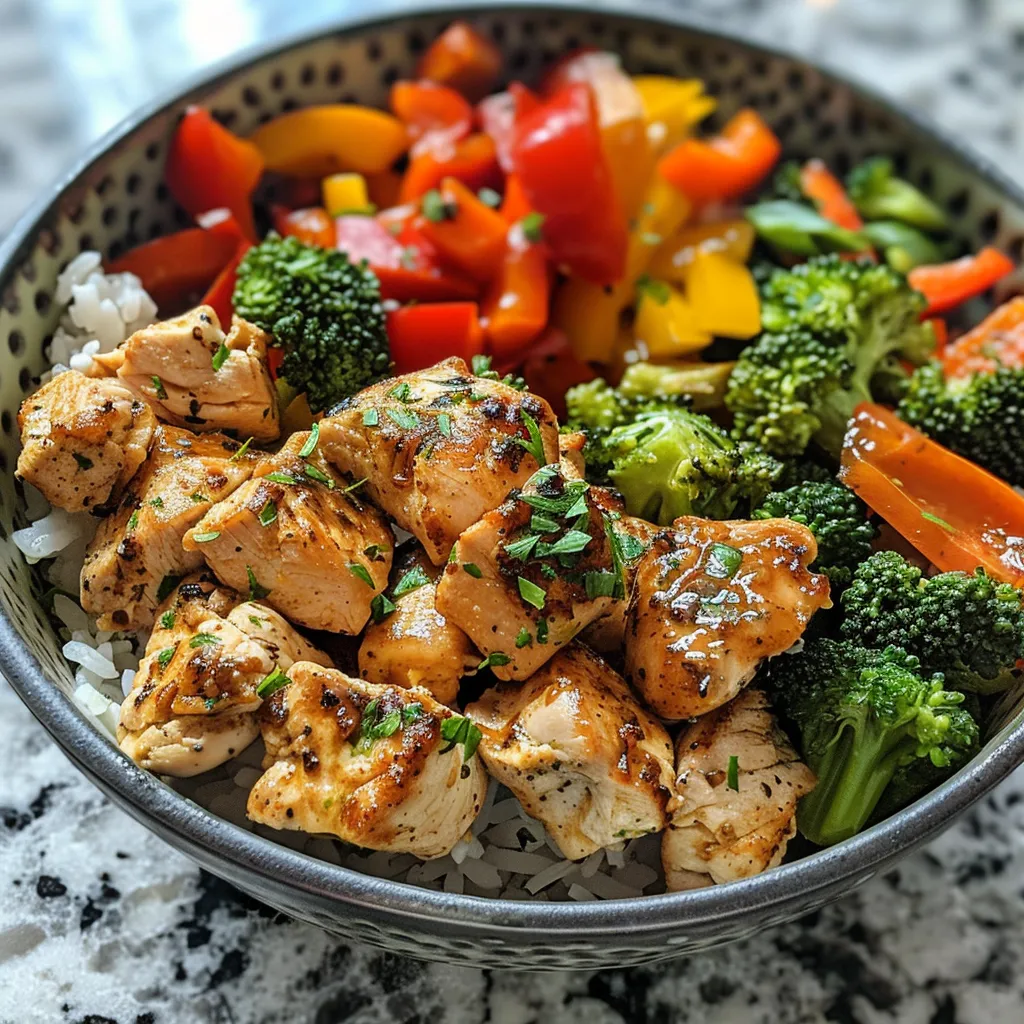
Close-up view of a plated garlic butter chicken bowl showcasing tender chicken and assorted veggies.

Let’s get cooking! Follow these simple steps to create a meal that feels like a warm hug.

Step 1: Preheat Your Oven

Start by preheating your oven to 400°F (200°C). This ensures your vegetables get that beautiful roasted flavor.

Step 2: Prepare the Vegetables

In a large bowl, toss your chopped vegetables with olive oil, salt, and pepper until they’re well-coated. Spread them out on a baking sheet and roast them in the oven for about 20 minutes.

Step 3: Melt the Garlic Butter

While your veggies are roasting, melt the butter in a skillet over medium heat. Once melted, stir in the minced garlic and let it sizzle for about a minute until fragrant.

Step 4: Cook the Chicken

Season the chicken breasts with salt and pepper, then add them to the skillet with the garlic butter. Cook for 6-7 minutes on each side or until the chicken is golden brown and cooked through.

Step 5: Assemble Your Bowl

Once everything is cooked, it’s time to assemble your bowl. Start with a base of your chosen protein, add the roasted vegetables, and top with the garlic butter chicken. Drizzle any remaining garlic butter over the top for that extra flavor!

Pro Tips for the Perfect Garlic Butter Chicken Bowl

To elevate your dish even further, consider these expert tips:

  • Let the Chicken Rest: After cooking, let your chicken sit for a few minutes before slicing. This keeps the juices locked in.
  • Customize Your Veggies: Use whatever seasonal vegetables you love. Carrots, asparagus, or even sweet potatoes can add a delightful twist.
  • Experiment with Spices: Add a pinch of red pepper flakes or smoked paprika to the garlic butter for an extra kick.
  • Go for Fresh Herbs: Finish your bowl with fresh parsley or basil for a burst of freshness.
  • Use Leftover Chicken: This recipe is perfect for repurposing leftover rotisserie chicken. Just add it to the garlic butter to warm through.
  • Don’t Skip the Salt and Pepper: Proper seasoning is key to bringing out the flavors, so don’t hold back!
  • Make it a Meal Prep: Prepare several servings in advance for easy grab-and-go lunches throughout the week.
  • Try Different Proteins: Not in the mood for chicken? Swap it out for shrimp or tofu for a different spin.

Common Mistakes to Avoid

Even with a simple recipe, it’s easy to make a few missteps. Here are some common mistakes to watch out for:

  • Overcooking the Chicken: Keep an eye on your chicken to avoid dryness. Use a meat thermometer to check for doneness (165°F or 75°C).
  • Not Using Fresh Garlic: Garlic powder won’t give you the same depth of flavor. Always opt for fresh when possible.
  • Skipping the Roasting Step: Don’t rush the veggies! Roasting brings out their natural sweetness and enhances the dish.
  • Not Tasting as You Go: Give your dish a taste throughout the cooking process to adjust seasoning to your liking.

Delicious Variations to Try

Feel free to switch things up with these tasty variations:

  • Asian-Inspired Bowl: Add soy sauce, ginger, and sesame oil to your garlic butter, and swap in bok choy and snap peas for a twist.
  • Italian Twist: Incorporate Italian herbs like oregano and basil, and add diced tomatoes and spinach to your veggies.
  • Spicy Southwest Bowl: Use cumin and chili powder in your garlic butter, and serve with corn and black beans.
  • Low-Carb Version: Replace rice and quinoa with cauliflower rice for a lighter option.

Storage and Make-Ahead Instructions

This recipe is perfect for meal prep! Here’s how to store and reheat your garlic butter chicken bowl:

  • Refrigeration: Store leftovers in an airtight container in the fridge for up to 4 days.
  • Freezing: You can freeze the chicken and vegetables in a freezer-safe container for up to 3 months. Thaw in the fridge overnight before reheating.
  • Reheating: Reheat in the microwave or on the stovetop until warmed through. Add a splash of broth if it seems dry.

Frequently Asked Questions

Here are some common questions about the One-Pan Garlic Butter Chicken Bowl:

  • Can I use frozen vegetables? Yes, but adjust the cooking time as they may require longer to cook through.
  • What can I substitute for chicken? Feel free to use turkey, tofu, or any protein you prefer.
  • How do I make it dairy-free? Substitute the butter with a dairy-free alternative like coconut oil or vegan butter.
  • Can I make this in advance? Yes! Prepare everything except for the final assembly, and store separately in the fridge.
  • What’s the best way to serve leftovers? Reheat and serve over fresh cooked rice or quinoa for a quick meal.
  • Can I add nuts or seeds? Absolutely! Toasted almonds or sunflower seeds would add a delightful crunch.
  • How can I make this spicier? Add a pinch of cayenne pepper or red pepper flakes to the garlic butter.
  • What sides go well with this dish? A simple green salad or crusty bread pairs perfectly with the bowl.

Nutrition Tips and Dietary Adaptations

This dish can be easily adapted to fit various dietary needs:

  • Low-Carb: Substitute traditional grains with cauliflower rice or zucchini noodles.
  • High-Protein: Add more chicken or incorporate legumes like lentils or beans for an extra protein boost.
  • Vegetarian: Use tofu or tempeh as the protein and ensure the butter is plant-based.
  • Gluten-Free: This recipe is naturally gluten-free, just ensure any added sauces are also gluten-free.

Essential Equipment for Cooking

Gather these tools to make your cooking experience smooth and enjoyable:

  • Large Skillet: A good quality non-stick skillet is essential for cooking chicken and veggies.
  • Baking Sheet: Use a rimmed baking sheet for roasting your vegetables.
  • Sharp Knife: A sharp knife is crucial for slicing chicken and chopping veggies efficiently.
  • Cutting Board: Have a sturdy cutting board to prep all your ingredients.

Serving Suggestions

To elevate your garlic butter chicken bowl, consider these delightful serving ideas:

  • Garnish with Fresh Herbs: A sprinkle of fresh parsley or cilantro adds a pop of color and freshness.
  • Serve with a Side Salad: A light salad with a vinaigrette complements the richness of the dish.
  • Add a Splash of Lemon Juice: A squeeze of lemon brightens up the flavors beautifully.
  • Pair with Crusty Bread: A slice of warm, crusty bread is perfect for soaking up the delicious garlic butter.

In Conclusion: Your New Go-To Recipe

The One-Pan Garlic Butter Chicken Bowl is more than just a meal; it’s a way to bring your family together around the table. With its rich flavors, simple ingredients, and ease of preparation, this dish is destined to become a staple in your home. Embrace the warmth of cooking and let this recipe be a part of your family traditions, just like it has been in mine. Happy cooking, friends!

Unleash the Power 1-Pan Garlic Butter Chicken Bowl

Prep Time 10 minutes
Cook Time 20 minutes
Total Time 30 minutes
Servings 4 servings
Calories 550
A flavorful and healthy one-pan chicken bowl packed with roasted vegetables and savory garlic butter chicken.

Ingredients

Protein

  • 1 pound Chicken breast
  • 4 cloves Garlic (minced)
  • 4 tablespoons Butter
  • 2 tablespoons Olive oil
  • 3 cups Mixed vegetables (broccoli, bell peppers, zucchini) (chopped)
  • to taste Salt and pepper
  • 1 cup quinoa, chickpeas, etc. (protein of choice)

Instructions 

  • Preheat oven to 400°F (200°C). Toss vegetables with olive oil, salt, and pepper; roast for 20 minutes.
  • Melt butter and mix with minced garlic.
  • Season chicken with salt and pepper, then cook in garlic butter until done.
  • Assemble the bowl with protein, roasted vegetables, and cooked quinoa or chickpeas.

Notes

Feel free to customize the vegetables and protein for variety.
Calories: 550kcal
Cost: $15
Course: Main Course
Cuisine: Fusion
Keyword: chicken, Garlic, Vegetables

The Heart of Comfort Food

Welcome to a culinary journey that brings the family together right at the dinner table! Today, we’re diving into the world of the Chicken Crunch Wrap, a dish that’s not just about satisfying your hunger; it’s about sharing moments and memories. This crispy chicken crunch wrap is a rustic celebration of flavors, where each bite is a reminder of home-cooked goodness. You’ll find it’s easy to make and packed with ingredients that you and your loved ones will adore.

So, whether you’re looking for a quick weeknight dinner or a fun meal to prepare with the kids, this recipe is your ticket to deliciousness. Let’s get started on this journey of crispy perfection!

Why You’ll Love This Recipe

  • Simple Ingredients: With just a handful of staple items, you can create a meal that feels gourmet without breaking the bank.
  • Customizable Flavors: This wrap allows for endless variations—add your favorite veggies or spices to make it uniquely yours.
  • Quick Preparation: In under 30 minutes, this meal can be ready to serve, making it perfect for busy nights.
  • Family-Friendly Meal: Kids love getting involved in the assembly process, and it’s a fun way to get them excited about cooking.
  • Perfect for Leftovers: The wrap is great for meal prep. Make a batch ahead of time and enjoy them throughout the week!

Chicken Crunch Wrap Ingredients

Let’s break down what you’ll need to whip up this delightful wrap:

  • 4 Large Flour Tortillas: These serve as the base of your wrap. Use whole wheat or gluten-free tortillas for a healthier twist.
  • 2 cups Cooked Crispy Chicken, chopped: This is the star of the show. Feel free to use leftover rotisserie chicken or air-fried chicken for that crispy texture.
  • 1 cup Shredded Lettuce: Adds a refreshing crunch. You can substitute with spinach or arugula for a different flavor.
  • 1/2 cup Diced Tomatoes: Fresh and juicy, offering a nice contrast to the other ingredients. Consider using cherry tomatoes for a pop of sweetness.
  • 1 cup Shredded Cheddar Cheese: Melty cheese is a must! Swap with Monterey Jack or Pepper Jack for an extra kick.
  • 1/2 cup Sour Cream: A creamy element that ties all the flavors together. Greek yogurt can stand in for a healthier option.
  • 1/2 cup Nacho Cheese Sauce: For that gooey, indulgent texture. You can also make a homemade cheese sauce if you’re feeling adventurous.
  • 4 Tostada Shells or a handful of Tortilla Chips: Adds the crunch factor! Chips can be used for added texture.
  • 1 tablespoon Olive Oil or Butter: For toasting the wrap golden brown.
  • Optional Hot Sauce to taste: For those who like a bit of heat!

How to Make Chicken Crunch Wrap

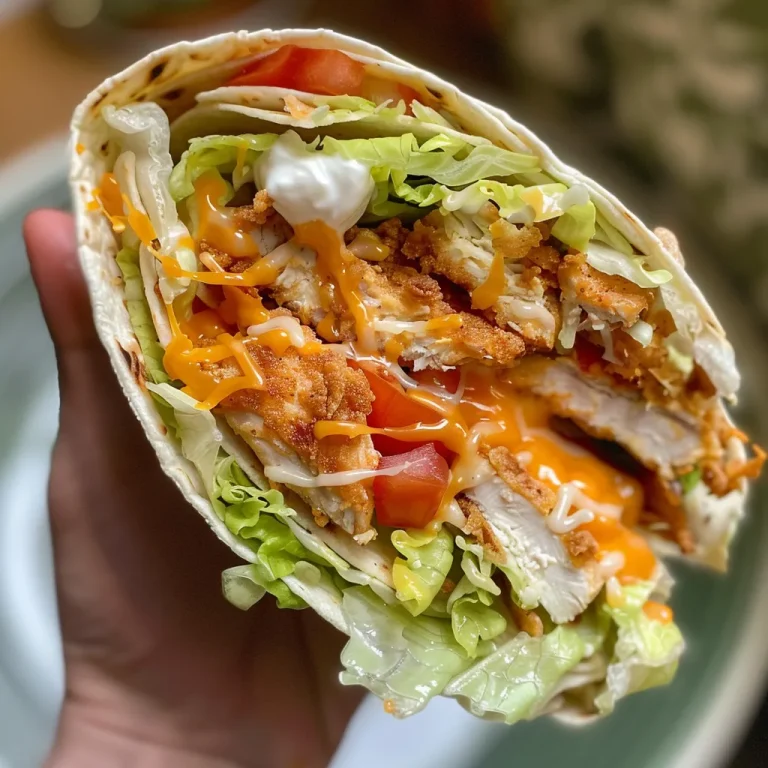
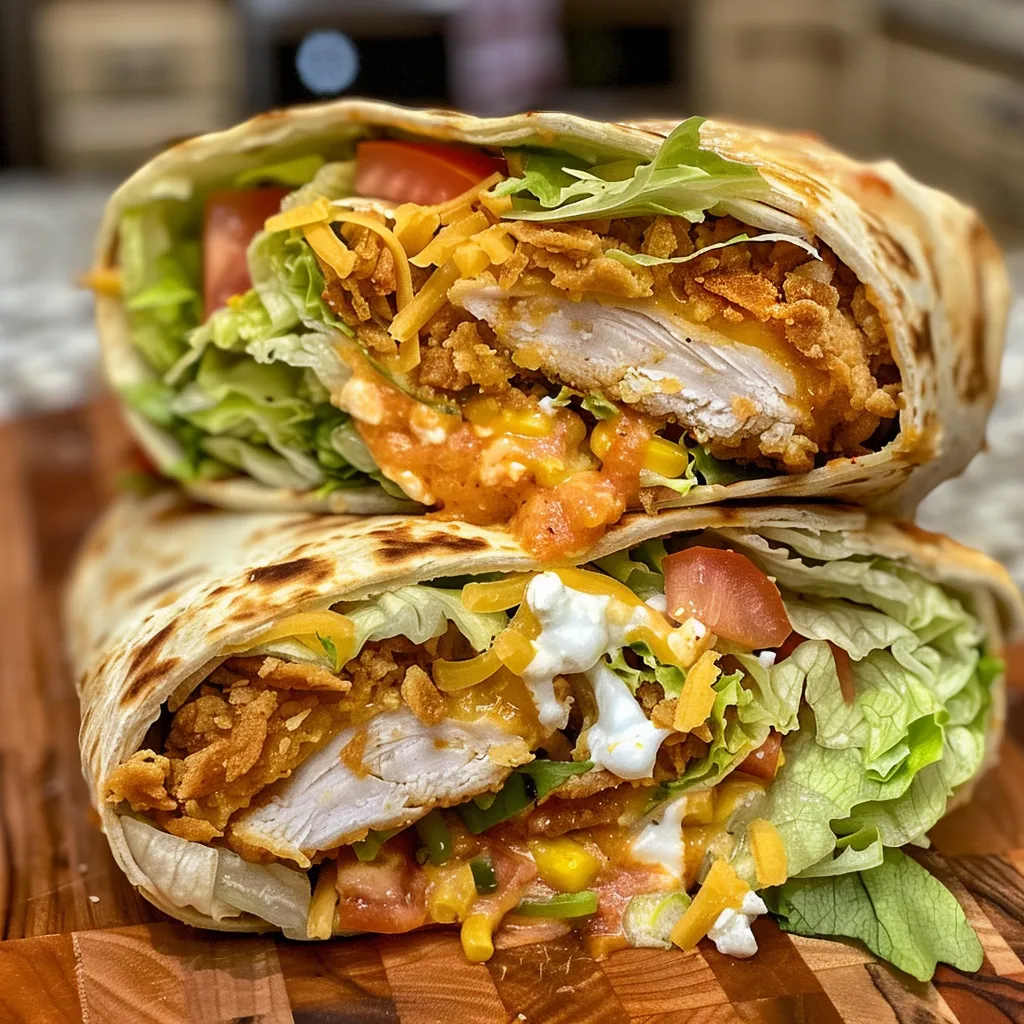
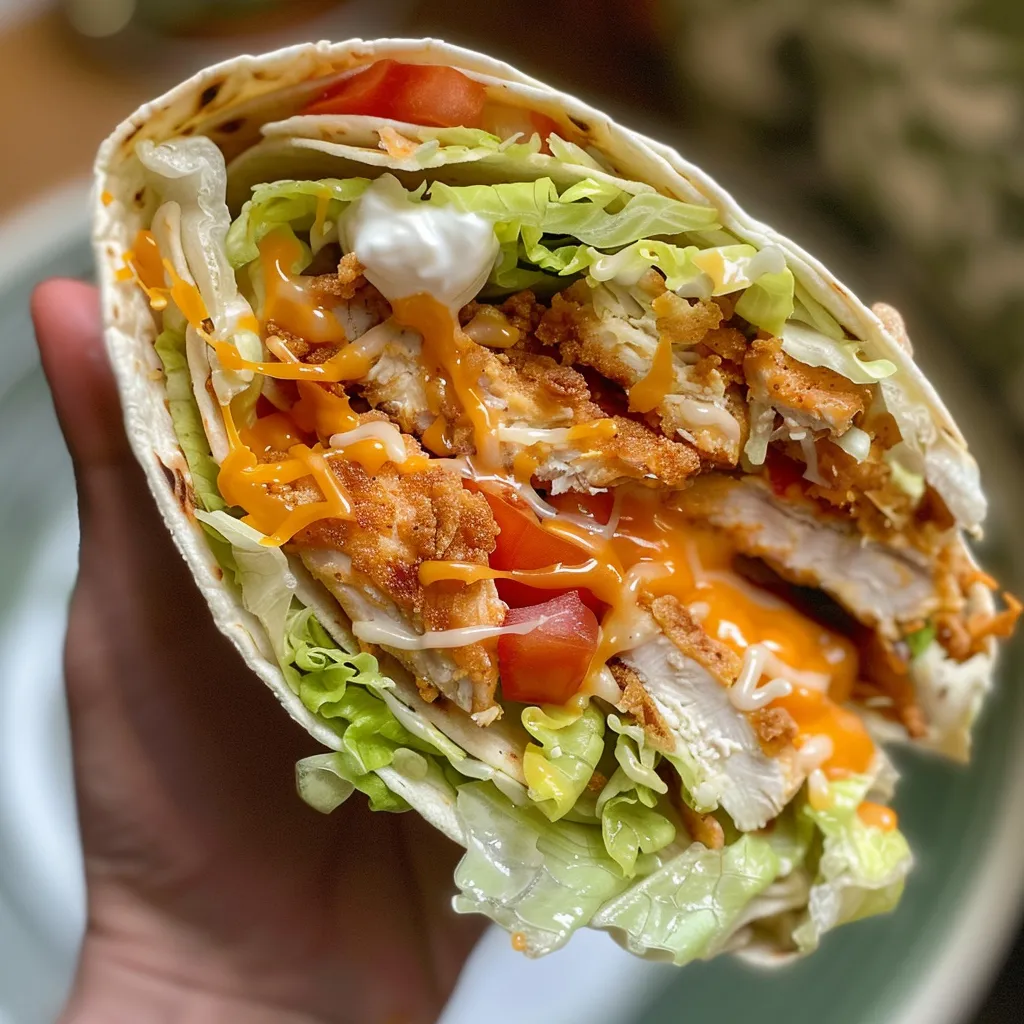
Side view of a juicy chicken crunch wrap showcasing its layered ingredients.

Follow these simple steps to create your own Chicken Crunch Wrap:

  1. Heat a skillet or grill pan over medium heat.
  2. Prep your fillings: chop the chicken, shred the cheese, and dice the tomatoes.
  3. Lightly grease the skillet with olive oil or butter.
  4. Lay one tortilla on a flat surface. In the center, layer nacho cheese sauce, crispy chicken, tostada shell, sour cream, lettuce, tomatoes, and shredded cheese.
  5. Fold the edges over the center in a circular motion to seal the wrap tightly.
  6. Place the wrap seam-side down in the skillet. Toast for 2-3 minutes per side until golden and crispy.
  7. Remove from the pan and let rest for 1 minute before slicing.
  8. Serve hot with your favorite sauces or dips.

Pro Tips for Perfect Results

  • Warming Tortillas: Always warm your tortillas briefly before assembly to prevent tearing.
  • Don’t Overfill: Less is more! Overstuffing can make it hard to seal the wrap properly.
  • Seam-side Down: Start cooking the wrap seam-side down to ensure it stays sealed.
  • Let it Rest: Allowing the wrap to rest for a minute after cooking helps the filling set.
  • Experiment with Fillings: Try adding black beans, corn, or guacamole for an extra flavor boost.
  • Perfect Crunch: For an extra crunch, consider adding some crushed tortilla chips directly into the filling.
  • Use a Heavy Pan: A heavy skillet or press can help achieve a more even crisp.
  • Keep it Warm: If making multiple wraps, keep them warm in a low oven while you finish cooking the rest.

Common Mistakes and Troubleshooting

Even the best cooks can run into issues. Here are some common mistakes and how to avoid them:

  • Wrap Falling Apart: Ensure the sealing is tight and don’t overload the filling.
  • Too Soggy: Use dry ingredients and avoid excess sauces to keep the wrap crispy.
  • Uneven Cooking: Make sure to preheat your skillet adequately for even browning.
  • Burnt Tortillas: Keep an eye on the wrap while it cooks; adjust the heat if needed.

Variations on the Classic

Your Chicken Crunch Wrap can be customized in many delightful ways:

  • BBQ Chicken Crunch Wrap: Use BBQ sauce instead of nacho cheese for a smoky flavor.
  • Vegetarian Crunch Wrap: Substitute chicken with grilled vegetables or chickpeas for a meat-free option.
  • Buffalo Chicken Crunch Wrap: Toss the chicken in buffalo sauce for a spicy twist.
  • Breakfast Crunch Wrap: Fill with scrambled eggs, sausage, and cheese for a hearty breakfast variation.

Storage and Make-Ahead Instructions

Want to prepare your wraps ahead of time? Here’s how:

  • Refrigeration: Store assembled wraps in an airtight container in the fridge for up to 2 days.
  • Freezing: Freeze unassembled wraps by wrapping them tightly in foil. They can last up to 2 months. Thaw before cooking.
  • Reheating: To reheat, place in a skillet over medium heat, covered, until heated through.

FAQ: Common Questions Answered

  • What can I put in a Chicken Crunch Wrap? You can include various fillings such as beans, corn, and other vegetables.
  • How long does a Chicken Crunch Wrap last in the fridge? They can last up to 2 days if stored properly in an airtight container.
  • Can I use corn tortillas instead of flour? Yes, corn tortillas can work, but they may be more fragile.
  • Can I make this wrap gluten-free? Absolutely! Use gluten-free tortillas and check your ingredients for any gluten.
  • What should I serve with these wraps? They pair wonderfully with salsa, guacamole, or a side salad.
  • Can I bake the Chicken Crunch Wrap? Yes! Bake at 400°F for about 10-15 minutes until golden and crispy.
  • How do I make it spicier? Add jalapeños or a spicy sauce to the filling to kick up the heat.
  • Is this wrap kid-friendly? Yes! Kids love to help assemble the wraps and can customize their own.

Nutritional Tips and Dietary Adaptations

For a healthier twist, consider these adaptations:

  • Lower Calorie: Use baked chicken and reduce cheese for a lighter option.
  • High Protein: Incorporate beans or legumes for an extra protein boost.
  • Dairy-Free: Substitute the cheese and sour cream with dairy-free alternatives.

Equipment Recommendations

Here’s what you’ll need to make your Chicken Crunch Wrap:

  • Skillet or Grill Pan: Essential for toasting the wraps to perfection.
  • Spatula: For flipping the wraps easily and safely.
  • Cutting Board: Great for prepping your ingredients.
  • Sharp Knife: To chop your chicken and veggies efficiently.

Serving Suggestions

To enhance your Chicken Crunch Wrap experience, consider pairing it with:

  • Fresh Salsa: A zesty addition that complements the wrap’s flavors.
  • Guacamole: Creamy and rich, it pairs beautifully with the crunch wrap.
  • Side Salad: A light salad can balance the meal and add freshness.

Conclusion: A Wrap to Remember

In the end, this Crispy Chicken Crunch Wrap is more than just a meal; it’s a way to bring your family together, share stories, and create lasting memories around the table. With its simplicity and customization options, you can make it uniquely your own while enjoying the comforts of a classic dish. So gather your loved ones, roll up your sleeves, and dive into the joy of cooking and sharing—because this wrap is destined to become a family favorite!

Crispy Chicken Crunch Wrap

Prep Time 10 minutes
Cook Time 10 minutes
Total Time 20 minutes
Servings 4 servings
Calories 650
A delicious and crispy wrap filled with seasoned chicken, fresh vegetables, and cheesy goodness, perfect for a quick lunch or dinner.

Ingredients

Large Flour Tortillas

  • 2 cups Cooked Crispy Chicken, chopped
  • 1 cup Shredded Lettuce
  • 1/2 cup Diced Tomatoes
  • 1 cup Shredded Cheddar Cheese
  • 1/2 cup Sour Cream
  • 1/2 cup Nacho Cheese Sauce
  • 4 pieces Tostada Shells or Tortilla Chips
  • 1 tablespoon Olive Oil or Butter
  • to taste Hot Sauce (optional) (for serving)

Instructions 

  • Heat a skillet over medium heat and lightly grease with olive oil or butter.
  • Lay a tortilla flat, spread nacho cheese sauce, then add crispy chicken, tostada shell, sour cream, lettuce, tomatoes, and shredded cheese in the center.
  • Fold the edges over the filling to seal the wrap.
  • Place the wrap seam-side down in the skillet and toast for 2-3 minutes per side until golden and crispy.
  • Remove from pan, let rest for 1 minute, then slice and serve hot with optional hot sauce.

Notes

For extra flavor, add your favorite hot sauce or dips.
Calories: 650kcal
Cost: $15
Course: Main Course
Cuisine: American
Keyword: chicken

Welcome to the Sweet and Spicy World of Honey Sriracha Chicken

When it comes to dinner, nothing warms the heart quite like the aroma of a good chicken dish wafting through the kitchen. Today, I’m inviting you into my rustic home to share a cherished recipe that combines the delightful flavors of honey and sriracha. This Honey Garlic Sriracha Chicken is not just a meal; it’s an experience that brings together sweet and spicy notes, making it a favorite at family gatherings and cozy weeknights alike. Let’s dive into the details of this dish that’s sure to spark joy at every dinner table.

Why You’ll Love This Recipe

  • Perfectly Balanced Flavors: The harmony between sweet honey and spicy sriracha creates a sauce that tantalizes your taste buds in every bite.
  • Quick and Easy: With minimal prep time and a cooking duration of just about 30 minutes, you can whip up this dish even on the busiest weeknights.
  • Versatile Protein: While this recipe features chicken breasts, feel free to substitute with chicken thighs, shrimp, or even tofu for a delightful twist.
  • Family Favorite: This dish has a way of bringing everyone together around the table, sparking conversation and creating lasting memories.
  • Make-Ahead Friendly: Prepare the sauce ahead of time and store it in the fridge for a stress-free cooking experience later on.

Ingredients You’ll Need

Gathering your ingredients is the first step in bringing this dish to life. Here’s what you’ll need:

  • 500 grams (1 lb) of chicken breasts: Cut into 1-inch cubes.
  • Salt and black pepper: To season the chicken to your taste.
  • 4 ½ tablespoons cornstarch: This helps achieve a crispy texture.
  • 3 tablespoons peanut oil: For frying; you can substitute with vegetable oil if needed.
  • 1 teaspoon garlic, minced: Adds a fragrant kick.
  • ¼ teaspoon red chili flakes: Optional, for added heat.
  • 2 tablespoons water or chicken broth: To thin the sauce if necessary.
  • 4 tablespoons honey: The star of the show, bringing sweetness.
  • 3 tablespoons sriracha sauce: For that beloved spice.
  • 1 tablespoon light soy sauce: Enhances the overall flavor.
  • 1 tablespoon rice vinegar: Adds a tangy note.
  • 1 teaspoon toasted sesame oil: For a nutty aroma.
  • 2 tablespoons spring onion greens, chopped: A fresh garnish.
  • 2 tablespoons toasted peanuts, crushed: For crunch and flavor.

How to Make Honey Sriracha Chicken

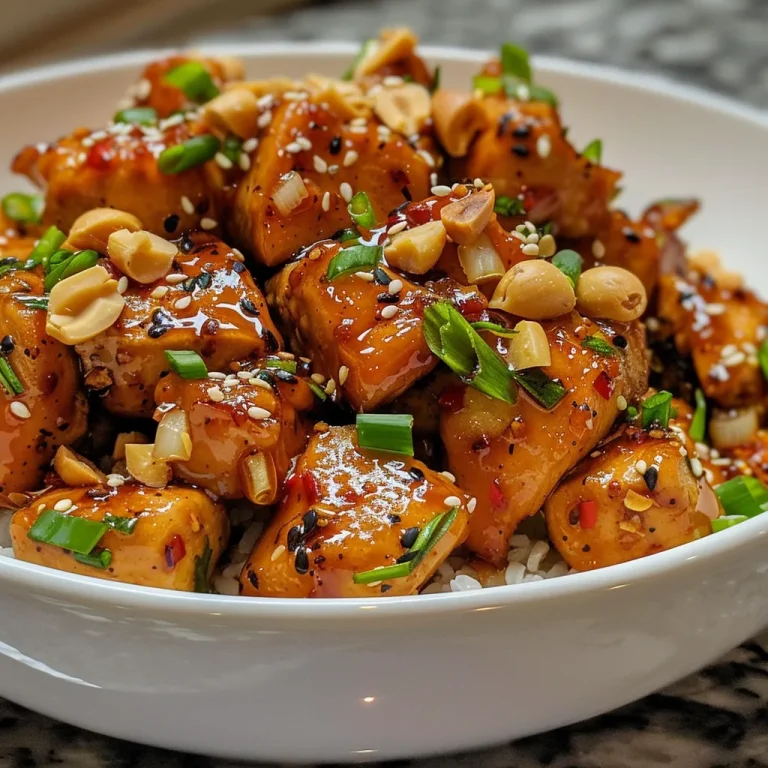
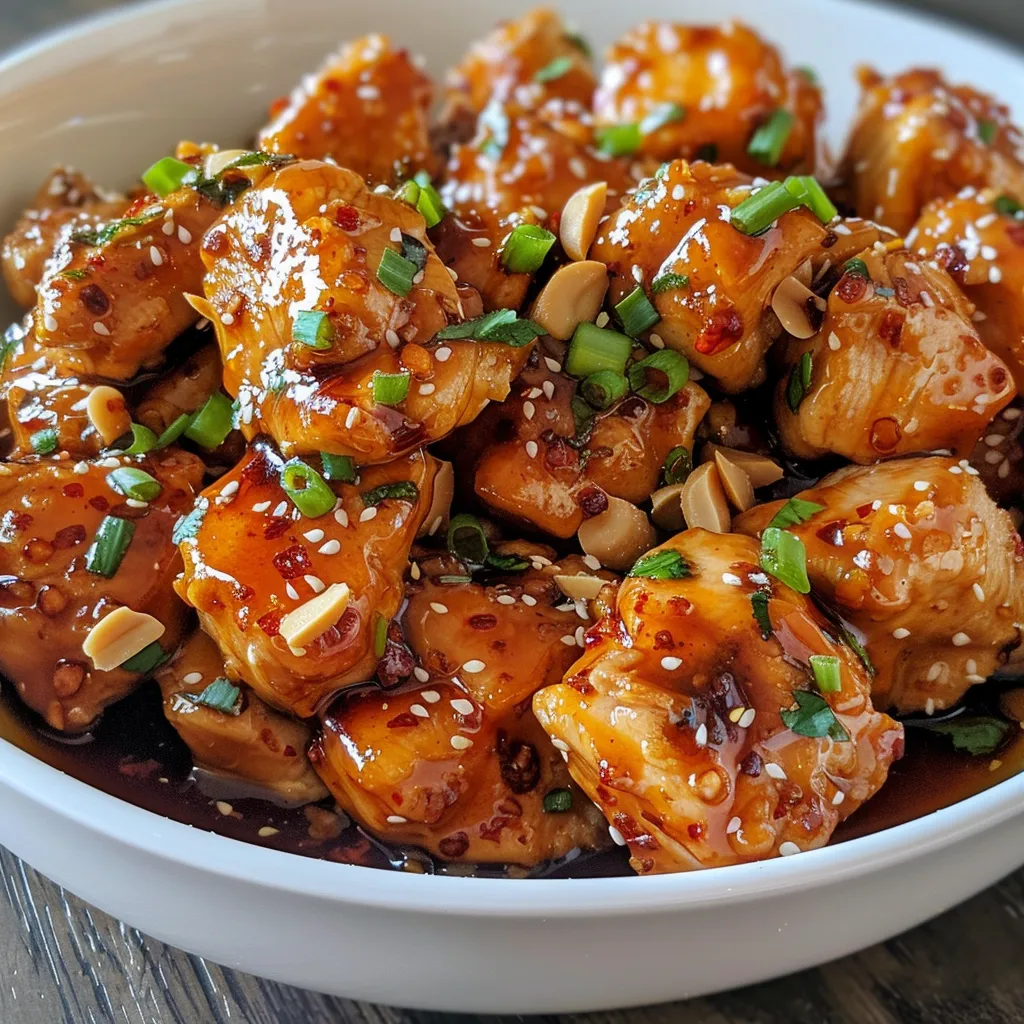
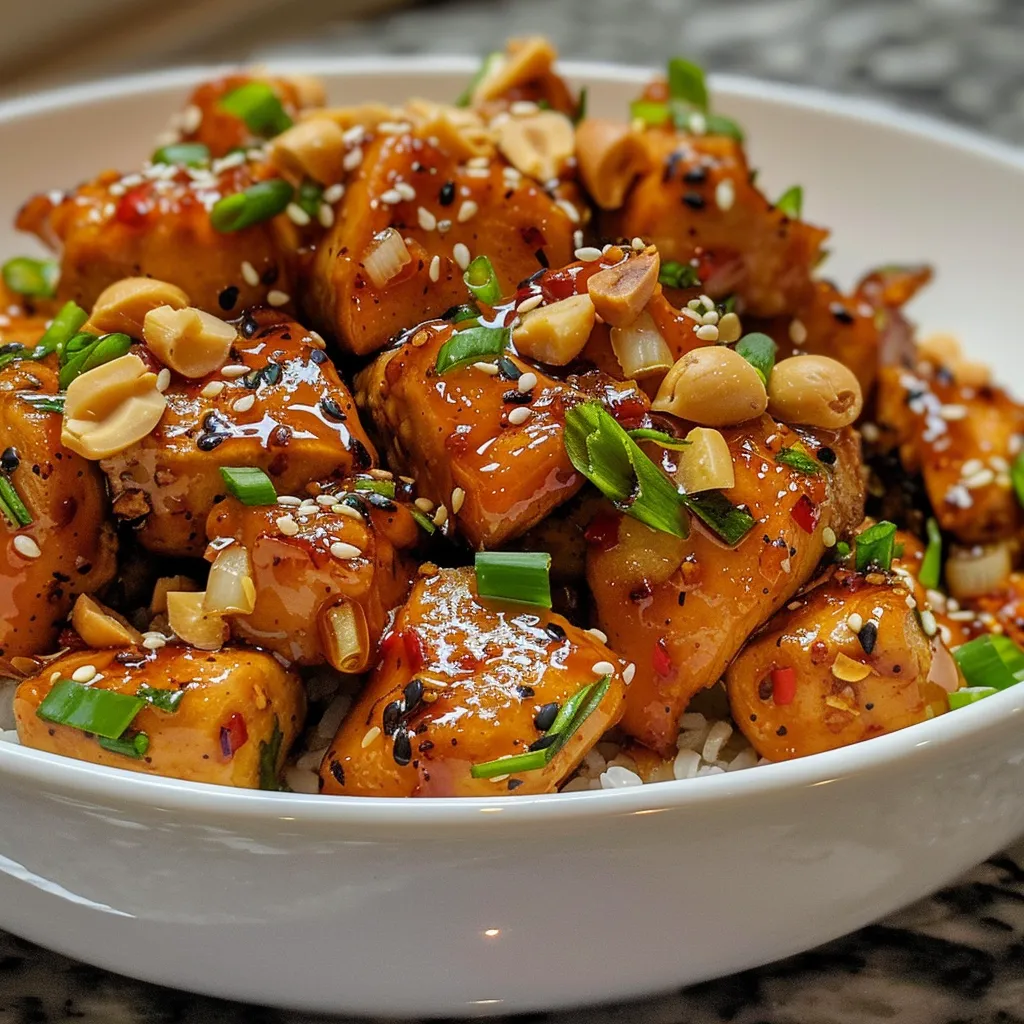
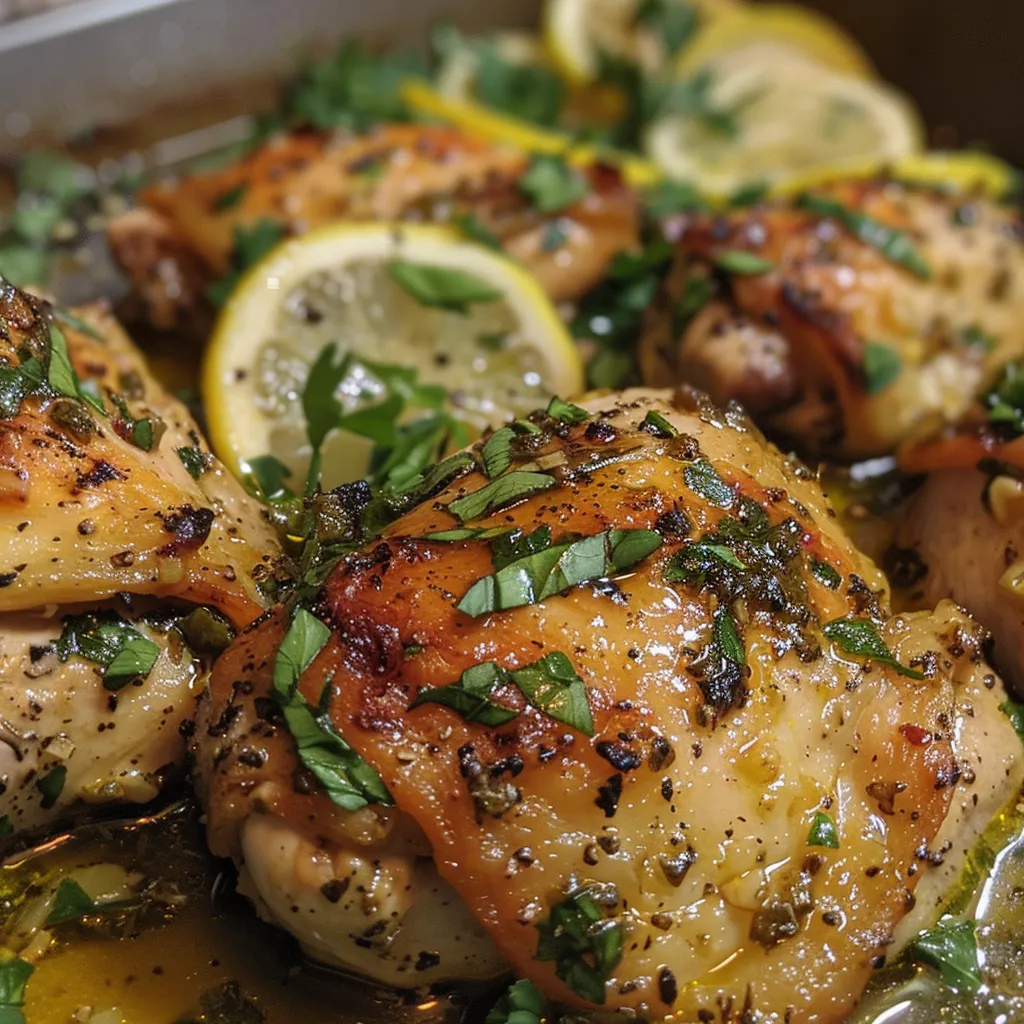
Side view of succulent pieces of Honey Garlic Sriracha Chicken drizzled with sauce and spices.

Now that you’ve gathered your ingredients, let’s move on to the cooking process. Follow these simple steps to create a dish that will become a staple in your home.

Step 1: Prepare Your Ingredients

Start by cutting your chicken into 1-inch cubes and seasoning it with salt and black pepper. Toss it in cornstarch until well-coated; this will give your chicken a delightful crunch.

Step 2: Heat the Oil

In a large skillet or wok, heat the peanut oil over medium-high heat. Once the oil is hot, carefully add the chicken cubes. Cook until golden brown and crispy, about 5-7 minutes. Make sure not to overcrowd the pan; cook in batches if necessary.

Step 3: Create the Sauce

In a separate bowl, combine honey, sriracha, soy sauce, rice vinegar, minced garlic, and a small amount of water or chicken broth. Mix well until smooth.

Step 4: Combine Chicken and Sauce

Once the chicken is cooked, lower the heat and pour the sauce over the chicken. Stir well to coat the chicken evenly and let it simmer for about 5 minutes, allowing the sauce to thicken and adhere to the chicken.

Step 5: Garnish and Serve

Remove from heat and garnish with chopped spring onion greens and crushed peanuts. Serve hot over a bed of rice or alongside steamed vegetables.

Pro Tips for Perfect Honey Sriracha Chicken

  • Adjust the Heat: If you’re sensitive to spice, start with less sriracha and add more to taste.
  • Marinate the Chicken: For deeper flavor, marinate the chicken in the honey sriracha mixture for at least 30 minutes before cooking.
  • Use Fresh Ingredients: Fresh garlic and high-quality honey can elevate the dish significantly.
  • Don’t Skip the Cornstarch: This is key to achieving that crispy texture you desire.
  • Experiment with Vegetables: Adding bell peppers or snap peas during the final cooking stage can enhance both flavor and nutrition.
  • Make It Ahead: You can prepare the sauce a day in advance and store it in the fridge for a quick meal later.
  • Garnish Generously: Fresh herbs and crushed nuts add texture and flavor that make the dish pop.
  • Serve with Sides: Pair with jasmine rice or a simple salad for a full meal.

Common Mistakes and Troubleshooting

Even the best of us can run into a few hiccups in the kitchen. Here are some common issues and how to avoid them:

  • Overcooking the Chicken: Keep an eye on your chicken; overcooked chicken can become dry. Use a meat thermometer to check for doneness (165°F).
  • Too Saucy or Not Saucy Enough: If you find your sauce is too thick, add a splash more water or broth. If it’s too thin, simmer it longer to reduce.
  • Burning the Garlic: Garlic can burn quickly; add it later in the cooking process to avoid a bitter taste.
  • Not Enough Flavor: If you find the dish lacking flavor, consider adding a splash more soy sauce or a pinch of salt.

Variations of Honey Sriracha Chicken

This recipe is wonderfully adaptable. Here are some variations to try:

  • Honey Garlic Sriracha Shrimp: Swap chicken for shrimp and follow the same instructions for a seafood twist.
  • Vegetarian Option: Use tofu instead of chicken, ensuring to press and cube it before cooking.
  • Honey Sriracha Cauliflower: For a vegetarian delight, toss cauliflower florets in the sauce and roast them in the oven.
  • Spicy Honey Sriracha Ribs: For a heartier meal, use pork ribs instead and slow-cook them in the sauce for a tender, flavorful dish.

Storage Solutions

Leftovers? Don’t worry! Here’s how to store and reheat your Honey Sriracha Chicken:

  • Refrigeration: Store in an airtight container in the refrigerator for up to 3 days.
  • Freezing: You can freeze the cooked chicken for up to 2 months. Thaw in the refrigerator before reheating.
  • Reheating: Reheat in the microwave or on the stovetop over low heat, adding a splash of water or broth to keep it moist.

Frequently Asked Questions

  • Can I use frozen chicken? Yes, but make sure to thaw it completely before cooking for even results.
  • Is this dish gluten-free? To make it gluten-free, use gluten-free soy sauce.
  • Can I make this dish in advance? Absolutely! Prepare the sauce beforehand and store it in the fridge.
  • What can I serve with Honey Sriracha Chicken? It pairs wonderfully with rice, noodles, or steamed vegetables.
  • How can I make it spicier? Add more sriracha or incorporate fresh chopped chili peppers into the sauce.
  • What if I don’t have sriracha? You can substitute with another hot sauce, but the flavor will differ.
  • Can I add vegetables to this dish? Yes, bell peppers, broccoli, or snap peas work great!
  • How spicy is this recipe? The spice level can be adjusted based on the amount of sriracha you use.

Nutritional Tips and Dietary Adaptations

With the right ingredients, you can make this dish fit various dietary needs:

  • Low-Carb: Serve over cauliflower rice instead of traditional rice.
  • Dairy-Free: This recipe is naturally dairy-free.
  • High-Protein: Loaded with chicken, this dish is great for a protein-packed meal.
  • Low-Calorie Option: Use less honey and more vinegar for a lighter sauce.

Essential Equipment for Cooking

Ensure you have the right tools for a smooth cooking experience:

  • Large Skillet or Wok: Perfect for frying chicken evenly.
  • Mixing Bowls: For combining ingredients and sauces.
  • Measuring Cups and Spoons: Precision is key when it comes to flavor.
  • Wooden Spoon or Spatula: For stirring and mixing.
  • Meat Thermometer: To ensure your chicken is cooked to perfection.

Serving Suggestions

Present your Honey Sriracha Chicken with style:

  • Over Rice: Serve over jasmine rice for a comforting meal.
  • With Noodles: Toss with noodles and vegetables for a complete stir-fry.
  • On a Bed of Greens: Serve over a fresh salad for a lighter option.
  • Garnished with Fresh Herbs: Top with cilantro or basil for a freshness boost.

Conclusion

Whether you’re cooking for family, friends, or just for yourself, this Honey Garlic Sriracha Chicken recipe beckons with its promise of flavor and comfort. It reminds us that cooking can be simple yet incredibly rewarding. So gather your ingredients, roll up your sleeves, and let the sweet and spicy aroma fill your kitchen. Enjoy the warmth of home-cooked meals and the memories they create. Happy cooking!

Honey Garlic Sriracha Chicken

Prep Time 10 minutes
Cook Time 15 minutes
Total Time 25 minutes
Servings 4 servings
Calories 450
A flavorful and spicy chicken dish with a sweet honey glaze, perfect for a quick and satisfying meal.

Ingredients

Chicken

  • 500 gram chicken breasts (cut into 1 inch cubes)
  • 1 teaspoon garlic minced
  • 0.25 teaspoon red chili flakes
  • 4.5 tablespoon cornstarch
  • 3 tablespoon peanut oil
  • 2 tablespoon water or chicken broth
  • 4 tablespoon honey
  • 3 tablespoon sriracha sauce
  • 1 tablespoon light soy sauce
  • 1 tablespoon rice vinegar
  • 1 teaspoon toasted sesame oil
  • 2 tablespoon spring onion greens chopped
  • 2 tablespoon toasted peanuts crushed

Instructions 

  • Toss chicken cubes with cornstarch until evenly coated.
  • Heat peanut oil in a pan over medium heat and cook chicken until golden and cooked through, about 8-10 minutes.
  • In a bowl, mix honey, sriracha, soy sauce, rice vinegar, garlic, red chili flakes, water, and sesame oil.
  • Pour sauce into the pan with cooked chicken and simmer for 2-3 minutes until thickened.
  • Garnish with chopped spring onions and crushed peanuts before serving.
Notes

Adjust the spice level by varying the amount of sriracha and chili flakes.
Calories: 450kcal
Cost: $12
Course: Main Course
Cuisine: Asian
Keyword: chicken

When it comes to comfort food, few dishes resonate like a warm bowl of pasta. Today, we’re diving into a recipe for High Protein Garlic Parmesan Pasta Bowls, a delightful blend of hearty ingredients that not only satisfies the soul but also nourishes the body. This dish is not just about flavor; it’s about creating memories around the dinner table, just like my family did when I was growing up in the South. With its creamy texture and savory notes, this meal is perfect for a cozy weeknight or a festive gathering. Let’s explore what makes this dish so special.

Why You’ll Love This Recipe

There are countless reasons to fall in love with this garlic parmesan pasta dish, but here are a few that stand out:

  • High Protein Power: Packed with protein from the chickpea or lentil pasta and Greek yogurt, this dish supports muscle recovery and keeps you full longer.
  • Quick & Easy: Ready in just 20-30 minutes, it’s perfect for busy weeknights or last-minute meal prep.
  • Versatile Ingredients: You can easily switch out the chicken for your favorite protein or plant-based option, making it adaptable for any dietary preference.
  • Secretly Healthy: With Greek yogurt in place of heavy cream, this creamy pasta bowl feels indulgent while being lower in fat and calories.
  • Comfort Food Classic: The familiar flavors of garlic and parmesan bring a sense of nostalgia, reminding you of home-cooked meals shared with loved ones.

Ingredients Breakdown and Substitutions

Before we get to the cooking, let’s take a closer look at the ingredients you’ll need for our protein garlic parmesan pasta bowls and some easy substitutions you can make:

  • 4 oz high-protein pasta: You can use chickpea, lentil, or protein-enriched wheat pasta. For a gluten-free option, look for quinoa or brown rice pasta.
  • 4 oz grilled chicken breast, chopped: Feel free to substitute with grilled shrimp, turkey, or even sautéed mushrooms for a vegetarian twist.
  • 1/2 cup plain nonfat Greek yogurt: This is the base for our creamy sauce. If you’re dairy-free, a plant-based yogurt can work as a substitute.
  • 2 tablespoons grated Parmesan cheese: Nutritional yeast can be used for a vegan alternative.
  • 1 tablespoon garlic powder: Fresh minced garlic can be used for a more robust flavor.
  • 1 teaspoon onion powder: This adds depth to the sauce but can be omitted if you prefer a lighter flavor.
  • 1/2 teaspoon salt and black pepper: Adjust to taste based on your preferences.
  • 2 tablespoons low-sodium chicken broth or reserved pasta water: This helps to loosen the sauce. Vegetable broth is a great alternative for vegetarian options.
  • Fresh parsley, chopped (optional): A sprinkle of parsley adds a fresh touch and a pop of color.

Step-by-Step Cooking Instructions

Now, let’s get to the heart of the matter—cooking! Follow these simple steps to create your delicious High Protein Garlic Parmesan Pasta Bowls.

  • Step 1: Cook the Pasta: Cook your high-protein pasta according to the package instructions until al dente. Remember to reserve a few tablespoons of the pasta water before draining.
  • Step 2: Prepare the Garlic Parmesan Sauce: In a small bowl, whisk together Greek yogurt, Parmesan, garlic powder, onion powder, salt, and pepper. Add a bit of chicken broth or pasta water to loosen the sauce until it’s smooth and slightly runny.
  • Step 3: Heat the Chicken: If you’re using pre-cooked chicken, warm it in a skillet or microwave. If starting from raw, simply season and grill or pan-sear until fully cooked, then chop or shred.
  • Step 4: Combine Everything: Add the drained pasta and grilled chicken back into the pot. Pour the garlic Parmesan sauce over the top and stir gently over low heat for 1-2 minutes until everything is warm and creamy.
  • Step 5: Garnish and Serve: Serve in bowls, garnished with chopped parsley and extra Parmesan if desired. Enjoy immediately or let it cool for meal prep!

Pro Tips for Perfect Pasta Bowls

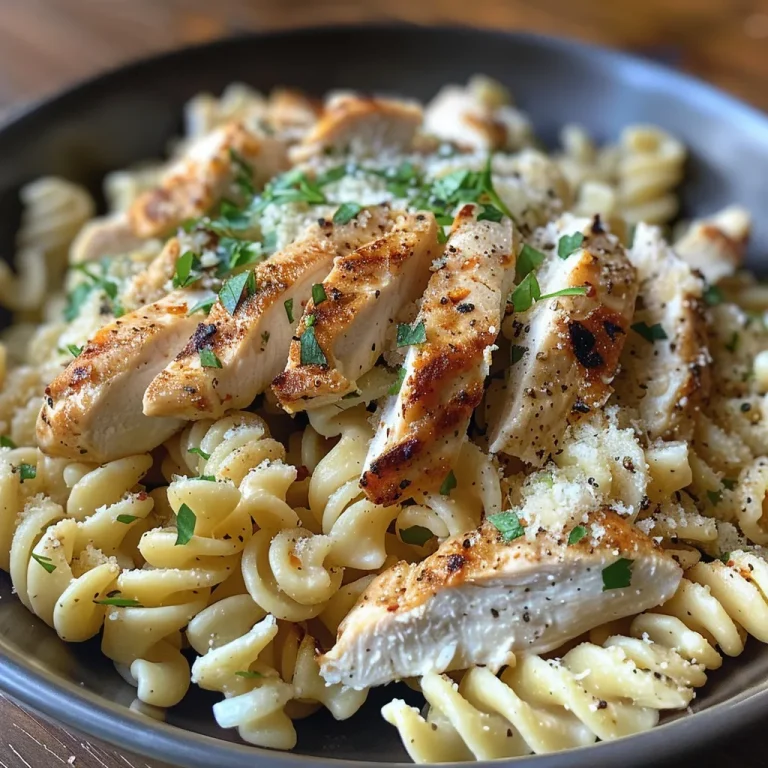
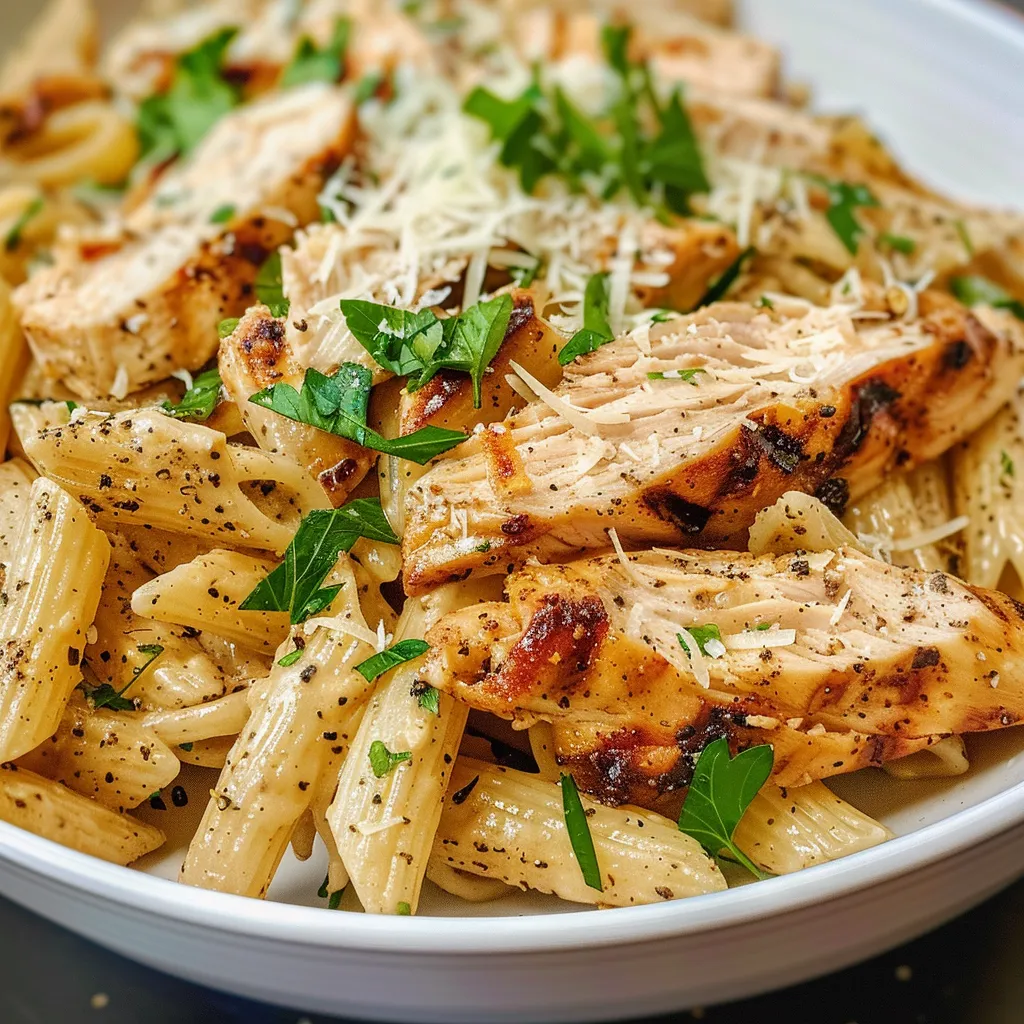
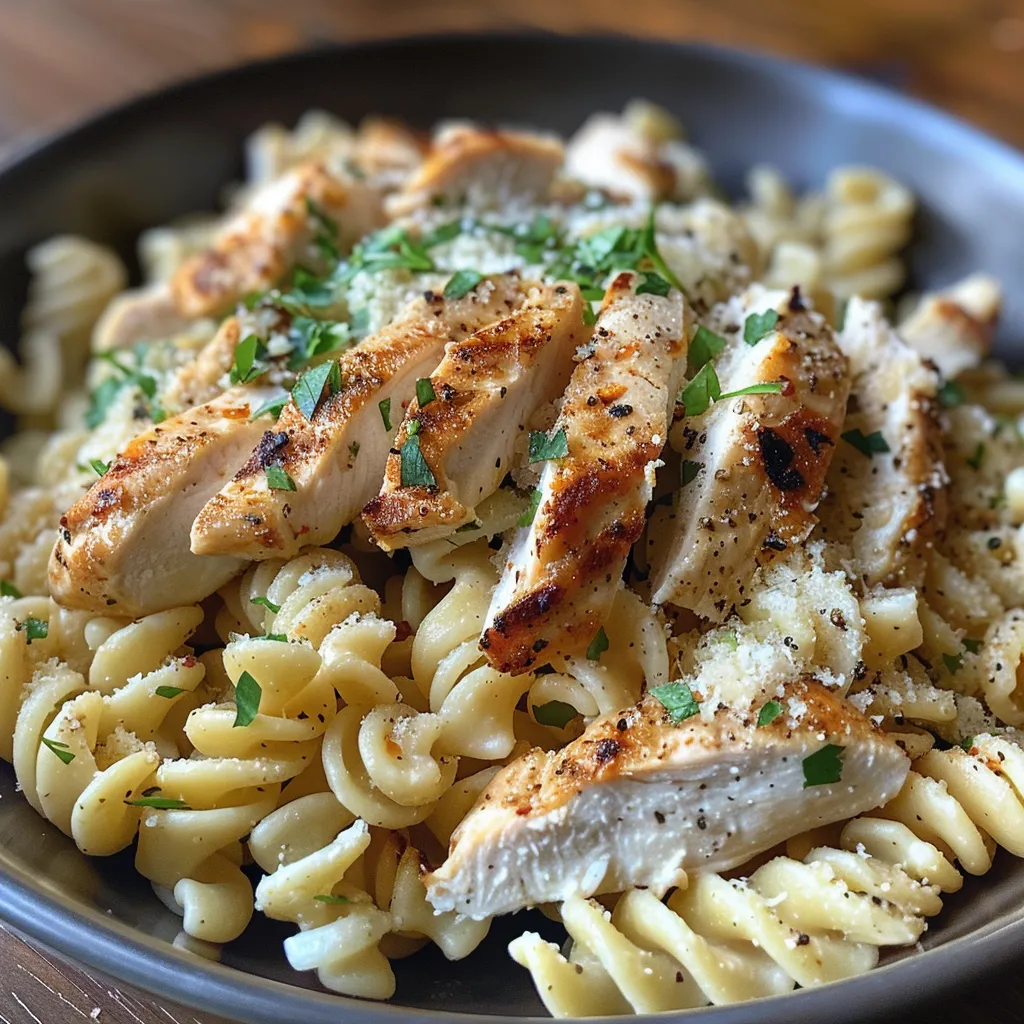
Side view of a delicious pasta bowl featuring high-protein pasta, garlic, and parmesan.

To ensure your pasta bowls turn out perfectly every time, keep these expert tips in mind:

  • Don’t Overcook the Pasta: Aim for al dente to prevent mushy noodles. This helps maintain a delightful texture.
  • Use the Right Heat: Keep the heat low when combining the sauce and pasta to avoid curdling the Greek yogurt.
  • Adjust the Consistency: If the sauce is too thick, add a splash more pasta water or broth until it reaches your desired creaminess.
  • Season as You Go: Taste and adjust salt and pepper at each stage of cooking for the best flavor.
  • Experiment with Add-Ins: Feel free to toss in some veggies like spinach, sun-dried tomatoes, or bell peppers for extra nutrition.
  • Make It a Meal Prep Wonder: This dish keeps well in the fridge for up to 4 days, making it perfect for meal prepping.
  • Pair with a Fresh Salad: Elevate your meal by serving it alongside a simple green salad for added crunch and freshness.
  • Use Quality Ingredients: Investing in good-quality pasta and cheese can make a noticeable difference in flavor.

Common Mistakes and Troubleshooting

Even the best of us can make mistakes in the kitchen. Here are some common pitfalls and how to avoid them:

  • Overcooking the Chicken: This can lead to dry chicken. Keep an eye on it and remove from heat as soon as it’s cooked through.
  • Too Much Heat on the Sauce: High heat can cause the Greek yogurt to curdle. Always keep it low and slow.
  • Skipping the Pasta Water: The starch in the pasta water helps the sauce cling to the pasta. Don’t forget to reserve some!
  • Not Adjusting Seasoning: Always taste as you go! Adjust the seasoning to your personal preference.

Variations on a Classic

While this recipe shines as is, here are a few variations you might enjoy:

  • Italian Herb Chicken: Add Italian seasoning to the chicken for a flavor boost.
  • Mediterranean Style: Incorporate olives, feta cheese, and cherry tomatoes for a Mediterranean twist.
  • Spicy Garlic Pasta: Add red pepper flakes to the sauce for a spicy kick.
  • Veggie Lovers Bowl: Load up with seasonal vegetables like zucchini, asparagus, or broccoli for a colorful and nutritious dish.

Storage and Make-Ahead Instructions

Want to prepare this dish in advance? Here are some tips for storing and reheating:

  • Refrigerate: Store leftover pasta bowls in an airtight container in the fridge for up to 4 days.
  • Freeze for Later: You can freeze the pasta without the sauce for up to 3 months. When ready to reheat, just prepare the sauce fresh.
  • Reheat Gently: When reheating, add a splash of water or broth to loosen the sauce and keep it creamy.

Frequently Asked Questions

Here’s a list of common questions about these High Protein Garlic Parmesan Pasta Bowls:

  • Can I use whole wheat pasta? Absolutely! Whole wheat pasta adds extra fiber and nutrients.
  • Is this dish gluten-free? Yes, just use gluten-free pasta alternatives like chickpea or lentil pasta.
  • Can I add more vegetables? Definitely! Feel free to mix in your favorite veggies.
  • How long does this dish last in the fridge? It can be stored for up to 4 days in an airtight container.
  • Can I meal prep this dish? Yes! It’s perfect for meal prep and keeps well in the fridge.
  • What can I substitute for Greek yogurt? A plant-based yogurt or sour cream can be used as a substitute.
  • Is this dish suitable for kids? Yes! The flavors are mild and appealing to children.
  • Can I make this vegan? Yes, simply use plant-based yogurt and omit the chicken or replace it with tofu or tempeh.

Nutrition Tips and Dietary Adaptations

This recipe is not only delicious but can be modified to fit various dietary needs:

  • Low-Calorie Option: Use less cheese and yogurt to reduce calories.
  • Vegetarian: Swap chicken for extra veggies or plant-based proteins.
  • Higher Fiber: Use whole grain or chickpea pasta for added fiber benefits.
  • Low Sodium: Opt for low-sodium broth and season to taste with herbs instead of salt.

Equipment Recommendations

To make your cooking experience smoother, here’s a list of handy equipment:

  • Large Pot: For cooking the pasta.
  • Skillet: For heating the chicken and combining the sauce.
  • Whisk: For mixing the sauce ingredients smoothly.
  • Measuring Cups and Spoons: Essential for accurate ingredient measurements.

Serving Suggestions

To elevate your dining experience, consider these serving suggestions:

  • Pair with a Salad: A fresh mixed greens salad with vinaigrette complements the richness of the pasta.
  • Serve with Garlic Bread: Nothing beats a side of crispy garlic bread to soak up the creamy sauce!
  • Garnish with Fresh Herbs: A sprinkle of fresh basil or chives can add a nice touch.
  • Wine Pairing: A chilled white wine, such as Sauvignon Blanc, pairs beautifully with the flavors of this dish.

In conclusion, these High Protein Garlic Parmesan Pasta Bowls are a testament to how simple ingredients can come together to create a dish that is not only nourishing but filled with love and tradition. Whether you’re enjoying it alone or sharing with family, this meal is bound to become a favorite. So grab your ingredients, gather around your kitchen, and let’s create something special together! Happy cooking!

High Protein Garlic Parmesan Pasta Bowls

Prep Time 10 minutes
Cook Time 15 minutes
Total Time 25 minutes
Servings 2 servings
Calories 450
A quick and nutritious pasta dish packed with protein, creamy Greek yogurt, and flavorful garlic Parmesan sauce, perfect for a satisfying meal.

Ingredients

Pasta

  • 4 oz high-protein pasta chickpea, lentil, or protein-enriched wheat pasta
  • 4 oz grilled chicken breast, chopped
  • 0.5 cup plain nonfat Greek yogurt
  • 2 tablespoons grated Parmesan cheese
  • 1 tablespoon garlic powder
  • 1 teaspoon onion powder
  • 0.5 teaspoon salt (adjust to taste)
  • 0.5 teaspoon black pepper
  • 2 tablespoons low-sodium chicken broth or reserved pasta water

Garnish

  • Fresh parsley, chopped (optional)

Instructions 

  • Cook the pasta according to package instructions until al dente. Reserve some pasta water, then drain.
  • Whisk Greek yogurt, Parmesan, garlic powder, onion powder, salt, and pepper. Add chicken broth or pasta water to loosen.
  • Warm the cooked chicken in a skillet or microwave.
  • Combine pasta, chicken, and sauce in a pan. Stir gently over low heat until heated through.
  • Serve in bowls, garnished with parsley and extra Parmesan if desired. Enjoy immediately.

Notes

Use reserved pasta water for a creamier sauce and to adjust consistency.
Calories: 450kcal
Cost: $12
Course: Main Course
Cuisine: American
Keyword: Garlic, High-Protein, Parmesan, Pasta

Experience the Comfort of Home with this Chicken Vegetable Rice Skillet

Gather around the table, folks! Today, we’re diving into a dish that’s sure to warm your heart and fill your belly: the One-Pan Chicken Vegetable Rice Skillet. This recipe isn’t just about feeding your hunger; it’s a celebration of wholesome ingredients and the love that goes into cooking. You’ll find it bursting with flavor and easy enough for even the busiest weeknight.

This skillet is perfect for those evenings when you want something hearty without the fuss. With just a handful of ingredients and the magic of one pan, you can create a meal that feels like a warm hug from home. So, roll up your sleeves, and let’s get cookin’!

Why You’ll Love This Recipe

  • Easy Cleanup: With everything cooked in one pan, you’ll spend less time scrubbing dishes and more time enjoying your meal.
  • Deliciously Versatile: This recipe allows for plenty of variations—swap out veggies or proteins based on what’s in season or what you have on hand.
  • Nutritious and Flavorful: Packed with tender chicken, vibrant veggies, and fluffy rice, this dish is a complete meal that nourishes the body and soul.
  • Quick and Simple: In just about 30 minutes, you can have a delicious, hearty meal ready to serve, making it perfect for busy weeknights.
  • Family-Friendly: Kids and adults alike will love the flavors and textures, making it a hit at the dinner table.

The Ingredients Breakdown

Let’s take a closer look at what you’ll need for this delightful skillet meal:

  • 1 lb boneless, skinless chicken thighs or breasts: Choose cuts that cook quickly and remain juicy. Chicken thighs offer a richer flavor, while breasts are leaner.
  • 1 cup long-grain white rice: Rinsed to remove excess starch for fluffier rice. Feel free to substitute with brown rice for a nuttier flavor.
  • 2 cups chicken broth: Opt for low sodium to control salt levels. Homemade broth is best for richness, but store-bought works fine.
  • 1 cup bell peppers: Use a mix of colors for sweetness and visual appeal. Red, yellow, and orange peppers add a lovely pop to the dish.
  • 1 medium onion: Finely chopped to enhance the flavor base.
  • 3 cloves garlic: Minced for that aromatic kick.
  • 1 cup carrots: Diced for sweetness and crunch.
  • 1 cup frozen peas or green beans: Added towards the end for a burst of color and nutrition.
  • 1 tbsp olive oil: For sautéing the veggies and chicken.
  • 1 tbsp smoked paprika: Adds a smoky warmth that elevates the dish.
  • 1 tsp dried thyme or Italian herbs: For a fragrant herbal touch.
  • 1 tsp salt: To taste.
  • 1 tsp freshly ground black pepper: Adds a subtle heat.
  • 2 tbsp fresh parsley or cilantro: Chopped for a fresh finish (optional).

How to Make This Skillet Recipe

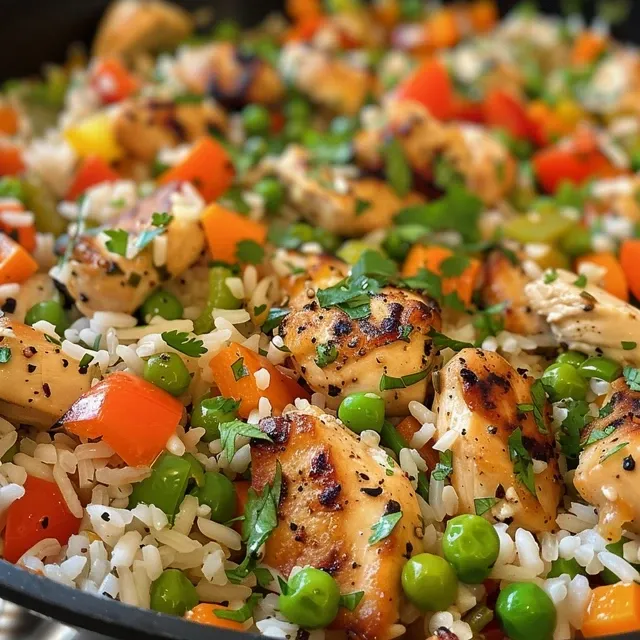
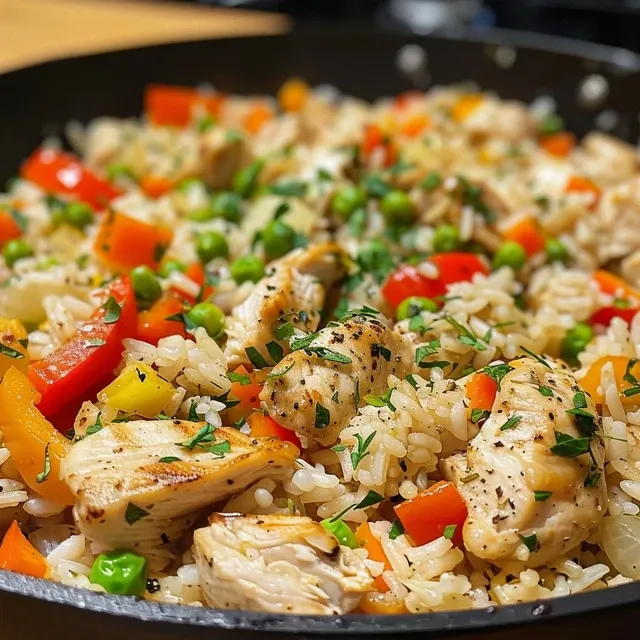
A side view of a delicious chicken and vegetable rice dish, featuring juicy chicken and fresh vegetables.

Now that we have our ingredients ready, let’s get into the cooking steps:

  1. In a large skillet, heat the olive oil over medium heat. Add the chopped onion and garlic, sautéing until they’re fragrant and translucent.
  2. Next, add the chicken to the skillet, seasoning with salt, pepper, and smoked paprika. Cook until the chicken is browned on the outside, about 5-7 minutes.
  3. Stir in the diced carrots and bell peppers, cooking for an additional 3-4 minutes until they soften slightly.
  4. Pour in the rinsed rice and chicken broth, then add the dried thyme. Bring the mixture to a gentle boil.
  5. Once boiling, reduce the heat to low, cover, and let it simmer for about 18-20 minutes, or until the rice is tender and has absorbed most of the broth.
  6. In the last few minutes of cooking, fold in the frozen peas or green beans, allowing them to heat through.
  7. Once cooked, fluff the rice with a fork and sprinkle with fresh parsley or cilantro before serving.
Pro Tips for Perfect Skillet Chicken Vegetable Rice

  • Use Fresh Ingredients: Fresh veggies not only taste better but also enhance the nutritional value of your meal.
  • Don’t Skip the Browning: Browning the chicken adds depth of flavor, so don’t rush this step!
  • Adjust the Liquid: Depending on the type of rice used, you may need to adjust the amount of broth. Brown rice generally requires more liquid and longer cooking time.
  • Let It Rest: Allowing the skillet to rest off the heat for a few minutes helps the flavors meld beautifully.
  • Experiment with Spices: Feel free to add your favorite spices to customize the flavor to your liking.
  • Batch Cooking: Double the recipe for leftovers that can be easily reheated for quick meals throughout the week.
  • Check for Doneness: Make sure the chicken is cooked through (internal temperature of 165°F) and the rice is tender.
  • Make It Creamy: For a creamier texture, stir in a splash of cream or a dollop of sour cream before serving.

Common Mistakes and Troubleshooting

Even the best of us can run into hiccups while cooking. Here’s how to avoid some common pitfalls:

  • Rice is Too Sticky: Make sure to rinse the rice thoroughly before cooking to remove excess starch.
  • Chicken is Dry: Avoid overcooking by monitoring the chicken’s internal temperature.
  • Undercooked Vegetables: Cut vegetables into uniform pieces for even cooking.
  • Too Salty: Use low-sodium broth and adjust salt levels to taste.

Variations to Try

This chicken vegetable rice skillet is incredibly flexible. Here are a few variations to consider:

  • Spicy Kick: Add red pepper flakes or a diced jalapeño for some heat.
  • Creamy Mushroom Delight: Stir in sliced mushrooms and a splash of cream for a rich, earthy flavor.
  • Southwestern Twist: Incorporate black beans, corn, and a sprinkle of cumin or taco seasoning.
  • Herb Infusion: Use fresh herbs like basil or dill for a fresh twist on the classic flavors.

Storage and Make-Ahead Instructions

Got leftovers? Here’s how to store and reheat your skillet:

  • In the Fridge: Store in an airtight container for up to 3 days.
  • Freezing: This dish can be frozen for up to 2 months. To reheat, thaw in the fridge overnight and then warm on the stove.
  • Make Ahead: Prep the ingredients in advance and store them separately to simplify your cooking process on busy nights.

Frequently Asked Questions

  • Can I use brown rice instead of white? Yes, but adjust the cooking time and liquid accordingly.
  • What can I substitute for chicken? Tofu or chickpeas are great vegetarian alternatives.
  • How do I make it dairy-free? This recipe is naturally dairy-free, but ensure any added ingredients are also dairy-free.
  • Can I double the recipe? Absolutely! Just ensure your skillet is large enough to accommodate the extra ingredients.
  • What other veggies can I add? Feel free to include zucchini, broccoli, or spinach, depending on what you have on hand.
  • Is this recipe gluten-free? Yes, as long as you use gluten-free chicken broth.
  • How can I make it spicier? Add more spices or a hot sauce of your choice.
  • Can it be made in advance? Yes, follow the make-ahead instructions for best results.

Nutritional Tips and Dietary Adaptations

This recipe can easily be adapted to fit various dietary needs:

  • Low-Carb Option: Swap rice for cauliflower rice for a low-carb alternative.
  • Protein Boost: Add beans or lentils to increase the protein content.
  • Vegetarian Version: Use vegetable broth and replace chicken with hearty vegetables or plant-based proteins.

Equipment Recommendations

To create this one-pan wonder, you’ll need:

  • Large Skillet: A sturdy skillet with a lid is essential for even cooking.
  • Wooden Spoon: For stirring and mixing ingredients without scratching your pan.
  • Meat Thermometer: To ensure chicken reaches the safe temperature of 165°F.

Serving Suggestions

Complete your meal by serving this chicken vegetable rice skillet with:

  • Fresh Salad: A simple green salad to add crunch and freshness.
  • Crusty Bread: Perfect for soaking up the delicious flavors.
  • Pickled Veggies: A tangy side that complements the richness of the skillet.

Conclusion

There you have it, friends! A hearty and wholesome One-Pan Chicken Vegetable Rice Skillet that not only fills bellies but warms hearts. This dish is a beautiful reminder that cooking can be simple, satisfying, and full of love. So gather your family, share some stories, and enjoy a meal that embodies the spirit of home cooking. Happy cooking, y’all!

Easy Chicken Vegetable Rice Skillet That Bursts With Flavor

Prep Time 10 minutes
Cook Time 20 minutes
Total Time 30 minutes
Servings 4 servings
Calories 450
This flavorful chicken and vegetable rice skillet is quick to prepare and perfect for a satisfying meal packed with vibrant flavors.

Ingredients

Protein

  • 1 lb boneless, skinless chicken thighs or breasts (Choose for quick cooking)
  • 1 cup long-grain white rice (Rinsed)
  • 2 cups chicken broth (Use low sodium)
  • 1 cup bell peppers (Colorful and sweet)
  • 1 medium onion (Finely chopped)
  • 3 cloves garlic (Minced)
  • 1 cup carrots (Diced)
  • 1 cup frozen peas or green beans (Added at the end)
  • 1 tbsp olive oil (For sautéing)
  • 1 tbsp smoked paprika (Adds smoky warmth)
  • 1 tsp dried thyme or Italian herbs
  • 1 tsp salt (To taste)
  • 1 tsp black pepper (To taste)
  • 2 tbsp fresh parsley or cilantro (Chopped, optional)

Instructions 

  • Heat olive oil in a large skillet over medium heat. Add chicken and cook until browned, about 5 minutes.
  • Add chopped onion, garlic, and bell peppers; sauté until fragrant and vegetables are tender, about 3-4 minutes.
  • Stir in smoked paprika, thyme, salt, and pepper. Add rice and chicken broth; bring to a boil.
  • Reduce heat, cover, and simmer for 15 minutes. Add carrots and frozen peas; cook for another 5 minutes until rice is tender.
  • Garnish with chopped parsley or cilantro before serving.

Notes

For extra flavor, let the dish rest for a few minutes before serving.
Calories: 450kcal
Cost: $15
Course: Main Course
Cuisine: American
Keyword: chicken, rice, Vegetables

Welcome to Comfort Food Heaven

Nothing brings a smile to your face quite like a steaming bowl of creamy broccoli and chicken penne. This dish is more than just a meal; it’s a celebration of simple ingredients coming together to create warmth and joy. Whether it’s a busy weeknight or a cozy family gathering, this recipe transforms everyday moments into something special. With its rich flavors and comforting texture, you’ll find that making dinner can be as much about love as it is about the food itself.

Why You’ll Love This Creamy Broccoli and Chicken Penne

  • Quick and Easy: With a cook time of approximately 30 minutes, you can whip up this dish even on your busiest days.
  • Nutritious and Delicious: Packed with broccoli and lean chicken, this recipe ensures a healthy meal that doesn’t skimp on flavor.
  • Comforting and Satisfying: The creamy sauce enveloping the penne provides a hearty feel that warms you from the inside out.
  • Versatile Ingredients: Feel free to swap out proteins or veggies based on what you have on hand, making it adaptable to your pantry staples.
  • Kid-Friendly: With its mild flavors and creamy texture, this dish is sure to please even the pickiest eaters.

Ingredients Breakdown

To create the magic of creamy broccoli and chicken penne, let’s gather the following ingredients:

  • 8 oz Penne Pasta: The backbone of this dish, cooking to al dente ensures the perfect bite.
  • 2 cups Broccoli Florets: These add vibrant color and nutrients; feel free to swap with cauliflower or spinach for variety.
  • 1 lb Boneless, Skinless Chicken Breast: A lean protein that can also be replaced with turkey or shrimp if you prefer.
  • 1 tbsp Olive Oil: Essential for sautéing; it adds a lovely flavor while keeping the chicken moist.
  • 3 cloves Garlic: Minced for a punch of flavor; you can adjust this based on your love for garlic.
  • 1 cup Heavy Cream: It’s the star of the sauce—substitutes like half-and-half or Greek yogurt can be used for lighter options.
  • 1/2 cup Grated Parmesan Cheese: This adds a rich, cheesy flavor; nutritional yeast is a great vegan alternative.
  • Salt and Pepper: Always adjust to enhance flavors; seasoning is key to a delicious dish.
  • 1 tsp Italian Seasoning: Optional but recommended for an extra layer of flavor.
  • 2 tbsp Fresh Parsley: Chopped, it adds freshness and a pop of color for presentation.

How to Make Creamy Broccoli and Chicken Penne

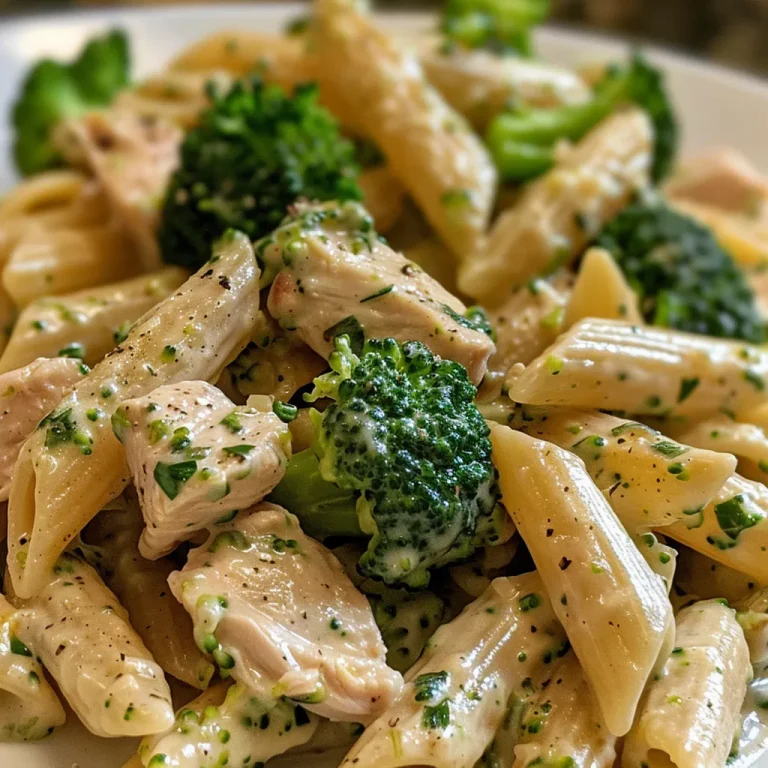
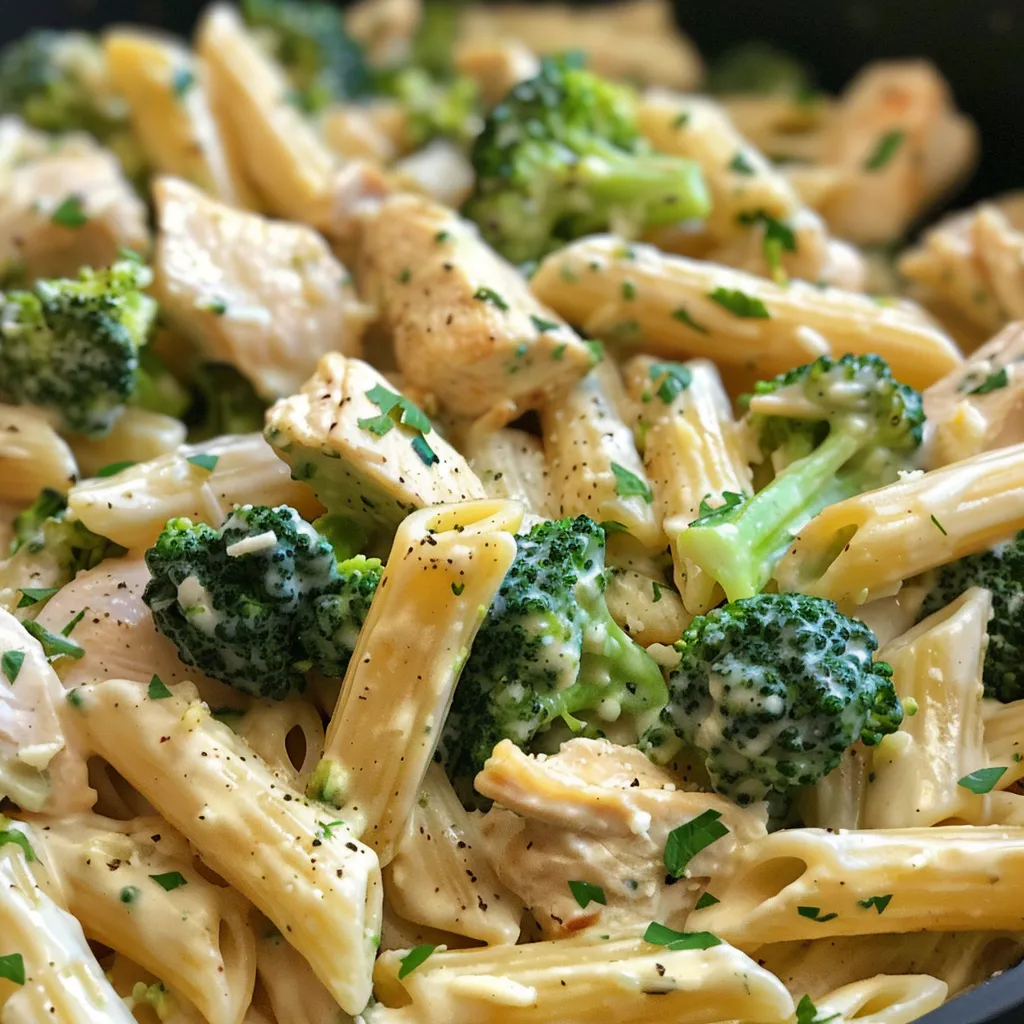
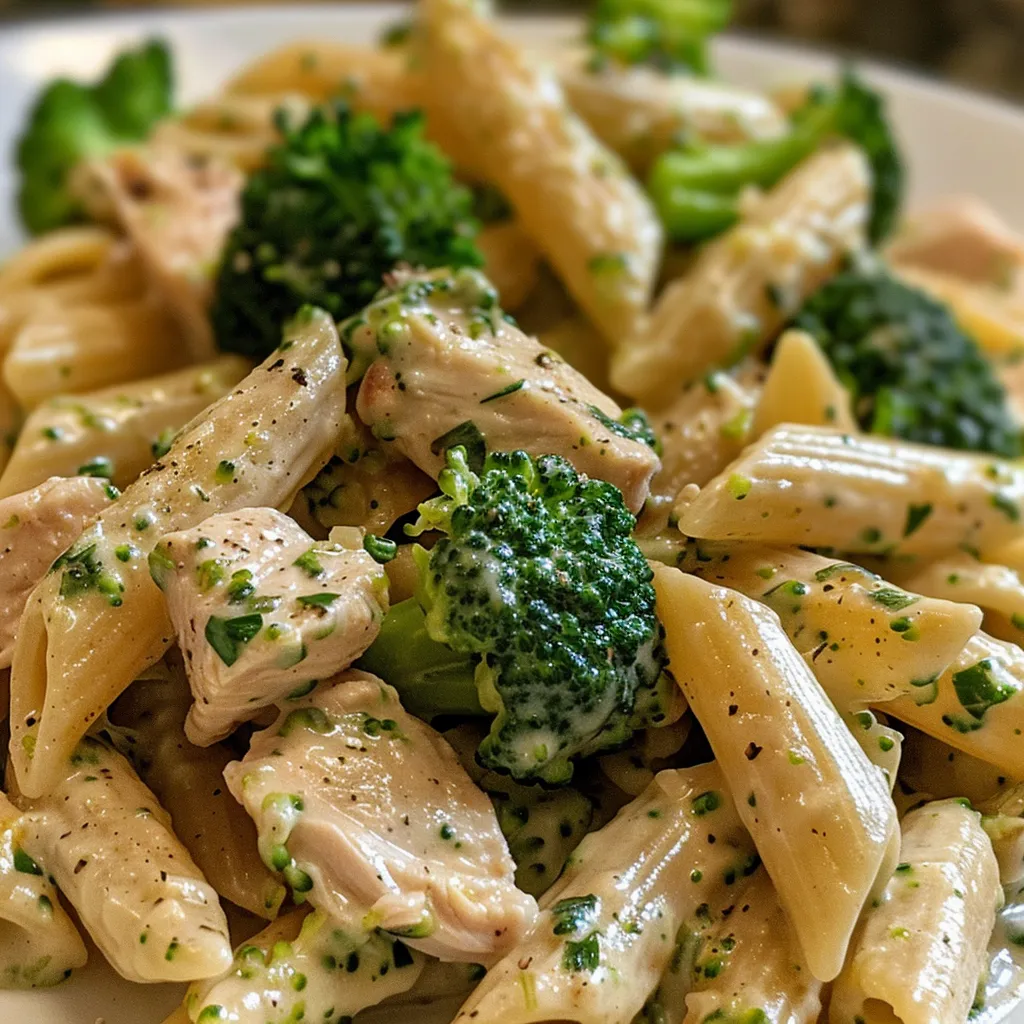
Side angle of a bowl filled with creamy broccoli, chicken, and penne pasta, showcasing vibrant ingredients.

Now that we’ve got our ingredients ready, it’s time to dive into the cooking process. Follow these simple steps:

  1. Cook the Pasta: Bring a large pot of salted water to a boil and cook the penne until al dente, usually about 8-10 minutes. Add the broccoli florets during the last 2-3 minutes of cooking. Drain and set aside.
  2. Sauté the Chicken: In a large skillet, heat olive oil over medium heat. Season the chicken with salt and pepper and cook until golden brown and cooked through, about 5-7 minutes. Remove from the skillet and set aside.
  3. Prepare the Sauce: In the same skillet, add minced garlic and sauté for about 30 seconds until fragrant. Pour in heavy cream, bringing it to a gentle simmer. Stir in Parmesan cheese until melted and the sauce is creamy.
  4. Combine: Add the cooked pasta and broccoli to the skillet with the creamy sauce. Toss gently to combine, ensuring every piece is beautifully coated.
  5. Serve: Garnish with fresh parsley and additional Parmesan if desired. Serve hot and enjoy!

Pro Tips for Perfecting Your Dish

  • Timing Is Everything: Keep an eye on the pasta to ensure it stays al dente; overcooking can lead to mushy noodles.
  • Adjust the Creaminess: If you prefer a lighter sauce, consider using half-and-half or even Greek yogurt to cut down on calories without sacrificing flavor.
  • Season Wisely: Taste your sauce before serving and adjust the seasoning as necessary; a pinch of salt can elevate the dish significantly.
  • Make It Ahead: This dish can be prepared in advance and stored in the fridge, making it a great option for meal prep.
  • Leftover Magic: Use any leftover chicken or veggies you have on hand; this recipe is all about flexibility.
  • Fresh Ingredients: Whenever possible, use fresh ingredients for the best flavor; frozen broccoli works in a pinch!
  • Cheese Substitute: For a vegan version, use cashew cream and nutritional yeast instead of heavy cream and Parmesan.
  • Pairing Options: Serve with a side salad or crusty bread to round out the meal.

Common Mistakes to Avoid

Even the best cooks make mistakes. Here are some common pitfalls and how to avoid them:

  • Overcooking the Pasta: Always follow package instructions and taste test for doneness.
  • Skipping Seasoning: Don’t underestimate the power of salt and pepper; seasoning at each stage enhances the overall flavor.
  • Letting Sauce Boil: Keep the sauce on low heat to prevent curdling; a gentle simmer is best.
  • Not Using Enough Cheese: Cheese adds flavor and creaminess; don’t skimp on it!

Delicious Variations

This creamy broccoli and chicken penne can be tailored to fit any taste preference. Here are some delightful variations:

  • Swap the Protein: Use shrimp, turkey, or even tofu for a vegetarian option.
  • Add More Veggies: Incorporate bell peppers, peas, or carrots for added nutrition and color.
  • Spicy Kick: Add red pepper flakes for a bit of heat, elevating the flavor profile.
  • Herb Infusion: Experiment with fresh herbs like basil or thyme for a unique twist on the classic recipe.

Storing and Make-Ahead Instructions

This dish can be made ahead of time, making it perfect for busy schedules. Here’s how to store and reheat:

  • Storing: Allow the dish to cool completely before transferring it to an airtight container. It can be stored in the refrigerator for up to 3 days.
  • Freezing: For longer storage, freeze portions in airtight containers for up to 2 months. Thaw in the refrigerator overnight before reheating.
  • Reheating: Reheat in a skillet over low heat, adding a splash of water or cream to revive the sauce.

Comprehensive FAQ

Here are some frequently asked questions regarding this creamy broccoli and chicken penne recipe:

  • Can I make this dish vegetarian? Absolutely! Just omit the chicken and use vegetable broth and more veggies.
  • What kind of pasta can I use? While penne is ideal, any pasta shape you enjoy will work just fine.
  • Is this recipe kid-friendly? Yes! The creamy texture and mild flavors are often a hit with kids.
  • Can I use frozen broccoli? Yes! Just make sure to thaw and drain it before adding to the dish.
  • How can I make this dish spicier? Add red pepper flakes or a dash of hot sauce to the creamy sauce for some heat.
  • What’s a good side dish to serve with this? A fresh garden salad or garlic bread pairs perfectly.
  • Can I meal prep this recipe? Yes! It’s great for meal prep and can be stored in the fridge for several days.
  • How do I prevent the sauce from curdling? Cook on low heat and avoid boiling the sauce, stirring gently.

Nutritional Information and Dietary Adaptations

This creamy broccoli and chicken penne is not just delicious; it can also fit into various dietary needs:

  • Low-Carb Option: Substitute pasta with zucchini noodles for a low-carb alternative.
  • Gluten-Free: Use gluten-free pasta to make this dish accessible for those with gluten sensitivities.
  • High-Protein: Add chickpeas or lentils for an extra protein boost if you’re looking for plant-based options.

Essential Equipment

To create this dish, you will need:

  • Large Pot: For boiling pasta and broccoli.
  • Skillet: To sauté chicken and make the sauce.
  • Colander: For draining pasta.
  • Measuring Cups and Spoons: For accurate ingredient measurements.

Serving Suggestions

Now that your creamy broccoli and chicken penne is ready to go, here are some serving suggestions:

  • Garnish: Top with extra Parmesan and fresh parsley for a beautiful presentation.
  • Pair: Serve alongside a crisp green salad or hearty garlic bread for a complete meal.
  • Wine Pairing: A chilled white wine, like Sauvignon Blanc, complements the creamy sauce beautifully.

Final Thoughts

Bringing together the flavors of chicken, broccoli, and a velvety creamy sauce, this creamy broccoli and chicken penne is a recipe that resonates with the heart of home cooking. It’s about more than just the ingredients; it’s about the memories created around the dinner table. So, gather your loved ones, serve up a bowl, and enjoy the comfort that comes with each bite. Happy cooking, neighbor!

Creamy Broccoli and Chicken Penne for a Cozy Weeknight Dinner

Prep Time 10 minutes
Cook Time 15 minutes
Total Time 25 minutes
Servings 4 servings
Calories 650
This comforting pasta dish combines tender chicken, fresh broccoli, and a creamy Parmesan sauce for a satisfying weeknight meal.

Ingredients

Pasta

  • 8 oz Penne Pasta (Cooks to al dente for the perfect bite.)
  • 2 cups Broccoli Florets (Can be swapped with cauliflower or spinach.)

Protein

  • 1 lb Boneless, Skinless Chicken Breast (Can be replaced with turkey or shrimp.)
  • 1 tbsp Olive Oil (Essential for sautéing.)
  • 3 cloves Garlic (Minced. Adjust amount to suit garlic preference.)
  • 1 cup Heavy Cream (Can substitute with half-and-half or Greek yogurt.)
  • 1/2 cup Grated Parmesan Cheese (Add nutritional yeast for a vegan alternative.)
  • to taste Salt (Always adjust to enhance flavors.)
  • to taste Pepper (Always adjust to enhance flavors.)
  • 1 tsp Italian Seasoning (Optional. Elevates flavor profile.)
  • 2 tbsp Fresh Parsley (Chopped. Adds freshness and color.)

Instructions 

  • Cook the penne pasta according to package instructions until al dente. Drain and set aside.
  • In a large skillet, heat olive oil over medium heat. Sauté minced garlic until fragrant, then add diced chicken and cook until no longer pink.
  • Add broccoli florets to the skillet and cook for 3-4 minutes until tender.
  • Pour in heavy cream, grated Parmesan, Italian seasoning, salt, and pepper. Stir to combine and simmer for 2-3 minutes until slightly thickened.
  • Mix the cooked pasta into the sauce, garnish with chopped parsley, and serve hot.

Notes

For a lighter version, use Greek yogurt instead of heavy cream.
Calories: 650kcal
Cost: $15
Course: Main Course
Cuisine: Italian-American
Keyword: broccoli, chicken, Pasta

The Joy of Cooking Lemon Herb Chicken Wings

Nothing brings friends and family together quite like a plate of juicy, flavorful chicken wings. Whether it’s game day, a summer barbecue, or a cozy family dinner, these lemon herb chicken wings are bound to be the star of the show. With simple ingredients that pack a punch, you’ll discover just how easy it is to create a dish that’s not only delicious but also filled with love and warmth. In this comprehensive guide, we’ll walk you through everything you need to know about making the ultimate lemon herb chicken wings.

Why You’ll Love This Recipe

This recipe for lemon herb chicken wings is not just about flavor; it’s about creating memories and sharing them with those you cherish. Here are just a few reasons why you’ll adore these wings:

  • Easy to Prepare: With minimal prep time, you can whip these wings up in no time. Simply marinate, bake, and serve!
  • Fresh and Flavorful: The combination of fresh herbs and lemon juice creates a taste that bursts with brightness, making every bite a delight.
  • Healthy Option: Baked instead of fried, these lemon herb chicken wings are a lighter alternative that still delivers on taste.
  • Customizable: Feel free to tweak the recipe according to your taste. Add spices, adjust the herbs, or experiment with different marinades.
  • Perfect for Any Occasion: Whether it’s a casual get-together or a fancy dinner, these wings fit right in, providing a heartwarming touch to every gathering.

Ingredient Breakdown

Let’s take a closer look at the ingredients that make up these lemon herb chicken wings. Each component plays a vital role in crafting the perfect flavor profile.

  • 2 pounds Chicken Wings: Choose fresh or thawed wings for the best texture and juiciness. You can also opt for organic options to enhance flavor.
  • 1/4 cup Lemon Juice: Freshly squeezed lemon juice offers a tangy brightness. Avoid bottled juice for the most authentic flavor.
  • 2 tablespoons Olive Oil: This helps to coat the wings and keep them moist during baking.
  • 3 cloves Garlic: Minced garlic infuses the wings with savory depth.
  • 1 teaspoon Salt: Enhances the natural flavors of the wings without overpowering them.
  • 1/2 teaspoon Black Pepper: Adds a subtle heat that complements the other flavors.
  • 2 tablespoons Fresh Rosemary: Finely chopped, this herb brings aromatic notes that elevate the dish.
  • 2 tablespoons Fresh Thyme: Provides an earthy depth that balances the brightness of the lemon.
  • 2 tablespoons Fresh Parsley: Adds fresh color and a hint of peppery flavor.
  • 1/2 teaspoon Red Pepper Flakes: Optional for a gentle kick if you desire a bit of heat in your wings.

How to Make Lemon Herb Chicken Wings

Close-up view of freshly cooked lemon herb chicken wings garnished with herbs.

Now that we’ve gathered all our ingredients, it’s time to get cooking! Follow this step-by-step guide to achieve lemon herb chicken wing perfection.

  1. Prepare the Marinade: In a large bowl, combine the lemon juice, olive oil, minced garlic, salt, black pepper, rosemary, thyme, parsley, and red pepper flakes (if using).
  2. Marinate the Wings: Add the chicken wings to the bowl, ensuring they are well coated with the marinade. Cover and refrigerate for at least 30 minutes (up to 4 hours for a deeper flavor).
  3. Preheat the Oven: Preheat your oven to 400°F (200°C). This temperature is ideal for achieving crispy skin and juicy meat.
  4. Prepare the Baking Sheet: Line a baking sheet with parchment paper or lightly grease it to prevent sticking.
  5. Arrange the Wings: Place the marinated wings in a single layer on the prepared baking sheet. Do not overcrowd them; leave space between each wing for even cooking.
  6. Bake the Wings: Bake in the preheated oven for 40-45 minutes, flipping them halfway through to ensure even browning. The wings should be golden brown and cooked through.
  7. Serve and Enjoy: Once done, remove the wings from the oven, let them rest for a few minutes, and then serve them warm. Enjoy your homemade lemon herb chicken wings with your favorite dipping sauces!

Expert Tips for Perfect Lemon Herb Chicken Wings

To ensure your lemon herb chicken wings turn out perfectly every time, consider these expert tips:

  • Use Fresh Ingredients: Fresh herbs and freshly squeezed lemon juice make a significant difference in flavor. Always opt for fresh when possible.
  • Don’t Rush the Marinade: Allowing the wings to marinate longer enhances the flavor. If time permits, aim for at least 2 hours.
  • Monitor Cooking Time: Ovens can vary, so keep an eye on the wings towards the end of the baking time to prevent overcooking.
  • Use a Meat Thermometer: Ensure the wings reach an internal temperature of 165°F (74°C) for safe consumption.
  • For Extra Crispiness: Broil the wings for an additional 2-3 minutes after baking for an extra crispy finish. Just watch them closely to avoid burning.
  • Experiment with Marinades: Feel free to swap out herbs or add additional spices to create your unique twist on lemon herb wings.
  • Let Them Rest: Allowing the wings to rest after baking helps retain their juices, resulting in a more tender bite.
  • Pair with Dips: Serve with a side of ranch, blue cheese, or a spicy sriracha mayo for an exciting flavor combination.

Common Mistakes and Troubleshooting

Even the best of us can run into a few hiccups in the kitchen. Here are some common mistakes and how to avoid them:

  • Overcrowding the Baking Sheet: This can lead to uneven cooking and soggy wings. Always use a large enough sheet or bake in batches.
  • Skipping the Marination Step: Not marinating the wings can result in bland flavors. Take the time to allow the wings to soak in the marinade.
  • Not Preheating the Oven: Baking wings in a cold oven can lead to uneven cooking. Always preheat your oven to the desired temperature before placing the wings inside.
  • Cooking at Too High a Temperature: While you want crispy wings, cooking at too high a temperature can burn the outside before the inside is cooked. Stick to the recommended 400°F (200°C).

Variations of Lemon Herb Chicken Wings

Feel free to get creative! Here are some variations to consider:

  • Spicy Lemon Herb Wings: Add more red pepper flakes or some hot sauce to the marinade for a kick.
  • Honey Lemon Herb Wings: Incorporate 2 tablespoons of honey into the marinade for a sweet and savory flavor.
  • Smoky Lemon Herb Wings: Add smoked paprika to the marinade for a rich, smoky flavor.
  • Garlic Parmesan Lemon Wings: After baking, toss the wings in melted butter and grated Parmesan cheese for an indulgent twist.

Storage and Make-Ahead Instructions

If you want to prepare ahead of time or save leftovers, here’s what you need to know:

  • Make Ahead: Marinate the wings up to 4 hours in advance. Just store them in the fridge until you’re ready to bake.
  • Storage: Store leftover wings in an airtight container in the fridge for up to 3 days.
  • Freezing: Freeze marinated wings before cooking for up to 3 months. Just thaw in the fridge overnight before baking.
  • Reheating: To reheat, place wings on a baking sheet and warm them in a 350°F (175°C) oven until heated through, about 10-15 minutes.

Nutrition Tips and Dietary Adaptations

These lemon herb chicken wings are not only delicious but can also fit various dietary needs:

  • Low-Carb Option: Perfect for keto or low-carb diets, as they are primarily protein with minimal carbohydrates.
  • Gluten-Free: Naturally gluten-free, making them suitable for those with gluten sensitivities.
  • Heart-Healthy: Using olive oil and fresh herbs can contribute to a heart-healthy diet.

Equipment Recommendations

Here are some kitchen essentials that will help you make these lemon herb chicken wings:

  • Baking Sheet: A sturdy baking sheet is essential for even cooking.
  • Parchment Paper: Use this to line your baking sheet for easy cleanup.
  • Mixing Bowl: A large bowl for marinating your wings comfortably.
  • Meat Thermometer: Ensures your wings are cooked to the proper internal temperature.

Serving Suggestions

These lemon herb chicken wings pair beautifully with a variety of sides and dips:

  • Classic Coleslaw: A crisp and refreshing side that balances the rich flavors of the wings.
  • Vegetable Platter: Fresh veggies and a dip make a great accompaniment.
  • Potato Wedges: Crispy potato wedges or fries add a hearty element to your meal.
  • Fresh Salad: A light mixed green salad can brighten the meal and complement the wings.

Frequently Asked Questions

Here are some common questions about making lemon herb chicken wings:

  • Can I use dried herbs instead of fresh? Yes, but since dried herbs are more concentrated, use about one-third of the amount.
  • How long should I marinate the wings? A minimum of 30 minutes to 4 hours is ideal for flavor absorption.
  • Can I grill these wings instead? Absolutely! Just follow the same marination process and grill over medium heat until cooked through.
  • What can I serve with these wings? They pair well with dips like ranch or blue cheese, and fresh veggies for a balanced meal.
  • How do I make them extra crispy? Broil the wings for the last few minutes of cooking for a crispy finish.
  • Can I use wingettes or drumettes? Certainly! Both options work well with this marinade.
  • How should I store leftovers? Place in an airtight container in the fridge for up to 3 days, or freeze for later use.
  • Are these wings gluten-free? Yes, as long as you use gluten-free sauces and marinades.

With this comprehensive guide, you’re now ready to tackle your own batch of lemon herb chicken wings that will impress everyone around your table. Remember, cooking is about love, patience, and enjoying the process. So gather your loved ones, fire up the oven, and create some delicious memories with these flavorful wings!

Ultimate Easy Lemon Herb Chicken Wings for Juicy Homemade Flavor

Prep Time 10 minutes
Cook Time 25 minutes
Total Time 35 minutes
Servings 4 servings
Calories 350
Enjoy tender, flavorful chicken wings infused with fresh herbs and zesty lemon in this simple homemade recipe.

Ingredients

Chicken wings

  • 2 pounds Chicken wings (Choose fresh or thawed wings for the best texture and juiciness.)
  • 0.25 cup Lemon juice (Freshly squeezed for a tangy flavor.)
  • 2 tablespoons Olive oil (Helps coat the wings while keeping them moist.)
  • 3 cloves Garlic (Minced for infusion of savory depth.)
  • 1 teaspoon Salt (Enhances natural flavors.)
  • 0.5 teaspoon Black pepper (Adds subtle heat.)
  • 2 tablespoons Fresh rosemary (Finely chopped for aromatic notes.)
  • 2 tablespoons Fresh thyme (Brings earthiness.)
  • 2 tablespoons Fresh parsley (Adds fresh color.)
  • 0.5 teaspoon Red pepper flakes (Optional for a gentle kick.)

Instructions 

  • In a large bowl, combine lemon juice, olive oil, minced garlic, salt, black pepper, chopped rosemary, thyme, parsley, and red pepper flakes.
  • Add chicken wings to the bowl and toss to coat evenly. Marinate for at least 15 minutes.
  • Preheat oven to 400°F (200°C). Arrange wings on a baking sheet lined with parchment paper.
  • Bake for 25 minutes or until golden and cooked through, flipping halfway.
  • Serve hot, garnished with additional herbs if desired.

Notes

For extra crispiness, broil the wings for the last 2 minutes.
Calories: 350kcal
Cost: $15
Course: Appetizer
Cuisine: American
Keyword: Chicken Wings

Welcome to the Heart of Italian Cooking

Welcome, friends! Today, we’re diving into a recipe that embodies the warmth of family gatherings and rustic charm: Italian Herb Chicken. This dish isn’t just about the ingredients; it’s about the love and tradition that comes with every bite. With its aromatic blend of herbs and the comforting taste of succulent chicken, this recipe is perfect for any occasion, from casual weeknight dinners to festive family feasts. Trust me, whether you’re a seasoned cook or just starting out in the kitchen, this dish will bring everyone together around the table.

Why You’ll Love This Italian Herb Chicken

There are countless reasons to cherish this Italian Herb Chicken recipe. Here are just a few highlights:

  • Simple Ingredients: Made with just a handful of pantry staples, this dish is accessible and easy to whip up.
  • Health-Conscious: Packed with flavor and lean protein, it’s a healthy option that doesn’t compromise on taste.
  • Versatile Flavor: The herb blend makes it adaptable—perfect for pairing with a variety of sides or serving atop a fresh salad.
  • Quick Prep Time: With minimal prep and cook time, you can have a delicious meal ready in under an hour.
  • Family-Friendly: Kids and adults alike will love the comforting flavors, making it a sure hit at any family gathering.

Ingredients for Italian Herb Chicken

Let’s gather our ingredients for this delightful dish. Here’s what you’ll need:

  • 4 boneless, skinless chicken breasts: The star of the show, juicy and tender.
  • 2 tablespoons olive oil: Adds richness and helps the herbs adhere.
  • 2 teaspoons dried oregano: A classic Italian herb that adds warm, earthy notes.
  • 2 teaspoons dried basil: Contributes a sweet and slightly peppery flavor.
  • 1 teaspoon garlic powder: For that aromatic base that makes this dish irresistible.
  • 1 teaspoon onion powder: Adds depth to the flavor profile.
  • 1 teaspoon salt: Essential for enhancing all the flavors.
  • 1/2 teaspoon black pepper: A dash of spice to brighten the dish.
  • 1 tablespoon fresh parsley, chopped (for garnish): Adds a fresh touch to the presentation.
  • 1 lemon, sliced (for serving): Provides a zesty contrast to the rich flavors of the chicken.

How to Make Italian Herb Chicken

Side view of cooked Italian Herb Chicken with a golden-brown crust and vibrant herb garnish.

Now, let’s roll up our sleeves and get cooking! Follow these simple steps to create your own Italian Herb Chicken:

  • Preheat Your Oven: Set it to 400°F (200°C) to ensure it’s hot and ready when your chicken is prepped.
  • Create the Herb Mixture: In a small bowl, combine the dried oregano, dried basil, garlic powder, onion powder, salt, and black pepper. Mix well.
  • Prepare the Chicken: Pat the chicken breasts dry with paper towels and place them in a baking dish—this helps to achieve a lovely golden color.
  • Coat with Olive Oil: Drizzle the olive oil over the chicken breasts, ensuring they are well coated. This adds flavor and helps keep the chicken moist.
  • Season with Herbs: Sprinkle the herb mixture evenly over the chicken. Rub it in gently to ensure the flavors adhere to every piece.
  • Bake the Chicken: Place the dish in the preheated oven and let it bake for 25-30 minutes. You’re looking for an internal temperature of 165°F (75°C).
  • Rest and Garnish: Once cooked, remove the chicken from the oven and let it rest for 5 minutes. This step is crucial for juicy chicken!
  • Serve: Garnish with fresh parsley and serve with lemon slices for that extra pop of flavor.

Pro Tips for Success

Want to take your Italian Herb Chicken to the next level? Here are some expert insights:

  • Use Fresh Herbs: If you have them on hand, fresh herbs can elevate the flavor even more!
  • Marinate for Flavor: For an added flavor boost, marinate your chicken in the herb mixture and olive oil for a few hours or overnight in the fridge.
  • Check Internal Temperature: Always use a meat thermometer to ensure perfect doneness without overcooking.
  • Don’t Skip the Resting Time: Letting the chicken rest allows the juices to redistribute for a juicier bite.
  • Pair with Sides: This dish goes wonderfully with roasted vegetables, a fresh salad, or even pasta.
  • Leftovers: Use leftover chicken in salads, sandwiches, or wraps for a quick meal!
  • Experiment with Spices: Feel free to adjust the herbs and spices to suit your taste. Add a pinch of red pepper flakes for a kick!
  • Store Properly: Make sure to store any leftovers in an airtight container in the fridge.

Common Mistakes and Troubleshooting

Even the best cooks have off days. Here are a few common pitfalls and how to avoid them:

  • Overcooking the Chicken: This can lead to dry chicken. Always check the internal temperature early to prevent this.
  • Not Prepping the Chicken Properly: Make sure to pat the chicken dry before seasoning to help the herbs stick.
  • Skipping the Rest: This can lead to dry and tough chicken. Always allow for resting time!

Variations of Italian Herb Chicken

Feeling adventurous? Here are some delicious variations you can try:

  • Grilled Herb Chicken: Marinate the chicken and grill it for a smoky flavor.
  • Stuffed Chicken Breasts: Stuff with spinach and feta for a Mediterranean twist.
  • Herb Chicken Pasta: Toss cooked chicken with pasta and your choice of vegetables for a complete meal.
  • Slow Cooker Italian Herb Chicken: Cook in a slow cooker for an easy, hands-off option.

Storage and Make-Ahead Instructions

This Italian Herb Chicken is perfect for meal prep! Here’s how to store it:

  • Refrigeration: Store leftovers in an airtight container in the fridge for up to 3-4 days.
  • Freezing: You can freeze cooked chicken for up to 3 months. Just ensure it’s well-wrapped to prevent freezer burn.
  • Make-Ahead: Prepare the herb mixture and marinate the chicken a day in advance for richer flavors.

FAQs About Italian Herb Chicken

Here are some common questions to help you along the way:

  • Can I make this chicken recipe on the grill? Absolutely! Just follow the same marinating steps and grill until cooked through.
  • How do I know when baked chicken is cooked all the way? Use a meat thermometer; it should read 165°F (75°C).
  • What side dishes pair well with chicken? Roasted vegetables, garlic bread, or a simple green salad work perfectly!
  • How do I store leftover chicken? Keep it in an airtight container in the fridge for up to 4 days.
  • Can I use chicken thighs instead? Yes, chicken thighs will work beautifully in this recipe!
  • Is this recipe gluten-free? Yes, all the ingredients are naturally gluten-free.
  • Can I use fresh herbs? Definitely! Use about three times the amount of fresh herbs compared to dried.
  • What’s the best way to reheat leftovers? Reheat in the oven at a low temperature to keep it juicy.

Nutrition Tips and Dietary Adaptations

Keeping health in mind? Here are some tips for making this dish even better:

  • Low-Calorie Option: Use skinless chicken breasts and limit the olive oil to reduce calories.
  • Gluten-Free: This recipe is naturally gluten-free, making it great for those with dietary restrictions.
  • Low-Sodium Variation: Use low-sodium versions of spices and herbs to decrease sodium intake.

Equipment Recommendations

To make this dish, you’ll need:

  • Baking Dish: For cooking the chicken evenly.
  • Meat Thermometer: Essential for checking doneness.
  • Mixing Bowl: For combining your herbs and spices.
  • Cutting Board: For prepping your chicken.

Serving Suggestions

To complete your meal, consider these serving ideas:

  • Accompany with a fresh salad: A simple green salad with vinaigrette complements the chicken nicely.
  • Pair with roasted vegetables: Seasonal veggies roasted with olive oil and herbs make a perfect side.
  • Serve over pasta: Toss the chicken with spaghetti or penne and a light sauce for a hearty meal.

Final Thoughts

There you have it—a comprehensive guide to making Italian Herb Chicken that warms the heart and satisfies the soul. With simple ingredients and straightforward steps, you’ll create a dish that not only tastes incredible but also brings the family together, just like the cherished meals of my childhood. So, gather your loved ones, share stories, and enjoy this beautiful creation. Happy cooking!

Italian Herb Chicken

Prep Time 10 minutes
Cook Time 30 minutes
Total Time 40 minutes
Servings 4 pieces
Calories 250
Enjoy tender, flavorful chicken breasts seasoned with Italian herbs, perfect for a quick and delicious meal.

Ingredients

Protein

  • 4 pieces boneless, skinless chicken breasts
  • 2 tablespoons olive oil
  • 2 teaspoons dried oregano
  • 2 teaspoons dried basil
  • 1 teaspoon garlic powder
  • 1 teaspoon onion powder
  • 1 teaspoon salt
  • 1.5 teaspoons black pepper
  • 1 tablespoon fresh parsley, chopped (for garnish)
  • 1 each lemon, sliced (for serving)

Instructions 

  • Preheat oven to 400°F (200°C).
  • Mix oregano, basil, garlic powder, onion powder, salt, and pepper.
  • Pat chicken dry, place in baking dish, drizzle with olive oil.
  • Sprinkle herb mixture over chicken, rub in gently. Bake 25-30 mins until cooked through.
  • Let rest 5 mins, garnish with parsley, serve with lemon slices.

Notes

Use fresh herbs if available for more flavor.
Calories: 250kcal
Cost: $15
Course: Main Course
Cuisine: Italian
Keyword: chicken, Herbs