Author

Tom

Browsing

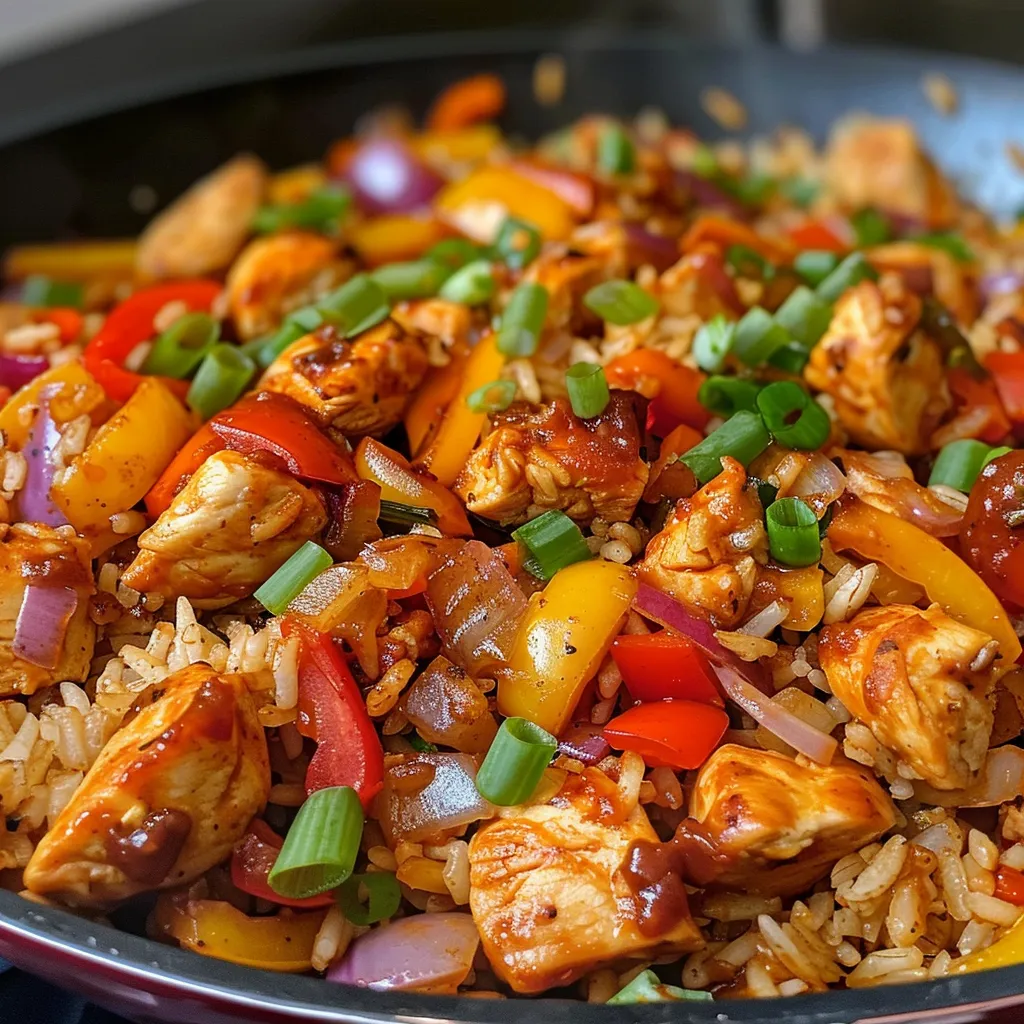
Welcome to my kitchen! Today, we’re diving deep into a dish that warms not just the belly but the heart—the Chicken Veggie Skillet. This recipe is a celebration of home-cooked goodness, transforming simple ingredients into a comforting meal perfect for busy weeknights or family gatherings. With its vibrant colors and flavors, this skillet dish is a delightful way to enjoy fresh vegetables and lean protein, making it a wholesome choice for any table.

In this article, we’ll explore the many facets of this skillet dish, from why you’ll love it, to detailed ingredient breakdowns, pro tips, variations, and even some common mistakes to avoid. Let’s get started!

Why You’ll Love This Recipe

This Chicken Veggie Skillet isn’t just another recipe; it’s a heartfelt dish that brings the family together. Here are some reasons why you’ll adore it:

  • Quick and Easy: This meal can be whipped up in just 30 minutes, making it perfect for those hectic evenings.
  • One-Pan Wonder: Enjoy minimal cleanup with everything cooked in one skillet, leaving more time to savor your meal.
  • Nutritious and Wholesome: Packed with lean protein and fresh vegetables, this dish supports healthy eating habits.
  • Versatile Ingredients: Feel free to swap in your favorite veggies or proteins to suit your taste or dietary needs.
  • Family-Friendly: With its mild flavors and vibrant colors, this dish appeals to kids and adults alike.

Ingredients Breakdown

Let’s take a closer look at the ingredients that make this Chicken Veggie Skillet special:

  • 2 boneless, skinless chicken breasts: Cut into bite-sized pieces for quick cooking. You can substitute with thighs for a juicier option.
  • 1 tablespoon olive oil: A heart-healthy fat that enhances flavor and helps cook the chicken evenly. Consider avocado oil for higher smoke points.
  • 1 small onion, diced: Adds sweetness and depth; shallots can be used for a more delicate flavor.
  • 2 cloves garlic, minced: For that aromatic kick; feel free to add more if you’re a garlic lover!
  • 1 red bell pepper, sliced: Sweet and crunchy, it contributes color and vitamins. Substitute with yellow or orange for variety.
  • 1 zucchini, sliced: A great way to sneak in some green; you can use yellow squash as a substitute.
  • 1 cup broccoli florets: Packed with nutrients; consider using green beans for a different texture.
  • 1 cup cherry tomatoes, halved: Adds a burst of sweetness and acidity; regular tomatoes can work too, just chop them up.
  • 1 teaspoon dried Italian seasoning: A blend of herbs that brings out the Mediterranean flavors. Use fresh herbs if you have them on hand!
  • Salt and pepper to taste: Essential for seasoning; don’t skimp on these!
  • Fresh parsley, chopped (optional): A lovely garnish that brightens the dish.

Cooking Instructions

Here’s how to bring this dish to life:

  1. Heat the olive oil in a large skillet over medium-high heat.
  2. Add the chicken pieces, season with salt, pepper, and half of the Italian seasoning. Cook until browned and cooked through, about 5-7 minutes. Remove chicken from the skillet and set aside.
  3. In the same skillet, add the onion and garlic. Sauté until fragrant and translucent, about 2 minutes.
  4. Add the bell pepper, zucchini, and broccoli. Cook, stirring occasionally, until vegetables are tender-crisp, about 5-6 minutes.
  5. Return the chicken to the skillet and add the cherry tomatoes and remaining Italian seasoning. Stir well and cook for another 2-3 minutes until tomatoes soften slightly.
  6. Adjust seasoning if needed. Garnish with fresh parsley before serving.

Pro Tips for Perfection

Side view of a sizzling skillet containing chicken and assorted vegetables, highlighting fresh ingredients.

Want to elevate your Chicken Veggie Skillet? Here are some expert insights:

  • Uniform Cuts: Cut your chicken and vegetables into similar sizes to ensure even cooking.
  • High Heat: Don’t be afraid to crank the heat a little; this helps to sear the chicken for extra flavor.
  • Fresh Herbs: If you have fresh herbs, use them instead of dried for a burst of flavor.
  • Cooking Order: Always add denser vegetables first (like broccoli) and softer ones later (like tomatoes) to maintain texture.
  • Taste as You Go: Adjust seasonings throughout the cooking process for the best flavor.
  • Resting Time: Let the skillet sit for a few minutes after cooking to allow flavors to meld.
  • Make It Ahead: This dish can be made ahead and reheated, making it perfect for meal prep.
  • Squeeze of Lemon: A splash of fresh lemon juice before serving brightens the entire dish.

Common Mistakes and Troubleshooting

Even the best cooks can run into hiccups. Here’s how to avoid common pitfalls:

  • Overcrowding the Skillet: If your skillet is too crowded, the chicken will steam instead of brown. Cook in batches if necessary.
  • Underseasoning: Don’t be shy with your seasonings. Taste as you go and adjust accordingly.
  • Overcooking Vegetables: Keep an eye on your veggies; you want them tender but still crisp.
  • Skipping the Rest: Allow your dish to rest before serving to let the flavors develop fully.

Variations to Try

One of the best things about this skillet is its adaptability. Here are some variations to consider:

  • Spicy Kick: Add red pepper flakes or a splash of hot sauce for a spicy version.
  • Asian Twist: Swap out olive oil for sesame oil, add soy sauce and ginger, and toss in snap peas or bok choy.
  • Southwestern Flair: Incorporate corn, black beans, and taco seasoning for a zesty take.
  • Low-Carb Delight: Substitute the zucchini with cauliflower rice to keep it low on carbs.

Storage and Make-Ahead Instructions

Planning for leftovers? Here’s how to store and reheat your Chicken Veggie Skillet:

  • Refrigeration: Store any leftovers in an airtight container in the fridge for up to 3 days.
  • Freezing: This dish can be frozen for up to 2 months. Just be sure to cool completely before freezing.
  • Reheating: Reheat on the stove over medium heat, adding a splash of water or broth to keep it moist.
  • Make-Ahead: You can chop your veggies and marinate your chicken the night before to save time!

Frequently Asked Questions

Here are some common questions about this Chicken Veggie Skillet:

  • Can I use frozen vegetables? Absolutely! Just add them directly to the skillet but increase cooking time slightly.
  • What other proteins can I use? Feel free to substitute chicken with turkey, shrimp, or tofu for a vegetarian option.
  • Is this recipe gluten-free? Yes, as long as you check that your chicken broth and seasonings are gluten-free.
  • Can I add more vegetables? Definitely! This dish is versatile, so add any veggies you love.
  • How can I make it dairy-free? This recipe is naturally dairy-free, but be mindful of any toppings you choose to add.
  • What should I serve with this skillet? It pairs wonderfully with rice, quinoa, or even crusty bread for soaking up the juices.
  • Can I make this in advance? Yes, this dish can be made ahead, stored, and reheated without losing flavor.
  • How do I know when the chicken is cooked? Ensure the chicken reaches an internal temperature of 165°F (75°C).

Nutrition Tips and Dietary Adaptations

This Chicken Veggie Skillet is not just delicious; it’s also packed with nutritional benefits. Here are some tips for enhancing its healthfulness:

  • Lean Protein: Chicken is a great source of lean protein, essential for muscle repair and overall health.
  • Fiber-Rich Veggies: The array of vegetables adds fiber, which aids digestion and keeps you feeling full.
  • Low-Calorie Option: By using minimal oil and fresh veggies, this dish is lower in calories compared to heavy, creamy sauces.
  • Antioxidants: Ingredients like tomatoes and bell peppers are rich in antioxidants, helping to combat inflammation.

Equipment Recommendations

To make this Chicken Veggie Skillet, you’ll need a few essential kitchen tools:

  • Large Skillet: A sturdy, non-stick skillet is ideal for even cooking.
  • Sharp Knife: Essential for chopping your ingredients quickly and safely.
  • Cutting Board: A stable surface for prepping your ingredients.
  • Meat Thermometer: To ensure your chicken is cooked to perfection.

Serving Suggestions

Once your Chicken Veggie Skillet is ready, it’s time to serve! Here are a few ideas to enhance your meal:

  • Garnish: Top with fresh parsley or a sprinkle of grated Parmesan cheese for added flavor.
  • Accompaniments: Serve alongside a fresh garden salad or crusty bread for a complete meal.
  • Meal Prep: Portion into meal prep containers for quick lunches throughout the week.
  • Pairing: A light white wine or sparkling water pairs beautifully with this vibrant dish.

In conclusion, the Chicken Veggie Skillet is more than just a recipe; it’s a heartwarming dish that connects us to our roots and reminds us that cooking can be simple yet fulfilling. So gather your loved ones, enjoy the process of cooking, and savor every bite of this wholesome meal. Happy cooking!

Chicken Veggie Skillet

Prep Time 10 minutes
Cook Time 15 minutes
Total Time 25 minutes
Servings 4 servings
Calories 350
A quick and healthy one-pan meal loaded with colorful vegetables and tender chicken, perfect for a weeknight dinner.

Ingredients

Protein

  • 2 pieces boneless, skinless chicken breasts (cut into bite-sized pieces)
  • 1 tablespoon olive oil
  • 1 small onion (diced)
  • 2 cloves garlic (minced)
  • 1 red red bell pepper (sliced)
  • 1 medium zucchini (sliced)
  • 1 cup broccoli florets
  • 1 cup cherry tomatoes (halved)
  • 1 teaspoon dried Italian seasoning
  • to taste Salt and pepper

Garnish

  • optional Fresh parsley (chopped)

Instructions 

  • Heat olive oil in a skillet over medium-high heat. Add chicken, season with salt, pepper, and half the Italian seasoning. Cook until browned, 5-7 minutes. Remove and set aside.
  • In the same skillet, sauté onion and garlic until fragrant, about 2 minutes.
  • Add bell pepper, zucchini, and broccoli. Cook until tender-crisp, 5-6 minutes.
  • Return chicken to skillet, add cherry tomatoes and remaining Italian seasoning. Cook 2-3 minutes until tomatoes soften. Garnish with parsley before serving.

Notes

Feel free to customize with your favorite vegetables or herbs.
Calories: 350kcal
Cost: $15
Course: Main Course
Cuisine: American
Keyword: chicken, Skillet, Vegetables

Discover the Heartwarming Flavors of Sticky Garlic Chicken Noodles

Welcome to a culinary adventure where comfort meets simplicity! Sticky Garlic Chicken Noodles are not just a meal; they’re a celebration of home-cooked goodness that brings family and friends together. Picture this: tender chicken embraced by a sticky garlic sauce, served over perfectly cooked noodles—sounds delightful, right? Let’s dive into this recipe that has a story behind every flavorful bite and a warmth that makes your heart smile.

Why You’ll Love This Recipe

  • Quick and easy: Ready in just 30 minutes, making it a perfect weeknight dinner solution.
  • Flavor-packed: The sticky garlic sauce is a delightful blend of sweet and savory notes that will have you reaching for seconds.
  • Customizable: Easily swap ingredients to cater to your family’s preferences, whether it’s beef, tofu, or different types of noodles.
  • Kid-approved: The sweet and savory flavors are a hit with picky eaters, transforming mealtime into a joyous occasion.
  • Pantry-friendly: Most ingredients are staples you likely already have at home, meaning no last-minute trips to the grocery store!

Ingredients for Sticky Garlic Chicken Noodles

This recipe is all about using simple, wholesome ingredients. Here’s what you’ll need:

  • For the Chicken and Noodles:
    • 1 lb boneless, skinless chicken thighs or breasts, cut into bite-sized pieces
    • 8 oz egg noodles, rice noodles, or spaghetti
    • 2 tablespoons cornstarch
    • 2 tablespoons neutral oil (like canola or avocado)
    • 2-3 green onions, sliced (optional garnish)
    • Sesame seeds (for garnish, optional)
  • For the Sticky Garlic Sauce:
    • 1/4 cup low-sodium soy sauce
    • 3 tablespoons brown sugar
    • 1 tablespoon oyster sauce
    • 1 tablespoon hoisin sauce
    • 1 tablespoon rice vinegar or apple cider vinegar
    • 1 tablespoon sesame oil
    • 4 cloves garlic, minced
    • 1 teaspoon fresh ginger, grated (optional)
    • 1/2 teaspoon chili flakes or sriracha (optional, for heat)
    • 1/4 cup water
    • 1 teaspoon cornstarch (to thicken sauce)

    How to Make Sticky Garlic Chicken Noodles

    Juicy pieces of chicken and noodles coated in a glossy sticky garlic sauce, garnished with green onions.

    Now that you have your ingredients ready, let’s get cooking! Follow these simple steps to create your masterpiece:

    • Step 1: Cook the noodles. Boil the noodles according to the package instructions until just tender. Drain and set aside. Toss with a drizzle of sesame oil to prevent sticking.
    • Step 2: Prep the sauce. In a small bowl, whisk together soy sauce, brown sugar, oyster sauce, hoisin, vinegar, sesame oil, garlic, ginger, chili flakes (if using), water, and cornstarch. Set aside.
    • Step 3: Coat and cook the chicken. Toss the chicken pieces with cornstarch for a light crisp on the outside. Heat oil in a large skillet or wok over medium-high heat. Add the chicken in a single layer and cook until golden and cooked through, about 5-7 minutes. Work in batches if needed to avoid overcrowding.
    • Step 4: Add the sauce. Pour the sticky garlic sauce into the pan with the chicken. Bring to a simmer and cook for 2-3 minutes until thick and glossy.
    • Step 5: Toss in the noodles. Add the cooked noodles to the skillet and toss well to coat in the sauce. Stir until everything is evenly combined and heated through.
    • Step 6: Garnish and serve. Serve hot, topped with sliced green onions and a sprinkle of sesame seeds if desired.

    Pro Tips for Perfect Sticky Garlic Chicken Noodles

    • Chicken selection: Using chicken thighs will give a juicier result, while chicken breast is leaner.
    • Marinate for flavor: For extra depth, marinate the chicken in the sauce for 30 minutes before cooking.
    • Adjust heat: Modify chili flakes or sriracha according to your spice preference.
    • Make it gluten-free: Opt for gluten-free soy sauce and rice noodles for a gluten-free option.
    • Veggie boost: Add bell peppers, broccoli, or snap peas for a nutritious twist.
    • Double the sauce: If you love extra sauce, double the ingredients for the sticky garlic sauce.
    • Fresh herbs: Add fresh cilantro or basil for a burst of freshness just before serving.
    • Keep it saucy: If the sauce thickens too much, add a splash of water to reach your desired consistency.

    Common Mistakes and Troubleshooting

    Don’t let minor hiccups spoil your meal. Here are some common mistakes and how to avoid them:

    • Overcooking the chicken: Keep an eye on the chicken; overcooked meat becomes dry. Aim for golden brown and cooked through.
    • Sticky noodles: If the noodles stick together, ensure they’re tossed in sesame oil immediately after draining.
    • Too salty sauce: If the sauce tastes too salty, balance it with a bit of sugar or additional vinegar.
    • Not enough sauce: If you find the dish lacking sauce, don’t hesitate to adjust the soy sauce and sugar ratios to your taste.

    Variations of Sticky Garlic Chicken Noodles

    This recipe is wonderfully adaptable! Here are some variations to try:

    • Spicy version: Add more chili flakes or a splash of hot sauce for an extra kick.
    • Vegetarian alternative: Swap chicken for firm tofu, and use vegetable broth instead of chicken for a robust flavor.
    • Curry twist: Mix in curry powder for a unique flavor profile that pairs beautifully with the garlic sauce.
    • Asian-inspired veggies: Stir in bok choy, carrots, or bean sprouts for added crunch and nutrition.

    Storage and Make-Ahead Instructions

    Planning ahead? Here’s how to store and reheat your Sticky Garlic Chicken Noodles:

    • Refrigerate: Store leftovers in an airtight container in the fridge for up to 3 days.
    • Freeze: For longer storage, freeze the chicken and sauce separately from the noodles for up to 2 months.
    • Reheating: Reheat in a skillet over medium heat, adding a splash of water or broth to loosen the sauce.
    • Make-ahead: You can prepare the sauce a day in advance and store it in the fridge, making your cooking time even shorter!

    Frequently Asked Questions

    Got questions? We’ve got you covered:

    • Can I use different types of noodles? Yes! Feel free to experiment with rice noodles, udon, or even whole wheat spaghetti.
    • How do I make the sauce thicker? To thicken the sauce, simply add more cornstarch mixed with water and cook until it thickens.
    • Can I prepare this ahead of time? Absolutely! You can prep the chicken and sauce in advance, then cook the noodles just before serving.
    • Is this recipe spicy? The recipe can be adjusted for spice by varying the chili flakes or sriracha based on your preference.
    • Can I make this gluten-free? Yes! Use gluten-free soy sauce and rice noodles for a gluten-free meal.
    • What can I serve with this dish? Sticky Garlic Chicken Noodles are delightful on their own, but you can pair them with a fresh salad or steamed vegetables.
    • Can I substitute other proteins? Absolutely! This recipe works wonderfully with beef strips, shrimp, or even seitan for a plant-based option.
    • How do I store leftovers? Keep leftovers in an airtight container in the fridge and consume within 3 days for the best taste.

    Nutritional Tips and Dietary Adaptations

    This recipe can be easily tailored to fit your dietary needs:

    • Protein sources: Choose chicken for lean protein or opt for tofu for a plant-based meal.
    • Lower sugar: Use a sugar substitute or reduce the amount of brown sugar for a healthier option.
    • Increase vegetables: Load up on vegetables to boost fiber and nutrients without significantly altering the flavor.
    • Watch the sodium: Opt for low-sodium soy sauce to keep the dish heart-healthy.

    Essential Equipment for Making Sticky Garlic Chicken Noodles

    Before you start cooking, ensure you have the right tools:

    • Large skillet or wok: Essential for evenly cooking the chicken and tossing the noodles.
    • Mixing bowls: For preparing the sauce and coating the chicken.
    • Measuring cups and spoons: To ensure accurate ingredient measurements.
    • Wooden spoon or spatula: Perfect for stirring and combining flavors.

    Serving Suggestions for Sticky Garlic Chicken Noodles

    Present your dish with flair! Here are some serving ideas:

    • Garnish: Finish with freshly sliced green onions and sesame seeds for visual appeal.
    • Pair with sides: Serve with a crisp cucumber salad or steamed broccoli for a balanced meal.
    • Presentation: Use colorful plates to make your dish pop and entice the senses.
    • Family-style: Serve in a large bowl for everyone to help themselves, fostering a communal dining experience.

    Conclusion

    In the end, Sticky Garlic Chicken Noodles aren’t just a meal; they’re a heartfelt connection to the comfort of home and the joy of sharing food with loved ones. With its simple ingredients and quick cooking time, it’s no wonder this dish has become a cherished favorite in many households. So roll up your sleeves, gather your loved ones, and enjoy the delightful flavors that come alive in this rustic, hearty recipe. Happy cooking, and may your kitchen always be filled with love and laughter!

Sticky Garlic Chicken Noodles

Prep Time 10 minutes
Cook Time 15 minutes
Total Time 25 minutes
Servings 4 servings
Calories 550
A flavorful and easy-to-make dish featuring tender chicken, noodles, and a savory garlic sauce, perfect for a quick dinner.

Ingredients

For the Chicken and Noodles

  • 1 lb boneless, skinless chicken thighs or breasts (cut into bite-sized pieces)
  • 8 oz egg noodles, rice noodles, or spaghetti
  • 2 tablespoons cornstarch
  • 2 tablespoons neutral oil like canola or avocado
  • 3 green onions sliced optional garnish
  • Sesame seeds for garnish optional

For the Sticky Garlic Sauce

  • 0.25 cup low-sodium soy sauce
  • 3 tablespoons brown sugar
  • 1 tablespoon oyster sauce
  • 1 tablespoon hoisin sauce
  • 1 tablespoon rice vinegar or apple cider vinegar
  • 1 tablespoon sesame oil
  • 4 cloves garlic, minced
  • 1 teaspoon fresh ginger, grated
  • 0.5 teaspoon chili flakes or sriracha (optional, for heat)
  • 0.25 cup water
  • 1 teaspoon cornstarch to thicken sauce

Instructions 

  • Cook the noodles until just tender, drain, toss with sesame oil, and set aside.
  • Whisk together soy sauce, sugar, oyster, hoisin, vinegar, sesame oil, garlic, ginger, chili flakes, water, and cornstarch to make the sauce.
  • Toss chicken with cornstarch, then cook in oil until golden and cooked through, about 5-7 minutes.
  • Pour sauce into pan with chicken, simmer until thick and glossy, about 2-3 minutes.
  • Add noodles to the pan, toss to coat, and heat through. Garnish with green onions and sesame seeds if desired.

Notes

For extra flavor, add a splash of lime juice or sprinkle with chopped cilantro before serving.
Calories: 550kcal
Cost: $15
Course: Main Course
Cuisine: Asian
Keyword: chicken, Garlic, Noodles

Introducing a Taste of Summer: Grilled Lemon Herb Chicken Salad

Ah, summer! It’s that glorious time of year when the sun shines brighter, the days are longer, and the grilling season is in full swing. Today, I’m excited to share a recipe that captures the essence of those warm, sunny days: a **Zesty Grilled Lemon Herb Chicken Salad**. This dish is not just a salad; it’s a celebration of flavors, textures, and memories tied to family gatherings and rustic meals shared on porches. With tender, marinated chicken, vibrant greens, and a tangy lemon dressing, this salad is perfect for light lunches or hearty dinners on warm evenings.

In this comprehensive guide, we’ll explore everything you need to know to create the ultimate **grilled lemon herb chicken salad**. From ingredient breakdowns to pro tips, common mistakes to avoid, and even variations to suit your taste buds, I’ve got you covered. So grab your apron, and let’s get cooking!

Why You’ll Love This Recipe

Here’s why this salad will become a staple in your kitchen:

  • Flavor Explosion: The combination of juicy grilled chicken, fresh herbs, and zesty lemon creates an irresistible flavor profile that sings of summer.
  • Quick and Easy: With minimal prep time, you can whip this salad up in less than an hour, making it ideal for busy weeknights.
  • Healthy and Nutritious: Packed with lean protein, vibrant vegetables, and fresh herbs, this salad is a wholesome choice for anyone looking to eat healthily.
  • Customizable: Whether you prefer a different protein or want to add more veggies, this salad is easy to adapt to your liking.
  • Great for Leftovers: This salad holds up well in the fridge, making it perfect for meal prep or enjoying as a light lunch the next day.

Ingredient Breakdown: What You Need

Let’s dive into the ingredients that make this salad shine. Below is a list of what you’ll need along with some handy substitutions:

  • Boneless, skinless chicken breasts: The star of our dish. You can substitute with thighs or tofu for a vegetarian option.
  • Olive oil: For marinating and dressing. If you’d like, you can use avocado oil or even melted butter.
  • Lemon juice: Freshly squeezed is best, but bottled lemon juice can work in a pinch.
  • Dried oregano: A must-have herb for flavor; feel free to use Italian seasoning for an added twist.
  • Garlic powder: Adds depth; fresh minced garlic can be used instead for a stronger flavor.
  • Mixed salad greens: A combination of spinach, arugula, and romaine works beautifully.
  • Cherry tomatoes: For a pop of color and sweetness; substitute with diced bell peppers for crunch.
  • Cucumber: Adds freshness; you can also incorporate radishes for a spicy kick.
  • Red onion: For that sweet bite; you can use green onions or shallots as alternatives.

How to Make This Salad: Step-by-Step Instructions

A side view of a vibrant salad bowl filled with zesty grilled chicken, fresh vegetables, and herbs.

Ready to create your masterpiece? Follow these simple steps:

Marinate the Chicken

1. In a bowl, combine:

  • 2 tablespoons olive oil
  • Juice of 1 lemon
  • 1 teaspoon dried oregano
  • 1 teaspoon garlic powder
  • Salt and pepper to taste

2. Add the chicken breasts, ensuring they are well coated. Cover and marinate for at least 30 minutes (or up to 4 hours for deeper flavor).

Grill the Chicken

1. Preheat the grill to medium-high heat.

2. Remove the chicken from the marinade and grill for about 6-7 minutes on each side, or until fully cooked (internal temperature should reach 165°F).

3. Let the chicken rest for a few minutes before slicing.

Prepare the Salad

1. In a large bowl, combine:

  • 4 cups mixed salad greens
  • 1 cup cherry tomatoes, halved
  • 1 cucumber, sliced
  • 1 red onion, thinly sliced

Make the Dressing

1. In a small bowl, whisk together:

  • 3 tablespoons olive oil
  • 1 tablespoon lemon juice
  • Salt and pepper to taste

Assemble

1. Slice the grilled chicken and place it on top of the salad.

2. Drizzle with dressing and toss gently to combine.

3. Serve immediately and enjoy the taste of summer!

Pro Tips for Perfecting Your Salad

To elevate your salad game, consider these expert insights:

  • Marination Time: The longer you marinate the chicken, the more flavorful it will be. If time allows, marinate overnight.
  • Grill Marks: For beautiful grill marks, ensure your grill is hot enough before placing the chicken on it.
  • Fresh Ingredients: Always opt for fresh ingredients. They not only taste better but also enhance the dish’s visual appeal.
  • Temperature Check: Use a meat thermometer to avoid overcooking the chicken; this ensures it remains juicy.
  • Dress Before Serving: If preparing ahead, keep the dressing separate until serving to maintain freshness.
  • Balance Flavors: Taste as you go! Adjust the seasoning in your dressing to find the perfect balance.
  • Use a Variety of Greens: Mixing different greens adds texture and flavor to the salad.
  • Garnish Wisely: Top with fresh herbs like parsley or basil for an aromatic touch.

Common Mistakes and Troubleshooting

Even the best cooks make mistakes! Here are some common pitfalls and how to avoid them:

  • Dry Chicken: Overcooking leads to dryness. Always use a thermometer and let the chicken rest before slicing.
  • Too Much Dressing: Start with a little dressing; you can always add more, but you can’t take it away once it’s on!
  • Stale Greens: Avoid wilty greens by checking the freshness before use. Always wash and dry thoroughly.
  • Inconsistent Sizes: Cut chicken into even sizes for uniform cooking. This prevents some pieces from being overcooked while others are undercooked.

Variations: Customize Your Salad

Make this salad your own by trying these variations:

  • Spicy Kick: Add sliced jalapeños or a dash of hot sauce to the dressing for some heat.
  • Cheesy Delight: Crumble feta or goat cheese over the salad for a creamy texture.
  • Fruit Twist: Toss in some sliced strawberries or peaches for a sweet contrast to the savory chicken.
  • Grain Bowl: Add cooked quinoa or brown rice for a heartier meal.

Storage and Make-Ahead Instructions

This salad is great for meal prep. Here’s how to store it:

  • **Refrigerate**: Store leftovers in an airtight container in the fridge for up to 3 days.
  • **Keep Dressing Separate**: If making ahead, store the dressing separately to keep the greens fresh.
  • **Freezing**: While the chicken can be frozen, the salad itself doesn’t freeze well. It’s best enjoyed fresh.

Comprehensive FAQ

Got questions? Here are answers to some common ones:

  • Can I use skin-on chicken? Yes, but adjust cooking time as skin-on pieces may require longer.
  • What can I substitute for lemon juice? Lime juice works well, or you can use vinegar for a different flavor.
  • Is this salad gluten-free? Absolutely! All ingredients are naturally gluten-free.
  • Can I grill the chicken indoors? Yes, using a grill pan or broiler will work beautifully.
  • How do I prevent the salad from getting soggy? Dress only what you’ll eat immediately and store the rest separately.
  • What are some good side dishes? Grilled corn, garlic bread, or a light soup complements this salad nicely.
  • Can I use frozen chicken? It’s best to thaw it first for even cooking.
  • How can I make this salad vegan? Substitute the chicken with grilled tofu or chickpeas and use maple syrup in the dressing.

Nutritional Tips and Dietary Adaptations

This salad is not just delicious; it’s also packed with nutrients:

  • Lean Protein: Chicken provides essential amino acids to fuel your body.
  • Vitamins and Minerals: Fresh veggies add vitamins A, C, and K, along with fiber.
  • Low-Carbohydrate: This salad is low in carbs, making it suitable for many diets.

Essential Equipment Recommendations

To make this salad preparation easier, here are some tools you might need:

  • Grill or Grill Pan: For perfectly grilled chicken.
  • Mixing Bowls: To marinate and combine ingredients.
  • Whisk: For mixing the dressing smoothly.
  • Meat Thermometer: To ensure your chicken is perfectly cooked.
  • Salad Spinner: For washing and drying greens efficiently.

Serving Suggestions

Now that your salad is ready, consider these serving ideas:

  • On a Platter: Serve the salad on a large platter for a family-style meal.
  • With Crusty Bread: Pair with a slice of homemade bread or baguette for a complete meal.
  • As a Side Dish: This salad makes a lovely accompaniment to grilled fish or steak.

In conclusion, this **Zesty Grilled Lemon Herb Chicken Salad** is more than just a recipe; it’s a way to bring family and friends together around the table. The vibrant flavors, the freshness of the ingredients, and the love infused into each bite are what make it truly special. So gather your loved ones, savor the moments, and enjoy this taste of summer that whispers of good times and happy memories.

Zesty Grilled Lemon Herb Chicken Salad

Prep Time 10 minutes
Cook Time 15 minutes
Total Time 25 minutes
Servings 4 servings
Calories 350
A fresh and flavorful salad featuring grilled lemon herb chicken, perfect for a healthy lunch or dinner.

Ingredients

Chicken

  • 2 pieces boneless, skinless chicken breasts
  • 2 tablespoons olive oil
  • 1 unit lemon (Juice of 1 lemon)
  • 1 teaspoon dried oregano
  • 1 teaspoon garlic powder
  • to taste Salt and pepper

Salad

  • 4 cups mixed salad greens
  • 1 cup cherry tomatoes, halved
  • 1 unit cucumber (sliced)
  • 1/4 red onion red onion, thinly sliced

Dressing

  • 3 tablespoons olive oil
  • 1 tablespoon lemon juice
  • to taste Salt and pepper

Instructions 

  • Marinate the chicken: combine olive oil, lemon juice, oregano, garlic powder, salt, and pepper. Marinate chicken for at least 30 minutes.
  • Grill the chicken: preheat grill, cook chicken for 6-7 minutes per side, then rest and slice.
  • Prepare the salad: combine greens, cherry tomatoes, cucumber, and red onion in a large bowl.
  • Make the dressing: whisk olive oil, lemon juice, salt, and pepper.
  • Assemble the salad: top with sliced chicken, drizzle with dressing, and toss gently.

Notes

Use fresh herbs for extra flavor and serve immediately.
Calories: 350kcal
Cost: $15
Course: Salad
Cuisine: American
Keyword: chicken, healthy, Lemon

Discover the Comfort of Garlic Herb Chicken

Welcome to a meal that speaks the language of home—Garlic Herb Chicken. This dish whispers of Sunday dinners, family gatherings, and the kind of warmth that fills your heart. With tender chicken, aromatic garlic, and fresh herbs, this recipe is not just a meal; it’s a celebration of simple, honest cooking. More than just flavors, it’s about the memories tied to every bite. Let’s dive into this delightful recipe, ensuring you create a dish that your loved ones will cherish.

Why You’ll Love This Recipe

  • Quick Preparation: You can whip this dish up in just 30 minutes, making it perfect for busy weeknights.
  • Health Benefits: Lean chicken breast is a great source of protein, aiding in muscle repair and overall health.
  • Versatility: This garlic herb chicken pairs wonderfully with a variety of sides, from roasted veggies to a fresh salad.
  • Meal Prep Friendly: Cook a batch to enjoy throughout the week—perfect for lunch or dinner.
  • Flavorful and Comforting: The combination of garlic and herbs creates a restaurant-quality dish right in your kitchen.

Ingredients Breakdown

For the perfect Garlic Herb Chicken, here’s what you need:

  • 2 boneless, skinless chicken breasts: These are the stars of the show, providing the lean protein base.
  • 3 tablespoons olive oil: Adds moisture and helps to brown the chicken beautifully.
  • 1 tablespoon fresh lemon juice or vinegar: Brightens the dish with acidity.
  • 4 garlic cloves, minced: The heart of the flavor profile—don’t skimp on this!
  • 1 teaspoon salt: Essential for bringing out the flavors in the chicken.
  • ½ teaspoon black pepper: Adds a little kick.
  • 1 teaspoon dried oregano: A classic herb that pairs perfectly with chicken.
  • 1 teaspoon dried basil: Provides a hint of sweetness.
  • ½ teaspoon paprika: Adds a subtle smokiness.
  • 1 tablespoon fresh parsley, chopped (optional for garnish): A touch of color and freshness.
  • 1 tablespoon butter (optional for pan-searing): For that extra richness.

Step-by-Step Instructions

Close-up of seasoned chicken breast garnished with parsley.

Let’s get cooking! Follow these straightforward steps to create your Garlic Herb Chicken:

  1. Pound the chicken breasts to an even thickness using a meat mallet or rolling pin. This ensures even cooking.
  2. Prepare the marinade by combining olive oil, lemon juice, garlic, salt, pepper, oregano, basil, and paprika in a bowl.
  3. Place the chicken in a resealable bag or shallow container, then pour the marinade over it. Let it marinate for at least 30 minutes or up to 8 hours in the fridge for deeper flavor.
  4. Preheat a skillet over medium heat or heat a grill. Add butter or a small amount of olive oil if desired.
  5. Cook the chicken breasts for about 5-6 minutes per side, or until golden brown and the internal temperature reaches 165°F (75°C).
  6. Rest the chicken for 5 minutes before slicing—this helps retain the juices.
  7. Garnish with fresh parsley and serve hot with your favorite sides.

Pro Tips for Success

  • Marinate Longer: For maximum flavor, marinate the chicken for up to 8 hours—overnight is even better!
  • Use Fresh Herbs: If you have access to fresh herbs, use them instead of dried for an even more vibrant flavor.
  • Check Temperature: Always use a meat thermometer to ensure your chicken reaches 165°F for safe consumption.
  • Resting Time: Letting the chicken rest after cooking is key to juicy meat.
  • Experiment with Spices: Feel free to add your favorite spices to the marinade for a personal touch.
  • Cooking Method: You can grill, pan-sear, or bake this chicken—each method offers a unique flavor.
  • Pairing Ideas: Serve with roasted veggies, a light salad, or creamy mashed potatoes for a complete meal.
  • Leftovers: Don’t be afraid to use leftovers in salads or wraps for a delicious next-day lunch.

Common Mistakes and Troubleshooting

Even the best of us can run into a hitch now and then. Here are some common pitfalls and how to avoid them:

  • Overcooking: Keep an eye on your chicken! Cooking too long can lead to dryness. Use a thermometer for best results.
  • Not Enough Marinade: Ensure your chicken is well-coated and submerged in the marinade for maximum flavor.
  • Skipping Resting Time: Resist the urge to cut into your chicken right away—let it rest to keep it juicy.
  • Using Cold Chicken: Allow your chicken to come to room temperature before cooking for more even cooking.

Variations to Try

Feeling adventurous? Here are some delicious variations of this recipe:

  • Italian Herb Chicken: Swap basil and oregano for Italian seasoning and add a splash of balsamic vinegar.
  • Spicy Garlic Chicken: Add red pepper flakes to the marinade for a kick of heat.
  • Honey Garlic Chicken: Add a tablespoon of honey to the marinade for a sweet twist.
  • Citrus Herb Chicken: Incorporate orange or lime juice into the marinade for a bright flavor.

Storage and Make-Ahead Instructions

This dish is perfect for meal prep and leftovers:

  • Refrigeration: Store cooked chicken in an airtight container for up to 3-4 days.
  • Freezing: You can freeze cooked chicken for up to 3 months. Just thaw in the fridge overnight before reheating.
  • Reheating: Reheat in a skillet over low heat or in the microwave, ensuring it doesn’t dry out.

Frequently Asked Questions

Here are some common questions about Garlic Herb Chicken:

  • Can I use bone-in chicken? Yes, bone-in chicken will take longer to cook but will be extra juicy.
  • What if I don’t have fresh garlic? Garlic powder can be used, but fresh garlic provides the best flavor.
  • How can I make it gluten-free? This recipe is naturally gluten-free; just ensure your marinade ingredients are gluten-free.
  • Can I grill this chicken? Absolutely! Grilling adds a lovely smoky flavor to the dish.
  • Can I make this ahead of time? Yes, you can marinate the chicken overnight for more flavor.
  • What should I serve with Garlic Herb Chicken? It pairs well with rice, veggies, or a fresh salad. Get creative with your sides!
  • Is this recipe suitable for meal prep? Yes! Cook a batch and enjoy it throughout the week.
  • Can I use other meats or tofu? This marinade works beautifully with pork, fish, or even tofu for a vegetarian option.

Nutritional Tips and Dietary Adaptations

Garlic Herb Chicken is not just delicious; it’s also nutritious. Here are some modifications based on dietary needs:

  • Low-Carb: Serve with non-starchy vegetables like broccoli or zucchini.
  • Dairy-Free: Omit the butter and use olive oil for cooking.
  • High-Protein: Pair with a quinoa or chickpea salad for extra protein.

Equipment Recommendations

To make your cooking experience effortless, here’s what you’ll need:

  • Meat Mallet: For pounding the chicken to an even thickness.
  • Non-Stick Skillet: Ideal for searing the chicken without it sticking.
  • Meat Thermometer: Ensures your chicken is cooked perfectly every time.
  • Mixing Bowl: For preparing your marinade.

Serving Suggestions

Now that your Garlic Herb Chicken is ready, consider these delightful serving ideas:

  • With Roasted Vegetables: Carrots, zucchini, and bell peppers make a colorful, nutritious side.
  • On a Bed of Greens: Create a fresh salad topped with your cooked chicken for a light meal.
  • In a Wrap: Slice the chicken and serve in a whole wheat wrap with fresh veggies.
  • With Rice or Quinoa: Serve alongside fluffy rice or nutty quinoa for a filling dinner.

Final Thoughts

Cooking is about creating memories and sharing love through food. The Garlic Herb Chicken is not just a recipe; it’s a bridge to moments spent with family and friends. Whether it’s a cozy dinner or a casual lunch, this dish brings comfort and satisfaction. So roll up your sleeves, gather your ingredients, and let’s make some magic happen in the kitchen. Happy cooking!

Garlic Herb Chicken Breast

Prep Time 10 minutes
Cook Time 12 minutes
Total Time 22 minutes
Servings 4 pieces
Calories 250
Juicy, flavorful chicken breasts infused with garlic and herbs, perfect for a quick and healthy meal.

Ingredients

Protein

  • 2 pieces boneless, skinless chicken breasts
  • 3 tablespoons olive oil
  • 1 tablespoon fresh lemon juice or vinegar
  • 4 cloves garlic, minced
  • 1 teaspoon salt
  • ½ teaspoon black pepper
  • 1 teaspoon dried oregano
  • 1 teaspoon dried basil
  • ½ teaspoon paprika
  • 1 tablespoon fresh parsley, chopped (optional for garnish)
  • 1 tablespoon butter (optional for pan-searing)

Instructions 

  • Pound chicken to even thickness.
  • Mix olive oil, lemon juice, garlic, salt, pepper, oregano, basil, and paprika to make marinade.
  • Marinate chicken for at least 30 minutes in fridge.
  • Cook chicken in a skillet over medium heat with butter or oil for 5-6 minutes per side until golden and internal temp reaches 165°F (75°C).
  • Rest for 5 minutes, then garnish with parsley and serve.

Notes

Ensure chicken reaches internal temperature for safety.
Calories: 250kcal
Cost: $15
Course: Main Course
Cuisine: American
Keyword: chicken, Garlic, Herb

The Comforting Embrace of Creamy Chicken and Tomatoes

There’s something truly magical about the combination of creamy chicken and ripe tomatoes. This dish isn’t just a meal; it’s an experience, a journey back to family dinners filled with laughter and warmth. As we dive into this recipe, you’ll discover just how simple it is to create something that not only satisfies hunger but also nourishes the soul. In under an hour, you can have a plate full of comfort that will make your loved ones feel right at home.

Why You’ll Love This Recipe

This creamy chicken and tomato dish is more than just delicious; it’s packed with benefits that will make it a staple in your home. Here are a few reasons to get excited:

  • Quick and Easy: With a preparation time of just 10 minutes and cooking time of about 30 minutes, you can whip this up on a busy weeknight.
  • Farm-Fresh Ingredients: Using fresh tomatoes gives the dish a vibrant flavor, while chicken thighs add tenderness and richness.
  • Customizable: Whether you want to throw in some extra veggies or swap the chicken for another protein, this dish can adapt to your taste.
  • Healthy Comfort Food: With low-fat cream cheese or coconut milk, you can enjoy a creamy texture without the guilt.
  • Perfect for Meal Prep: Make a big batch for the week, and enjoy leftovers that taste just as good the next day!

Ingredients You’ll Need

Here’s what you’ll need to create this heartwarming dish:

  • 600g (21 oz) of uncooked boneless skinless chicken thighs: Trimmed of visible fat and sliced thinly.
  • 2 tablespoons of paprika: For a smoky flavor that complements the chicken beautifully.
  • 1 large onion: Halved and sliced for sweetness.
  • 2 cloves of garlic: Crushed for an aromatic kick.
  • 8 tablespoons of low-fat cream cheese or coconut milk: Adds creaminess without overwhelming calories.
  • 4 medium ripe tomatoes: Peeled and chopped for a fresh, juicy base.
  • 2 tablespoons of tomato paste: To deepen the tomato flavor.
  • 1 cup (240ml) of chicken stock: For added richness.
  • Salt and black pepper: To taste.
  • Low-calorie spray: For cooking without adding unnecessary fats.
  • A handful of fresh parsley, chopped: For garnish and freshness.

How to Make Creamy Chicken and Tomatoes

Side view of juicy chicken thighs in a creamy sauce with fresh chopped tomatoes.

Follow these simple steps to create a dish that will become a family favorite:

  1. Heat a frying pan over medium-high heat and spray it with low-calorie spray oil.
  2. Add the sliced onion to the pan and sauté for a few minutes until softened.
  3. Introduce the chicken, paprika, and garlic into the pan and fry until the chicken is lightly golden.
  4. Stir in the fresh tomatoes and tomato paste, then reduce the heat and let it simmer until the tomatoes break down into a sauce.
  5. Pour in the chicken stock, add the cream cheese, and chopped fresh parsley, and stir until the cream cheese melts.
  6. Simmer the sauce until it thickens and becomes creamy, about 5-10 minutes.
  7. Serve with your preferred choice of sides, and enjoy your delicious meal!

Pro Tips for Perfection

Here are some expert insights to ensure your dish shines:

  • Use Fresh Tomatoes: They offer a robust flavor compared to canned tomatoes, but if you must use canned, opt for high-quality, whole peeled varieties.
  • Adjust the Creaminess: You can increase or decrease the amount of cream cheese or coconut milk based on your dietary preferences.
  • Don’t Rush the Simmer: Allowing the tomatoes to break down fully will enhance the sauce’s flavor.
  • Experiment with Spices: Add Italian herbs like oregano or basil for extra flavor depth.
  • Perfect Leftovers: This dish reheats beautifully, making it perfect for meal prep.
  • Garnish Generously: Fresh herbs like basil or parsley can brighten the dish before serving.
  • Check for Seasoning: Always taste before serving to adjust salt and pepper.
  • Serve with Bread: A crusty bread is perfect for soaking up that creamy sauce.

Common Mistakes and Troubleshooting

Even the best chefs make mistakes! Here are some common pitfalls and how to avoid them:

  • Overcooking the Chicken: Ensure the chicken is cooked just until golden; overcooking can lead to dryness.
  • Not Enough Flavor: Taste and adjust seasoning throughout the cooking process.
  • Using Low-Quality Ingredients: Fresh ingredients make a world of difference in flavor.
  • Skipping the Simmer: Don’t rush this step; it’s crucial for developing flavor.

Variations to Try

If you want to mix things up, here are some tasty variations:

  • Mediterranean Twist: Add olives and capers for a Mediterranean flair.
  • Spicy Kick: Incorporate red pepper flakes or diced jalapeños for heat.
  • Cheesy Delight: Top with mozzarella or parmesan cheese before serving for an extra creamy texture.
  • Veggie-Packed: Toss in spinach, zucchini, or bell peppers for added nutrition.

Storage and Make-Ahead Instructions

This creamy chicken and tomato dish can be made ahead of time and stored for later. Here’s how:

  • Refrigeration: Store in an airtight container for up to 3 days. Reheat gently on the stove or in the microwave.
  • Freezing: Allow it to cool completely, then freeze in portions for up to 2 months. Thaw in the fridge overnight before reheating.

Comprehensive FAQ

Here are some frequently asked questions about this delightful recipe:

  • Can I use chicken breasts instead of thighs? Yes, but thighs are juicier and more forgiving.
  • What can I serve with this dish? It pairs well with rice, pasta, or a fresh salad.
  • Can I make this dish dairy-free? Absolutely! Use coconut milk in place of cream cheese.
  • How do I make the sauce thicker? Simmer longer or add a cornstarch slurry to achieve your desired consistency.
  • What if I don’t have fresh tomatoes? Canned tomatoes can be used, but the flavor may vary.
  • Is this recipe suitable for meal prep? Yes! It stores well and tastes even better the next day.
  • How can I adjust the spice level? Add or reduce spices based on your family’s preference.
  • Can I add other proteins? Yes! Shrimp or tofu could be delicious alternatives.

Nutritional Information and Dietary Adaptations

This dish offers a good balance of protein and healthy fats. For those watching their intake, consider these adaptations:

  • Low-Calorie Option: Use reduced-fat cream cheese and more vegetables.
  • Gluten-Free: This recipe is already gluten-free; just ensure your stock is gluten-free.
  • High-Protein: Serve with a side of quinoa or lentils for added protein.

Essential Equipment Recommendations

To make this recipe smoothly, here’s what I recommend:

  • Non-Stick Pan: Essential for easy cooking and cleanup.
  • Sharp Knife: For slicing chicken and vegetables with ease.
  • Cutting Board: A sturdy surface is vital for preparation.
  • Measuring Cups and Spoons: To ensure accuracy in ingredients.

Serving Suggestions

Now that your creamy chicken and tomatoes are ready, consider these serving ideas:

  • Over Rice: Serve it over fluffy white or brown rice to soak up the sauce.
  • With Pasta: Toss with your favorite pasta for a comforting meal.
  • On a Bed of Greens: Create a fresh salad base for a lighter option.
  • With Crusty Bread: Perfect for dipping and enjoying every last drop of sauce.

In Conclusion

Creating a comforting dish like creamy chicken and tomatoes isn’t just about cooking; it’s about sharing love and care with every bite. This recipe invites you to gather around the table and enjoy hearty flavors that nourish both body and soul. So grab your ingredients, put on your apron, and let’s make some memories together! Enjoy!

Creamy Chicken and Tomatoes

Prep Time 10 minutes
Cook Time 20 minutes
Total Time 30 minutes
Servings 4 servings
Calories 450
A flavorful and creamy chicken dish with fresh tomatoes and herbs, perfect for a quick and satisfying meal.

Ingredients

Protein

  • 600 g boneless skinless chicken thighs (trimmed and sliced thinly)
  • 2 tablespoons paprika
  • 1 large onion (halved and sliced)
  • 2 cloves garlic (crushed)
  • 8 tablespoons low fat cream cheese or coconut milk
  • 4 medium ripe tomatoes (peeled and chopped)
  • 2 tablespoons tomato paste
  • 1 cup chicken stock
  • to taste salt and black pepper
  • as needed low calorie spray
  • a handful fresh parsley (chopped)

Instructions 

  • Spray a frying pan with low calorie spray and sauté the onion until softened.
  • Add chicken, paprika, and garlic; cook until chicken is golden.
  • Stir in tomatoes and tomato paste; simmer until tomatoes break down.
  • Add stock and cream cheese; stir until melted and sauce thickens.
  • Simmer until sauce is creamy; garnish with parsley and serve.

Notes

Use fresh herbs for the best flavor and adjust seasoning to taste.
Calories: 450kcal
Cost: $15
Course: Main Course
Cuisine: international
Keyword: chicken, cream, Tomatoes

Welcome, dear friends! Today, I’m excited to share a recipe that embodies the warmth and comfort of home—my Smoky Chipotle BBQ Chicken and Rice Skillet. This dish is more than just a meal; it’s a gathering point for family and friends, a way to bring everyone around the table. With its tender chicken, smoky spices, and comforting rice, this one-pan wonder is perfect for busy weeknights or leisurely Sunday dinners. Let’s dive in and discover why this dish deserves a special spot in your kitchen!

Why You’ll Love This Recipe

This Smoky Chipotle BBQ Chicken and Rice Skillet is not just another recipe; it’s a blend of flavors and memories. Here are some reasons why you’ll appreciate this dish:

  • One-Pan Convenience: Enjoy a hearty meal without the hassle of multiple pots and pans to clean up. Simply cook everything in one skillet!
  • Flavor Explosion: The combination of BBQ sauce and chipotle peppers creates a deliciously smoky and spicy flavor profile that will tantalize your taste buds.
  • Quick and Easy: With a prep time of just 15 minutes and cooking time of 30 minutes, dinner is served in under an hour!
  • Customizable: This dish is flexible! You can easily swap out ingredients based on what you have on hand or your personal preferences.
  • Comfort Food at Its Best: With tender chicken and savory rice, this skillet meal is like a warm hug on a plate, perfect for any family gathering.

Ingredients

Gather the following ingredients to create this delightful dish:

  • 1 lb boneless skinless chicken breast, diced into bite-sized pieces
  • 1 tablespoon olive oil: For sautéing the chicken and veggies
  • 1 small yellow onion, diced: Adds a sweet and savory base flavor
  • 1 red bell pepper, chopped: Provides sweetness and crunch
  • 2 garlic cloves, minced: A must for that aromatic touch
  • 1 chipotle pepper in adobo, finely chopped: Delivers that signature smoky heat
  • 1 tablespoon adobo sauce from the chipotle can: Enhances the dish’s flavor
  • ½ teaspoon smoked paprika: Boosts the smoky flavor
  • Salt and pepper, to taste: Essential for seasoning
  • 1 cup long grain white rice: The heart of the dish, soaking up all the flavors
  • 1 ¾ cups chicken broth: Adds moisture and depth
  • ½ cup BBQ sauce: For that tangy sweetness
  • ½ cup shredded cheddar cheese: Melts beautifully on top
  • 2 tablespoons chopped green onions or cilantro (optional): For garnish and freshness

If you’re looking to make substitutions, here are some ideas:

  • Chicken Thighs: Use thighs for a juicier option.
  • Vegetable Broth: Swap chicken broth for vegetable broth for a vegetarian version.
  • Brown Rice: For a healthier twist, replace white rice with brown rice, but increase the cooking time.
  • Vegan Cheese: Use a plant-based cheese alternative to make it vegan-friendly.

How to Make Smoky Chipotle BBQ Chicken and Rice Skillet

Now that you have your ingredients ready, let’s walk through the steps to whip up this delightful dish:

Step 1: Sear the Chicken

Heat the olive oil in a large skillet over medium-high heat. Add the diced chicken, seasoning it lightly with salt and pepper. Cook until browned on all sides, about 5-6 minutes. Remove the chicken from the skillet and set it aside.

Step 2: Build the Flavor Base

In the same skillet, reduce the heat to medium and add the diced onion and bell pepper. Sauté until softened, around 3-4 minutes. Stir in the minced garlic, chopped chipotle pepper, adobo sauce, and smoked paprika. Let it cook for another 1-2 minutes until fragrant. The chipotle will release its smoky aroma, filling your kitchen with warmth.

Step 3: Toast the Rice

Add the rice to the skillet and stir well, coating the grains with the smoky mixture. Toast it for 1-2 minutes to deepen the flavor.

Step 4: Simmer Everything Together

Pour in the chicken broth and BBQ sauce. Stir to combine, then return the cooked chicken to the pan. Bring everything to a gentle boil, then reduce the heat to low. Cover and simmer for 20-25 minutes, or until the rice is tender and the liquid is absorbed.

Step 5: Add Cheese and Finish

Sprinkle the shredded cheddar cheese over the top and cover the skillet for 2-3 minutes until melted. Garnish with chopped green onions or fresh cilantro for a burst of color and freshness.

Pro Tips for the Best Smoky Chipotle BBQ Chicken

Juicy chicken and rice dish garnished with green onions, featuring a smoky BBQ sauce.

Here are some expert insights to ensure your dish turns out perfect every time:

  • Use Fresh Ingredients: Fresh vegetables and herbs will elevate the dish’s flavor significantly.
  • Control the Heat: Adjust the amount of chipotle pepper based on your spice tolerance.
  • Let It Rest: After cooking, let the skillet rest for a few minutes before serving to enhance the flavors.
  • Experiment with Spices: Feel free to add other spices like cumin or chili powder for extra depth.
  • Don’t Rush the Cooking: Allow the rice to simmer gently for the best texture and flavor absorption.
  • Garnish Generously: A fresh herb garnish not only adds color but also a fresh taste that brightens the dish.
  • Make It Ahead: This dish tastes even better the next day, so consider making it in advance!
  • Pair with Sides: Serve with a simple salad or cornbread for a complete meal.

Common Mistakes and Troubleshooting

Even the best of us make mistakes in the kitchen. Here are some common pitfalls to avoid:

  • Undercooking the Rice: Make sure to let the rice simmer fully; if it’s still hard, add a bit more broth and cook longer.
  • Overcrowding the Skillet: If you’re doubling the recipe, use two skillets instead of cramming everything into one.
  • Not Seasoning Enough: Don’t be shy with salt and pepper; seasoning is key to bringing out flavors.
  • Skipping the Toasting Step: Toasting the rice really enhances its flavor, so don’t skip this step!

Variations of Smoky Chipotle BBQ Chicken and Rice Skillet

This recipe is versatile, and you can easily switch things up! Here are some delightful variations:

  • Vegetarian Version: Substitute chicken with sautéed mushrooms or chickpeas for a vegetarian-friendly dish.
  • Spicy Southwest Twist: Add black beans and corn for a Southwestern flair.
  • Creamy Version: Stir in a dollop of sour cream or cream cheese before serving for a creamy texture.
  • BBQ Chicken Pizza: Use the same ingredients on a pizza crust for a fun twist!

Storage and Make-Ahead Instructions

Planning ahead? Here’s how to store and reheat your delicious skillet:

  • Refrigerate: Store leftovers in an airtight container in the fridge for up to 3 days.
  • Freezing: This dish freezes well! Store in a freezer-safe container for up to 3 months. Thaw in the fridge before reheating.
  • Reheat: Warm it up on the stovetop over low heat, adding a splash of chicken broth if it seems dry.

Comprehensive FAQ

Here are some frequently asked questions to help you get the most out of this recipe:

  • Can I make this dish ahead of time? Absolutely! Prepare it a day in advance and reheat when ready to serve.
  • What can I substitute for chicken? Tofu or tempeh works well for a vegetarian option.
  • How spicy is this dish? The spice level depends on how much chipotle you use; adjust to your liking.
  • Can I use brown rice instead? Yes, but you’ll need to increase the cooking time.
  • What sides pair well with this dish? A simple green salad or cornbread complements it wonderfully.
  • Can I add more vegetables? Of course! Feel free to include veggies like zucchini or spinach.
  • How do I store leftovers? Keep them in the refrigerator in an airtight container for up to 3 days.
  • Can I cook this in a slow cooker? Yes, cook on low for 4-6 hours, adding rice towards the end of cooking.

Nutrition Tips and Dietary Adaptations

This dish is not only delicious but also adaptable for various dietary needs:

  • Low-Carb Option: Substitute rice with cauliflower rice for a low-carb version.
  • Gluten-Free: Ensure your BBQ sauce is gluten-free to accommodate dietary restrictions.
  • Higher Protein: Add beans for an extra protein boost, making the dish even more satisfying.

Equipment Recommendations

To make your cooking experience smooth, here’s what you’ll need:

  • Large Skillet: A heavy-bottomed skillet is essential for even cooking.
  • Wooden Spoon: Great for stirring and scraping the bottom of the pan.
  • Measuring Cups and Spoons: For precise ingredient measurements.
  • Sharp Knife: For easy chopping of vegetables and chicken.

Serving Suggestions

When it comes to serving this dish, here are a few ideas:

  • Garnish with Fresh Herbs: A sprinkle of cilantro or green onions adds freshness.
  • Serve with Cornbread: A slice of warm cornbread pairs beautifully.
  • Make it a Feast: Round out your meal with a fresh salad or roasted vegetables.

So there you have it, folks! My Smoky Chipotle BBQ Chicken and Rice Skillet is a heartfelt dish that brings comfort and joy to any table. I hope you try it, share it with loved ones, and create your own memories around it. Cooking is about more than just food—it’s about love, warmth, and connection. Happy cooking!

Smoky Chipotle BBQ Chicken and Rice Skillet

Prep Time 10 minutes
Cook Time 30 minutes
Total Time 40 minutes
Servings 4 servings
Calories 650
A flavorful one-pan dish combining smoky chipotle, tender chicken, and cheesy rice for a satisfying meal.

Ingredients

Protein

  • 1 lb boneless skinless chicken breast, diced
  • 1 tablespoon olive oil
  • 1 small yellow onion, diced
  • 1 red red bell pepper, chopped
  • 2 cloves garlic, minced
  • 1 chipotle pepper in adobo finely chopped
  • 1 tablespoon adobo sauce from the chipotle can
  • ½ teaspoon smoked paprika
  • to taste Salt and pepper
  • 1 cup long grain white rice
  • 1 ¾ cups chicken broth
  • ½ cup BBQ sauce
  • ½ cup shredded cheddar cheese
  • 2 tablespoons chopped green onions or cilantro (optional for garnish)

Instructions 

  • Heat olive oil in a skillet, cook chicken until browned, then set aside.
  • Sauté onion and bell pepper, add garlic, chipotle, adobo sauce, and paprika; cook until fragrant.
  • Add rice, toast for 1-2 minutes to deepen flavor.
  • Pour in broth and BBQ sauce, return chicken, bring to boil, then simmer covered for 20-25 minutes.
  • Sprinkle cheese, cover until melted, garnish with green onions or cilantro.

Notes

Adjust salt and spice levels to taste. For extra flavor, garnish with fresh herbs.
Calories: 650kcal
Cost: $15
Course: Main Course
Cuisine: American
Keyword: BBQ, chicken, rice, smoky

Welcome to Your New Favorite Recipe: Easy Chicken Zucchini Rice Skillet

Gather ’round, friends! Today, we’re diving into a dish that perfectly captures the essence of home cooking: the Easy Chicken Zucchini Rice Skillet. With its hearty ingredients and comforting flavors, this one-pan meal is not just a recipe; it’s a warm invitation to gather your loved ones and share a meal that feels like a hug from the inside.

As you slice through tender chicken, crisp zucchini, and aromatic herbs, you’ll find that cooking doesn’t have to be complicated. With just a handful of simple ingredients, you can whip up a dish that nourishes the body and soul alike. So, let’s get started on this culinary journey, shall we?

Why You’ll Love This Recipe

  • Quick and Easy: Ready in under 30 minutes, it’s perfect for busy weeknights when you want a home-cooked meal without the fuss.
  • One-Pan Wonder: Minimal cleanup means more time to enjoy your meal and less time scrubbing pots and pans.
  • Balanced Nutrition: This dish combines protein from chicken, healthy veggies, and wholesome rice, making it a well-rounded meal.
  • Kid-Friendly: With its mild flavors and colorful presentation, it’s a hit with the little ones and the big kids alike.
  • Versatile Ingredients: Feel free to swap in your favorite vegetables or grains based on what you have on hand, making it as flexible as your schedule!

Ingredients for Your Chicken Zucchini Rice Skillet

Here’s a look at what you’ll need to create this delightful dish:

  • 2 pieces Boneless chicken breasts or thighs: Choose tender cuts that cook quickly and stay juicy in the skillet.
  • 2 cups Zucchini: Adds moisture and a fresh, mild flavor that pairs beautifully with the chicken.
  • 1 medium Onion: Provides a savory base note that enhances the dish’s depth.
  • 3 cloves Garlic: Essential for bold aroma and spice; don’t skip this one!
  • 1 cup Long-grain white rice: Absorbs flavors perfectly, making each bite a burst of deliciousness.
  • 2 cups Chicken broth: Use for richer flavor; it elevates the taste significantly.
  • 1 teaspoon Dried oregano: Adds subtle earthiness that complements the chicken.
  • 1 teaspoon Dried thyme: Elevates taste and brings a touch of warmth.
  • 1 teaspoon Paprika: Adds a smoky warmth that rounds out the flavors.
  • 1 teaspoon Salt and Pepper: Essential for seasoning; adjust to your taste.
  • 1/4 cup Fresh parsley or basil: For freshness and a pop of color.
  • 1/4 cup Grated Parmesan cheese: For an extra layer of indulgence; optional but highly recommended!

Step-by-Step Instructions

Juicy chicken and zucchini rice dish in a skillet with vibrant colors.

Now that we’ve got our ingredients ready, let’s dive into the cooking process:

  1. Prepare the Ingredients: Start by chopping the zucchini, onion, and garlic, and cutting your chicken into bite-sized pieces.
  2. Heat the Skillet: In a large skillet, heat a splash of olive oil over medium heat.
  3. Sauté Aromatics: Add the onions and garlic to the skillet and sauté until fragrant and translucent, about 2-3 minutes.
  4. Brown the Chicken: Add the chicken pieces and cook until they’re golden brown, about 5-7 minutes.
  5. Add Zucchini and Rice: Stir in the zucchini and rice, mixing everything together well.
  6. Pour in Chicken Broth: Add the chicken broth, followed by the dried herbs, salt, and pepper. Bring to a gentle simmer.
  7. Cover and Cook: Reduce the heat to low, cover the skillet, and let it cook for 20 minutes or until the rice is tender and has absorbed the liquid.
  8. Finish with Cheese: Stir in the grated Parmesan cheese and fresh herbs just before serving for an extra touch of flavor.

Pro Tips for the Best Chicken Zucchini Rice Skillet

  • Use Fresh Ingredients: Fresh herbs and quality chicken make a world of difference in flavor.
  • Don’t Overcrowd the Pan: If your skillet is too crowded, the chicken won’t brown properly. Use two pans if necessary.
  • Adjust Seasoning: Taste as you go! Adjust salt, pepper, and herbs based on your preferences.
  • Let It Rest: Allow the dish to sit covered for a few minutes after cooking; it helps the flavors meld.
  • Make It Spicy: Add a pinch of red pepper flakes for a little kick if you like some heat.
  • Experiment with Grains: Feel free to swap the rice for quinoa or brown rice for a healthier twist.
  • Make It a Meal Prep: This dish keeps well in the fridge for up to four days, making it a great meal prep option.
  • Try Different Vegetables: Substitute or add vegetables like bell peppers, spinach, or corn for variety.

Common Mistakes and Troubleshooting

Even the best cooks run into hiccups now and then. Here are some common mistakes and how to avoid them:

  • Rice Not Cooking: If the rice isn’t cooked through, it may need more liquid. Add a splash more broth and let it simmer longer.
  • Chicken Overcooked: Be careful not to cook the chicken too long; it can become dry. Aim for juicy, tender bites.
  • Too Much Liquid: If there’s excess liquid at the end, leave the lid off for the last few minutes to allow it to evaporate.

Variations to Try

Don’t be afraid to switch things up! Here are some variations to keep your Chicken Zucchini Rice Skillet exciting:

  • Mexican Twist: Add black beans, corn, and taco seasoning for a southwestern flair.
  • Italian Style: Incorporate sun-dried tomatoes, olives, and mozzarella cheese for an Italian-inspired dish.
  • Vegetarian Delight: Replace chicken with chickpeas or tofu and use vegetable broth.
  • Asian Fusion: Use soy sauce, ginger, and sesame oil, and add snap peas or bok choy for an Asian-inspired dish.

Storage and Make-Ahead Instructions

This Chicken Zucchini Rice Skillet is perfect for meal prep!

  • Refrigeration: Store in an airtight container in the fridge for up to 4 days.
  • Freezing: This dish freezes well! Let it cool completely, then transfer to an airtight container. It can last in the freezer for up to 3 months.
  • Reheating: Reheat on the stove with a splash of chicken broth to revive the flavors and moisture.

Frequently Asked Questions

  • Can I use brown rice instead of white? Yes, but you’ll need to adjust the cooking time and liquid accordingly.
  • What can I substitute for chicken? Try chickpeas, tofu, or even shrimp for a different protein option.
  • How do I make this dish gluten-free? Ensure your chicken broth is gluten-free and use a gluten-free rice option if needed.
  • Can I add more vegetables? Absolutely! Feel free to load up on your favorite veggies.
  • Is it possible to make this dish vegan? Yes, just replace chicken with tofu and use vegetable broth.
  • How do I store leftovers? Keep in an airtight container in the fridge for up to 4 days.
  • Can I double this recipe? Certainly! Just ensure you use a larger skillet or split the dish into two pans.
  • What goes well with this dish? A simple green salad or some crusty bread makes for a lovely pairing.

Nutritional Tips and Dietary Adaptations

This dish is naturally healthy, but you can make a few adjustments for specific dietary needs:

  • Low-carb option: Substitute rice with cauliflower rice for a low-carb alternative.
  • High-protein boost: Add extra chicken or beans to up the protein content.
  • Low-sodium version: Use low-sodium chicken broth and limit added salt to make it heart-friendly.

Essential Equipment Recommendations

Here’s what you’ll need to whip up this scrumptious skillet:

  • Large Skillet: A heavy-bottomed skillet ensures even cooking.
  • Wooden Spoon: Perfect for stirring without scratching your pan.
  • Sharp Knife: For chopping ingredients efficiently.
  • Cutting Board: A sturdy board for all your chopping needs.

Serving Suggestions

When it’s time to serve, consider these delightful ideas:

  • Garnish with fresh herbs: Sprinkle extra parsley or basil on top for a fresh finish.
  • Pair with a salad: A light green salad with vinaigrette complements the dish beautifully.
  • Serve with crusty bread: Perfect for sopping up any extra juices left on the plate.

As we draw to a close, I hope this Easy Chicken Zucchini Rice Skillet becomes a staple in your kitchen, just as it has in mine. Remember, cooking is about community and sharing, so don’t hesitate to invite your family or friends to join in the fun. Happy cooking, and may your meals always be filled with love and laughter!

Easy Chicken Zucchini Rice Skillet Packed with Bold Flavors

Prep Time 10 minutes
Cook Time 20 minutes
Total Time 30 minutes
Servings 4 servings
Calories 520
This flavorful skillet combines tender chicken, fresh zucchini, and aromatic herbs with rice for a quick and satisfying meal.

Ingredients

Protein

  • 2 pieces Boneless chicken breasts or thighs (Choose tender cuts that cook quickly and stay juicy in the skillet.)
  • 2 cups Zucchini (Adds moisture and a fresh, mild flavor.)
  • 1 medium Onion (Provides a savory base note.)
  • 3 cloves Garlic (Essential for bold aroma and spice.)
  • 1 cup Long-grain white rice (Absorbs flavors perfectly.)
  • 2 cups Chicken broth (Use for richer flavor.)
  • 1 teaspoon Dried oregano (Adds subtle earthiness.)
  • 1 teaspoon Dried thyme (Elevates taste.)
  • 1 teaspoon Paprika (Adds a smoky warmth.)
  • 1 teaspoon Salt (Essential for seasoning.)
  • 1 teaspoon Pepper (Essential for seasoning.)
  • 1/4 cup Fresh parsley or basil (For freshness.)
  • 1/4 cup Grated Parmesan cheese (For an extra layer of indulgence.)

Instructions 

  • Season and cook the chicken in a skillet until browned, then set aside.
  • Sauté chopped onion and garlic until fragrant.
  • Add chopped zucchini and cook until tender.
  • Stir in rice, broth, herbs, salt, and pepper; bring to a boil, then simmer until rice is cooked and liquid is absorbed.
  • Return chicken to skillet, sprinkle with parsley and Parmesan, then serve.

Notes

For extra flavor, add a squeeze of lemon before serving.
Calories: 520kcal
Cost: $15
Course: Main Course
Cuisine: American
Keyword: chicken, rice, Zucchini

The Irresistible Allure of Crispy Chilli Chicken

Gather ’round, friends! Let me tell you about a dish that will not only bring everyone to the table but will also have them asking for seconds. This crispy chilli chicken recipe is a delightful balance of heat and sweetness, capturing the essence of comfort food with a spicy twist. Perfect for family gatherings or cozy dinners, this dish has become a staple in my home—just like it has for many of you, I bet. Trust me; once you get a taste of this crispy goodness, you’ll wonder how you ever lived without it. Let’s dive into the heart of this recipe!

Why You’ll Love This Recipe

  • Ultimate Comfort Food: This crispy chilli chicken is a takeout-style meal that you can easily whip up at home, making it perfect for those nights when you’re craving something special.
  • Perfectly Crispy Texture: The double frying technique ensures that every piece of chicken is enveloped in a light, crispy coating that stays crunchy, even after being tossed in the sauce.
  • Flavor Packed Sauce: The combination of sriracha, honey, and soy sauce creates a rich, tangy flavor profile that will have your taste buds dancing with joy.
  • Quick and Easy Preparation: With minimal prep time and straightforward steps, you can have a delicious meal ready in about 30 minutes.
  • Customizable to Your Taste: Whether you enjoy it extra spicy or prefer a milder flavor, this recipe allows you to adjust the heat level to suit your palate.

Ingredients You’ll Need

Let’s gather our ingredients! Here’s what you’ll need to create this delightful dish:

  • 1 lb (450 g) boneless, skinless chicken breasts: Cut into thin strips for quick cooking.
  • 1 tbsp light soy sauce: Adds depth and umami to the marinade.
  • 1 tsp sesame oil: Introduces a nutty aroma that enhances flavor.
  • 1 egg white: Helps the cornstarch stick, giving the chicken its signature crunch.
  • 1 cup cornstarch for coating: This is the secret to achieving that restaurant-worthy crispiness.
  • Vegetable oil for deep frying: Choose an oil with a high smoke point to ensure perfect frying.
  • 3 tbsp sriracha or hot chilli sauce: The star ingredient for that spicy kick—adjust based on your heat preference.
  • 2 tbsp honey: Balances the heat beautifully with a touch of sweetness.
  • 2 tbsp soy sauce: For that savory, umami flavor that brings it all together.
  • 1 tbsp ketchup: Adds a hint of tanginess to the sauce.
  • 1 tbsp lime juice: Fresh and zesty, it cuts through the richness of the dish.
  • 1 tsp chili flakes (optional): For those who like an extra layer of heat.
  • 1 tbsp vegetable oil (for sautéing): Used to stir-fry the aromatics.
  • 1 tbsp minced garlic: Infuses the dish with deep, fragrant flavor.
  • 1 tsp minced ginger: Adds a bright, peppery note to the mix.
  • 1 red bell pepper, sliced: For a pop of color and mild sweetness.
  • 1 small carrot, julienned: Adds a delightful crunch and slight sweetness.
  • Spring onions and sliced red chilies for garnish: Elevates the dish with freshness and a pop of heat.

How to Make Crispy Chilli Chicken

Juicy, golden-brown crispy chilli chicken with a spicy glaze, presented on a white plate.

Now that we have our ingredients ready, let’s roll up our sleeves and get cooking!

Step 1: Marinate the Chicken

In a mixing bowl, combine the chicken strips with soy sauce, sesame oil, and egg white. Toss until each piece is well-coated and let it marinate for 10-15 minutes. This quick marinade will not only season the chicken but also help the cornstarch coating stick better, ensuring it’s extra crispy.

Step 2: Coat the Chicken

After marinating, add the cornstarch to the bowl and toss until all pieces are thoroughly coated. This creates a light, crispy layer that gives you that restaurant-style crunch we all crave.

Step 3: Fry the Chicken

In a wok or deep frying pan, heat vegetable oil to 350°F (180°C). Fry the chicken pieces in small batches for 2-3 minutes, or until they turn golden and crispy. Avoid crowding the pan, as this can lower the oil temperature and affect the crispiness. Once done, drain the chicken on a paper towel.

Step 4: Double Fry for Maximum Crunch

For that extra crunchiness, fry the chicken again for an additional 2-3 minutes. This double frying technique makes the coating exceptionally crispy, ensuring it holds up even after being tossed in the sauce. Remove the chicken and set aside on a fresh paper towel.

Step 5: Prepare the Sauce

In a small bowl, mix together the sriracha, honey, soy sauce, ketchup, lime juice, and optional chili flakes. This sauce is the perfect blend of sweet, spicy, and tangy—each bite is balanced with a little bit of everything.

Step 6: Stir-Fry the Vegetables

In a clean wok or frying pan, heat 1 tablespoon of vegetable oil over medium heat. Add the minced garlic and ginger, stirring until fragrant (about 30 seconds). Then, add the sliced bell pepper and carrot, stir-frying for about 2 minutes until they start to soften but retain some crunch.

Step 7: Toss the Chicken in the Sauce

Pour the prepared sauce into the pan with the garlic, ginger, and vegetables. Let it simmer for a minute, allowing it to thicken slightly. Add the fried chicken pieces and toss well to coat each piece in the sauce, ensuring every bite is packed with flavor.

Step 8: Serve and Garnish

Transfer the Crispy Chilli Chicken to a serving dish and garnish with fresh spring onions and sliced red chilies. Serve hot with steamed rice or noodles to soak up the extra sauce.

Pro Tips for Perfect Crispy Chilli Chicken

  • Use Fresh Ingredients: Fresh chicken and vegetables enhance flavor and texture, making the dish more vibrant.
  • Don’t Rush the Frying: Fry in small batches to maintain oil temperature for that perfect crunch.
  • Adjust the Heat: Experiment with the amount of sriracha and chili flakes to find your preferred spice level.
  • Let the Chicken Rest: Allow the fried chicken to sit on paper towels for a moment after frying to eliminate excess oil.
  • Mix the Sauce Well: Ensure you combine the sauce ingredients thoroughly for a balanced flavor in every bite.
  • Prep Ahead: Marinate the chicken and prep the sauce a few hours ahead for quicker cooking later.
  • Garnish Generously: Fresh herbs and sliced chilies not only add flavor but also make the dish visually appealing.
  • Use a Thermometer: To avoid overcooking, use a thermometer to check the oil temperature—aim for 350°F (180°C).

Common Mistakes and Troubleshooting

Even seasoned cooks can run into a few hiccups! Here are some common mistakes and how to avoid them:

  • Not Marinating Long Enough: A quick marinade is essential for flavor and adhesion. Make sure to marinate for at least 10-15 minutes.
  • Coating Too Thick: Ensure an even, light coat of cornstarch for that perfect crispiness.
  • Overcrowding the Pan: Fry in batches to maintain oil temperature and achieve even cooking.
  • Using Old Oil: Fresh oil ensures better frying and prevents an off flavor in your dish.

Variations to Try

If you’re looking to mix things up, consider these delicious variations:

  • Sweet and Sour Version: Add pineapple chunks and bell peppers to the sauce for a sweet and tangy twist.
  • Spicy Garlic Chicken: Increase the garlic and add more sriracha for a robust flavor.
  • Vegetarian Option: Substitute chicken with firm tofu or cauliflower for a veggie-friendly version.
  • Orange Ginger Chicken: Add orange juice and zest to the sauce for a citrusy kick.

Storage and Make-Ahead Instructions

This dish is best enjoyed fresh, but here’s how to handle leftovers:

  • Refrigerate: Store leftover chicken in an airtight container in the fridge for up to 3 days.
  • Reheat: To restore crispiness, reheat in an oven or air fryer instead of a microwave.
  • Make Ahead: You can marinate the chicken and prepare the sauce a few hours ahead of cooking.

Frequently Asked Questions

Here are some common queries about this recipe:

  • Can I use skin-on chicken? Yes! Just note that skin-on chicken will have a different texture and flavor.
  • How spicy is this dish? You can control the spice level by adjusting the amount of sriracha and chili flakes you use.
  • Can I bake the chicken instead of frying? Yes, you can bake the chicken at 400°F (200°C) for about 20 minutes, flipping halfway through.
  • What can I serve with crispy chilli chicken? It pairs wonderfully with steamed rice, noodles, or a fresh salad.
  • Can I freeze leftovers? Yes, but freezing may affect the texture. Store in an airtight container for up to 2 months.
  • Is there a gluten-free option? Use gluten-free soy sauce and cornstarch to make this dish gluten-free.
  • What can I substitute for sriracha? Any hot sauce can work, but adjust the amount based on your heat preference.
  • How do I make it less oily? Ensure the oil is hot enough before frying and drain on paper towels after cooking.

Nutritional Tips and Dietary Adaptations

This dish can be tailored to fit various dietary needs:

  • Low-Carb Option: Use a low-carb coating like almond flour instead of cornstarch for a keto-friendly version.
  • High-Protein Option: Pair the chicken with a side of quinoa or lentils to boost protein intake.
  • Vegetable Boost: Add more vegetables like broccoli or snap peas for added nutrition.

Equipment Recommendations

Here’s what you’ll need to make this recipe a success:

  • Deep Fryer or Heavy Pot: For frying the chicken efficiently and safely.
  • Thermometer: To check the oil temperature for perfect frying.
  • Mixing Bowls: For marinating and mixing ingredients.
  • Wok or Stir-Fry Pan: Ideal for stir-frying the vegetables and sauce.

Serving Suggestions

When it comes to serving this dish, consider these ideas:

  • Rice or Noodles: Serve over steamed rice or toss with noodles to soak up that delicious sauce.
  • Fresh Salad: Pair with a crunchy salad to balance the rich flavors of the chicken.
  • Garnish Creatively: Don’t skimp on garnishes; they add flavor and visual appeal to your plate.

So there you have it, friends—the ultimate crispy chilli chicken recipe that’s bound to become a favorite in your household. Cooking is about sharing joy and creating memories, and I hope this dish brings you and your loved ones together around the table. Enjoy every bite, and happy cooking!

Crispy Chilli Chicken

Prep Time 15 minutes
Cook Time 10 minutes
Total Time 25 minutes
Servings 4 servings
Calories 450
A flavorful and crispy Chinese-style dish featuring tender chicken coated in a spicy, tangy sauce, perfect for a quick and satisfying meal.

Ingredients

Protein

  • 1 lb boneless, skinless chicken breasts (sliced into thin strips, tender and easy to cook quickly)
  • 1 tbsp light soy sauce (adds a savory base to the marinade)
  • 1 tsp sesame oil (for a hint of nutty depth in the flavor)
  • 1 egg white egg white (helps the cornstarch adhere, giving the chicken a perfect crunch)
  • 1 cup cornstarch for coating (ensures a light, crispy coating for the chicken)
  • Vegetable oil for deep frying vegetable oil (neutral oil with a high smoke point, ideal for frying)
  • 3 tbsp sriracha or hot chili sauce (the key ingredient for a spicy kick, adjust to taste)
  • 2 tbsp honey (balances the heat with a touch of sweetness)
  • 2 tbsp soy sauce (adds a rich, umami flavor)
  • 1 tbsp ketchup (a hint of tanginess that rounds out the sauce)
  • 1 tbsp lime juice (fresh and tangy, cutting through the richness)
  • 1 tsp chili flakes (optional, for extra heat)
  • 1 tbsp vegetable oil (neutral oil to sauté the aromatics)
  • 1 tbsp minced garlic (adds depth and fragrance)
  • 1 tsp minced ginger (a bright, peppery complement to the garlic)
  • 1 red bell pepper sliced (for a pop of color and mild sweetness)
  • 1 small carrot (julienned, adds crunch and slight sweetness)
  • Spring onions and sliced red chilies for garnish spring onions and sliced red chilies (brings freshness and a pop of heat)

Instructions 

  • Marinate chicken with soy sauce, sesame oil, and egg white for 10-15 minutes.
  • Toss marinated chicken with cornstarch until well coated.
  • Deep fry chicken in hot oil (350°F/180°C) in batches for 2-3 minutes until golden, then drain. Double fry for extra crispiness.
  • Prepare sauce by mixing sriracha, honey, soy sauce, ketchup, lime juice, and chili flakes.
  • Sauté garlic and ginger in oil, add vegetables, then pour in sauce and simmer briefly. Toss in fried chicken to coat.
  • Garnish with spring onions and sliced red chilies. Serve hot with rice or noodles.

Notes

For extra crunch, ensure the oil is at the correct temperature before frying and double fry the chicken.
Calories: 450kcal
Cost: $15
Course: Main Course
Cuisine: Chinese
Keyword: chicken, crispy, Spicy

Welcome to the Heart of Home Cooking: Lemon-Garlic Baked Chicken

Gather ‘round, friends. Today, we’re diving into a dish that’s as comforting as a warm hug from grandma—Lemon-Garlic Baked Chicken. This recipe is more than just a meal; it’s a story of simplicity, love, and the joy of sharing good food with those we cherish. With just a handful of ingredients, you can create a dish that sings with flavor and warmth, perfect for family dinners and cozy gatherings alike. Let’s roll up our sleeves and get started!

Why You’ll Love This Recipe

  • Easy Preparation: With simple steps and minimal fuss, you can whip up this dish even on the busiest of nights.
  • Flavor Explosion: The combination of lemon and garlic brings a zesty brightness that perfectly complements the tender chicken.
  • Healthy Meal Option: This recipe is low in calories and packed with protein, making it a guilt-free choice for any dinner table.
  • Versatile Side Pairings: It goes wonderfully with a variety of sides, from roasted veggies to fluffy rice—perfect for personalizing your meal.
  • Meal Prep Friendly: Bake a batch ahead of time and enjoy leftovers throughout the week—just reheat and savor!

Ingredients Breakdown

Before we dive into cooking, let’s take a closer look at what you’ll need for this delightful dish.

  • 4 boneless, skinless chicken breasts: The backbone of this recipe, providing a lean source of protein. You can use bone-in chicken for a richer flavor if you prefer.
  • 2 tablespoons olive oil: Adds moisture and richness to the chicken. You can substitute with melted butter for an even heartier taste.
  • 3 cloves garlic, minced: Infuses the chicken with a robust flavor. Use fresh garlic for the best taste, or substitute with 1 teaspoon garlic powder if that’s what you have.
  • 1 lemon, zested and juiced: This brings the dish to life with acidity and brightness. If you don’t have fresh lemons, bottled lemon juice will work too.
  • 1 teaspoon dried oregano or thyme: Adds depth to the flavor. Feel free to use fresh herbs if available.
  • Salt and freshly ground black pepper to taste: Essential seasonings that enhance all the ingredients.
  • 1 tablespoon fresh parsley, chopped, for garnish: A sprinkle of freshness to brighten the dish.
  • 1 tablespoon butter (optional): For those who want to indulge a bit more, adding butter in the last few minutes of baking will give an extra layer of richness.

Pro Tips for Perfect Lemon-Garlic Baked Chicken

Close-up of golden baked chicken breast with lemon zest and minced garlic.

Let’s ensure our chicken turns out perfectly every time with these expert insights:

  • Pat the chicken dry: Before seasoning, dry the chicken breasts with paper towels. This helps them brown beautifully in the oven.
  • Let the marinade work its magic: If you have time, let the chicken marinate for at least 15-30 minutes. This will deepen the flavors.
  • Use a meat thermometer: To ensure perfect doneness, check that the internal temperature of the chicken reaches 165°F (75°C).
  • Broil for a golden finish: If you like a crispy top, broil the chicken for the last 2-3 minutes of cooking, watching carefully to avoid burning.
  • Rest before slicing: Allow the chicken to rest for a few minutes after baking to retain its juices—this is key for moist chicken.
  • Experiment with flavors: Feel free to mix in different herbs or spices to make this dish uniquely yours. Consider adding a pinch of chili flakes for heat or some honey for sweetness.
  • Store properly: If you have leftovers, let the chicken cool and store it in an airtight container in the fridge for up to 4 days.
  • Reheat gently: To enjoy leftovers, reheat in the oven or microwave, but avoid overcooking to keep it juicy.

Common Mistakes and Troubleshooting

Even the best of us can stumble in the kitchen. Here are some common pitfalls and how to avoid them:

  • Overcooking the chicken: This can make it dry. Always check the internal temperature and pull it out as soon as it hits 165°F.
  • Skipping the marinade: While you can bake the chicken right away, marinating enhances the flavor exponentially. Don’t skip this step if you can help it.
  • Using too much salt: Season gradually and taste as you go to avoid overpowering the dish.
  • Not letting it rest: Cutting into it right away will let the juices escape. Give it a few moments to rest for the best texture.

Variations to Try

Don’t be afraid to mix things up! Here are some variations to keep your chicken dinners exciting:

  • Honey Garlic Chicken: Add 2 tablespoons of honey to the marinade for a sweet and savory twist.
  • Spicy Lemon Chicken: Mix in some cayenne pepper or chili powder for a kick.
  • Herb-Crusted Chicken: Add breadcrumbs mixed with fresh herbs to the top for a crispy texture.
  • Lemon and Asparagus Bake: Add asparagus spears to the baking dish for a one-pan meal, roasting alongside the chicken.

Storage and Make-Ahead Instructions

Planning ahead is a great way to save time. Here’s how to make this dish even more convenient:

  • Make-ahead: Marinate the chicken the night before and keep it in the fridge. This allows the flavors to deepen.
  • Storage: Store leftover chicken in an airtight container in the refrigerator for up to 4 days. Reheat gently to enjoy.
  • Freezing: You can also freeze the marinated chicken for up to 3 months. Just thaw in the fridge overnight before cooking.

Frequently Asked Questions

Got questions? Here are some commonly asked queries about this recipe:

  • Can I use bone-in chicken? Yes, bone-in chicken can be used, but cooking time may need to be adjusted.
  • What if I don’t have fresh garlic? You can substitute with garlic powder, but fresh garlic gives the best flavor.
  • Is this recipe gluten-free? Yes, all the ingredients are naturally gluten-free.
  • Can I use other types of meat? Absolutely! This marinade works well with pork or fish as well.
  • How can I make this dish more spicy? Add some crushed red pepper flakes to the marinade for a bit of heat.
  • What sides do you recommend? Pair with roasted vegetables, mashed potatoes, or a fresh salad for a complete meal.
  • How do I know when the chicken is done? The chicken should reach an internal temperature of 165°F (75°C).
  • Can I marinate it overnight? Yes, marinating overnight will enhance the flavor even more!

Nutritional Tips and Dietary Adaptations

This dish isn’t just delicious; it’s also healthy! Here’s how to make it even better:

  • Low-Calorie Option: Use skinless chicken breasts and limit the olive oil to keep this dish light.
  • For a Keto Diet: The ingredients are naturally low in carbs, making it a perfect fit.
  • For a Vegan Option: Substitute chicken with tofu or tempeh marinated in the same lemon-garlic marinade.

Equipment Recommendations

To make this cooking process as smooth as butter, here’s what you’ll need:

  • Oven: A reliable oven is key to ensuring the chicken cooks evenly.
  • Baking Dish: A 9×13 inch dish works perfectly for this recipe.
  • Meat Thermometer: This handy tool ensures you never overcook your chicken.
  • Mixing Bowl: For preparing your marinade, a medium-sized bowl is essential.

Serving Suggestions

Ready to dish up? Here are some ideas on how to serve Lemon-Garlic Baked Chicken:

  • Over Rice: Serve atop a bed of fluffy rice, allowing the juices to soak in.
  • With a Side Salad: Pair with a green salad for a refreshing contrast.
  • Sandwich Style: Slice the chicken and serve it in a sandwich with fresh veggies and a drizzle of the marinade.

Final Thoughts

There you have it—Lemon-Garlic Baked Chicken, a dish steeped in tradition and flavor. Cooking should never feel like a chore; it’s about bringing people together and enjoying the simple pleasures of life. So next time you gather your loved ones around the table, let this chicken remind you of home, comfort, and the joy of sharing a meal. Happy cooking, y’all!

Baked Chicken Breast with Lemon and Garlic Recipe

Prep Time 10 minutes
Cook Time 25 minutes
Total Time 35 minutes
Servings 4 pieces
Calories 250
Enjoy tender, flavorful baked chicken breasts infused with lemon and garlic, perfect for a quick and healthy meal.

Ingredients

Protein

  • 4 pieces boneless, skinless chicken breasts
  • 2 tablespoons olive oil
  • 3 cloves garlic, minced
  • 1 lemon lemon zest and juice
  • 1 teaspoon dried oregano or thyme
  • to taste Salt and freshly ground black pepper
  • 1 tablespoon fresh parsley, chopped (for garnish)
  • 1 tablespoon butter, optional (for extra richness)

Instructions 

  • Preheat your oven to 400°F (200°C).
  • Pat the chicken breasts dry, then place on a baking sheet.
  • Mix olive oil, garlic, lemon zest, lemon juice, oregano, salt, and pepper. Pour over chicken.
  • Bake for 20-25 minutes until internal temperature reaches 165°F (75°C). Optionally broil for 2-3 minutes for a golden top.
  • During the last 5 minutes, add butter on top if desired. Rest for a few minutes, then garnish with parsley before serving.

Notes

For extra flavor, marinate the chicken for 15-30 minutes before baking.
Calories: 250kcal
Cost: $15
Course: Main Course
Cuisine: international
Keyword: chicken, Garlic, Lemon

Discover the Comfort of Chicken Pasta: A Heartwarming Recipe

Nothing says home quite like a warm plate of pasta, especially when it’s drizzled in a creamy garlic parmesan sauce and accompanied by tender chicken. In this article, we’ll explore a delightful recipe for Healthy Garlic Parmesan Chicken Pasta that not only nourishes the body but feeds the soul. With an abundance of flavor and the simplicity of wholesome ingredients, this dish is perfect for family gatherings, weeknight dinners, or just a cozy night in. So let’s dive into the comforting world of chicken pasta!

Why You’ll Love This Recipe

  • Wholesome Ingredients: This recipe features whole wheat pasta, lean chicken, and fresh spinach, making it a nutritious choice for any meal.
  • Quick and Easy: With minimal prep and cooking time, you can whip up this delightful dish in under 30 minutes, making it perfect for busy evenings.
  • Rich in Flavor: The creamy garlic parmesan sauce is both savory and satisfying, ensuring each bite is packed with deliciousness.
  • Kid-Friendly: With its mild flavors and cheesy goodness, this meal is sure to please even the pickiest eaters at your table.
  • Versatile Options: This recipe allows for various adaptations and variations, so you can tailor it to your family’s tastes.

Ingredients Breakdown

Let’s gather our ingredients for this Healthy Garlic Parmesan Chicken Pasta. Here’s what you’ll need:

  • 8 ounces whole wheat penne or fettuccine pasta: Whole grain options add fiber and nutrients.
  • 2 tablespoons olive oil: A heart-healthy fat that enhances flavor and aids in cooking.
  • 3 garlic cloves, minced: Fresh garlic brings a punch of flavor that pairs beautifully with the creamy sauce.
  • 1 pound boneless, skinless chicken breasts, cut into bite-sized cubes: This lean protein is the star of the dish, providing essential nutrients.
  • 1/2 teaspoon paprika and 1/2 teaspoon Italian seasoning: These spices elevate the flavor profile of the chicken.
  • 1 tablespoon whole wheat flour: Used to thicken the sauce and provide a creamy texture.
  • 1 cup low-sodium chicken broth: Adds depth to the sauce without too much salt.
  • 1/2 cup low-fat milk: This helps create a lighter creamy base for the sauce.
  • 1/2 cup plain non-fat Greek yogurt: A healthier alternative to heavy cream that adds creaminess.
  • 1/2 cup freshly grated Parmesan cheese: Essential for that rich, cheesy flavor.
  • 2 cups baby spinach: Fresh spinach adds nutrients and color to the dish.
  • Salt and freshly ground black pepper: To taste, enhancing the overall flavors.
  • Fresh parsley, chopped: A lovely garnish that adds a pop of color and freshness.

Directions: Step-by-Step Cooking Instructions

Side view of a bowl filled with Healthy Garlic Parmesan Chicken Pasta and garnished with parsley.

Now that we have our ingredients, let’s get cooking!

  1. Cook the Pasta: Boil water in a large pot and cook the pasta according to package directions. Once done, drain the pasta but reserve 1/2 cup of the pasta water for later.
  2. Prepare the Chicken: While the pasta cooks, pat the chicken dry and season with salt, pepper, paprika, and Italian seasoning. In a skillet, heat 1 tablespoon of olive oil over medium heat. Sear the chicken until golden brown and fully cooked, about 5-7 minutes. Remove the chicken and set aside.
  3. Make the Sauce: In the same skillet, add the remaining tablespoon of olive oil. Sauté the minced garlic until fragrant, about 1 minute. Stir in the whole wheat flour and cook to form a roux, about another minute.
  4. Whisk in the Broth and Milk: Gradually whisk in the chicken broth, scraping up any browned bits from the skillet. Bring to a simmer, then slowly whisk in the milk. Let it simmer until the sauce thickens, about 3-5 minutes.
  5. Finish the Sauce: Remove the skillet from heat and stir in the Greek yogurt and Parmesan cheese until smooth and creamy. Season with salt and pepper to taste. Add the spinach and stir until wilted.
  6. Combine: Add the cooked chicken back to the skillet, then toss in the drained pasta. Mix well, adding reserved pasta water as needed to reach your desired consistency.

Pro Tips for Perfect Chicken Pasta

  • Cut Chicken Evenly: Ensure your chicken is cut into uniform pieces to promote even cooking.
  • Adjust the Thickness: If your sauce is too thick, add a splash of reserved pasta water until you reach the desired consistency.
  • Fresh Ingredients Matter: Use fresh garlic and herbs for the best flavor; dried spices can be used but may not provide the same freshness.
  • Experiment with Cheeses: Feel free to mix in other cheeses like mozzarella or feta for a unique twist!
  • Make it Ahead: Prepare the sauce a day in advance and refrigerate it for a quick dinner option.
  • Serve Immediately: This dish is best enjoyed fresh, but leftovers can be reheated gently.
  • Pair with Salad: Serve alongside a fresh green salad to balance the richness of the pasta.
  • Use Whole Foods: For extra nutrition, consider adding veggies like bell peppers or zucchini.

Common Mistakes and Troubleshooting

  • Overcooking the Chicken: Keep an eye on your chicken to avoid drying it out. It should be golden brown and cooked through.
  • Not Enough Seasoning: Taste your sauce and adjust the seasoning as needed; garlic, salt, and pepper are key for flavor.
  • Too Thick Sauce: If your sauce is too thick, simply add more chicken broth or pasta water until it reaches the desired consistency.

Delicious Variations to Try

Feeling adventurous? Here are some fun variations to mix things up:

  • Vegetarian Version: Swap the chicken for sautéed mushrooms or chickpeas for a hearty plant-based option.
  • Spicy Kick: Add red pepper flakes to the sauce for a spicy twist that elevates the flavor.
  • Herb Infused: Incorporate fresh basil, thyme, or oregano for a burst of herbal flavor.
  • Seafood Delight: Substitute chicken with shrimp or scallops for a delightful seafood twist.

Storage and Make-Ahead Instructions

This dish is great for meal prep. Here’s how to store it:

  • Refrigeration: Store leftovers in an airtight container in the fridge for up to 3 days.
  • Freezing: For longer storage, freeze the pasta in an airtight container for up to 2 months. Reheat gently.
  • Make-Ahead: Prepare the sauce in advance and keep it refrigerated. Cook the pasta fresh for the best texture.

Comprehensive FAQ

  • Can I use regular pasta instead of whole wheat? Yes, but whole wheat pasta adds more fiber and nutrients.
  • Is this recipe gluten-free? You can use gluten-free pasta to make this dish suitable for gluten-free diets.
  • Can I use pre-cooked chicken? Absolutely! Just add it to the sauce to heat through.
  • What can I substitute for Greek yogurt? You can use sour cream, but it will change the flavor slightly.
  • How do I make the sauce creamier? Add more Greek yogurt or a splash of heavy cream for richness.
  • Is this dish kid-friendly? Yes! The mild and cheesy flavors are usually a hit with kids.
  • How can I make this dish dairy-free? Use dairy-free yogurt and cheese alternatives.
  • What sides pair well with this dish? A fresh salad or garlic bread would complement it nicely.

Nutritional Tips and Dietary Adaptations

This recipe can be adapted to fit various dietary needs:

  • Low-Calorie Option: Reduce the amount of cheese and use low-fat dairy products.
  • High-Protein Variation: Increase the chicken or add some beans for extra protein.
  • Vegan Adaptation: Use tofu or tempeh instead of chicken, and opt for plant-based yogurt and cheese.

Essential Equipment Recommendations

For making this dish, you’ll need:

  • Large Pot: For boiling pasta.
  • Skillet: A non-stick skillet works best for sautéing and making the sauce.
  • Whisk: To blend the sauce ingredients smoothly.
  • Measuring Cups and Spoons: Accurate measurements ensure the best results.

Serving Suggestions

Present your Healthy Garlic Parmesan Chicken Pasta with a sprinkle of fresh parsley and some extra grated Parmesan on top. Serve it with a side of garlic bread or a crisp green salad to complete this comforting meal.

Conclusion

This recipe for Healthy Garlic Parmesan Chicken Pasta is more than just a meal; it’s a comforting embrace that brings family together around the dinner table. With its simple ingredients and heartwarming flavors, it’s a reminder that cooking can be straightforward and fulfilling. Dive into this delightful dish, and let every bite transport you to a cozy kitchen filled with love and laughter. Happy cooking!

Healthy Garlic Parmesan Chicken Pasta - Easy Recipe

Prep Time 10 minutes
Cook Time 20 minutes
Total Time 30 minutes
Servings 4 servings
Calories 550
A quick and nutritious pasta dish featuring tender chicken, garlic, spinach, and a creamy Parmesan sauce.

Ingredients

Pasta

  • 8 ounces whole wheat penne or fettuccine pasta
  • 2 tablespoons olive oil
  • 3 cloves garlic, minced
  • 1 pound boneless, skinless chicken breasts, cut into bite-sized cubes
  • 1/2 teaspoon paprika
  • 1/2 teaspoon Italian seasoning
  • 1 tablespoon whole wheat flour
  • 1 cup low-sodium chicken broth
  • 1/2 cup low-fat milk (or 1/2 cup)
  • 1/2 cup plain non-fat Greek yogurt
  • 1/2 cup freshly grated Parmesan cheese
  • 2 cups baby spinach

Salt and black pepper

  • to taste Salt and freshly ground black pepper

Fresh parsley

  • for garnish Fresh parsley, chopped

Instructions 

  • Cook pasta according to package directions. Drain, reserving 1/2 cup of pasta water.
  • Pat chicken dry. Season with salt, pepper, paprika, and Italian seasoning. Sear in 1 tbsp olive oil until golden and cooked through. Remove and set aside.
  • In the same skillet, heat remaining 1 tbsp olive oil. Sauté garlic until fragrant. Stir in flour and cook 1 minute.
  • Whisk in chicken broth, then milk. Simmer until sauce thickens. Remove from heat and stir in yogurt and Parmesan. Add spinach and cooked chicken.
  • Add cooked pasta to skillet, toss to coat. Add reserved pasta water if needed. Garnish with chopped parsley before serving.

Notes

Use fresh spinach for best flavor and nutrition. Adjust seasoning to taste.
Calories: 550kcal
Cost: $15
Course: Main Course
Cuisine: American
Keyword: chicken, healthy, Pasta