Author

Tom

Browsing

Transform Your Chicken Bites with This Creamy Garlic Sauce

Welcome to a culinary journey where **simple ingredients** come together to create a heartwarming masterpiece. Today, we’re diving into a recipe that takes **grilled chicken bites** to the next level with a creamy garlic sauce that’s as comforting as a hug from a dear friend. Cooking is about sharing love and joy, and this dish is perfect for family gatherings or a cozy dinner. Let’s roll up our sleeves and explore how to make the best creamy garlic sauce for grilled chicken bites!

Why You’ll Love This Recipe

There are countless reasons to fall in love with this creamy garlic sauce that makes your chicken bites sing. Here are just a few:

  • Quick and Easy: This recipe can be prepared in under 30 minutes, making it perfect for busy weeknights or last-minute gatherings.
  • Rich Flavor: The creamy garlic sauce is rich and savory, enhancing the taste of the grilled chicken bites and ensuring every bite is packed with flavor.
  • Versatile Dish: Enjoy these bites as an appetizer, main course, or even toss them into salads or wraps for a delightful twist.
  • Family-Friendly: With its mild yet delicious flavor, this dish is a hit with both picky eaters and adventurous palates alike.
  • Memorable Meals: This creamy garlic sauce evokes the warmth of home-cooked meals, making it perfect for family gatherings or cozy nights in.

Ingredients for Success

Before we begin, let’s gather our ingredients. Here’s what you’ll need to create this delightful dish:

  • 1 lb boneless, skinless chicken breasts: Cut into bite-sized pieces for easy grilling and perfect sauce absorption.
  • 1 tablespoon olive oil: This helps to sear the chicken beautifully while adding a light, fruity flavor.
  • 3 garlic cloves, minced: Fresh garlic infuses the sauce with a robust flavor that is simply irresistible.
  • 1 cup heavy cream: This gives the sauce its luscious, creamy texture.
  • 1/2 cup grated Parmesan cheese: Adds depth and richness to the sauce.
  • Salt and black pepper to taste: Essential for bringing out the flavors.
  • Optional: lemon juice and chopped parsley for garnish: These add brightness and a fresh finish to your dish.

How to Make the Best Creamy Garlic Sauce for Grilled Chicken Bites

Juicy grilled chicken pieces with a rich, creamy garlic sauce in a side view.

Now, let’s dive into the steps to make this delightful dish. Grab your apron, and let’s get cooking!

Step 1: Prepare the Chicken

In a large bowl, toss the chicken pieces with olive oil, salt, and pepper. Make sure each piece is well-coated; this helps keep the chicken tender and flavorful when cooked.

Step 2: Grill the Chicken Bites

Heat a grill pan or skillet over medium-high heat. Add the chicken and cook for 5–7 minutes, flipping occasionally, until golden brown and cooked through. Make sure to let the chicken rest for a few minutes before tossing it in the sauce.

Step 3: Make the Creamy Garlic Sauce

In a saucepan, melt a tablespoon of butter over medium heat. Add the minced garlic, sautéing until fragrant (about 1 minute). Be careful not to burn it, as burnt garlic can impart a bitter taste.

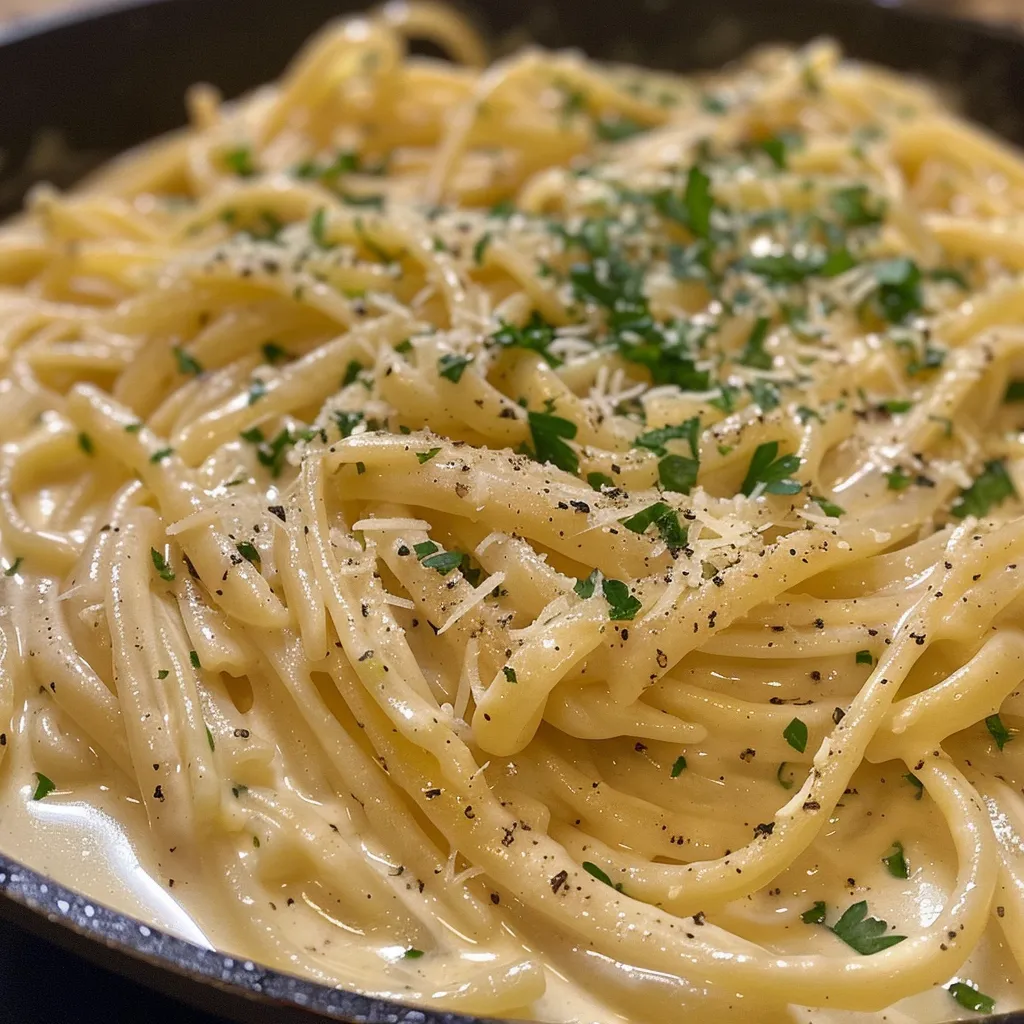
Step 4: Create the Creamy Base

Stir in the heavy cream and bring it to a gentle simmer. Next, add the Parmesan cheese, stirring until it melts and the sauce thickens. If you prefer a thicker sauce, let it simmer for a few more minutes.

Step 5: Brighten Up the Sauce

If you like a bit of brightness, add a splash of lemon juice to the sauce for a refreshing twist. This step is optional, but it can elevate the flavors beautifully.

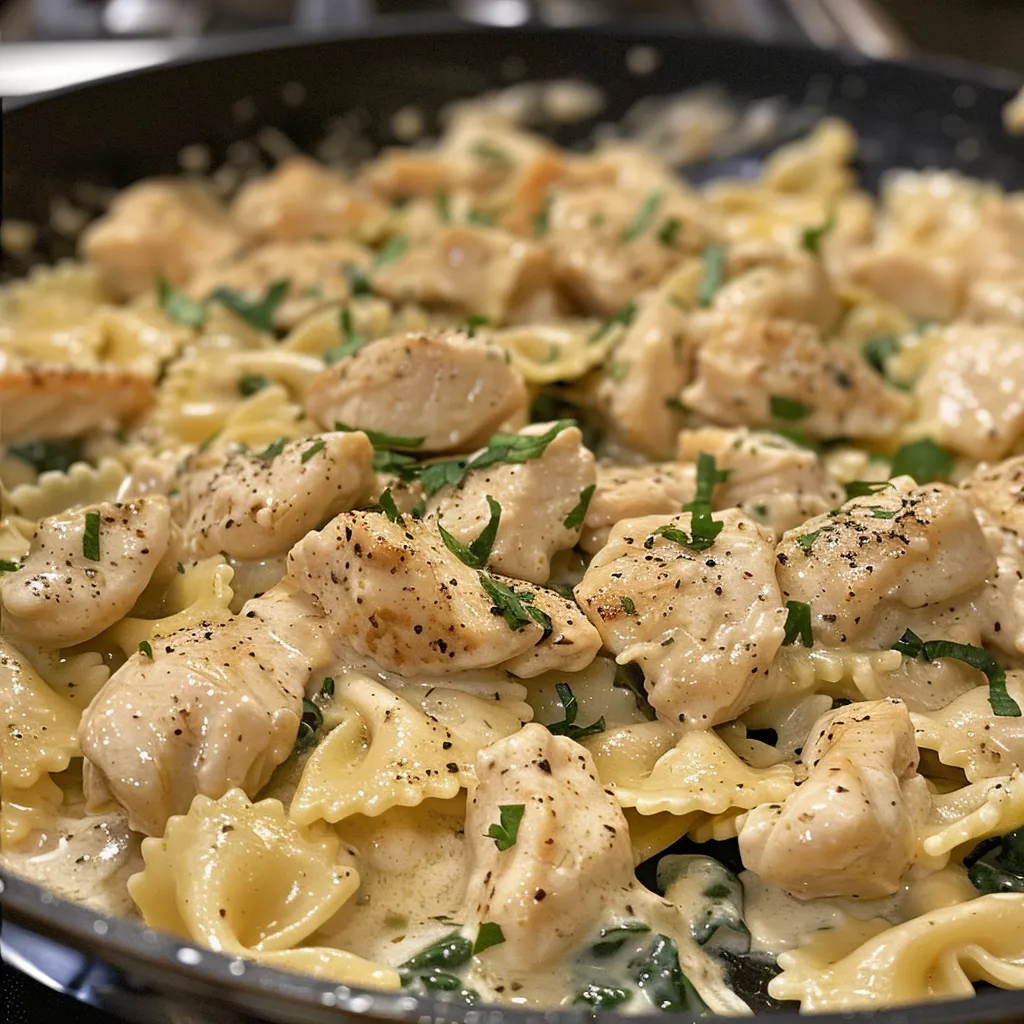
Step 6: Combine Chicken and Sauce

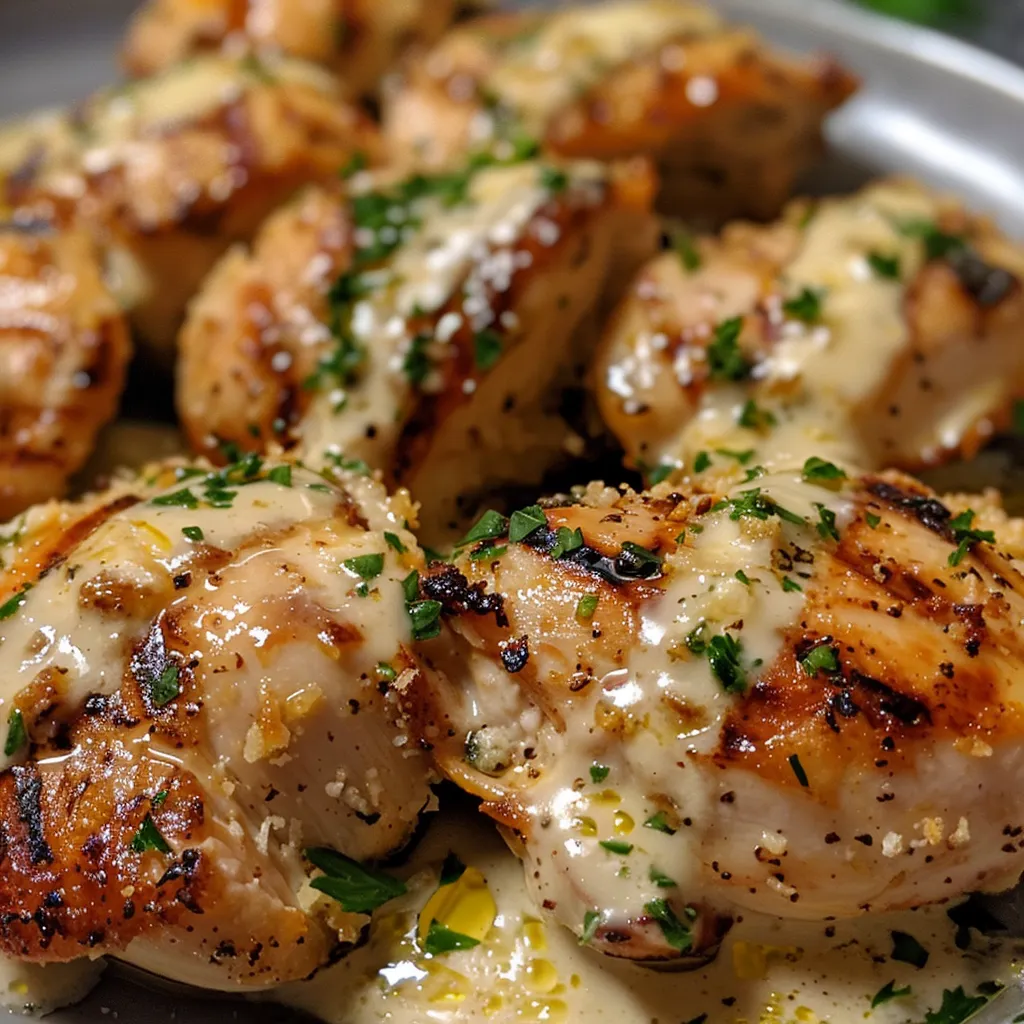
Toss the cooked chicken bites in the creamy garlic sauce until they are all well-coated. Alternatively, you can serve the sauce on top of the chicken for a more visually appealing presentation.

Step 7: Garnish and Serve

Garnish with chopped parsley for a pop of color and freshness. Serve immediately and enjoy the delightful flavors of this dish!

Pro Tips for Perfect Chicken Bites

To elevate your cooking game, consider these expert insights:

  • Marinate Ahead: If time allows, marinate the chicken in olive oil, lemon juice, and garlic for at least 30 minutes. This enhances flavor and tenderness.
  • Use a Meat Thermometer: Ensure your chicken is perfectly cooked by using a meat thermometer—165°F is the sweet spot.
  • Experiment with Cheeses: Try different cheeses like mozzarella or Asiago for a unique twist on the sauce.
  • Control the Heat: Adjust the heat level by adding red pepper flakes or cayenne pepper to the sauce for a spicy kick.
  • Leftover Sauce: This creamy garlic sauce can be stored in the fridge for up to a week. Just reheat gently before serving.
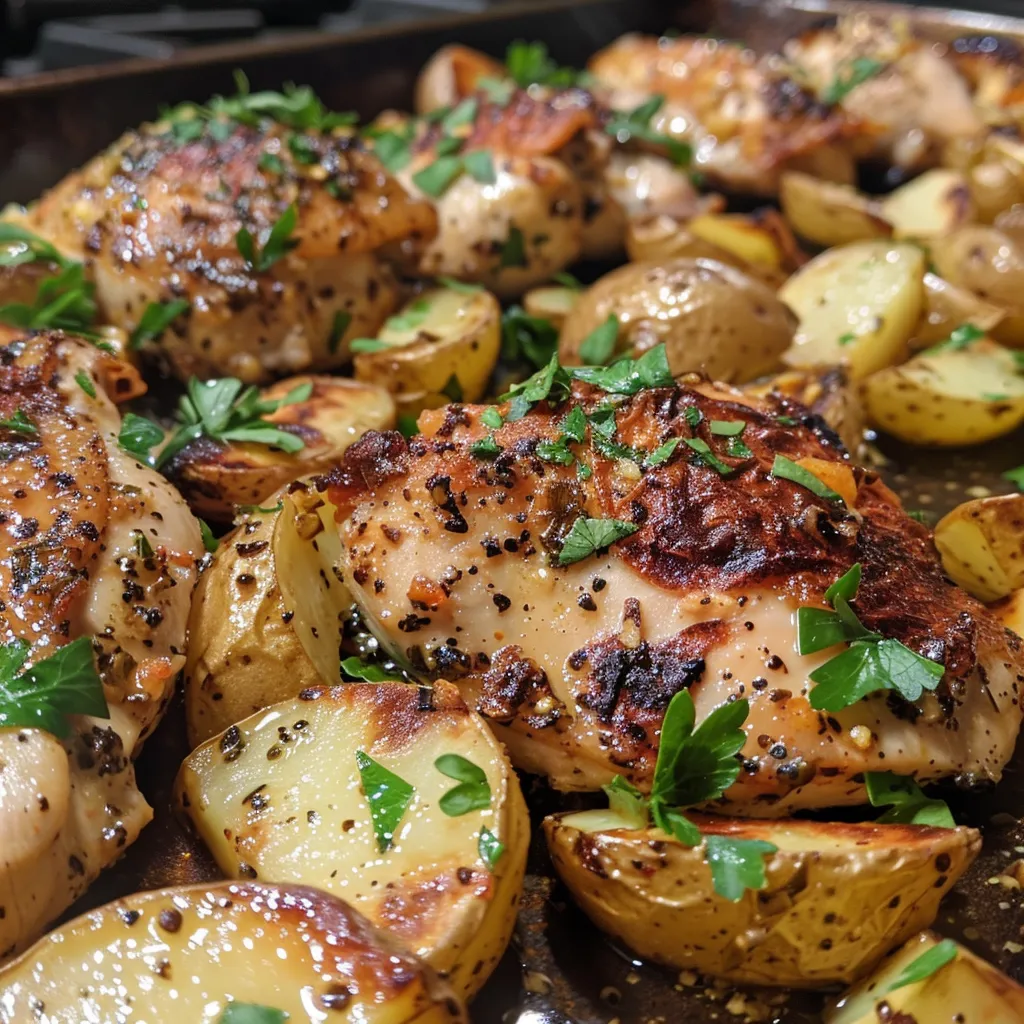
  • Pair with Sides: Serve your chicken bites with roasted vegetables, a fresh salad, or crusty bread to soak up the delicious sauce.
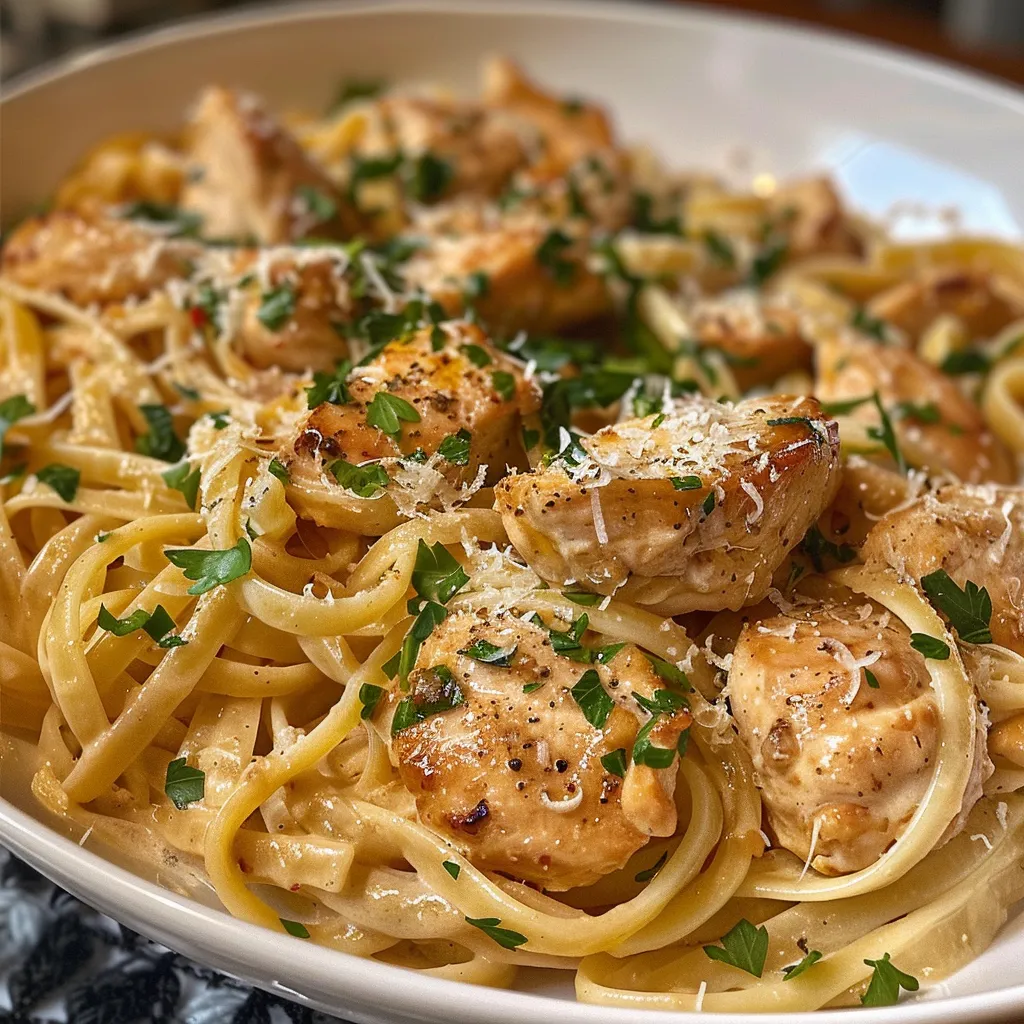
  • Make it a Meal: Add some cooked pasta or rice to the chicken and sauce mixture for a hearty one-dish meal.
  • Presentation Matters: A sprinkle of fresh herbs or a drizzle of balsamic glaze can make your dish restaurant-worthy.

Common Mistakes and Troubleshooting

Even the best chefs make mistakes from time to time. Here are some common pitfalls and how to avoid them:

  • Overcooking the Chicken: Keep an eye on your chicken; overcooked chicken can become dry and tough. Aim for juicy, tender bites.
  • Burnt Garlic: Sauté garlic just until fragrant. If it turns brown, start over; it can ruin the sauce.
  • Too Thick or Too Thin Sauce: If your sauce is too thick, add a splash of chicken broth or milk. If it’s too thin, simmer it longer to thicken.
  • Skipping Seasoning: Don’t skimp on salt and pepper; they enhance the overall flavor of the dish.

Creative Variations

Want to switch things up? Here are some delightful variations to try:

  • Spicy Garlic Sauce: Add diced jalapeños or red pepper flakes for a kick.
  • Mediterranean Twist: Incorporate sun-dried tomatoes and olives into the sauce for a Mediterranean flair.
  • Herbed Garlic Sauce: Mix in fresh herbs like basil, thyme, or oregano for an aromatic touch.
  • Honey Garlic Sauce: Sweeten the deal by adding a tablespoon of honey for a sweet-savory flavor combination.

Storage and Make-Ahead Instructions

You can make this dish ahead of time without sacrificing flavor:

  • Refrigeration: Store cooked chicken bites and sauce separately in airtight containers for up to 3 days.
  • Freezing: Freeze chicken bites and sauce in a freezer-safe container for up to 3 months. Thaw overnight in the fridge before reheating.
  • Make Ahead: Prepare the sauce in advance and reheat it just before serving, adding freshly cooked chicken bites for a quick meal.

Frequently Asked Questions

Let’s tackle some common questions about this recipe:

  • Can I use chicken thighs instead of breasts? Absolutely! Chicken thighs add a bit more flavor and tenderness.
  • What can I substitute for heavy cream? You can use half-and-half or a mixture of milk and butter for a lighter option.
  • How do I make it gluten-free? Ensure your Parmesan cheese is gluten-free, and you’re good to go!
  • Can I use pre-cooked chicken? Yes! Just toss it in the sauce to heat through.
  • What sides pair well with this dish? Roasted vegetables, mashed potatoes, or a fresh salad are all excellent choices.
  • Is this recipe suitable for meal prep? Yes, it’s perfect for meal prep! The flavors meld beautifully when reheated.
  • Can I make this sauce vegan? Substitute heavy cream with coconut cream and use nutritional yeast instead of Parmesan.
  • How can I store leftovers? Store leftovers in an airtight container in the fridge for up to 3 days.

Nutrition Tips and Dietary Adaptations

For a healthier twist, consider these adaptations:

  • Lower Fat Option: Use fat-free cream or Greek yogurt in place of heavy cream.
  • Increase Vegetable Intake: Add sautéed spinach or zucchini to the chicken bites for extra nutrition.
  • Protein Boost: Swap in chickpeas or white beans for a plant-based protein option.

Equipment Recommendations

Here are some kitchen tools that will make your cooking experience smoother:

  • Grill Pan or Skillet: Essential for achieving that perfect grill mark and flavor.
  • Meat Thermometer: Ensures your chicken is cooked to perfection without guesswork.
  • Mixing Bowls: Useful for marinating and mixing ingredients.

Serving Suggestions

Serve your creamy garlic chicken bites in style with these ideas:

  • On a Platter: Arrange the chicken bites on a large platter, drizzled with sauce and scattered with parsley.
  • In Wraps: Use lettuce leaves or tortillas to create wraps filled with chicken and sauce.
  • With Dipping Sauce: Serve extra sauce on the side for guests to dip their chicken bites.

Final Thoughts

This creamy garlic sauce has the power to turn simple grilled chicken bites into a memorable meal. With its rich flavor and comforting essence, it’s sure to become a family favorite. Remember, cooking is about love and sharing, so gather your loved ones around the table and enjoy every bite together. Happy cooking, friends!

How to Make the Best Creamy Garlic Sauce for Grilled Chicken Bites

Prep Time 10 minutes
Cook Time 15 minutes
Total Time 25 minutes
Servings 4 servings
Calories 550
Enjoy tender grilled chicken bites topped with a rich, creamy garlic sauce that’s perfect for a quick and flavorful meal.

Ingredients

Protein

  • 1 lb boneless, skinless chicken breasts
  • 1 tablespoon olive oil
  • 3 cloves garlic, minced
  • 1 cup heavy cream
  • 1/2 cup grated Parmesan cheese
  • to taste Salt and black pepper
  • Optional lemon juice and chopped parsley for garnish

Instructions 

  • Toss chicken with olive oil and seasonings.
  • Grill chicken for 5–7 minutes until golden.
  • Melt butter and sauté garlic until fragrant.
  • Add cream and Parmesan; simmer until thickened.
  • Mix chicken with sauce or serve on top, garnish with parsley.

Notes

For extra flavor, add a squeeze of lemon juice before serving.
Calories: 550kcal
Cost: $15
Course: Main Course
Cuisine: American
Keyword: chicken, cream, Garlic

Why You’ll Love These Crispy Fried Chicken Wings

Gather ’round, friends! There’s a certain magic in the air when crispy fried chicken wings are on the table. Whether it’s game day, a family gathering, or just a cozy dinner at home, this recipe is sure to bring warmth and joy. Here’s why you’ll fall head over heels for these wings:

  • Unforgettable Flavor: Each bite bursts with a harmonious blend of spices, creating a crispy exterior that locks in the juicy tenderness of the chicken.
  • Perfectly Crispy Every Time: With the right frying technique, these wings will always come out golden brown and delightfully crunchy.
  • Simple Ingredients: You don’t need a pantry full of exotic items. Just a handful of everyday ingredients ensures that anyone can whip these up.
  • Versatile for Any Occasion: From backyard barbecues to intimate dinners, these wings fit right in, adapting to any flavor or sauce you desire.
  • Easy to Customize: Feel free to play with the spices or sauces—there’s no limit to the deliciousness you can create!

Gather Your Ingredients

Before we dive into the cooking, let’s talk about what you’ll need for these crispy fried chicken wings.

  • Chicken Wings: 2 lbs of fresh chicken wings. You can choose whole wings or split them at the joint for easier handling.
  • Oil: 17 fl oz of vegetable or canola oil, the perfect choice for frying due to its high smoke point.
  • All-Purpose Flour: 1/2 cup to create that crunchy crust we all love.
  • Seasonings: 1 tsp salt, 1/2 tsp black pepper, 1/4 tsp garlic powder, 1/4 tsp paprika, and 1/4 tsp cayenne pepper for a little kick.
  • Egg: 1 whole egg to help the flour adhere to the wings.

Step-by-Step Instructions for Crispy Fried Chicken Wings

Now, let’s roll up our sleeves and get cooking! Follow these easy steps to achieve the perfect crispy fried chicken wings.

Step 1: Prepare the Oil

Heat the oil in a frying pan over medium heat for about 5-10 minutes. Aim for an oil temperature of 350-375°F. A thermometer can help, but if you don’t have one, just drop a bit of flour in; if it sizzles, you’re good to go!

Step 2: Prepare the Coating

While the oil is heating, set up your breading station. In one bowl, place the flour mixed with the salt, pepper, garlic powder, paprika, and cayenne. In another bowl, beat the egg until smooth.

Step 3: Coat the Wings

Take each chicken wing, dip it into the egg, then roll it in the seasoned flour mixture. Make sure each wing is well coated for maximum crunch!

Step 4: Fry the Wings

Carefully place the coated wings into the hot oil one by one. Fry the wings for about 15 minutes, flipping them halfway through to ensure even cooking.

Step 5: Finish Cooking

Continue frying for an additional 15 minutes or until the wings are golden brown and crispy. The double-frying technique really helps achieve that perfect crunch!

Step 6: Drain and Serve

Once cooked, remove the wings from the oil and let them drain on a paper towel-lined plate. This step helps keep them crispy!

Pro Tips for the Best Fried Chicken Wings

Juicy chicken wings with a crispy exterior, garnished with herbs.

Want to take your crispy fried chicken wings to the next level? Here are some expert insights:

  • Dry Before Frying: Pat the wings dry with paper towels before coating. This helps achieve a crispier texture.
  • Brining is Key: Consider brining your wings in buttermilk for a couple of hours before frying. It adds moisture and flavor.
  • Double Frying: For extra crunch, fry the wings twice! Fry them for the first time until just cooked, let them rest, then fry again until golden.
  • Control the Heat: Maintain a steady temperature in the oil. Too hot can burn the coating; too cool will make them greasy.
  • Experiment with Spices: Don’t be afraid to add your favorite spices to the flour mixture for a personal touch!
  • Keep It Moving: Avoid overcrowding the pan; fry in batches to keep the oil temperature consistent.
  • Use a Wire Rack: If you have one, place the fried wings on a wire rack instead of paper towels to keep them crispy.
  • Let Them Rest: After frying, allow the wings to rest for a few minutes before serving. This ensures they retain their crunch.

Avoiding Common Mistakes

Even the best cooks can have a mishap! Here are some common mistakes to watch out for:

  • Using Wet Wings: Frying wings that are still wet can lead to a soggy result. Always dry them thoroughly.
  • Skipping the Oil Temperature Check: Not monitoring the oil temperature can result in unevenly cooked wings—too hot can burn, too cool can make them greasy.
  • Overcrowding the Pan: Placing too many wings in the oil at once can drop the temperature and lead to soggy wings.
  • Not Letting Them Rest: Skipping the resting period after frying can cause steam buildup and make the wings lose their crispiness.

Delicious Variations to Try

Want to shake things up? Here are some tasty variations on the classic fried chicken wings recipe:

  • Buffalo Wings: Toss the fried wings in a mixture of melted butter and hot sauce for that classic Buffalo flavor.
  • Honey Garlic Wings: Glaze the wings with a mixture of honey, soy sauce, and minced garlic for a sweet and savory treat.
  • Lemon Pepper Wings: After frying, toss the wings in a mixture of lemon zest and cracked black pepper for a zesty twist.
  • Spicy Asian Wings: Marinate the wings in a mixture of soy sauce, ginger, and chili paste before frying for an Asian-inspired flavor.

Storage and Make-Ahead Instructions

These wings are best eaten fresh, but here’s how to store or prepare ahead:

  • Storage: Store leftover wings in an airtight container in the fridge for up to 3 days.
  • Reheating: Reheat in the oven at 375°F for about 10-15 minutes to regain their crispiness.
  • Make-Ahead: You can prep the wings and coat them a few hours in advance. Just fry them when you’re ready to serve!

Frequently Asked Questions

Got questions? We’ve got answers! Here are some common queries regarding crispy fried chicken wings:

  • Can I use frozen chicken wings? Yes, but make sure to thaw them completely and pat them dry before frying.
  • What oil is best for frying? Vegetable or canola oil works best due to their high smoke points.
  • How do I make wings extra crispy? Double frying and ensuring the wings are dry before coating will give you that extra crunch.
  • What can I serve with chicken wings? Classic sides include celery sticks and blue cheese dressing, or try fries and coleslaw!
  • Can I bake these wings instead? Yes! For a healthier option, toss them in a little oil and bake at 400°F for about 40-45 minutes, flipping halfway.
  • How do I know when the wings are done? The wings should be golden brown and reach an internal temperature of 165°F.
  • Can I make these wings spicy? Absolutely! Adjust the amount of cayenne pepper or add your favorite hot sauce.
  • What’s the best way to serve them? Serve immediately after frying for the best flavor and texture!

Nutritional Tips and Dietary Adaptations

Want to enjoy these wings while keeping health in mind? Consider these tips:

  • Healthier Coating: Use whole wheat flour or almond flour for a more nutritious option.
  • Lower Fat Option: Try air frying instead of deep frying for fewer calories and fat.
  • Gluten-Free Version: Substitute the all-purpose flour with a gluten-free flour blend.
  • Paleo-Friendly: Use almond flour and coconut oil for frying to fit a paleo diet.

Essential Equipment for Perfect Wings

Here’s what you’ll need to make your crispy fried chicken wings:

  • Frying Pan or Dutch Oven: A heavy-bottomed pan is ideal for even heat distribution.
  • Thermometer: A kitchen thermometer to monitor oil temperature ensures perfectly fried wings.
  • Slotted Spoon or Tongs: For safely handling the wings while frying.
  • Wire Rack: Helpful for draining excess oil while keeping wings crispy.

Serving Suggestions

These wings shine on their own, but here are some ideas to elevate your serving:

  • Classic Dipping Sauces: Serve with ranch dressing or blue cheese for that perfect pairing.
  • Fresh Vegetables: Pair with crunchy celery and carrot sticks for a refreshing balance.
  • Flavorful Sauces: Offer a variety of sauces for dipping, such as BBQ, honey mustard, or sriracha.
  • Creative Platters: Arrange wings on a platter with sides for a stunning presentation that will impress your guests.

There you have it! A comprehensive guide to making crispy fried chicken wings that are not only delicious but also tied to the warmth of home and family. So roll up your sleeves, gather your loved ones, and let’s make some memories around the dinner table!

Crispy Fried Chicken Wings Recipe: A Simple, Flavorful Treat for Any Occasion

Prep Time 10 minutes
Cook Time 30 minutes
Total Time 40 minutes
Servings 4 servings
Calories 450
This crispy fried chicken wings recipe delivers a crunchy exterior and juicy interior, perfect for any gathering or snack time.

Ingredients

Main

  • 2 lbs chicken wings
  • 17 fl oz oil (vegetable or canola oil)
  • 1/2 cup all-purpose flour
  • 1 tsp salt
  • 1/2 tsp black pepper
  • 1/4 tsp garlic powder
  • 1/4 tsp paprika
  • 1/4 tsp cayenne pepper
  • 1 whole egg

Instructions 

  • Heat oil in a frying pan over medium heat for 5-10 minutes.
  • Mix flour and spices in one bowl; beat the egg in another.
  • Dip wings in egg, then coat with flour mixture.
  • Fry wings for 15 minutes, flipping halfway, then continue for another 15 minutes until golden and crispy.
  • Remove wings from oil and serve hot.

Notes

Ensure oil temperature stays consistent for crispy results.
Calories: 450kcal
Cost: $15
Course: Appetizer
Cuisine: American
Keyword: Chicken Wings

Welcome, friends! Today, we’re diving into a dish that embodies comfort and simplicity—One-Pan Lemon Garlic Chicken. This recipe isn’t just about cooking; it’s about gathering around the table, sharing stories, and creating memories. With tender chicken and vibrant vegetables, this dish is a true celebration of home-cooked goodness.

In this heartfelt article, I’ll guide you through everything you need to know to make this meal sing. We’ll cover why you’ll love this recipe, break down each ingredient, share expert tips, and even explore delicious variations. So, let’s get started on this culinary journey that brings the warmth of the South right to your kitchen!

Why You’ll Love This Recipe

This One-Pan Lemon Garlic Chicken isn’t just another meal; it’s a delightful experience. Here are five reasons why this dish deserves a spot on your dinner table:

  • Easy Cleanup: Cooking everything in one pan means less time scrubbing pots and more time enjoying your meal.
  • Flavorful Ingredients: The combination of lemon and garlic elevates the chicken, making every bite refreshing and savory.
  • Health-Conscious: Packed with lean protein and vibrant veggies, this dish is a healthy choice that doesn’t skimp on flavor.
  • Family-Friendly: Kids and adults alike will love the juicy chicken and colorful veggies, making it perfect for family dinners.
  • Quick to Prepare: With a prep time of just 10 minutes and a total cooking time of 40 minutes, you’ll have a hearty meal on the table in no time.

Ingredients Breakdown

Let’s take a closer look at what goes into this delightful dish. Here’s what you’ll need:

  • 4 boneless, skinless chicken breasts: The star of the show, providing lean protein.
  • 1 tablespoon olive oil: For sautéing and adding healthy fats.
  • 2 tablespoons butter: Adds richness and flavor.
  • 3 cloves garlic, minced: Brings that essential aromatic punch.
  • 1 lemon, juiced and zested: Adds brightness and acidity.
  • 1 teaspoon dried thyme: A classic herb that pairs beautifully with chicken.
  • 1 teaspoon dried oregano: Adds an earthy flavor.
  • Salt and pepper to taste: Essential for flavor enhancement.
  • 1 cup baby carrots: Adds sweetness and color.
  • 1 cup Brussels sprouts, halved: For a nutritious touch and excellent texture.
  • 1 cup red potatoes, cubed: Hearty and filling, perfect for soaking up flavors.
  • Fresh parsley for garnish: A pop of color and freshness.

Pro Tips for Perfect One-Pan Lemon Garlic Chicken

To ensure your chicken dinner turns out perfectly, keep these expert tips in mind:

  • Even Thickness: Make sure your chicken breasts are of even thickness for uniform cooking.
  • High Heat for Searing: Don’t be afraid of the heat! Searing the chicken at a high temperature creates a beautiful golden crust.
  • Let it Rest: Allow the chicken to rest for a few minutes after cooking to lock in juices.
  • Use Fresh Ingredients: Whenever possible, fresh garlic and herbs elevate the dish significantly.
  • Don’t Overcrowd the Pan: Give your ingredients room to cook evenly and develop flavor.
  • Adjust Seasoning: Always taste before serving and adjust seasoning as needed.
  • Experiment with Herbs: Feel free to switch up the thyme and oregano with your favorite herbs for a unique twist.
  • Use a Meat Thermometer: Ensure your chicken reaches an internal temperature of 165°F (75°C) for safe consumption.

Common Mistakes and Troubleshooting

Side view of cooked chicken breasts on a plate with golden roasted veggies.

Even seasoned cooks can make mistakes. Here are a few common pitfalls to avoid:

  • Overcooking the Chicken: Always check the internal temperature to avoid dry chicken.
  • Not Enough Flavor: Be generous with seasoning and taste as you go to ensure bold flavors.
  • Dry Vegetables: If your veggies seem dry, add a splash of broth or water during cooking.
  • Skipping the Resting Step: Resting is key to juicy chicken—don’t skip it!

Variations to Try

If you’re in the mood for something different, here are four tasty variations to consider:

  • Herb-Infused Chicken: Add fresh rosemary or basil for a fragrant twist.
  • Spicy Kick: Incorporate red pepper flakes for a bit of heat.
  • One-Pan Mediterranean: Substitute olives and feta cheese for a Mediterranean flair.
  • Vegetarian Delight: Replace chicken with hearty vegetables like eggplant and zucchini for a veggie version.

Storage and Make-Ahead Instructions

You can make this dish in advance or store leftovers for later:

  • Refrigerate: Store leftovers in an airtight container for up to 3 days.
  • Freeze: This dish freezes well for up to 2 months. Just reheat in the oven or microwave.
  • Make-Ahead: You can prep the chicken and veggies a day in advance. Just assemble and cook when you’re ready!

Frequently Asked Questions

Here are some common questions I often get about this recipe:

  • Can I use bone-in chicken? Yes, just adjust the cooking time to ensure it reaches 165°F.
  • What if I don’t have Brussels sprouts? Feel free to substitute with broccoli or green beans!
  • How do I know when the chicken is done? Use a meat thermometer to check the internal temperature.
  • Can I make this recipe in advance? Absolutely! Prep ahead and bake when ready to serve.
  • What can I serve with this dish? It pairs beautifully with rice, quinoa, or a fresh salad.
  • Can I add more vegetables? Yes! Feel free to add your favorites or what you have on hand.
  • How spicy is this dish? It’s not spicy unless you add red pepper flakes, which you can adjust to your taste.
  • Is this dish gluten-free? Yes, all the ingredients are naturally gluten-free!

Nutrition Tips and Dietary Adaptations

This One-Pan Lemon Garlic Chicken is not only delicious but can also be adapted to fit various dietary needs:

  • Low-Carb Option: Skip the potatoes and add more green vegetables.
  • Dairy-Free: Omit the butter or use a dairy-free alternative.
  • Paleo-Friendly: Replace the potatoes with sweet potatoes or cauliflower.
  • Whole30 Compliant: Stick to whole foods and avoid processed ingredients.

Equipment Recommendations

Here’s what you’ll need to whip up this delightful meal:

  • Oven-Safe Skillet: A good-quality cast iron or stainless steel skillet works best.
  • Meat Thermometer: Essential for checking chicken doneness.
  • Sharp Knife and Cutting Board: For easy prep of the ingredients.

Serving Suggestions

Once your One-Pan Lemon Garlic Chicken is ready, consider these serving options:

  • Serve with Rice: A bed of fluffy rice absorbs the flavorful juices beautifully.
  • Pair with Salad: A light, crisp salad balances the richness of the chicken.
  • Offer Crusty Bread: Perfect for sopping up any extra sauce.
  • Garnish with Lemon Wedges: Adds a fresh touch and enhances the lemon flavor.

As we wrap up this culinary adventure, I hope you feel inspired to bring this One-Pan Lemon Garlic Chicken to your table. Remember, cooking is about love, patience, and the joy of sharing good food with those you cherish. Enjoy the process, savor each bite, and let this dish remind you of the warmth of home. Happy cooking, friends!

The Comfort of Home-Cooked Dairy Free Chicken Alfredo

When it comes to family gatherings, few dishes hit the spot quite like a warm bowl of creamy Chicken Alfredo. But what if I told you that you could enjoy this classic comfort food without dairy? This dairy free chicken alfredo recipe combines tender chicken, gluten-free pasta, and a rich, creamy sauce that will leave everyone at the table asking for seconds. Let’s dive into the heart of this recipe, where simple ingredients shine and flavor packs a punch.

Why You’ll Love This Recipe

  • Quick and Easy: You can have this delightful dish ready in under 30 minutes, making it perfect for weeknight dinners or impromptu gatherings.
  • Family-Friendly: It’s a hit with both kids and adults, ensuring that everyone leaves the table satisfied.
  • Comforting Creaminess: The dairy free sauce is just as rich and satisfying as the traditional version, with a creamy texture that coats the pasta beautifully.
  • Nutritious Ingredients: Packed with protein from chicken and nutrient-rich spinach, this dish is as wholesome as it is delicious.
  • Versatile and Customizable: With plenty of variations and substitutions available, you can easily make this recipe suit your family’s tastes and dietary needs.

Ingredient Breakdown

Let’s take a closer look at the ingredients that create this mouthwatering dairy free chicken alfredo:

  • Chicken Breast (1 1/4 lbs): Diced small for quick cooking and easy eating. Feel free to substitute with turkey or tofu for a different protein option.
  • Spices: Sweet smoked paprika, oregano, garlic powder, thyme, black pepper, and salt add layers of flavor. You can adjust these seasonings based on your preference.
  • Gluten-Free Pasta (12 oz): I recommend gluten-free farfalle, but any gluten-free pasta will work. Cook it al dente for the best texture.
  • Dairy Free Butter (4 tbsp): This is the base for your sauce. Brands like Earth Balance work wonderfully.
  • Minced Onion (2 tbsp): Adds a sweet, aromatic base to the sauce.
  • Dairy Free Heavy Cream (2 cups): For that rich creaminess. You can use coconut cream or cashew cream as alternatives.
  • Dairy Free Parmesan (8 oz): For a cheesy flavor without the dairy. Nutritional yeast is also a great option.
  • Spinach (2 cups): This adds color and nutrition. Feel free to substitute with kale or arugula.
  • Pasta Water (2 tbsp): Helps adjust the sauce consistency as needed.

Step-by-Step Instructions

Juicy Dairy Free Chicken Alfredo on a plate, showcasing a rich white sauce mixed with chopped spinach and shredded dairy-free parmesan.

Now that we’ve covered the ingredients, let’s get cooking!

  1. Boil the gluten-free pasta in a large pot of salted water according to package directions until al dente. Drain and set aside, reserving a bit of the pasta water for later.
  2. In a bowl, combine the diced chicken with the seasonings, making sure each piece is well-coated.
  3. Heat olive oil in a large skillet over medium heat and sear the chicken for 3-4 minutes on each side or until it reaches an internal temperature of 165°F. Transfer the chicken to a plate.
  4. Add the dairy free butter to the same skillet and let it melt. Stir in the minced onion and cook until translucent.
  5. Add all the sauce seasonings and simmer for about a minute to meld the flavors.
  6. Sprinkle the gluten-free flour into the skillet and mix well, scraping the bottom to ensure nothing sticks.
  7. Pour in the chicken broth and dairy free heavy cream, whisking until smooth. Toss in the spinach and continue to whisk, letting it simmer for 3-4 minutes until the sauce thickens.
  8. Stir in the dairy free parmesan cheese until melted and fully incorporated.
  9. Add the cooked pasta to the skillet, tossing to coat. If the sauce is too thick, add a tablespoon of reserved pasta water at a time until you reach your desired consistency.
  10. Gently fold in the seared chicken, ensuring everything is well-coated. Serve hot and enjoy!

Pro Tips for Perfection

  • Don’t Overcook the Chicken: Keep an eye on the chicken as it cooks; overcooked chicken can become dry.
  • Use Fresh Ingredients: Fresh garlic and herbs can elevate the dish’s flavor significantly.
  • Adjust Consistency: Use pasta water to thin the sauce without losing flavor.
  • Experiment with Flavors: Don’t hesitate to add in your favorite veggies or spices for a personalized touch.
  • Make Ahead: You can prepare the chicken and sauce a day in advance to save time.
  • Storage Tips: Store leftovers in an airtight container in the fridge for up to 3 days.
  • Reheat Gently: When reheating, add a splash of water or broth to loosen the sauce.
  • Garnish for Presentation: Fresh parsley or a sprinkle of extra dairy free parmesan can make the dish pop.

Common Mistakes and Troubleshooting

Even the best of us can run into a few hiccups while cooking. Here’s how to avoid common pitfalls:

  • Thick Sauce? Add a bit more pasta water or broth to reach your desired creaminess.
  • Too Salty? A splash of lemon juice can balance out the saltiness.
  • Chicken Not Cooked Properly? Always check the internal temperature; it should reach 165°F.
  • Flavor Lacking? Taste and adjust the seasoning as needed—sometimes a pinch more salt or pepper can make all the difference.

Variations to Try

Feel free to mix things up with these variations:

  • Add Veggies: Incorporate broccoli, bell peppers, or mushrooms for added nutrition and flavor.
  • Switch Up the Protein: Use shrimp or sausage for a different twist on the classic recipe.
  • Spice It Up: Add red pepper flakes for a little kick.
  • Herb Infusion: Fresh basil or thyme can elevate the dish and add a delightful aroma.

Storage and Make-Ahead Instructions

This dairy free chicken alfredo can be made ahead and stored for later use:

  • Refrigeration: Store in an airtight container for up to 3 days.
  • Freezing: While the sauce can change texture after freezing, you can freeze the cooked chicken separately for up to a month. Reheat and add fresh pasta and sauce when ready to eat.

FAQs About Dairy Free Chicken Alfredo

  • Can I use regular pasta instead of gluten-free? Absolutely! Just cook according to package directions.
  • Is this recipe nut-free? Yes, if you use a nut-free dairy free butter and cheese.
  • What can I substitute for dairy free heavy cream? Coconut cream or blended silken tofu are great alternatives.
  • How do I make this dish spicier? Add red pepper flakes or diced jalapeños to the sauce.
  • Can I make this vegan? Yes, simply replace the chicken with tofu and use plant-based butter and cheese.
  • What’s the best way to reheat leftovers? Gently reheat on the stove with a splash of broth or water.
  • Can I add other proteins? Yes! Shrimp, sausage, or even grilled tofu can be delicious additions.
  • How many servings does this recipe make? This recipe typically serves 4-6, depending on portion sizes.

Nutritional Tips and Dietary Adaptations

This dairy free chicken alfredo can be easily adapted for various dietary needs:

  • Low Carb: Use spiralized veggies instead of pasta.
  • High Protein: Add beans or lentils to boost the protein content.
  • Lower Fat: Use light dairy free cream or reduce the amount of butter.

Recommended Equipment

To make this recipe a breeze, you’ll need:

  • LARGE SKILLET: For cooking the chicken and sauce.
  • COLANDER: For draining the pasta.
  • MEASURING CUPS AND SPOONS: To ensure accurate ingredient quantities.
  • WHISK: For mixing the sauce smoothly.

Serving Suggestions

To round out your meal, consider serving this dairy free chicken alfredo with:

  • Garlic Bread: Perfect for soaking up that delicious sauce.
  • Side Salad: A fresh mixed greens salad can balance the richness of the pasta.
  • Steamed Vegetables: Broccoli or green beans make a nutritious side.

As you gather around the table with your loved ones, let this creamy dairy free chicken alfredo remind you of home, comfort, and the joy of sharing a meal. With simple ingredients and a timeless recipe, you’ll create memories that linger long after the last bite. Happy cooking!

Dairy Free Chicken Alfredo

Prep Time 10 minutes
Cook Time 20 minutes
Total Time 30 minutes
Servings 4 servings
Calories 650
A creamy, dairy-free twist on classic Alfredo, packed with tender chicken and spinach for a satisfying meal.

Ingredients

Protein

  • 1 1/4 lbs Chicken breast (diced small)

Spices & Seasonings

  • 1 3/4 tsp sweet smoked paprika
  • 1 1/2 tsp oregano
  • 1 1/2 tsp garlic powder
  • 1/2 tsp thyme
  • 1/2 tsp black pepper
  • 1/2 tsp salt

Pasta

  • 12 oz gluten-free farfalle

Sauce & Dairy

  • 4 tbsp dairy free butter
  • 2 tbsp minced onion
  • 2 tsp Italian seasoning
  • 1 tsp garlic powder
  • 1/2 tsp salt
  • 2 cup chicken broth
  • 1 2/3 tbsp gluten free 1:1 flour
  • 2 cups dairy free heavy cream
  • 2 cups chopped spinach
  • 8 oz dairy free parmesan (shredded)
  • 2 tbsp pasta water (as needed)

Instructions 

  • Cook pasta until al dente, then drain and set aside.
  • Season chicken with spices, then sear until cooked through. Set aside.
  • In the same skillet, melt butter, add seasonings, then whisk in flour, broth, cream, and spinach. Simmer until thickened.
  • Stir in parmesan until melted, then toss with pasta and chicken. Add pasta water if needed to thin sauce.

Notes

Use gluten-free pasta and dairy-free cheese for a vegan-friendly option.
Calories: 650kcal
Cost: $15
Course: Main Course
Cuisine: Italian
Keyword: chicken, Dairy Free, Pasta

Gather ’round, friends, because today we’re diving into a recipe that’s as comforting as a sunny afternoon on the porch. This Yogurt Marinated Chicken is not just a dish; it’s an experience—one that fills the kitchen with warm aromas and invites family and friends to the table. Simple ingredients come together to create a meal that’s juicy, tender, and downright delicious. Let’s roll up our sleeves and get started!

Why You’ll Love This Recipe

This recipe isn’t just about cooking; it’s about nurturing. Here are a few reasons why you’ll fall head over heels for this yogurt marinated chicken:

  • Tender and Juicy: The yogurt marinade works wonders, breaking down the proteins in the chicken for a succulent bite every time.
  • Simple Ingredients: With just a handful of pantry staples, you’ll create a dish that feels like a labor of love.
  • Versatile Cooking Methods: Whether you choose to grill, bake, or sauté, this chicken adapts beautifully to your preferred cooking method.
  • Meal Prep Friendly: Marinate the chicken ahead of time and have a delicious meal ready to go whenever you need it.
  • Crowd-Pleaser: This dish is perfect for family dinners, gatherings, or even a cozy date night at home—everyone loves it!

Ingredients You’ll Need

Let’s grab our ingredients! Here’s what you’ll need to whip up this delightful yogurt marinated chicken:

  • 1½-2 lbs chicken cutlets: Feel free to use breasts or thighs, depending on your preference.
  • 1/2 cup plain full-fat Greek yogurt: This is the star of the marinade, providing creaminess and flavor.
  • 1/4 cup olive oil: Adds richness and helps the marinade coat the chicken evenly.
  • 1 tbsp honey: A touch of sweetness balances the acidity of the yogurt.
  • 1 lemon (juiced, about 1/4 cup): Fresh lemon juice brightens the dish.
  • 1 tsp lemon zest: For an extra citrus kick!
  • 5 garlic cloves (minced): Because garlic makes everything better.
  • 1 tbsp fresh parsley (chopped fine): Adds a burst of color and freshness.
  • 1/2 tsp salt: Adjust according to your taste.
  • 1/4 tsp black pepper: A must for seasoning.
  • 1/2 tsp paprika: For a hint of smokiness.
  • 1/2 tsp onion powder: Adds depth of flavor.
  • 1/2 tsp dried oregano: A nod to Mediterranean flavors.
  • 1/2 tsp dried basil: Complements the other herbs beautifully.
  • 1/4 tsp cayenne pepper: For a little heat (optional).
  • 1/4 tsp coriander: A unique flavor that enhances the marinade.
  • 1/4 tsp cumin: Adds a warm, earthy note.

How to Make Yogurt Marinated Chicken

Now that we have everything ready, let’s get to the fun part—making this magical marinade and cooking the chicken!

  1. In a large bowl, combine all the marinade ingredients: Greek yogurt, olive oil, honey, lemon juice, lemon zest, minced garlic, parsley, salt, pepper, paprika, onion powder, oregano, basil, cayenne, coriander, and cumin.
  2. Whisk until well combined and smooth.
  3. Add the chicken cutlets to the bowl and toss to coat every piece evenly with the marinade.
  4. Cover the bowl with plastic wrap and refrigerate for at least 1 hour, or up to 24 hours for maximum flavor.
  5. Before cooking, let the chicken come to room temperature for about 20 minutes.

Pro Tips for Perfect Yogurt Marinated Chicken

Side view of cooked chicken cutlets marinated in yogurt, garnished with herbs.

To elevate your cooking game, consider these expert tips:

  • Marinate Longer: For the best flavor and tenderness, marinate your chicken for at least 4 hours, or overnight if you can.
  • Room Temperature: Always allow the chicken to reach room temperature before cooking to ensure even cooking.
  • Cooking Method: Whether you grill, bake at 400°F for 25-30 minutes, or sauté, adjust the cooking time based on the thickness of your chicken.
  • Check for Doneness: Use a meat thermometer to ensure your chicken reaches an internal temperature of 165°F.
  • Add Fresh Herbs: Garnish with extra chopped parsley or mint before serving for a fresh touch.
  • Pair it Right: This chicken goes fantastically with a side of roasted vegetables or a fresh salad.
  • Experiment with Spices: Feel free to adjust spices in the marinade to suit your taste; add a pinch of cinnamon for warmth or more cayenne for heat.
  • Resting Time: Let the chicken rest for a few minutes after cooking to retain its juices.

Common Mistakes and Troubleshooting

Even the best cooks make mistakes! Here’s how to avoid common pitfalls:

  • Too Little Marinade: Ensure the chicken is fully coated for maximum flavor and tenderness.
  • Skipping the Resting Period: Always let cooked chicken rest; this keeps it juicy.
  • Overcooking: Watch the cooking time closely to avoid dry chicken.
  • Not Using Fresh Ingredients: Fresh garlic and herbs make a noticeable difference in flavor.

Variations on the Recipe

This recipe is adaptable to suit your palate or what you have on hand. Here are some fun variations:

  • Curry Yogurt Chicken: Add curry powder to the marinade for an Indian twist.
  • Herbed Chicken: Swap in fresh thyme or rosemary for earthy flavors.
  • Spicy Chipotle: Mix in chipotle powder or hot sauce for a smoky kick.
  • Honey Mustard: Replace honey with mustard for a tangy glaze.

Storage and Make-Ahead Instructions

This yogurt marinated chicken is perfect for meal prep. Here’s how to store it:

  • Refrigerator: Store cooked chicken in an airtight container for up to 4 days.
  • Freezing: Marinated chicken can be frozen for up to 3 months in a freezer-safe bag. Thaw in the refrigerator before cooking.
  • Make-Ahead: Marinate chicken up to 24 hours in advance for ultimate flavor.

Comprehensive FAQ

Got questions? I’ve got answers:

  • How long do I need to marinate the chicken? Minimum 1 hour, but overnight is best for flavor.
  • Can I use other cuts of chicken? Absolutely! Thighs or drumsticks work wonderfully.
  • Is Greek yogurt necessary? While it’s preferred for creaminess, regular yogurt can be used too.
  • Can I grill the chicken? Yes! Just ensure to preheat your grill for best results.
  • What should I serve with this chicken? It pairs well with rice, potatoes, or a fresh salad.
  • Can I marinate for more than 24 hours? It’s best not to exceed 24 hours, as the chicken may become too tender.
  • Can I use low-fat yogurt? Yes, but full-fat yields the best flavor and texture.
  • Can I make this chicken spicy? Absolutely! Adjust the cayenne or add your favorite hot sauce.

Nutrition Tips and Dietary Adaptations

This yogurt marinated chicken can be made to fit various dietary needs:

  • Low-Carb: Simply skip the honey or replace it with a low-carb sweetener.
  • Dairy-Free: Substitute Greek yogurt with a dairy-free yogurt alternative.
  • Gluten-Free: This recipe is naturally gluten-free, perfect for those with gluten sensitivities.

Equipment Recommendations

To make this recipe easy and enjoyable, here are a few tools I recommend:

  • Mixing Bowls: A large, sturdy bowl for mixing the marinade.
  • Whisk: For smooth and consistent marinade.
  • Meat Thermometer: To check the doneness of your chicken.
  • Plastic Wrap: To cover the marinade while it chills.

Serving Suggestions

Now that your chicken is perfectly marinated and cooked, here are some delightful ways to serve it:

  • On a Bed of Greens: Serve sliced chicken over a fresh salad with your favorite dressing.
  • With Rice or Couscous: A bed of fluffy rice or couscous makes a wonderful base.
  • As a Sandwich: Slice it for sandwiches with fresh veggies and sauces.
  • With Roasted Veggies: Pair with seasonal roasted vegetables for a hearty meal.

Conclusion

There you have it, folks! A simple yet immensely satisfying recipe for Yogurt Marinated Chicken that embodies the spirit of home cooking. With its rich flavor, tender texture, and adaptability, this dish is sure to become a staple in your kitchen. So gather your loved ones, share a meal, and make memories around the table. Happy cooking!

Yogurt Marinated Chicken

Prep Time 10 minutes
Cook Time 15 minutes
Total Time 25 minutes
Servings 4 servings
Calories 250
Juicy, flavorful chicken marinated in creamy yogurt and herbs, perfect for a quick and healthy meal.

Ingredients

Chicken

  • 1.75 lbs chicken cutlets (about 8 pieces)
  • 0.5 cup plain full fat Greek yogurt
  • 0.25 cup olive oil
  • 1 tbsp honey
  • 1 lemon lemon (juiced) (about 1/4 cup juice)
  • 1 tsp lemon zest
  • 5 cloves garlic (minced)
  • 1 tbsp fresh parsley (chopped)
  • 0.5 tsp salt (or more to taste)
  • 0.25 tsp black pepper
  • 0.5 tsp paprika
  • 0.5 tsp onion powder
  • 0.5 tsp dried oregano
  • 0.5 tsp dried basil
  • 0.25 tsp cayenne pepper
  • 0.25 tsp coriander
  • 0.25 tsp cumin

Instructions 

  • Mix marinade ingredients in a large bowl.
  • Add chicken and toss to coat.
  • Cover and refrigerate for at least 1 hour.
  • Bring chicken to room temperature before cooking.

Notes

Marinate the chicken for at least an hour for best flavor.
Calories: 250kcal
Cost: $15
Course: Main Course
Cuisine: Mediterranean
Keyword: chicken, marinade, yogurt

A Zesty Chicken and Rice Dish to Brighten Any Table

Gather ’round, friends! If there’s one dish that brings the heart of home to any table, it’s this lemon garlic chicken and rice recipe. Bursting with the bright notes of citrus and the savory essence of garlic, this dish isn’t just a meal; it’s a comforting embrace that reminds us of family dinners and warm memories. Whether it’s a weeknight meal or a special occasion, this chicken and rice delight is sure to please every palate.

Why You’ll Love This Recipe

This isn’t just another recipe; it’s a culinary experience wrapped in simplicity and flavor. Here’s why this dish will become a staple in your kitchen:

  • One-Pan Wonder: Minimal cleanup means you can enjoy more time with loved ones and less time scrubbing dishes.
  • Flavor Explosion: The combination of lemon juice and garlic infuses the chicken and rice with a vibrant zest that’s hard to resist.
  • Hearty and Wholesome: Packed with protein and comforting carbs, this dish is perfect for a filling family meal.
  • Versatile Ingredients: With simple staples, you can whip this dish up even on busy nights, adapting it with what you have on hand.
  • Meal Prep Friendly: This recipe holds up well in the fridge, making it a great option for meal prep!

Ingredients

Before we dive into the cooking, let’s gather our ingredients. Here’s what you’ll need:

  • Boneless, Skinless Chicken Breasts – 1.5 pounds (about 2-3 large breasts), cut into 1-inch cubes. This is the lean protein powerhouse of our dish. You can also use chicken thighs for a richer flavor.
  • Olive Oil – 2 tablespoons. Used for searing the chicken to a beautiful golden brown.
  • Unsalted Butter – 3 tablespoons. Adds richness and flavor to the sauce and helps sauté the aromatics.
  • Yellow Onion – 1 medium, finely chopped. This builds the foundational aromatic base of the dish.
  • Garlic – 6 cloves, minced. Don’t be shy with the garlic; it’s a star player and provides a deep, savory flavor.
  • Long-Grain White Rice – 1.5 cups, uncooked. It’s crucial to rinse the rice thoroughly before use to ensure a fluffy, non-sticky texture.
  • Low-Sodium Chicken Broth – 3 cups. This is the cooking liquid for the rice, infusing it with immense flavor as it cooks.
  • Dried Oregano – 1 teaspoon. Adds a touch of earthy, Mediterranean aroma.
  • Salt – 1 teaspoon, plus more to taste. Essential for seasoning every layer of the dish.
  • Black Pepper – ½ teaspoon, freshly ground. Provides a gentle, spicy kick.
  • Lemon – 1 large. You will use both the zest and the juice for a multi-layered citrus brightness.
  • Fresh Parsley – ¼ cup, chopped, for garnish. Adds a pop of color and fresh, herby flavor at the end.

Step-by-Step Instructions

Close-up of tender Lemon Garlic Chicken with aromatic rice, showcasing fresh ingredients.

Now that we have our ingredients, let’s get cooking! Follow these simple steps to create your lemon garlic chicken and rice masterpiece:

  1. Prep the Chicken: Pat the chicken cubes completely dry with paper towels. This is a crucial step to ensure a good sear rather than steaming the meat. In a medium bowl, toss the chicken cubes with ½ teaspoon of salt and ¼ teaspoon of black pepper until evenly coated.
  2. Sear the Chicken: Place a large, deep skillet or Dutch oven with a lid over medium-high heat. Add the 2 tablespoons of olive oil. Once the oil is shimmering, carefully add the seasoned chicken to the pan in a single layer. Be careful not to overcrowd the pan; work in batches if necessary. Sear the chicken for 2-3 minutes per side, until golden brown and cooked through. The chicken doesn’t need to be fully cooked at this stage, as it will finish cooking with the rice. Remove the seared chicken from the skillet and set it aside on a plate.
  3. Cook the Aromatics: Reduce the heat to medium. Add the 3 tablespoons of butter to the same skillet, allowing it to melt and scrape up any browned bits (fond) from the bottom of the pan—this is packed with flavor! Add the finely chopped onion and sauté for 4-5 minutes, or until it becomes soft and translucent. Add the minced garlic and dried oregano and cook for another minute until fragrant. Be careful not to burn the garlic.
  4. Toast the Rice: Add the rinsed and drained rice to the skillet. Stir constantly for about 1-2 minutes, allowing the grains to toast in the butter and aromatics. This step is vital as it enhances the nutty flavor of the rice and helps keep the grains separate and fluffy.
  5. Combine Ingredients: Pour in the 3 cups of chicken broth, the juice of the lemon, the remaining ½ teaspoon of salt, and ¼ teaspoon of black pepper. Use a wooden spoon to scrape any remaining browned bits from the bottom of the pan. Bring the liquid to a boil.
  6. Simmer and Cook: Once the broth is boiling, return the seared chicken and any accumulated juices back to the skillet. Stir gently to combine. Reduce the heat to low, cover the skillet with a tight-fitting lid, and let it simmer for 18-20 minutes, or until the rice has absorbed all the liquid. Avoid lifting the lid during this time, as it will release the steam needed to cook the rice properly.
  7. Rest and Fluff: Remove the skillet from the heat and let it stand, covered, for 10 minutes. This resting period is essential; it allows the rice to steam fully, becoming light and fluffy. Do not skip this step!
  8. Finish and Serve: After resting, remove the lid. Zest the entire lemon directly over the dish. Add the chopped fresh parsley. Use a fork to gently fluff the rice and mix in the zest and parsley. Taste and adjust seasoning with more salt, pepper, or a squeeze of lemon juice if desired. Serve immediately.

Pro Tips for Perfection

To elevate your lemon garlic chicken and rice experience, consider these expert insights:

  • Experiment with Herbs: Fresh thyme or rosemary can add a lovely depth of flavor to the dish.
  • Don’t Skip the Searing: This step enhances the chicken’s flavor and adds a beautiful color.
  • Broth Matters: Using homemade or high-quality broth will make a noticeable difference.
  • Use a Heavy-Bottomed Pan: This ensures even cooking and prevents burning.
  • Rinse the Rice: This removes excess starch and helps achieve fluffy rice.
  • Adjust the Acid: If you prefer a tangier dish, add more lemon juice to taste.
  • Cook’s Choice: Feel free to add veggies like spinach or bell peppers for extra nutrition and color.
  • Storage Tips: Store leftovers in an airtight container in the fridge for up to 3 days.
  • Reheat Gently: When reheating, add a splash of chicken broth to keep the rice moist.
  • Make It a Meal: Serve with a side salad or roasted vegetables for a complete dinner.

Common Mistakes and Troubleshooting

Even the best of us make mistakes! Avoid these common pitfalls to ensure your dish shines:

  • Skipping the Drying Step: Not drying the chicken can lead to steaming instead of searing.
  • Overcrowding the Pan: Cook in batches if necessary to get that ideal golden crust on the chicken.
  • Not Letting It Rest: Skipping the resting time can lead to soggy rice.
  • Too Much Liquid: Make sure to measure your broth correctly to avoid mushy rice.
  • Ignoring Flavor Adjustments: Always taste and adjust seasoning before serving!

Variations of Lemon Garlic Chicken and Rice

If you’re feeling adventurous, here are a few tasty variations to keep things exciting:

  • Herb-Infused Rice: Add a bay leaf or fresh herbs to the broth for enhanced flavor.
  • Spicy Kick: Incorporate red pepper flakes or diced jalapeño for a little heat!
  • Creamy Version: Stir in a splash of cream or a dollop of sour cream just before serving for richness.
  • Vegetarian Option: Swap the chicken for chickpeas or tofu and use vegetable broth for a hearty vegetarian dish.

Storage and Make-Ahead Instructions

Planning ahead? Here’s how to store and prepare this dish for future meals:

  • Refrigerate: Store leftovers in an airtight container in the fridge for up to 3 days.
  • Freezing: Freeze cooled portions in freezer-safe containers for up to 3 months.
  • Make-Ahead: You can prepare the chicken and rice separately and combine them just before serving for optimal flavor.
  • Reheat: Gently reheat in a skillet with a little broth to restore moisture.

Frequently Asked Questions

Here are some common questions folks have about making this lemon garlic chicken and rice:

  • Can I use brown rice instead of white? Yes, but the cooking time will be longer. Adjust your broth accordingly.
  • What’s the best way to reheat leftovers? Add a splash of broth and reheat gently on the stove or microwave.
  • Can I make this gluten-free? Absolutely! Use gluten-free broth and ensure all ingredients are certified gluten-free.
  • What if I don’t have chicken broth? Water can work in a pinch, but it won’t be as flavorful. Consider using vegetable broth instead.
  • How can I make this dish spicier? Add crushed red pepper flakes or diced jalapeños during cooking for a kick.
  • Can I add vegetables? Yes! Feel free to toss in your favorite vegetables like peas, carrots, or spinach.
  • Is this recipe suitable for meal prep? Definitely! This dish holds up well in the fridge and reheats nicely.
  • What should I serve with this dish? A simple side salad or roasted vegetables pairs wonderfully!

Nutrition Tips and Dietary Adaptations

Here are some nutrition tips to consider while enjoying this hearty meal:

  • Protein Boost: Add more protein by including beans or lentils into your rice mix.
  • Lower Sodium: Use low-sodium broth and skip added salt for a healthier option.
  • Vegan Variation: Substitute chicken with chickpeas or tofu and use vegetable broth.
  • Whole Grain Option: Use brown rice for added fiber and nutrients.

Equipment Recommendations

Having the right tools can make all the difference. Here’s what I recommend:

  • Heavy-Bottomed Skillet: Ideal for even heat distribution.
  • Wooden Spoon: Perfect for stirring without scratching your pan.
  • Measuring Cups and Spoons: For accurate ingredient measurement.
  • Lid for Skillet: Essential for controlling steam during cooking.

Serving Suggestions

To create a complete meal, consider these serving ideas:

  • Fresh Salad: Pair with a crisp garden salad drizzled with vinaigrette.
  • Roasted Vegetables: Serve with seasonal roasted veggies for added color and flavor.
  • Crusty Bread: A slice of rustic bread is perfect for soaking up the delicious sauce.
  • Wine Pairing: A chilled glass of white wine complements the lemony notes beautifully.

So there you have it, friends! This lemon garlic chicken and rice recipe is not just a meal; it’s an experience filled with vibrant flavors and heartwarming memories. I hope you enjoy making, sharing, and savoring this dish as much as I do. Happy cooking!

Lemon Garlic Chicken and Rice

Prep Time 10 minutes
Cook Time 20 minutes
Total Time 30 minutes
Servings 4 servings
Calories 520
A flavorful and easy one-pan dish featuring tender chicken, fragrant rice, and bright lemon notes, perfect for a satisfying meal.

Ingredients

Protein

  • 1.5 pounds Boneless, Skinless Chicken Breasts (cut into 1-inch cubes)
  • 2 tablespoons Olive Oil (for searing)
  • 3 tablespoons Unsalted Butter (adds richness)
  • 1 medium Yellow Onion (finely chopped)
  • 6 cloves Garlic (minced)
  • 1.5 cups Long-Grain White Rice (rinsed thoroughly)
  • 3 cups Low-Sodium Chicken Broth (for cooking rice)
  • 1 teaspoon Dried Oregano (adds aroma)
  • 1 teaspoon Salt (plus more to taste)
  • 0.5 teaspoon Black Pepper (freshly ground)
  • 1 large Lemon (zest and juice)
  • 0.25 cup Fresh Parsley (chopped, for garnish)

Instructions 

  • Pat chicken dry, season with ½ tsp salt and ¼ tsp pepper. Sear in hot oil until golden, then set aside.
  • Melt butter, sauté onion 4-5 min, add garlic and oregano, cook 1 min.
  • Add rice, toast 1-2 min, then pour in broth, lemon juice, remaining salt and pepper. Bring to boil.
  • Return chicken to pan, cover, and simmer 18-20 min until rice absorbs liquid. Rest 10 min, then fluff with lemon zest and parsley.

Notes

Ensure the rice is covered during simmering to prevent steam escape and achieve fluffy texture.
Calories: 520kcal
Cost: $15
Course: Main Course
Cuisine: Mediterranean
Keyword: chicken, Lemon, rice

Welcome to the Heart of Comfort Food

When the sun sets and the evening chill creeps in, there’s something about the aroma of a hearty dish that feels like a warm hug. Today, I’m excited to share with you my recipe for One Pot Creamy Garlic Pasta, a dish that’s quick to whip up yet rich in flavor and nostalgia. This dish embodies everything I love about cooking—simple ingredients coming together to create something truly comforting. Let’s dive into how to make this creamy garlic pasta that whispers comfort and fills your home with warmth.

Why You’ll Love This Recipe

  • Quick and Easy: In just 20 minutes, you can have a delightful meal prepared with minimal cleanup.
  • Hearty Flavor: The combination of garlic and creamy Parmesan creates a rich sauce that envelops every strand of pasta.
  • Flexible Ingredients: You can easily substitute ingredients based on what you have in your pantry.
  • Perfect for Any Occasion: Whether it’s a family dinner or a quick meal for one, this dish fits the bill.
  • Nutritious Comfort: Packed with dairy goodness and flavor, it’s a dish that brings joy without compromising on nutrition.

Ingredients You’ll Need

Here’s what you need to make this One Pot Creamy Garlic Pasta. Feel free to mix and match based on your preferences!

  • 8 oz pasta: Spaghetti, linguine, or penne work beautifully.
  • 1 tablespoon butter or olive oil: For sautéing the garlic and enhancing flavor.
  • 4 cloves garlic: Minced, to give the dish its signature savory kick.
  • 2 cups milk: Whole milk is preferred, but any milk you have on hand will do.
  • 1 cup water: Just enough to cover the pasta.
  • ¾ cup freshly grated Parmesan cheese: A must for that creamy texture.
  • ½ teaspoon salt: Adjust to taste.
  • ¼ teaspoon black pepper: Freshly cracked for the best flavor.
  • 1 teaspoon Italian seasoning: For a dash of herby goodness.
  • Optional: 2 tablespoons cream cheese or sour cream for extra creaminess.
  • Optional garnish: Chopped parsley or basil for a fresh touch.

Step-by-Step Instructions

A bowl of creamy garlic pasta with visible garlic and cheese, garnished with parsley.

Now let’s get cooking! Follow these simple steps to prepare your creamy garlic pasta.

  1. In a large pot, melt the butter or heat the olive oil over medium heat.
  2. Add the minced garlic and sauté for about 1-2 minutes until fragrant, being careful not to burn it.
  3. Pour in the milk and water, then add the pasta, salt, pepper, and Italian seasoning.
  4. Bring the mixture to a boil, then reduce to a simmer, stirring frequently to prevent sticking. Cook until the pasta is al dente, about 10-12 minutes.
  5. Once the pasta is cooked, stir in the Parmesan cheese until melted and creamy. If you’re using cream cheese or sour cream, add it now for an extra boost of richness.
  6. Serve immediately, garnished with chopped parsley or basil if desired.

Pro Tips for Perfect Pasta

  • Don’t Overcook the Pasta: Keep an eye on it to ensure it’s al dente; mushy pasta is a common mistake!
  • Adjust Sauce Consistency: If the sauce is too thick, add a bit more milk or water until you achieve your desired creaminess.
  • Flavor Boost: For an extra layer of flavor, consider adding a splash of white wine when sautéing the garlic.
  • Use Fresh Ingredients: Fresh garlic and high-quality cheese make all the difference in flavor.
  • Storage: Store leftovers in an airtight container in the fridge for up to three days.
  • Reheat Gently: When reheating, add a splash of milk to revive the creaminess.
  • Experiment with Proteins: Cooked chicken or shrimp can be added for a heartier meal.
  • Vegetarian Twist: Add in seasonal vegetables like spinach, peas, or roasted tomatoes for a nutritious boost.

Common Mistakes and Troubleshooting

Even the best of us can make mistakes in the kitchen. Here are some common pitfalls and how to avoid them:

  • Overcooking the Garlic: If you let the garlic brown too much, it can turn bitter. Remember, it only needs a couple of minutes!
  • Too Much Liquid: If you add too much water or milk, your sauce may turn out soupy. Measure carefully and adjust as needed.
  • Lumpy Sauce: Stir the cheese in gradually to ensure it melts smoothly into the sauce.
  • Underseasoning: Don’t be shy with salt and seasonings; they’re crucial for bringing out the flavors.

Delicious Variations to Try

If you’re feeling adventurous, here are some variations to make this dish your own:

  • Spicy Garlic Pasta: Add red pepper flakes for a spicy kick that elevates the dish.
  • Mushroom and Garlic: Sauté sliced mushrooms with the garlic for an earthy flavor.
  • Broccoli Garlic Pasta: Toss in steamed broccoli for a healthy green addition.
  • Cheesy Spinach Pasta: Mix in fresh spinach and additional cheese for a creamy, cheesy delight.

Make-Ahead and Storage Instructions

This creamy garlic pasta is perfect for meal prep! Here’s how to make it ahead of time:

  • Make Ahead: You can prepare the pasta and sauce a day in advance and store them separately in the fridge.
  • Storage: Store leftovers in an airtight container for up to three days. When reheating, add a splash of milk to maintain the creamy texture.
  • Freezing: While the pasta can be frozen, the texture might change upon thawing. It’s best enjoyed fresh.

Frequently Asked Questions

  • Can I use a different type of pasta for this recipe? Yes! Any pasta shape will work, just adjust the cooking time as needed.
  • Can I make creamy garlic pasta without heavy cream? Absolutely! The milk and cheese create a creamy sauce, so no heavy cream is necessary.
  • What can I serve with creamy garlic pasta? A light salad, garlic bread, or steamed vegetables make great sides.
  • How do I store leftovers? Keep leftovers in an airtight container in the fridge for up to three days.
  • Can I freeze this dish? While it’s best fresh, you can freeze it; just know the texture may change.
  • How can I make this dish vegan? Use a plant-based milk and nutritional yeast instead of cheese.
  • Can I add protein to this dish? Yes, cooked chicken, shrimp, or bacon can be added for a heartier meal.
  • How long does this recipe take to prepare? This recipe takes about 20 minutes from start to finish!

Nutritional Tips and Dietary Adaptations

This dish is versatile and can be adapted to fit various dietary needs:

  • Low-Carb Option: Substitute pasta with zucchini noodles or spaghetti squash for a lighter meal.
  • Gluten-Free: Use gluten-free pasta to accommodate dietary restrictions.
  • Plant-Based: For a vegan version, use almond milk and skip the cheese.
  • Increase Protein: Add cooked chicken, chickpeas, or lentils for a protein boost.

Equipment Recommendations

Here’s what you’ll need to prepare this delightful meal:

  • Large Pot: A sturdy pot for boiling and combining ingredients.
  • Wooden Spoon: For stirring your pasta and sauce together without scratching your pot.
  • Measuring Cups: For accurately measuring liquids and pasta.
  • Grater: A microplane or box grater for fresh cheese.

Serving Suggestions

To elevate your meal, consider these serving ideas:

  • Garnish: Fresh herbs like parsley or basil add color and freshness.
  • Extra Cheese: Serve with additional grated Parmesan on top for cheese lovers.
  • Accompaniment: Pair with a crisp salad or garlic bread for a complete meal.

In conclusion, this One Pot Creamy Garlic Pasta is not just a meal; it’s a warm embrace on a plate, perfect for busy weeknights or family gatherings. Remember, cooking is all about the love and care you put into it. So gather your ingredients, follow these steps, and enjoy a dish that speaks of home and comfort. Happy cooking from my kitchen to yours!

One Pot Creamy Garlic Pasta (Just 20 Minutes!)

Prep Time 5 minutes
Cook Time 15 minutes
Total Time 20 minutes
Servings 4 servings
Calories 550
This quick and easy one-pot creamy garlic pasta is perfect for a satisfying meal in just 20 minutes. It combines simple ingredients for a rich, flavorful dish.

Ingredients

Pasta

  • 8 oz pasta (spaghetti, linguine, or penne)
  • 1 tablespoon butter or olive oil
  • 4 cloves garlic (minced)
  • 2 cups milk (whole preferred, or use any you have)
  • 1 cup water (or as needed to just cover the pasta)
  • ¾ cup freshly grated Parmesan cheese
  • ½ teaspoon salt (or to taste)
  • ¼ teaspoon black pepper
  • 1 teaspoon Italian seasoning
  • 2 tablespoons cream cheese or sour cream (optional for extra creaminess)
  • optional garnish: chopped parsley or basil

Instructions 

  • In a large pot, melt butter or heat olive oil over medium heat. Add minced garlic and sauté until fragrant.
  • Add water and milk to the pot, then bring to a boil. Stir in pasta, salt, black pepper, and Italian seasoning.
  • Reduce heat and simmer until pasta is cooked and liquid is mostly absorbed, about 10 minutes.
  • Stir in Parmesan cheese and optional cream cheese or sour cream until creamy and well combined.
  • Garnish with chopped parsley or basil before serving.

Notes

For a richer flavor, use full-fat milk and cheese. Adjust seasoning to taste.
Calories: 550kcal
Cost: $10
Course: Main Course
Cuisine: Italian
Keyword: Pasta

Gather ‘Round: A Heartwarming One-Pan Garlic Parmesan Chicken and Potatoes

Welcome, friends! Today, we’re diving into a dish that wraps you in comfort like a warm blanket on a chilly evening. Our Garlic Parmesan Chicken and Potatoes is not just a meal; it’s a celebration of home-cooked goodness, perfect for family gatherings or busy weeknights. With simple ingredients and one pan to clean, this recipe is bound to become a staple in your kitchen. So, let’s get cooking!

Why You’ll Love This Recipe

  • Family-Friendly Flavor: This dish is a crowd-pleaser, loved by both kids and adults alike. The savory garlic and rich Parmesan create an irresistible flavor profile.
  • One-Pan Wonder: With everything cooked in one pan, cleanup is a breeze. Perfect for busy evenings when you want comfort food without the fuss.
  • Simple Ingredients: You likely have most of these ingredients in your pantry already, making it an ideal last-minute meal option.
  • Customizable: Feel free to add your favorite vegetables, like brussels sprouts or broccoli, to make it even heartier!
  • Meal Prep Friendly: This dish stores well, making it great for meal prep or leftovers that taste just as good the next day.

Ingredients Breakdown

Here’s what you’ll need for this delightful dish:

  • 4 boneless, skinless chicken breasts (or thighs): Thighs stay juicier, but use what you have!
  • 1 teaspoon Italian seasoning: Adds an herby flavor that complements the garlic.
  • ½ teaspoon smoked paprika: For a subtle smoky depth.
  • ½ teaspoon salt: Essential for seasoning.
  • ¼ teaspoon black pepper: Adds a little kick.
  • 1 tablespoon olive oil: Helps with browning the chicken.
  • 1.5 pounds baby Yukon Gold or red potatoes (halved): These potatoes are creamy and hold their shape well.
  • 3 tablespoons olive oil: For tossing the potatoes and enhancing their flavor.
  • 4 cloves garlic (minced): The star of the show for that rich, aromatic flavor.
  • ⅓ cup grated Parmesan cheese: This adds that cheesy goodness we all love.
  • ½ teaspoon salt: Additional seasoning for the potatoes.
  • ¼ teaspoon black pepper: Enhances the overall flavor.
  • 1 tablespoon chopped fresh parsley: For garnish and a fresh touch.

Step-by-Step Instructions

Close-up of cooked Garlic Parmesan Chicken with halved Yukon Gold potatoes, drizzled in olive oil.

Now, let’s get to the heart of the matter—cooking this delicious dish!

  1. Preheat the Oven: Start by preheating your oven to 400°F (200°C).
  2. Prepare the Chicken: In a bowl, mix the Italian seasoning, smoked paprika, salt, and pepper. Rub this mixture all over the chicken breasts or thighs.
  3. Prep the Potatoes: In another bowl, toss the halved potatoes with olive oil, minced garlic, salt, and pepper.
  4. Combine in the Pan: Arrange the seasoned chicken in a large baking dish or a rimmed baking sheet, then scatter the potatoes around the chicken.
  5. Add Cheese: Sprinkle the grated Parmesan cheese evenly over the chicken and potatoes.
  6. Bake: Place the pan in the oven and bake for about 30-35 minutes or until the chicken is cooked through (reaches an internal temperature of 165°F) and the potatoes are tender.
  7. Garnish and Serve: Remove from the oven, garnish with chopped parsley, and serve warm. Enjoy the delightful aroma as you gather your loved ones around the table!

Pro Tips for Perfect Garlic Parmesan Chicken

  • Use a Meat Thermometer: To ensure your chicken is perfectly cooked, use a meat thermometer to check for an internal temperature of 165°F.
  • Let It Rest: Allow the chicken to rest for a few minutes after baking. This keeps it juicy and flavorful.
  • Experiment with Flavors: Don’t hesitate to add your favorite herbs or spices to the chicken or potatoes, like rosemary or thyme.
  • Try Different Cheeses: While Parmesan is a classic, other cheeses like mozzarella or cheddar can add a new twist.
  • Add More Veggies: Toss in some brussels sprouts, broccoli, or carrots for added nutrition and flavor.
  • Make It Spicy: If you like a kick, sprinkle some red pepper flakes on top before baking.
  • Prep Ahead: Marinate the chicken in the seasoning overnight for an even deeper flavor.
  • Use a Cast Iron Skillet: If you have one, a cast iron skillet not only cooks evenly but also adds a rustic touch to your presentation.

Common Mistakes and Troubleshooting

Even the best cooks make mistakes! Here are common pitfalls and how to avoid them:

  • Overcrowding the Pan: Ensure there’s enough space between the chicken and potatoes for even cooking.
  • Not Enough Seasoning: Don’t skimp on the seasoning! It’s essential for flavor.
  • Undercooking the Chicken: Always check the internal temperature to avoid serving undercooked chicken.
  • Burnt Garlic: If you notice the garlic browning too quickly, cover the dish with foil for part of the cooking time.

Variations to Make It Your Own

Feel free to get creative! Here are some variations that can add a little twist to this classic:

  • Cheesy Garlic Chicken and Potatoes: Add more cheese by layering slices of mozzarella on top in the last 10 minutes of baking.
  • Sautéed Spinach Addition: Stir in some fresh spinach during the last few minutes of baking for added color and nutrition.
  • Honey Garlic Glaze: Drizzle a honey garlic glaze over the chicken before serving for a sweet and savory touch.
  • Italian Herb Roasted Vegetables: Toss in assorted vegetables like bell peppers and zucchini for a colorful side.

Storage and Make-Ahead Instructions

This dish is perfect for leftovers! Here’s how to store and reheat:

  • Storing Leftovers: Place any leftover chicken and potatoes in an airtight container and refrigerate for up to 3-4 days.
  • Reheating: Reheat in a preheated oven at 350°F (175°C) until warmed through, about 15-20 minutes.
  • Freezing: You can freeze leftovers for up to 3 months. Thaw in the fridge overnight before reheating.
  • Make-Ahead Option: Prepare everything the night before and pop it in the oven when you’re ready to cook.

Frequently Asked Questions

Here are some common questions and answers about our beloved dish:

  • Can I use bone-in chicken for this recipe? Yes, but adjust the cooking time to ensure the chicken cooks through.
  • What type of potatoes work best? Baby Yukon Golds or red potatoes hold up well and have great flavor.
  • Can I add other vegetables? Absolutely! Broccoli, brussels sprouts, or carrots make excellent additions.
  • Is there a way to make this dish dairy-free? Yes, use a dairy-free cheese alternative and omit the Parmesan.
  • How can I make this spicier? Add red pepper flakes or a dash of cayenne pepper to the seasoning.
  • What can I serve with this recipe? A simple green salad or crusty bread pairs beautifully with this dish.
  • Can I cook this in an air fryer? Yes! Cook at 370°F for about 25-30 minutes, checking the chicken’s temperature.
  • How do I know when the chicken is done? Use a meat thermometer to ensure it reaches an internal temperature of 165°F.

Nutrition Tips and Dietary Adaptations

This dish not only warms the heart but can also be adapted to fit various dietary needs:

  • Low-Carb Option: Substitute potatoes for cauliflower for a low-carb alternative.
  • Gluten-Free: All ingredients are naturally gluten-free; just double-check any packaged items.
  • Heart-Healthy: Use skinless chicken and reduce the amount of oil for a lighter version.
  • Vegetarian Version: Swap chicken for hearty vegetables like portobello mushrooms for a delicious vegetarian take.

Essential Equipment Recommendations

To make this recipe shine, having the right tools can make all the difference:

  • Rimmed Baking Sheet or Large Baking Dish: Essential for even cooking and easy cleanup.
  • Sharp Knife and Cutting Board: For quick and safe chopping of ingredients.
  • Meat Thermometer: To ensure your chicken is cooked perfectly every time.
  • Mixing Bowls: For seasoning and tossing ingredients effectively.

Serving Suggestions

When it comes to serving, you want to bring out the best in your meal. Here are some ideas:

  • Fresh Green Salad: A light, crisp salad can balance the richness of the chicken and potatoes.
  • Garlic Bread: Serve with warm garlic bread for a comforting touch.
  • Seasonal Vegetables: Roasted or steamed vegetables make a colorful side.
  • Cold Beverages: Pair with iced tea or lemonade for a refreshing drink option.

In closing, the Garlic Parmesan Chicken and Potatoes is more than a dish; it’s a heartfelt expression of love and care that brings family and friends together. Whether it’s a weeknight dinner or a special occasion, this recipe is sure to be a hit. So gather your ingredients, roll up your sleeves, and let’s create some delicious memories!

Garlic Parmesan Chicken and Potatoes (One-Pan Dinner)

Prep Time 10 minutes
Cook Time 30 minutes
Total Time 40 minutes
Servings 4 servings
Calories 650
A flavorful and easy one-pan dinner featuring tender chicken, crispy potatoes, and a cheesy garlic Parmesan topping.

Ingredients

Protein

  • 4 pieces boneless (skinless chicken breasts (or thighs))

Spices and seasonings

  • 1 teaspoon Italian seasoning
  • 0.5 teaspoon smoked paprika
  • 0.5 teaspoon salt
  • 0.25 teaspoon black pepper

Cooking fats

  • 1 tablespoon olive oil

Vegetables

  • 1.5 pounds baby Yukon Gold or red potatoes (halved)
  • 3 tablespoons olive oil
  • 4 cloves garlic (minced)
  • 0.33 cup grated Parmesan cheese
  • 0.5 teaspoon salt
  • 0.25 teaspoon black pepper
  • 1 tablespoon chopped fresh parsley

Instructions 

  • Season chicken with Italian seasoning, smoked paprika, salt, and black pepper.
  • Heat 1 tablespoon olive oil in a large skillet over medium heat and cook chicken until golden and cooked through, about 6-8 minutes per side.
  • Remove chicken and in the same skillet, add 3 tablespoons olive oil and potatoes. Cook until crispy and tender, about 15 minutes.
  • Add minced garlic to the potatoes and cook for 1 minute. Sprinkle Parmesan cheese, parsley, salt, and black pepper over the dish.
  • Return chicken to the skillet, garnish with additional Parmesan and parsley if desired, and serve hot.

Notes

For extra flavor, sprinkle additional Parmesan and fresh herbs before serving.
Calories: 650kcal
Cost: $15
Course: dinner
Cuisine: American
Keyword: chicken, Garlic, Parmesan, Potatoes

Discover the Comfort of Cowboy Butter Chicken Linguine

Gather ’round, friends! Today we’re diving into a dish that marries heartiness with a hint of the Wild West: **Cowboy Butter Chicken Linguine**. This creamy, buttery pasta dish is not just a meal; it’s a celebration of flavors that brings warmth to your family table. As someone who’s spent a lifetime perfecting the art of chicken cookery, I promise this recipe will become a cherished staple in your kitchen.

Made with simple, fresh ingredients, **this dish** embodies the essence of comfort food while being easy enough for a weeknight dinner. Let’s roll up our sleeves and get started!

Why You’ll Love This Recipe

Here are just a few reasons why this Cowboy Butter Chicken Linguine will capture your heart:

  • Simple Ingredients: With just a handful of items, including chicken, pasta, and a few seasonings, you can whip up a dish that feels gourmet.
  • Rich Flavor: The creamy butter sauce coats every strand of linguine, bringing together flavors that dance on your palate.
  • Versatile Dish: This recipe allows for endless customization—feel free to add your favorite vegetables or swap out the chicken for shrimp or tofu.
  • Quick Preparation: Ready in under 30 minutes, it’s perfect for busy nights when you still want something comforting and satisfying.
  • Family Favorite: The combination of creamy, buttery goodness and tender chicken makes this a hit with kids and adults alike.

Essential Ingredients for Cowboy Butter Chicken Linguine

Before we dive into cooking, let’s gather our ingredients. Here’s what you’ll need:

  • 3-4 boneless, skinless **chicken breasts**
  • 3 cloves fresh **garlic**
  • 8 oz **linguine pasta** (or your choice of pasta)
  • 4 tbsp **unsalted butter**
  • 1 cup **heavy cream**
  • ¼ cup fresh **parsley**, chopped
  • ½ cup grated **Parmesan cheese**
  • 1 tsp **paprika**
  • 1 tsp **Italian seasoning**

**Substitutions**: If you’re looking to switch things up, here are some easy swaps:

  • Chicken: Substitute with shrimp, tofu, or even mushrooms for a vegetarian version.
  • Pasta Shape: While linguine is recommended, feel free to use penne or fettuccine.
  • Heavy Cream: For a lighter version, use half-and-half or a non-dairy cream alternative.
  • Butter: Olive oil works well if you’re looking for a healthier fat option.

How to Prepare the Perfect Cowboy Butter Chicken Linguine: Step-by-Step Guide

Juicy Cowboy Butter Chicken Linguine in a bowl, showcasing chicken pieces and pasta.

Now that we have everything ready, let’s get cooking! Follow these steps for a delicious result:

  1. Chop the garlic and parsley, then bring a large pot of salted water to a boil for the linguine.
  2. Add the linguine to the boiling water and cook according to package instructions until al dente. Remember to reserve some **pasta water** before draining.
  3. While the pasta is cooking, heat a large skillet over medium heat and melt half of the butter. Season the chicken breasts with salt and pepper, and cook them until golden brown, about 5-7 minutes per side.
  4. Once the chicken is cooked through, stir in the minced garlic, paprika, and Italian seasoning, sautéing until fragrant.
  5. Pour in the heavy cream and add the remaining butter, stirring until the sauce thickens slightly.
  6. Finally, toss the drained linguine into the skillet with the sauce, adding reserved pasta water as needed for a creamy consistency.

Pro Tips for Mastering Cowboy Butter Chicken Linguine

To ensure your dish turns out perfectly every time, keep these expert tips in mind:

  • Don’t Rush the Chicken: Allow the chicken to sear properly for that golden color and flavor.
  • Use High-Quality Ingredients: Fresh garlic and good butter can elevate the dish significantly.
  • Adjust Consistency: Use pasta water to achieve your desired sauce thickness without losing flavor.
  • Herb Freshness: Always add fresh parsley at the end to keep its vibrant color and taste.
  • Heat Management: Keep an eye on the heat to avoid burning the garlic—medium heat is usually perfect.
  • Don’t Overcook the Pasta: Al dente is key; it will continue cooking slightly in the sauce.
  • Leftover Opportunities: This dish makes for great leftovers, so don’t hesitate to double the recipe!
  • Pair with Bread: Serve with crusty bread to soak up that delicious sauce.

Common Mistakes and Troubleshooting

Even the best cooks make mistakes, so here are some common pitfalls and how to avoid them:

  • Too Thick Sauce: If your sauce is too thick, just add a splash of pasta water to loosen it up.
  • Overcooked Chicken: If your chicken ends up dry, try using chicken thighs next time, as they are more forgiving.
  • Sticking Pasta: Make sure to stir the pasta during cooking and add a bit of oil to the pot if necessary.
  • Flavorless Sauce: Always taste your sauce and adjust seasoning as needed—salt and pepper go a long way!

Variations on Cowboy Butter Chicken Linguine

This recipe is versatile and can be adapted to suit your taste. Here are some variations to consider:

  • Vegetable-Loaded Version: Add spinach, cherry tomatoes, or bell peppers to the skillet when cooking the chicken for extra nutrients.
  • Spicy Twist: Incorporate red pepper flakes or a dash of hot sauce to give your dish a kick.
  • Cheesy Delight: Mix in additional cheeses like mozzarella or feta for a richer flavor.
  • Herb Infusion: Experiment with different herbs like basil or thyme for a fresh twist.

Storage and Make-Ahead Instructions

If you want to prepare ahead of time, here’s how to store and reheat your Cowboy Butter Chicken Linguine:

  • Refrigeration: Store leftovers in an airtight container in the fridge for up to 3 days.
  • Freezing: While not ideal due to the cream sauce, you can freeze it for up to one month. Just be aware the texture might change slightly upon reheating.
  • Reheating: To reheat, warm gently on the stove over low heat, adding a splash of cream or pasta water to restore creaminess.

FAQs: Frequently Asked Questions About Cowboy Butter Chicken Linguine

Here are some common questions I get about preparing this comforting dish:

  • What is Cowboy Butter?: Cowboy butter is a rich, buttery sauce that’s infused with garlic and spices, perfect for enhancing the flavor of chicken and pasta.
  • Can I make this dish without heavy cream?: Yes! You can use half-and-half or a non-dairy alternative for a lighter version.
  • How do I prevent the linguine from sticking together?: Stirring the pasta during cooking and using plenty of salted water helps keep it from clumping.
  • Can I add vegetables to the recipe?: Absolutely! Feel free to toss in your favorite veggies when cooking the chicken.
  • Is this dish kid-friendly?: Definitely! The creamy sauce and tender chicken make it a hit with children.
  • What can I serve with this dish?: A fresh green salad or garlic bread pairs beautifully with Cowboy Butter Chicken Linguine.
  • How do I know when the chicken is cooked?: The chicken should reach an internal temperature of 165°F (75°C) for safe consumption.
  • Can I use leftover chicken?: Yes, you can incorporate leftover chicken; just add it to the sauce to heat through.

Nutrition Tips and Dietary Adaptations

This dish can easily be adapted to suit various dietary needs:

  • Low-Carb Option: Use zucchini noodles in place of linguine for a lighter meal.
  • Dairy-Free Version: Substitute heavy cream with coconut cream and use vegan butter.
  • Gluten-Free Option: Opt for gluten-free pasta to make this dish suitable for gluten-sensitive individuals.

Equipment Recommendations

To make your cooking experience smooth, here are some tools that will help:

  • Large Pot: For boiling the pasta.
  • Skillet: A large skillet or sauté pan to cook the chicken and sauce.
  • Meat Thermometer: For checking the doneness of the chicken.
  • Wooden Spoon: Perfect for stirring the sauce and pasta.

Serving Suggestions

When it comes to serving Cowboy Butter Chicken Linguine, presentation is key! Here are some ideas:

  • Garnish: Sprinkle fresh parsley or additional grated Parmesan on top before serving.
  • Side Dishes: Pair with a simple side salad or steamed vegetables for a well-rounded meal.
  • Bread: Offer garlic bread or crusty rolls to soak up the lovely sauce.

In Conclusion

There you have it, folks! A hearty, soul-satisfying Cowboy Butter Chicken Linguine recipe that’s bound to become a family favorite. It’s the perfect blend of flavors and comfort, all wrapped up in a creamy sauce that’s easy to make and hard to resist. As you gather around the dinner table with loved ones, remember that cooking is about more than just food; it’s about creating memories and sharing love. So, grab your ingredients and let’s make this dish together! Happy cooking!

Cowboy Butter Chicken Linguine

Prep Time 10 minutes
Cook Time 20 minutes
Total Time 30 minutes
Servings 4 servings
Calories 650
A creamy, flavorful pasta dish featuring tender chicken and a rich butter sauce with garlic and herbs.

Ingredients

Chicken

  • 3-4 pieces boneless, skinless chicken breasts
  • 3 cloves fresh garlic

Pasta

  • 8 oz linguine pasta

Dairy

  • 4 tbsp unsalted butter
  • 1 cup heavy cream
  • ¼ cup fresh parsley
  • ½ cup grated Parmesan cheese
  • 1 tsp paprika
  • 1 tsp Italian seasoning

Instructions 

  • Boil water, cook linguine until al dente, then drain, reserving some pasta water.
  • In a skillet, melt half of the butter, season chicken, and cook until golden (5-7 min).
  • Add garlic, paprika, and Italian seasoning; sauté until fragrant.
  • Pour in heavy cream, add remaining butter, and stir until slightly thickened.
  • Toss cooked linguine with sauce, adding reserved pasta water as needed.

Notes

For extra flavor, sprinkle additional Parmesan or fresh herbs before serving.
Calories: 650kcal
Cost: $15
Course: Main Course
Cuisine: American
Keyword: Butter, chicken, Pasta

Welcome to a Hearty Journey of Creamy Chicken Delight

When the sun sets and the aroma of home-cooked meals begins to fill the air, there’s nothing quite like a plate of creamy chicken to wrap up your day. This Creamy Chicken Breast with Cream Sauce recipe isn’t just about feeding the belly; it’s about nourishing the soul. With simple ingredients that sing of warmth and comfort, you’ll find yourself reminiscing of family dinners and cherished memories. In this guide, we’ll dive deep into the art of cooking tender chicken breasts enveloped in a rich, velvety sauce that turns an ordinary dinner into a heartfelt gathering.

Why You’ll Love This Recipe

This isn’t just another chicken recipe; it’s a celebration of flavors and traditions. Here are five reasons why this dish deserves a spot on your dinner table:

  • Comfort Food at Its Best: This creamy chicken dish wraps you in a warm embrace, making it perfect for family gatherings or cozy evenings at home.
  • Quick and Easy Preparation: With about 30 minutes from start to finish, you’ll have a delicious meal on the table without spending hours in the kitchen.
  • Versatile Pairings: This dish pairs beautifully with rice, pasta, or a fresh garden salad, allowing for endless meal options.
  • Kid-Approved: Even the pickiest eaters will love the creamy sauce and tender chicken, making it a great option for family dinners.
  • Rich in Flavor: With garlic, parmesan cheese, and a medley of spices, every bite is packed with flavor that keeps you coming back for more.

Ingredients Breakdown

Let’s gather our ingredients for this creamy delight. Here’s what you’ll need:

  • 2-3 large boneless, skinless chicken breasts: Halved horizontally to create four pieces, this helps them cook evenly and stay juicy.
  • 4 tablespoons all-purpose flour: This will help thicken our sauce and give it a wonderful texture.
  • 4 tablespoons freshly grated parmesan cheese: Adds a rich, cheesy flavor that complements the cream beautifully.
  • 2 teaspoons salt: Essential for enhancing all the flavors in the dish.
  • 1 teaspoon garlic powder: Infuses the chicken with a savory depth.
  • 1/2 teaspoon cracked black pepper: A little kick to balance the creaminess.
  • 5 tablespoons olive oil: For searing the chicken to a golden brown.
  • 2 tablespoons butter: Adds richness to our sauce.
  • 1 small onion, finely chopped: Provides a sweet undertone.
  • 1 whole head of garlic, peeled and separated into 10-12 cloves: Whole cloves will roast beautifully in the sauce.
  • 1 1/4 cups chicken broth: The base of our sauce, adding depth and flavor.
  • 1 1/4 cups heavy cream (or half-and-half or evaporated milk): The star of our creamy sauce.
  • 1/2 cup freshly grated parmesan cheese: To finish off the sauce with a cheesy touch.
  • 2 tablespoons fresh parsley (for serving): A sprinkle of freshness to brighten the dish.

Pro Tips for the Perfect Creamy Chicken

Side view of succulent chicken breast with a rich cream sauce, garnished with parsley.

Before we dive into the cooking steps, here are some expert tips to ensure your dish stands out:

  • Use a Meat Thermometer: To ensure your chicken is perfectly cooked, aim for an internal temperature of 165°F.
  • Don’t Rush the Searing: Allow the chicken to develop a golden crust by not overcrowding the pan.
  • Adjust the Consistency: If the sauce is too thick, add a splash of chicken broth until you reach your desired consistency.
  • Experiment with Herbs: Fresh thyme or rosemary can add a lovely aromatic touch to the dish.
  • Make it Spicy: Add a pinch of cayenne pepper or red pepper flakes for a bit of heat.
  • Swap Dairy Alternatives: For a lighter version, use low-fat milk or plant-based cream alternatives.
  • Prep Ahead: You can season and sear your chicken a day in advance to save time on busy nights.
  • Garnish Generously: A sprinkle of fresh parsley not only adds color but also a refreshing flavor.

Common Mistakes to Avoid

Cooking should be a joyful experience, but sometimes we run into snags. Here are common pitfalls and how to avoid them:

  • Overcooking the Chicken: This leads to dry meat. Always check the internal temperature.
  • Not Letting the Sauce Simmer: Skipping this step can result in a bland flavor. Let it bubble gently to meld the flavors.
  • Using Pre-Grated Cheese: For the best flavor, always use freshly grated parmesan.
  • Skipping the Seasoning: Don’t forget to season your chicken before cooking for the best flavor.

Variations of Creamy Chicken

Don’t be afraid to mix things up! Here are four delicious variations to try:

  • Creamy Parmesan Garlic Chicken: Add more parmesan and minced garlic for a richer flavor.
  • Creamy Spinach and Artichoke Chicken: Stir in fresh spinach and artichoke hearts for a delightful twist.
  • Cajun Creamy Chicken: Spice it up with Cajun seasoning for a southern flair.
  • Lemon Garlic Cream Chicken: Add lemon zest and juice for a fresh, zesty finish.

Storage and Make-Ahead Instructions

Planning ahead can save you time. Here’s how to store and prepare this dish in advance:

  • Refrigeration: Store leftover creamy chicken in an airtight container for up to 3 days.
  • Freezing: Freeze the creamy chicken without the sauce for up to 2 months. Thaw overnight in the fridge before reheating.
  • Make-Ahead: You can prepare the sauce a day in advance; just reheat and add the chicken before serving.

Frequently Asked Questions

Let’s address some common queries about this creamy delight:

  • Can I use chicken thighs instead of breasts? Yes, chicken thighs work wonderfully and offer a richer flavor.
  • Is there a non-dairy alternative for the cream? Absolutely! Coconut cream or cashew cream can be great substitutes.
  • What can I serve with creamy chicken? It pairs well with mashed potatoes, rice, or a simple salad.
  • How can I make it gluten-free? Substitute the all-purpose flour with cornstarch or a gluten-free flour blend.
  • Can I cook this in a slow cooker? Yes, combine all ingredients and cook on low for 4-6 hours.
  • How do I know when the chicken is done? Use a meat thermometer; it should read 165°F.
  • Can I add vegetables to the dish? Yes, mushrooms, bell peppers, or spinach can be added for extra nutrition.
  • How long can leftovers be stored? In the refrigerator, leftovers can last for about 3 days.

Nutritional Tips and Dietary Adaptations

Looking out for your health? Here are some tips:

  • Use Skinless Chicken: This reduces fat content without sacrificing flavor.
  • Opt for Low-Fat Dairy: Use low-fat cream or milk to cut calories but still enjoy the creaminess.
  • Add More Vegetables: Incorporate vegetables like broccoli or peas for added nutrients.

Essential Equipment for Cooking

Here’s what you’ll need to have a smooth cooking experience:

  • Heavy-Bottomed Skillet: Ideal for even heat distribution and browning.
  • Meat Thermometer: Essential to ensure your chicken is perfectly cooked.
  • Whisk: For mixing flour and broth smoothly.
  • Spatula: A sturdy spatula for flipping and stirring.

Serving Suggestions to Elevate Your Meal

To make your meal even more special, consider these serving ideas:

  • Garnish with Fresh Herbs: A sprinkle of parsley or basil adds a pop of color and freshness.
  • Pair with Crusty Bread: Serve with warm, crusty bread for sopping up the luscious sauce.
  • Include a Side Salad: A fresh green salad balances the richness of the dish.

Conclusion: A Dish to Cherish

This Creamy Chicken Delight is more than just a recipe; it’s a way to create memories around the dinner table. As you savor each bite, remember that cooking is an act of love, and with this dish, you’re sharing a piece of your heart. So gather your loved ones, serve this creamy goodness, and let the memories unfold. Happy cooking!

Creamy Chicken Breast with Cream Sauce

Prep Time 10 minutes
Cook Time 20 minutes
Total Time 30 minutes
Servings 4 servings
Calories 550
A rich and flavorful dish featuring tender chicken breasts in a luscious cream sauce, perfect for a comforting meal.

Ingredients

Protein

  • 2-3 large boneless, skinless chicken breasts (halved horizontally to create 4 pieces)

Dry Ingredients

  • 4 tablespoons all-purpose flour
  • 4 tablespoons freshly grated parmesan cheese
  • 2 teaspoons salt
  • 1 teaspoon garlic powder
  • 1/2 teaspoon cracked black pepper

Oils & Fats

  • 5 tablespoons olive oil
  • 2 tablespoons butter

Aromatics

  • 1 small onion (finely chopped)
  • 1 whole head of garlic (peeled and separated into 10-12 cloves)

Liquids

  • 1 1/4 cups chicken broth
  • 1 1/4 cups heavy cream (or half-and-half or evaporated milk)
  • 1/2 cup freshly grated parmesan cheese

Herbs

  • 2 tablespoons fresh parsley (for serving)

Instructions 

  • Season chicken with salt, pepper, and garlic powder, then dredge in flour.
  • Heat oil and butter in a skillet, cook chicken until golden, then set aside.
  • Sauté onion and garlic, then add chicken broth and heavy cream, simmer to thicken.
  • Return chicken to the sauce, cook until heated through, then sprinkle with parmesan and parsley.

Notes

For a richer flavor, use freshly grated parmesan and high-quality cream.
Calories: 550kcal
Cost: $15
Course: Main Course
Cuisine: American
Keyword: chicken, Cream Sauce