Author

Tom

Browsing

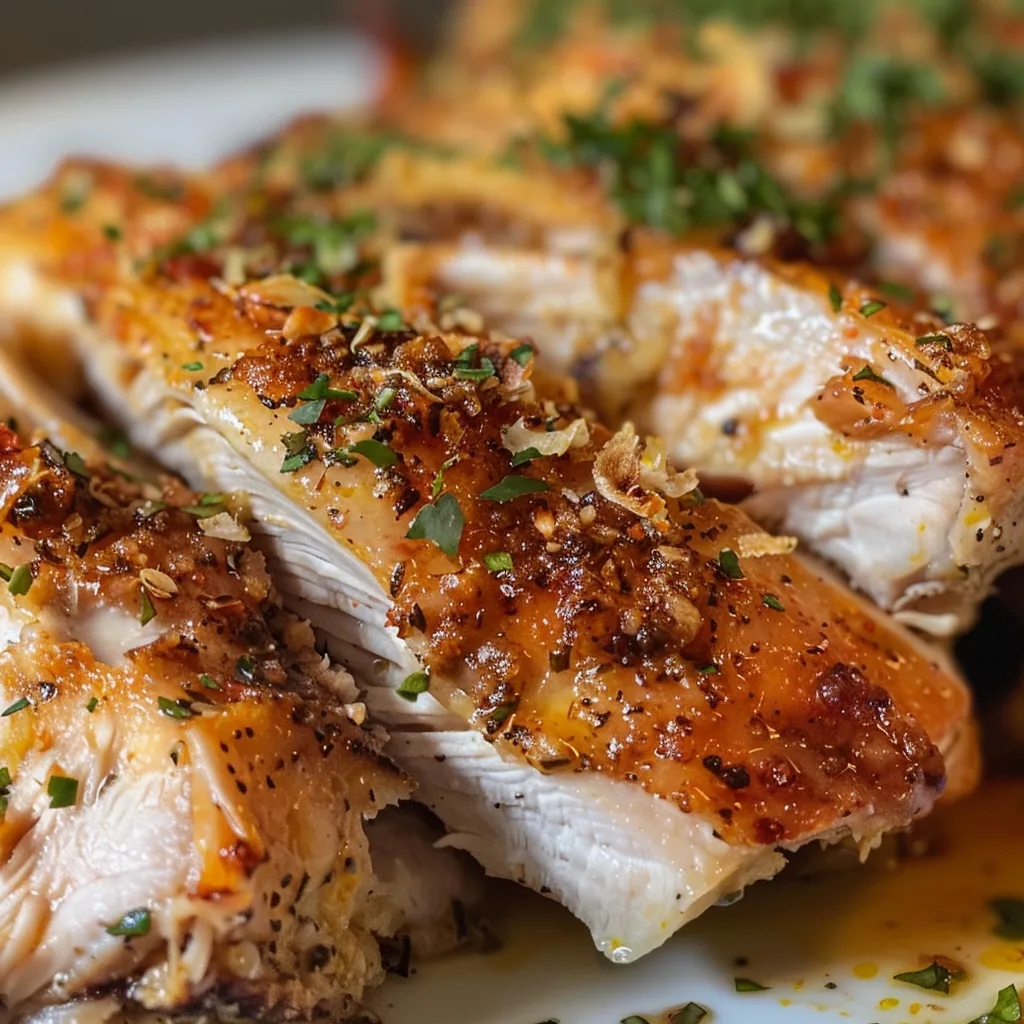
The Heartwarming One-Pot Chicken and Rice Recipe That Feels Like Home

Welcome to the kitchen where flavors dance and memories bloom. Today, we’re diving into a dish that’s as comforting as a hug from Grandma—a delightful One-Pot Chicken and Rice. This recipe beautifully combines tender chicken, fluffy rice, and a medley of vegetables, creating a symphony of flavors that warms the soul. Perfect for family gatherings or a quiet night in, it’s a reminder of the joys of home-cooked meals.

Why You’ll Love This Recipe

Here are just a few reasons why this dish should grace your dinner table:

  • Simple and Satisfying: With just a handful of ingredients, this dish is easy to prepare, delivering big flavors without the fuss.
  • Family-Friendly: Kids love it, and adults will appreciate its heartiness. It’s a win-win for family dinners.
  • One-Pot Wonder: Less cleanup is always a plus! Cook everything in one pot, making your life just a little easier.
  • Versatile: Feel free to customize with your favorite vegetables or spices to suit your family’s taste.
  • Meal Prep Friendly: It stores well and reheats beautifully, making it perfect for meal prep.

Ingredients Breakdown

Let’s gather our ingredients. Here’s what you’ll need for this comforting dish:

  • Bone-in, skin-on chicken thighs: For juicy and flavorful meat. You can substitute with chicken breasts or use rotisserie chicken for a quicker option.
  • Long-grain white rice: This rice cooks perfectly in the broth and absorbs all the flavors. Brown rice can be used but may require additional cooking time.
  • Onion: Adds depth and sweetness to the dish.
  • Garlic: A must for that aromatic base.
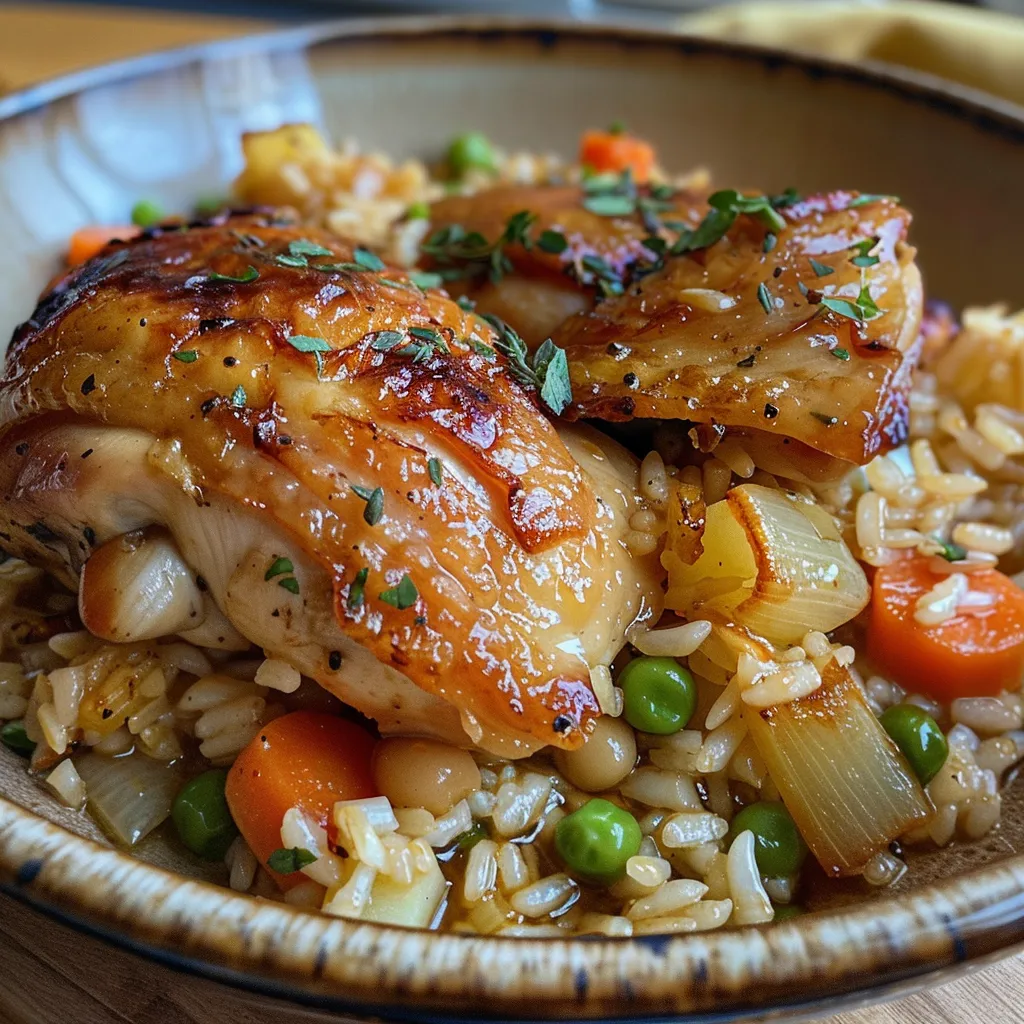
  • Carrots, Peas, Celery: These vegetables add color, texture, and nutrition. Feel free to swap in your favorite veggies.
  • Chicken Broth: Homemade or store-bought, it’s the heart of the flavor.
  • Seasonings: Salt, black pepper, paprika, thyme, and a bay leaf round out the flavors beautifully.
  • Olive Oil or Butter: For sautéing and adding richness.

Instructions for Perfect One-Pot Chicken and Rice

Side view of a delicious One Pot Chicken and Rice meal, highlighting the golden chicken and vibrant rice.

Now, let’s get cooking! Follow these simple steps to create your dish:

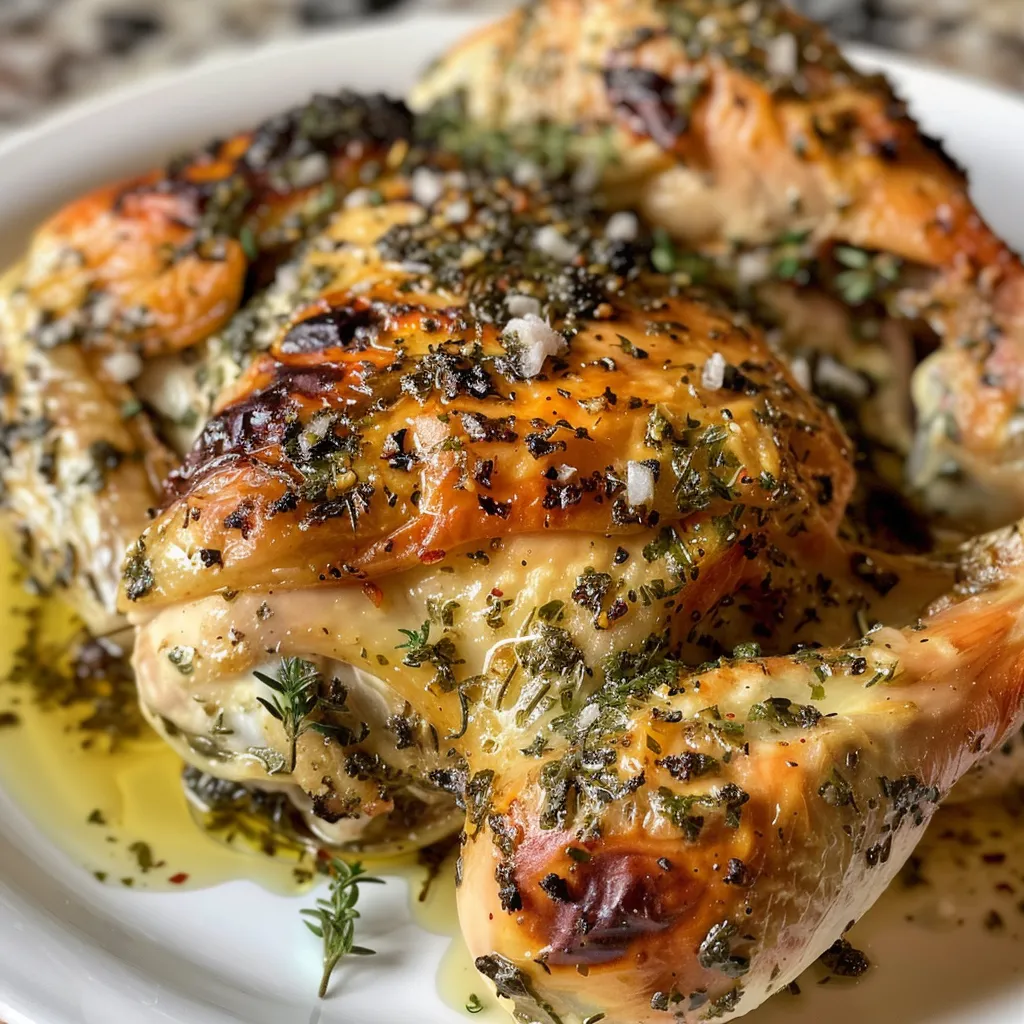
  • Prepare the Chicken: Pat the chicken dry with paper towels and season generously with salt, pepper, paprika, and a pinch of garlic powder. Heat olive oil in a large Dutch oven or deep skillet over medium-high heat, then sear the chicken skin-side down until golden brown, about 5-7 minutes per side. Remove the chicken and set aside.
  • Sauté the Vegetables: In the same pot, add a splash more oil if needed. Toss in the chopped onions, garlic, and carrots, sautéing until fragrant and slightly softened, about 3 minutes.
  • Toast the Rice: Add the uncooked rice to the pot, stirring for 1-2 minutes. This toasts the rice slightly, enhancing its flavor and preventing mushiness.
  • Add the Broth and Season: Pour in the chicken broth, scraping the bottom of the pot to release any browned bits for extra flavor. Season with thyme, a bay leaf, and a pinch more salt and pepper.
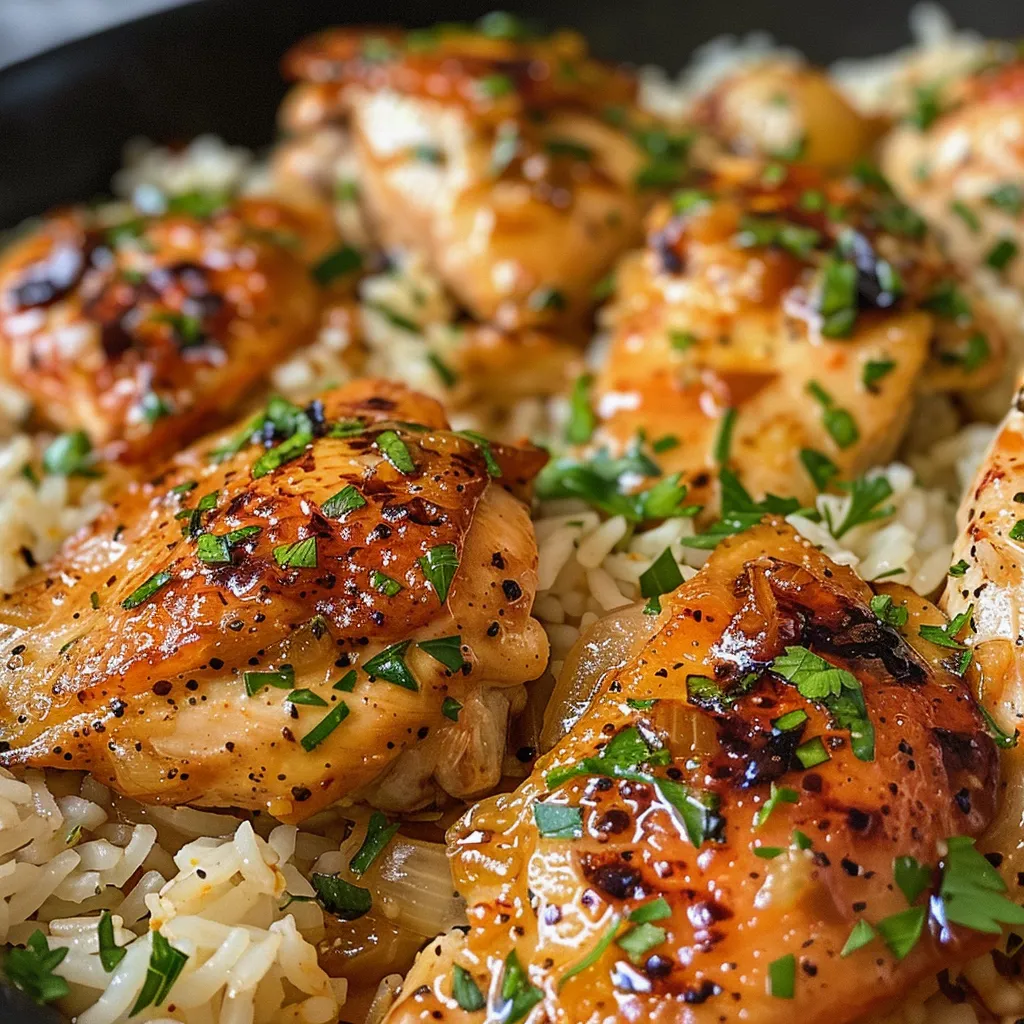
  • Nestle the Chicken: Place the seared chicken back into the pot on top of the rice. Bring everything to a gentle simmer, cover with a lid, and reduce heat to low. Let it cook for 20-25 minutes, or until the rice is tender and the chicken reaches an internal temperature of 165°F (74°C).
  • Add Quick-Cooking Veggies: Stir in the peas (or other quick-cooking vegetables) during the last 5 minutes of cooking. Remove from heat and let rest, covered, for 5 minutes before serving.

Pro Tips for Success

Here are some expert insights to ensure your dish turns out perfectly:

  • Use Quality Chicken: Fresh, high-quality chicken will make a noticeable difference.
  • Let it Rest: Allowing the dish to rest before serving helps the flavors meld and the rice to absorb any remaining liquid.
  • Don’t Skip Toasting the Rice: This step adds a lovely nuttiness that enhances the overall flavor.
  • Cover Tightly: Ensure your pot is covered tightly while cooking to trap steam and cook the rice evenly.
  • Customize Your Veggies: Feel free to get creative with seasonal vegetables to keep it interesting.
  • Check Seasoning: Always taste your dish before serving to adjust seasoning to your preference.
  • Make it Ahead: This dish keeps well in the fridge, so you can enjoy it for days.
  • Perfect Leftovers: Reheat gently on the stovetop with a splash of broth to keep the rice moist.

Common Mistakes and Troubleshooting

Every cook makes mistakes, and it’s all part of the learning journey. Here are a few common pitfalls and how to avoid them:

  • Overcooking the Rice: If the rice is mushy, try reducing the cooking time next time.
  • Dry Chicken: If your chicken turns out dry, it might have been overcooked. Always use a meat thermometer for accuracy.
  • Lack of Flavor: Ensure you season adequately at each step—don’t skip the broth or spices!
  • Burnt Bottom: Stir well after adding the rice and broth to avoid sticking.

Variations to Try

Feel free to mix it up with these variations:

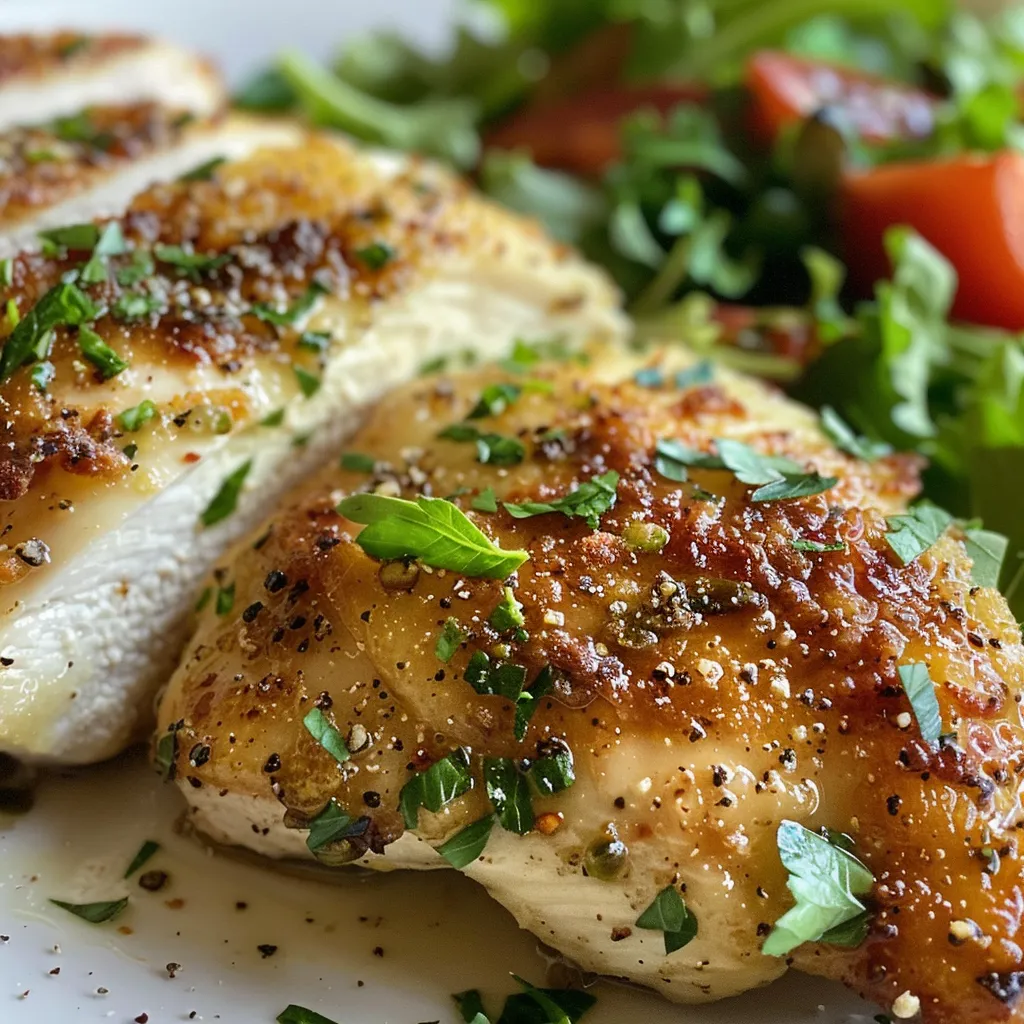
  • Herb Chicken and Rice: Add fresh herbs like parsley or dill for a vibrant twist.
  • Spicy Chicken and Rice: Incorporate diced jalapeños or red pepper flakes for heat.
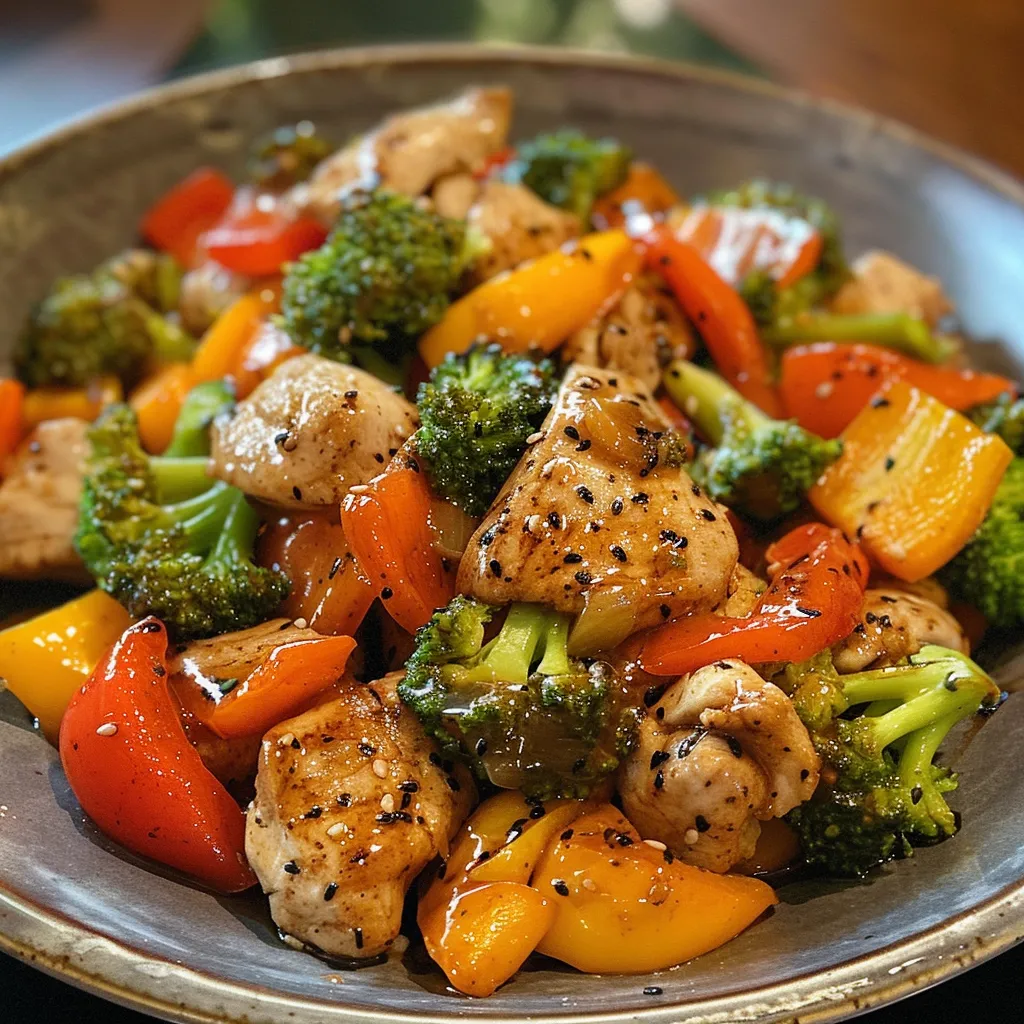
  • Asian-Inspired: Use soy sauce and sesame oil, and swap in bok choy and snap peas.
  • Comforting Chicken Pot Pie: Top with a flaky pie crust for a delicious twist on the classic pot pie.

Storage and Make-Ahead Instructions

This dish is perfect for meal prep! Here’s how to store and reheat:

  • Refrigerate: Store leftovers in an airtight container in the fridge for up to 3-4 days.
  • Freeze: Cool completely, then transfer to a freezer-safe container for up to 3 months.
  • Reheat: Gently reheat on the stovetop with a splash of chicken broth to prevent drying out.

Frequently Asked Questions

Here are some common questions to enhance your cooking experience:

  • Can I use brown rice instead of white? Yes, but it will require a longer cooking time and more liquid.
  • What can I substitute for chicken thighs? Chicken breasts or rotisserie chicken work well as alternatives.
  • Can I make this dish vegetarian? Absolutely! Use vegetable broth and substitute the chicken with hearty veggies or tofu.
  • What other vegetables can I add? Bell peppers, green beans, or corn are great additions.
  • How do I know when the chicken is done? Use a meat thermometer to ensure it’s reached 165°F (74°C).
  • Can I make this in a slow cooker? Yes, just adjust the cooking times and follow similar layering steps.
  • What’s the best way to reheat leftovers? Gently reheat on the stove with a bit of broth to keep it moist.
  • Is this recipe kid-friendly? Yes! It’s a hit with kids and adults alike.

Nutritional Tips and Dietary Adaptations

This recipe can be adapted for various dietary needs:

  • Low-Carb Option: Substitute rice with cauliflower rice for a lower-carb meal.
  • Gluten-Free: Ensure your chicken broth is gluten-free.
  • Dairy-Free: Use olive oil instead of butter and check seasonings.

Equipment Recommendations

For the best results, here’s some equipment you may need:

  • Large Dutch Oven or Deep Skillet: Perfect for browning and simmering.
  • Meat Thermometer: To check the doneness of your chicken.
  • Wooden Spoon: For stirring and scraping up those flavorful bits.

Serving Suggestions

To create a full meal, consider pairing it with:

  • Simple Salad: A fresh green salad for a crunchy contrast.
  • Homemade Bread: Serve with crusty bread to soak up the delicious broth.
  • Steamed Vegetables: A side of seasonal vegetables for added nutrition.

Conclusion

There you have it—the One-Pot Chicken and Rice recipe that brings the warmth of home right to your table. With its comforting flavors and simple preparation, it’s bound to become a staple in your kitchen, just like it is in mine. So gather your loved ones, share a meal, and create beautiful memories around your dinner table. Happy cooking!

One Pot Chicken and Rice

Prep Time 10 minutes
Cook Time 25 minutes
Total Time 35 minutes
Servings 4 servings
Calories 650
A flavorful and easy one-pot meal combining tender chicken, rice, and vegetables for a satisfying dinner.

Ingredients

Protein

  • 4 pieces Bone-in, skin-on chicken thighs

Grains

  • 1.5 cups Long-grain white rice

Vegetables

  • 1 medium Onion
  • 3 cloves Garlic (minced)
  • 2 carrots Carrots (chopped)
  • 0.5 cup Peas (frozen or fresh)
  • 2 stalks Celery (chopped)

Broth & Seasonings

  • 3 cups Chicken Broth
  • 1 tsp Salt
  • 0.5 tsp Black pepper
  • 1 tsp Paprika
  • 1 tsp Thyme
  • 1 bay leaf Bay leaf

Cooking Oil

  • 2 tbsp Olive Oil or Butter

Instructions 

  • Season chicken with salt, pepper, paprika, and garlic powder. Sear in oil until golden, then set aside.
  • Sauté onions, garlic, and carrots until fragrant and softened.
  • Add rice and toast for 1-2 minutes. Pour in broth, season, and scrape browned bits.
  • Nestle chicken into the pot, simmer covered on low for 20-25 minutes until cooked. Add peas in last 5 minutes.
  • Rest for 5 minutes, then serve.

Notes

Ensure chicken reaches an internal temperature of 165°F (74°C) before serving.
Calories: 650kcal
Cost: $15
Course: Main Course
Cuisine: American
Keyword: chicken, one pot, rice

Welcome to the Heart of Home Cooking: Juicy Baked Chicken Breasts

When it comes to comfort food, nothing quite hits the spot like a perfectly baked chicken breast. This article will guide you through everything you need to know to achieve juicy, flavorful chicken every time you step into the kitchen. Whether you’re preparing a family dinner or meal prepping for the week ahead, this recipe promises tenderness and taste that will make your taste buds sing. Let’s dive into the world of chicken breasts, packed with nutrition and love, and discover the secrets behind creating the perfect baked chicken!

Why You’ll Love This Juicy Baked Chicken Breast Recipe

  • Simple Ingredients: This recipe uses ingredients you probably already have in your pantry, making it easy to whip up on a whim.
  • Health Benefits: Baked chicken breasts are lean protein sources, perfect for a healthy diet. They’re low in fat and packed with nutrients.
  • Versatile Meal: This dish pairs well with various sides, from roasted vegetables to fluffy rice, making it a go-to for any meal.
  • Family-Friendly: Kids love chicken, and this recipe ensures it’s juicy and flavorful, so even the pickiest eaters will ask for seconds.
  • Meal Prep Friendly: Make a batch ahead of time and store it for easy lunches or quick dinners throughout the week.

Ingredients You’ll Need

Here’s what you’ll need for this simple yet delicious recipe:

  • 4 boneless, skinless chicken breasts
  • 2 tablespoons olive oil
  • 1 teaspoon garlic powder
  • 1 teaspoon onion powder
  • 1 teaspoon paprika
  • Salt and pepper to taste
  • Fresh herbs (optional, for garnish)

**Ingredient Substitutions**:
If you don’t have olive oil, canola oil or melted butter works just as well. Prefer fresh herbs? Use thyme or rosemary instead of dried spices for a fresh flavor.

Step-by-Step Instructions

Appetizing slice of white cake showcasing layers and creamy frosting.

1. Preheat Your Oven

Set your oven to 375°F (190°C). Preheating ensures that the chicken cooks evenly and retains its juices.

2. Prepare the Chicken

Pat the chicken breasts dry with a paper towel. This step is crucial for achieving that golden, crispy exterior.

3. Season Generously

In a small bowl, mix olive oil with garlic powder, onion powder, paprika, salt, and pepper. Rub this mixture all over the chicken breasts, making sure they are well-coated.

4. Bake to Perfection

Place the seasoned chicken breasts in a baking dish and bake for 25-30 minutes, or until the internal temperature reaches 165°F (75°C).

5. Rest Before Serving

Once baked, let the chicken breasts rest for 5-10 minutes before slicing. This allows the juices to redistribute, ensuring every bite is moist and flavorful.

Pro Tips for the Juiciest Chicken Breasts

  • Don’t Overcook: Keep an eye on the internal temperature to avoid drying out the chicken.
  • Brine for Flavor: Soaking the chicken in a simple brine solution (water, salt, sugar) for 30 minutes before cooking can enhance flavor and moisture.
  • Use a Meat Thermometer: This handy tool will help you cook your chicken to perfection every time.
  • Let it Breathe: Always allow your chicken to rest after cooking. This step is crucial for a juicy bite.
  • Experiment with Marinades: For added flavor, marinate the chicken in your favorite sauces or spices overnight.
  • Try Different Cooking Methods: This recipe can also be adapted for grilling or sautéing for a different taste experience.
  • Include a Flavor Boost: Add lemon slices or fresh herbs on top of the chicken before baking for extra flavor.
  • Pan-Seared Finish: For a crispy exterior, sear the chicken in a hot skillet for 2-3 minutes on each side before baking.

Common Mistakes and Troubleshooting

Even the best chefs make mistakes! Here are some common pitfalls and how to avoid them:

  • Dry Chicken: This often happens from overcooking. Always check your chicken’s internal temperature.
  • Underseasoned: Don’t skimp on seasoning! Chicken can be bland without proper flavors.
  • Uneven Cooking: Ensure all chicken breasts are of similar size for even cooking.
  • Skipping the Rest: Allowing the chicken to rest is essential for juicy meat.

Flavor Variations

One of the best parts about chicken is its versatility. Here are a few variations to keep things exciting:

  • Lemon Herb Chicken: Add lemon juice, zest, and fresh herbs for a bright flavor.
  • BBQ Chicken: Brush your favorite barbecue sauce on the chicken during the last 10 minutes of baking.
  • Italian Herb Chicken: Use Italian seasoning and serve with a side of marinara sauce.
  • Spicy Chipotle Chicken: Incorporate chipotle powder or a spicy marinade for a kick.

Storage and Make-Ahead Instructions

If you find yourself with leftover chicken, or if you’d like to prep ahead for meals, here’s what to do:

  • Store in an airtight container in the refrigerator for up to 4 days.
  • To freeze, wrap each breast individually in plastic wrap and place in a freezer-safe bag. They can last up to 4 months.
  • Reheat in the oven at 350°F (175°C) until warmed through, about 15 minutes.

Frequently Asked Questions

  • Can I use frozen chicken breasts? Yes, but be sure to thaw them completely before cooking for even results.
  • What’s the best way to check for doneness? A meat thermometer is the most reliable method, aiming for 165°F (75°C).
  • Can I bake chicken with skin on? Absolutely! Just adjust the cooking time as necessary.
  • Should I cover the chicken while baking? Covering can help retain moisture, but uncovering for the last 10 minutes will crisp the top.
  • What sides go well with baked chicken? Roasted veggies, mashed potatoes, or a fresh salad are fantastic pairings!
  • How can I add more flavor? Marinating the chicken or using a spice rub will enhance its taste significantly.
  • Can leftovers be used in other dishes? Yes! Shred leftover chicken for salads, sandwiches, or tacos.
  • What if my chicken breasts are very thick? You might want to pound them to an even thickness for consistent cooking.

Nutritional Tips and Dietary Adaptations

This recipe is not only delicious but can also be adapted to fit various dietary needs:

  • Low-Carb Option: Serve with leafy greens instead of starchy sides.
  • Gluten-Free: This recipe is naturally gluten-free; just ensure seasonings are free from gluten.
  • High-Protein: Chicken breasts are packed with protein, making them ideal for muscle recovery.
  • Flavorful Additions: Consider adding vegetables to the baking dish for a one-pan meal.

Equipment Recommendations

Here are a few kitchen essentials that will help you prepare this baked chicken breast recipe:

  • Meat Thermometer: A must-have for perfect doneness every time.
  • Baking Dish: A good-quality baking dish ensures even cooking.
  • Cutting Board: For easy slicing and serving after cooking.
  • Mixing Bowl: For combining spices and oil.

Serving Suggestions

Once your chicken is baked to perfection, consider these serving suggestions:

  • Top with a sprinkle of fresh herbs for a pop of color.
  • Pair with a hearty grain like quinoa or farro for a well-rounded meal.
  • Serve with steamed vegetables for a healthy side dish.
  • Create a delicious chicken salad using diced chicken and your choice of dressing.

Conclusion

There you have it, folks—a foolproof way to bake juicy chicken breasts that will leave your family and friends raving. With simple ingredients and a few easy steps, you’ll be on your way to mastering this comforting dish that embodies the warmth of home. Remember, cooking is about love and patience, so take your time, enjoy the process, and share the results with those you cherish. Happy cooking!

Classic White Cake from Cake Mix

Prep Time 10 minutes
Cook Time 30 minutes
Total Time 40 minutes
Servings 12 pieces
Calories 250
This classic white cake is quick to prepare and perfect for any celebration. Moist, fluffy, and easy to customize with your favorite frosting.

Ingredients

Cake Mix

  • 1 box white cake mix
  • 3 large egg whites egg whites
  • 1 cup water
  • ½ cup vegetable oil
  • 1 tsp vanilla extract

Instructions 

  • Preheat oven to 350°F (175°C). Grease and flour two 9-inch round pans.
  • Mix cake mix, egg whites, water, oil, and vanilla until smooth.
  • Pour batter into prepared pans.
  • Bake for 25–30 minutes until a toothpick comes out clean.
  • Cool completely and frost as desired.

Notes

Using large egg whites helps keep the cake light and fluffy.
Calories: 250kcal
Cost: $10
Course: Dessert
Cuisine: American
Keyword: cake

Welcome to the Heart of Comfort Food: The Ultimate Chicken Casserole

When it comes to comfort food, nothing beats the warmth and satisfaction of a hearty chicken casserole. This dish not only fills your belly but also warms your soul, making it the perfect centerpiece for family gatherings or cozy nights in. In this article, we will explore a detailed recipe for a chicken casserole that’s not only easy to make but also packed with flavors that remind us of home-cooked meals. Let’s dive into the details and discover why this dish is a must-try!

Why You’ll Love This Recipe

  • Pure comfort: This chicken casserole is the epitome of comfort food, perfect for when you want something warm and filling.
  • Quick to prepare: Ready in 30 minutes, this recipe allows you to spend more time with your loved ones and less time in the kitchen.
  • Family-friendly: With its tender chicken and rich flavors, this dish caters to all ages, making it a hit for family dinners.
  • Versatile ingredients: Use what you have on hand; this casserole can be easily adapted with different vegetables or spices.
  • Make-ahead option: Prepare it in advance and simply pop it in the oven when you’re ready to eat, perfect for busy weeknights.

Ingredients Breakdown

Before we get cooking, let’s gather our ingredients. Here’s what you’ll need for this delightful chicken casserole:

  • 3 cups cooked chicken: Shredded or cubed; rotisserie chicken works great for convenience.
  • 2 cups mixed vegetables: Frozen peas, carrots, and corn are excellent choices, but feel free to use your favorites.
  • 1 can cream of chicken soup: For that rich and creamy base—homemade options are also welcome.
  • 1 cup shredded cheese: Cheddar or a blend of your favorite cheeses for a gooey topping.
  • 1 cup milk: To thin out the soup and create a more tender texture.
  • 1 teaspoon garlic powder: For an extra kick of flavor.
  • Salt and pepper: To taste, enhancing the overall flavor profile.

If you’re looking to make substitutions, here are a few tips:

  • **Protein swap**: Use turkey or leftover beef instead of chicken for a different flavor.
  • **Dairy-free option**: Substitute with coconut milk and dairy-free cheese.
  • **Veggie boost**: Incorporate fresh spinach or bell peppers for added nutrients.

Expert Pro Tips for Perfection

Side view of a juicy chicken recipe on a plate, showcasing its vibrant colors and enticing texture.

To ensure your chicken casserole turns out just right, consider these expert tips:

  • Layer wisely: For a more flavorful casserole, layer the ingredients instead of mixing them all together.
  • Don’t skip the cheese: A generous sprinkle of cheese on top creates a beautifully bubbly crust.
  • Cover during baking: Cover with foil for the first half of baking to keep moisture in, then uncover for a golden top.
  • Check the seasoning: Taste before baking and adjust salt and pepper as needed for the best flavor.
  • Garnish for flair: Fresh herbs like parsley or thyme sprinkled on top before serving add a lovely touch.
  • Make it spicy: Add red pepper flakes or a dash of hot sauce for those who enjoy a kick.
  • Use quality ingredients: Fresh, high-quality ingredients make a world of difference in flavor.
  • Cook time matters: Keep an eye on the casserole towards the end to avoid overcooking and drying it out.

Avoiding Common Mistakes

Even seasoned cooks can run into hiccups. Here are some common mistakes to watch out for:

  • Overcooking the chicken: If using raw chicken, ensure it’s fully cooked but not dry. Aim for juicy and tender!
  • Skipping the rest time: Allow the casserole to sit for 10 minutes after baking for easier serving and better texture.
  • Too much liquid: If the mixture seems too soupy, add a little more cheese or breadcrumbs to thicken it up.
  • Poor storage: Ensure you store leftovers in airtight containers to maintain freshness.

Variations to Try

This chicken casserole is versatile! Here are a few variations to keep things exciting:

  • Southwestern twist: Add black beans, corn, and taco seasoning for a southwest flavor profile.
  • Italian style: Use marinara sauce instead of cream soup and top with mozzarella for an Italian flair.
  • Buffalo chicken: Mix in buffalo sauce for a spicy kick and serve with celery sticks on the side.
  • Vegetable overload: Increase the vegetable content for a hearty vegetarian option, omitting chicken entirely.

Storage and Make-Ahead Instructions

You can easily make this casserole ahead of time and store it for later. Here’s how:

  • Refrigerator: Store in an airtight container for up to 3-4 days. Reheat in the oven or microwave until heated through.
  • Freezer: Freeze before baking for up to 3 months. Thaw overnight in the fridge before baking as directed.
  • Make-ahead: Assemble the casserole, cover tightly, and store in the fridge for up to 24 hours before baking.

Frequently Asked Questions

Here are some common questions about the chicken casserole:

  • Can I use uncooked chicken? Yes, but ensure it’s fully cooked to a safe temperature before serving.
  • What’s the best cheese to use? Cheddar, mozzarella, or a blend works beautifully for a creamy topping.
  • Can this recipe be doubled? Absolutely! Just use a larger baking dish and adjust the baking time.
  • How do I make it gluten-free? Use gluten-free cream soup and check that all other ingredients are gluten-free.
  • Can I add pasta? Yes! Cooked pasta can be mixed in for a heartier casserole.
  • How do I know when it’s done? The casserole should be bubbly and the top golden brown.
  • Can I prepare it in advance? Yes, you can assemble it ahead of time and bake when ready.
  • What’s a good side dish? A simple green salad or crusty bread pairs wonderfully with this casserole.

Nutritional Tips and Dietary Adaptations

This chicken casserole can be adapted to fit various dietary needs:

  • Low-carb: Replace pasta or rice with cauliflower rice for a healthier option.
  • High-protein: Add more chicken or incorporate beans for a protein boost.
  • Vegetarian: Skip the chicken and double up on the veggies for a fulfilling meatless meal.

Equipment Recommendations

Here’s what you’ll need to whip up this chicken casserole:

  • Baking dish: A 9×13 inch dish works best for an even bake.
  • Mixing bowl: For combining ingredients before they go into the baking dish.
  • Spatula: To spread the mixture evenly in the dish.

Serving Suggestions

When it comes to serving, consider these delightful ideas:

  • Garnish: Fresh herbs like parsley or chives add a pop of color and flavor.
  • Accompaniments: Serve with crusty bread or a fresh salad for a complete meal.
  • Pairing drinks: A light white wine or iced tea complements the richness of the casserole beautifully.

Conclusion

There you have it—the ultimate chicken casserole recipe that’s sure to become a staple in your kitchen. With its simple ingredients and heartwarming flavors, this dish encapsulates the essence of comfort food. So gather your loved ones, share a meal, and create memories around the table. Remember, cooking doesn’t have to be complicated; it’s all about love, patience, and letting those simple ingredients shine. Happy cooking!

Browse By

Prep Time 10 minutes
Cook Time 20 minutes
Total Time 30 minutes
Servings 4 people
Calories 350
Explore a variety of recipes categorized by meal and ingredient to inspire your next cooking adventure.

Ingredients

Home

  • 1 cup RECIPESBreakfastLunchDinnerDessertsSeafood

Breakfast

  • 1 cup Lunch

Dinner

  • 1 cup Desserts

Seafood

  • 1 cup IngredientsChickenBeefSaladsSoup

Chicken

  • 200 g Chicken (boneless, skinless)

Beef

  • 150 g Beef (lean ground)

Salads

  • 1 cup Salads

Soup

  • 1 cup Soup

In the KitchenAirfryer Recipes

  • 1 piece Airfryer Recipes

New Year’s Day Recipes

  • 1 piece New Year’s Day Recipes

Valentine’s Day Recipes

  • 1 piece Valentine’s Day Recipes

St. Patrick’s Day Recipes

  • 1 piece St. Patrick’s Day Recipes

Easter Recipes

  • 1 piece Easter Recipes

Mother’s Day Recipes

  • 1 piece Mother’s Day Recipes

Juneteenth Recipes

  • 1 piece Juneteenth Recipes

Independence Day Recipes

  • 1 piece Independence Day Recipes

Halloween Recipes

  • 1 piece Halloween Recipes

Thanksgiving Recipes

  • 1 piece Thanksgiving Recipes

Christmas Recipes

  • 1 piece Christmas Recipes

Instructions 

  • Combine all ingredients in a large bowl.
  • Mix thoroughly until well combined.
  • Transfer mixture to the air fryer basket.
  • Cook at 180°C (356°F) for 15-20 minutes until golden brown.
  • Serve hot and enjoy!

Notes

For a healthier option, use low-sodium ingredients and lean meats.
Calories: 350kcal
Cost: $15
Course: Breakfast, Desserts, dinner, Lunch
Keyword: chicken

The Comfort of Home-Cooked Flavors

When it comes to comfort food, nothing beats the warmth and joy of a perfectly roasted chicken. This Classic Herb and Garlic Rotisserie Chicken recipe encapsulates everything that makes home cooking special: simple ingredients, heartfelt preparation, and the delightful aroma that fills your kitchen. As we dive into this rotisserie chicken recipe, I invite you to join me in celebrating the flavors of family and community, reminding us that cooking is not just about nourishment—it’s about love.

Why You’ll Love This Recipe

  • Juicy Perfection: The method of rotisserie cooking ensures that the chicken remains moist, with tender meat that practically falls off the bone.
  • Simple Ingredients: With just a handful of pantry staples, you can create a dish that feels gourmet without the fuss.
  • Herbaceous Aroma: The combination of garlic and fresh herbs infuses the chicken with a delightful fragrance that will have everyone gathering around the table.
  • Impressive Presentation: A whole roasted chicken makes for an eye-catching centerpiece, perfect for family gatherings or special occasions.
  • Versatile Leftovers: Enjoy the chicken on its own, or use leftovers in salads, sandwiches, or soups for a quick and satisfying meal.

Ingredients Breakdown

To create this delicious rotisserie chicken, gather the following ingredients:

  • 1 whole chicken (about 4-5 pounds): Look for a fresh, high-quality bird for the best flavor.
  • 3 tablespoons olive oil: This adds moisture and helps the herbs stick to the skin.
  • 4 cloves garlic, minced: Fresh garlic provides a punch of flavor.
  • 2 teaspoons sea salt: Essential for seasoning and enhancing the chicken’s natural flavors.
  • 1 teaspoon freshly ground black pepper: A key ingredient for a well-seasoned chicken.
  • 1 tablespoon fresh thyme leaves: Thyme complements the chicken beautifully.
  • 1 tablespoon fresh rosemary, chopped: Rosemary adds a fragrant, earthy flavor.

Expert Tips for the Perfect Rotisserie Chicken

Close-up view of a whole roasted chicken with herbs and garlic.

Here are some insider tips to ensure your rotisserie chicken turns out flawless every time:

  • Pat the chicken dry: This is crucial for achieving crispy skin. Use paper towels to remove moisture from the surface.
  • Coat under the skin: For maximum flavor, gently rub some of the herb mixture underneath the skin as well as on top.
  • Truss the chicken: Tying the legs together helps the chicken cook evenly and maintain its shape.
  • Monitor internal temperature: Use a meat thermometer to check that the internal temperature reaches 165°F for safe consumption.
  • Baste occasionally: If you have remaining herb mixture, use it to baste the chicken during cooking for added flavor.
  • Let it rest: Allow the chicken to rest for at least 10-15 minutes before carving to lock in the juices.
  • Experiment with spices: Feel free to add your favorite spices or citrus zest to the herb mixture for a unique twist.
  • Use a drip pan: Place a drip pan underneath the chicken to catch the juices, which can be used for gravy or sauces.

Common Mistakes and Troubleshooting

Even the best of us can make mistakes in the kitchen. Here are some pitfalls to avoid:

  • Skipping the dry brine: Not seasoning the chicken in advance can lead to bland meat. Consider salting your chicken a few hours before cooking.
  • Overcrowding the grill: If you’re cooking other items alongside, it can lead to uneven cooking. Rotate your chicken to ensure even heat distribution.
  • Not checking the temperature: Trusting cooking times alone can lead to undercooked or overcooked chicken. Always rely on a thermometer for accuracy.
  • Forgetting to rest: Cutting into the chicken too soon will result in dry meat. Give it time to rest for the best results.

Delicious Variations

Once you’ve mastered the classic version, try these variations to keep things exciting:

  • Lemon Herb Rotisserie Chicken: Add zest and juice from a lemon to the herb mixture for a bright, citrusy flavor.
  • Spicy Cajun Rotisserie Chicken: Incorporate Cajun seasoning for a flavorful kick that packs a punch.
  • Honey Mustard Rotisserie Chicken: Mix honey and Dijon mustard into the herb paste for a sweet and tangy glaze.
  • Smoky BBQ Rotisserie Chicken: Use smoked paprika and your favorite BBQ rub for a deliciously smoky flavor profile.

Storage and Make-Ahead Instructions

Want to enjoy your rotisserie chicken later? Here’s how to store and prepare it ahead of time:

  • Refrigeration: Store any leftover chicken in an airtight container in the fridge for up to 3-4 days.
  • Freezing: For longer storage, freeze the cooked chicken in portions. Thaw in the fridge before reheating.
  • Make-ahead tip: You can prepare the herb mixture in advance and store it in the fridge for up to a week.

Frequently Asked Questions

Got questions? I’ve got answers! Here are some common queries about rotisserie chicken:

  • Can I use frozen chicken? Yes, but make sure it’s completely thawed before cooking for even results.
  • What if I don’t have a rotisserie? You can roast the chicken in the oven at 375°F for about 1.5 hours, basting occasionally.
  • How do I know when my chicken is done? The internal temperature should reach 165°F in the thickest part of the breast and thigh.
  • Can I cook other vegetables with the chicken? Absolutely! Root vegetables like potatoes and carrots can be placed in the drip pan to roast alongside.
  • What’s the best way to carve a rotisserie chicken? Let it rest first, then start by removing the legs and thighs, followed by the breast meat.
  • How can I enhance the flavor? Marinating the chicken overnight before cooking can infuse additional flavor.
  • Can I use dried herbs instead of fresh? Yes, but use about 1/3 of the amount, as dried herbs are more concentrated.
  • What’s the best way to reheat leftovers? Reheat in the oven at low temperature to keep the chicken moist, or in the microwave covered with a damp paper towel.

Nutritional Tips and Dietary Adaptations

This rotisserie chicken is not only delicious but also nutritious. Here are some tips for dietary adaptations:

  • Low-carb option: Serve with a side of steamed vegetables instead of starchy sides for a low-carb meal.
  • Gluten-free: All ingredients used in this recipe are gluten-free, making it a safe choice for those with gluten sensitivities.
  • Higher protein: Pair the chicken with a protein-rich side, like quinoa or beans, to enhance the meal’s nutritional profile.

Equipment Recommendations

To achieve the best results, consider these essential tools:

  • Rotisserie attachment: If you’re using a grill, ensure it has a rotisserie attachment for even cooking.
  • Meat thermometer: A reliable thermometer is key to ensuring your chicken is cooked to perfection.
  • Sharp carving knife: Invest in a good knife to make carving a breeze.

Serving Suggestions

Once your rotisserie chicken is ready, here are some serving ideas to elevate your meal:

  • Classic sides: Serve with mashed potatoes and green beans for a true comfort food experience.
  • Salads: Slice the chicken and add it to a fresh garden salad for a light and refreshing meal.
  • Sandwiches: Use leftover chicken to make hearty sandwiches with your favorite toppings.

In conclusion, this Classic Herb and Garlic Rotisserie Chicken is more than just a recipe; it’s a tradition that brings family and friends together. With its rich flavors and simple preparation, it’s bound to become a beloved staple in your home. So, roll up your sleeves and prepare to create a meal that embodies warmth, love, and the comforting essence of home-cooked goodness. Enjoy every moment of cooking and sharing this delightful dish with those you hold dear.

Classic Herb and Garlic Rotisserie Chicken

Prep Time 15 minutes
Cook Time 2 hours
Total Time 2 hours 15 minutes
Servings 4 servings
Calories 450
This flavorful rotisserie chicken is infused with fresh herbs and garlic, resulting in a juicy and aromatic main dish perfect for any occasion.

Ingredients

Whole Chicken

  • 1 piece whole chicken (about 4-5 pounds)

Herb and Garlic Mixture

  • 3 tablespoons olive oil
  • 4 cloves garlic, minced
  • 2 teaspoons sea salt
  • 1 teaspoon black pepper (freshly ground)
  • 1 tablespoon fresh thyme leaves
  • 1 tablespoon fresh rosemary, chopped

Instructions 

  • Preheat the rotisserie or grill for indirect heat.
  • Mix olive oil, garlic, salt, pepper, thyme, and rosemary into a paste.
  • Pat chicken dry and rub with herb mixture evenly.
  • Truss and secure chicken on rotisserie spit. Cook until internal temp reaches 165°F (about 1.5-2 hours).
  • Rest the chicken before carving and serving.

Notes

Ensure the chicken reaches an internal temperature of 165°F for safety.
Calories: 450kcal
Cost: $15
Course: Main Course
Cuisine: American
Keyword: chicken

Welcome to the Heart of Chicken Comfort: A Culinary Journey

Ah, chicken—the versatile bird that has graced our tables since time immemorial. Whether it’s the sizzling sound of it frying in a hot skillet or the aroma wafting from a bubbling pot of stew, chicken has a way of wrapping us in warmth and nostalgia. Today, we’re diving into the world of hearty chicken dishes that not only nourish the body but also feed the soul. So grab your apron, and let’s transform simple ingredients into unforgettable meals that remind us of home.

Why You’ll Love This Recipe

This isn’t just any chicken casserole; it’s a creation that embodies love, tradition, and comfort. Here’s why you’ll cherish each spoonful:

  • Hearty and Filling: This casserole is packed with chicken, vegetables, and a creamy sauce that will keep you full for hours.
  • Simple Ingredients: Made with pantry staples, you won’t need to hunt for rare items—just wholesome goodness.
  • Easy to Prepare: Perfect for busy weeknights, this dish comes together with minimal fuss, allowing you to spend more time with loved ones.
  • Great for Meal Prep: Make a big batch and enjoy leftovers throughout the week or freeze for later—nothing beats a home-cooked meal on a busy day.
  • Family-Friendly: Even the pickiest eaters will come back for seconds. It’s a dish everyone can enjoy!

Ingredient Breakdown

Let’s get into the nitty-gritty of what makes this casserole so special. Here’s what you’ll need:

  • Chicken: You can use boneless skinless chicken breasts, thighs, or even a rotisserie chicken for a shortcut. My go-to is always thighs for their rich flavor.
  • Vegetables: A mix of carrots, peas, and corn adds sweetness and color. Feel free to swap in your favorites, like green beans or bell peppers.
  • Cream of Chicken Soup: This is what makes the dish creamy and comforting. You can also use homemade or low-sodium versions.
  • Cheddar Cheese: For that melty, gooey goodness. I remember the time I added extra cheese—what a hit!
  • Seasonings: Salt, pepper, garlic powder, and onion powder enhance the flavor beautifully. A sprinkle of thyme or rosemary brings a rustic touch.

Pro Tips for the Best Chicken Casserole

Detailed view of succulent chicken, showcasing its crispy exterior and vibrant garnishes.

Before you start cooking, here are some expert insights to elevate your dish:

  • Use Leftover Chicken: If you have leftover roast chicken, shred it and use it here—saves time and adds flavor!
  • Don’t Overcook the Chicken: If you’re cooking fresh chicken first, avoid overcooking it to keep it tender and juicy.
  • Layer Your Flavors: Sauté your vegetables before adding them to the casserole for a deeper flavor profile.
  • Experiment with Cheese: Try different cheeses like Gruyère or pepper jack for a unique twist.
  • Adjust the Seasoning: Always taste as you cook. What works for me might need a bit more salt for you!
  • Cover and Uncover: Cover the casserole with foil for the first part of baking, then uncover to let the top brown nicely.
  • Let It Rest: Allow the casserole to sit for about 10 minutes after baking. This helps set the layers and makes serving easier.

Avoiding Common Mistakes

Even seasoned cooks can make a misstep. Here are some common pitfalls and how to avoid them:

  • Skipping the Sauté: Don’t skip sautéing onions and garlic before adding them; it adds depth to the dish.
  • Using Cold Ingredients: Ensure your ingredients are at room temperature for even cooking.
  • Not Tasting: Always taste your mixture before baking to adjust seasoning accordingly.
  • Overfilling the Dish: Leave some space at the top of your casserole dish to allow for bubbling.

Delicious Variations to Try

Get creative with these variations to suit your taste:

  • Buffalo Chicken Casserole: Add buffalo sauce for a spicy kick and top with blue cheese.
  • Mediterranean Chicken Casserole: Incorporate olives, feta, and sun-dried tomatoes for a vibrant twist.
  • Chicken and Broccoli: Add steamed broccoli for extra nutrition and color.
  • Cheesy Garlic Chicken Casserole: Mix in roasted garlic and extra cheese for a decadent flavor upgrade.

Storage and Make-Ahead Instructions

This casserole is perfect for meal prep! Here’s how to store it:

  • Refrigerator: Store leftovers in an airtight container for up to 4 days.
  • Freezer: You can freeze the unbaked casserole for up to 3 months. Just wrap it tightly in foil and plastic wrap.
  • Reheating: To reheat, thaw overnight in the fridge, then bake at 350°F until heated through (about 30 minutes).

Frequently Asked Questions

Got questions? I’ve got answers!

  • Can I use frozen chicken? Yes! Just make sure to thaw it completely before cooking.
  • What if I don’t have cream of chicken soup? You can make a homemade version with chicken broth, milk, and flour.
  • Can I add more vegetables? Absolutely! Feel free to pack it with more veggies to boost nutrition.
  • How long does it take to bake? Typically, about 45 minutes at 350°F.
  • Can I make it vegan? Yes! Substitute chicken with chickpeas or tofu and use plant-based milk and cheese.
  • Is it gluten-free? Use gluten-free soup and breadcrumbs for a gluten-free option.
  • What’s a good side dish? Serve it with a simple green salad or crusty bread to soak up the sauce.
  • Can I double the recipe? Yes! Just use a larger baking dish and adjust the baking time as needed.

Nutritional Tips and Dietary Adaptations

Here are some tips to make this dish fit your dietary needs:

  • Low-Calorie Option: Use low-fat cheese and reduced-fat soup to lighten it up.
  • High-Protein Boost: Add beans or lentils for extra protein without adding too many calories.
  • Low-Carb Version: Substitute rice or pasta with cauliflower rice or zucchini noodles.
  • Vegetarian Adaptation: Swap chicken for hearty vegetables or legumes for a delicious veggie casserole.

Essential Equipment for Success

To make this casserole, you’ll need:

  • Large Mixing Bowl: To combine all your ingredients easily.
  • 9×13 Baking Dish: A classic choice for casseroles that allows even cooking.
  • Wooden Spoon: Perfect for mixing without scratching your dish.
  • Measuring Cups and Spoons: Essential for precise ingredient measurements.

Serving Suggestions

Serve this casserole hot from the oven with:

  • Crusty Bread: A side of warm, crusty bread is perfect for sopping up the creamy sauce.
  • Fresh Salad: A crisp green salad dressed in vinaigrette adds a refreshing contrast.
  • Homemade Biscuits: Fluffy biscuits make for a delightful accompaniment to this hearty dish.

Conclusion: A Dish That Feels Like Home

As we wrap up this culinary journey, remember that cooking is about love, patience, and creating memories around the table. This chicken casserole is more than just a meal; it’s a comforting embrace that brings family together. So, whether it’s a rainy day or a sunny afternoon, let this dish remind you of the simple joys in life. Happy cooking, friends!

Browse By

Prep Time 10 minutes
Cook Time 20 minutes
Total Time 30 minutes
Servings 4 people
Calories 250
A versatile collection of recipes categorized for easy browsing, perfect for any occasion or meal.

Ingredients

Categories

  • 1 unit Home
  • 1 unit RECIPESBreakfastLunchDinnerDessertsSeafood
  • 1 unit Breakfast
  • 1 unit Lunch
  • 1 unit Dinner
  • 1 unit Desserts
  • 1 unit Seafood
  • 1 unit IngredientsChickenBeefSaladsSoup
  • 1 unit Chicken
  • 1 unit Beef
  • 1 unit Salads
  • 1 unit Soup
  • 1 unit In the KitchenAirfryer Recipes
  • 1 unit Airfryer Recipes
  • 1 unit New Year’s Day Recipes
  • 1 unit Valentine’s Day Recipes
  • 1 unit St. Patrick’s Day Recipes
  • 1 unit Easter Recipes
  • 1 unit Mother’s Day Recipes
  • 1 unit Juneteenth Recipes
  • 1 unit Independence Day Recipes
  • 1 unit Halloween Recipes
  • 1 unit Thanksgiving Recipes
  • 1 unit Christmas Recipes
  • 1 unit About Us
  • 1 unit Contact Us

Instructions 

  • Gather all ingredients and prepare your workspace.
  • Follow the specific steps for each category or ingredient as needed.
  • Cook or assemble the recipes according to your preferences.
  • Serve and enjoy your meal or dessert.

Notes

Feel free to customize categories to suit your taste and occasion.
Calories: 250kcal
Cost: $15
Course: Breakfast, Desserts, dinner, Lunch, Seafood
Keyword: Home, RECIPES

Welcome to the Heart of Comfort Cooking

When it comes to crafting dishes that resonate with warmth and nostalgia, few ingredients can rival the humble chicken. A staple in kitchens across the South, chicken embodies the essence of comfort food. In this article, we’ll explore a treasure trove of recipes that celebrate chicken in all its glorious forms—from crispy fried delights to soothing, simmered stews. Prepare to fill your kitchen with the rich aromas of home-cooked meals that are sure to bring your loved ones together.

Why You’ll Love These Chicken Recipes

  • Heartwarming meals: Each dish is designed to evoke memories of family gatherings and cherished moments around the table.
  • Versatile ingredients: Chicken adapts beautifully to a variety of flavors, making it perfect for any occasion or season.
  • Easy to follow: These recipes are straightforward, ensuring you can whip up a delicious meal without stress.
  • Budget-friendly: Chicken is often more affordable than other meats, making it a smart choice for family meals.
  • Perfect for meal prep: Many of these recipes can be made ahead of time, saving you effort during the week.

The Irresistible Chicken Pot Pie

This classic dish is a family favorite that combines tender chicken, fresh vegetables, and a creamy sauce, all encased in a flaky crust. Let’s dive into how to create this comforting masterpiece.

Ingredients

  • Chicken: 2 cups cooked, shredded chicken (use rotisserie for convenience).
  • Vegetables: 1 cup carrots, diced; 1 cup peas; 1 cup celery, diced.
  • Broth: 2 cups chicken broth for a rich flavor.
  • Cream: 1 cup heavy cream for that creamy texture.
  • Seasoning: Salt, pepper, and thyme to taste.
  • Crust: 1 package of refrigerated pie crusts or homemade if you prefer.

Pro Tips for the Perfect Chicken Pot Pie

  • Use leftover chicken: Save time by using leftover chicken from a previous meal or a store-bought rotisserie chicken.
  • Don’t rush the filling: Allow the filling to cool slightly before adding the crust; this prevents sogginess.
  • Experiment with spices: Try adding a dash of nutmeg or paprika for extra depth of flavor.
  • Brush with egg wash: For a golden crust, brush the top with beaten egg before baking.
  • Cover edges with foil: If the crust edges brown too quickly, cover them with foil for the remainder of baking.

Common Mistakes and Troubleshooting

Side view of a colorful display of mouth-watering recipes including baked goods and appetizers.
  • Crust too tough: Make sure not to overwork the dough; handle it gently.
  • Filling too runny: If your filling is too watery, add a cornstarch slurry to thicken it before baking.
  • Burnt tops: If the top is browning too fast, reduce the oven temperature slightly.

Variations to Spice Up Your Chicken Pot Pie

  • Cheesy Chicken Pot Pie: Stir in 1 cup of shredded cheese (like cheddar) for a cheesy twist.
  • Mushroom Chicken Pot Pie: Add 1 cup of sautéed mushrooms for added earthiness.
  • Spicy Chicken Pot Pie: Incorporate diced jalapeños or hot sauce for a kick.
  • Vegetarian Option: Substitute chicken with hearty vegetables like potatoes and butternut squash.

Storage and Make-Ahead Instructions

This chicken pot pie can be made ahead of time. Simply prepare the filling and store it in the fridge for up to 2 days. Assemble and bake it when you’re ready to eat. For leftovers, store them in an airtight container in the fridge for up to 3 days. To reheat, cover with foil and warm in the oven until heated through.

Frequently Asked Questions

  • Can I freeze chicken pot pie? Yes, you can freeze the unbaked pie for up to 3 months. Just wrap it well and bake from frozen.
  • What can I serve with chicken pot pie? A simple green salad or steamed veggies complement this dish perfectly.
  • Can I use frozen vegetables? Absolutely! Frozen vegetables can save time and are just as nutritious.
  • How do I know when it’s done? The crust should be golden brown and the filling should be bubbling.
  • Can I use a different type of meat? Yes, turkey or even beef can be delicious alternatives.
  • What if I don’t have heavy cream? You can substitute it with milk, but the filling may be less rich.
  • Can I make it gluten-free? Yes, use a gluten-free pie crust and cornstarch for thickening.
  • How do I prevent a soggy bottom crust? Pre-bake the crust for 10 minutes before adding the filling.

Nutrition Tips and Dietary Adaptations

This chicken pot pie is a hearty meal, but it can be modified to fit various dietary needs. Use low-fat milk instead of heavy cream for a lighter version, or substitute chicken with tofu or legumes for a plant-based dish. Always consider your personal dietary restrictions and adjust ingredients accordingly.

Essential Equipment for Success

  • 9-inch pie dish: A standard size for even baking.
  • Mixing bowls: For preparing your filling and crust.
  • Whisk: Essential for mixing the filling and ensuring a smooth consistency.
  • Rolling pin: If making your own crust, a good rolling pin is a must.

Serving Suggestions

Serving your chicken pot pie is just as important as making it. Consider garnishing with fresh herbs like parsley or thyme for a pop of color and flavor. Pair it with a side of buttery biscuits or cornbread to soak up the delicious filling.

Final Thoughts

Cooking isn’t just about feeding the body; it’s about nourishing the soul. This chicken pot pie recipe is more than a meal; it’s a way to create memories, share love, and bring people together around the dinner table. So gather your ingredients, roll up your sleeves, and let’s make some magic happen in your kitchen. Remember, cooking is a journey, and every dish tells a story. Happy cooking, my friends!

Marissa Recipes

Prep Time 20 minutes
Cook Time 30 minutes
Total Time 50 minutes
Servings 4 people
Calories 650
A collection of delightful treats curated by Marissa, perfect for any occasion. From rich desserts to savory pancakes, enjoy these irresistible recipes.

Ingredients

Doughs and Batters

  • 1 cup coconut milk
  • 2 cups all-purpose flour
  • 1 cup granulated sugar
  • 0.5 cup unsweetened cocoa powder
  • 1 tablespoon instant espresso powder
  • 1 cup shredded coconut

Frying and Dipping

  • 2 cups vegetable oil
  • 1 cup mayonnaise
  • 0.5 cup ketchup

Chocolate and Filling

  • 1 cup semi-sweet chocolate chips
  • 1 cup heavy cream
  • 2 tablespoons unsalted butter

Additional Ingredients

  • 1 cup powdered sugar
  • 1 cup eggnog

Instructions 

  • Prepare the coconut custard babka dough by mixing flour, sugar, cocoa, espresso, and coconut milk. Let it rise for 1 hour.
  • Roll out the dough, spread with coconut, then roll and cut into slices. Bake at 350°F (175°C) for 25 minutes.
  • For the chocolate truffles, heat heavy cream and butter, pour over chocolate chips, stir until smooth, then chill for 2 hours.
  • Form the chilled ganache into balls, then coat with shredded coconut or powdered sugar as desired.
  • Prepare the crispy onion petals by slicing onions, dipping in batter, and frying until golden. Serve with zesty dipping sauce.

Notes

Ensure all ingredients are fresh for best results. Adjust cooking times based on your oven and stove.
Calories: 650kcal
Cost: $20
Course: Appetizer, Breakfast, Dessert
Cuisine: American
Keyword: chocolate, coconut, eggnog

Welcome to the Heart of Comfort Food: Chicken Casserole

When the chilly winds blow and the days grow short, there’s nothing quite like a warm, hearty chicken casserole to bring comfort and joy to your family table. This chicken casserole is not just a dish; it’s a nostalgic embrace, filled with memories of family gatherings and shared laughter. In this article, we’re diving deep into the world of chicken casseroles, exploring everything from ingredients to techniques, so you can create a dish that’s ready in minutes and loaded with love.

Why You’ll Love This Chicken Casserole Recipe

  • Quick Preparation: With simple ingredients and easy steps, this casserole is ready in under an hour, making it perfect for busy weeknights.
  • Comfort Food at Its Best: This dish embodies pure comfort, packed with tender chicken, creamy sauce, and delightful toppings that melt in your mouth.
  • Customizable Ingredients: Feel free to swap out vegetables or proteins based on what you have on hand, making it a versatile option for your pantry.
  • Make-Ahead Friendly: You can prepare this casserole in advance and refrigerate or freeze it, allowing you to enjoy a homemade meal with minimal effort.
  • Family Favorite: It’s a hit with both kids and adults alike; the creamy, cheesy goodness is sure to be a crowd-pleaser!

Ingredients Breakdown

Let’s gather our ingredients to create this beautiful casserole. Here’s what you’ll need:

  • Chicken: Use shredded rotisserie chicken for convenience, or cook your own chicken breasts. Either way, the tender chicken is the star of this dish.
  • Cream of Chicken Soup: This forms the creamy base. You can substitute with homemade cream sauce or mushroom soup for a different flavor.
  • Vegetables: Frozen peas, corn, or mixed veggies work wonderfully. Fresh bell peppers and onions can add a lovely crunch and flavor.
  • Cheese: Sharp cheddar cheese is a classic choice, but feel free to mix in mozzarella or pepper jack for added kick.
  • Seasonings: Salt, pepper, garlic powder, and onion powder will enhance the flavors beautifully.
  • Topping: Crushed crackers, breadcrumbs, or even tater tots can create a golden and crispy top layer.

Pro Tips for the Perfect Chicken Casserole

Juicy and delicious chicken dishes displayed on a table, emphasizing a comforting meal.
  • Don’t Overcook the Chicken: If you’re cooking chicken from scratch, be careful not to overcook it; you’ll want it juicy to keep the casserole moist.
  • Layer Wisely: Start with the chicken mixture at the bottom and layer the toppings evenly for a balanced bake.
  • Cover with Foil: If the top browns too quickly, cover it with aluminum foil for part of the baking time to ensure everything cooks through without burning.
  • Experiment with Flavors: Add herbs like thyme or rosemary for a fresh twist, or a splash of hot sauce for those who like it spicy.
  • Serve with Love: Garnish with fresh herbs like parsley or chives for a pop of color and flavor before serving.

Common Mistakes and Troubleshooting

Even the best of us can make mistakes in the kitchen! Here are some pitfalls to avoid:

  • Dry Casserole: If your casserole turns out dry, it may be due to overbaking or not enough sauce. Ensure the mixture is adequately moist before baking.
  • Soggy Bottom: If the bottom is too wet, make sure to drain any excess liquid from your vegetables.
  • Uneven Cooking: Always stir the mixture before baking to distribute the ingredients evenly for consistent cooking.

Variations to Try

One of the best things about chicken casserole is its adaptability. Here are a few variations you can try:

  • Mexican Chicken Casserole: Add black beans, corn, and salsa for a zesty kick. Top with tortilla chips and cheese.
  • Buffalo Chicken Casserole: Mix in buffalo sauce for a spicy version, topped with blue cheese and celery.
  • Vegetarian Option: Swap the chicken for chickpeas or lentils, and include more vegetables to keep it hearty.
  • Cheesy Broccoli Chicken Casserole: Add steamed broccoli and additional cheese for a veggie-packed twist.

Storage and Make-Ahead Instructions

This casserole is ideal for meal prep. Here are some tips on how to store it:

  • Refrigerating: Store leftovers in an airtight container in the fridge for up to 4 days.
  • Freezing: You can freeze the assembled casserole before baking. Simply cover it tightly with foil or plastic wrap. It will keep well for up to 3 months.
  • Reheating: To reheat, thaw overnight in the fridge and bake at 350°F until heated through, about 25-30 minutes.

Frequently Asked Questions

  • Can I use frozen chicken? Yes, just ensure it’s cooked thoroughly before adding it to the casserole.
  • What can I use instead of cream of chicken soup? You can make a homemade version using milk, butter, and flour or use vegetable broth for a lighter option.
  • How do I make this casserole gluten-free? Use gluten-free crackers or breadcrumbs and ensure all other ingredients are gluten-free.
  • Can I add pasta to the casserole? Absolutely! Cooked pasta can be a delightful addition for extra heartiness.
  • How long does it take to cook from frozen? If cooking from frozen, it may take 1.5 to 2 hours at 375°F, covered.
  • Can I use other meats? Yes, turkey or ham can be great substitutes for chicken.
  • Will this casserole still taste good reheated? Yes, it tastes even better the next day as the flavors meld.
  • Can I make this dairy-free? Yes, substitute dairy products with almond or coconut milk and use dairy-free cheese.

Nutrition Tips and Dietary Adaptations

For those mindful of their nutrition, here are some tips:

  • Lean Protein: Opt for skinless chicken breast to keep the dish lower in fat.
  • Vegetable Boost: Add extra vegetables to increase fiber and nutrients—think spinach, kale, or bell peppers.
  • Whole Grains: Use whole grain crackers or bread for a healthier topping option.

Equipment Recommendations

To make your cooking experience smoother, here’s what you’ll need:

  • Large Mixing Bowl: For combining all the ingredients.
  • 9×13 Baking Dish: This size is perfect for baking a hearty casserole.
  • Measuring Cups and Spoons: Accurate measurements ensure the best flavor.

Serving Suggestions

When it’s finally time to serve, consider these ideas to elevate your meal:

  • Fresh Salad: A simple green salad with a light vinaigrette pairs well with the richness of the casserole.
  • Garlic Bread: Serve with warm, buttery garlic bread for a comforting touch.
  • Seasonal Vegetables: Roasted or steamed seasonal veggies add color and nutrition to your table.

Conclusion

Cooking is about creating connections, and this chicken casserole is a beautiful way to bring family and friends together. With its comforting flavors and adaptable ingredients, it’s a cherished recipe that will surely become part of your family’s tradition. So, roll up your sleeves, gather your loved ones, and get ready to enjoy a dish that warms the heart, just like a Sunday dinner at Grandma’s house.

Browse By

Prep Time 10 minutes
Cook Time 20 minutes
Total Time 30 minutes
Servings 4 people
Calories 450
Explore a variety of recipes categorized by meal and ingredient to inspire your next cooking adventure.

Ingredients

Home

  • 1 cup RECIPESBreakfastLunchDinnerDessertsSeafood

Breakfast

  • 1 cup Lunch

Dinner

  • 1 cup Desserts

Seafood

  • 1 cup IngredientsChickenBeefSaladsSoup

Chicken

  • 200 g Chicken (boneless, skinless)

Beef

  • 150 g Beef (ground)

Salads

  • 1 head Salad Greens

Soup

  • 2 cups Vegetable Broth

Instructions 

  • Prepare ingredients by chopping chicken and beef, and washing salad greens.
  • Cook chicken and beef in a skillet until browned, about 8-10 minutes.
  • Assemble salads with greens and cooked meats.
  • Heat vegetable broth in a pot and add seafood or other ingredients as desired.
  • Serve salads and soup together for a complete meal.

Notes

Feel free to customize ingredients based on your preferences.
Calories: 450kcal
Cost: $15
Course: Breakfast, Desserts, dinner, Lunch
Keyword: chicken

Gather around the dinner table, folks, because today we’re diving into a dish that’s as comforting as a warm hug from Grandma—Chicken Stir Fry with Vegetables. This recipe isn’t just about tossing a few ingredients in a pan; it’s a heartfelt invitation to share a meal that nourishes the body and soul. With vibrant veggies and tender chicken, this stir fry captures the essence of home-cooked goodness, making it perfect for busy weeknights or a cozy family gathering. Let’s get cooking!

Why You’ll Love This Recipe

This chicken stir fry is not just a meal; it’s an experience that brings joy and satisfaction. Here are five reasons to love it:

  • Quick and Easy: Ready in under 30 minutes, this dish fits perfectly into your busy schedule without skimping on flavor.
  • Flavor Explosion: The savory sauce and fresh veggies create a symphony of flavors that dance on your taste buds.
  • Customizable: Whether you prefer spicy or mild, you can easily adjust the ingredients to suit your family’s tastes.
  • Healthy and Nutritious: Packed with colorful vegetables and lean chicken, this stir fry is a wholesome option for your dinner table.
  • Perfect for Leftovers: Enjoy the great taste again tomorrow! This dish reheats beautifully, making it ideal for meal prep.

Ingredients for Chicken Stir Fry with Vegetables

Here’s what you’ll need to gather from your kitchen:

  • 1 pound boneless, skinless chicken breasts: The star of our show, providing lean protein.
  • 2 cups broccoli florets: A nutrient-packed veggie that adds crunch and color.
  • 1 cup bell peppers (mixed colors): For sweetness and visual appeal.
  • 1 cup carrots (thinly sliced): Adds a bit of sweetness and makes the dish vibrant.
  • 3 cloves fresh garlic (minced): Essential for that rich flavor.
  • 3 tablespoons low-sodium soy sauce: The base of our savory sauce, keeping it healthy.
  • 1 tablespoon sesame oil: Adds a nutty flavor that enhances the dish.
  • 1 tablespoon honey or sugar: Balances the savory elements beautifully.
  • Salt and pepper to taste: For seasoning to perfection.

How to Make Chicken Stir Fry with Vegetables

Let’s get down to the nitty-gritty of preparing this delightful dish:

  1. Slice the chicken into bite-sized pieces and chop the vegetables.
  2. Heat a large skillet or wok over medium-high heat with a splash of oil until shimmering.
  3. Add the chicken pieces and stir-fry for about 5-7 minutes until golden brown; season lightly with salt and pepper.
  4. Toss in the broccoli, bell peppers, and carrots; stir-fry for an additional 3-4 minutes until they are tender-crisp.
  5. In a bowl, whisk together the soy sauce, sesame oil, honey (or sugar), and minced garlic.
  6. Pour the sauce over the chicken and vegetables, stirring well to coat; simmer for another minute before serving.

Pro Tips for an Amazing Stir Fry

Juicy chicken stir fry with vibrant vegetables cooked in a glossy sauce.

Want to take your chicken stir fry to the next level? Here are some expert insights:

  • Prep Before Cooking: Have all your ingredients chopped and ready to go. Stir-frying happens quickly!
  • High Heat is Key: Use medium-high to high heat to get that beautiful sear on your chicken.
  • Don’t Crowd the Pan: Cook in batches if necessary, so each piece gets that lovely crispness.
  • Fresh Ingredients Matter: Use the freshest veggies you can find for the best flavor and texture.
  • Experiment with Sauces: Try adding teriyaki sauce or a splash of chili oil for a unique twist.
  • Cook in Order: Start with the chicken, then the veggies, to ensure everything cooks perfectly.
  • Garnish for Flavor: Top with sesame seeds or green onions for an extra touch of flavor.
  • Check for Doneness: Make sure the chicken is cooked through—no one likes undercooked poultry!

Common Mistakes and Troubleshooting

Even the best of us can make a mistake in the kitchen. Here are some common pitfalls and how to avoid them:

  • Overcooked Chicken: Keep an eye on the chicken; it should be juicy and tender, not dry.
  • Too Much Sauce: Start with less sauce; you can always add more if needed.
  • Underseasoned Vegetables: Don’t forget to season your veggies as they cook for maximum flavor.
  • Burnt Garlic: Add garlic towards the end of cooking; it burns quickly and can ruin the dish.

Variations to Try

This recipe is incredibly versatile. Here are some fun variations to keep things interesting:

  • Spicy Chicken Stir Fry: Add red pepper flakes or sriracha for a kick.
  • Teriyaki Chicken Stir Fry: Substitute teriyaki sauce for soy sauce for a sweeter flavor.
  • Vegetable-Heavy Stir Fry: Add more veggies like snap peas, zucchini, or mushrooms for a hearty option.
  • Protein Swap: Use shrimp, beef, or tofu instead of chicken for a different taste and texture.

Storing and Make-Ahead Instructions

If you want to prep this meal in advance, here’s how to store it:

  • Refrigeration: Store leftovers in an airtight container in the fridge for up to 3 days.
  • Freezing: This stir fry can be frozen for up to 2 months. Just make sure to cool it completely before packing.
  • Reheating: Reheat on the stovetop over medium heat, adding a splash of water or broth to keep it moist.

Nutrition Tips and Dietary Adaptations

Looking for a healthier twist? Here are some tips:

  • Low-Sodium Soy Sauce: Use low-sodium soy sauce to reduce salt intake.
  • Whole Grain Options: Serve with brown rice or quinoa instead of white rice for added fiber.
  • Gluten-Free: Use tamari sauce instead of soy sauce for a gluten-free option.
  • Vegetarian: Substitute chicken with tofu or tempeh for a plant-based option.

Equipment Recommendations

To make your cooking experience smoother, consider having the following tools on hand:

  • Wok or Large Skillet: Essential for even cooking and high heat.
  • Sharp Knife: For easy and precise chopping of your ingredients.
  • Cutting Board: A sturdy cutting board will make prepping easier.
  • Measuring Cups and Spoons: Accurate measurements ensure the right balance of flavors.

Serving Suggestions

Serve this delightful chicken stir fry over:

  • Steamed Rice: Traditional and comforting.
  • Brown Rice: A healthier alternative that pairs well.
  • Quinoa: For a protein-packed gluten-free option.
  • Rice Noodles: A delicious vehicle for your stir fry goodness.

Frequently Asked Questions (FAQs)

Got questions? We’ve got answers!

  • Can I use frozen vegetables for this stir fry? Yes, frozen veggies are a convenient option and can save time, just add them straight to the pan.
  • How do I make my chicken stir fry healthier? Use lean chicken, low-sodium sauces, and load up on a variety of colorful vegetables.
  • What type of chicken is best for stir fry? Boneless, skinless chicken breasts or thighs work best for their tenderness and quick cooking time.
  • Can I prepare this dish ahead of time? Absolutely! You can chop the veggies and marinate the chicken a day in advance.
  • What can I serve with chicken stir fry? This dish pairs beautifully with rice, noodles, or even on its own as a light meal.
  • How can I add more flavor to my stir fry? Consider adding fresh herbs, citrus zest, or a splash of vinegar to brighten the flavor.
  • Can I make this a vegetarian dish? Yes, simply swap out the chicken for tofu or a mix of your favorite vegetables.
  • Is this chicken stir fry gluten-free? Use tamari instead of soy sauce to make it gluten-free.

Now, friends, as you gather your ingredients and prepare to create this wholesome chicken stir fry, remember that cooking is about love and sharing moments. So, grab your loved ones, enjoy the process, and savor every bite. Happy cooking!

Chicken Stir Fry with Vegetables

Prep Time 10 minutes
Cook Time 10 minutes
Total Time 20 minutes
Servings 4 servings
Calories 350
A quick and flavorful chicken stir fry packed with colorful vegetables and a savory sauce, perfect for a healthy weeknight dinner.

Ingredients

Protein

  • 1 pound boneless, skinless chicken breasts

Vegetables

  • 2 cups broccoli florets
  • 1 cup bell peppers (mixed colors)
  • 1 cup carrots (thinly sliced)

Flavorings & Sauces

  • 3 cloves fresh garlic (minced)
  • 3 tablespoons low-sodium soy sauce
  • 1 tablespoon sesame oil
  • 1 tablespoon honey or sugar

Seasoning

  • to taste Salt and pepper

Instructions 

  • Slice chicken and chop vegetables.
  • Heat oil in a skillet; cook chicken until golden, season with salt and pepper.
  • Add vegetables; stir-fry until tender-crisp.
  • Mix soy sauce, sesame oil, honey, and garlic; pour over stir-fry.
  • Stir well and cook for another minute before serving.

Notes

For extra flavor, garnish with sesame seeds or chopped green onions.
Calories: 350kcal
Cost: $15
Course: Main Course
Cuisine: Asian
Keyword: chicken, Vegetables

Creating Comfort Food Magic at Home

Welcome to the heart of home cooking! Here, we dive into the warm embrace of comfort food, specifically focusing on how to make scrumptious chicken dishes using your Instant Pot, Slow Cooker, and Air Fryer. Whether it’s a busy weeknight or a cozy weekend gathering, these methods allow you to create meals that not only satisfy the hunger but also nourish the soul. Let’s explore the joy of cooking chicken in a way that feels as good as it tastes.

Why You’ll Love This Recipe

Cooking chicken can be a delightful experience, especially when you know the benefits of using these handy appliances. Here’s why you’ll fall in love with this approach:

  • Versatile Cooking Methods: Whether you prefer the speed of the Instant Pot, the slow, rich flavors from the Slow Cooker, or the crispy finish from the Air Fryer, you’ll find the perfect fit for your cooking style.
  • Time-Saving: These appliances allow you to get meals on the table quicker, freeing up time for you to enjoy with family or friends.
  • Consistent Results: Each method ensures your chicken comes out juicy and flavorful, eliminating the guesswork.
  • Healthier Options: Reduce the need for excess oil and fats without sacrificing flavor, making your meals healthier while still being delicious.
  • Easily Scalable: Perfect for everything from a family dinner to a gathering of friends, you can adjust quantities without hassle.

What You Will Need

Let’s gather our ingredients and tools for a delightful journey into comfort food. Here’s what you’ll need to get started:

  • Instant Pot: For quick pressure cooking and tender results.
  • Slow Cooker: For deep flavors and minimal fuss.
  • Air Fryer: For crispy, golden-brown chicken without the frying.

Ingredient Breakdown

A mouth-watering home-cooked meal displayed in a cozy kitchen setting with bright ingredients.

Here’s a detailed look at the ingredients you can use, along with some helpful substitutions:

  • Chicken: You can use thighs, breasts, or wings. Thighs provide more flavor and moisture, while breasts are leaner.
  • Seasonings: Salt, pepper, garlic powder, paprika—these staples add depth. You can also experiment with herbs like rosemary or thyme.
  • Liquids: Chicken broth enhances flavor, but you can also use white wine or even a splash of apple cider vinegar for a tangy twist.
  • Vegetables: Carrots, potatoes, and onions are great additions for added nutrition and flavor.
  • Substitutions: If you’re looking for healthier options, consider using skinless chicken or swapping out regular potatoes for sweet potatoes.

How to Make Comfort Food Chicken

Now, let’s get into the steps for creating your chicken dish using each appliance:

Using the Instant Pot

1. Season your chicken with salt, pepper, and your choice of spices.

2. Add a cup of broth or water to the pot and place the chicken inside.

3. Seal the lid and cook on high pressure for 10-15 minutes, depending on the cut.

4. Allow for natural release for 5 minutes, then quick release any remaining pressure.

Using the Slow Cooker

1. Place your seasoned chicken in the slow cooker with vegetables and broth.

2. Cover and cook on low for 6-8 hours or high for 4-5 hours until the chicken is tender.

Using the Air Fryer

1. Preheat the air fryer to 375°F (190°C).

2. Lightly coat the chicken with oil and seasoning.

3. Place in the basket and cook for 25-30 minutes, flipping halfway through for even cooking.

Pro Tips for Perfect Chicken

Here are some expert insights to elevate your chicken game:

  • Resting Time: Always let your chicken rest for a few minutes before cutting into it. This helps retain the juices.
  • Flavor Infusion: Marinate your chicken overnight for maximum flavor.
  • Don’t Overcrowd: If using the Air Fryer, make sure to leave space for air circulation.
  • Check Internal Temperature: Ensure your chicken reaches an internal temperature of 165°F (75°C) for safety.
  • Experiment with Sauces: Try pairing with honey garlic sauce or barbecue for added flavor.
  • Use Bone-In Chicken: This will yield juicier results compared to boneless cuts.
  • Layer Flavors: Add garlic and onions at the bottom of the pot for more depth.
  • Don’t Skip the Browning: For the Slow Cooker, browning the chicken first adds a wonderful flavor.

Common Mistakes and Troubleshooting

Even the most seasoned cooks can make mistakes. Here’s how to avoid them:

  • Overcooking: Keep a close eye on cooking times—overcooked chicken can dry out quickly.
  • Not Using Enough Liquid: If the chicken looks dry after cooking, you may not have added enough liquid.
  • Skipping the Seasoning: Don’t forget to season your chicken before cooking; unseasoned chicken is bland.

Variations to Try

Feeling adventurous? Here are some delicious variations to experiment with:

  • Honey Garlic Chicken: Mix soy sauce, honey, and minced garlic for a sweet glaze.
  • Lemon Herb Chicken: Add lemon juice and fresh herbs for a bright, zesty flavor.
  • Buffalo Chicken Wings: Toss your wings in buffalo sauce before serving for a spicy kick.
  • BBQ Chicken: Slather your chicken in your favorite barbecue sauce during the last few minutes of cooking.

Storage and Make-Ahead Instructions

If you want to prepare ahead of time or store leftovers, here’s how:

  • Refrigeration: Store cooked chicken in an airtight container for up to 3-4 days.
  • Freezing: Freeze portions in freezer bags for up to 3 months. Thaw in the refrigerator before reheating.
  • Make-Ahead: You can prepare the chicken seasoning and marinate it a day in advance for deeper flavor.

Frequently Asked Questions

Here’s a roundup of common questions about cooking chicken:

  • Can I cook frozen chicken in the Instant Pot? Yes, just increase the cooking time by a few minutes.
  • What’s the best way to reheat chicken? Use the oven or air fryer to maintain crispiness.
  • How do I know when chicken is done? Use a meat thermometer to ensure it reaches 165°F (75°C).
  • Can I use chicken breast instead of thighs? Absolutely, but keep an eye on the cooking time as breasts cook faster.
  • What are some good sides to serve? Mashed potatoes, green beans, or a fresh salad pair wonderfully.
  • How can I make chicken more flavorful? Marinades and rubs are great ways to infuse flavor.
  • Is it safe to cook chicken with vegetables? Yes, just ensure the chicken cooks to the proper temperature.
  • Can I use other meats in these recipes? Certainly! These methods work well with pork, beef, or even tofu.

Nutritional Tips and Dietary Adaptations

Cooking chicken can be healthy and adaptable to various diets:

  • Low-Carb: Pair with non-starchy vegetables like broccoli or zucchini.
  • Gluten-Free: Use gluten-free sauces and seasonings.
  • High-Protein: Chicken is naturally high in protein, making it a great option for muscle repair and growth.

Equipment Recommendations

Investing in the right kitchen tools can elevate your cooking experience:

  • Instant Pot: Look for a model with multiple functions for added versatility.
  • Slow Cooker: Choose one with a timer, so you can set it and forget it.
  • Air Fryer: A compact model is great for smaller kitchens without sacrificing performance.

Serving Suggestions

Finish off your meal with these delightful serving ideas:

  • With Fresh Herbs: Garnish your dish with chopped parsley or cilantro for a fresh touch.
  • Over Rice or Quinoa: Serve your chicken over a bed of rice or quinoa for a complete meal.
  • With a Side Salad: A crisp salad balances the richness of the chicken.

Conclusion

Cooking chicken doesn’t have to be complicated or stressful. With the right methods and a sprinkle of love, you can create meals that are not just delicious but also comforting. So gather your ingredients, fire up your appliances, and get ready to enjoy the simple magic of home-cooked chicken. Remember, it’s all about good food, good company, and creating memories around the table. Happy cooking!

Home

Prep Time 10 minutes
Cook Time 30 minutes
Total Time 40 minutes
Servings 4 servings
Calories 250
A versatile recipe that can be prepared using an Instant Pot, Slow Cooker, or Air Fryer, perfect for quick and easy meals.

Ingredients

Equipment

  • 1 unit Instant Pot
  • 1 unit Slow Cooker
  • 1 unit Air Fryer

Instructions 

  • Choose your preferred cooking appliance and prepare ingredients accordingly.
  • Follow the specific instructions for each appliance to cook the meal.
  • Ensure the dish is cooked through and ready to serve.

Notes

This recipe is flexible and can be adapted to your preferred kitchen appliance for convenience.
Calories: 250kcal
Cost: $15
Course: Main Course
Cuisine: American
Keyword: Versatile

Discover the Heart of Home Cooking with Chicken Thighs and Rice

Ah, chicken and rice—a timeless combination that warms the soul and nourishes the body. This comforting dish is not just a meal; it’s a journey through memories, flavors, and family traditions. In this guide, I’ll walk you through my cherished recipe for Chicken Thighs and Rice, a rustic and hearty dish that brings the family together around the table. In the next 1500+ words, we’ll explore everything from ingredients and cooking methods to variations and storage tips. Let’s dive in and make something delicious!

Why You’ll Love This Recipe

This chicken thighs and rice recipe is designed with love and simplicity, making it perfect for any occasion. Here are just a few reasons why it will become a staple in your kitchen:

  • Family-Friendly: Even the pickiest eaters will enjoy this meal, making it a hit for family dinners.
  • Easy to Prepare: With straightforward steps, you can whip up this dish in no time, perfect for busy weeknights.
  • One-Pan Wonder: This recipe cooks everything in one pan, reducing cleanup and allowing flavors to meld beautifully.
  • Versatile Ingredients: You can easily customize it with your favorite veggies or spices, making it adaptable to your pantry.
  • Comforting Flavor: The tender chicken thighs and aromatic rice create a dish that feels like a warm hug on a plate.

Ingredients Breakdown

Let’s gather our ingredients for this delightful chicken thighs and rice dish. Here’s what you’ll need:

  • Chicken Thighs: 8 boneless, skin-on or skinless. The skin adds flavor and moisture. You can also substitute with chicken breasts if preferred.
  • Seasoning: Salt and black pepper to taste, along with 1 teaspoon paprika for an extra kick.
  • Olive Oil and Butter: 1 tablespoon each, for searing and flavor.
  • Aromatics: 1 diced yellow or white onion and 3 cloves of minced garlic (or 1 teaspoon garlic powder) to build a rich base.
  • Rice: 1 ½ cups of long-grain white rice, which pairs perfectly with the chicken.
  • Chicken Broth: 3 cups, enhancing the dish with savory goodness.
  • Onion and Garlic Powder: 1 teaspoon each, for depth of flavor.
  • Fresh Parsley: 2 tablespoons minced, plus more for garnish, adding a touch of color and freshness.

These ingredients combine to create a dish that is not only filling but also bursting with flavor. Feel free to substitute with your favorite herbs or spices to make it your own!

Step-by-Step Directions

Close-up view of golden-brown chicken thighs with rice and garnished with parsley.

Now that we have our ingredients ready, let’s get cooking. Follow these simple steps to prepare a delightful chicken thighs and rice dish:

  1. Pat chicken thighs dry and season generously with salt, pepper, and paprika on both sides.
  2. In a deep skillet or Dutch oven, heat olive oil over medium-high heat. Sear the chicken for 4–5 minutes on each side until golden brown. Remove the chicken and cover with foil to keep warm.
  3. In the same pan, melt the butter. Add the diced onion and sauté until softened, about 3 minutes. Then, stir in the minced garlic and cook for another 30 seconds.
  4. Add the rice to the pan and toast it for 1 minute, stirring constantly to avoid burning.
  5. Pour in the chicken broth, scraping up any browned bits from the bottom of the pan. Stir in onion powder, garlic powder, and parsley.
  6. Return the chicken to the pan, nestling it into the rice. Bring everything to a boil, then reduce the heat to low, cover, and let simmer for 20–25 minutes or until the rice is tender and the chicken is fully cooked.
  7. Remove from heat and let it rest for 5 minutes. Garnish with extra parsley, and your delightful dish is ready to be served!

Pro Tips for Success

To ensure your chicken thighs and rice turn out perfect every time, here are some expert insights:

  • Use Bone-In Thighs: For richer flavor, consider using bone-in chicken thighs. Just increase the cooking time by about 10 minutes.
  • Perfectly Toasted Rice: Toasting the rice before adding the broth enhances its nutty flavor, making the dish even more delicious.
  • Let it Rest: Allowing the dish to rest after cooking helps the flavors meld and makes serving easier.
  • Check for Doneness: Ensure the chicken reaches an internal temperature of 165°F (75°C) for safety.
  • Adjust Liquid as Needed: Depending on your rice type, you might need to adjust the broth quantity—always check package instructions.
  • Add Vegetables: For a complete meal, stir in vegetables like peas, carrots, or bell peppers during the last few minutes of cooking.
  • Experiment with Herbs: Fresh herbs like thyme or rosemary can elevate the flavors—don’t hesitate to get creative!
  • Leftover Makeover: Use leftover chicken and rice to create a hearty soup by adding more broth and vegetables.

Common Mistakes and Troubleshooting

Even the best of us can run into hiccups while cooking. Here are some common mistakes to watch out for:

  • Overcooking the Chicken: Keep an eye on your chicken to avoid drying it out. Thighs are forgiving, but check for doneness.
  • Undercooked Rice: If your rice remains hard after the cooking time, add a splash more broth and cover, cooking for a few more minutes.
  • Too Much Liquid: If the dish is too soupy, uncover and cook on low heat for a few minutes to evaporate excess liquid.
  • Skipping the Searing Step: Don’t skip searing the chicken; it adds depth of flavor and a beautiful golden color.

Variations to Try

This chicken thighs and rice dish is wonderfully adaptable. Here are some variations to consider:

  • Herb Infusion: Add fresh thyme or rosemary to the chicken broth for a fragrant twist.
  • Spicy Kick: Stir in a teaspoon of cayenne pepper or red pepper flakes for heat.
  • Creamy Delight: Add a splash of heavy cream towards the end of cooking for a richer, creamier texture.
  • Vegetarian Option: Swap chicken for chickpeas or tofu and use vegetable broth for a hearty vegetarian meal.

Storage and Make-Ahead Instructions

This dish is perfect for meal prep and leftovers:

  • Storage: Store leftovers in an airtight container in the fridge for up to 3 days.
  • Freezing: This chicken thighs and rice dish can be frozen for up to 2 months. Ensure it’s fully cooled before transferring to freezer-safe containers.
  • Reheating: Gently reheat in the microwave or on the stovetop, adding a splash of broth to keep it moist.
  • Make Ahead: Prepare the base (rice and broth mixture) a day ahead and add cooked chicken when ready to serve.

Comprehensive FAQ

Here are some frequently asked questions to help you navigate this recipe:

  • Can I use brown rice instead? Yes, but brown rice requires more liquid and a longer cooking time—check package instructions.
  • What if I don’t have chicken broth? You can substitute with water, but broth adds a richer flavor.
  • Can I cook this in a slow cooker? Absolutely! Just sauté the chicken and aromatics first, then transfer everything to the slow cooker and cook on low for 4-6 hours.
  • Is it okay to use frozen chicken? Yes, just ensure it’s fully thawed before cooking for even cooking.
  • How can I make it gluten-free? Ensure your chicken broth is gluten-free and check all spices and condiments for gluten.
  • Can I double the recipe? Yes, just use a larger pot and ensure everything fits comfortably.
  • How do I know when the chicken is done? Use a meat thermometer; chicken should reach an internal temperature of 165°F (75°C).
  • What sides go well with this dish? Consider serving it with a simple salad or steamed vegetables to balance the meal.

Nutrition Tips and Dietary Adaptations

Cooking for different dietary needs? Here are some helpful tips:

  • Low-Calorie Option: Use skinless chicken thighs and reduce oil for a lighter meal.
  • Whole Grain Choice: Opt for brown rice or quinoa for added fiber and nutrients.
  • Vegetarian Adaptation: Replace chicken with hearty vegetables or legumes for a satisfying vegetarian dish.
  • Low-Sodium Variation: Use low-sodium broth and season to taste to control salt intake.

Recommended Equipment

To make this recipe a breeze, here are a few essential kitchen tools:

  • Deep Skillet or Dutch Oven: Provides even heat distribution for perfect cooking.
  • Meat Thermometer: Ensures your chicken reaches safe temperatures.
  • Wooden Spoon: Great for stirring without scratching your cookware.
  • Measuring Cups and Spoons: For precise ingredient measurements, ensuring consistent results.

Serving Suggestions

Once your chicken thighs and rice are ready, let’s talk presentation:

  • Fresh Herbs: Garnish with extra parsley or even a sprinkle of thyme for flair.
  • Accompany with Salad: A light green salad with a tangy vinaigrette complements the richness of the dish.
  • Pair with Bread: Serve with crusty bread to soak up the delicious juices.
  • Wine Pairing: A light white wine, like Sauvignon Blanc, pairs beautifully with this dish.

Conclusion

Cooking is all about love, patience, and the joy of sharing good food with those we care about. This Chicken Thighs and Rice recipe embodies those principles, bringing warmth and comfort to your table. Whether it’s a family gathering or a quiet evening at home, this dish is sure to satisfy. So roll up your sleeves, gather your loved ones, and enjoy the simple pleasure of home-cooked goodness. Happy cooking!

Chicken Thighs and Rice

Prep Time 10 minutes
Cook Time 30 minutes
Total Time 40 minutes
Servings 4 servings
Calories 550
A flavorful one-pan dish featuring tender chicken thighs cooked with aromatic rice and herbs, perfect for a satisfying meal.

Ingredients

Protein

  • 8 pieces boneless chicken thighs (skin-on or skinless)
  • 1 teaspoon salt (to taste)
  • 1 teaspoon black pepper (to taste)
  • 1 teaspoon paprika
  • 1 tablespoon olive oil
  • 1 tablespoon unsalted butter
  • 1 piece yellow or white onion (diced)
  • 3 cloves garlic (minced or 1 teaspoon garlic powder)
  • 1.5 cups long-grain white rice
  • 3 cups chicken broth
  • 1 teaspoon onion powder
  • 1 teaspoon garlic powder
  • 2 tablespoons fresh parsley (minced, plus more for garnish)

Instructions 

  • Pat chicken dry and season with salt, pepper, and paprika.
  • Heat oil, sear chicken 4–5 mins per side, then cover with foil.
  • Melt butter, sauté onion until soft, add garlic, cook 30 sec.
  • Add rice, toast 1 min, then pour in broth, add seasonings, and stir.
  • Return chicken, bring to boil, reduce heat, cover, simmer 20–25 mins.
  • Rest 5 mins, garnish with parsley, then serve.

Notes

Ensure rice is fully cooked and chicken reaches an internal temperature of 165°F (74°C).
Calories: 550kcal
Cost: $15
Course: Main Course
Cuisine: American
Keyword: chicken, rice