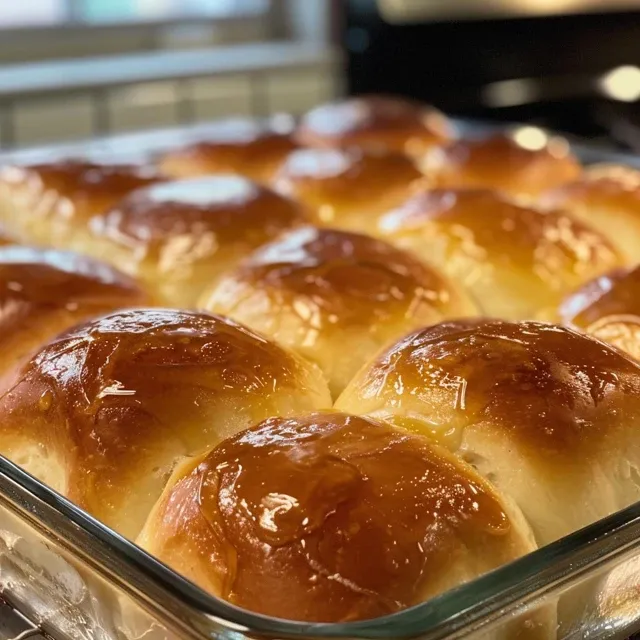
When it comes to bringing family and friends together, nothing warms the heart like a basket of freshly baked dinner rolls. These soft, fluffy creations are the perfect companions to any meal, transforming a simple dinner into a cherished gathering. In this guide, we’ll dive deep into the art of making homemade dinner rolls that not only taste amazing but also evoke fond memories of shared meals and laughter. Let’s get started!
Why You’ll Love This Recipe
This dinner roll recipe is more than just a list of ingredients and steps. It’s a heartfelt invitation to create something special in your kitchen. Here are some specific benefits that make this recipe a must-try:
- Fluffy texture: Achieve the perfect lightness by using warm milk and rapid-rise yeast, which helps the rolls rise beautifully.
- Simple ingredients: With just a handful of pantry staples, you can whip up these rolls without any fuss.
- Versatile serving options: These rolls pair wonderfully with soups, salads, or as a stand-alone treat with butter.
- Make-ahead friendly: Prepare the dough in advance or freeze the rolls for effortless entertaining.
- Customizable flavors: Experiment with add-ins like herbs, cheese, or spices to match your meal perfectly.
Essential Ingredients for Dinner Rolls
Let’s break down the ingredients you’ll need to create these delightful rolls. Each component plays a vital role in ensuring your rolls are soft, flavorful, and downright irresistible.
- All-purpose flour: 4 to 5 cups. This forms the base and gives the rolls their structure. Use bread flour for even more chewiness.
- Rapid rise instant yeast: 2 tablespoons. This helps the dough rise quickly for that light texture.
- Granulated sugar: One-third cup. Adds a hint of sweetness and feeds the yeast, ensuring a good rise.
- Salt: 1 teaspoon. Balances the flavors and enhances the overall taste of the rolls.
- Warm milk: 1 and one-half cups heated to 110 degrees Fahrenheit. Provides moisture and richness for soft rolls.
- Softened butter: 5 tablespoons. Adds tender, buttery goodness to the dough.
- Egg: 1 at room temperature. Helps bind the ingredients and adds a nice lift to the rolls.
- Melted butter: 2 tablespoons for brushing. Gives the tops a shiny finish and extra flavor.
How to Prepare the Perfect Dinner Rolls: Step-by-Step Guide
Now that you have your ingredients ready, it’s time to roll up your sleeves and get baking! Follow these simple steps for a delightful outcome.
- Start by gathering your ingredients and setting up your workspace. Make sure your warm milk is at just the right temperature to activate the yeast properly. This sets the stage for fluffy, delicious results.
- Slowly add the warm milk, softened butter, and egg, stirring to form a rough dough. The mixture should come together nicely before you move on.
- If you have a stand mixer, use the dough hook to save time. Let the dough rise in a greased bowl covered with a cloth in a warm spot for around an hour, or until it doubles in size.
- Divide it into equal portions and shape them into rolls of your preferred size. Place them on a greased baking tray, cover again, and let them rise for another 30 minutes.
- Bake for 15-20 minutes until they’re nicely browned. Let them cool a bit before serving, and feel free to adjust for dietary tweaks like vegan swaps.
Pro Tips for Perfecting Your Dinner Rolls
To really master the art of dinner roll making, consider these expert tips. They’ll help you avoid common pitfalls and elevate your rolls to the next level!
- Use the right temperature: Ensure your warm milk is about 110°F. Too hot and you’ll kill the yeast; too cold and it won’t activate.
- Knead thoroughly: Invest a good 8-10 minutes in kneading the dough to develop gluten, which gives the rolls their structure.
- Let it rise: Don’t rush the rising process. Patience is key to achieving those fluffy rolls.
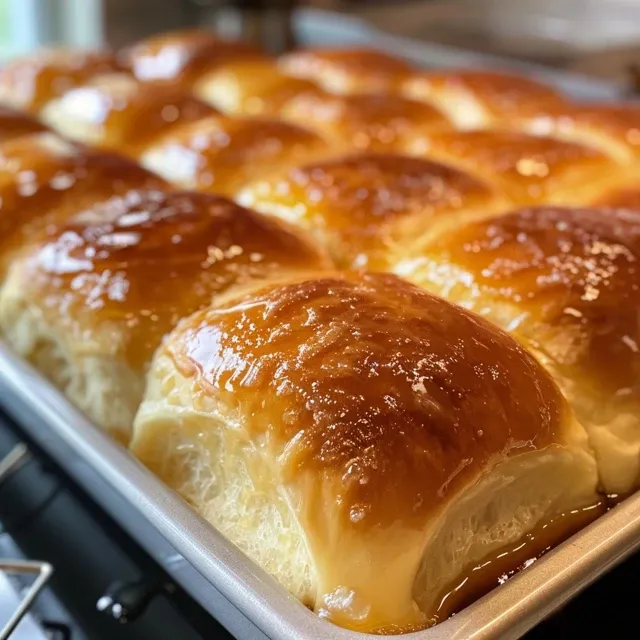
- Brush with butter: For a beautiful golden crust, brush the tops with melted butter right after baking.
- Check for doneness: The rolls should be golden brown and sound hollow when tapped on the bottom.
- Experiment with flavors: Try adding garlic powder, herbs, or cheese to the dough for a unique twist.
- Keep dough covered: Prevent the dough from drying out by keeping it covered during the rising process.
- Storing rolls: Store leftover rolls in an airtight container, and reheat in the oven for a few minutes to regain softness.
Common Mistakes and Troubleshooting
Even the best of us can encounter issues when baking. Here are some common mistakes and how to avoid them:
- Dough is too sticky: If your dough is overly sticky, gradually add more flour until it reaches a workable consistency.
- Rolls are dense: This could be due to expired yeast or not kneading enough. Always check the freshness of your yeast before starting.
- Overbaking: Keep an eye on your rolls as they bake. Every oven is different, so check for doneness a few minutes early.
- Not enough rise: If your rolls didn’t rise properly, check the temperature of your environment. Yeast needs warmth to thrive.
Variations to Try
Feeling adventurous? Here are a few variations to personalize your dinner rolls:
- Garlic Herb Rolls: Add minced garlic and mixed herbs to the dough for a fragrant twist.
- Cinnamon Sugar Rolls: Swirl in a mixture of cinnamon and sugar before shaping into rolls for a sweet treat.
- Cheese-Stuffed Rolls: Insert small chunks of your favorite cheese in the center before shaping the rolls.
- Whole Wheat Rolls: Substitute half the all-purpose flour with whole wheat flour for a heartier option.
Storage and Make-Ahead Instructions
Planning ahead? Here’s how to make your baking experience smoother:
- Storing leftovers: Keep rolls in an airtight container at room temperature for up to 3 days.
- Freezing: Freeze cooled rolls in a zip-lock bag for up to 3 months. Reheat in the oven for best results.
- Make-ahead dough: Prepare the dough and let it rise, then shape the rolls and refrigerate overnight. Allow them to come to room temperature before baking.
Frequently Asked Questions
Got questions? We’ve got answers! Here are some frequently asked questions about dinner rolls:
- Can I use whole wheat flour? Yes, you can substitute part of the all-purpose flour with whole wheat flour for a healthier option.
- What if my dough doesn’t rise? Ensure your yeast is fresh and your environment is warm. You may need to give it more time.
- How can I make these rolls dairy-free? Use almond milk or another plant-based milk and substitute the butter with a dairy-free alternative.
- Is it necessary to knead the dough? Yes, kneading develops gluten, crucial for the structure of the rolls.
- How do I reheat leftover rolls? Wrap them in foil and bake in a preheated oven at 350°F for 10-15 minutes.
- Can I add fillings to the rolls? Absolutely! Cheese, herbs, or even cooked meats can be added for a delightful surprise.
- What’s the best way to serve dinner rolls? Serve warm with butter spread on top. They’re also great for dipping in soups or sauces.
- How do I know when the rolls are done? They should be golden brown and sound hollow when tapped on the bottom.
Nutrition Tips and Dietary Adaptations
Making healthier choices doesn’t mean sacrificing flavor. Here are some tips for a more nutritious roll:
- Reduce sugar: You can cut down on sugar for a less sweet roll without affecting texture.
- Use whole grains: Incorporate whole grain flours for added fiber and nutrients.
- Monitor portion sizes: Enjoy rolls in moderation as part of a balanced meal.
Equipment Recommendations
To make the process smoother, here are some kitchen tools that can help:
- Stand mixer: A stand mixer with a dough hook will save you time and effort in kneading.
- Baking sheets: Use heavy-duty baking sheets for even heat distribution while baking.
- Measuring cups and spoons: Accurate measurements are key to successful baking.
- Kitchen thermometer: This ensures your milk is at the perfect temperature for yeast activation.
Serving Suggestions
These dinner rolls can shine in various settings. Here are some creative serving suggestions:
- With soups: Serve alongside your favorite soups for a comforting meal.
- As sliders: Use the rolls to create delicious sliders filled with meats or veggies.
- Brunch addition: Pair them with eggs and bacon for a delightful brunch spread.
Final Thoughts
Creating homemade dinner rolls is more than just a cooking task; it’s an opportunity to bring warmth and love to your table. With this comprehensive guide, you’re equipped to bake rolls that not only taste incredible but also become a beloved part of your family tradition. So, roll up your sleeves, gather your ingredients, and let’s bake some memories together! Happy baking!
Dinner Rolls
Ingredients
Dough
- 4 cups all-purpose flour (This forms the base and gives the rolls their structure.)
- 2 tablespoons rapid rise instant yeast (Helps the dough rise quickly for that light texture.)
- 0.33 cup granulated sugar (Adds a hint of sweetness and feeds the yeast.)
- 1 teaspoon salt (Balances the flavors and enhances the overall taste.)
- 1.5 cups warm milk (Heated to 110°F to activate the yeast.)
- 5 tablespoons softened butter (Adds tender, buttery goodness to the dough.)
- 1 egg at room temperature (Helps bind the ingredients and adds a nice lift.)
- 2 tablespoons melted butter (For brushing tops for shine and flavor.)
Instructions
- Gather ingredients and warm the milk to 110°F.
- Mix warm milk, softened butter, and egg; add flour, yeast, sugar, and salt to form a dough.
- Let the dough rise in a greased bowl covered in a warm spot for 1 hour.
- Divide dough into portions, shape into rolls, place on a greased tray, and let rise for 30 minutes.
- Bake at 375°F (190°C) for 15-20 minutes until golden brown. Brush with melted butter before serving.