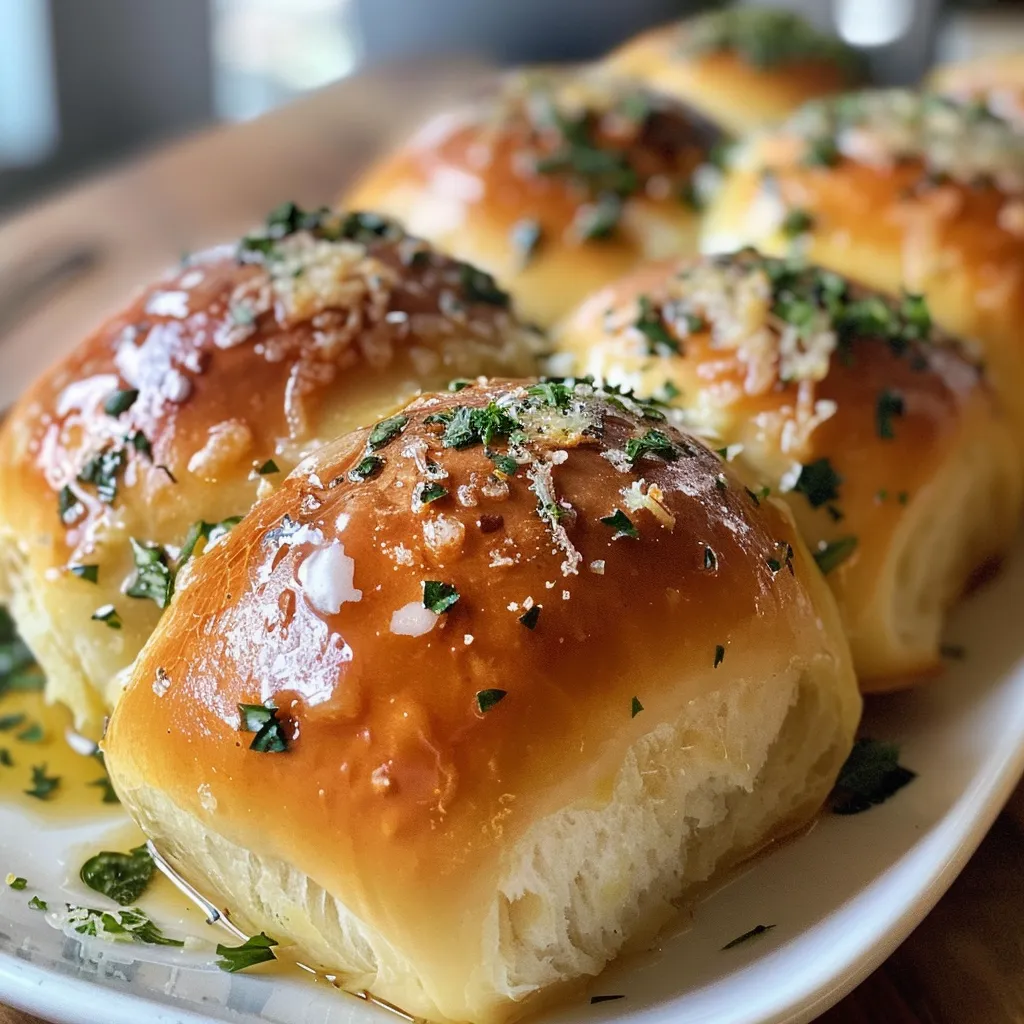
Discover the Heartwarming Joy of Garlic Butter Dinner Rolls
There’s something truly special about gathering around a warm meal that brings family and friends together. One of the most comforting and inviting additions to any dinner table is a basket of fresh, warm *garlic butter dinner rolls*. These rolls are not just a side dish; they’re an experience—soft, fluffy, and infused with the rich flavors of garlic and butter that make every bite a delight. In this comprehensive guide, we’ll walk through everything you need to know about making these irresistible rolls at home, from the ingredients to pro tips and troubleshooting advice. Let’s dive in!
Why You’ll Love This Recipe
Let’s take a moment to explore what makes these garlic butter dinner rolls so special:
- Incredible Fluffiness: These rolls are designed to be soft and airy, thanks to the careful kneading and rising processes.
- Simple Ingredients: Made with pantry staples like flour, yeast, and milk, you can whip them up anytime without special shopping trips.
- Irresistibly Flavorful: The garlic butter glaze takes these rolls to the next level, adding a savory punch that complements any meal.
- Perfect for Sharing: Ideal for family gatherings, holidays, or just a cozy dinner, they are a hit with everyone.
- Beginner-Friendly: With straightforward steps and helpful tips, even novice bakers can master these rolls with ease.
Gather Your Essentials: Ingredients for Irresistibly Soft Rolls
Before you begin, let’s break down the ingredients needed for your garlic butter dinner rolls and discuss possible substitutions:
- 1 cup whole milk (240g), warm (around 110°F): This helps activate the yeast. You can substitute with almond milk or any plant-based milk if dairy-free.
- 3 teaspoons active dry yeast or instant yeast: This is essential for making the rolls rise. If you use instant yeast, no need to activate it beforehand.
- 1/3 cup sugar (70g): Adds a touch of sweetness that balances the savory garlic. Consider using honey or maple syrup as alternatives.
- 3 3/4 cup all-purpose flour (490g): For the structure of the rolls. Whole wheat flour can be used for a healthier option, but you may need to adjust the liquid.
- 1 large egg: This enriches the dough and gives it a beautiful golden color. For egg-free rolls, you can use a flax egg (1 tbsp ground flaxseed + 3 tbsp water).
- 1.5 teaspoons salt: Enhances flavor. Sea salt or kosher salt works well too.
- 6 tbsp unsalted butter, softened at room temperature (85g): Adds richness to the dough. You can use vegan butter for a dairy-free version.
- Egg wash: 1 egg yolk and 1 tbsp milk: Gives the rolls a shiny finish. You can replace this with milk or a dairy-free alternative for a vegan wash.
- 1/4 cup salted butter (57g): For the garlic butter glaze.
- 2-3 garlic cloves, finely chopped: The star of our flavor. Feel free to adjust based on your garlic preference.
- 1-2 tbsp freshly chopped parsley: Adds freshness and color.
Step-by-Step Guide: Crafting Your Classic Garlic Butter Dinner Rolls
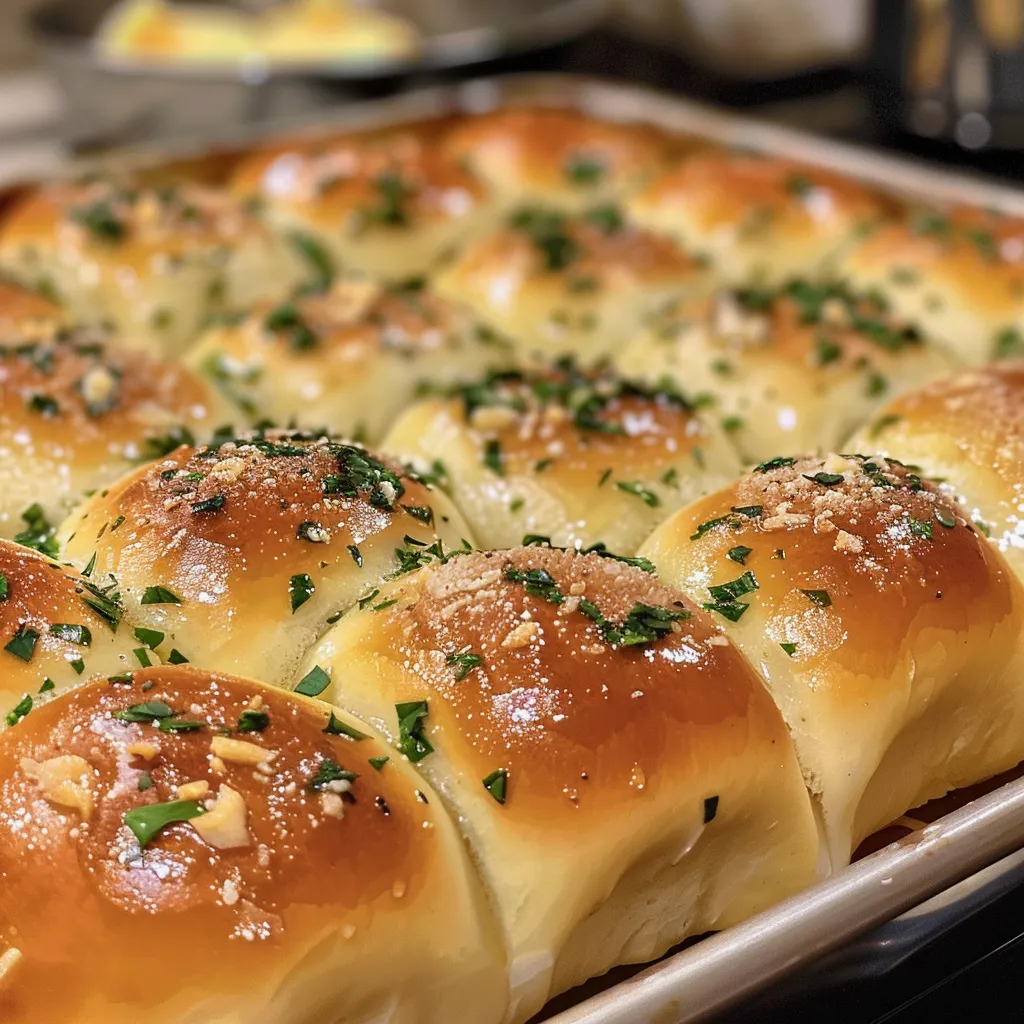
Now, let’s get into the heart of the matter: how to make these delightful rolls from scratch. Follow these steps for success:
- In a large bowl, stir together the warm milk with the yeast. Allow it to sit for about 5-10 minutes until frothy.
- Add all the other ingredients for the dinner rolls into the same bowl: sugar, flour, egg, salt, and softened butter.
- Use a large spoon or your hands to mix until everything comes together and forms a shaggy dough.
- Turn the dough out onto a clean surface and knead with a push-pull motion using your palms for about 15 minutes. The dough will be sticky at first, but it will become smooth and elastic; don’t be tempted to add more flour. You’ll know it’s ready when it passes the window-pane test—stretch a piece of dough until it’s almost transparent without tearing.
- Transfer the kneaded dough to a clean bowl sprayed lightly with oil. Cover it with cling wrap and place it in a warm, humid spot to rise until it doubles in size, which usually takes around 90 minutes.
- Once risen, punch the dough down gently to release the air. Turn it out onto a clean surface and divide it into 12 equal pieces.
- Roll each piece into a tight, smooth ball. You can do this by placing the dough on one palm and twisting it with the other, ensuring there are no wrinkles or cracks.
- Line a 9×13 inch baking sheet with parchment paper and place the rolls on the sheet with even spacing.
- Prepare the egg wash by mixing the egg yolk and milk in a small bowl. Brush the rolls generously with this mixture.
- Allow the rolls to rise a second time in a warm spot for 30-45 minutes until they are puffy.
- During the last 20 minutes, preheat your oven to 350°F (175°C).
- Once the rolls have risen, brush them with another generous coating of the egg wash.
- Bake for 20-22 minutes until the rolls are beautifully golden brown and shiny.
- While the rolls are baking, melt the butter in a saucepan. Add the finely chopped garlic and sauté for 1-2 minutes until fragrant. Mix in the parsley and remove from heat.
- When the rolls are done baking, brush them with the garlic butter while they’re still hot. Serve warm and enjoy!
Pro Tips and Expert Insights
To ensure your garlic butter dinner rolls turn out perfectly every time, here are some expert tips:
- Temperature Matters: Ensure your milk is warm but not hot; too much heat can kill the yeast. Aim for around 110°F (43°C).
- Kneading Technique: Proper kneading develops gluten, which gives the rolls structure. Don’t rush this step!
- Rising Time: Be patient! Dough needs time to rise. If your kitchen is cool, consider using the oven (turned off) with the light on to create a warm environment.
- Window-Pane Test: This test is crucial to ensure your dough is well-kneaded. It should stretch without tearing, showing a thin, translucent layer.
- Don’t Skip the Egg Wash: This gives your rolls that professional finish and a lovely golden crust.
- Flavor Variations: Feel free to experiment with adding different herbs like rosemary or thyme to the garlic butter for a twist.
- Batch Baking: Make a double batch and freeze half for later. Bake them straight from the freezer when you need them!
- Use Fresh Garlic: Freshly minced garlic enhances the flavor compared to pre-minced versions.
Common Mistakes and Troubleshooting
Even the best cooks can run into issues. Here’s how to fix common mistakes:
- Dough Not Rising: Ensure your yeast is fresh. If your dough hasn’t risen, it may be due to cold temperatures or expired yeast.
- Dense Rolls: This may occur from over-kneading or not allowing enough rising time. Make sure to follow the recipe closely.
- Too Much Flour: Avoid adding excessive flour during kneading. The dough should be slightly sticky but manageable.
- Burnt Tops: If the tops are browning too quickly, cover them with foil during baking.
Delicious Variations to Try
If you’re looking to mix things up, here are some delightful variations you can try:
- Cheesy Garlic Rolls: Add shredded mozzarella or cheddar cheese to the dough for a cheesy twist.
- Sweet Cinnamon Rolls: Omit the garlic and add cinnamon and sugar for a delightful breakfast treat.
- Herbed Dinner Rolls: Incorporate dried herbs like oregano and basil into the dough for an Italian flair.
- Spicy Jalapeño Rolls: Add finely chopped jalapeños to the dough for a spicy kick.
Storage and Make-Ahead Instructions
These rolls can easily be made ahead of time or stored for later:
- Make-Ahead: Prepare the rolls up to the second rise, cover them, and store them in the fridge overnight. Let them come to room temperature before baking.
- Freezing: After baking, let the rolls cool completely. Store them in an airtight container or freezer bag for up to 3 months. Reheat them in the oven when ready to serve.
- Storage: Keep leftover rolls in an airtight container at room temperature for up to 2 days, or in the fridge for up to a week. Reheat in the oven for the best texture.
Frequently Asked Questions
Here are some common questions you might have:
- Can I use whole wheat flour? Yes, but you may need to adjust the liquid as whole wheat absorbs more moisture.
- What if I don’t have active dry yeast? You can use instant yeast instead without activating it first.
- How can I make these rolls vegan? Substitute the butter with vegan butter and use a flax egg instead of a chicken egg.
- Can I add herbs to the dough? Absolutely! Fresh or dried herbs can enhance the flavor significantly.
- What should I do if my dough is too sticky? Avoid adding too much flour; instead, let it rest for a few minutes to develop gluten.
- Do I need to let the dough rise twice? Yes, the two rises are crucial for achieving the perfect texture.
- How can I tell when they’re done baking? They should be golden brown and sound hollow when tapped on the bottom.
- What’s the best way to reheat these rolls? For the best results, reheat in a 350°F (175°C) oven until warm.
Nutritional Tips and Dietary Adaptations
For those mindful of nutrition, here are some tips:
- Healthier Fats: Use olive oil instead of butter for a healthier fat option.
- Lower Sugar: You can reduce the sugar content or use a natural sweetener like stevia or erythritol.
- Gluten-Free Option: Substitute with a gluten-free flour blend, ensuring you add a binding agent like xanthan gum.
Essential Equipment for Success
To make your baking experience smooth, here are some tools you’ll need:
- Mixing Bowls: A large mixing bowl for combining ingredients is essential.
- Measuring Cups and Spoons: Accurate measurements ensure consistent results.
- Rolling Pin: Useful for shaping dough into smooth balls.
- Baking Sheet: A sturdy sheet lined with parchment paper for easy cleanup.
- Pastry Brush: For applying the egg wash and garlic butter.
Serving Suggestions
These garlic butter dinner rolls pair beautifully with:
- Soups: Serve alongside a warm bowl of soup for a comforting meal.
- Salads: They make a delicious accompaniment to fresh salads.
- Grilled Meats: Perfect for soaking up the juices from grilled chicken or steak.
- Holiday Dinners: They’re a classic addition to Thanksgiving or Christmas feasts.
There you have it! With this comprehensive guide, you’re well-equipped to make *warm garlic butter dinner rolls* that will delight your family and friends. Remember, it’s all about patience, love, and a bit of practice. Happy baking, and may your kitchen be filled with the wonderful aroma of fresh bread!
Easy Garlic Butter Dinner Rolls
Ingredients
Dough
- 1 cup whole milk (warm (around 110F))
- 3 teaspoons active dry yeast or instant yeast
- 1/3 cup sugar (70g)
- 3 3/4 cups all purpose flour (490g)
- 1 large egg
- 1.5 teaspoons salt
- 6 tbsp unsalted butter (softened at room temperature (85g))
Egg wash
- 1 egg yolk egg yolk
- 1 tbsp milk
- 1/4 cup salted butter (57g)
- 2-3 cloves garlic (finely chopped)
- 1-2 tbsp freshly chopped parsley
Instructions
- Mix warm milk and yeast until combined, then add remaining ingredients and form a shaggy dough.
- Knead the dough for 15 minutes until smooth and elastic, then let it rise until doubled in size (~90 minutes).
- Divide the risen dough into 12 pieces, shape into balls, and place on a parchment-lined baking sheet.
- Brush the rolls with egg wash, let rise for 30-45 minutes, then brush again and bake at 350°F (175°C) for 20-22 minutes until golden.
- Prepare garlic butter by melting butter, sautéing garlic for 1-2 minutes, then mixing in parsley. Brush hot rolls with garlic butter before serving.